

As far as blog posts are concerned this post is definitely up there on the memorable stakes. Yes, it’s a labour of love, but I can assure you the wait and effort is more than worth it. In fact we all agreed that we had never tasted bagels so fresh and tasty, this was, of course, because they had just come out of the oven and we had toiled hard to make them ourselves.

We’d headed out of London for the weekend to dog sit for my parents who live in the rolling Sussex countryside. I thought that bagel making would provide the perfect morning’s entertainment, with the results making a truly satisfying lunch.

Big A and Little Z had their own bowls to make the dough and whilst a little flour, salt and yeast found itself out of the bowl, the majority made its way into the dough itself!

Honey is added to the vegetable oil then poured into the dough mixture.

Really getting involved in the dough-making is so rewarding, as Little Z found out.
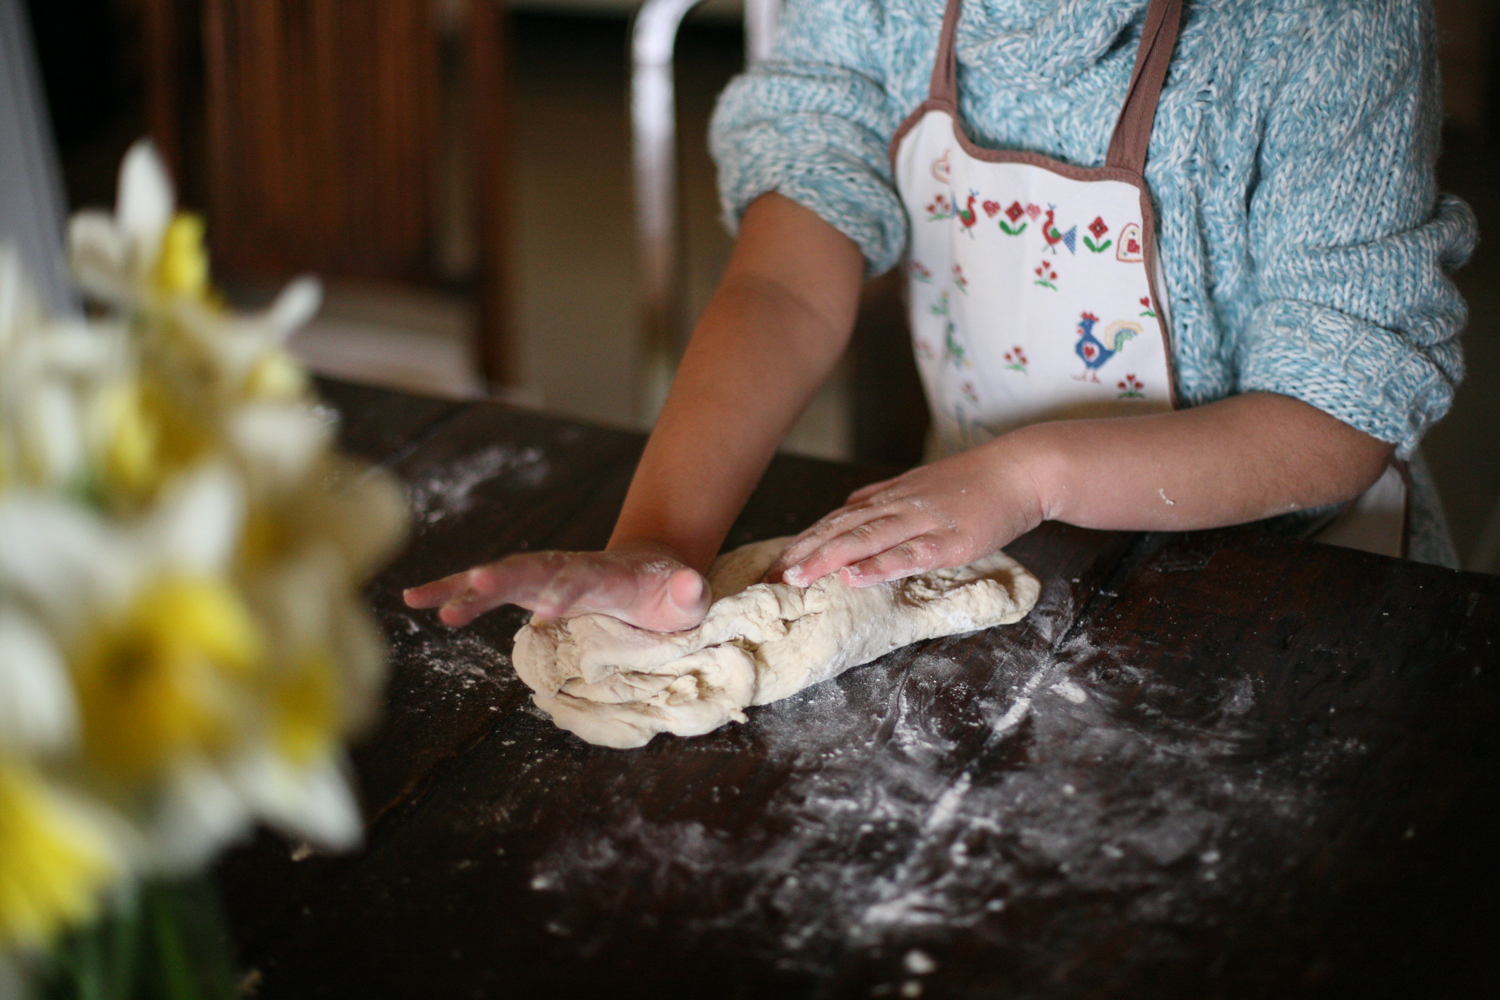
Big A had a natural ability at kneading the dough for ten whole minutes.

Once the dough had been given a good work out we combined Little Z and Big A’s dough and created one large ball. Rub a little vegetable oil around a large bowl and all over the dough, and place inside the bowl. You need to cover the bowl tightly with cling film and leave it somewhere warm – but not hot for 2 hours. The airing cupboard provided the perfect place.
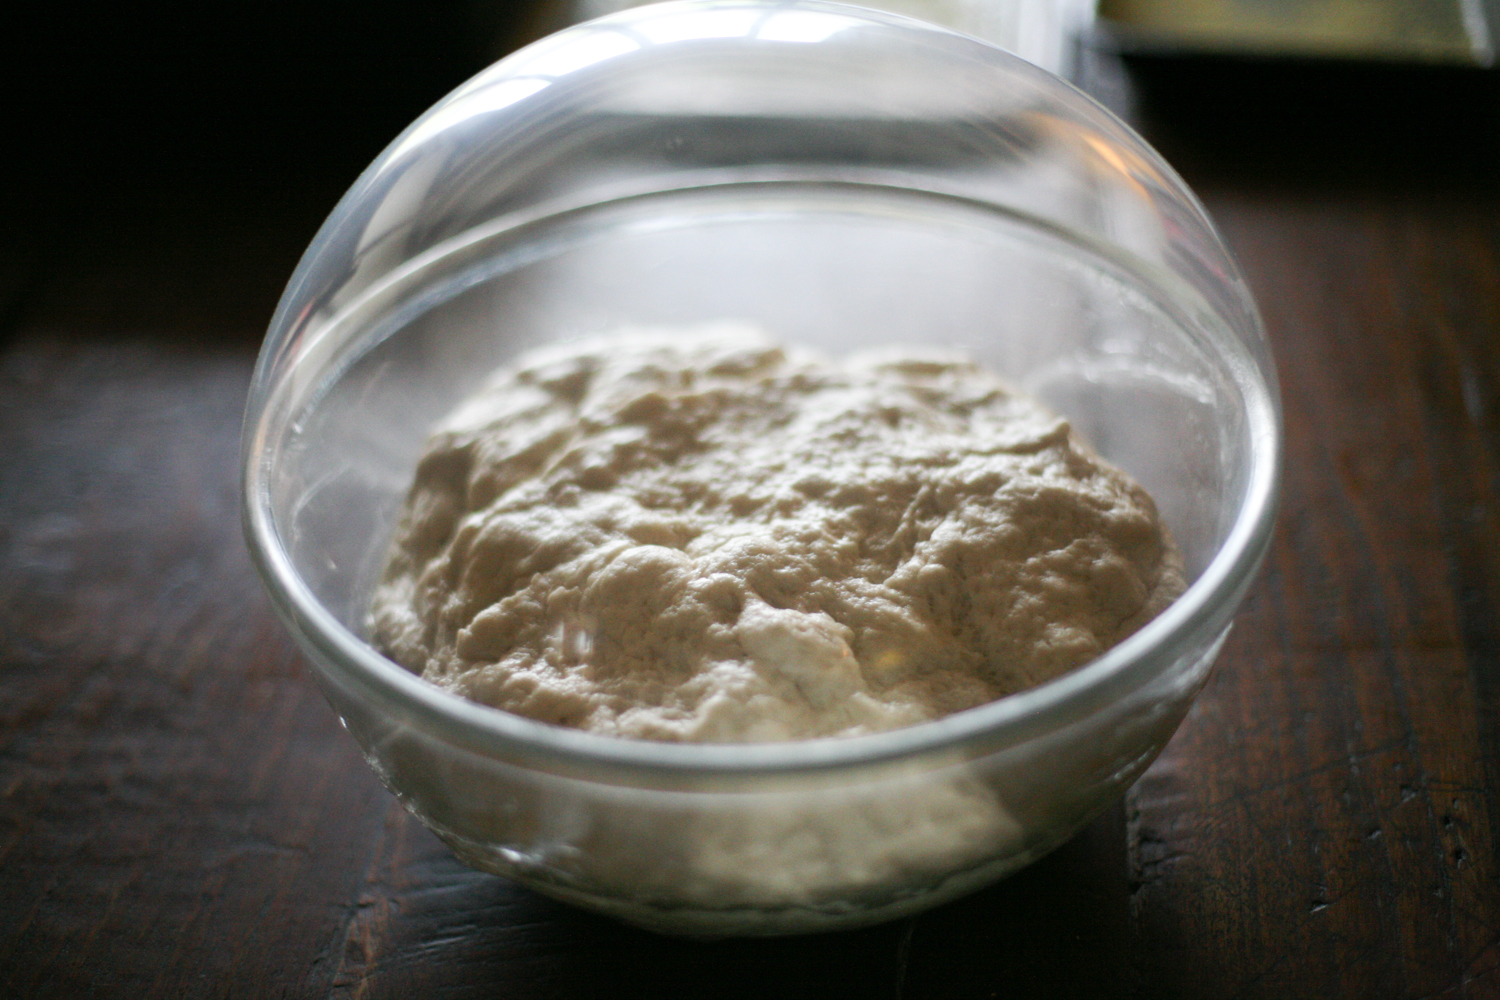
By the time we returned the cling film had created a huge dome like structure over the bowl and the dough had doubled in size.

We decided to cover our bagels with either chilli flakes, black poppy seeds or sesame seeds, but you could also cover them in black onion seeds, grated cheese, cinnamon sugar or whatever takes your fancy.

The best way to shape your bagel is to roll it into a ball and then to use the end of a wooden spoon and push through the centre. Once it has reached through the dough, keep the handle on the surface and wriggle it around until a hole is created to the size that you want the hole to be. You can also shape it further with your hands. When the desired shape is reached place to one side for ten minutes so as to let the dough relax into shape.
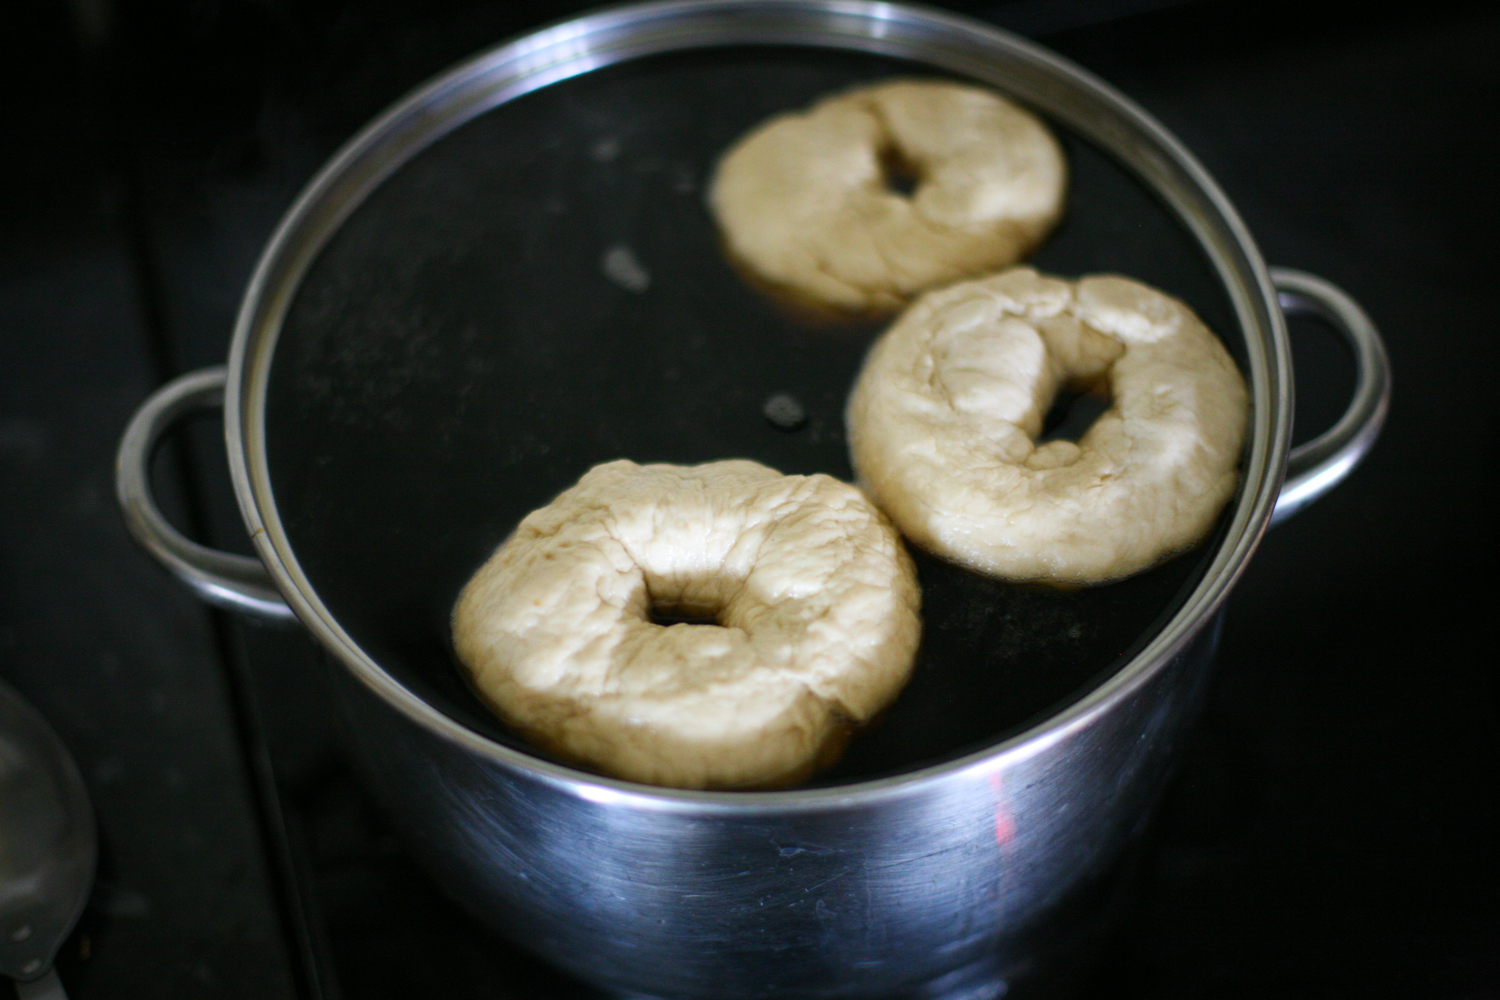
Now this part is really unusual, but doing it will allow your bagel to have that wonderful soft sponginess in the dough, once it is baked. Don’t skip it, even if you think you’ve read the instructions wrongly…..because you haven’t, you do actually need to BOIL the bagels briefly for one and a half minutes each side by placing them in a saucepan of boiling water and black treacle, (I know sounds crazy right?) that is simmering away.
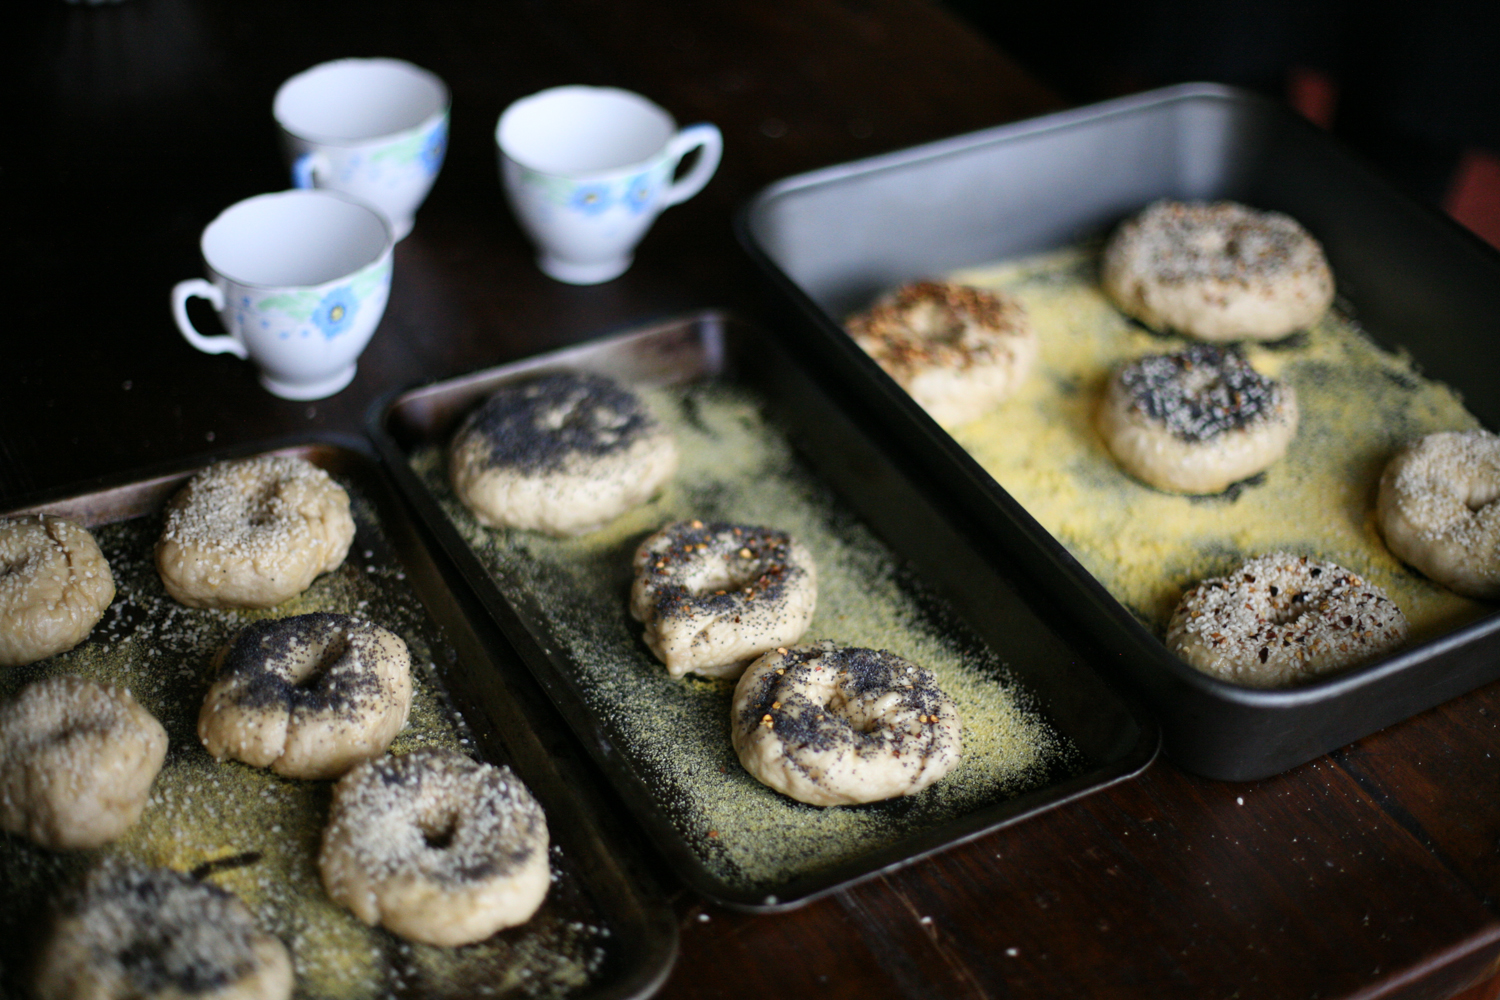
After the brief dunk in boiling treacle water and a thorough drain, place the bagels on lightly oiled baking trays that are sprinkled lightly with polenta – this is to stop the bagels sticking to the tray. Brush a beaten egg gently over all the bagels and then decide on your choice of topping and sprinkle over the bagels, pressing down gently so that the toppings stay in place.
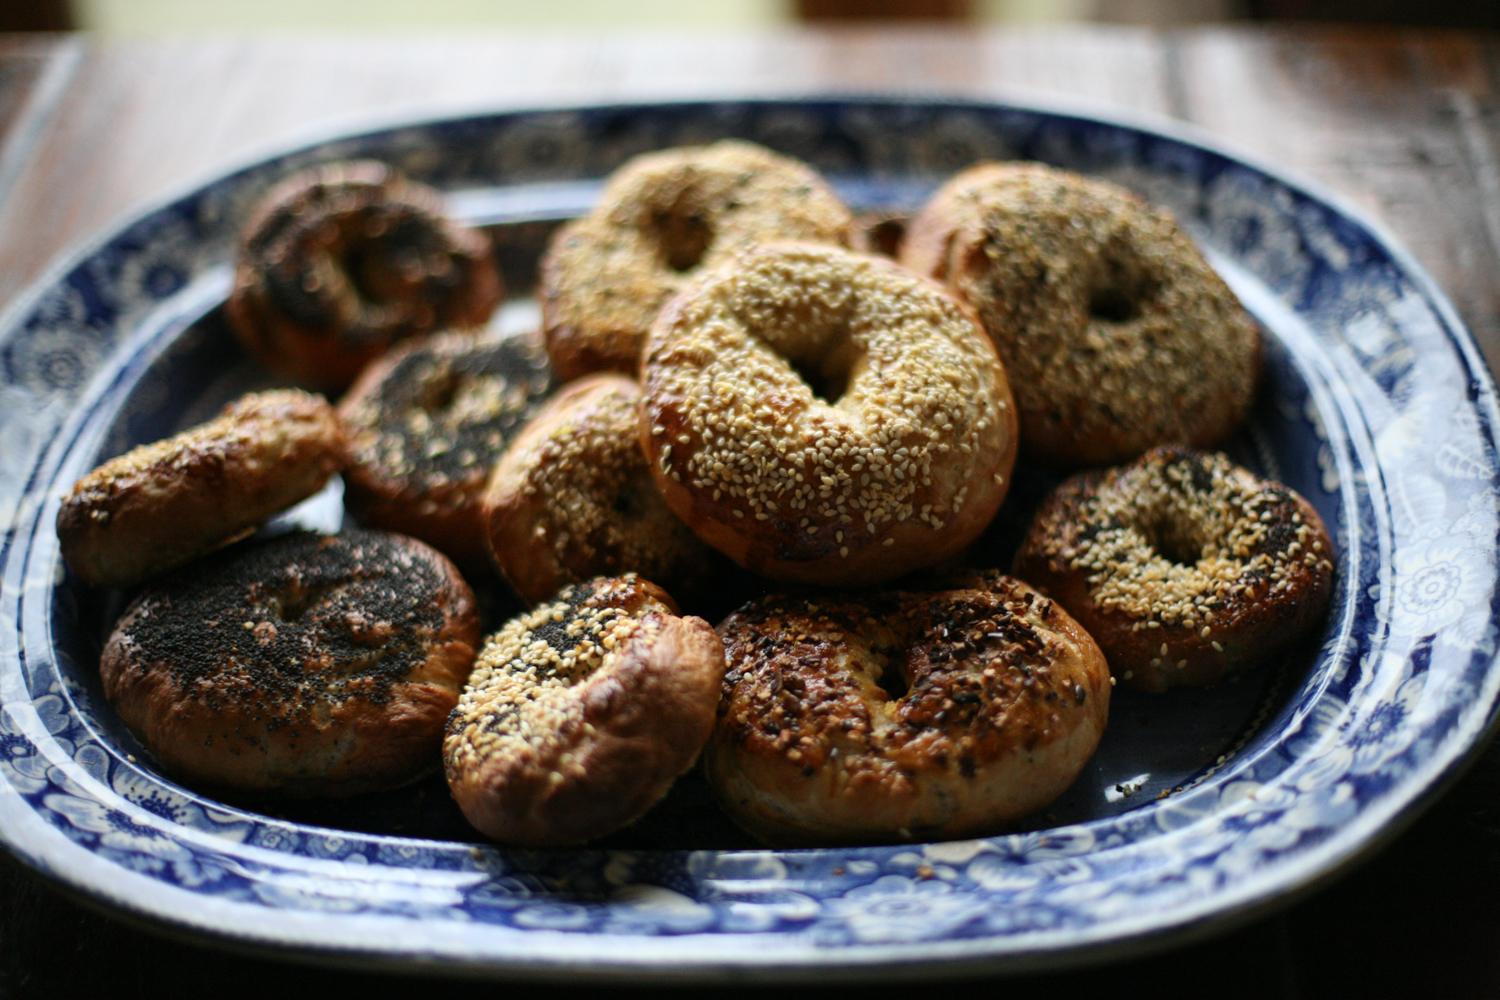
Freshly baked straight out of the oven. At this point, our stomachs were rumbling and we were ready to dive into our lunch.

More choices…..what filling to place in our bagels. We opted mainly for either:
* Grilled bacon, soft cows cheese or cream cheese, rocket and a spoonful of my chipotles sauce.
0r
* Smoked salmon, cream cheese, avocado and rocket with a splash of lemon juice.

Other than Little Z we all had two (a little piggy I know but oooh they were soooo good!) and the remainder we ate the following day for breakfast.
After such a good feast we decided to don our country coats and wellies and head out with Tessie the dog for a good old long walk across the fields and through the woods. A perfect day to spend a Saturday.

Tessie loves to dive into hollow trees!!
Homemade Bagels
makes 14
adapted from Rachel Allen:Bake!
675g strong white bread flour
3 tsp salt
10.5g fast-acting yeast
375ml warm water
3 tbsp honey
2 tbsp vegetable oil
3 tbsp black treacle/molasses
polenta, for sprinkling
1 egg, beaten
toppings of your choice (chilli flakes, sesame seeds, black poppy seeds)
1. Sift the four, salt and yeast into a large bowl and create a well in the centre.
2. Place the warm water, honey and oil into a measuring jug and pour the liquid in in stages, using your hands to begin to make the dough. This stage is rather messy and sticky so take your time not too add too much liquid at once.
3. Once all the flour has come together to form a dough, transfer to a flat surface and sprinkle a little extra flour and then knead the dough for a good ten minutes. I tend to push the dough away with one hand and then fold the dough towards me and then turn it slightly before repeating the process. You’ll be able to pick up a good pace.
4. Lightly oil a large bowl and pour a little oil in your hands and smooth it on the dough, which you have made into a ball. Place the dough in the bowl and cover tightly with cling film. Place in a warm (but not hot hot) place for around 2 hours – the airing cupboard worked perfectly – when the dough will have doubled in size.
5. Place 6 pints of water into a large deep pan and bring to the boil. Add the black treacle and stir in throughly. Once it has come to the boil, let the treacle water simmer gently on a low heat.
6. Preheat an oven to 220 degrees centigrade (425F).
7. Meanwhile, once the treacle water is heating up, take the dough out of the bowl and place on a surface sprinkled with a little flour and knead it briefly before breaking it off into small balls for you to then make into individual bagels. The best way I found to make the bagel is to place the end of a wooden spoon into the centre of the ball, which you have flattened slightly. When it pierces through the bottom of the dough, give the wooden spoon a good twist around so that a larger hole is formed. You can then reshape slightly with your hands. Place to one side until you have used up all the dough. More hands make light work at this stage!! You will need to leave the bagels to stand for 10 minutes before moving onto the next stage, however, by the time you have finished shaping your last bagel the first few you made will be ready to be boiled.
8. Place no more than 4 bagels into the boiled simmering black treacle water and turn over after 90 seconds and leave for another 90 seconds. Then drain thoroughly and place on lightly oiled baking trays that have a sprinkling of polenta on them.
9. Brush each bagel lightly with whisked egg and then cover with your choice of topping.
10. Place in the oven for 15 minutes, by which stage they will be bronzed and ready to eat. If you would like a more bronzed bagel then turn the bagel over for a few more minutes extra cooking, although I don’t think that you’ll need it.
Eat whilst still warm for the perfect bagel.
Filling ideas:
* smoked salmon and cream cheese *goats cheese and red onion *salt beef, mustard and gherkin *bacon, soft cows milk cheese, chipotle sauce and rocket * cheddar and chutney *tuna, tomatoes and capers
What’s your favourite topping and filling? Would love to hear.

12 thoughts on “Bagel Mania”