We are off to the island of the gods

OLYMPUS DIGITAL CAMERA

Our family summer holiday beckons. We are heading to the island of the gods – or as it is more recognisably known, Bali. Its been over a decade since Mr B and I have visited this wonderful island and we felt it was time to return, this time with big A and little Z in tow. Its a long way from London town, but we feel that the marathon journey is worth it when we get to this lush green island. We are heading for the jungle first for a week where we hope to be woken by the morning calls of unfamilar wild life. There will be lots to explore and the rhythm of daily life will change considerably. It will do all of us the world of good – well that’s the plan anyway.

I am not so sure how easy it will be for me to blog, so apologies in advance if it is not as frequent as you are use to. I am hoping to adopt some new recipes on my travels and any that make the grade I will certainly share with you.

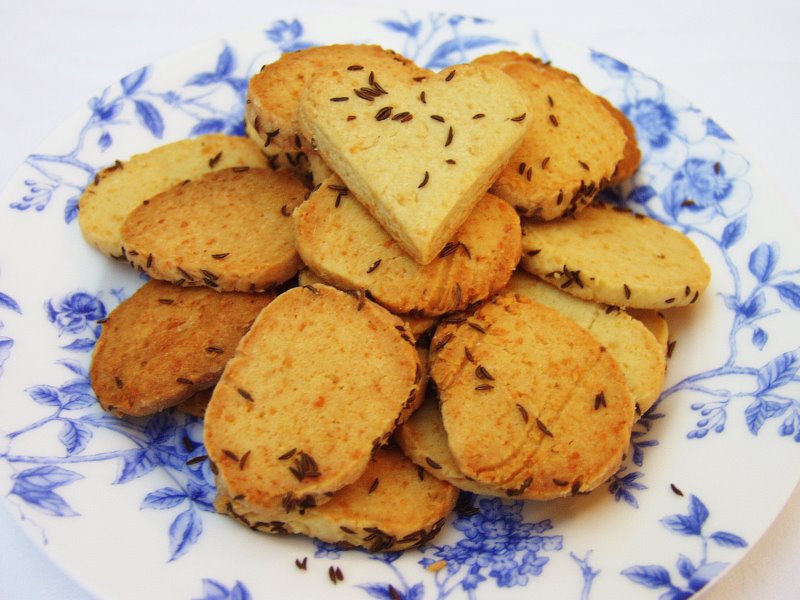
When going on a journey it is comforting to have a few home comforts or in my case, home made morsels, to nibble on during the flight/drive/sail (delete as appropriate!). These parmigiano reggiano caraway (thats quite a mouthful!) biscuits should go down a treat with the girls and Mr B in moments of hunger on the flight. You can make the same biscuits with cheddar cheese as well, just use whatever variety of hard cheese needs eating in your fridge, and in my case its parmigiano reggiano. There are a number of potential ‘extras’ you can add to the biscuits, such as caraway, sesame or poppy seeds or chilli flakes on the outer rim so experiment and see which you like the best. Within the biscuits themselves I would also add a pinch or two of cayenne pepper, but since the girls will be eating them, and we are going on a journey, I will keep them as plain and simple as possible whilst retaining their moreish quality.

OLYMPUS DIGITAL CAMERA

They are great to freeze – pre cooking – so make a large amount and bring out the rolls as and when you need them. I also find they are great as a little canape when hosting dinners.

Parmigiano-Reggiano Caraway Biscuits

Makes between 50-60 small round biscuits

125g parmigiano reggiano (or any hard cheese – cheddar works equally well), grated

125g cold butter

200g plain flour

1/2 tsp of cayenne pepper, optional

1 egg

pinch of salt

2 tbsp of caraway seeds

1. For speed and ease I tend to use my blender and I literally put all the ingredients in together and whizz for around 30 seconds and by this time all the ingredients have come together to create a dough like ball. If you are doing it all by hand then sift the flour and then mix in the butter, cayenne pepper and salt with your finger tips to create a bread crumb consistency. Then add the grated cheese and the egg, which should then help to bind the ingredients together. If it is too dry then add a tsp of water or if it is too wet then add a little more flour to bind it all together to create a ball.

2. Place on a floured surface and knead so that the ingredients are well bound together.

OLYMPUS DIGITAL CAMERA

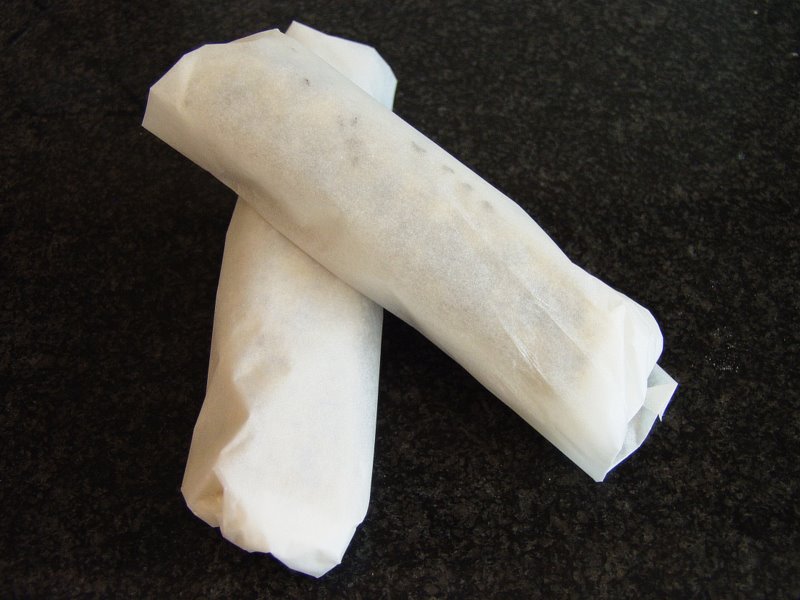
3. Roll out your dough into a long sausage shape and cut in two if necessary. Then using either greaseproof paper or cling film place the rolled dough in the centre and spread the caraway seeds over the dough. It is best to gently roll then over the seeds so that they are spread as evenly as possible.

OLYMPUS DIGITAL CAMERA

OLYMPUS DIGITAL CAMERA

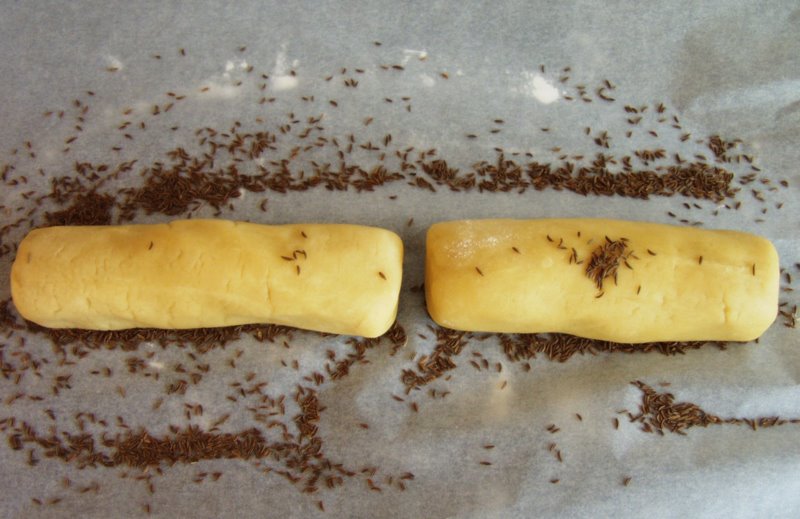
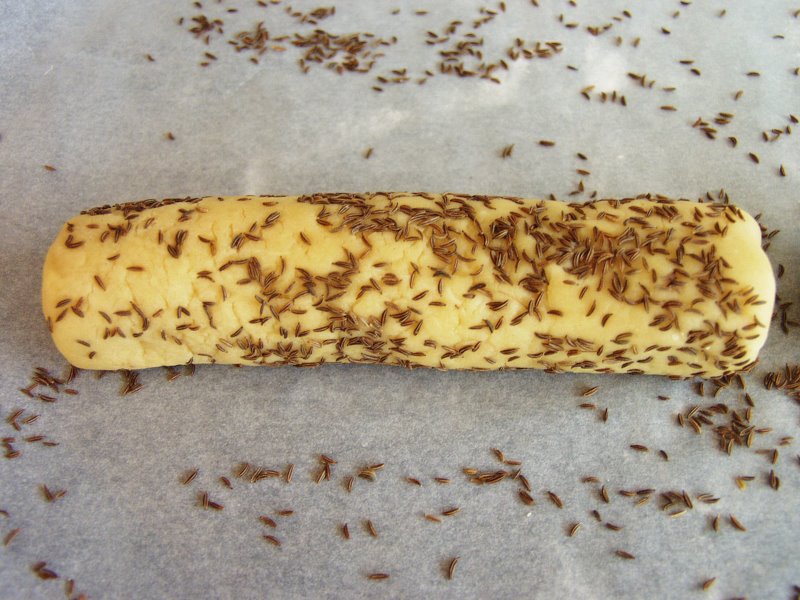
4. Wrap the dough in the greaseproof paper or cling film and either put straight into the freezer to use at a later date or place in the fridge for few hours. You will find that it holds together and is better to cut once it has had some time to rest in the fridge.

OLYMPUS DIGITAL CAMERA

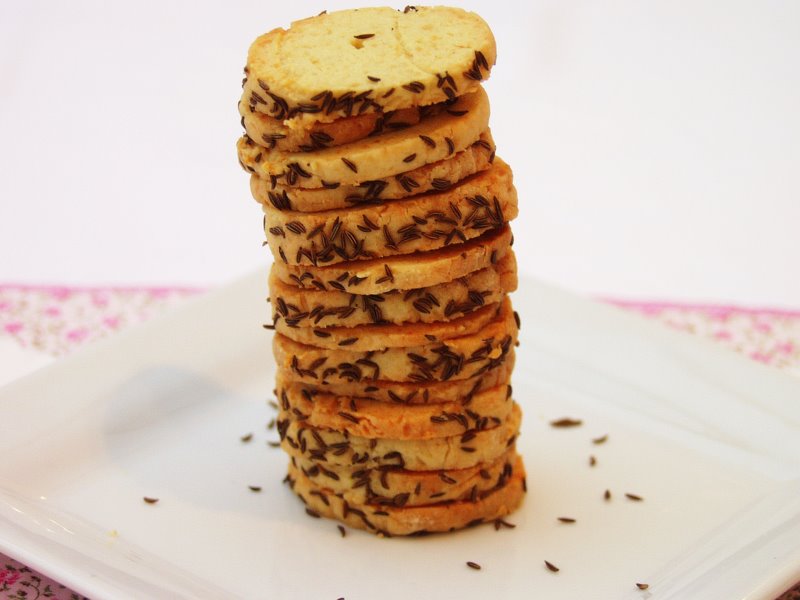
5. After some time in the fridge, unwrap the dough and slice it evenly into small biscuits using a sharp knife.

6. Preheat your oven to 180 degrees and while it is heating up grease a baking tray and evenly spread out the biscuits.

7. Place in the oven between 8-10 minutes. They are ready just as they are beginning to bronze. Be careful not to overcook, so do check regularly. They are delicious warm or will store for a few days in an airtight container.

I couldn’t resist this last shot when little Z’s hand crept into the photo frame eager to try one of the biscuits.

OLYMPUS DIGITAL CAMERA


Florentine Lemongrass soup

OLYMPUS DIGITAL CAMERA

Spinach is one of those super foods that you can literally feel the goodness seeping into your body with every mouthful. When Catherine de Medici became Queen of France in 1533, she was so taken by spinach that she insisted it be served at every meal. Dishes that are cooked with spinach are known as ‘Florentine’, after Catherine’s place of birth – Florence. Hence the name I have given this delicious soup.

I know I tend to say this a lot in my blogs, but this really is super easy and takes no time at all – so perfect for a light lunch or for a starter when guests are coming over. You can prepare it in advance, freeing you up to have proper conversation without the worry of having to prepare the starter. Have you ever tried making souffles for a starter? Well believe me, the results are delicious, but it does involve a lot of care and attention and time away from your guests to get it right.

You can absolutely use fresh spinach here, but I often tend to use frozen as I always have bags of it in the freezer. This soup is versatile in that it tastes equally good in the summer or winter.

Florentine Lemongrass Soup

Serves 4-6

3 garlic cloves, chopped

1 onion, chopped

2 tbsp of olive oil

2 green chillies, deseeded and chopped

2 tsp of lemongrass paste (I use Barts)

1kg of spinach, frozen or fresh

2 pints/40 fl oz vegetable stock

400ml tin of coconut milk

juice of 2 limes

single cream to garnish, if desired

salt and pepper

1. In a large saucepan heat the olive oil and then fry the onions gently until they begin to become transparent – this should not take more than six minutes. Then add the garlic and chillies continuing to stir for a few minutes.

2. Add the vegetable stock and lemongrass paste and gently simmer for five minutes. Then add the frozen or fresh spinach and cover until they have completely wilted/defrosted. Once this has happened use a hand blender to blend the soup thoroughly.

OLYMPUS DIGITAL CAMERA

3. Add the coconut milk and lime juice and blend once again. Season to taste and garnish with single cream if desired.

OLYMPUS DIGITAL CAMERA


My mother’s memorable strawberry ice-cream courtesy of the ‘Cooking Cannon’

Does anyone remember the legendary ‘Cooking Canon’? A rather charming, bearded, portly member of the English clergy who, in many respects, was one of the first ‘celeberity chefs’, along with eccentric Fanny Craddock, to grace our screens in the early eighties. Long before Delia was on the scene this was my mother’s go-to cooking bible! He published three cookery books: The Cooking Canon, The Cooking Canon Entertains and Simply Divine.

I only discovered the other day that the strawberry ice cream, which my mother always makes and continues to do so, originally came from ‘The Cooking Canon’. It’s delicious creamy and easy to make and as a real bonus, you don’t need to go out and buy an expensive ice cream maker. Strawberries epitomize the joys of summer and what better way to celebrate the sun’s rays than a bowl of home-made strawberry ice cream. It may not be exotic or original but it certainly hits the spot. I hope you agree.


Now it may shock some of you to hear that the ice cream is not in fact made with fresh strawberries – my mother has tried using them but the results are not as good she assures me. Instead she has gone down the route of using tinned strawberries. Shock horror.

You still with me?

Please don’t be alarmed. I assure you, you will be pleasantly surprised by the results.

Homemade Strawberry Ice-Cream

290g/8oz tin of strawberries (or anything around that amount)

150g/6oz icing sugar

1 pint of double cream

1 plastic/metal tray or container

1. Take the tin of strawberries and pour out about one quarter of the liquid, reserving to make a fruit salad at a later date

2. Blend the strawberries with the other ingredients and freeze for 40 minutes in your container. I have always used a plastic container and it works out well.

3. Stir and freeze again for a minimum of a couple of hours.

4. Scatter some fresh strawberries over the ice cream and serve to what will be happy family and friends.


Asian Vinaigrette

Summer is the season for salads and even a plain green salad can taste crisp and cleansing with a delicious vinaigrette or salad dressing to accompany it. My default dressing is always the typical french vinaigrette of olive oil, lemon, white wine vinegar, whole grain mustard, a little garlic and a sprinkling of salt and pepper. I fancied a change so came up with this  fresh, zingy, Asian influenced dressing, which gives a pretty standard green salad some edge – and all salads deserve to have a little ‘edge’ now again.

Its super easy and quick to prepare. If you have an old jam jar I suggest putting all the ingredients into that and then, with the lid on, giving the ingredients a good shake about to give them a thorough mix together.

Let me know what you think! My guess is that you’ll be pleasantly surprised by the results.

Here’s how to make it.

Asian Vinaigrette 

Serves 4-6

1 old jam jar

3 limes, squeezed

1 tsp of sesame oil

1 tsp of light soy sauce

1 tsp of nam pla fish sauce

1 to 2 tsp of white sugar

half a tsp of chilli flakes

In an old, clean jam jar squeeze three limes and then add all the ingredients. You may find that you need a little more sugar or another lime juice so be prepared perhaps to add a little more of one or two of the ingredients. I find that it does not need any salt as this is provided by the soy sauce. Shake the contents of the jar thoroughly and taste to see if the vinaigrette is to your liking.


Monkfish curry with tamarind, coconut, ginger and coriander – inspired by Skye Gyngell

This curry is always a crowd pleaser. The talented Skye Gyngell, of Petersham Nurseries fame, does the decadent lobster version in her book ‘A Year in My Kitchen’ and I have tweaked her recipe slightly to suit my style of cooking, but the essence of this recipe stems from Skye, I sadly take no credit.

So the main things I have done differently to Skye are:

1. Blending the onions after they have been cooked on a low heat. I found that I preferred a slightly smoother texture, but not blending them works equally well. It’s just a personal choice.

2. I have only used one 400g can of coconut milk. I find that it is more than sufficient.

3. I use a little less sugar.

4. I have omitted the toasted coconut flakes to serve – mainly because my husband finds it a bit of a coconut overkill, but again this is down to personal choice.

5. Skye uses a whole tamarind pods and breaks off a little piece as she needs them. She soaks these pieces in hot water for 20 minutes.

In the photo above I put 1 tablespoon of caster sugar as Skye suggested, however, with hindsight, I would reduce this amount but half. Add a little, then taste it to see if it needs any extra sweetness.

Monkfish curry with tamarind, coconut, ginger and coriander 

Serves 4

850g of Monkfish, cut into 2 inch pieces

2 onions, peeled and finely sliced

5cm piece of fresh root ginger, peeled and grated or diced

4 garlic cloves, peeled and finely chopped

2 red chillies, chopped

1 tbsp of coriander seeds, toasted

5 ripe tomatoes, chopped

1 tbsp caster sugar

3 tbsp fish sauce

3 tbsp of tamarind water

1 x 400g can of coconut milk

To garnish: either unsweetened dried coconut flakes, lightly toasted or coriander leaves

1. Break a small piece of tamarind (the blocks that you can buy NOT the paste) into a bowl and cover with boiling water. Leave to stand for 15 minutes. Following this strain the liquid into another bowl. Really press the pulp into your strainer with the back of a spoon and then put the extra strained pulp into the water. Tamarind has a wonderful sour taste,which adds real depth and balance to a dish. I absolutely adore it.

2. Cut the monkfish into 2 inch pieces, or larger if you prefer, and clean under cold water. Set aside.

3. Heat a small frying pan and when it is hot, gentle toast the coriander seeds for 30 seconds so they begin to brown, then set aside.

4. Heat a little olive or vegetable oil in a pan over a medium heat. Add the onions and cook until they become translucent. This will take around 5 minutes.

5. Put the ginger, garlic, chillies, toasted coriander seeds and tomatoes in a blender and whizz to a paste. Then place the translucent onions into the paste and whizz again briefly. Transfer the contents back into the pan and simmer for 5 minutes, stirring frequently. If you prefer it less smooth then obviously do not blend the onions.

6. Add the sugar, fish sauce, tamarind water and coconut milk and stir so that the contents are merged into the tomato and onion sauce. Simmer for a further 5-10 minutes. Add the monkfish and add additional seasoning if it requires it. Keep the heat on medium/low heat stirring occasionally for no more than 10 minutes. Be careful not to break up the monkfish!

7. Ladle into a warm bowl or soup plate and garnish with coriander leaves or coconut flakes. Serve with a bowl of steamed rice.