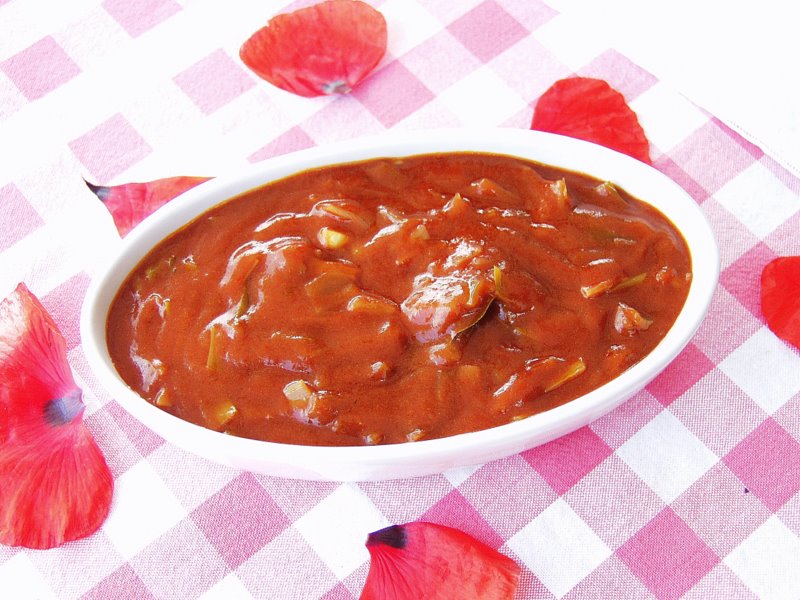
Vietnamese Chicken Herb Salad

IMG_0254

When time allows I enjoy getting my weekly fruit and veg from my local market. Thankfully I live a short hop, skip and jump away from a seriously good one in West London, where the stalls are bursting with colourful produce and the stallholders have an infectious energy and enthusiasm for their produce. Bowls of fruit and veg go for £1 and when you buy herbs it’s two large bunches for a £1 – to ask for one just won’t do – so I invariably  end up with rather a huge amount of coriander, mint, parsley and dill.

IMG_0233

Dill, mint and coriander remind me of fond times in Vietnam – the food is so fragrant, largely due to mint and dill being in so many dishes, Cha Ca La Vong being a perfect example – you can see the recipe here. As I ended up with two huge bundles of cos lettuce, I decided to create a Vietnamese inspired chicken salad for our Saturday lunch. Something that could be thrown together quickly and that would appeal to the whole family.

IMG_0245

It was a success and we polished it all off in one sitting. Since then I have cooked it again (I still have lots of herbs to get through) and photographed it for you so that you too can prepare it at home. The dressing I use for the salad is the typical Vietnamese dressing of nuoc cham, which adds zing and sweetness, the perfect combo.

IMG_0237

Vietnamese Chicken Herbed Salad

Serves 4

450g chicken breasts

1 tbsp olive oil

black pepper

large cos/romaine lettuce, 6 leaves

handful of fresh coriander

handful of fresh mint leaves

handful of fresh dill

1 red chilli, finely sliced

2 spring onions, cut on the diagonal

**********

Nuoc Cham Sauce

1 tbsp fish sauce

1 tbsp rice vinegar

1 lime, juice only

1 garlic, finely chopped

3 tbsp water

1.5 tbsp white sugar

1. Cover the chicken breasts in the olive oil and season with a little black pepper. Meanwhile heat a griddle/cast iron pan and when it is hot place the breasts into the pan and bronze on each side for just under 2 minutes a side. Place on a baking tray in a preheated oven 180 degrees for 20 minutes.

2. Break off the lettuce leaves and cut into mouth size chunks and place in a large mixing bowl. Add the dill, mint and coriander leaves along with the finely sliced red onion, spring onions. If serving to children as well slice the red chilli and place in a separate side dish. Mix together gently using your hands.

3. Prepare the nuoc cham sauce by mixing all the ingredients together. If it needs to be a little sweeter add some more sugar, if you prefer it more sour add more lime.

4. Pour half the dressing over the salad and gently toss. Pour the remaining dressing in a small jug so that you can add more dressing over the individual salad portions as needed.


Fish Balls in a Sweet Smoked Paprika and Tomato Sauce

IMG_5401

After spending the whole of the Easter holidays in Asia, both Hong Kong and Vietnam, it is great to finally come home to London;  as the saying goes: ‘absence makes the heart grow fonder’. Whilst I loved ever minute of our travels from exploring new environs, cultural sites, the beach (of course) and experiencing the amazing cuisine that both countries have to offer, there is something wonderfully homely and satisfying about preparing your own meals and sourcing your own ingredients. Mark Bittman from ‘The New York Times’ has written a fascinating article on why home cooked food is the way to go. Check it out here.  Crazy as this may sound, I kind of missed not getting stuck into some serious cooking, that said I was very lucky to get a place at ‘The Green Bamboo Cooking School’ in Hoi An, which gave me a wealth of new exciting Vietnamese recipes to cook and share with you all.

Hong Kong is pork crazy and whilst I love my pork, I decided that fish and vegetarian meals were going to be on the menu, certainly for the first week or two once I returned. The very first meal I cooked when I got back were these lovely fish balls, which are so easy to put together. Big A loved getting involved and helping me to prepare them. I made a large batch and then had the leftovers for lunch the following day.

Serve with couscous, rice or pasta and you have yourself a simple and deliciously healthy meal. I did not put any fresh chilli in either the sauce or fish balls, but you could easily pop in a finely chopped one if you are in need of that extra spicy kick!

IMG_5433

Fish Balls in a Sweet Smoked Paprika and Tomato Sauce

adapted from Yotam Ottolenghi and Sami Tamimi’s recipe ‘Cod Cakes in Tomato Sauce’ in their book Jerusalem.

Serves 4

sauce

glug of olive oil

2 small/medium sized white onions, finely chopped

1/2 (half) tsp of sweet smoked paprika – I use and totally rate this one

1 heaped tsp cumin powder

1 tsp salt

125ml white wine

1 tin of chopped tomatoes, blended

1 tsp caster sugar

4 garlic cloves, finely chopped

150ml water

fish balls

600g cod (or any white fish that has been sustainably caught), boned and skin removed

100g white breadcrumbs

2 tsp ground cumin

1 tsp salt

2 eggs

1 large handful of flat leaf parsley

1 large handful of fresh coriander

1. First you need to start making the sauce. Place a glug (a little) olive oil into a large frying pan and when it is hot add the onions. Stir and turn the heat down slightly to make sure that they do not burn. As they begin to soften after a few minutes add the sweet paprika, cumin powder and salt and then after a couple more minutes add the garlic and stir together. Leave to cook steadily for a few minutes.

2. Next add the white wine and stir into the spiced onions and let simmer for a couple of minutes before adding the blended tinned tomatoes (it is not essential to blend, but I like having the sauce slightly smoother for this recipe) and caster sugar. Stir together and simmer gently for 20 minutes on a low heat so that the flavours can mature and work together.

3. Meanwhile in a large mixing bowl use your hands to blend all the fish ball ingredients together and then roll in the palm of your hands small, bite sized, round fish balls. I made around 30 with these proportions.

4. In a large frying pan heat a glug of olive oil. When it is hot gently place the fish balls in the pan so that they are lightly bronze. I suggest doing this in stages as it takes no more than a few minutes cooking time – remember to turn them over so that they are bronzed all over.

5. After you have bronzed your first batch place them gently in the sweet smoked paprika and tomato sauce and continue to add the rest of the fish balls until they are all sitting in the sauce. Add a little water – around 150ml, or a little more if needed, so that the fish balls are just covered and then let simmer on a low heat for a further 15 minutes. Add more seasoning if necessary.

6. Serve hot with couscous, rice or pasta.

Good old comfort food. Enjoy. It’s good to be home.


Chipotles En Adobo – a store cupboard essential

IMG_4384

If there is ONE new thing you do this year I urge, beg and plead you to try making your own ‘chipotles en adobe’, homemade chipotle sauce to you and me. If you like chutneys, relishes and jellies, and chilli of course, then this is culinary nirvana. OK, you probably think that I am going a little over the top here, but seriously you will thank me once you have made some pots of this sauce. It’s addictive and tastes seriously good, so much so that it is not unheard of for me to have it with my breakfast (whether it be french toast/fried egg toastie/grilled tomatoes/bacon buttie – basically it goes with anything, well maybe not cereal!) and then again at lunch time by placing a little dollop of it in my sandwich.

IMG_4286

Chipotles chillies, originate from Mexico and are in fact a smoked and dried jalapeno chilli. They are not like their spicier cousins, such as the serrano or the chile de arbol, instead they have wonderful smokey notes that give warmth and a little spicy kick that beckons you back for more.  They are sold dried or in an adobo (sauce).

IMG_4292

Now I can just hear you all saying ‘where on earth can I get hold of those types of chillies’? Yes it does take a little bit of forward planning, but as I don’t have a farmers market next door or a store that holds them near by, I get mine online from a range of Mexican grocers including Mex Grocer. It takes literally a few minutes to log on and order and hey presto within a couple of days you have your beautiful dried chipotles chillies. I imagine if you live in the US they are likely to be even easier to source as I know that Mexican food and products are far more commonplace than they are here in the UK.

IMG_4294

Making the sauce is incredible straightforward and the sweet smells coming from the cooking pot are wonderful.
IMG_4311

The sauce itself lasts for months so it’s great to have a private hoard in the store cupboard for personal consumption, although I will probably give a couple of my pots away to those I deem worthy of such culinary pleasures – basically family and friends who I know like chillies.

IMG_4323

IMG_4340

My life has been made so much easier since I invested in my kilner wide neck funnel (see photo above). I know it will get a lot of use with all the chutneys and jams I make over the course of a year.

IMG_4370

IMG_4347

Chipotles En Adobo

adapted from Thomasina Miers’s recipe in Mexican Food Made Simple

Makes 6 jars

200g chipotle chillies

1 white onion, chopped

1 bulb of garlic, peeled and chopped

3 tbsp fresh oregano

2 tbsp fresh thyme leaves

2 bay leaves

1 tsp cumin seeds, crushed

4 tbsp olive oil

350ml white wine vinegar

50ml balsamic vinegar

1 tbsp black treacle

3 tsp tomato puree

6 tbsp demerara sugar

2 tbsp sea salt

1. Cut the storks off the tops of all the chillies and then place them in a colander and wash in cold water.

2. Transfer to a large pan and cover with water and simmer gently for around half an hour, by which time the chillies will be soft. Strain the water and place six of them into a blender along with the onion, garlic, herbs, cumin and 200ml of water. Blend until smooth.

3. Heat up a large pan (my Le Creuset pot is perfect for this) with the olive oil and when it is very hot add the blended chilli paste and stir continuously for a couple of minutes before adding the tomato puree, sugar, salt, vinegars, black treacle, along with 100ml of water. Turn the heat down and simmer for a few minutes before adding the remaining chillies.

4. Simmer gently for a further 15 minutes, stirring throughout.

5. Transfer the sauce to a blender (or use a hand blender) and blend once again until you have a smooth sauce.

6. Place into your steralised jars and store in a dark, cool place.

This amount makes 6 small kilner jars, as shown in the photos. Whilst it lasts for months, I can bet that it won’t last too long once you have tried it as you’ll be putting it in and on everything.

Best of luck, a little bit of effort will reward you royally.


Indian Style Tomato Chutney

I adore condiments with my food no matter what the origin of the food. Chutneys, mustards, jellies, pickles, dressings – you name it, I love to have the option of having them on my plate supporting the meats and/or vegetables and giving the dish that extra added dimension. So you can just imagine how in heaven I was when Mr B’s grandmother, known as Dida, cooked this simple tomato chutney for us when we visited her in Kolkata a while ago. We were all given a little bowl of the chutney to eat alongside our dal and vegetable dishes and it tasted sublime. The combination of hot and spicy with sweet undertones  made the chutney completely addictive.

Tomatoes are to me what I imagine chocolate is to many people. I could give up eating chocolate tomorrow, but tomatoes……well that would be seriously hard. In fact for Easter my parents gave me a tomato plant instead of a chocolate egg, knowing that I would get more enjoyment out of that than a chocolate egg.  I eat tomatoes pretty much everyday and without doubt they are my absolute favourite fruit as they are just so versatile and can completely transform dishes. If you have any tomato recipes that you think I would like please send me an email to chilliandmint@gmail.com as I would love to try them.

With this recipe you can keep it simple and just use tomatoes, but I like to add a little dried fruit so as to blend the flavours. You can add a couple of dried prunes, dates, apricots or mango. Experiment and see which you like to compliment with the tomato.

Dida cooks her chutney without the tomato skins on, however, for speed and because I don’t mind them, I have left the tomato skins on. If you prefer a smoother texture then simply boil the tomatoes in a pan of boiling water for five minutes and then strain them and you will find the tomato skins easily come away from the body of the tomato.

Indian Style Tomato Chutney

Makes 1 bowl, 4-6 servings

300g tomatoes, chopped in half if using cherry and quartered if using larger size

1 inch of ginger, grated or chopped finely

2 dried red chillies

1 tsp black mustard seeds

1 tbsp olive/mustard/nut oil

1/4 (quarter) tsp salt

4 tsp sugar (to taste)

3 slices of Aam Shatwa (dried mango), or dried apricots, dried prunes, dried dates – optional

1. Warm the oil in a pan and when it is hot place the two dried red chillies into the oil. You want to fry them until they turn black, which will take a few minutes. For those of you who have seen or made my homemade mango chutney you will remember that frying the dried chillies will make you cough. My mother-in-law assures me that it helps those with nasal congestion, so if you have any issues in this area get involved at this part of the recipe as it is sure to help your ailment!

2. When the dried red chillies have blackened add the remaining ingredients and stir. The tomatoes will release juice as they warm in the pan. Squash the tomatoes with the back of a fork so that they become limp. Taste the chutney and add extra sugar if required.

3. Leave to simmer for 5 minutes, or until the tomatoes have completely softened and then transfer into a bowl to cool. Serve at room temperature.

SaveSave


Extra Hot Smokey Chipotle Sauce Giveaway

I stumbled across the most delicious extra hot smokey chipotle sauce not so long ago, so much so that I studied the label on the jar in great detail so as to find out more about this beautifully balanced sauce. I was delighted to find out that it is made in Suffolk, England by ‘The Chilli Company’ – a chilli farm run by Denise and Adrian Nuttall since 2006. I proactively decided to get in touch with them, to offer my respect amongst other things to their great chipotle sauce. Generously they sweetly sent me a package with some of their products for me to enjoy. So I am going to look forward to trying their hot habanero chutney and their extra hot sweet chilli sauce.

I thought, however, it would be fun to give away a bottle of the smokey chipotle sauce so you too can discover the sensational, fiery taste for yourself. It’s the first time that I have organised a giveaway on my blog, so whilst it’s not a year’s supply of the chipotle sauce (maybe next time!), I hope a single bottle will attract your attention enough.

I will send it to one lucky winner – anywhere in the world (at my expense…even if you are on the other side of the world – that’s how much I rate this sauce).

With a chance of winning all you need to do is:

1) Leave a short comment below

2) Follow me on either twitter or my blog (or both of course ;o)

It’s that simple. A winner will then be chosen at random in one week’s time.

GIVEAWAY now closed. The lucky winner is:

Claire

Would love to try this:) I’ve never tried chipotle sauce.

CONGRATULATIONS


Asian Vinaigrette

Summer is the season for salads and even a plain green salad can taste crisp and cleansing with a delicious vinaigrette or salad dressing to accompany it. My default dressing is always the typical french vinaigrette of olive oil, lemon, white wine vinegar, whole grain mustard, a little garlic and a sprinkling of salt and pepper. I fancied a change so came up with this  fresh, zingy, Asian influenced dressing, which gives a pretty standard green salad some edge – and all salads deserve to have a little ‘edge’ now again.

Its super easy and quick to prepare. If you have an old jam jar I suggest putting all the ingredients into that and then, with the lid on, giving the ingredients a good shake about to give them a thorough mix together.

Let me know what you think! My guess is that you’ll be pleasantly surprised by the results.

Here’s how to make it.

Asian Vinaigrette 

Serves 4-6

1 old jam jar

3 limes, squeezed

1 tsp of sesame oil

1 tsp of light soy sauce

1 tsp of nam pla fish sauce

1 to 2 tsp of white sugar

half a tsp of chilli flakes

In an old, clean jam jar squeeze three limes and then add all the ingredients. You may find that you need a little more sugar or another lime juice so be prepared perhaps to add a little more of one or two of the ingredients. I find that it does not need any salt as this is provided by the soy sauce. Shake the contents of the jar thoroughly and taste to see if the vinaigrette is to your liking.


My mother’s legendary ‘Smokey Barbeque Sauce’ and ‘Tarragon and Lemon Chicken’

OLYMPUS DIGITAL CAMERA

No barbeque is complete without my mother’s legendary smokey barbeque sauce. It’s straightforward to make and always guaranteed to please. There are certain things that you eat as a child that remain in your memory forever and this sauce is definitely one of those happy memory tastes. We were blessed with stunning weather this past weekend – for the Wimbledon finals – so having a barbeque was definitely in order. A glass of Pimms, that ubiquitous English summer tipple, a game of croquet (which is seriously addictive) all in all made for a perfect summer’s day.

OLYMPUS DIGITAL CAMERA

Smokey Barbecue Sauce

Makes approximately 1/2 pint/300ml

25g /1oz butter

1 onion, peeled and finely chopped (although my mother uses leeks as my father has an onion intolerance, which works equally well)

1 garlic clove, crushed

2 tbsp white wine vinegar

150ml/1/4 pint of water or vegetable stock

1 tbsp English mustard

2 tbsp demerara sugar

1 slice of lemon

1 bay leaf

Pinch of cayenne pepper

2 tbsp of Worcestershire sauce

5 tbsp of tomato ketchup

3 tbsp tomato puree

salt

fresh ground pepper

1. Melt the butter in a saucepan and fry the onion (or leek for those with an onion intollerance) and garlic until soft and translucent.

OLYMPUS DIGITAL CAMERA

2. Now add the vinegar, water or stock, mustard, sugar, lemon slice, bay leaf and cayenne. Bring slowly to the boil and simmer for 15 minutes, stirring occasionally.

3. Stir in the remaining ingredients with salt and pepper to taste. Simmer for a futher 10 minutes. I tend to leave the bay leaf in when I serve the sauce as I like the rustic, homemade quality to it.

OLYMPUS DIGITAL CAMERA

As an alternative to simply just barbequing chicken, which is delicious in its own right, my mother’s ‘Tarragon and Lemon Chicken’ is a good alternative. It’s best to marinade the chicken for as long as possible, ideally overnight and to pierce the skin of the chicken so that the flavours can really be absorbed by the chicken. Serve with a crisp green salad and piping hot new potatoes with a dollop of butter and some chopped up fresh parsley and my mother’s legendary smokey barbeque sauce.

Tarragon and Lemon Chicken  serves 4

3.5lb whole chicken cut into pieces

5 fl oz olive oil

6 tbsp lemon juice

1 onion (or leek), finely chopped

1 large handful of fresh tarragon

1 large handful of fresh parsley (flat leaf or curly), finely chopped

few drops of tabasco

salt and pepper

lemon wedges and fresh tarragon sprigs to garnish

1.  Season the chicken with salt and pepper and then make a few knife incisions into the chicken pieces. This is to enable the marinade to really penetrate the chicken so that it is more flavoursome when it is cooked. In a separate bowl mix together the olive oil, lemon juice, onion (or leek), the handful of tarragon and parsley and tabasco. Then add the chicken pieces and with your hands really work the marinade into the chicken pushing some of the onion and herbs into the small incisions that you have made.   Leave the chicken to marinate in the fridge overnight.
OLYMPUS DIGITAL CAMERA
2.  Take the marinated chicken out of the fridge for over an hour before cooking time and leave to stand at room temperature.
3.  When the barbeque is ready brush the grid with olive oil.  Drain the chicken pieces, reserving the marinade, and place chicken on the grid starting with the bony side down. Brush the chicken pieces with the marinade at intervals during cooking, remembering to turn the chicken so that it is cooked sufficiently.
4.  Barbequing the chicken takes 30 minutes. You know that the chicken is cooked when the juices run clear when pierced with a knife through the thickest part of the meat.
5.  Garnish with tarragon sprigs and serve with lemon wedges.
OLYMPUS DIGITAL CAMERA

Raoul’s Eggs Rock

OLYMPUS DIGITAL CAMERA

England is experiencing the ‘great flood’ take 2. Not literally of course, but after the great weather in April and May to say it has declined would be an understatement. Its Wimbledon week, the crowds are here and the grey clouds are looming large over London town. I feel sorry for the individuals responsible for rescheduling the matches so that they are all played in the two week Wimbledon window. Headache or what! But hey lets look on the bright side (us Brits are good at that) our reservoirs must be full again, there won’t be a hose pipe ban and our gardens are lush bright green.

So with all this wet weather I thought it was high tide (sorry I could not resist) to take a little trek across town to buy some of the tastiest eggs on the planet. If the sun refuses to come out in our skies then I will recreate it on the plate. Well that was my thinking.

There is this wonderful restaurant/brunch establishment, and grocery store in Maida Vale, called…..you guessed it, ‘Raoul’s‘. The brunch menu is heavenly and it is there that they serve and sell these wonderful eggs, which they source from Italy. They taste incredible and the yolks are so yellow I really wouldn’t be surprised if they had been injected with turmeric.

OLYMPUS DIGITAL CAMERA

I stumbled across this little gem of a place years ago when I was looking for a place to live. I thought Maida Vale looked charming and villagey being nestled by ‘Little Venice’ and not far from Regents Park. When I stopped to gather my thoughts and look through the suggestions the estate agent had given me I refuelled in Raoul’s. It was a defining moment because I fell completely in love with this brunch hangout. With its wonderful eggs benedict royal and fresh fruit smoothies, I was sold. I decided there and then that the property I was going to live in HAD to be in walking distance of Raoul’s. I imagine it never crossed estate agents minds that something as simple as an eatery could convince someone to buy in an area. If I was to pin point it even further I think it was the eggs that won me over.

I think you kind of get my gist on how mind blowing these eggs are.

It wasn’t until I bought a dozen at the weekend that I actually decided to dig a little further and find out more about the eggs in question. All I knew was that they were from Italy. The packaging has changed since I was last there – which was quite a few years ago – and the eggs are imported by a company called ‘Machiavelli Foods‘, which focuses on importing food from Italy to London. On the packaging it says that the ‘hens are fed on a purely vegetarian diet of corn, grain and soy with marigolds and acorns added to help develop the rich and flavourful yolk’. So there you go folks if you want your hens to lay eggs with a deeper, rich, yellower colour, feed your hens marigolds and acorns. For those of you who keep hens let me know how you get on, I am really curious to see  if you notice a difference in the colour of your hens’ yolks. I genuinely would be interested to know.

OLYMPUS DIGITAL CAMERA

I thought I would recreate eggs benedict royale for you to try at home. My hollandaise sauce recipe is fail proof  and super easy (I use a blender) so give it a try.

Hollandaise Sauce 

Serves 4

3 egg yolks

150 g unsalted butter

juice from half a lemon

pinch of salt (optional)

1. Separate 3 egg yolks from the whites. This is easy to accomplish by breaking the egg and then placing the yolk back and fourth between the two broken egg shell halves. Save the eggs whites for later on – you could make an egg white omelet.

OLYMPUS DIGITAL CAMERA

2. Squeeze the juice of half a lemon onto the egg yolks, less if you prefer it less lemony. Add a pinch of salt at this stage, although I personally find it unnecessary if you are going to be using smoked salmon for the eggs benedict royale. Blend the egg yolk mixture for 20 seconds at a medium speed. It should appear slightly lighter in colour.

OLYMPUS DIGITAL CAMERA

3. Slowly, and that is the key, heat up the butter, making sure not to let it boil.

4.  When the butter is melted, slowly add it to the egg mixture, continuing to blend (I use the pulse button at this stage)as you do so. The speed of the blender and the heat from the butter will heat the yolks slightly without them scrambling. Blend for a couple of seconds once all the butter has been incorporated into the mixture.

OLYMPUS DIGITAL CAMERA

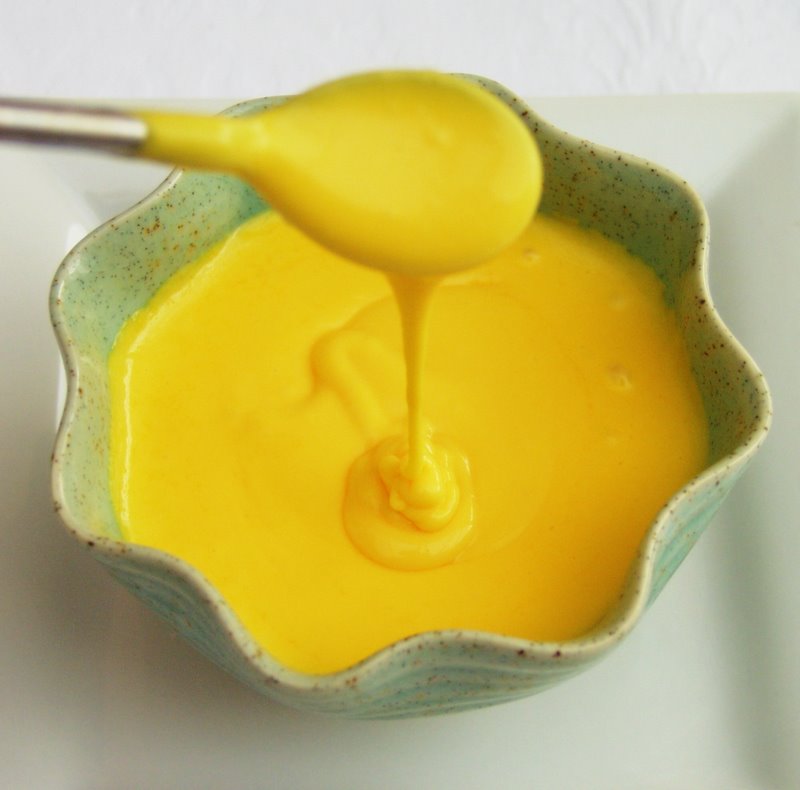
5. Taste the mixture and add more salt or lemon as you see fit. If you like a thinner consistency then add a little warm water and blend briefly.
OLYMPUS DIGITAL CAMERA

6. Keep the hollandaise sauce warm until you are ready to use by placing the blender container or small bowl you have transfered it into, in a pan of hot tap water.  Use within 1 hour.

As well as eggs benedict royale, hollandaise sauce works really well over asparagus, broccoli, salmon (although that might be a bit 70’s!).

Eggs Benedict Royale

Serves 4

4 white muffins, toasted

4 eggs, poached

few drops of vinegar

cling film (to wrap the poach eggs in)

4 slices of smoked salmon

4 tbsp of hollandaise sauce (see above)

1. Prepare the hollandaise sauce first (see above) and put to one side in a warm place.

2. I have a number of ways to poach eggs but the method I am presently using is the one I saw my brother doing at Christmas when he was preparing brunch for the family. Basically you crack an egg over some cling film – enough so that you can gather the ends up easily and there is some left over (which you can place over the side of a pan). You must make sure that there is no air in the little cling film egg parcels. Place a few drops of vinegar with the egg. It is easy to poach many eggs at once like this by separating them into their own little cling film parcels.

3. Boil a pan of water and place the eggs into the boiling water. Leave for 2/3 minutes.

4. Meanwhile toast the muffins and then separate onto plates placing a slice of smoked salmon onto one half of the muffin. The extra half of muffin I leave to one side so as to mop up the hollandaise sauce and egg at the end.

5. Once the eggs are done, place them directly on top of the smoked salmon and then place a large tablespoon of the hollandaise sauce over the top.

6. Garnish options could be ground pepper, parsley or chives. I personally like to leave it plain as there are so many wonderful flavours coming from the dish already.

OLYMPUS DIGITAL CAMERA


In the mood for ‘Italian Salsa Verde’

OLYMPUS DIGITAL CAMERA

My family has been craving greenery. We spent the last week in the beautiful Var valley in France and whilst we had some wonderful dishes we felt that perhaps, without sounding too rude, French food is slightly stuck in a 1970’s time warp and is due a food revival. Meticulously prepared and presented, the food still remains pretty rich and creamy with lots of unpasteurized cheese not much veg and basically not ideal if you happen to be under 10, pregnant or health conscious. Before you ask, no I am not pregnant, but one of the friends we went with is, and she found it slightly restrictive on what she could actually eat. A favourite dish that one of our party devoured was scallops in a creamy curried sauce, similar to coronation chicken in taste – the sauce that is; surprisingly delicious but a little 70’s kitsch you have to agree. If only I’d taken a photo as evidence.

So back in Blighty we gathered some fresh herbs to make an Italian Salsa Verde to detox our bodies from all the cheese and cream laced food we had eaten across the waters.

Italian Salsa Verde 

Not to be mistaken with French sauce verte, German green sauce, Mexican salsa verde and Argentinian chimichurri

1 large handful of fresh mint

1 large handful of fresh basil

2 large handfuls of fresh flat leaf parsley

3 pieces of chopped garlic

6 anchovies chopped

1 large handful of chopped cornichons or gherkins

1 large handful of capers

2 tbsp of olive oil

3 tbsp of red wine vinegar

1 dsp (dessert spoon) of dijon mustard

pepper

salt

1. Finely chop the garlic, cornichons, anchoives. If you are doing it all by hand then you will also need to finely chop the fresh flat leaf parsley, mint and basil, if however you are like me and you want to save time, use a blender. Also add the capers and olive oil at this stage.

OLYMPUS DIGITAL CAMERA

2. After an initial quick blend – so that it is NOT smooth in consistency, add the red wine vinegar and dijon mustard. Season to taste although you will probably find that the saltiness of the anchovies suffice.

OLYMPUS DIGITAL CAMERA

OLYMPUS DIGITAL CAMERA

The girls loved it so much they even ended up licking out the remainder from the blender with a spoon. How sweet !


3. Salsa Verde is so versatile that it can be eaten with meat, fish, poultry or vegetables. I decided to serve mine with grilled chicken, vine tomatoes and borlotti beans on the side, and hunks of crusty bread to mop up the salsa. Delicious and not too 70’s !

OLYMPUS DIGITAL CAMERA

SaveSave