Almond Milk and Vanilla Panna Cotta with a Strawberry and Black Pepper Coulis

IMG_9740

Panna cotta is a delightful pudding. Sweet but not too sweet, relatively light and ridiculously easy to make, but shhh don’t tell anyone. Instead of using cows milk I opted for delicious almond milk to give it a slight nutty undertone to accompany the vanilla.

IMG_9738

The Pressery has just relaunched with a pure, long-life organic almond milk, which is utterly delicious and perfect for this recipe. The list of London locations where you can purchase the milk is growing by the week so I am sure there will be somewhere near you where you can pick up a carton. Take a look here to find out the locations.

IMG_9739

I love the combination of strawberries and black pepper, so thought I would accompany the panna cotta with a smooth coulis made from the two ingredients. Equally you can simply just serve the panna cotta with fresh strawberries with a pinch or two of black pepper.

IMG_9737

This sweet delight is perfect after a number of dishes from my recipe library – here are a few to point you in the right direction.

slow cooked lamb with tomatoes, dried fruit and spices, warm lentil and goats cheese salad with a fresh basil dressing, chickpea, chorizo and cod stew, umami rich portable mushrooms, sun dried tomato and black garlic pesto

Let me know how you get on. Do you like the strawberry and black pepper combo?

Almond Milk and Vanilla Panna Cotta with a Strawberry and Black Pepper Coulis

Serves 4-5 (depending on the size of your ramekins)

250ml  almond milk

250ml double cream

2 tbsp agave nectar (or 25g white sugar)

2 vanilla pods or 1 tsp vanilla extract with seeds

3 gelatine leaves

******

60ml water

30g caster sugar

150g fresh strawberries, stems removed and sliced

1 tsp of freshly ground black pepper

  1. Place the gelatine leaves in a bowl of cold water for 4 minutes.
  2. In a pan gently heat the almond milk, cream, agave nectar/sugar and vanilla (if using pods split them lengthways and scoop out the seeds and leave the pods in the milk to infuse). Let it simmer gently for 5 minutes.
  3. Squeeze the water out of the gelatine leaves and place in the pan with the almond milk. Stir well so that it dissolves into milky liquid.
  4. Sieve all the liquid into a jug and discard the vanilla pods if using, and then pour even amounts into your ramekins. Allow to cool before placing in the fridge for a couple of hours.
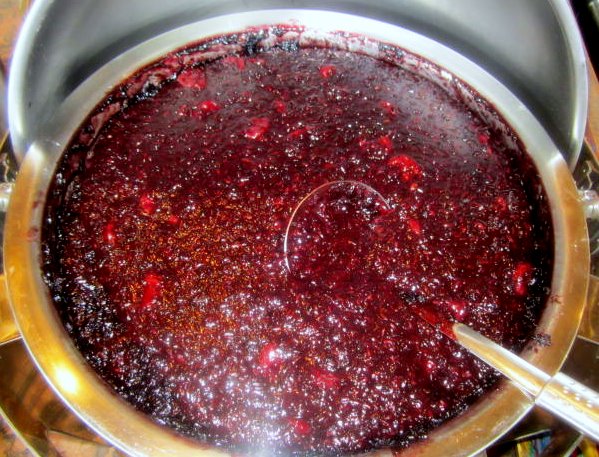
  5. In a new pan add the water, caster sugar and fresh strawberries and gently heat so that the sugar dissolves.
  6. Use a hand blender to create a smooth sauce. If you find the sauce is too thick do add a little more water at this stage. You are aiming to have a sauce that is the same thickness as a single cream.
  7. For the final stage you have two options. Either sieve the strawberry coulis into a serving jug or if you prefer to have the black pepper bits in the coulis do not strain. Both ways work well, that latter naturally having more pepper bite, which I personally love.
  8. Place the coulis in a serving jug and when it is cools place in the fridge.

To serve the panna cotta, gently use a sharp knife to loosen the top rim of the panna cotta. Then place the bottom of the ramekin in a bowl of hot water for a couple of seconds maximum. Place the serving plate on top of the ramekin and then turn over and gently shake the ramekin so that the panna cotta gently slips onto the plate.

Either allow guests to serve the coulis themselves or place a little around the edge of the panna cotta. Equally you can add fresh fruit as well as the coulis or instead of. Strawberries or blueberries would work beautifully.

As an alternative idea to turning the panna cotta out onto a plate you could serve them in vintage mismatched tea cups.


Chocolate, Chilli and Cinnamon Fondants with Cardamom Chantilly Cream

IMG_0416

Happy New Year everyone. As January strides forth I know that everyone sets out with very good intentions to exercise more, drink less, read more, be more sociable, cook more, be healthier and I honestly  think that to rebalance and set goals is a good thing. I am realistic though and I know that by February some of our old ways will have crept back.

IMG_0403

This pudding is probably the last thing you feel like eating in January after all the excesses of Christmas, but I think it is definitely a good one to have up your sleeve if you are having guests over. It is rich and decadent (I have to share a pot) and can be made well in advanced. I often make up a batch and then freeze them until I am ready to use them. From frozen, it’s simply a case of putting them in a preheated oven (180 degrees) for 15-17 minutes and then they are ready. If you bake them without freezing them they only take  10-12 minutes.  Sponge like on the outside and rich molten larva on the inside. How easy is that?

Cardamom Chantilly cream is the perfect companion to the fondants and again very quick to whip up, literally. The cream takes the richness off the fondants and I personally love the taste of cardamom so think it works really well with the chocolate. I hope you agree.

So when you are back to eating chocolate give this a try and let me know how you get on. I can guarantee you will impress your guests.

IMG_0405

Chocolate, Chilli and Cinnamon Fondants

makes 8

2 tbsp butter, melted

cocoa powder, for dusting

200g cooking chocolate, broken up – I like this one (sometimes I use 100g dark and 100g milk)

200g unsalted butter

200g caster sugar

4 eggs

4 egg yolks only

200g plain flour

1 tsp chilli flakes

1 tsp cinnamon powder

icing sugar for dusting

*******

Cardamom Chantilly Cream

250ml double cream

2 tbsp caster sugar

7 cardamom pods opened and then the seeds ground

*******

1. Using the 2 tablespoons of melted butter brush the inside of the fondant moulds and then place in the freezer for 10 minutes.

2. Remove from the freezer and coat once again and immediately after coating one fondant mould add a little cocoa powder so that you completely cover the inside of the mould.

3. Preheat your oven (I use a fan oven) to 180 degrees.

4. In a pan gently boil some water and then place a bowl in the pan with the broken cooking chocolate and butter. Let the butter and chocolate gradually melt, stirring at intervals.

5. In a mixing bowl whisk (I use an electric whisk) the eggs, egg yolks and sugar so that it thickens slightly. This will take a couple of minutes. Add the flour and then gradually pour in the melted chocolate and butter. Continue to whisk. Add the chilli flakes and cinnamon. Taste to check on flavour. I sometimes add more chilli flakes at this stage, but it’s up to you!

6. Pour the chocolate mixture into a measuring jug and then pour into the moulds so that they are 3/4 full.

7. You can either put them in the freezer at this point, ready to use at another time or you can place in the oven immediately. If cooking from frozen place them on the centre shelf for 15-17 minutes. If cooking immediately cook them for 10 minutes. I like them really soft in the middle but if you prefer them less runny in the middle then leave them in the oven for an extra minute or two max.

8. Once cooked leave to rest for a minute before placing a plate on top of the mould and turning upside down so that it is the right way up. The mould will easily come away from the chocolate fondant. Should it need a helping hand gently shake making sure to hold the plate firmly in place.

9. Dust with a little icing sugar and serve with cardamom chantilly cream, which perfectly balances the richness of the chocolate with the smooth subtle tones of the the cardamom and cream.

********

Cardamom Chantilly Cream

1. Pour the double cream into a mixing bowl and whisk so that it firms up and peaks are created.

2. Add the caster sugar and ground cardamom and continue to whisk so that it become light, thick and fluffy.

Store in the fridge until ready to use.


Cinnamon, Sea Salt and Chilli Chocolate Truffles

IMG_8254

Foodie gifts are always the best. Not only do they show effort and thought but are guaranteed to bring a smile to the receiver and a warm fuzzy feeling to the giver. Recently friends who came for supper bought along four bags of spices from Turkey that they had picked up on a recent business trip. So I now have bags of sumac and spice rubs – you can imagine how overjoyed I was.

IMG_8239

Time permitting, I like to take food gifts, sometimes homemade sometimes not, to friends who are hosting suppers. I find my chipotle sauce always goes down well, or in fact any of my chutneys under the chutney section in my recipe library. Chocolate truffles are always a crowd pleaser and are also perfect for bringing out at the end of a dinner. They take minimal effort to make and you can make them a few days in advance and then store them in the fridge.

IMG_8274

I am more partial to milk than dark chocolate so I have double the amount of milk chocolate to dark, I find this ration works really well. You can do the opposite if you prefer dark. You can also get creative with these truffles and instead of adding cinnamon, sea salt and chilli flakes, who can add just one or perhaps another spice such as cardamom, or perhaps fresh mint, coconut, ginger, nuts, raisons, bacon – the possibilities are endless.

Personally I love the combination of cinnamon, sea salt and a pinch of chilli flakes. Give them a try and leave a comment below and tell me what you think.

IMG_8217

Cinnamon, Sea Salt and Chilli Chocolate Truffles

200ml double cream

100g Green & Black milk chocolate 37% cocoa with sea salt

50g Green & Black dark chocolate 70% cocoa

1/2 tsp cinnamon powder

1  pinch of sea salt

1 pinch of chilli flakes

1 tbsp cocoa powder – for dusting

1. Place the milk and dark chocolate in a freezer bag and seal. Use a rolling pin to bash the chocolate into small pieces.

2. Gently warm the cream in a saucepan. When hot take off the heat and pour the broken up pieces of chocolate into the saucepan along with the cinnamon powder, sea salt and chilli flakes. The chocolate will melt within a couple of minutes. Give a good stir and taste to see if you like the flavour. Add a little more cinnamon powder, sea salt or chilli flakes as your taste requires.

3. Place into a bowl and place in the fridge for an hour and a half, by which time the chocolate will have become firmer to handle.

4. Roll in the palms of your hands to form small bite sized balls. I prefer them to look a little uneven compared to beautifully neat balls, but it’s a personal preference. Please note this part can become a little messy!

5. Roll in the cocoa powder and store  in an airtight container in the fridge until ready to eat. They will last for up to a week.

Instead of rolling the truffles in cocoa powder you could roll in pistachio, hazelnuts or coconut. Experiment and see what works for you.

IMG_8234


Saffron and Cinnamon Honey Served TWO ways – sweet and savoury

IMG_6152

Sometimes the simplest dishes are the best. A plate of freshly steamed samphire with a knob of butter, a moule mariniere with crusty bread to mop up the sauce, a mature chunk of cheddar with a crisp apple, a boiled egg dipped into cumin powder, fresh tomatoes with fresh basil and buffalo mozzarella drizzled in the finest extra-virgin olive oil, fresh asparagus dipped in butter (have you noticed there’s a butter theme going on here!). I could go on but in this day and age when many chef’s are pushing boundaries and creating new flavour sensations and wowing us with their scientific approach to the culinary arts it sometimes comes as a welcome relief to sit down and eat a meal that is not complicated and flash but is simple and truly delicious.

For those who have been following my blog for a while will know, I don’t really have a sweet tooth, well certainly not the kind to have dark chocolate cake/torte/mousse at the end of the meal. Growing up my favourite puddings were rhubarb crumble, pavlova, custard tart and anything with nuts in. Mr B on the other hand loves all the old English puds and often puts a request into my mother at around Christmas time to prepare one or two – things like jam roly poly, spotted dick, treacle pudding, tiramisu – she’s good at making all these, so I let her run with it.

Generally speaking we tend to just pick on fresh fruit at the end of the meal, which is not only delicious but also satisfying and involves no effort or preparation.

I recently came across a pudding however that immediately catapulted itself into the top league of puddings after the first mouthful. It involves 7 ingredients and can be whipped together very quickly.

IMG_6136

Saffron and Cinnamon Honey with Figs and Greek Yoghurt

adapted from Greek.food.com

5 figs, halved

2 large tbsp thick Greek Yoghurt per serving

2 tbsp honey

1 large pinch of saffron

1 large stick of cinnamon

40 g white sugar

300ml cold water

1. In a saucepan place the cold water, sugar, honey, cinnamon stick and saffron and stir thoroughly until the sugar has completely dissolved. Simmer gently for around 15-20 minutes. Do not over cook as the liquid will turn into a thick toffee substance, which you do not want to happen.

2. On a serving plate/bowl add a generous dollop of Greek yoghurt and place three fig halves on top of each mound of yoghurt.

3. Finally gently spoon the scented honey over the figs and yoghurt having removed the cinnamon stick first and serve.

Note: You can also gently heat the figs in the honey for a minute on both sides, however I tend to prefer them fresh with the honey drizzled on top. Try both and see which you prefer.

As you are likely to have some sweet scented honey left over the following Scandinavian influenced open sandwich works a treat with the sweetness of the honey and the saltiness of the cheese and prosciutto/parma ham.

IMG_6183

Open Sourdough Sandwich with Prosciutto, Cheese, Rocket, Peach and Scented Honey

Per Serving you will need:

1 slice of sour dough bread

1 slice of prosciutto

2 slices of cheese – I used Italian Taleggio La Baita above, but crumbled soft goat cheese also works really well

small handful or rocket/arugula

1/2 (half) peach

drizzle of scented honey (re above recipe)

pinch of coarse black pepper

Serve

I tend to make this open sandwich in the following order: bread, prosciutto, cheese, rocket, peach (or can be before rocket), honey and black pepper.

It makes a very satisfying lunch as the flavours compliment each other so well. For this photo shoot above I used white flat peaches but I think the sweet yellow flesh peaches would probably look more attractive on an open sandwich.

IMG_6162


Rhubarb and Rosewater Tart and a visit to the Jurassic Coast

Fear not, my loyal subscribers, I have not abandoned you, although I realise it might have felt like that these past few weeks. Upon returning from my adventures in Turkey we headed off to the English south west coast, or to be precise, the Jurassic coast on the border of Dorset and East Devon. The old cottage, that we made our home for the week, was fairly remote and had no Wifi so there was no chance of blogging and also if the truth be told I was far too busy rock pooling, exploring coastal and in land walks, swimming – most refreshing although a little chilly upon entry but perfect after 15 seconds, playing board games and eating Devonshire cream teas.

We stumbled across characterful villages where time seems to have stood still and the same families have holidayed at the same place for generations. The weather can be a bit unpredictable but you can guarantee there is always adventures to be had. One such intimate village was called ‘Beer’ – we had to visit it out of curiosity. I liked the fact that the village still has an active fishing community and that you can actually buy fish direct from the fisherman.

Striped deck chairs are quintessentially English and I particularly loved this little advertising board – good honest advertising. Refreshing!

Boats waiting to be hired on the beach in Beer.

Cream teas and crab sandwiches in Beer  – things can’t get much better than this.

View from one of our many coastal walks


I gave swimming a pass on this day….

…………….but these guys just couldn’t resist a good storm

On our return journey we drove cross country in our bid to explore even more quaint, hidden away, little villages.  Not far from Milton Abbas – which is seriously worth a detour when you are next in Dorset – there is a charming little farm shop at Steeptonbill Farm, where we decided to stock up on supplies. We were greeted warmly by Tess who talked us through all the produce and meats. Seeing the sign in the right of the photo for ‘freshly pulled rhubarb’ gave me my idea for my next blog post.  I loved rhubarb crumble as a child but rarely eat rhubarb as an adult. It just so happens that I had stumbled across a recipe recently in House & Garden magazine for ‘Rhubarb and Rosewater tart’ and the combination intrigued me enough to try it out.

All the recipes on this blog, unless stated, are ones that I have cooked a number of times and work well. This recipe however was my first effort and I definitely think I could perfect the results further on my next try. The most important step with this recipe, which I found out a little too late, is to not overcook the rhubarb to begin with. The House & Gardens recipe states simmering the rhubarb in the dissolved sugar, water and rosewater for 8-12 minutes. I found that I cooked mine for less than 8 minutes and it was beginning to lose its shape. So my advice is to keep checking every 2 minutes when it is simmering; by 6 minutes it should almost be done.

You can see what I mean if you look at the bottom left hand side of the tart, which is more how I wanted the whole tart to look compared to the far right side which has rhubarb that has lost its shape.

What it lacked in presentation it certainly gained in taste. I hope you will think so too.

Don’t look too close at this photo, but you can see what I mean regarding the rhubarb loosing its shape on the middle to right of the tart.

You’ll find that you will end up with excess rhubarb and rosewater syrup so take a look at Heidi’s (from 101 Cookbooks) suggestions here on what to do with the leftover syrup.

Rhubarb and Rosewater Tart

Sourced from House & Garden July 2011 issue

Serves 6-8

150g caster sugar

250ml cold water

4 teaspoons rosewater (see another recipe on my blog using rosewater – here)

850g rhubarb, trimmed cut into 3cm pieces

250g ready-made puff pastry

handful of plain flour for rolling out the pastry

1 egg, whisked

300ml whipping cream

1. Wash, cut and trim the rhubarb into 3cm pieces.

2. Gently heat a deep pan with the cold water, sugar and rosewater so that the sugar completely dissolves; this will only take a couple of minutes.

3. Place the rhubarb into the dissolved sugar and water and simmer  for 6 minutes, remembering to cover the pan. You want to make sure the rhubarb is soft BUT  still holds its shape. If after 6 minutes the rhubarb is still firm, continue to heat for another couple of minutes until it has softened.

4. While the rhubarb is simmering, roll out the puff pastry so that it measures a rectangle of 35 x 25cm. Place onto a slightly larger piece of greaseproof paper.

5. Using a slotted spoon lift the rhubarb out of the syrup and place on a flat plate. With the remaining syrup continue to heat it on a high heat so that it is reduced, but that there  is at least 6 tablespoons of rhubarb rosewater syrup.

6. Preheat the oven to 180 degrees, if using a fan oven, 20 degrees hotter if not or mark 6.

7. Arrange the rhubarb on the puff pastry leaving a boarder of 2.5cm. I find it is easiest to make a slight mark with a knife all the way around so that it is fairly uniform.

8. Before placing in the oven brush with egg mixture around the boarder.

9. Bake in the oven for 15 minutes so that the pastry is puffed and golden. Leave to cool for five minutes.

10. When the tart is baking, pour the whipping cream into a large bowl and stir in 3 tablespoons of rhubarb rosewater syrup. Whisk until the cream thickens and peaks form.  Chill until ready to serve.

11. Brush the tart with the rhubarb rosewater syrup and serve hot along with the whipped cream.


Croissant Bread and Butter Pudding

Have you ever been in the situation of having croissants in your bread bin slowly going stale over a couple of days and not wanting to simply discard them?

I was in this very dilemma recently so thought that the best option was to either:

(a) feed them to the birds

or

(b) make croissant bread and butter pudding.

I opted for (b)…………..sorry birds you’ll have to make do with normal bread crumbs!!

Lardy? Most definitely.

Decadent? Well just a little bit.

Healthy? We’ll just pass on that one shall we.

Bread and butter pudding is a much loved British dessert that we can all fondly (well for the most part!) remember eating as children. Today there are so many varieties of the dish to tempt and inspire. As well as stale bread or croissants you can also use brioche or panetonne – the possibilities are limitless. I stumbled across a rather interesting and amusing website called ‘The British Bread and Butter Pudding  Appreciation Society’ when looking into the exact origins of the pudding. Do check it out here to find some interesting facts about the dish.

My daughters asked me to omit sultanas, which would normally be my go-to fruit of choice to put in the pudding, and asked for chocolate drops. The closest thing I could find in my pantry to little chocolate drops were giant chocolate buttons, so as a treat I scattered a few of these in the pudding. You can basically add any fruit to the mix – summer berries would be delicious and colourful or even blackberries in the late summer, early autumn. If you do end up using sultanas do remember to soak them first in warm water or the ones you scatter on the top will become hard and rather burnt.


I had a couple of almond croissants getting stale so added these with my regular croissants.

Croissant Bread and Butter Pudding

Serves 6-8

5 stale croissants, sliced into thin segments

3 eggs, whisked

400ml semi-skimmed milk

150ml double cream

2 tbsp caster sugar and an extra sprinkling to go on top

pinch of cinnamon powder

pinch of nutmeg

1 tbsp melted butter

1 tsp of vanilla extract

handful (or two!) of chocolate drops

1. Preheat an oven at 180 degrees (I use a fan oven). Slice the croissants evenly and line them in a greased ovenproof dish.

2. Whisk the eggs and then add the milk, cream, sugar, cinnamon, nutmeg, melted butter, vanilla extract and some of the chocolate drops. Whisk/stir the ingredients into the eggs.

3. Pour the mixture over the croissants and leave for 10 minutes to let the mixture soak into the croissants.

4. Before putting in the oven scatter with a few extra chocolate drops , along with a sprinkling of extra caster sugar.

4. Place in the oven for 30 minutes and serve immediately.

Naughty but very very nice!


Classic Lemon Tart

Sometimes in life I think it is best to get straight to the point…….

COOKING A CLASSIC LEMON TART IS NO EASY FEAT

However,  I have been fine tuning this recipe now for sometime (I had a few disasters on the pastry front) so I think that if you follow my instructions carefully you should be rewarded with a delicious dessert that will wow your friends into thinking you a natural patisserie chef in the making.

My blog has been up and running for one year now (….jumps for joy…) and after looking through all the recipes I have shared with you I realise that I have tended to ignore the sweeter things in life. This is largely because I rarely eat puddings – I just don’t really have a sweet tooth and I guess part of it stems from the fact that, for the most part, I don’t think they are massively healthy. Then again the old adage of ‘everything in moderation’ is so true, so perhaps over the coming year you may find a few more sweet recipes to tempt you.

So to the recipe in hand. Scroll through the photos below and read the tips I have added to prepare a perfect lemon tart. Let me know if you find any other tweeks necessary that you would like to share with the wider community. I would always love to hear from you.

I prepare the pastry a day ahead and leave it in the fridge. Bring it out of the fridge at least an hour before rolling so that it can acclimatise to room temperature.

Thoroughly grease the loose bottom tart tin with butter. This is really important as you want the tin to come away easily from the pastry after cooking. Failing to do so will result in the sides of your tart breaking.

Sprinkle flour on the surface that you are going to roll the pastry. I have found that to transfer the rolled pastry to the tin is virtually impossible as some of it breaks off. Do not be alarmed. Place as much of the pastry in the tin as you can and with the bits that have broken off simply piece together.  Also make sure that the pastry is sufficiently up the sides so that it is evenly spread.

Remember the bottom of the flan is not going to be seen by a wider audience as you have the lemon mixture going on top of it.

Make sure you have enough ceramic baking beans/and or mixed beans to cover the whole of the tart dish. You want to make sure that they are evenly spread.

Do not whisk the eggs so that they are frothy. A gentle whisk, using a hand whisk is suffice.

Don’t forget to strain the creamy lemon mixture before transferring into the tart base. You want the mixture to be smooth.

I added some raspberries to compliment the lemon tart in both appearance and taste. Strawberries would also be a great addition.

A scattering of icing sugar adds the finishing touch. I noticed a little hand popping into the frame of my photo just as I had taken the shot. Clearly too irresistible not to eat!

Classic Lemon Tart

Serves around 12 people

Adapted from the recipe in Red Magazine April 2012  

I use an 11 inch (29cm by 4cm) tart dish

For the pastry

300g plain flour

45g ground almonds

pinch of salt

200g butter, keep at room temperature and cut into cubes

4 tbsp caster sugar

3 egg yolks

1 1/2 (one and half) tbsp cold water

For the filling

300 ml double cream

zest of 2 lemons

juice of 8/9 lemons (so that it measures 200ml juice)

6 eggs

200g white caster sugar

1. If you can make the pastry a day in advance. If not make the pastry and leave to chill in the fridge for 20 minutes. Ideally using a food processor, pulse the flour, ground almonds and pinch of salt and then add the butter followed by the caster sugar. Add the add yolks and water and whizz together until the mixture forms a large clump. Work the pastry into a neat ball and wrap in clingfilm and place into the fridge, either over night or for around 20 minutes.

2. Preheat the oven to 180 degrees if using a fan oven or 200 degrees if not or gas mark 6.

3. Grease the tart dish throughly. On a cold surface sprinkle some flour and roll out the pastry and transfer, as best you can, to the tart dish. If it breaks simply press the remaining pastry pieces together to cover the gaps. Make sure the pastry has sufficiently gone into all the grooves of the dish. You will probably find that you have a little pastry left over, which you can either use to make a mini tart or use as you see fit.

4. Place baking paper into the tart dish and cover with baking beans. Place in the oven for 20 minutes to bake blind. Take out of the oven and discard the baking paper and save the baking beans for another time.  Brush the pastry with egg yolk and return to the oven for a maximum of 5 more minutes. Then leave to rest before putting in the lemon mixture.

5. Put the cream in a pan with the lemon zest to infuse gently. When small bubbles appear turn off the heat.

6. Break the eggs into a bowl along with the caster sugar. Using a hand whisk gently stir together – you do not want to make them frothy so do not over do it here. Stir in the lemon juice and very slowly, so as not to cook the eggs, add the warm lemon zest cream.

7. Place the tart shell onto an oven tray and then sieve the lemon mixture into bowl/jug and gently pour into the warmed pastry tart shell. Transfer to the oven on the middle shelf and cook for 18 minutes. Keep checking for the lemon mixture to set (it becomes nicely firm and does not wobble when you move the tray!!) as you may find you can bring it out of the oven a touch sooner than this.  I left mine in for 20 minutes (as the Red Magazine recipe states) but found that it darkens some of the pastry too much (have a close inspection of final photo !).

8. Place on a wire rack to cool completely. Gently remove only the outer part of the tart dish. Serve at room temperature.  Add icing sugar, raspberries to decorate as required.


Mary’s Granola Bars

Mary McCartney has been gracing the pages recently of certain magazines here in the UK, namely The Saturday FT Magazine (April 21st 2012) and the June issue of ‘Red’ Magazine. Known for her talent behind the camera it was a revelation, albeit a positive one, that she has just produced a cook book called ‘Food‘ that she wrote and photographed. For those who are unaware, the McCartney clan are passionate vegetarians and Mary has clearly channelled her love of all things vegetarian into her own tome. Between the two magazines I now have just under 20 of her recipes, which should appeal to a wide audience in that they look straight forward to execute and appetising enough to warrant an attempt at making.

I thought that I would follow her take on the granola bar, which to all intense and purpose is a glorified healthy flapjack right? I am always thinking of little snacks to feed Big A and Little Z when I collect Big A from school, so thought Mary’s granola bar idea would be perfect to give them to fill the gap before supper.  I am also a huge fan of agave syrup, (which I also used in this recipe) which was right at the top of her ingredients list.

The recipe is so incredibly easy that it would be perfect for Big A (whose 6) to cook on her own, with a little overseeing from Mama of course! I followed the recipe religiously, but I think I will get creative next time and change some of the ingredients around. For example I think the bars would also be delicious with pecan nuts, hazelnuts, dates, dried cranberries, coconut. If you get carried away with some new ingredients that work do let me know and maybe next time I’ll follow your suggestion.

Granola Bars

Sourced from Mary McCartney’s recipes in The Saturday FT Magazine, April 21st 2012

Makes 12-14 slices

200ml agave syrup

50g butter

4 tbs vegetable oil

1/4 ground cinnamon

1 tbs vanilla extract

200g porridge oats

80g cornflakes

100g almonds, coarsely chopped

100g dried apricots, coarsely chopped

100g raisins or sultanas

2 tbs sunflower seeds

2 tbs pumpkin seeds

 1. Line a baking tray with baking parchment. I used a 25cm x 25cm tray. Preheat the oven to 180 degrees.

2. Heat the agave syrup in a pan for a few minutes and then add the  vegetable oil and butter. Take it off as the butter melts.

3. Add all the ingredients to the syrup mixture and gently fold in together so that all the ingredients are evenly covered in the syrup.

4. Transfer the contents of the pan to the baking tray and firmly press down evenly.

5. Bake in the oven for 15-20 minutes.

6. Take tray out of oven and leave to cool. When it is cool, cut the granola into square, rectangles – whatever shape takes your fancy! The baking parchment will come away easily once the granola has cooled.

7. Store in an air tight container.


Balinese Black Rice Pudding – it certainly caught my attention

balinese black rice pudding

balinese black rice pudding

For those of you who have been following my blog, you’ll know how much I LOVE my savoury food and tend to dismiss the sweeter things in life. Other than being pregnant the first time round where I craved pain au chocolat fairly regularly, I have never particularly had a sweet tooth. Even as a child I was definitely more of a crisps than sweets gal. However, occasionally, very occasionally, a dessert grabs my attention and makes me sit up and go wow. I had one of these wow moments recently when I was holidaying in Bali.

Picture this:

We had stopped to rest for lunch at a restaurant overlooking the impressive Mount Batur, Bali’s largest active volcano.

P8093022

The restaurant offered a buffet service, which allowed Mr B, big A, little Z and me to try a range of authentic Balinese cuisine. Normally I would stop after the mains, but for some reason I was tempted to try a rather sultry and gloopy looking black rice dish, which had a purple crimson hue to it.

IMG_1611

I don’t know why, because it certainly wouldn’t win a beauty contest, but I think I was curious to see what it would taste like and what the red lumps were exactly (see photo above).

We’ve all had white rice pudding, but black? Settled back in my seat, enjoying the vista I tried a small mouthful and to my utter surprise it tasted REALLY good. I starred into the bowl, trying to figure out why it tasted so heavenly. Within the rice pudding the ‘red lumps’ turned out to be mouthful size chunks of banana, which had been stained deep crimson due to the rice. They tasted delicious and worked so well with the chewy sweet and slightly nutty black rice. It was sweet, but not sickly sweet, and I was able to polish off a small bowl.

I was so impressed by the dish that I managed to find the chef who had actually cooked it and he talked me through how he had made it. I tend to have a habit of doing this when I eat a dish that is sensational and that I think I can replicate back at home. I figure that chefs must quite like it when occasionally someone takes a great interest in a dish that they prepare. I imagine if everyone followed suit then it would be annoying, but I am hoping that I’m in a minority so they don’t mind telling me!

Anyway where were we…….

Taking down a mental note of the ingredients, and a couple of photographs as reminders, I left the restaurant completely won over by this understated dessert that certainly packs a punch. I hope you enjoy it as much as I do, and thats coming from a savoury eater!

Balinese black rice pudding with banana

Serves 6

200g/8oz, black glutinous rice (ketan itam), can be found in Asian stores

100g palm sugar, can be found in general supermarkets

600ml of water

1 vanilla pod

2 bananas, chopped to mouth sized pieces

coconut milk/cream, for serving (optional)

1. Place the black glutinous rice in a bowl and rinse it through with water a couple of times so as to clean it throughly and dispense of loose husks. Then leave it to stand overnight soaking in water, so that the water is sufficiently above the rice.

2. Empty the water from the rice bowl and place the rice in a pan along with 600ml of boiling water. Simmer gently, uncovered, for 45-55 minutes, stirring intermittently so that the rice does not stick to the bottom of the pan.

3. After 20 minutes, place the chopped banana pieces into the pan, along with the palm sugar (I use granules, but palm sugar blocks would work equally well. As an alternative brown sugar is an option but does not have the same sweet tones of palm sugar).

4. At this stage also add the vanilla from the vanilla pod. To do this use a sharp knife to cut open the pod and then, with a teaspoon, scrap out the vanilla contents. A teaspoon of vanilla essence could be used as a replacement to a vanilla pod.

5. Around 45-55 minutes of simmering all the water will have been absorbed and the rice will be soft.

6. Serve immediately. A spoonful of coconut milk compliments this dessert perfectly.

black glutinous rice (ketan itam)

black glutinous rice (ketan itam)


My mother’s memorable strawberry ice-cream courtesy of the ‘Cooking Cannon’

Does anyone remember the legendary ‘Cooking Canon’? A rather charming, bearded, portly member of the English clergy who, in many respects, was one of the first ‘celeberity chefs’, along with eccentric Fanny Craddock, to grace our screens in the early eighties. Long before Delia was on the scene this was my mother’s go-to cooking bible! He published three cookery books: The Cooking Canon, The Cooking Canon Entertains and Simply Divine.

I only discovered the other day that the strawberry ice cream, which my mother always makes and continues to do so, originally came from ‘The Cooking Canon’. It’s delicious creamy and easy to make and as a real bonus, you don’t need to go out and buy an expensive ice cream maker. Strawberries epitomize the joys of summer and what better way to celebrate the sun’s rays than a bowl of home-made strawberry ice cream. It may not be exotic or original but it certainly hits the spot. I hope you agree.


Now it may shock some of you to hear that the ice cream is not in fact made with fresh strawberries – my mother has tried using them but the results are not as good she assures me. Instead she has gone down the route of using tinned strawberries. Shock horror.

You still with me?

Please don’t be alarmed. I assure you, you will be pleasantly surprised by the results.

Homemade Strawberry Ice-Cream

290g/8oz tin of strawberries (or anything around that amount)

150g/6oz icing sugar

1 pint of double cream

1 plastic/metal tray or container

1. Take the tin of strawberries and pour out about one quarter of the liquid, reserving to make a fruit salad at a later date

2. Blend the strawberries with the other ingredients and freeze for 40 minutes in your container. I have always used a plastic container and it works out well.

3. Stir and freeze again for a minimum of a couple of hours.

4. Scatter some fresh strawberries over the ice cream and serve to what will be happy family and friends.