Indian Panch Phoron Damson Achaar

After chatting on instagram with my friend Harriet, aka ‘The Nutritional Bean’ about damsons and what to do them – damson wine or chutney was my go-to response, my mother independently called me moments later to ask if I wanted any. Seeing it as a sign, I said yes and she arrived later that day with said damsons, as well as a bounty of other fruits and veg from the garden. Juicy sweet yellow plums, pears and some runner beans and tomatoes. The damsons were so ripe that they were about to turn and go off, so I felt an Indian achaar (chutney) would be a good way to work with them quickly. Indian achaar is different from those made with vinegar, which allows them to keep for a month or two. An achaar is often made and eaten on the same day with dal, rice and/or curry. Whatever fruit or vegetable that needs eating you can make into an achaar. This is my mango  achaar recipe.  They are always deliciously tangy, spicy, sweet and sour and work so well with Indian and Sri Lankan food.

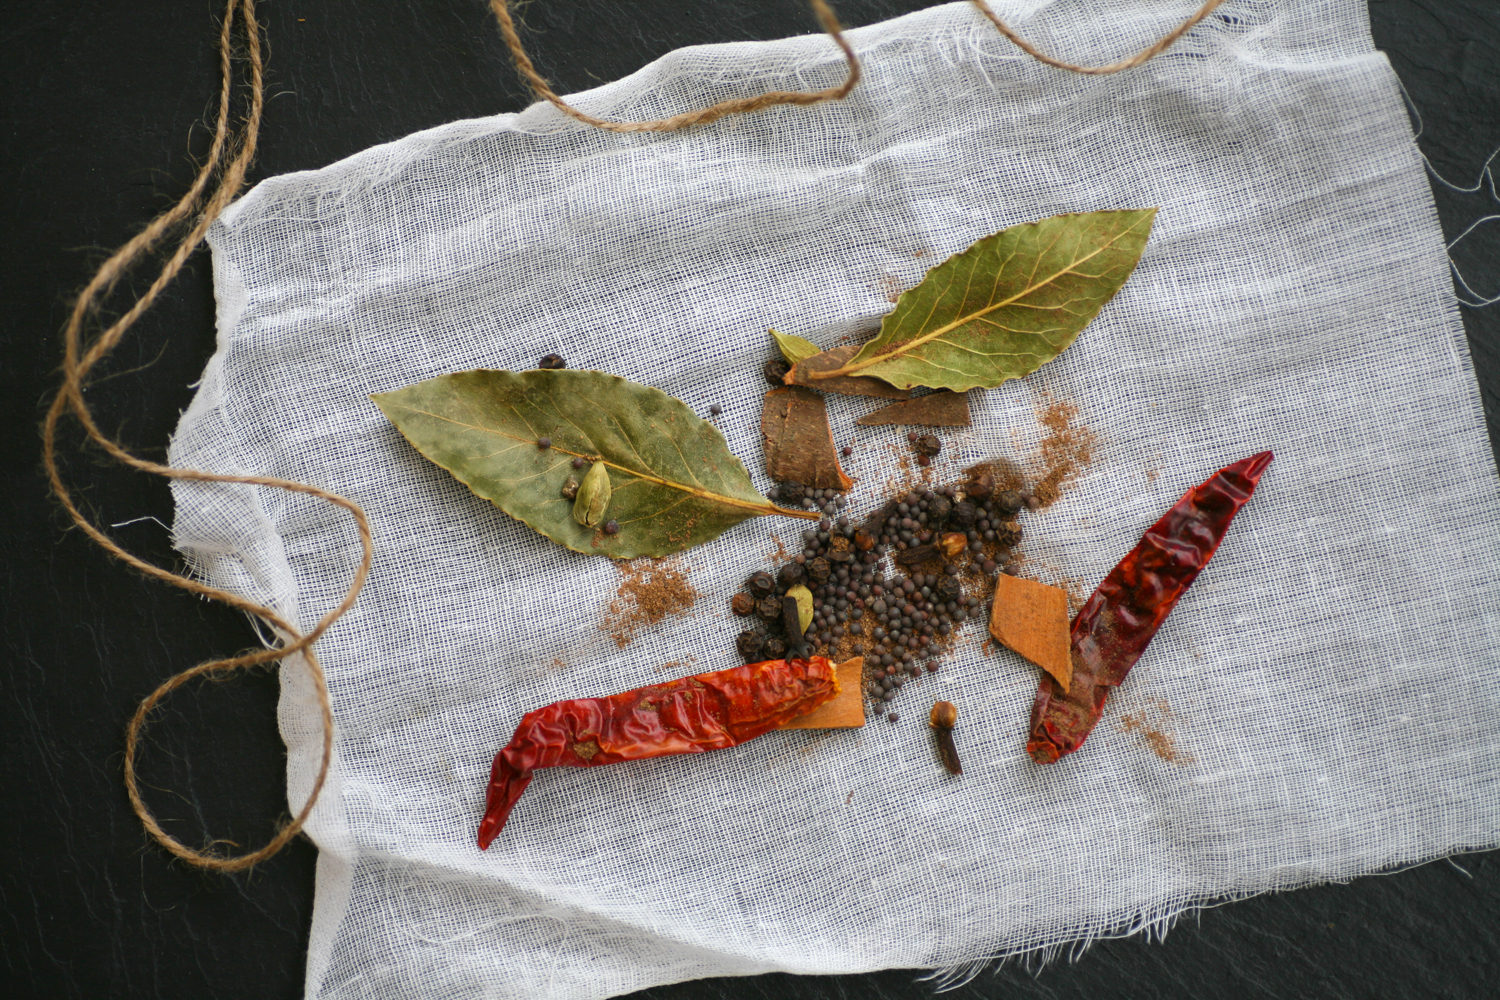
The magic ingredient, which I have spoken about many times over the last nine years of writing this blog, is the Bengali five spice known as ‘panch phoron’. It is often used in achaar in West Bengal. You can either make your own – by reading this post – or you can pick up panch phoron at any Asian grocers and I have even seen some of the large supermarkets stock it. When it comes to de-stoning the damson you can either do it the long way (which was my option) by cutting it half and then scoping out the stone or invest in a cherry and olive pitter, which will also fit damsons. It’s definitely on my Christmas wish list.


Like all chutneys it does involve adding a good measure of sugar to counterbalance the acidity. As you will only be eating one or two spoonfuls per person per sitting, it ends up balancing itself out, but be aware that it does seem quite a lot at first glance. Taste test as you go and if you find your damsons are not too acidic then you can add less sugar.

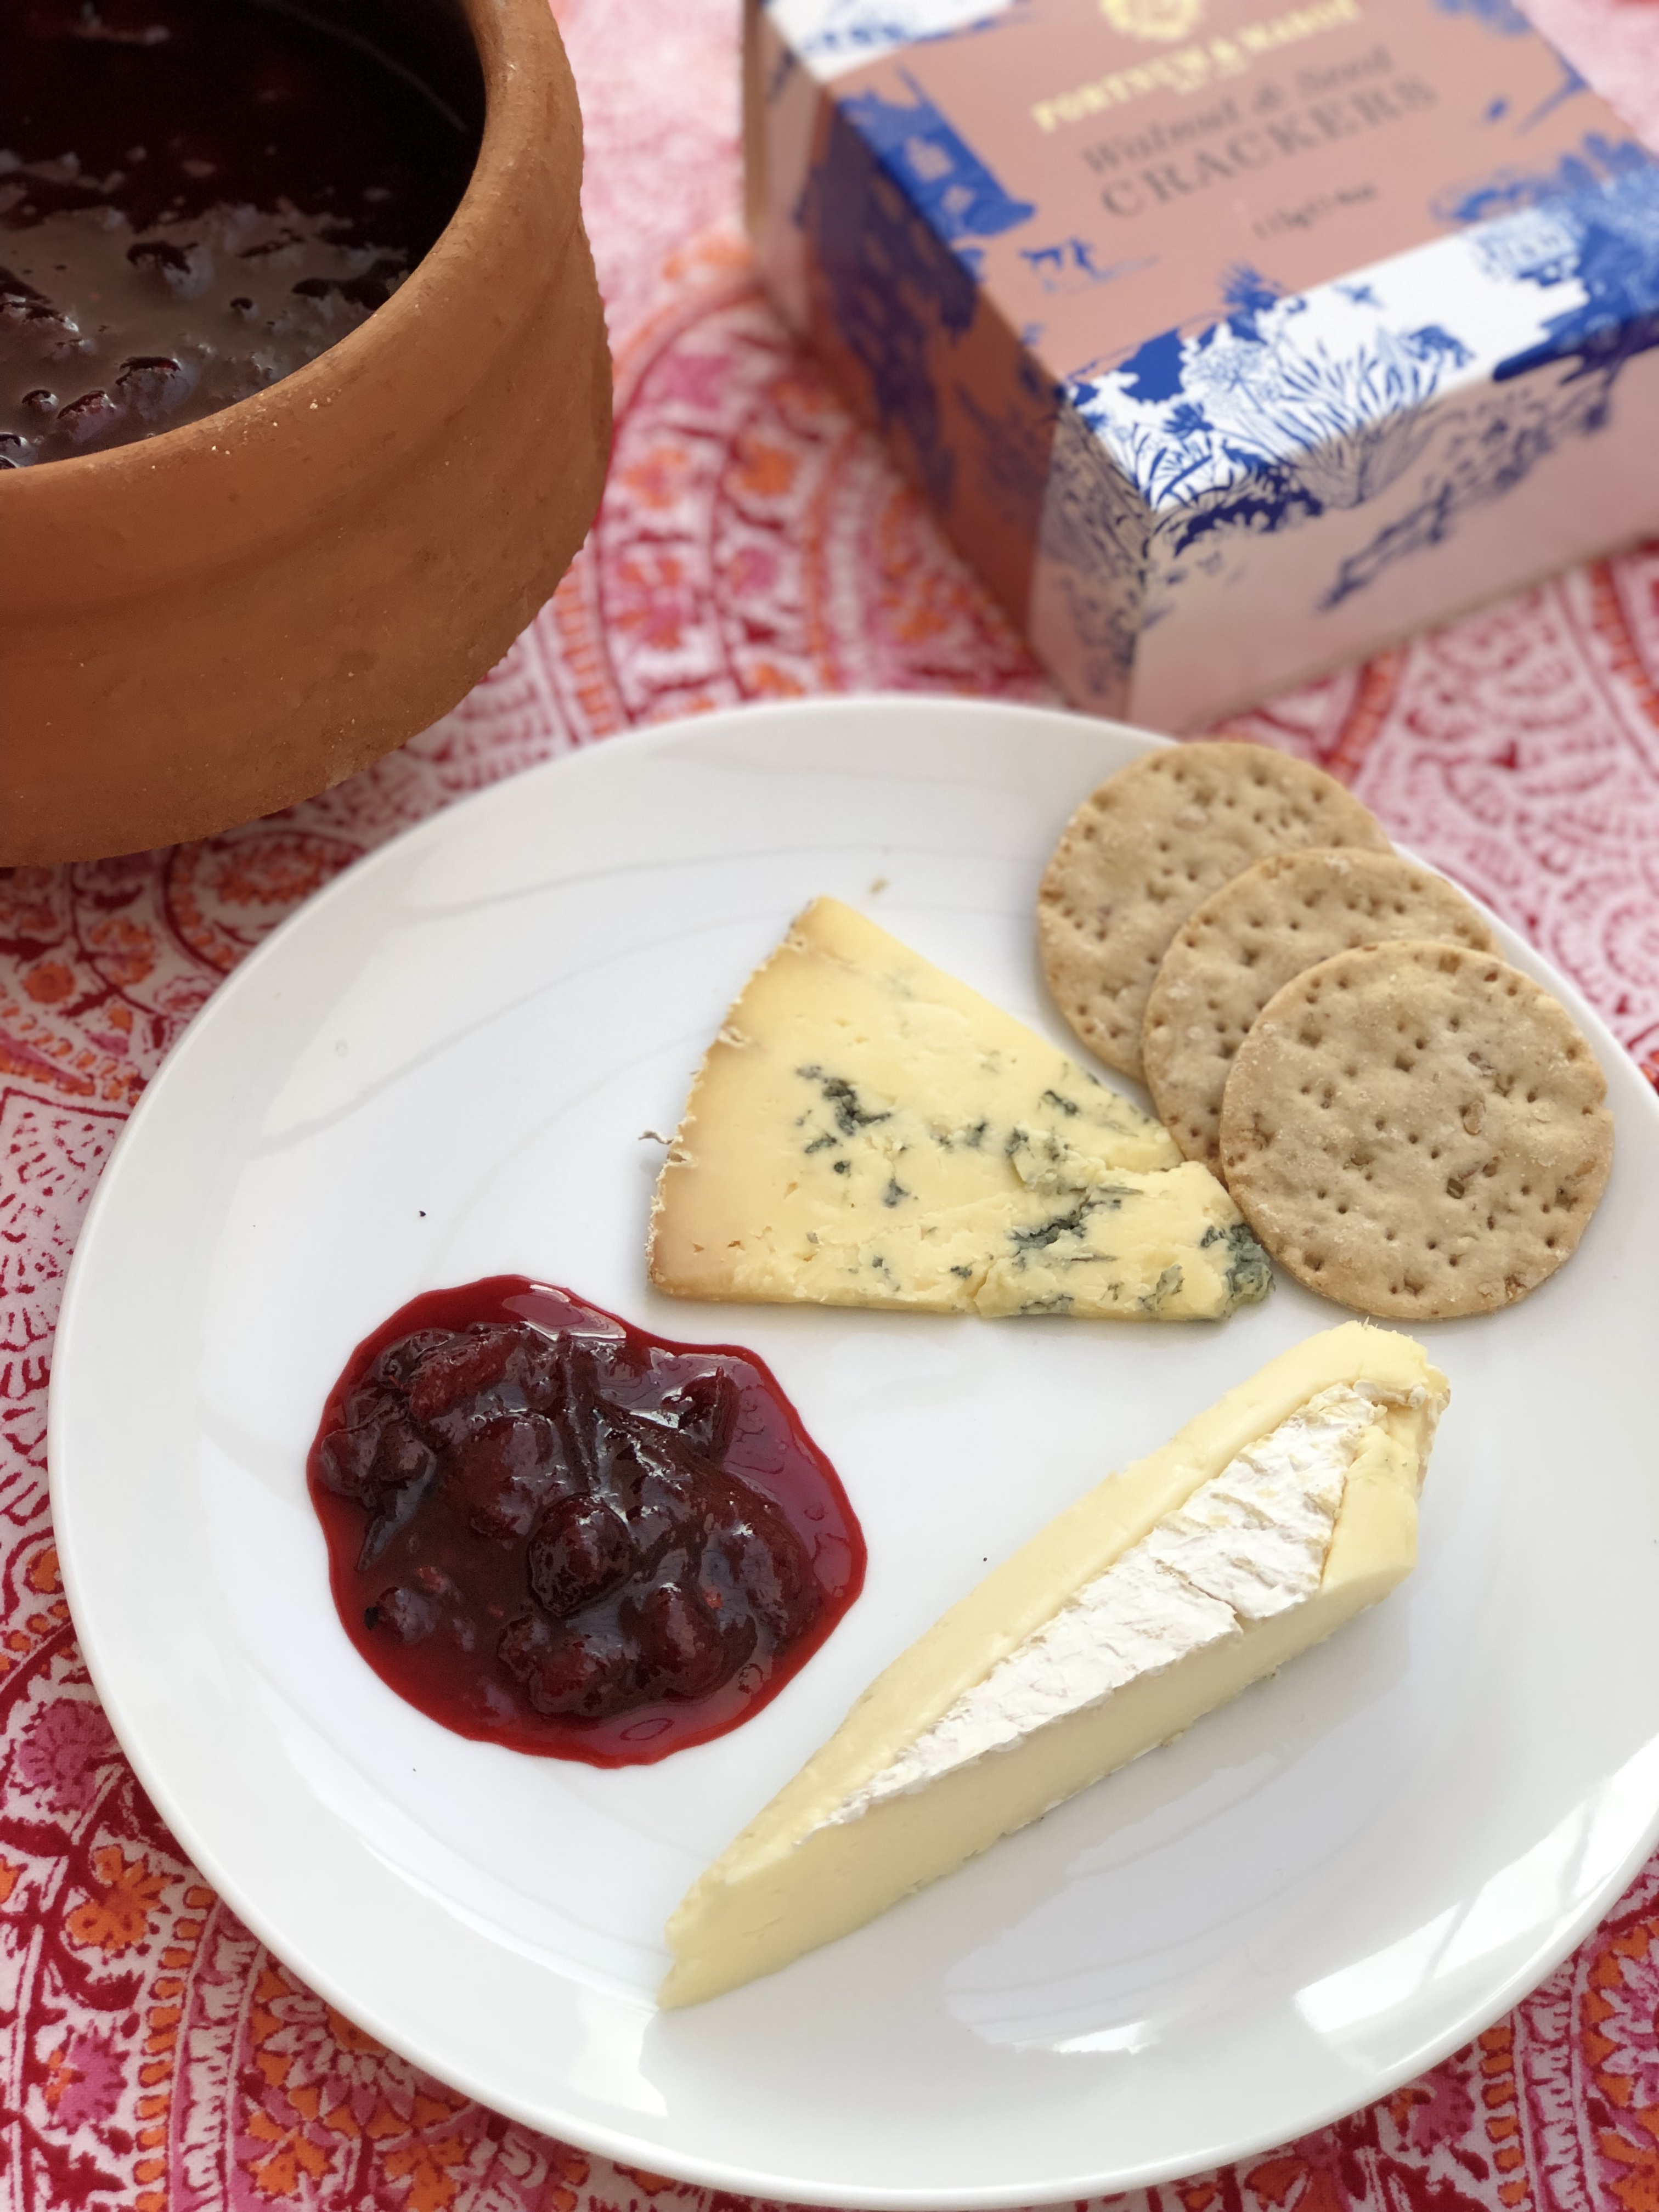
Whilst you can eat the chutney with Indian snacks, curries or dal, the achaar also works really well with cheese. It lasts in the fridge for 3-4 days. Have you had any damsons this year? If so how are you using them? I would love to know.


Indian Panch Phoron Damson Achaar

Makes a small bowl full

1 tbsp vegetable oil

2 small dried red chillies

1 tsp panch phoron/Bengali five spice

1/2 tsp turmeric powder

655g (or thereabouts) damsons, stone removed

2 tbsp raisins, optional

1 tsp grated ginger

3-4 tbsp sugar (you can use caster or brown)

salt, to taste


  1. In a deep pan heat the oil and then add the 2 dried chillies. Allow them to begin to darken – it may make you cough a little – this is normal.
  2. Next add the panch phoron (fenugreek, nigella, fennel, black mustard, cumin seeds) and allow them to begin to splutter.
  3. Next add the turmeric quickly followed by the damsons. Give a good stir then add the fresh ginger and raisins.
  4. Add the sugar, a little at a time and taste as you go. Depending on the acidity of the damsons depends on how much you will require.
  5. Allow to bubble away on a low heat for 15 minutes. Add a little salt if required.
  6. Allow to cool and serve with Indian food or cheese, it works really well with both – just probably not together.


Membrillo – A Labour of Love

Ok, I am going to come straight out with it. THIS IS A LABOUR OF LOVE. It’s my first time making membrillo – Spanish quince paste – you know the one often found on a cheese board that tastes delicious with a slice of manchego cheese. They are found in great abundance in the autumn/fall. My lovely neighbour had a huge glut of quinces from her tree so said would I like a bag. Naturally I said ‘yes’ and after showing me all the glorious creations that she was making in her kitchen – membrillo, as well as quince jelly, I was truly inspired. Her passing words to me was that it was a labour of love, which I didn’t quite fully register.

Look I don’t want to put you off, just to simply say there are a few steps and therefore involves effort to seek a reward. The children’s book about the hen who made bread and asked for help from the other farmyard animals, came to mind when I spent a considerable amount of time sieving the quince through a sieve.

So a few things of importance to note. Quince are not like apples or pears, other than in appearance. Their bitter flesh means they are almost exclusively for cooking instead of eaten raw. To core them is super hard, even with a sharp knife and after grazing my finger I thought that the best way to deal with them was to simply peel them and quarter or half them and then put them in water to boil – along with the lemon rind and vanilla pod. After 45 minutes I turned off the heat and in fact left them overnight to rest until morning. If you do this earlier in the day then you can simply removed the vanilla pod and then blend them, pips and all. What comes out of the sieve – with a bit of hard work with the back of a spoon –  is a very smooth paste, that resembles baby puree. At this stage the colour is a mellow yellow.

Then you need to weigh the amount of pureed quince and then whatever the amount is, you place the same amount of granulated sugar in a large pan. Keeping on a low heat you stir at intervals for an 1h 15 mins. The quince changes from yellow to more of a red hue. Then the final stage is to put it into an ovenproof dish, which you line with parchment paper, greased with a very little coating of butter. Pour the contents of the pan into the dish and place into a low oven 125 degrees F for a further hour, by this time it will be a deep blood red colour.  Leave to cool completely before removing the greaseproof paper and the now hard membrillo from the dish. Cut it up into the sizes you wish to portion up. I cut mine into 9 large cubes, which I wrapped in foil and placed in the fridge. According to my neighbour, they can last for a year in the fridge. If any mould appears in time, it’s simply a case of removing the top layer and continuing to eat. Waste not want not springs to mind. I will give these out as some of my edible Christmas gifts, maybe accompanied with some Manchego cheese.


Membrillo – Spanish Quince Paste

best eaten with a hard cheese such as Manchego, or game or pate.

1 bag of quince (mine weighed in at this stage to 2.5kg)

1 vanilla pod, sliced in two

juice of one lemon

2 strips of lemon peel (yellow part only)

granulated sugar (the same amount exactly as your pureed quince – mine came to 1.254kg)


  1. Peel the quince and cut them in half or quarters if you can. Place in a large pan and cover with water and add the vanilla pod and lemon peel. Boil away gently for 45 minutes, or until they are soft.
  2. Strain the water, remove the vanilla pod and discard, but keep the lemon peel with the quince and then blitz in batches in your blender.
  3. Take the blended quince and put into a sieve and using the back of a spoon sieve through the contents. The pips and cores will remain, but what comes through the sieve is a really smooth paste, similar to baby puree. This part takes effort to do persist and don’t give up.
  4. Once it has all being sieved (congratulations the hard bit is over), weigh it out and then place in a large sauce pan. Place the same amount of granulated sugar as quince puree into the pan along with the juice of a whole lemon. Simmer, stirring at intervals, for the next 1h 15 mins, by which time the quince puree will have gone a reddish colour – but not the colour of the final membrillo, that only comes when it goes in the oven.
  5. Using an ovenproof dish – I used a large square baking dish 25cmx25cm – line it with greaseproof parchment paper and coat with a little butter. Place the quince paste into the dish and then place in a low oven at 125 degrees F for a further 1 hour.
  6. Remove from the oven to cool completely before removing from the tin and sectioning up into large squares or rectangles. Cover individually with foil and place in the fridge.
  7. Perfect as gifts and eaten with some delicious hard cheese such as Manchego.


Coconut Chutney (and a top tip at removing a coconut shell)

IMG_1775

Have you ever had trouble getting into a coconut or rather removing the outer shell so that the sweet flesh within is easy to tuck into? If you have then you are going to love the following tip.

All you need to do is the following:

  1. Place the coconut in the freezer for 30-45 mins.
  2. Remove from the freezer and then use a rolling pin to bang down on the coconut whilst holding it in your other hand. The outer shell will break away.
  3. Easy hey!

IMG_1751

Drinking the coconut milk is a whole lot easier this way I find.

So on to the coconut chutney.

Once you have the naked coconut you then need to peel it – the outer skin comes away so easily. Then it is simply a matter of grating the coconut.

IMG_1759

Using a whole coconut does produce a lot of coconut chutney, but I find it lasts for up to a week in the fridge no problem. A dollop on the side of some spiced semolina – upma, from my previous post, works wonders or equally it would be great with any south Indian curry. In southern India they eat coconut chutney as part of breakfast, lunch or supper so if you take a similar attitude it will be used up pretty fast!

IMG_1768

Coconut Chutney

1 coconut

2 tbsp chana dal, roasted

2 fresh green chillies

*****

tempering

2 tbsp vegetable/coconut oil

1/2 tsp black mustard seeds

1/2 tsp cumin seeds

pinch of asafoetida/hing

2 dried red chillies

7 curry leaves

1 tsp salt

  1. Remove the shell from the coconut by placing it in a freezer for 30 minutes and then banging down on it carefully with a rolling pin.
  2. Remove the skin from the coconut using a potato peeler and then grate the coconut.
  3. In a frying pan dry roast the chana dal so they begin to bronze slightly. Let them cool and then use a spice grinder to grind them up.
  4. Place in a smaller blender along with the grated coconut and fresh green chillies. You will need to add a little water to loosen it up (the amount of water added depends on how thick you like your chutney! I tend to use 300ml). Blend to form a smooth paste. Add a little salt to taste.
  5. In a frying pan heat the oil and when it is hot add the mustard and cumin seeds, the dried chillies, curry leaves and hing. Move around the pan for 20 seconds before pouring over the coconut chutney.
  6. Stir into the chutney and serve.

IMG_1788


Indian Inspired Peach Chutney

IMG_1299

Gloriously ripe and deliciously sweet juicy peaches are in season right now. They are great to eat fresh or in a salad perhaps with some mozzarella, parma ham and some fresh basil with a little olive oil and black pepper flecks sprinkled on top. I sometimes like to transform them into an Indian inspired chutney that is so versatile and delicious that you’ll be making pots of it in no time at all.

IMG_1313


As well as eating this chutney as a condiment to Indian dishes I also love it in sandwiches, with some cold or hot meats, fish, halloumi or any nice stinky and smelly cheese come to think of it. It’s perfect to take along on a summers day picnic – the sweet chilli notes adding that necessary kick to cheese baguette perhaps!

IMG_1309

If your peaches are beginning to turn, then this is another great way to use them up. If you like this recipe try making my mango and tomato one which all require the Bengali five spice known as ‘panch phoron’. You can find it in your local Asian grocers or you can easily make your own and store it in a sealed jar for months – here is my recipe.


Peach Chutney

1 tbsp groundnut oil (or equivalent)

1 tsp panch phoron – Bengali five spice

1 large dried chilli, broken into 2 or 3 pieces

1/2 tsp turmeric

5 large juicy peaches, stone removed and cut up roughly into 2 cm cubes

2 tbsp plain flour

50ml cold water

1 tsp salt

1 tbsp caster sugar

1 large storage jar

1) Heat the oil and then add the panch phoron, dried chilli pieces and turmeric. Move them around the pan for 20 seconds before adding the juicy peach pieces. Stir into the ingredients and simmer gently.

2) In a small bowl add the flour and cold water and stir until smooth. Add to the peaches in the pan.

3) Add the salt and sugar and continue to simmer until the peach chutney has thickened. This will take no longer than 6 minutes. If you require it thicker add a little more flour.

4) If eating on the same day, allow to cool completely before serving. If eating at a later date sterilise your jar by washing it thoroughly and then placing in a warm oven for 15 minutes. Add the chutney and once it has cooled it can be kept in the fridge for a couple of weeks.


Tamarind and Date Chutney

IMG_0385

I promised you a delicious chutney and here it is. This tamarind and date chutney is perfect with samosas, pakoras, popadoms you name it, it’s great with pretty much everything. It takes no time to prepare and is the perfect accompaniment with an Indian snack.

IMG_0369

It’s simply a case of putting all the ingredients together in a blender and whizzing together to form a smooth chutney. Check that you like the taste and add more lemon, chilli, salt or sugar as you see fit. It’s literally that simple.

IMG_0388

I hope you all have a really wonderful Christmas. If you are hosting or feeding the crowds cooking an Indian meal on the days after Christmas will come as a welcome surprise for everyone. This pork and onion curry is quick to assemble and good at feeding a large number or perhaps this vegetarian spicy black bean curry. If you go to my ‘Recipe Library’ you will find lots of alternative recipes to choose from.

Merry Christmas

IMG_0392


Tamarind and Date Chutney

23 dates, stoned and chopped in half

150 ml water

1/2 tsp Kashmiri chilli powder

1/2 lemon, juice only

1 tsp salt

1 tsp sugar

2tsp tamarind concentrate

  1. Place the dates into a magimix/blender and blend to break up the dates. After they have been broken up add the water and whizz again in the blender.
  1. Add the chilli powder, lemon juice, salt, sugar and tamarind concentrate and whizz until the chutney becomes as smooth as possible, which will be around a minute.

Store in the fridge until ready to use. Can store in an airtight container for over a week.


Green Tomatoes – Two Ways

IMG_7506

During half time we went and spent some time at my parents house, which is hidden away in the depths of the Sussex countryside. Life slows down and allows you to become at one with nature. I love living in the city and am not the type to rush out to rolling green hills at every opportunity, but that said now and again it really does ones soul the world of good. Breathing in fresh air, getting properly muddy and having walks in the woods. Also if the truth be told I love my folks wood burning fire that warms the house and wafts woody smells throughout.

IMG_7572

My mother is Mrs green fingers and has an enviable vegetable patch, which supplies my father and her with bountiful crops of endless vegetables and fruit. She has been overrun with green tomatoes this year and had a couple of troughs full sitting in her pantry so I asked if I could take one to make into a chutney and a relish back in London.

IMG_7585

The result has been pleasing and I wanted to share both recipes with you. They are perfect to bring out with pretty much any cold meat, especially any type of pork product.

IMG_7596

The photo above and below are of the cucumber and green tomato relish.

IMG_7606

Green tomatoes are simply tomatoes that have not ripened in the sun. Change in weather can mean that some of your crop just aren’t able to make the transition from green to red. That said you can bring the whole plant inside and there are ways to help them turn red – see here for tips, but my mother had already picked the remaining tomatoes, most of which were green.

IMG_7515

To eat raw, whilst still green, would not be advisable as they are tart, however by cooking and making into a chutney or relish brings them into their own and sweetens them enough to make a fabulous little preserve.

IMG_7523

Both recipes require a fair amount of chopping so if you can gather in helpers that will certainly speed up the laborious part of the preparation.  The above photo shows the layered vegetables in the colander sprinkled with salt – they leave them like this overnight.

The photo below is the pickling spice that is used in the chutney but not the relish!  I have made my own pickling spice – you can add whatever you fancy, but I decided upon bay leaves, green cardamom, black mustard seeds, dried chillies, whole cloves, cinnamon bark, allspice and peppercorns.

IMG_7534

Once you have made either the relish or chutney – or both, once sealed in jars, leave to rest in a dark, cool place for a couple of weeks for the chutney and 1 week for the relish. The chutney will last longer – around a year, whilst the relish should be eaten within 6 months. Once open store in the fridge and eat with in a couple of weeks.

Both recipes below I have adapted from ‘The Complete Book of Preserves & Pickles’ by Catherine Atkinson and Maggie Mayhew

Green Tomato Chutney

makes approx 8 jars. I mainly use Wares of Knutsford 250ml Mason jars

2.3 kg green tomatoes, chopped

600g cooking apples, chopped – cored and peeled

600g onions, chopped

4 garlic cloves, crushed

1.5 tbsp salt

1 small muslin bag full of pickling spice (see below)

800ml cider vinegar

600g granulated sugar

**********************************

Pickling spice

1/2 tsp allspice

2 bay leaves

3 green cardamom pods

1 tsp black mustard seeds

2 inch piece of cinnamon bark, broken into pieces

4 cloves

5 peppercorns

2 dried red chilli

1 small piece of muslin cloth

some string

You can also add dried ginger, cassia, coriander seeds

1. After roughly chopping all the tomatoes, apples, onions and garlic place them in a large pan (or two if you need to) and add the salt. Add the muslin full of pickling spice, securely tied, along with half the vinegar and bring to the boil.

2. Once it has reached boiling point, reduce the heat and let it simmer for an hour stirring at regular intervals to aid with the softening of the ingredients.

3.  In a separate pan add the remaining cider vinegar and sugar and gently heat, stirring until the sugar has completely dissolved. Once this has happened pour into the main pan and give a good stir. The chutney needs a further hour and a half to simmer and become thick.

4. In the last half hour of number 3. wash the jars and lids in hot soapy water and then place in a cold oven. Turn the oven on to 110 degrees and then let the jars and lids (do not place the lid on the jar) sterilise for 30 mins.

5. Once the jars and lids have sterilised and the chutney has become thick remove the muslin and then spoon the hot chutney into the warm jars and seal. I find this wide neck funnel, immensely useful during this process as it means I keep the rims of the jars clean. I tend to put a waxed disc on top (was side down), although I think with the two piece gold disc and screw band lid it is probably not necessary.

6. Label and store in a cool dark place and leave to mature for a couple of weeks before opening. It will last for up to a year.

IMG_7539

Cucumber and Green Tomato Relish

Makes approx 5 jars

2 cucumbers, cubed 1cm

900g green tomatoes, cubed 1cm

4 onions, finely chopped

1.5 tsp salt

350ml white vinegar

150g demerara sugar

200g granulated sugar

1tbsp plain flour

1/2 tsp mustard powder

1.  Layer the cubed cucumber, green tomatoes and finely sliced onions in a colander placed over a bowl and sprinkle each layer with salt. Leave to drain for minimum 6 hours or overnight if you can.

2. Removing the salty liquid and place the vegetables in a large pan along with 320ml of the white vinegar. The remaining 30ml of white vinegar will be used later! Add both sugars to the pan and gently heat, stirring to allow the sugars to dissolve. Simmer gently for 40 minutes.

3. In a bowl add the flour, mustard powder and remanding white vinegar to form a paste and then add to the relish. Simmer for a further 20 mins or until the mixture is thick.

4. Similarly to point 4. in the instructions for the green tomato chutney, sterilise the jars and then spoon the contents of the relish into each one, remember to push the relish down firmly so that there are no air bubbles. Add the waxed disc, waxed side up (if using) and place the gold disc and screw top lid on top.

5. Store in a cool dark place for a week before using. Use within 6 months. Once opened store in the fridge and eat within a couple of weeks once opened.


Embracing Autumn and Chutney Making

Autumn has definitely arrived here in England and I for one LOVE the season.

10 reasons to embrace autumn:

1) The dramatic burnt orange, golden and red leaves on the trees is breathtakingly beautiful and it always manages to impress me with its vibrant hue.

2) Kicking the crisp fallen leaves as you walk gives us all – old and young alike – that inner thrill.

3) Roaring fires to warm up by whilst drinking hot chocolate or warm apple cider.

4) Big warm jumpers to keep us roasty toasty. Everyone looks great in autumn fashion.

5) Harvest Festival, Bonfire Night, Halloween and everything that is associated with them.

6) Hearty comfort food such as casserole, stews and soups become regular staples.

7) The smell of woodsmoke – it has to be one of my all time favourite smells.

8) Foraging for blackberries, crab apples, rose hips, elderberries

9) Eating all the foods that are now in season: the above as well as, apples (cox, gala, spartan, egremont, russet), celery, endive, mussels, kale, fennel, spinach, beans, leeks, beetroot, swede, pumpkin, spring onions, carrots, turnips, cauliflower, squash cabbage (autumn, red, spring green, winter white and savoy), marrow, potatoes and parsnips

10) Making chutneys, pickles and preserves.

What do you like most about autumn? Don’t be shy, leave a message below.

Photo sourced by PicoCool 

Last year I cooked a huge batch of Kashmir chutney and sweet piccalill which made great little christmas gifts and recently I decided to make some pickled peach and chilli chutney. They were selling huge batches of peaches at the market so I thought that they would be perfect for this chutney. I tend to make double the portions of the amounts below as they last for up to 6 months so are easy to keep and store.

Pickled Peach and Chilli Chutney

Sourced from the Complete Book of Preserves & Pickles by Catherine Atkinson and Maggie Mayhew

Makes about 450g/1lb

475ml cups cider vinegar

275g light brown muscovado sugar

225g dried pitted dates, finely chopped

1 tsp ground allspice

1 tsp ground mace

450g ripe peaches, stoned and cut into small pieces

3 onions, thinly sliced

4 fresh red chillies, seeded and finely chopped

4 garlic cloves, crushed

5cm/2inches fresh root ginger, peeled and finely grated

1 tsp salt

1.  In a large pan place the vinegar, dates, sugar, allspice and mace and gently heat. Stir with a wooden spoon until the sugar is completely dissolved.

2. Bring to the boil and then add the peaches, sliced onion, chopped chillies, crushed garlic, grated ginger and salt continuing to stir occasionally.

3. Reduce the heat and simmer for 40-50 minutes – by which time the chutney should have thickened.

4. Spoon the hot chutney in steralised jars – either by boiling them in water first or putting them in the dishwasher. I place a waxed disc on top – waxed side down and then place the lid on top.

You need to store them in a cool, dark place where the chutney can mature for at least 2 weeks before eating. They will last up to 6 months.

Another great way to eat the chutney is with grilled chicken served in warm wraps or with ricotta or goats cheese and some crusty bread.

Taken just after point 2) above and before it has been cooking for 40-50 mins


Indian Style Tomato Chutney

I adore condiments with my food no matter what the origin of the food. Chutneys, mustards, jellies, pickles, dressings – you name it, I love to have the option of having them on my plate supporting the meats and/or vegetables and giving the dish that extra added dimension. So you can just imagine how in heaven I was when Mr B’s grandmother, known as Dida, cooked this simple tomato chutney for us when we visited her in Kolkata a while ago. We were all given a little bowl of the chutney to eat alongside our dal and vegetable dishes and it tasted sublime. The combination of hot and spicy with sweet undertones  made the chutney completely addictive.

Tomatoes are to me what I imagine chocolate is to many people. I could give up eating chocolate tomorrow, but tomatoes……well that would be seriously hard. In fact for Easter my parents gave me a tomato plant instead of a chocolate egg, knowing that I would get more enjoyment out of that than a chocolate egg.  I eat tomatoes pretty much everyday and without doubt they are my absolute favourite fruit as they are just so versatile and can completely transform dishes. If you have any tomato recipes that you think I would like please send me an email to chilliandmint@gmail.com as I would love to try them.

With this recipe you can keep it simple and just use tomatoes, but I like to add a little dried fruit so as to blend the flavours. You can add a couple of dried prunes, dates, apricots or mango. Experiment and see which you like to compliment with the tomato.

Dida cooks her chutney without the tomato skins on, however, for speed and because I don’t mind them, I have left the tomato skins on. If you prefer a smoother texture then simply boil the tomatoes in a pan of boiling water for five minutes and then strain them and you will find the tomato skins easily come away from the body of the tomato.

Indian Style Tomato Chutney

Makes 1 bowl, 4-6 servings

300g tomatoes, chopped in half if using cherry and quartered if using larger size

1 inch of ginger, grated or chopped finely

2 dried red chillies

1 tsp black mustard seeds

1 tbsp olive/mustard/nut oil

1/4 (quarter) tsp salt

4 tsp sugar (to taste)

3 slices of Aam Shatwa (dried mango), or dried apricots, dried prunes, dried dates – optional

1. Warm the oil in a pan and when it is hot place the two dried red chillies into the oil. You want to fry them until they turn black, which will take a few minutes. For those of you who have seen or made my homemade mango chutney you will remember that frying the dried chillies will make you cough. My mother-in-law assures me that it helps those with nasal congestion, so if you have any issues in this area get involved at this part of the recipe as it is sure to help your ailment!

2. When the dried red chillies have blackened add the remaining ingredients and stir. The tomatoes will release juice as they warm in the pan. Squash the tomatoes with the back of a fork so that they become limp. Taste the chutney and add extra sugar if required.

3. Leave to simmer for 5 minutes, or until the tomatoes have completely softened and then transfer into a bowl to cool. Serve at room temperature.

SaveSave


Homemade Mango Chutney

Warmer weather beckons (I hope!) at the end of the week when I’ll be in the sunny Florida Keys and art deco Miami. I was last in the Keys when I was 19 so it’s been some time since I visited its warm shores and admired its glorious sunsets. There is always so much to get ready before embarking on a long journey and since I pride myself on my packing it is left up to me to pack all the clothes. There is definitely an art to effective packing right! The truth of the matter is I hate packing, seriously it is so tedious and tricky to get the balance on what exactly to take. I am hoping that since it will be warmer then in London, I won’t have to take too many clothes and the ones I do will be light weight cotton. Well that’s the plan.

There is nothing that screams sunshine and warm weather more than mangoes. They are undoubtedly the queen of fruits and whilst the yellow ones are juicy and sweet, the unripe ones – they are the green ones by the way – are perfect for chutney making. The sourness combined with spice and salt is a perfect winning combination and cools down the body in hot temperatures. In India a few spoonfuls of the chutney either alongside or after some spicy dal or curry works a treat.

We have all sampled the mango chutney served in curry houses when we order poppadums,  however nothing prepares you for the true deliciousness of this knock out, authentic, fresh mango chutney. It tastes completely different and I love the sweet, sour, salty combination.

Mango Chutney

(or affectionately known as Aam-er Tok by Bengali speakers, which actually translates as sour mango)

Fills a small bowl/jam jar (can last in the fridge for up to a week)

2 small unripe green mangoes/1 large regular green mango, which you find in British supermarkets, skin removed and then sliced or diced

1 tsp mustard/groundnut/vegetable oil

 1 large dried red chilli, cut into two pieces (or 2-3 small dried red chilli)

1 tsp panch phoron 

1/4 tsp turmeric

1 tsp freshly grated ginger (optional)

2 tsp plain flour

three quarters of a tsp salt

110 ml cold water

2/3 tbsp sugar

1. Peel the mango skin and discard. Slice or dice the mango and keep the stone if you are using a larger mango as they are good to suck on post cooking! If you have really unripe green mangoes, which can be very sour, it is best to boil the sliced mangoes in a little water, with a pinch of salt, to remove part of the acidity for two minutes. Discard the water and put the mangoes to one side.

2. Place the oil in a pan and gently heat. When it is hot add the dried red chilli, including the seeds and fry the chilli gently until it darkens slightly in colour, which will take no more than a minute. Warning: you are likely to cough at this stage as the chilli darkens  so do not be alarmed!

3. Add the panch phoron, turmeric and ginger (if adding) to the hot oil as well as the soft mango, salt and 75 ml of water.

4. In a separate bowl add the flour and 35ml of cold water to create a white, smooth liquid. Immediately add this to the pan and stir it into the mangoes. At this stage also add the sugar.

5. Boil gently for 5-6 minutes. If you prefer to have a runnier chutney add a little more water, however, if you prefer a thicker consistency then you will need to boil it for longer.

6. Leave to cool and chill. Serve at either chilled or room temperature, but not hot.

It is wonderful to eat after a heavy curry as it helps to cleanse the palate and digest your food.

Note: In hot climates people tend to prefer the chutney with a stronger sour undertone and as such the amount of sugar they add is less. For those who prefer a sweeter taste then add the amount of sugar that I have specified above.


Kashmir Chutney – the perfect winter gift

There is always something rather heartwarming and homely when a friend surprises you with a gift of homemade chutney, jelly, relish or pickles. It doesn’t often happen, but when it does I love it all the more, (than a bought one that is!) as I know how much effort, love and precious time has gone into preparing it. I am wondering whether chutney making is a pastime that is more popular for those who live in the countryside than the city? Maybe the majority of city dwellers are busying themselves with the hustle, bustle and grind of daily life that the thought of chutney making just doesn’t appeal. Well I for one am bucking that trend!

I have always been told that you are meant to give gifts that you would ultimately like to receive yourself, so I decided for this blog I would share the recipe of one of my favourite chutneys, known as Kashmir chutney. If they are properly prepared and stored they last up to a year, so I thought I would make a batch ready for gifts over the winter season. I plan to share a few more with you before Christmas, but thought that Kashmir chutney was the perfect one to get you into mood for chutney making.

They are perfect for bringing out at family gatherings such as Thanksgiving and Christmas and as well as cheese, they work wonderfully with hams, and grilled spicy sausages. I find that such condiments really lift a dish and give them that extra satisfying dimension. I hope that you agree.

The jars I use are not uniformly similar. They range from the traditional kilner jars, to the reused old jam jars. I use waxed discs and cellophane covers for some of the jars, but to point me in the right direction I really love the book by Catherine Atkinson and Maggie Mayhew called ‘The Complete Book of Preserves & Pickles’. They cover everything you need to know as well as a wide range of wonderful recipes. Its also a good idea to get hold of some labels so that you can mark the date and type of chutney;  some chutneys can last unopened for up to 2 years.  For all the equipment you need I order from the ‘Jam Jar Shop‘, which are efficient and offer a speedy delivery service.

Kashmir Chutney

Sourced from ‘The Complete Book of Preserves & Pickles’ 

Makes about 2.75kg (approx 8 jars, depending on size)

1kg green eating apples

15g of garlic cloves

1 litre/4 cups of malt vinegar

450g stoneless dates

120g preserved stem ginger

450g raisins

450g soft brown sugar (I usually use light but this time I used dark)

1/2 tsp of cayenne pepper

2 tbsp salt

1. Peel the apples, quarter them and remove the cores. Then chop them into bite sized chunks. Peel the garlic and chop.

2. In a pan pour the malt vinegar to cover the garlic and apples, and bring to the boil for 10 minutes.

3. Meanwhile, chop the dates and ginger and then add them, along with all the other ingredients to the pan and stir. Simmer for 45 minutes.

4. Transfer the contents of the pan into warmed sterilized jars and place a waxed disc on top. Wipe clean any mess that has spilled around the top of the jars and then seal immediately. Rest in a cool place and leave ideally for a minimum of a month before opening.