Pork and Onion Curry, known as Dopiaza


If you are new to curry making and want a really simple one to kick start your curry affair then this pork dopiaza is a dream. Seriously it is SO good. Believe it or not it only has 4 spices – yup you heard correctly 4 – so there is no excuses that you don’t have all the ingredients. The only slightly trickier one is fenugreek seeds but all large supermarkets will stock this so look out for it in the spices section when you next go shopping or ordering online.  You can also make it with chicken and I reckon it would also be rather delicious with jackfruit (which has the same texture as pork – or pulled pork) if you want to go down the vegetarian route.

So you are probably wondering what dopiaza actually means? In short “two onions” or at least onions cooked in two stages during the cooking. The recipe comes from Persia and the time of the Mughals and is very popular in Indian and Pakistan. If you are on instagram then I have done a short IGTV showing you how to cook it exactly. Take a look. I have not added any tomatoes. The rich red colour comes from the Kashmiri chilli powder – which gives curries a wonderful deep red colour without too much heat – so perfect for the family.  I like to serve it with fluffy rice and some dal.

Pork and Onion Curry (Dopiaza)

serves 4

400g onions (slice half thinly and chop the other half)

2 tbsp ghee/vegetable oil

650g boneless pork shoulder, cubed into bite sized portions

1 tsp fenugreek seeds

1 tsp turmeric powder

2tsp ground coriander powder

1 tsp Kashmiri chilli powder

1 tsp salt, to taste

a little water to loosen whilst cooking

1/2 lemon, juice only

 handful of fresh coriander – to serve

1. Heat the oil/ghee in a deep pan and add the chopped onions (remember to keep back the sliced onions) and cook gently for 7-10 minutes on a low heat until bronzed, stirring frequently. Remove from the pan and place in a bowl to one side.

2. Using the same pan add the pork and increase the heat slightly so that the pork is lightly browned on all sides – but not cooked through. This should take around 10 minutes. Remove from the pan and place to one side.

3. Continuing with the same pan (you may want to add a little more butter/ghee/oil) add the fenugreek seeds and allow them to crackle for 20 seconds before adding the sliced onions, coriander, turmeric, Kashmiri chilli powders and salt. Fry for around 10 minutes.

4. Return the lightly browned pork and add a little cold water and the juice of half a lemon and gently cook covered on a low heat for 45-50 minutes. Stir it at intervals. I rather like it when it catches a little bit at the bottom and you get really charred bits on the pork. You may need to add a little more water a couple of times during cooking if it begins to look too dry or over chars.

5. After 30 minutes return the fried onion and cook for another 15 minutes continuing to stir at intervals.

It is perfect with fluffy rice or some Indian flat bread.


Goan Pork Curry for Sunday Supper

On Sundays we tend to have our ‘main’ meal now in the early evening, where we can all sit down and break bread together. We eat very little meat in the week these days, but on Sunday we like to indulge and have a roast or perhaps a curry. This evening we will be having a Goan pork curry, which is deliciously spiced – not chilli hot as my youngest daughter is 9 years old. It’s a great one you can make advance, either the day before or in the morning of the day you are making it.

I’ll be accompanying it with some plain basmati rice and my beetroot curry.

Do you have a main family meal on Sundays? Do you go for the traditional English roast or something more exotic?

Let me know in the comments below.


Goan Pork Curry

Serves 4

2 tsp cumin seeds

1 tsp peppercorns

1 tsp cardamom seeds, remove seeds from the pod

4cm stick of cinnamon bark

2 tsp black mustard seeds

2 dried red chillies (4 if you want more chilli heat)

1tsp fenugreek seeds

1 tsp cardamom seeds, remove seeds from the pod

2 inch fresh ginger, peeled and finely grated

1 whole head of garlic, all cloves peeled

2 white onions, peeled and chopped

1 tsp salt

4 tbsp white wine vinegar

4 tbsp of vegetable oil

750g of boneless pork, cut into bite sized cubes

1 tsp light brown sugar

2 tsp ground coriander

1 tsp of turmeric

250ml water

********

1.  Dice the pork into bite sized mouthfuls and set aside in a bowl.

2. Heat a frying pan and add the cumin seeds, red chillies, peppercorns, cinnamon bark, black mustard seeds and fenugreek seeds. Move around the pan so that the aromas are released but they do not burn. This will take under 1 minute. Place them into a small bowl to cool. Add the cardamom seeds to the bowl.

3. After a few minutes, place them into a spice grinder to create a masala. Return the powdered masala into the small bowl.

4. In the same frying pan, fry the onions until they begin to bronze. This will take around 10 minutes.

5. Whilst the onions are bronzing, peel the garlic and the fresh ginger (use the back of a teaspoon to do this – it is really easy this way), and grate the fresh ginger. Place in a hand blender, add a splash of water and blend to form a smooth paste. Place in a small bowl and place to one side.

6. Once the onions have bronzed transfer them to the same hand blender and blend until smooth. Add the vinegar to make the consistency smooth. The reason for putting vinegar in this recipe is to help soften the pork when cooking.

7. In the same frying pan, heat half the oil and gently fry the pork cubes so that they too begin to bronze. Remove with a slotted spoon.

8. In a new deeper pan, add  the remaining oil and add the ginger-garlic paste you have created. Add the turmeric and coriander powder and then return the pork to the pan along with the onion puree and masala blend. Fold all the spices into the pork. Add the water and cook on a low heat for 45-55 mins, stirring intermittently.

I like to serve this with a simple plain basmati rice and a vegetable curry as a side dish.


Book Review of Nikkei Cuisine – Japanese Food the South American Way by Luiz Hara

IMG_7931

Luiz Hara has been on my culinary radar for a couple of years now. Word has it that he runs THE most exquisite supper clubs from his town house in Islington focusing primarily on Japanese, Nikkei and French cuisine. I’ve been procrastinating for far too long so I will definitely get my skates on in 2016 and give Luiz’s supper clubs a go. He is also the man behind the successful food blog, ‘The London Foodie’, which focuses on food, wine and travel. Most recently however he has published his very first cookbook called ‘Nikkei Cuisine – Japanese Food the South American Way’. It sounds intriguing right?

Nikkei Cuisine £25

‘Above Image from Nikkei Cuisine: Japanese Food the South American Way by Luiz Hara. Photography by Lisa Linder. Published by Jacqui Small (£25).’

Nikkei cuisine is the cooking of the Japanese diaspora. Japanese immigrants often found themselves in countries that had very different cooking techniques and ingredients to what they were used to. They had to adapt to their new surroundings but at the same time wanted to continue using Japanese techniques and traditions. The resulting cuisine is called Nikkei. To say ‘fusion’ would be wrong and Luiz goes to great lengths in his introduction to explain Nikkei cuisine and how it is a very distinct cuisine in its own right. He explains “Nikkei cuisine is a byproduct of migration and adaption, created over 100 years ago in South America. It was a cuisine created out of necessity”.

IMG_2062

Outside Japan the highest contentration of Japanese live in South America, namely Brazil and Peru. It was in Brazil that Luiz’s family finally settled and became part of the Nikkei community. The cuisine has been part of his family history and is certainly no food fad. Luiz himself moved to London for university after which he worked in Finance in the city.  Much like myself he created his blog ‘The London Foodie’ as a creative outpost for this food thoughts and exploration. It was love of food and cuisine that they led him to quit his day job and embark on a new chapter in food. He trained at Le Cordon Bleu, where he graduated with the Grande Diplome in 2012. It was following his training and some time spent in Japan learning from the masters, that he then opened up his own home to friends and strangers by hosting his supper club. As well as continuing to this day with his supper club, he teaches cooking and writes in many national and overseas publications on the topic of food and travel.

IMG_2074

Which brings us to the book itself. To say that it is a feast for the eyes as well as the belly is a massive understatement. It’s colourful, bold and exciting.  It’s the type of book that is perfect for confident homecooks or for those who like to be pushed in their abilities. I recall some people grumbling over the ingredients lists of the hallowed books from the Ottolenghi empire, but for me this was a revelation and not something that phased me in the slightest. Luiz’s book must be treated with the same respect. Yes, it requires a bit of thought and forward planning, but with the help of some wonderful Oriental supermarkets in the UK and online, it is not too difficult to create the dishes. Luiz even lists a ‘directory of suppliers’ in the back of the book to help you if you are unsure where to buy certain ingredients. He also lists all the ingredients you may be unfamiliar with and gives an overview about each one.

‘Above Images from Nikkei Cuisine: Japanese Food the South American Way by Luiz Hara. Photography by Lisa Linder. Published by Jacqui Small (£25).’

The sound of the dishes coupled with the stunning photographs in the book (see above photos) really inspire you to try cooking these yourself. How about duck breast robata with pickled pearl onions and sancho pepper vinaigrette or salmon and passion fruit tiradito with crispy butternut squash and espelette pepper or Nikkei hotpot of pork belly, cod and seafood? Mouthwatering hey. Word of warning, never read this book if you are feeling hungry as it will make matters a whole lot worse believe me.

I decided to trial one of his recipes. Deciding which to go for was a hard job as they all looked so good. In the end I chose the ‘Aubergine, Pork and Rice Noodle Salad’ as most of the ingredients I had in my kitchen – I’m also partial to little pork mince from time to time. I kept pretty to close to his recipe with the few alterations being:

  1. The amount of pork I used. He said 300g and I used the whole pack of 500g. Unless you go to the butcher, most packets of pork mince in the UK are 500g, hence I decided to use the lot.
  2. I also used vegetable bouillon instead of Asian chicken stock. I went to Korea Foods and when I asked for Asian chicken stock the guy showed me what looked like a regular chicken stock but with Chinese writing all over it. This was probably the Asian chicken stock that Luiz was referring to but the packet was so large I decided that I would replicate it with my regular vegetable stock.
  3. I would recommend you suggest cooking the aubergine for  nearer 7 minutes as opposed to 5-6 as you want to make sure that the aubergine is properly soft inside.
  4. For speed I opted for ginger paste instead of fresh ginger!
  5. I used reduced salt soy sauce.

The recipe was really very straightforward and I would most definitely cook it again. Flavoursome, with great balances of salty and sweet with only a hint of chilli.

IMG_2093

Aubergine, Pork & Rice Noodle Salad

Serves 4

for the pork soboro:

2 tbsp sesame oil

500g pork mince

50ml sake

50ml mirin

100ml reduced salt soy sauce

2tsp ginger paste

2 tsp caster sugar

****

for the dressing:

1/2 tsp of vegetable stock powder (Asian chicken stock if you have it)

4 tbsp boiling water

1 tbsp rice vinegar

1 tbsp sesame oil

1 tbsp caster sugar

2 tbsp soy sauce

2 tsp finely chopped red chilli

2 tsp ginger paste

****

100g dried rice vermicelli noodles

1 tbsp finely chopped fresh coriander leaves

sunflower oil for deep frying

2 aubergines

2 tsp toasted white sesame seeds

a sprinkle of shichimi pepper

  1. First start by making the pork soboro. Place the sesame oil in a pan and when it is hot add the pork mince and allow to brown in colour (this will take around 5 minutes) before adding all the rest of the ingredients in the list for the pork soboro. Cook on a medium heat for around 20 minutes or until all the liquid has evaporated. Leave to cool on one side.
  2. Cook the dried rice vermicelli noodles according to the packet and when cooked through, drain allowing cold water to run through the noodles. Add the fresh coriander to the noodles and place to one side.
  3. Next you need to make the dressing by adding all the ingredients together in a mixing jug. Place to one side.
  4. Using a pan  bigger enough to hold both aubergines gently heat up some sunflower oil. You want to fill the pan up to half way with the sunflower oil. Clean the aubergines and make a few delicate incisions into each aubergine to prevent them from bursting in the pan. Gently place the aubergine into the hot oil.
  5. Gently turn the aubergines over every minute and allow them to cook for 7 minutes.
  6. Get a large bowl of cold water (pop in some ice if you have any). When the aubergines have cooked for 7 minutes, plunge them into the iced cold water. They will immediately shrivel up.
  7. Once the aubergines have cooled, peel their skin. It will come away really easily.
  8. Now cut the aubergine lengthways so that you have 4 pieces. Take one aubergine section and cut it lengthways on the diagonal. Place both sections onto a serving plate.
  9. Place a portion of the noodles across the centre of the aubergine on the diagonal. Layer the pork soboro on top and finish off with some of the dressing, sesame seeds and shichimi pepper.

Luiz suggests eating it at room temperature, which I did. All the elements of the dish can be prepared in advance, which is always a bonus if you are entertaining.

Please don’t be put off by the lengthy ingredient list. From start to finish this dish will not take longer to prepare than 30 minutes. It really is very tasty indeed.

IMG_2071


Mexican Slow Cooked Pork Cheeks With Chipotle, Polenta and Fino

IMG_1969-2

With the clocks having gone back last weekend, the nights are drawing in earlier and winter seems almost knocking at our door. With the colder months set out before us, hearty food comes into its own. It’s with this in mind that I came up with this wintery of dishes. The type of meal that you can only really do justice to after a long bracing walk. Pork cheeks, if you have never tried them before, are flakey, succulent and a real treat to have now and again. I cook them at a low temperature (130 degrees) for 3 hours, which gives a similar texture to pulled pork. I have combined them with a Mexican influenced sauce, which envelopes the pork cheeks making them irresistibly tasty.

IMG_1977

I have paired the dish with a glass of Fino, which cuts through the sweet, sticky richness of the pig cheeks sauce. I ordered both the pork cheeks and Fino from Basco Fine Foods, which are Spanish food importers and supplies based in Yorkshire. They have won many gourmet food accolades and have a wide selection of really tasty food and drink, perfect for the Christmas season. They are well priced and even do next day deliver, which is a real bonus.

IMG_2005

I have paired the pork cheeks with creamy polenta, which is the perfect partner to soak up all the tasty sauce. I know polenta divides people but please trust me when I say it really comes into its own in this dish.

IMG_1980

So I hope you get to give this one a go over the winter months. Let me know how you get on and if you are on instagram take a photo of it and use the #chilliandmint and tag me @chilliandmint so I can see. It comfortably feeds 6 people as you’ll find that two pig cheeks are very filling.

IMG_2019

Mexican Slow Cooked Pork Cheeks With Chipotle 

serves 6

4 whole dried chipotle chillies, seeds removed if you prefer it less hot

1.2 kg pork cheeks

flour for dusting

2 tbsp vegetable oil

1 tsp cumin seeds

350g red onion, finely chopped

1 tsp salt

3 carrots, finely chopped

5 garlic cloves, finely chopped

1 cinnamon stick

2 bay leaves

2 tbsp tomato puree

3 tbsp white wine vinegar

2 tbsp balsamic vinegar

1 handful of fresh oregano

2 tbsp demerara sugar

700ml vegetable stock

50ml Fino En Rama

1/2 juice of an orange

  1. Preheat an oven to 130 degrees.
  2. Place the dried chipotle chillies in a pan of boiling water so that they are covered and simmer for 30 mins.
  3. Place some plain flour on a plate and then dust all the pigs cheeks. Heat a large pan and add a little vegetable oil and bronze the pigs cheeks in batches. This will take a couple of minutes on each side. Place to one side to rest.
  4. In the same pan add a little more vegetable oil and add the cumin seeds followed after 20 seconds by the red onions and salt. After 5 minutes add the carrots and garlic and simmer gently for a further 5 minutes.
  5. Meanwhile drain the chipotle and remove any seeds. Using a blender, blend them into a smooth paste.
  6. Add the cinnamon stock, bay leaves, tomato puree, chipotle paste, both vinegars, the Fino En Rama, fresh oregano and demerara sugar.
  7. Return the pig cheeks to the pan and coat them in the sauce.
  8. Add the vegetable stock so that the pig cheeks are submerged and place them in the oven for 3 hours.

**********

Perfect Polenta

200ml milk

600ml water

1/2 tsp salt

150g powdered coarse polenta/cornmeal

1 heaped tbsp butter

  1. Heat the milk and water in a pan and add the salt.
  2. When the milk/water has boiled add the powdered polenta and whisk so that it become smooth and mixes completely with the water/milk.
  3. Whisk every few minutes, on a low heat, for 10-15 minutes so that the polenta remains smooth. Add a little more milk if you feel it is a little too thick. It will begin to come away from the sides. Taste to see if it is done and serve immediately.

Note: This post was kindly sponsored by Basco Fine Foods.

IMG_1975

SaveSave

SaveSave


Chinese Spiced Roast Pork – An Alternative Sunday Roast

IMG_0500

As an alternative to a typical English Sunday roast I thought I would tempt you with a Chinese spiced alternative that is sticky, sweet and balances perfectly with the saltiness from the pork and crackling. It’s a real family crowd pleaser and I can guarantee you all the plates will be completely clean after everyone has devoured their portion. This time I served mine with pak choi and some white fluffy rice, but you can equally serve with mangetout, green beans, Chinese greens, noodles – the list is endless.

IMG_0486

Take a look at these close ups and you can almost smell the five spice and the honey from looking at these glorious hunks of meat. With the juices from the meats you can quickly make a little sauce to run all over the meat and rice (the sauce was made just after these photos were taken so you are going to have to imagine the meat with a little bit of dark sauce running all over it).

IMG_0487


The meat requires as much marinading as you can manage. This time I only managed about an hour – kept at room temperature, but if you are super organised you can prepare it the night before and leave it in the fridge over night and then bring it out in the morning so that it is at room temperature when you place it in the oven.

IMG_0469

Before marinading the meat make sure your butcher, or you, has scored the meat so that there is a deep lattice effect running along the top of the fat. Once this is done you can then cover the meat in the marinade. Make sure you use your hands to massage the meat and skin.

IMG_0473

After cooking don’t worry if the crackling looks a little black (see photo below) – it’s meant to. The sauce has darkened the meat and the crackling to perfection. Let it rest for 10 minutes under foil before cutting up.

IMG_0479

 Chinese Roast Pork

Serves 4

800g boned and rolled pork shoulder

*******

pork marinade

1 heaped tsp Chinese five spice

2 tsp garlic paste

1 tbsp sesame oil

2 tbsp light soy sauce

2 tbsp tomato ketchup

*******

Sauce

all the gooeyness from the baking tray post cooking the pork

1 tsp honey

2 tbsp light soy sauce

2 tbsp boiling water

*******

for the park choi

4 garlic cloves, sliced

4 bundles park choi

1 tbsp light soy sauce

1/2 tbsp sesame oil

rice or noodles to serve

*******

1. First marinade the pork with the ingredients above either for an hour or if you are super organised, overnight. If you are marinading for an hour, leave the pork marinading at room temperature.

2. Preheat the oven to 200 degrees (180 degrees if using fan) and when the oven is hot place the pork on a roasting tray in the middle of the oven. Cook for 1 hour turning the pork over after 30 minutes of cooking time.

3. If after about 50 minutes the crackling has not crackled sufficiently increase the temperature of the oven to 200 degrees and cook for 10 minutes by which time the fat will have crackled to perfection.

4. Remove from the oven and then cover with foil for 10 minutes to rest on a warmed plate.

5. Prepare the rice or noodles so that they are ready to serve in 10 minutes.

6. Meanwhile to make the sauce, scrape all the gooeyness from the bottom of the roasting tray and add the honey, soy sauce and water. Stir so that all the ingredients mix well together. Simmer for a minute and then pour into a warmed sauce jug.

7. In a separate large pan, gently fry the garlic in the sesame oil for 2 minutes and then add the washed pak choi. The pak choi will wilt slightly within a couple of minutes, but which time it is ready to serve.


Pork Larb – the national dish of Lao

IMG_0141


Larb originates from Lao but is also eaten in North Eastern Thailand where many of the Thai people are of Laotian decent. It is, put simply, a meat mince salad (pork, chicken, turkey or duck) that is placed in a lettuce ‘cup’ and then eaten in a couple of delicious bites. They have a similar lettuce wrap recipe in Korea known as ‘Ssambap’ – ssam meaning ‘wrap’ and bap meaning ‘rice’.


IMG_0129

My version has replaced the rice, (which is traditionally toasted then roughly ground (Khao Khua) and sprinkled on the top of the mince when serving to help soak up any of the juices) with roughly ground shelled and oven roasted unsalted peanuts. I like the crunch and taste of the nut combining with the minced meat and fresh herbs. If you want to stay true to the original recipe then just add ground toasted rice in place of peanuts. Try both and see which works for you.

IMG_0120

The combination of fresh crunchy salad leaves, fragrantly spiced mince meat and fresh mint and thai basil (or coriander, but I had run out otherwise I would have thrown that in too) is satisfyingly tasty that one, or three in fact, is never quite enough. It is perfect as a canapé, or as a starter whereby guests can put together their own wraps before popping them in their mouths. Personally I love eating with my hands so any excuse to get everyone to throw themselves into this enjoyable pursuit gets the thumbs up in my books.

IMG_0102

If you tone done on the chilli this dish is also a hit with kids (although my 8 yr old has it as is) as it is a little bit different, packed full of flavours and quite simply good fun to eat, which bottom line is what food and eating should all be about. My dish is more Laotian in style and substance, minus the rice sprinkle. The north east Thailand variety varies again omitting fish sauce and lime juice and instead uses a wide range of spices including cinnamon, star anise, long pepper, cumin, cloves amongst others. I’ll post this version in the future.

IMG_0127

Throw yourself into it, try something different. I can assure you that you one wrap is never enough. This will become a firm family favourite I can guarantee.

Pork Larb 

Serves 15 as a canapé or 6-8 as a starter

2 tbsp sunflower oil (or peanut oil if you have it)

2 banana shallots, finely sliced

1 tsp grated ginger

1 tsp grated garlic

1 tsp lemongrass paste

2 small red chillies, finely chopped (take the seeds out if you like it less hot)

1 kg pork mince

2 limes, juice only

5 tbsp fish sauce

1 tbsp light soy sauce

2 tbsp caster

1/2 tsp red chilli flakes

***********

30g shelled and oven roasted unsalted peanuts, roughly chopped

5 little gem lettuces or similar lettuce

handful of fresh thai basil

handful of fresh mint leaves

handful of coriander leaves

limes wedges to serve

1. In a large pan heat the oil on a medium heat and then add the shallots and fry gently. (Equally 1 large red onion also works well if you cannot get hold of shallots).

2. When the shallots have softened add the garlic, ginger, lemongrass and fresh red chilli and stir together gently.

3. Add the pork mince and move around the pan until all the pink meat has become brown. This will take around 8-10 minutes.

4. Add the fish sauce, light soy sauce, lime juice, caster sugar and red chilli flakes and stir into the mince. Leave to cook on a low heat for a further 5 minutes. Just before serving throw in a few fresh herbs and give a good stir.

5. To serve place a tablespoonful of the mince onto the lettuce cup followed by a couple of mint, Thai basil and coriander leaves and a sprinkling of peanuts (or rice if you want to stay totally traditional). Add a splash of lime juice as required.

It can be eaten at room temperature or slightly warm.

* If your mince has juice, cook it for a little longer with the lid off the pan. That should do the trick. If there continues to be some juice, it is best to strain the mince as it is easier to eat on the lettuce cups if there is no juice. 

you can replace the pork mince, with chicken, turkey, duck or I reckon even tofu would work well.


Chicken, Ginger and Spring Onion Gyoza/Jiaozi/Pop Sticker

IMG_8706

Mention the worked ‘gyoza’ in my household and you will hear yelps of delight – and that’s not just from the children. These moreish savoury dumplings are incredibly addictive and are a great little starter or snack, although you can off course have them as a main meal along with some steamed greens with soy and garlic perhaps.

Japan and China both have their version of the dumpling, although these dumplings first originated from China and were then adopted by the Japanese. The Chinese dumplings are known as jiaozi if they are boiled or steamed and guo tie if they are fried, in Japan – gyoza and the US – pot sticker.

The Chinese variety have slightly thicker wrappers and have a far wider combination of fillings than their Japanese counterparts. They are often steamed, whereas the Japanese gyoza are fried for a few minutes and then steamed for a further few minutes. The fillings I typically use for the vegetarian are tofu and shiitake mushrooms, or the meat variety filled with pork, chicken or duck or the seafood version, which tends to be prawn. Whatever takes your fancy these little dainties will be forever cherished by those who sample them.

IMG_8670

Now the question is to lovingly prepare your own wrappers or to buy some from your local Asian grocers or online. Basically it will come down to time on your part. Making your own takes a little time, but its the perfect activity to do with a mate who comes over for coffee – just rope them in they’ll love the experience or even with the kids. Shop bought is pretty cheap, as you can see for the price sticker I left on above, and are likely to be more uniform in thickness, but I’ll leave it to you to decide which suits your lifestyle.

IMG_8662

For those who wish to make their own it is SO simple. Seriously you only need a couple of ingredients and then a bit of kneading.

IMG_8653

Homemade Gyoza Wrappers

Makes around 20

210g plain flour, seived

125ml warm water

 pinch of salt

1. Stir the salt into the warm water until it completely dissolves.

2. Place the sieved flour into a large bowl and add the warm water. Using a wooden spoon mix the flour and water together and then use your hands to create a ball.

3. Kneed the dough on a cold surface for around 10 minutes, when it will be soft and springy to touch. Sprinkle more flour onto the dough if it is getting too sticky.

4. Wrap in cling film and place in the fridge for 30 mins.

5. Take small balls of the dough – about the size of apricot – and flatten it with your hand. Gently roll the dough into a round shape, turning it after every roll. Using a round cookie cutter (or the bottom of a saucer) cut out a round circle and cover gently with flour and place in a pile.

6. Continue until the dough has been used up. You should make around 20 dough wrappers with the proportions above. Whilst you prepare the filling place a damp cloth over the wrappers so they do not dry out.

IMG_8655

So now you have the wrappers ready to go you need to prepare the filling. Whether you want to use chicken, pork mince, prawn, duck or shiitake mushrooms and tofu the rest of the ingredients remain the same.

IMG_8680

Whilst using Chinese cabbage is the most authentic, use whatever green cabbage you have in your fridge. Place two large leaves in a pan of boiling water for 1 minute and then drain and pat completely dry with kitchen paper. You then want to slice and cut them up as small as you can. You can blitz everything in a blender but I tend to often take the slightly slower version of cutting by hand. Today I used chicken and as I tend to find minced chicken hard to source so I bought boneless chicken thighs and cut up them up into small pieces. I also added spring onions, chopped garlic, finely grated ginger, soy sauce, sesame oil, salt and pepper and hey presto you have your filling. You can get creative and add any other ingredient you think might work – how about carrot, fresh chilli, five spice.

IMG_8687

Wrapping the dumplings is rather satisfying and you will begin to get into a rhyme with them. Don’t overfill the gyoza, instead putting a teaspoonful in the centre and then, using your finger tip, wet the low half rim of the circle. You then want to fold over the gyoza in half and then begin to pleat from left to right, making sure the filling is securely inside the parcel. It is definitely a case of the more you do the better you become. My 8 year old is a complete natural and can do multiple pleats across the top. You only pleat one side of the gyoza s0 do not turn over and attempt to do more on the other side.

IMG_8721

The above photo shows half of the gyoza pleated. I finished doing this row, but did not turn it over to attempt to do the other side. To pleat you simply use your thumb and forefinger to make small pleats going over the last. Make sure you press the top together so that it is firmly stuck together – you don’t want them opening up in the pan.

IMG_8693

So you can see some are neater than others above. They will still taste delicious even if you haven’t got the perfect symmetrical pleating!

IMG_8708

Dumpling Filling

to fill around 20 dumplings

2 large leaves from a green cabbage/Chinese leaf cabbage

2 garlic cloves, finely sliced

20g ginger, peeled and finely grated

3 spring onions, finely sliced into small pieces

1 tsp sesame oil

1 tsp soy sauce

1 tsp mirin rice wine

275g boneless chicken thighs/or chicken mince (or duck, pork mince, tofu and shiitake mushrooms)

100 ml water

************

Dumpling Dipping Sauce

3 tsp rice vinegar

6 tsp soy sauce

1 tsp chilli oil (optional)

1 tsp sesame seeds

**********

1. Finely chop all of the ingredients and then bind together using your hands.

2. Place a heaped teaspoon of the ingredients onto one of the wrappers in the centre.

3. Wet the rim of the lower half of the wrapper using your finger.

4. Fold the wrapper in two and then pleat from left to right across the top, making sure to firmly seal the top of the wrappers.

5. Bend the wrapper slightly so that it is in a crescent moon shape and so it can stand up unaided. Place to one side whilst you prepare the rest.

6. Using a large nonstick pan add a tablespoon of sesame oil and when hot add the dumplings so that they are standing up and not sticking to one another. Fry them for 3 minutes, by which time they will have bronzed underneath. If they have not bronzed sufficiently leave them to fry for a little longer.

7. Add 100ml of water to the pan and place a lid on the top. Leave to steam for a further 3-4 minutes so that the water has completely dissolved.

8. Mix the ingredients of the dipping sauce together and then place to one side in a little bowl.

9. Serve immediately with the dipping sauce.

IMG_8719


Bun Cha – Vietnam’s culinary jewel

IMG_6057

On a recent trip to Vietnam Mr B, Big A and Little Z (husband and two daughters) stopped off in Hanoi for a couple of days before heading south to Hoi An and it was during this stay I discovered a dish known as Bun Cha (pronounced Boon Cha – even the name of it appeals) that will stay with me forever. There have been certain times in my life that I have, often unexpectedly, had a meal that was off the delicious charts and consequently imprinted on my memory. This was one of them.

IMG_6080

We had booked ourselves onto a guided tour of ‘real’ Hanoi with Hanoi Kids – which I cannot recommend more highly if you are planning a visit. The personal tours are conducted by local university students who show you their beloved Hanoi. The hope is that the students can improve their English and you enjoy an original type of tour. The tours are free so it’s a win win for everyone, although it’s only polite to pay for their lunch and drinks and leave a tip at the end (although there is no pressure to leave one).

Van and Nhung (our designated Hanoi Kids for the day) collected us from our hotel in Old Hanoi and after a few minutes discussion on what kind of things we enjoy doing they whisked us off to a few places they thought we should see, both on the tourist trail and the more hidden places.

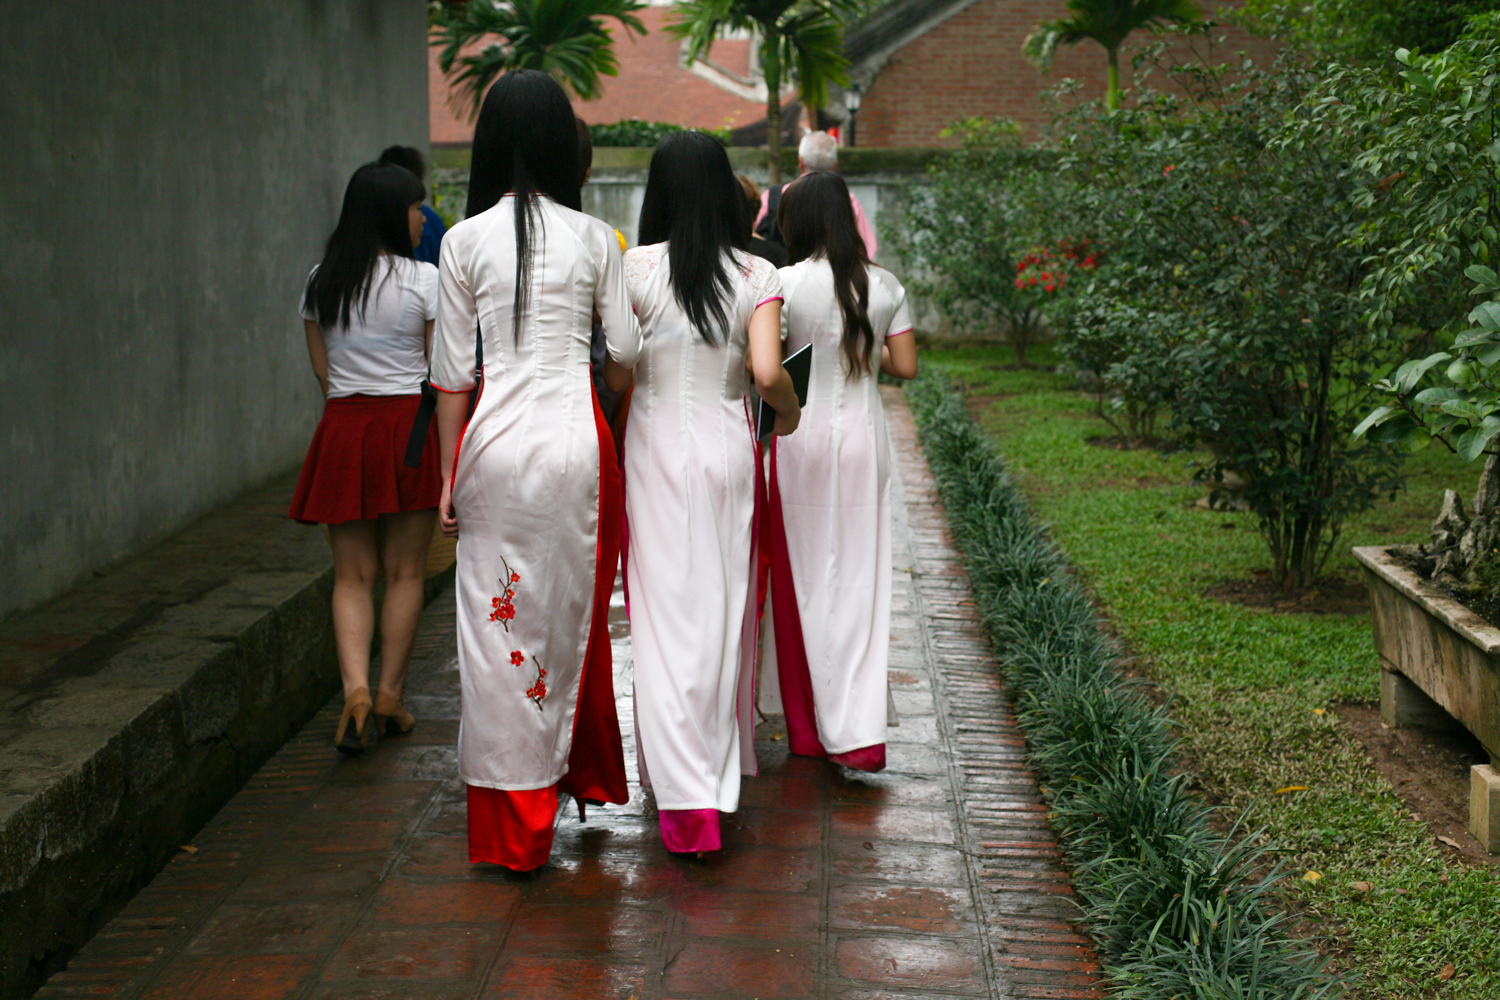
Despite the tourists who flock to ‘The Temple of Literature’, the site of Vietnam’s first university, the place was breathtakingly calm and serene as recently graduated students wafted around in their stunning ‘ao dai’ – the national dress for Vietnamese women.

IMG_4794

The temple is a place for them to take cherished photographs of themselves in all their finery having completed their studies; their graduation photographs if you will.

IMG_4799We wandered around the large complex taking in our surroundings before heading back to the cool of our transportation and on to the next destination.

IMG_4800

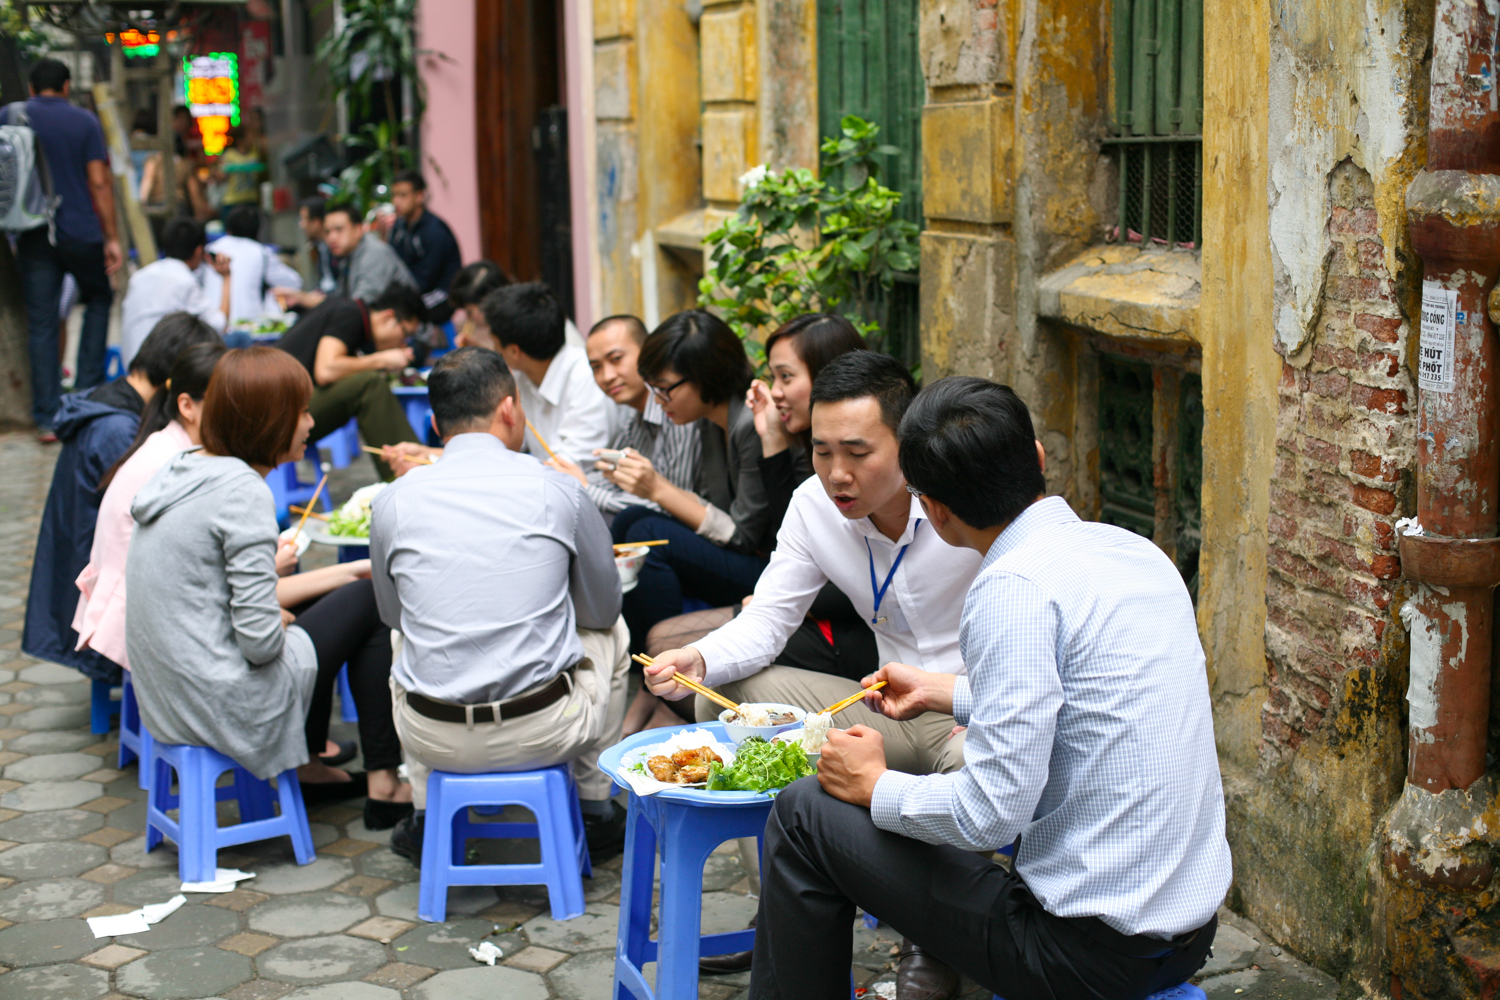
After a morning of soaking up the some of Hanoi’s sites Van and Nhung promised to take us to one of their favourite Bun Cha establishments. New to Bun Cha we were open to their suggestion. Our driver dropped us off by the pavement where we found a collection of little tables with miniature blue stools where local Vietnamese were feasting on Bun Cha.

IMG_4818

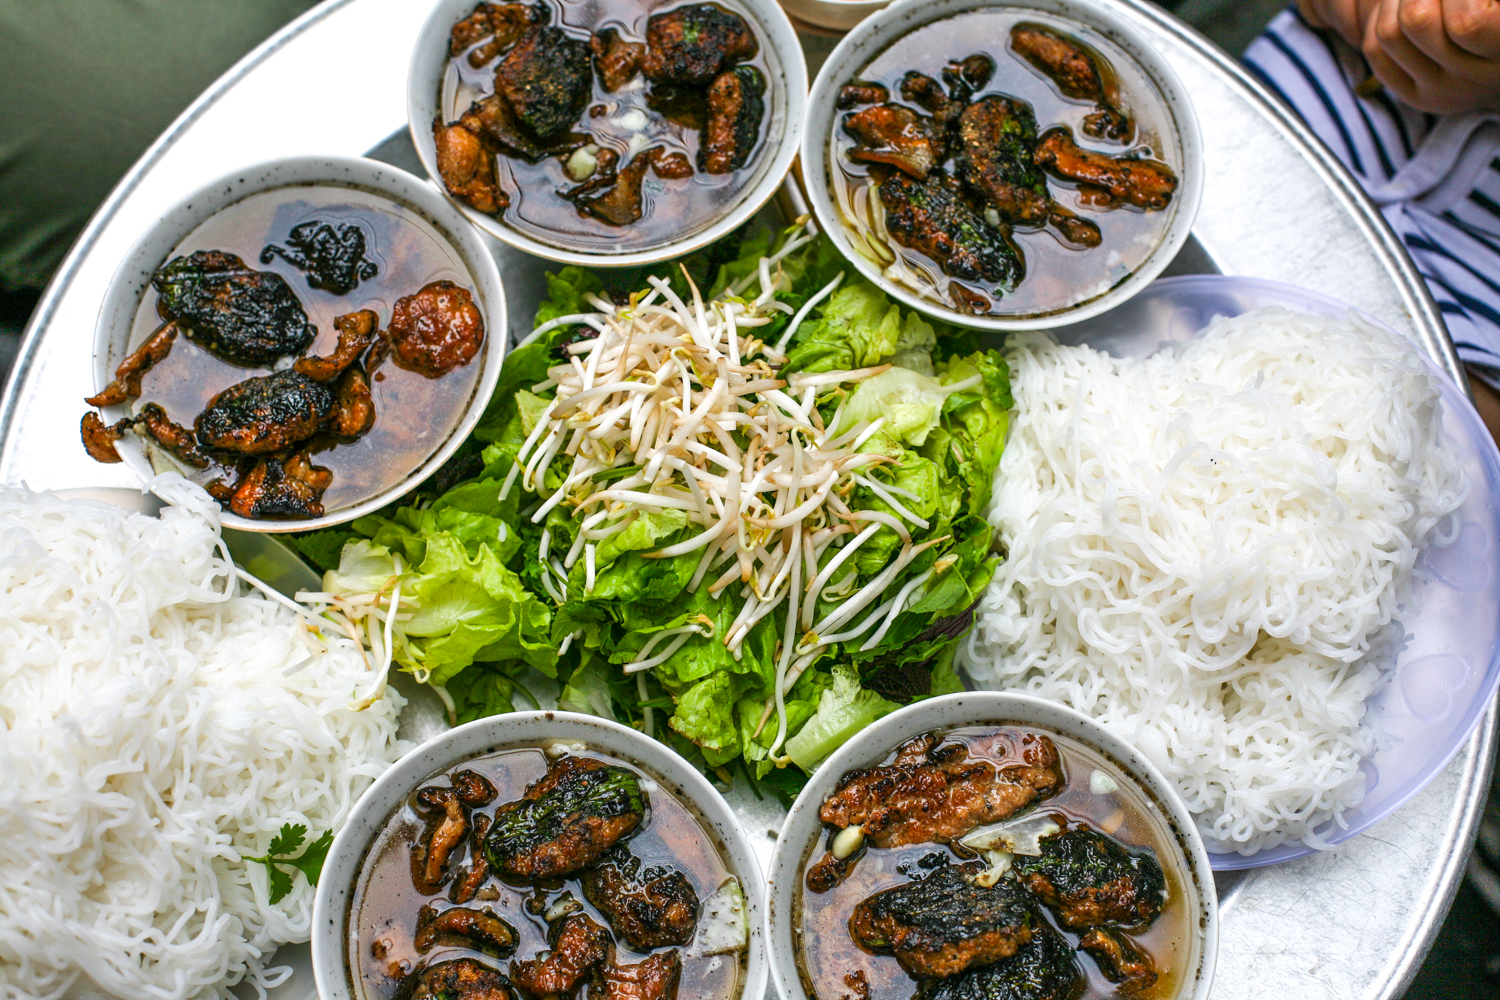
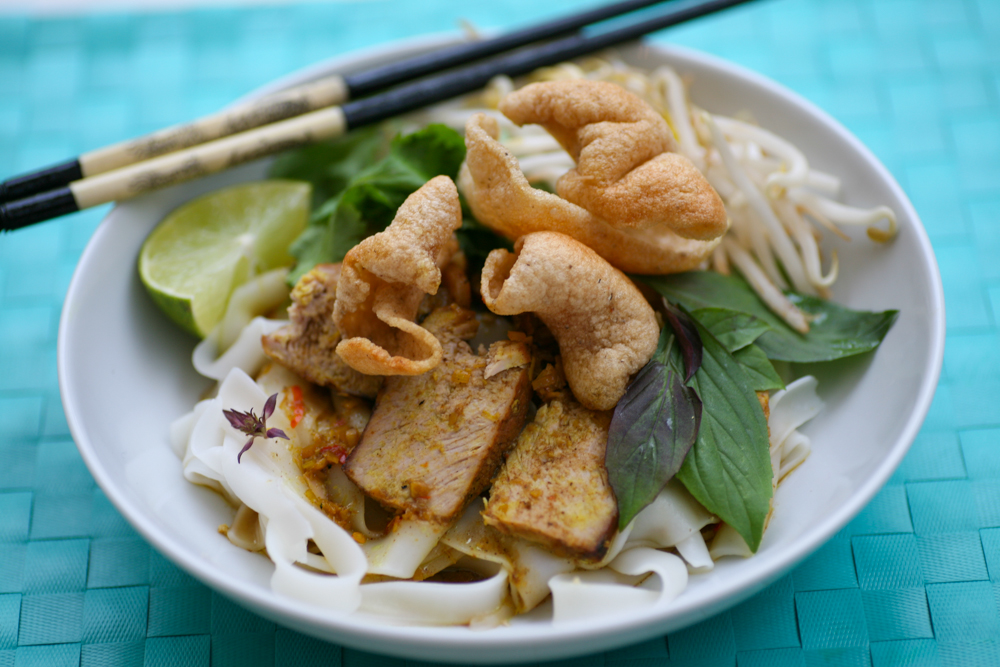
We were shown to a table and waited briefly for our meal to arrive. A large tin platter was placed on the small table, which we were huddled around and upon it were six bowls of broth filled with BBQ pork slices and patties. In the middle of the platter where mountainous piles of noodles, fresh herbs, lettuce and bamboo shoots.

IMG_4822

The simplicity of the spread did not reveal the resplendent flavours that came to the fore after the first mouthful. Without exception we were all in culinary nirvana; even Little Z who has not such a developed palate – being 3 yrs old – devoured every mouthful. The atmosphere of eating in a local eatery with traffic and bikes whizzing by only added to the charm. All the tables were filled with locals, not a tourist in sight (apart from us that is).

At £2 a head it is without doubt the best cheapest meal I have ever eaten. If you are in Hanoi do check it out you won’t be disappointed. The address is : Bún Chả 34 Hàng Than, 34 Hàng Than, Hoàn Kiếm, Hanoi.

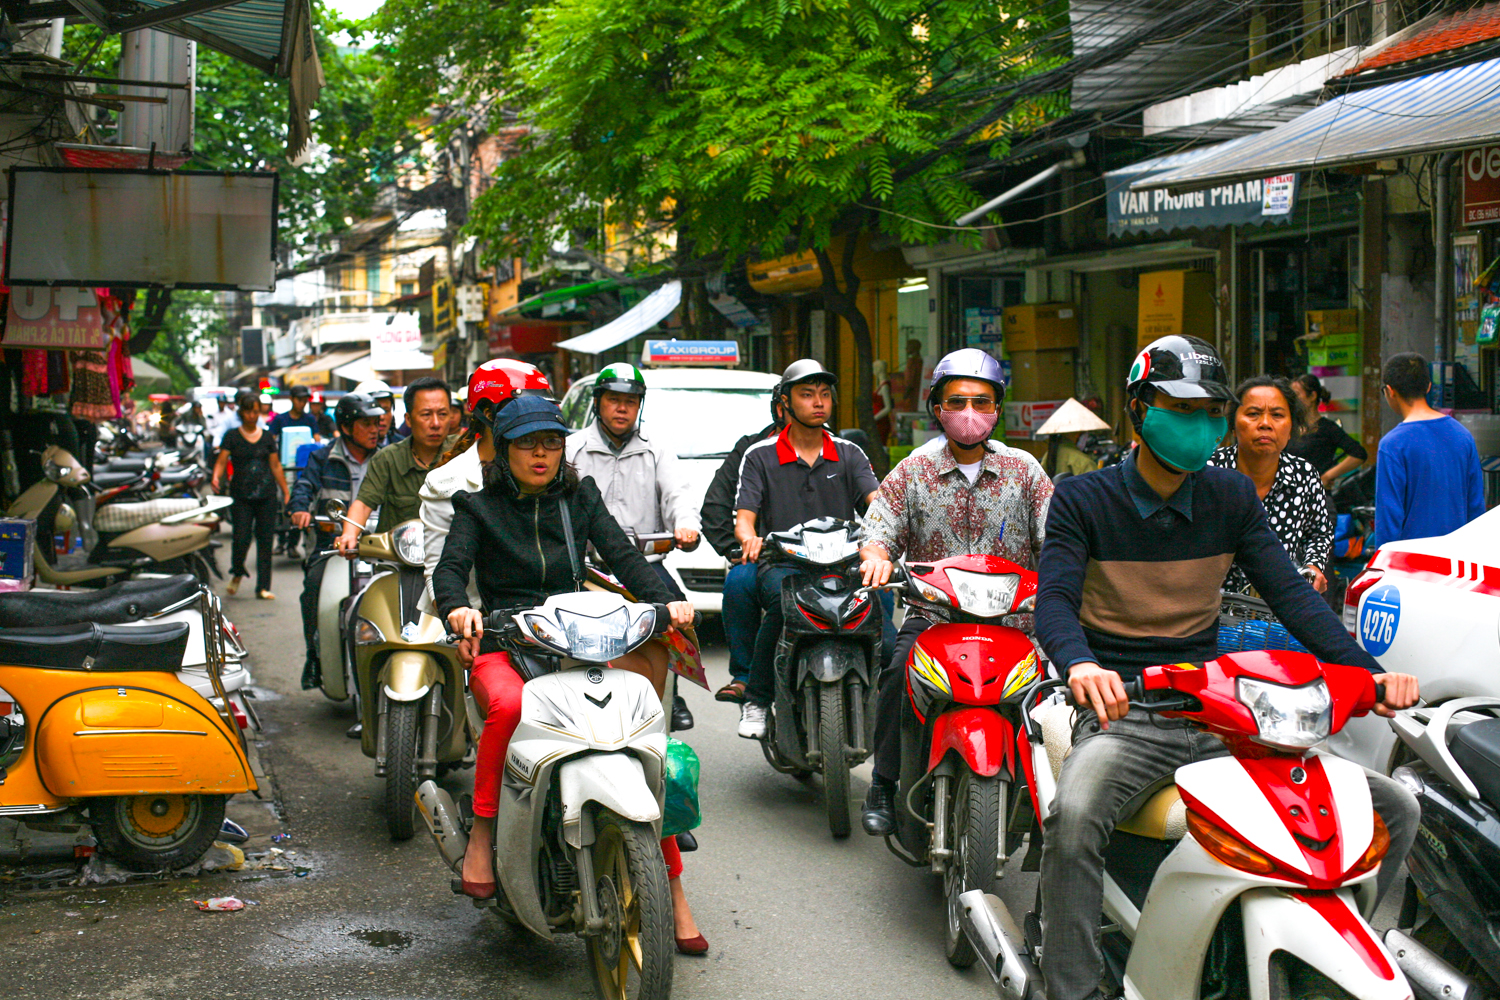
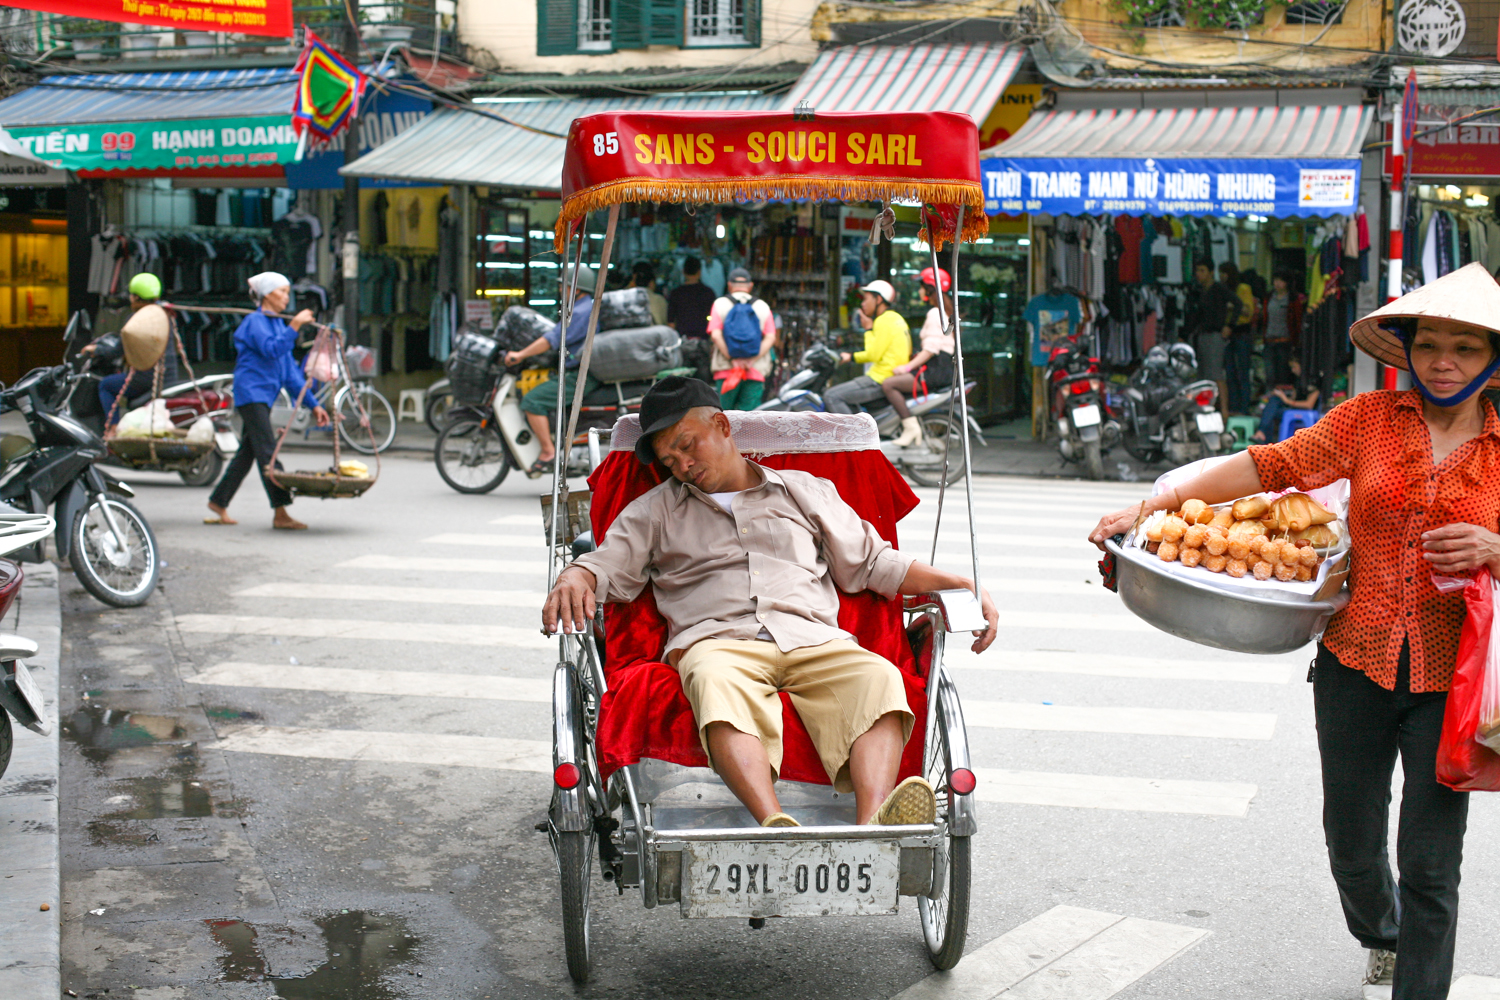
The afternoon was spent on foot touring the streets of Old Hanoi,which is no easy feet I tell you. Crossing a road in Hanoi is a tricky business, but with our guides on hand we managed to stay alive to tell the tale.

IMG_4840

Some like to take a more leisured approach to daily life!!

IMG_4848

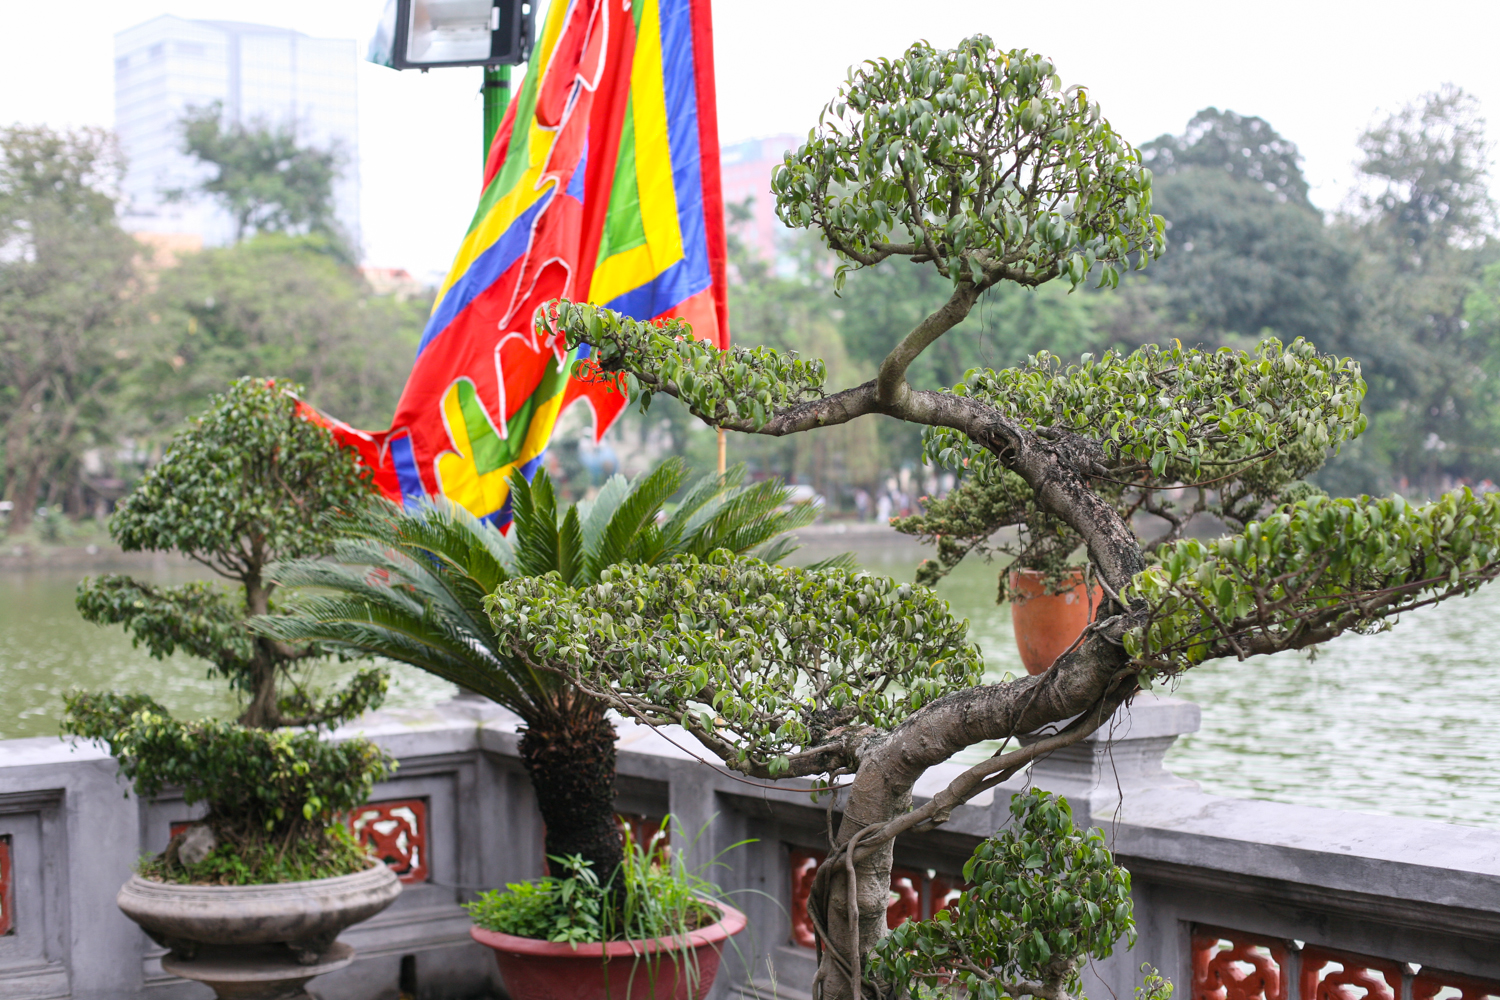
We ambled around Hoan Kiem Lake, which is the heart of Hanoi. Within the frenetic metropolis the lake offers peaceful walks in the relative shade of the tree lined walkways. We visited the temple in the lake and heard about the legend of the giant tortoise and the sword.

IMG_4865

The rest of the afternoon we spent wandering down the laberinth of narrow roads that make up Old hanoi, stopping off at temples and markets and of course sampling the famous egg coffee at Cafe Giang, a coffeehouse that’s been around for decades. (39 Nguyen Huu Haan) and is delightfully charming hidden down a dark little alleyway (we would never have found it without Hanoi Kids), over two floors scatted with it’s miniature tables and wooden stools, much to Mr B’s chagrin, as he is a good six foot tall. The girls loved it however as the seating arrangements in Hanoi were perfect for them.

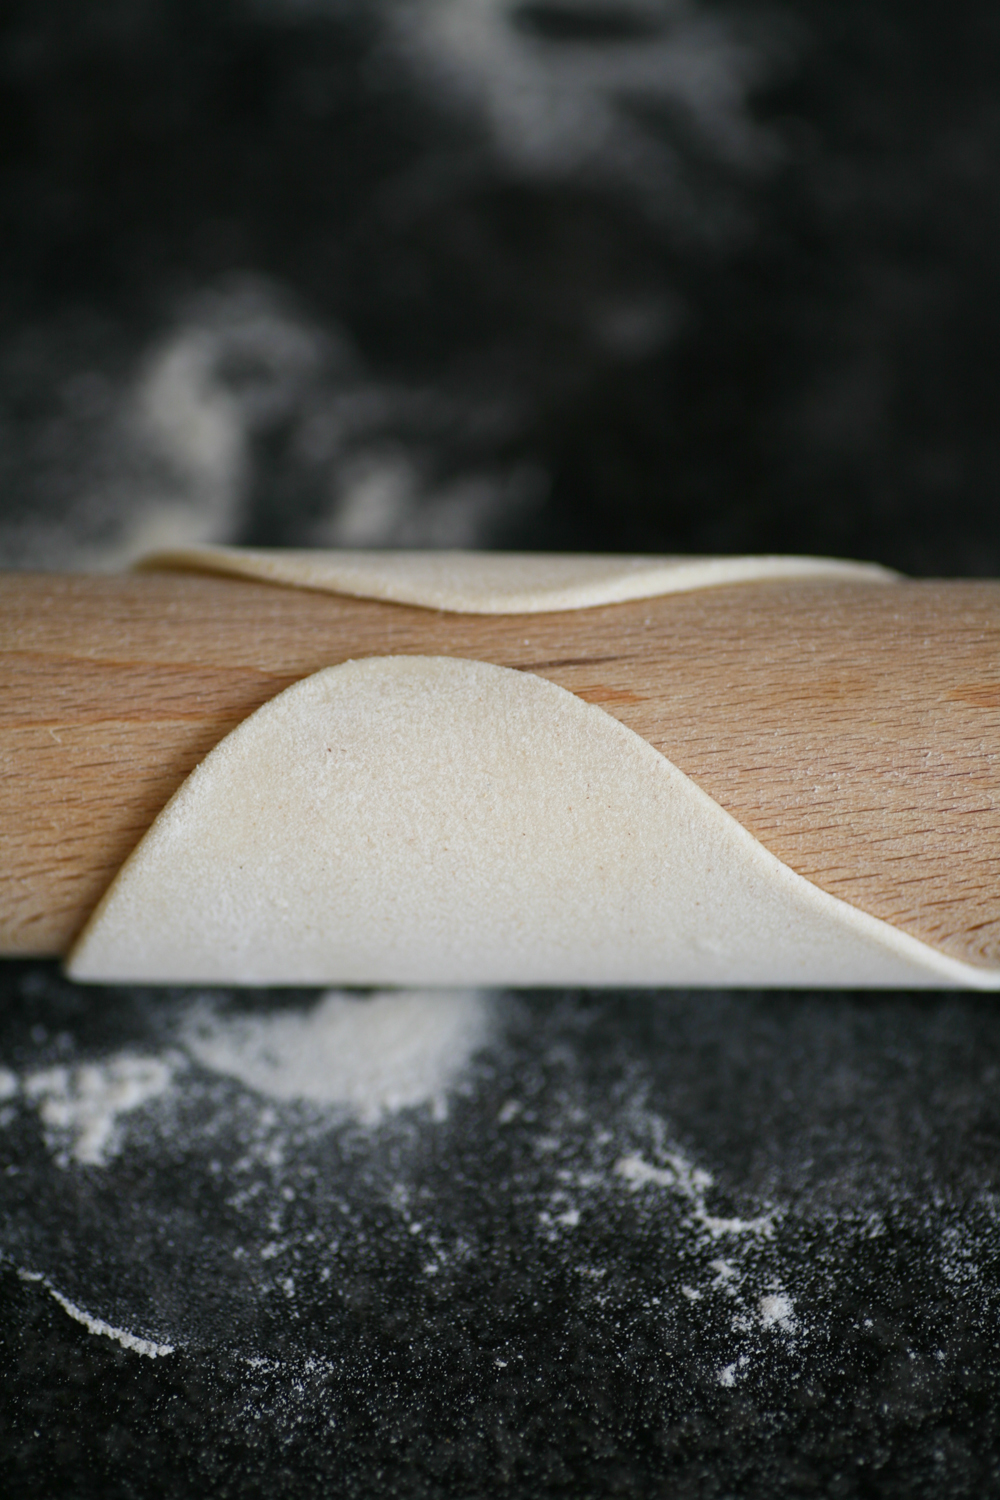
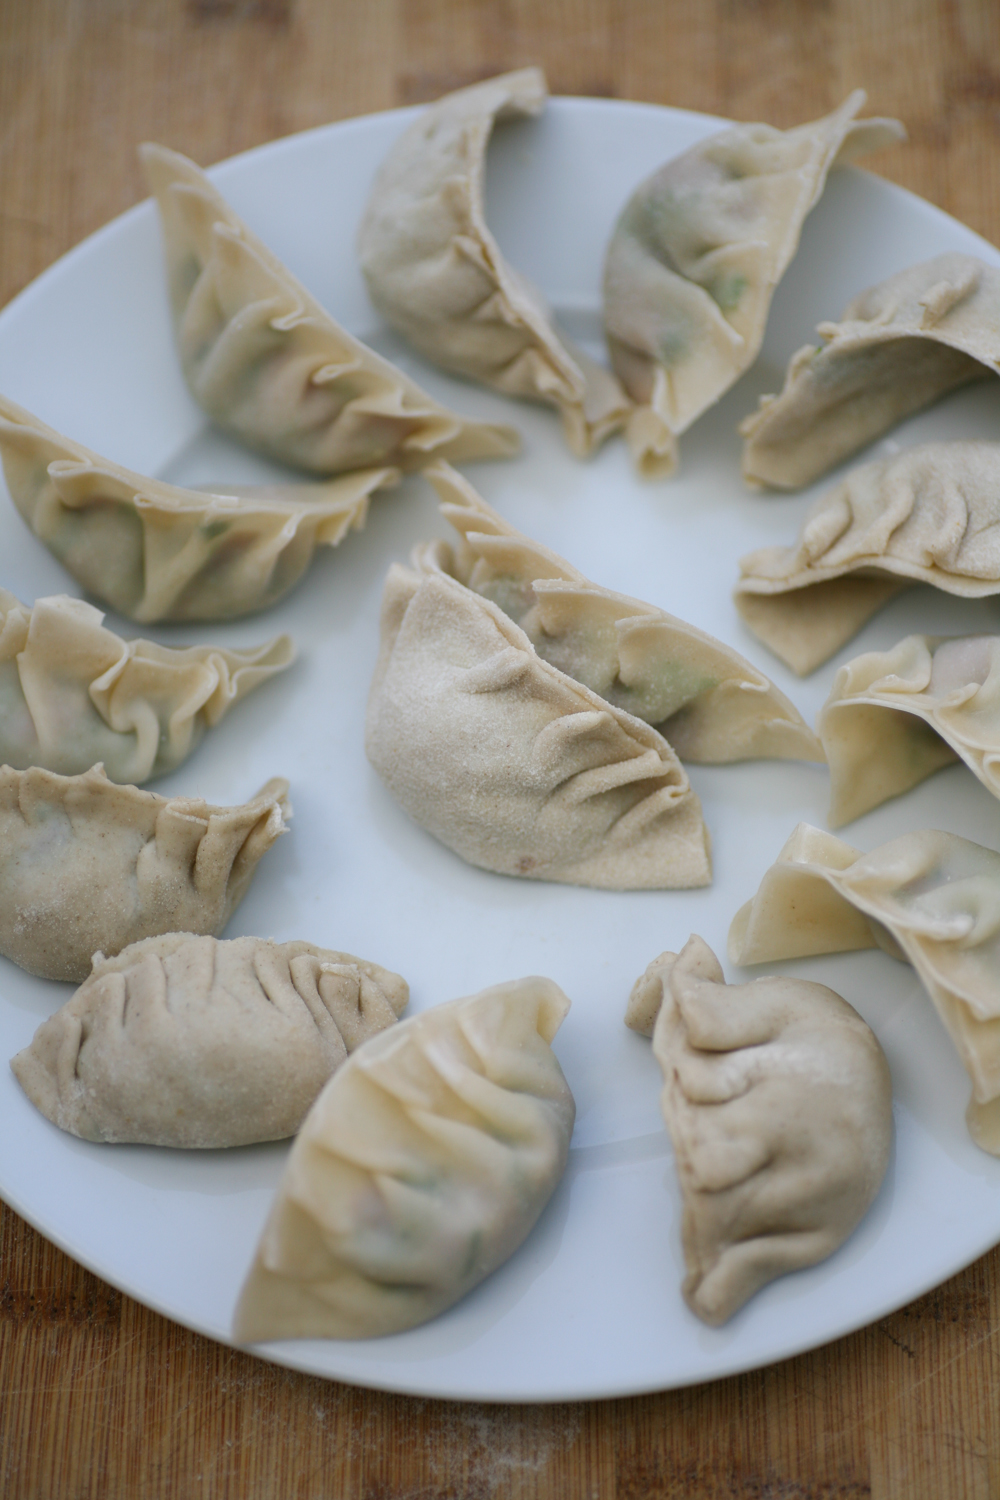
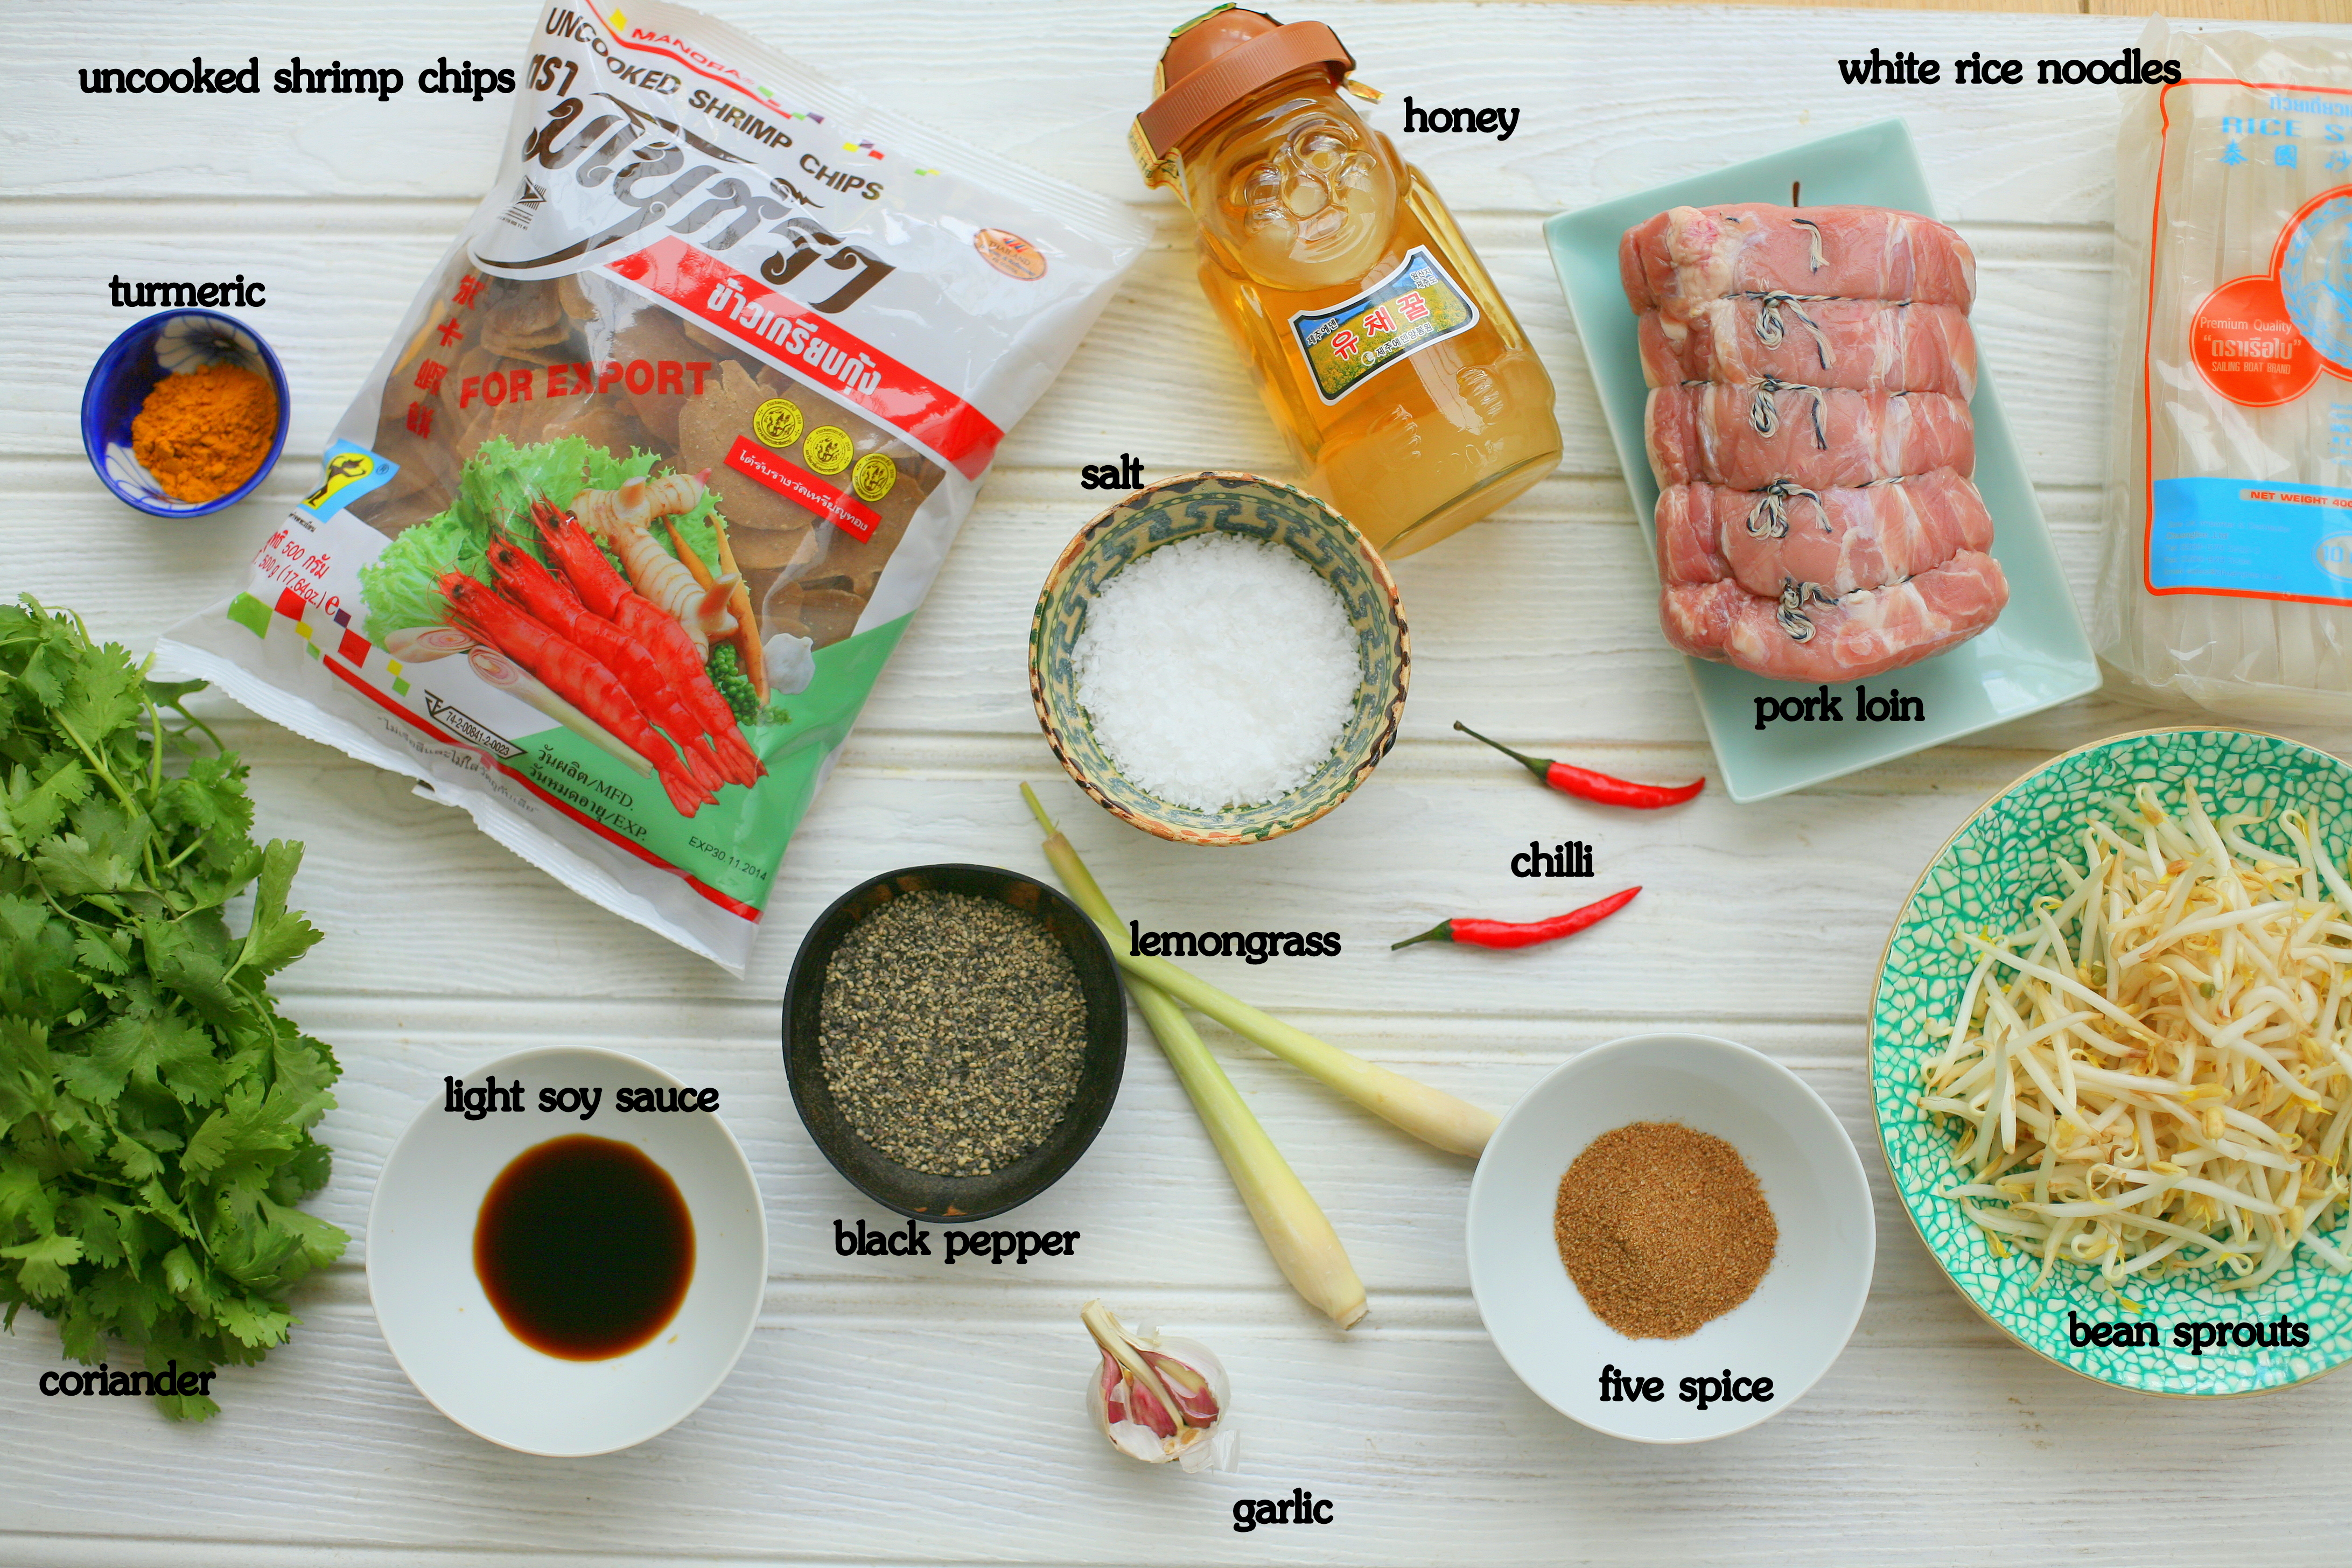
So for those who have no immediate trips to Hanoi planned, fear not, here is the simple but truly delicious Bun Cha recipe that you can make at home. Don’t be put off by the length of ingredients, it is far more straightforward than it may appear and if you don’t have all the herbs just use one or two of those listed. Equally if you find green papaya too hard to source just add carrot. Ideally marinate the pork mince and slices and leave in the fridge overnight if you have time/remember. Failing that a couple of hours marinating will also be sufficient.

Bun Cha

Serves 4

Pork Patties and Slices

300g pork shoulder

300g pork mince

6 shallots, minced

6 garlic cloves, minced

2 spring onions, very finely chopped

1 tsp sugar

2 tsp fish sauce

2 tsp dark soy sauce

2 tsp salt

2 tsp honey

1 tsp freshly ground black pepper

To Serve

1 handful of mint leaves

1 handful of coriander leaves

1 handful of Thai Basil

1 large handful of bean sprouts

1 large handful of lettuce leaves

500g rice vermicelli noodles, cooked

Side of Pickles

quarter of a green papaya, thinly sliced

1 large carrot, sliced into carrot flowers (or simply sliced)

2 tsp salt

1 tbsp caster sugar

2 tbsp rice wine vinegar

Dipping Sauce

2 tbsp fish sauce

2 tbsp caster sugar

2 tbsp rice wine vinegar

250 ml water

1 chilli, sliced thinly

2 garlic cloves, diced finely

juice of half a lime

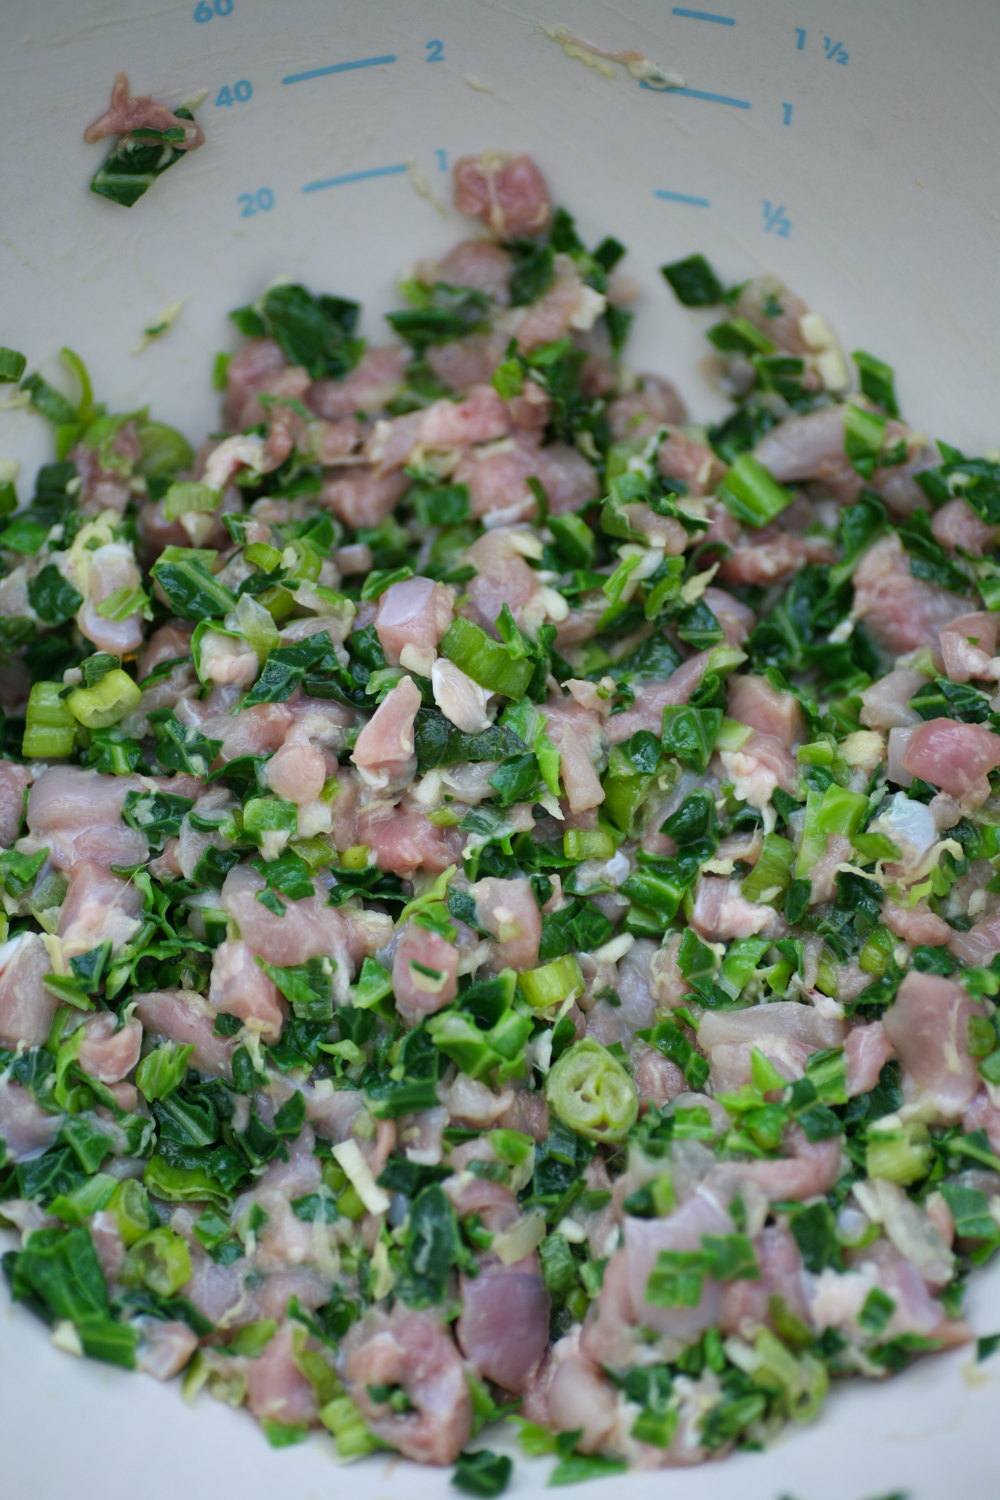
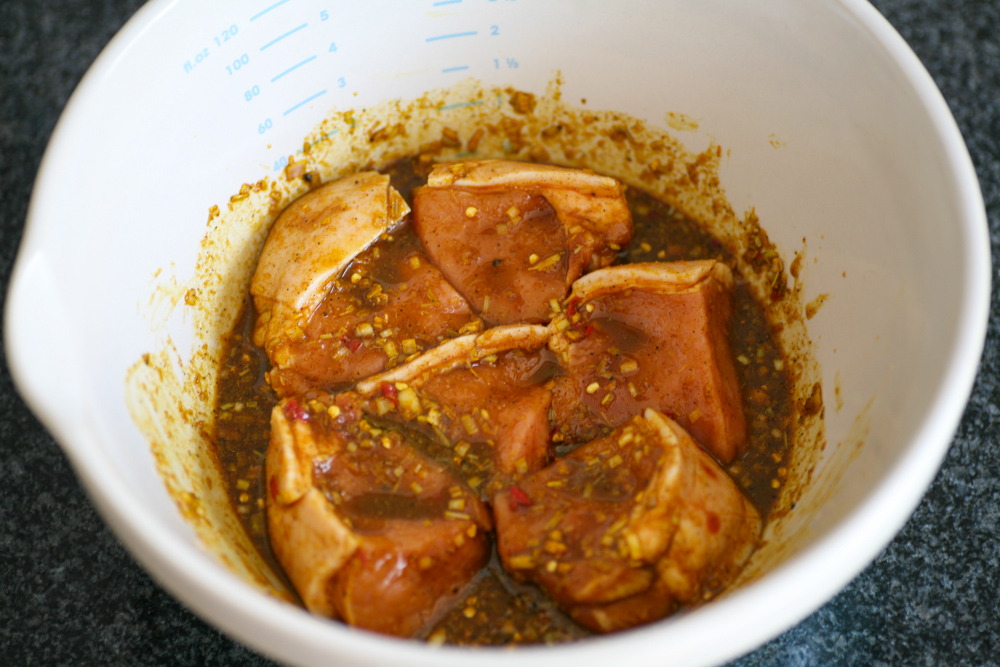
1. In a mixing bowl combine the pork mince with HALF of all the ingredients in the ‘Pork Patties and Slices’ section. Thinly slice the pork shoulder to around 1/2 cm depth, 5cm length x 4cm width approximately. Place in a separate bowl with the other HALF of the remaining ingredients.  Cover both bowls and leave in the fridge to marinate overnight or for a couple of hours.

2. Next prepare the side of pickles by slicing the carrots, or if you are feeling ambitious make little carrot flowers. Simply peel the carrots and then make V cuts lengthways, without going all the way through the carrot. This way when you slice the carrot horizontally little carrot flowers have been formed. Peel and slice the green papaya and then put both the vegetables into a bowl with the salt. Set aside for 10 minutes before rinsing off the salt in water. Drain thoroughly and then place in a new bowl with the sugar and the rice vinegar. Leave to rest for an hour. This will allow the vegetables to absorb the sugary vinegar flavour.

3. Prepare the dipping sauce by mixing all the ingredients together. Leave to one side.

4. Cook the rice vermicelli according to the packet – few minutes normally in boiling water. Drain under cold water and leave to one side.

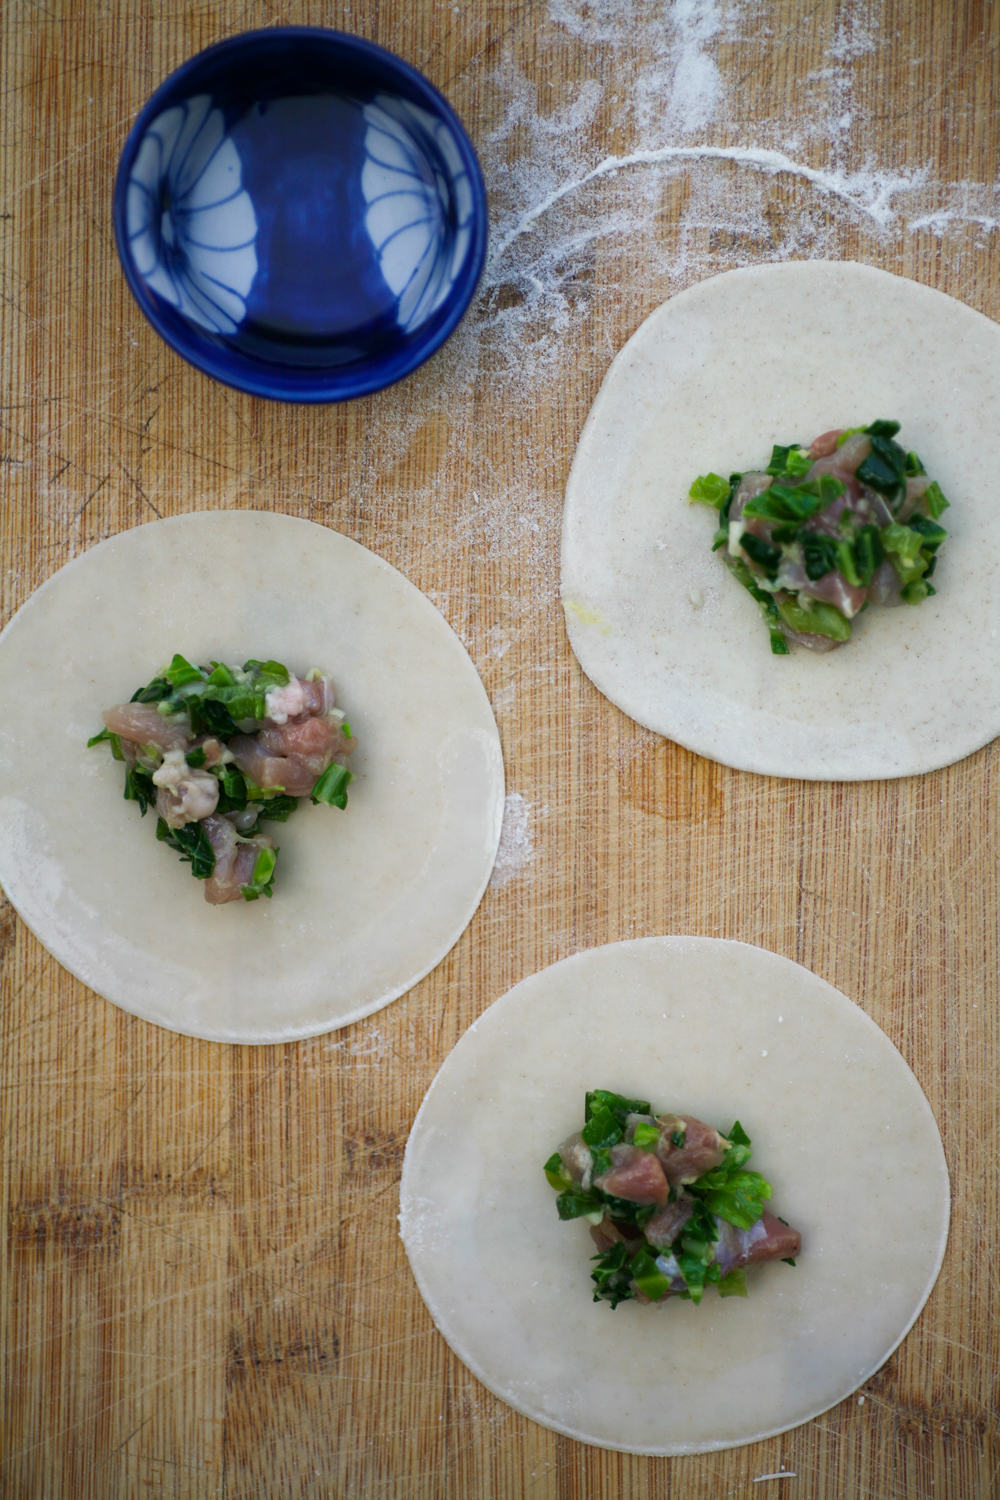
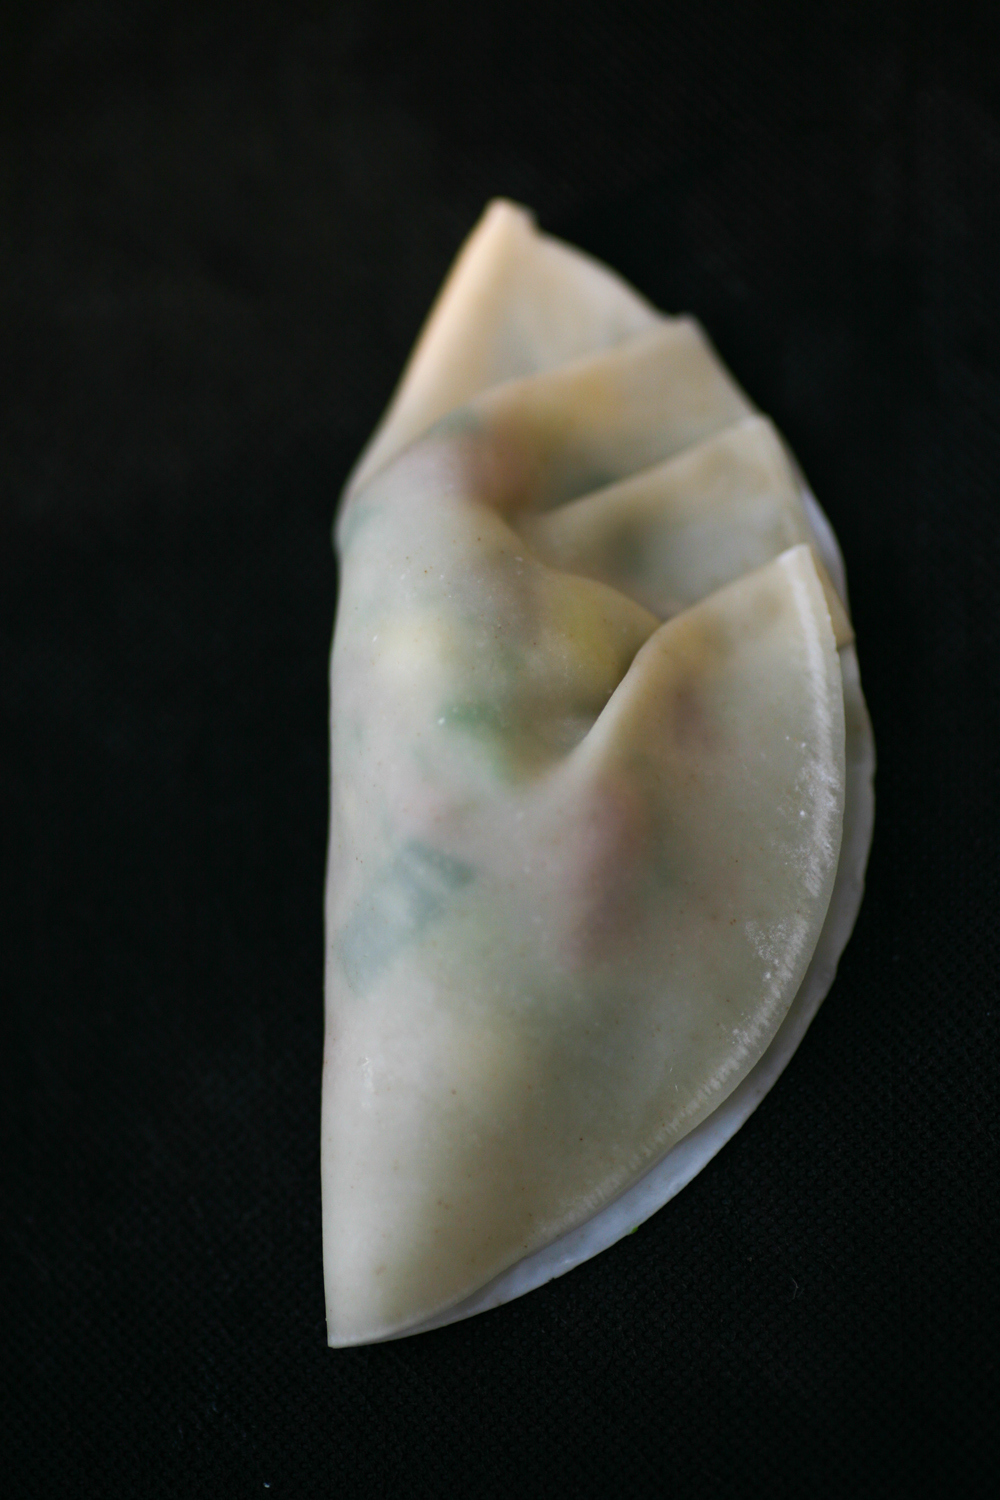
5. After marinating the pork, make small patties using your hands, similar to how you would make meatballs. It is easiest to form the balls if your hands have a little oil on them. Once you have formed a ball, gently flatten the pattie so that it is easier to handle when cooking.

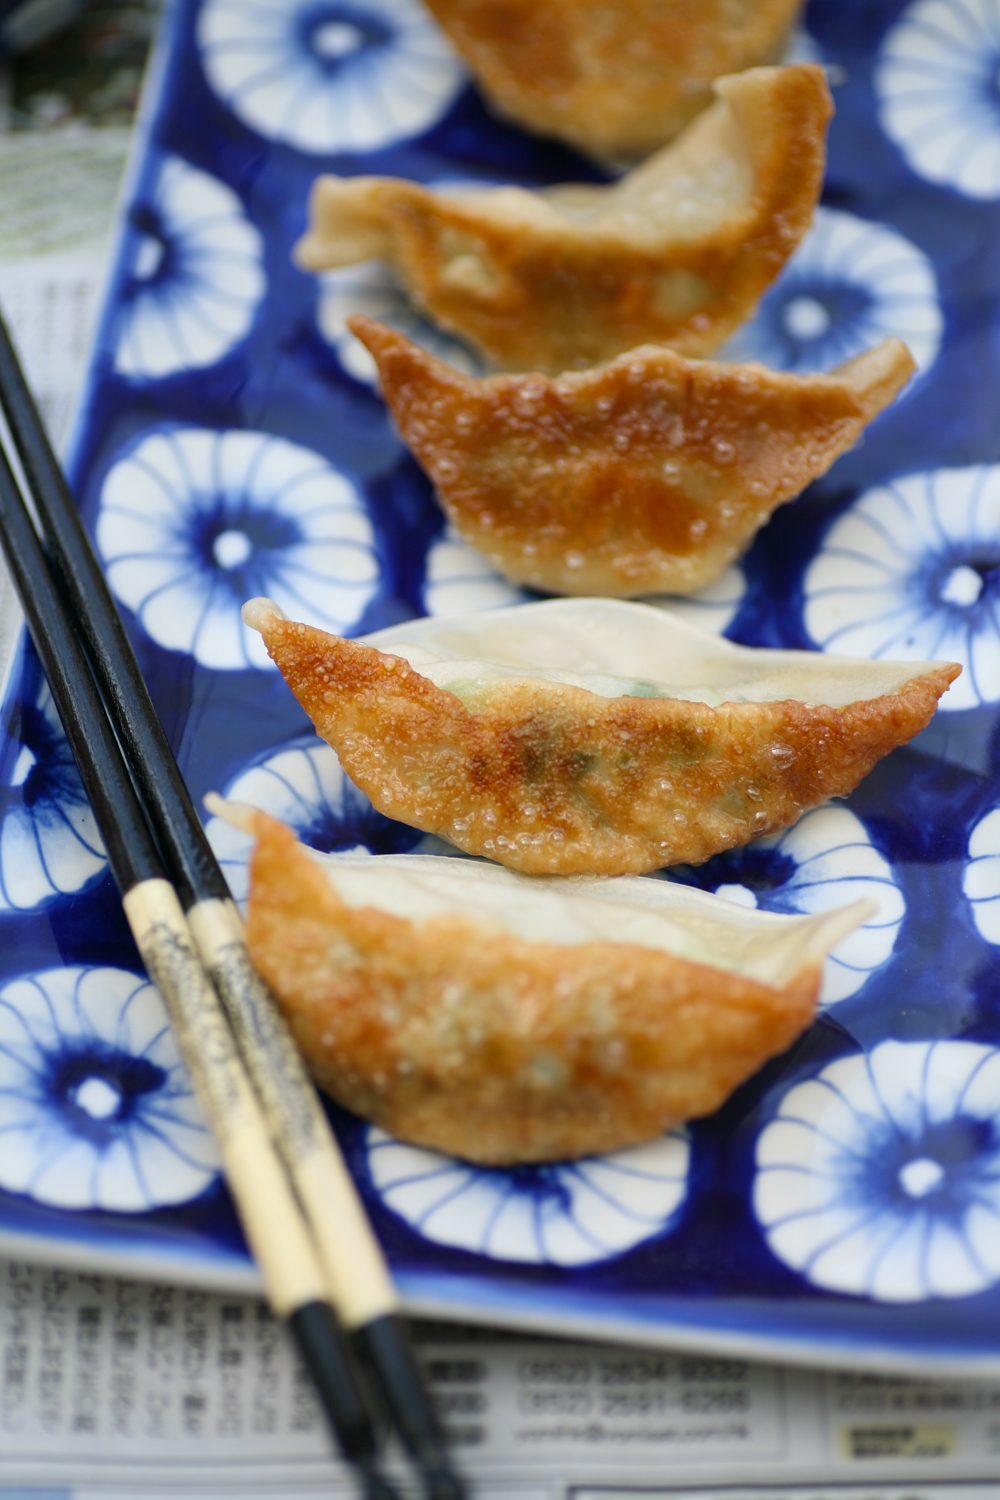
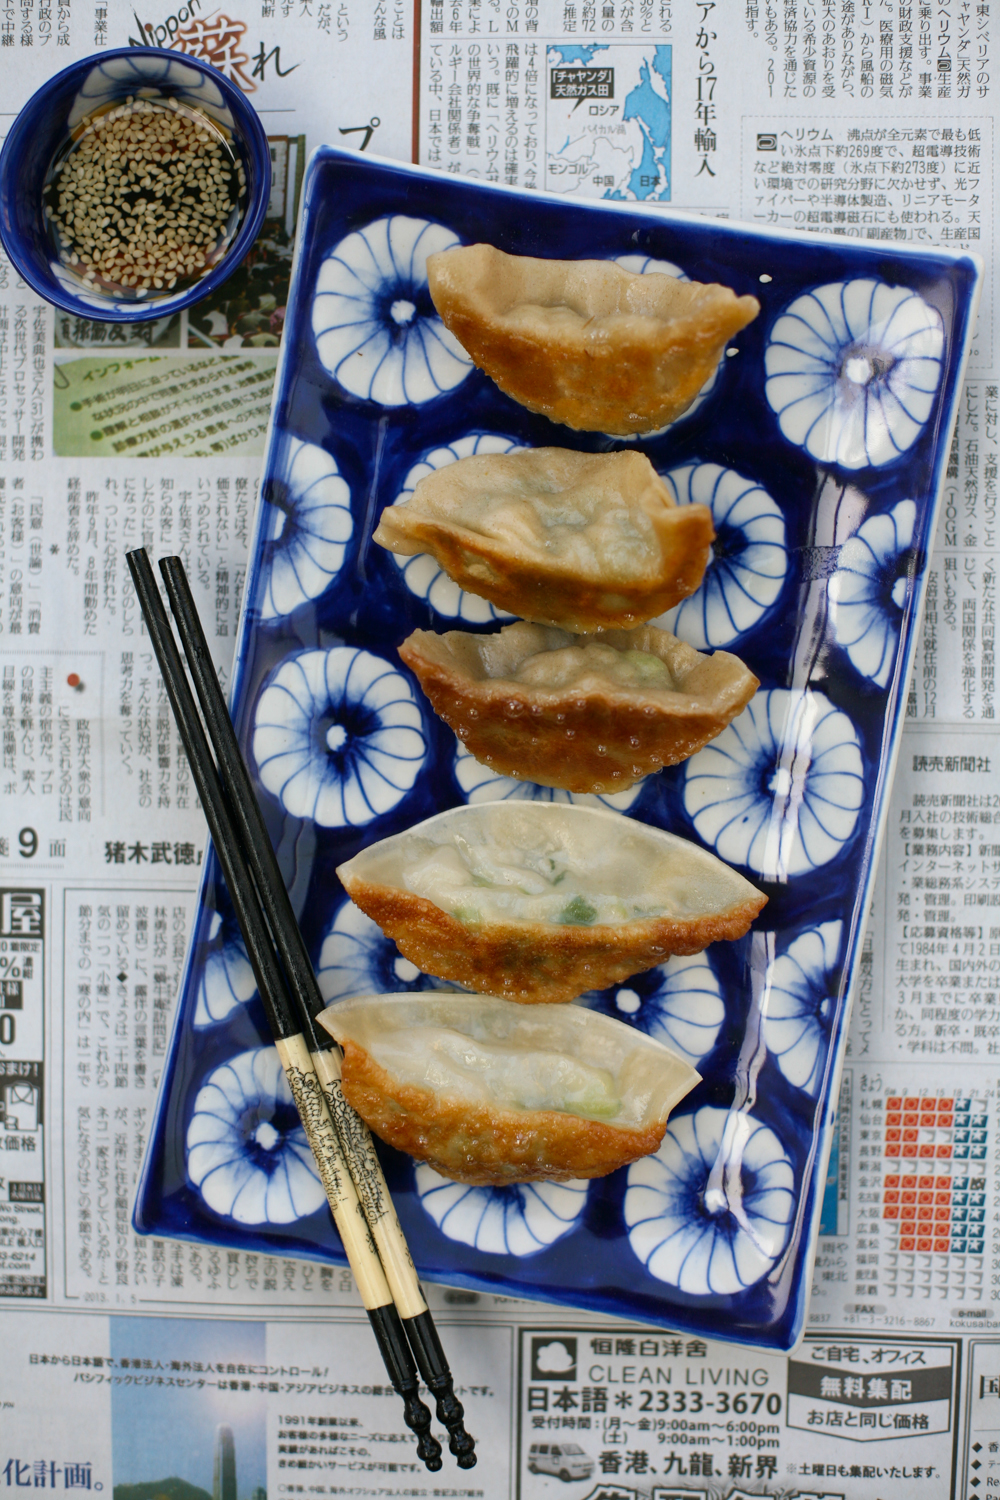
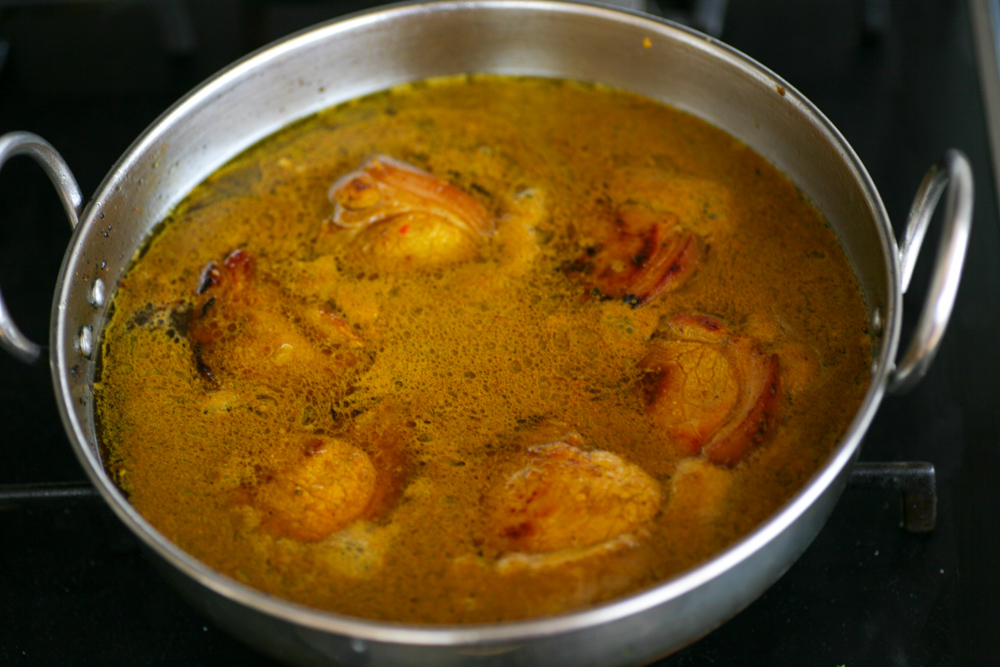
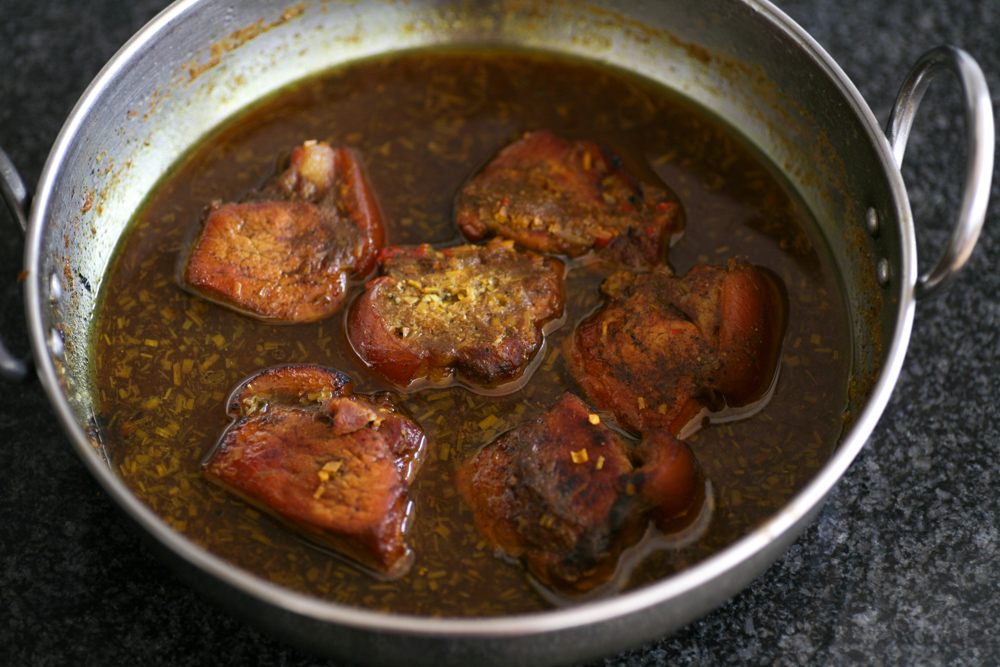
6. If you want to be really authentic then you could BBQ the meats but as it is not always BBQ weather here in the UK, I find the oven grill works equally well. Preheat the oven grill to 180 degrees (I use fan oven). Place the slices and patties on the grill rack and grill for just under 10 minutes (or until nicely turned brown) before turning and grilling for a further 10 minutes.
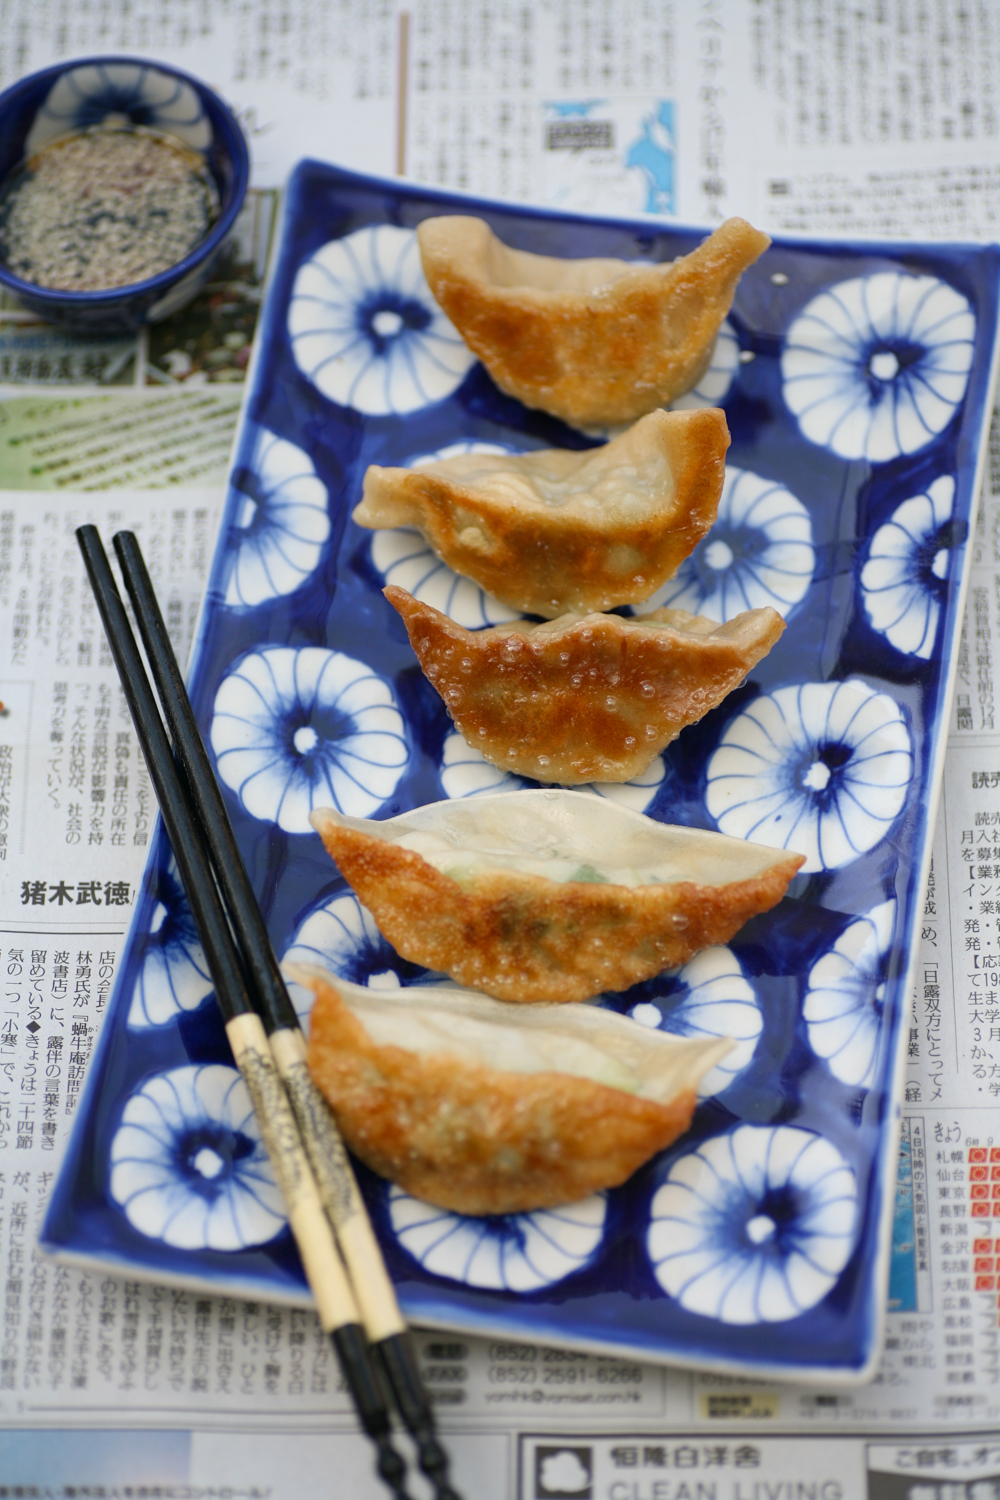
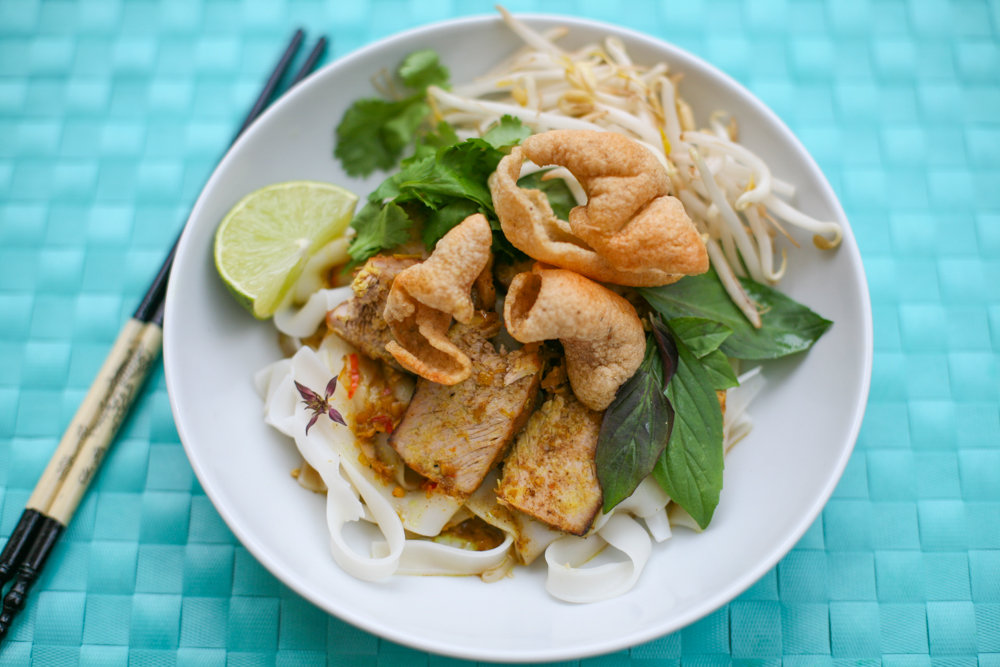
To serve: 

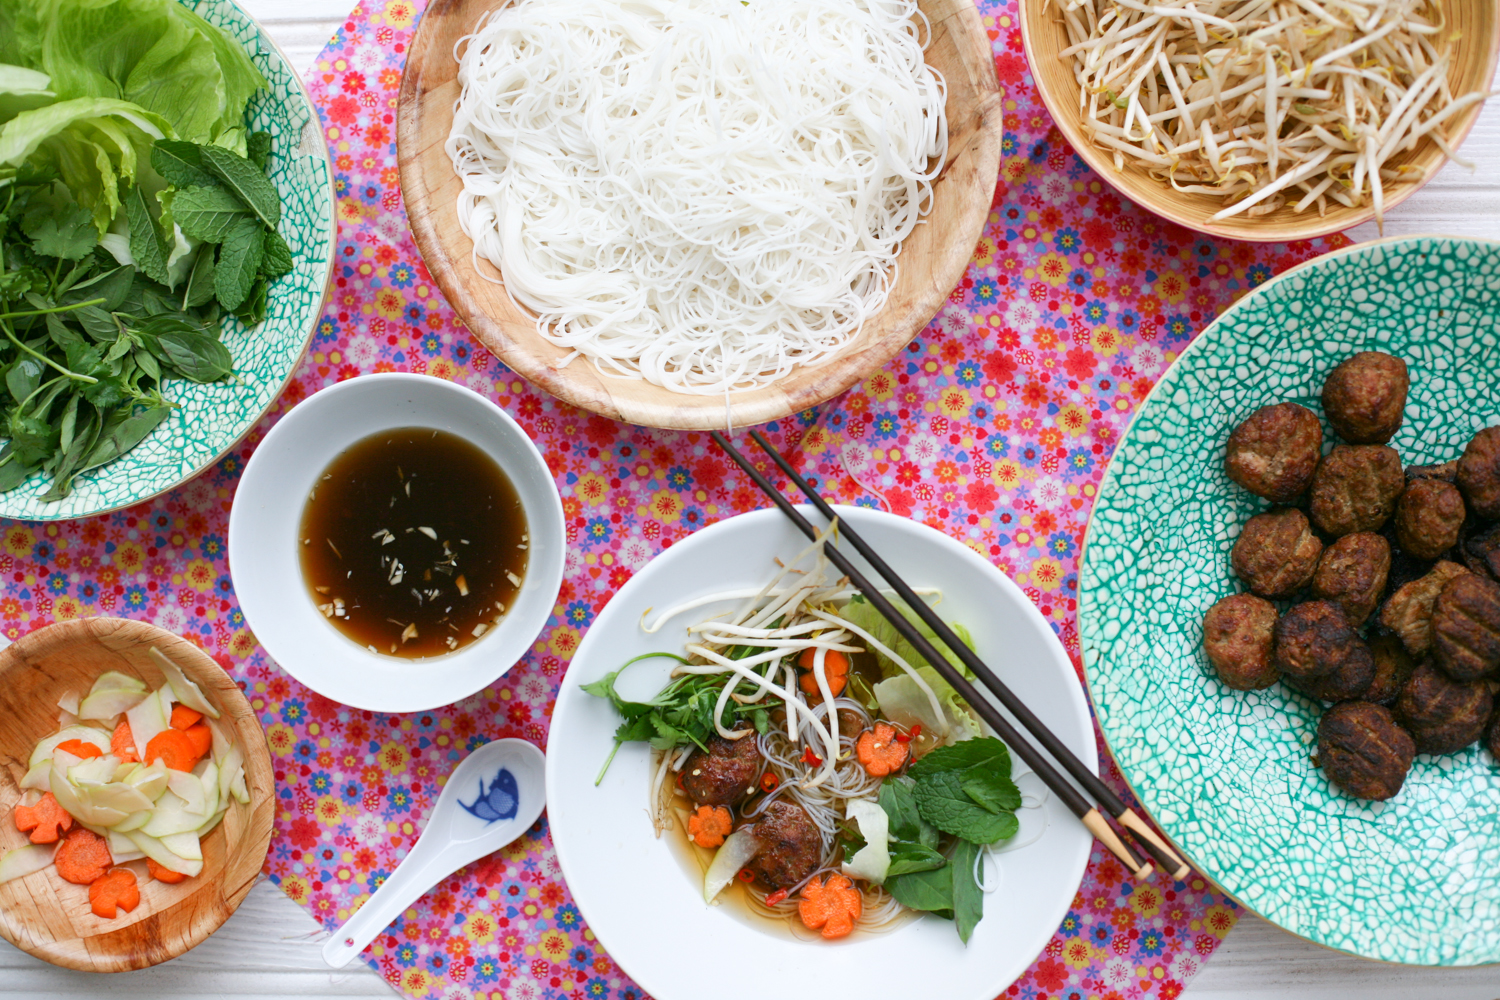
It’s a great dish for people to help themselves so place the herbs/lettuce/bean sprouts, dipping sauce, side of pickles and noodles in separate bowls. To heat up the noodles simple pour boiling water over them and drain them thoroughly! Then place the meat on a separate plate. Ideally serve in small little round bowls like those served in Hanoi (see photo above). My bowls are a little too large really so aim for a small bowl if possible. Guests pour a little dipping sauce in their bowl followed by a couple of slices of pork and a couple of pork patties and  pickles. Then you dip a bit of vermicelli and fresh herbs/lettuce/bean sprouts into the bowl and then eat. The flavours and textures will sing to you and you will be finishing off bowls of the dish before you know it. If you run out of dipping sauce it is easy to prepare a fresh batch. Both my hosts in Hanoi did not finish off the sauce as it is sweet, although I couldn’t resist finishing off every last mouthful.


Pasta Pasta Pasta at La Cucina Caldesi Cooking School

IMG_5915

“I am not a glutton – I am an explorer of food”
― Erma Bombeck

Last week I booked myself onto the full day pasta course at La Cucina Caldesi cooking school, which is attached to the Italian restaurant, with the same name, on Marylebone Lane in central London. I was keen to learn from an Italian pro on the various skills and techniques required to make different types of pasta and gnocchi and the sauces that accompany them.

IMG_5920

Cooking courses are always very good fun, not least because you are thrown together with a diverse bunch of kindred fellow foodies who are all eager and receptive to learn. As well as getting to cook a number of dishes together you also get to feast on them over a long lunch with a glass or two of wine.  The ringmaster for the day was the formidable Stefano who tells things straight and does not suffer fools….just don’t mention the ‘pepper lady’ to him, but clearly is a warm hearted Italian from Parma – well via Lewisham, with a good sense of humour.

The workshop included a lengthy list of recipes ranging from green fettuccine with rabbit ragu to potato gnocchi with tomato, sausage and fennel seed ragu, scialatielli – fresh pasta ribbons with herbs and parmesan, cannelloni, ravioli, gluten free pasta, spinach pasta, clams with chilli, garlic, white wine and ribbons pasta and that glorious spaghetti alla Puttanesca, which is a tomato sauce filled with olives, capers, anchovies, garlic and herbs.

From the word go Stefano set a good pace as we had a lot of ground to cover. First we discussed sauces and he showed us how to make a range of good old honest tomato sauces. The class discovered that we all use too little salt and not enough extra virgin olive oil (has to be extra virgin folks there is no going back now) but once we’d ironed out these failings we all stepped up to the plate and were more liberal with both ingredients.

IMG_5981

Making gnocchi was surprisingly very straightforward or perhaps it was the case that Eric, our chosen classmate, made it look easy, to bind the potato, ’00’ flour, egg, salt and pepper. After a large dough ball was created it was separated for the group so that we could all have some dough to work with and create the gnocchi itself. Once the dough is made, it takes a very short time to prepare and then cook them as they only require a couple of minutes in boiling water. Thankfully we had a tasty sausage, tomato and fennel seed ragu ready to incorporate with the gnocchi so that we could sit down and enjoy our hard labour.

IMG_5984

Something that I for one am guilty of is that quite often I serve a pasta dish at home and then I place the sauce on top. This one act alone gives the game away that I am not a genuine Italian mamma, although the fact that I don’t look the slightest bit Italian I guess doesn’t help! Italian pasta dishes are mixed together with the sauce before they hit the plate, so that when the dish comes to the table the pasta and the sauce are already the best of friends.

IMG_5999

We all got very stuck into making the pasta ribbons. Stefano taught us a nifty little trick to prepare them, which I have been practicing at home ever since. In a nutshell: roll out some pasta and then feeder through all the settings on your pasta machine. Make sure you scatter a good helping of flour underneath as well as on top of the pasta and cut into 40cm pieces. Leave to dry out for a couple of minutes before placing your pasta rectangle horizontally in front of you and folding in each end, making sure to do two, three or four folds each end before they almost reach each other in the centre. Then cut through the pasta vertically leaving a finger size between the next cut. Then slip the knife under the middle of the pasta running horizontally and then lift and voila your pasta should look like the one above and below. It was a very satisfying action to achieve.

The ravioli was also very enjoyable to make. So much so I made more when I got home for my dinner guest and then the following day to feed the girls. The ones I made at home I filled with ricotta, parmesan, chives and pink peppercorns. You can get so creative with the fillings that I am looking forward to experimenting over the coming months.

After almost 6 hours on our feet – bar some time to sit down and enjoy the food – exhausted and very full indeed we all bid our farewells and dispersed into the metropolis clutching our goodie bags of leftover fresh pasta for us to use at home. The day flew by ever so quickly and I feel I took away some new skills. If you are thinking of going on a course at La Cucina Caldesi one recommendation would be eat a very light breakfast….you have been warned!


Potato gnocchi with a sausage, tomato and fennel seed ragu

A recipe I learned during the course at La Cucina Caldesi

Gnocchi

1kg floury potatoes (King Edward, Maris Piper or Desiree)

1 heaped tsp salt

sprinkling of black pepper

300g ’00’ flour

1 egg

Ragu

6 Italian pork sausages (if you live in the UK you can order on line from here or here)

6 tbsp extra virgin olive oil

2 garlic cloves, lightly crushed

1 onion (red or white), finely chopped

1 tbsp fennel seeds

2 bay leaves

125ml red wine

3 tbsp tomato puree

400g tin of whole Italian plum tomatoes

To make the ragu:

1. Remove the sausages from their casings and chop up the meat using your hands.

2.Heat up the olive oil in a frying pan over a medium heat and the garlic. After 2 minutes add the onion and seasoning and allow the onion to become translucent – this will take 5 minutes on a low/medium heat.

3. Throw in the fennel seeds and bay leaf and stir into the onions and garlic.

4. Add the sausage meat and fry for around 7 minutes or until cooked through. You will need to stir the meat regularly to stop it sticking.

5. Add the red wine and allow to reduce for a couple of minutes. Then add the tomato puree and tinned tomatoes and stir well.

6. Leave the ragu to gently simmer for 10-15 minutes allowing the flavour to work together.

To make the gnocchi:

1. Boil the potatoes in their skins in salted water until tender, which can take up to an hour.

2. Peel the potatoes whilst hot using a fork and sharp knife and then pass the potatoes through a food mill (see photo of the potato and gnocchi shots).

3. On a clean flat surface empty out the ground potatoes and add the flour, egg and seasoning and knead together into a dough.

4. On a lightly floured work surface roll the dough into a 2cm thick sausage shape and then cut into 2cm long pieces. Place in a tray which has been lightly scattered with semolina or flour.

5. As gnocchi freezes very well it is advisable to make double portions and freeze half. When you want to use again, cook from frozen and allow an extra minute or two cooking time.

6. Place the fresh gnocchi in a pan of boiled salted water. When they rise to the surface strain and place in a large bowl/plate ready for the sauce.

Place the cooked gnocchi in a large bowl and pour in the sauce and mix together gently with a spoon. Ladle into bowls/plates or into a large serving platter.

IMG_6055


Cau Lau – Hoi An Special Noodles with Marinated Pork

IMG_5745

This Vietnamese pork and noodle dish is wonderfully fragrant and tasty and very straightforward to put together. It is known as Cau Lau in Vietnam and is a speciality of the world heritage town of Hoi An. Cau Lau is a noodle that is made from rice and water – nothing new there I hear you say – but wait – the water is supposedly from a well in Hoi An. Into the collected well water the locals place the ash of the La Gai Leaf, which they burn. The water and ash are then left over night to rest and then it is this water that is then used to make the noodles, which gives them a light brown hue. As they are tricky to come by in London, I have replaced them with the rice ribbon noodles, but frankly you can use whichever noodle you have to hand.

So this is what you need:

IMG_5624

The only ingredient absent from this photo is ‘sweet basil’, which I managed to source before devouring the meal. It is not a absolutely necessary but definitely adds a delicate fragrant flavour if you are able to get hold of some.

IMG_5627

Place the chilli, turmeric, garlic and lemongrass into a mortar, as above and give it a good grind with your pestle. If you don’t have one simply use a bowl and the end of a rolling pin, works wonders!

IMG_5647

Then add the honey, soy sauce, five spice powder, salt and pepper to taste and you will end up with a marinade to pour over your pork loin.

IMG_5653

Keep the fat on the pork loin and cut into 6 pieces. Using your hands cover and mix the marinade over all the pieces and then leave the meat to marinade in your fridge for ideally a few hours or even overnight if you can.

IMG_5655

In a large, slightly deep, pan pour in some oil and bronze each piece of pork on both sides.

IMG_5663

Then add the marinade along with enough water to just cover the pork. Simmer and cover for around 45 minutes, by which time the pork will be tender and the sauce will have reduced by around half.

IMG_5667

Before serving remove the fat from the pork and discard and finely slice the pork. Follow the instructions for the noodles. For ribbon rice noodles I simmered them for around 5-7 minutes in boiling water and then strained them and ran them under cold water for a second. Whilst the rice noodles are cooking place a little oil in a pan and when it is hot add a handful of uncooked shrimp chips for 10 seconds, by which time they will puff up and curl.

IMG_5720

When serving place a good helping of noodles into a bowl followed by the sliced pork loin on top. Ladle a generous spoonful or two of the remaining marinade/sauce on top followed by a small handful of bean sprouts, coriander and sweet basil on the side. Lastly add the shrimp chips and a slice of lime. Serve hot and enjoy.

Cau Lau- Hoi An Special Noodles with Marinated Pork

Adapted from The Green Bamboo Cooking School recipe in Hoi An

serves 4

800g pork loin, cut into 6 pieces

small handful of bean sprouts per serving

small handful of uncooked prawn chips per serving

small handful of fresh coriander and sweet basil per serving

 1 packet of white rice ribbon noodles (see photo)

1 lime, quartered

Marinade

5 pieces of garlic, finely sliced

1 tsp ground turmeric

 2 lemongrass, finely chopped

2 chillies, finely chopped (remove seeds if you prefer less of a kick!)

2 tbsp of five spice powder

5 tbsp light soy sauce

2 tbsp honey

salt and pepper to taste

1. Using a pestle and mortar, or bowl and end of a rolling pin, crush the lemongrass, chilli, garlic and turmeric for a few minutes. Once the ingredients have broken down add the five spice powder, soy sauce and honey.

2. Place the pieces of pork loin (with fat on) in a bowl and cover with the marinade using your hands. Place cling film over the bowl and place in the fridge for at least an hour – you could leave over night if you have time.

3. Using a fairly deep pan, heat up a little oil and bronze both sides of the pork loin. Then pour in the marinade and add enough water to the pan so that the pork loins are just covered. Simmer for 45 minutes at which point the sauce will have reduced by almost a half and the pork loin will be tender.

4. When the pork is cooking, in a separate pan add some oil and when it is hot place a small handful of uncooked shrimp chips into the oil and cook for 10-15 seconds, by which time the chips will have puffed up and lightened in colour. They burn really quickly so don’t take your eyes off them during this part. Place to one side on some kitchen roll. Repeat until you have enough to put a few on each serving.

5. Heat up some boiling water and add the rice noodles for the time specified on the packet – which is usually around 5-7 minutes. Strain and run under a cold tap briefly and separate into each bowl.

6. Using a spatula take the pork loin out of the sauce, remove the fat and slice thinly. Place the pork slices onto the noodles and add a ladle of the sauce on top of the pork and noodles. Add a small handful of bean sprouts, coriander, sweet basil and shrimp chips to the bowl along with a wedge of fresh lime.