Rhubarb and Ginger Jam

Last year when I attended the Ballymaloe Food and Drink Literary Festival one of the first things I did upon arriving, was to take myself to their beautiful living room and order tea and scones – as you do!  Needless to say it set the tone for the whole weekend, but one very lasting memory was that they served their scones and clotted cream not with strawberry or raspberry jam, BUT with rhubarb and ginger jam. It tasted sublime and I made a mental note to try making some at some point back at home.

Now ok it’s taken me a year but I got there and it tastes great so was keen to share it with you. My mother celebrated her birthday the other day and invited some friends over for tea. My youngest daughter and I made cakes (an elderflower and lemon drizzle, in honour of the recent royal wedding and a carrot cake) and scones and some mushroom tartlets with sour cream and parsley. My eldest daughter baked her legendary chocolate cake and my father made a wonderful Victoria sponge and scones with raisins.

As a side note, scones you can make ahead as they are great to freeze – I made around a 100 for my brothers wedding tea – the recipe is here and it works really well. So whilst strawberry and raspberry jam were on offer for the traditionalists, my rhubarb and ginger jam tempted those who wished to try something new and exciting. Hope you like it too.

Strawberry jam (left) my Rhubarb and Ginger jam (right)         Mama


Rhubarb and Ginger Jam

1 kg of pink rhubarb, washed and cut into 2cm pieces

1kg of jam sugar

50g stem ginger

1 lemon, zest and juice

4cm fresh ginger, peeled and finely grated


Before you begin you will want to clean and sterilise the jars that you are planning on using.

  1. Place all the ingredients into a large plastic bowl, stir thoroughly and then cover and leave to one side for a couple of hours, stir a couple of times over this period,  so that the sugar dissolves and the flavours all harmonise together.
  2. Place a plate into the freezer.
  3. Use a large stainless steel pot – you do not need a preserving pan – and pour all the ingredients from the bowl into the pan. Place on a medium heat and stir so that the rhubarb tenderises and a setting point is reached. This will take no longer than 15 minutes.
  4. To test for setting point, simply remove the plate from the freezer and spoon a little jam onto the plate. Within a minute the jam will have little wrinkles if you move it with your finger. If it is still too runny, leave it to cook a little longer and try again.
  5. If setting point has been reached, remove from the heat and leave for a couple of minutes before pouring into the sterilised jars. Seal immediately and label. I find this easy fill funnel great for jam and chutney making.


SaveSave

SaveSave

SaveSave


Homemade Donuts

It’s been a whirlwind of half term activities these past couple of weeks and it has only been today that all of mine have returned to school. So apologies that my blog posting has been rather tardy. I thought it would be fun however to show you one of the activities we all got involved in over half term. A rainy day a while back we all made bagels – see here  so this time I thought donuts would be equally satisfying to make.

There is something about making your own that makes them so much more satisfying that store bought. The icing could certainly have been prettier – I think we probably iced when they were still a little warm – but I think the homemade/rustic look gives them an appealing edge don’t you think?

This recipe made us around 16 or so, but it kind of depends on how large your cutter is. They are irresistible light and fluffy to eat and the perfect teatime extravagance .

donuts

300ml whole milk

7g instant quick rise yeast

2 eggs

115g unsalted butter, melted and cooled

50g granulated sugar

pinch of salt

540g bread flour

sunflower oil (for frying)

glaze

icing sugar

milk

salt

sprinkles of your choosing

  1. Warm the milk in a pan and then place in a bowl along with the yeast and give a stir. Leave to rest for 15 minutes, by which time foam should have formed on the top.
  2. Either by hand or using a hand whisk beat together the eggs, butter, yeast/milk mixture, sugar and salt.
  3. Add the flour little by little until it has all been absorbed into the mixture. Cover and leave to rest in a warm room for an hour so that the dough has doubled in size.
  4. Sprinkle flour over a clean surface and turn out the risen dough. Gently roll it out to around 1/2 inch thickness and using a round cutter (3 inch diameter works well), cut out the circles and using a smaller cutter make the central hole. Place each donut onto a square of baking parchment. Once they have all been cut out cover again for a further 40 minutes to allow them to rise.
  5. Heat the oil in a deep pan and when it is hot – test by dropping in a little dough crumb and if it fizzles and rises to the top it is ready – then place 3 or 4 in a pan at once. Leave for around 45 seconds and then turn and leave for a further 30 seconds or until golden brown. Remove with a slotted spoon and place on a cooling rack with paper towels. Repeat until they have all been prepared.

When the donuts have cooled you need to make the glazes.

  1. In a large bowl add icing sugar, a little milk and a pinch of salt. Add the milk gradually so that you get the right consistency. If you want a specific colour icing sugar add the colouring at this stage.
  2. On a side plate get your sprinkles ready.
  3. Gently dip one side of the donut in the icing glaze followed by the sprinkles and return to the cooling rack. Repeat.
  4. Eat immediately – although they do still taste good the following day, they taste the best on the day of preparation.

SaveSave

SaveSave

SaveSave

SaveSave


Double Ginger Cake

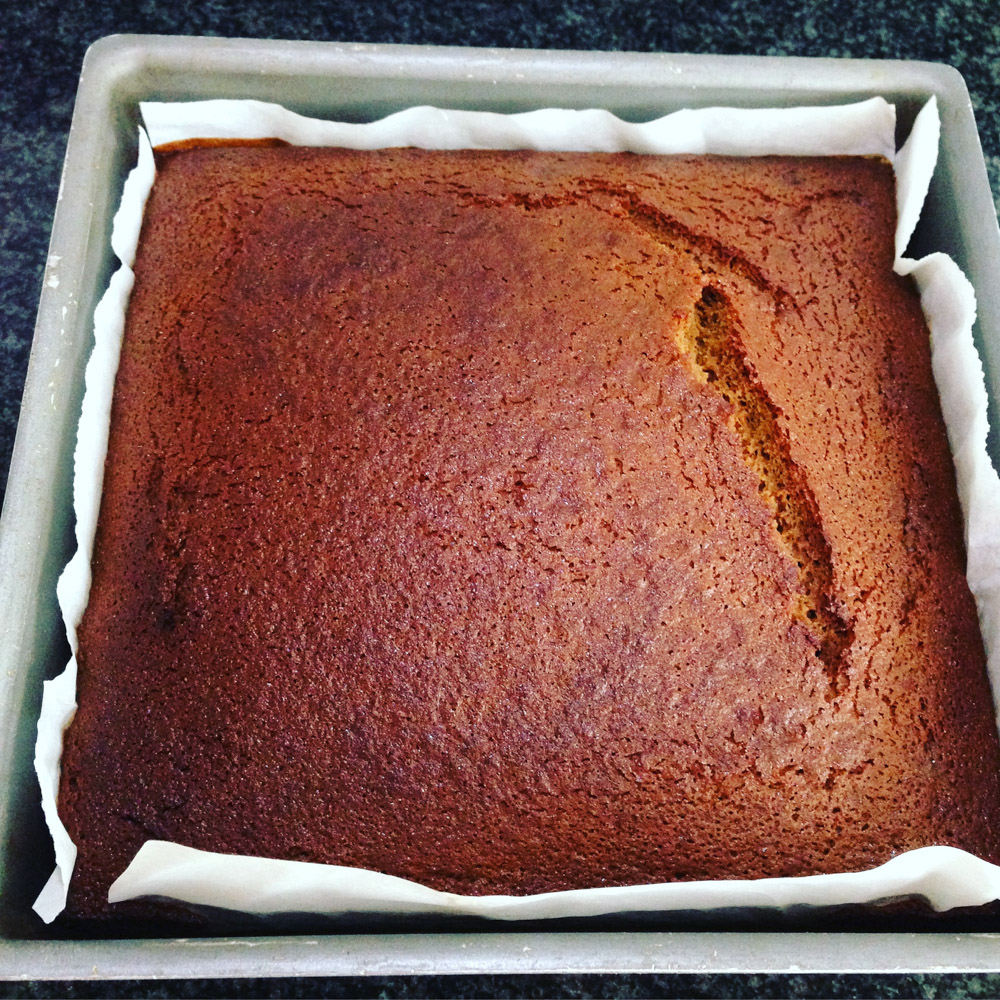
img_3641

I am not a big baker. I leave that to the precision experts like my father. My kind of cooking tends to gravitate to more savoury, spiced and packed with flavour. That said I do like an uncomplicated sweet recipe or in this case a double ginger cake. I don’t have a kitchen aid or anything fancy, instead when I bake a cake I like to do everything in a bowl, ideally by hand or a hand whisk if necessary. I was browsing through Nigel Slater’s ‘The Kitchen Diaries’ the other day – great book if you haven’t got a copy, otherwise one for the christmas list – and his double ginger cake stood out for three reasons. One it was ginger – I love ginger, two – it looked quick and easy to make and three – it did not require any specialist equipment.

img_3636

My father’s belated birthday family lunch was the ideal excuse to try out Nigel’s recipe. After a long lingering lunch, cooked by my mother – parsnip soup for starters (above), followed by roast pork with fennel, finished off with blackberry and apple crumble, we donned winter coats and wellies and headed for the woods for a walk at dusk.

img_3642

Upon returning the feasting continued with my ginger cake (and a coffee cake that the birthday boy had made himself – just in case no one else had made him a cake) and tea. It got the thumbs up all round. The sponge was moist and deliciously gingery and as there was no sight of icing, it was not too saccharine sweet.

img_3644

Double Ginger Cake

Adapted from Nigel Slater’s Double Ginger Cake from ‘The Kitchen Diaries’ 

Serves 10+

250g self-raising flour

1 level tsp bicarbonate of soda

2 tsp ground ginger powder

halt a tsp cinnamon powder

pinch of salt

200g golden syrup

2 tbsp syrup from the stem ginger jar

125g unsalted butter

3 lumps (about 53g) stem ginger in syrup, finely diced

2 tbsp sultanas (optional)

125g dark muscovado sugar

2 eggs

240ml milk

I used a 25cmx25cm tin (Nigel used one slightly smaller). I also think it would work well in a loaf tin.

  1. Line the tin with baking parchment and place to one side.
  2. Preheat the oven to 180 degrees.
  3. Sift the flour, ginger powder, cinnamon, bicarbonate of soda and salt into a large bowl and place to one side.
  4. In a pan heat the golden and ginger syrup along with the butter, keeping it on a low heat.
  5. Add the finely diced ginger, sultanas (if using) and sugar to the pan. Stir allowing the sugar to dissolve completely for a couple of minutes before gently pouring it into the bowl with the flour and stirring all together so that the flour has been absorbed into the hot syrupy butter.
  6. In a small bowl break the eggs and using a fork gently beat them. Add to the milk before adding that into the bowl with the mixture.
  7. Pour into the lined baking tin and place in the oven for 35 minutes. You want to be able to able to insert a skewer and for it to come out clean.

Leave in the tin to cool completely, unless you are wanting to eat immediately that is. You can wrap it in foil and eat over the next few days – Nigel mentions allowing it to mature for a day or two will enhance the flavour further. Thankfully there are leftovers so I will be having a square every day for the next few days.

img_3643


Parmesan, Chive and Truffle Madeleines and a Paris Snapshot

IMG_2373

Despite Paris being so close to London – three hours on the Eurostar – we had never been with big A and little Z. Mr B and I had been on numerous occasions in the past both for work and pleasure, but we were long overdue a visit with all the family. Good friends had recently moved there – well to the pretty town of Versailles to be exact, so the decision to visit was very easy.

IMG_9202

We decided to show our girls (aged 10 and 6) a snapshot of Paris so that they could soak up the atmosphere and see some of the sights; the most famous of all being the Eiffel Tower. I had always admired it from afar but never ventured to the top. A flurry of light snow began to fall, despite the pretty blossom making an appearance, and we climbed (well Mr B and big A did – Little Z and I took the lift) right to the top. The view was spectacular, despite it being rather overcast. As we made our way down in the lift we were told that we could get out on the first floor if we wanted the ice rink – pretty impressive I thought to have a rink actually on the tower.

IMG_9242

After a stroll around the Louvre we made our way to a charming and very buzzy French restaurant called Bistrot Victoires on 6 rue Vrillère – about a 10 minute walk from the Louvre. Here you can indulge in traditional gallic fare accompanied by a bottle of red wine and some great tasting baguette to munch on whilst you wait for your food. The restaurant is famous for its steak frites that comes with burning thyme on top. IMG_9210

The smell, pomp and visual spectacle of it all is very memorable so I would urge you to order it if you go. We had a portion each and I must say I think it was the most tasty I have ever had.

IMG_9217

Here is a close up to make you hungry!

I rather loved their old till, which looks so much grander than the hand held card reading device that they use to day. Old and new sitting side by side. IMG_9240

We walked off our lunch with a visit to the wonderful Musee D’Orsay which is housed in the former Gare D’Orsay, a Beaux-Arts railway station built between 1898 and 1900. A must if it’s your first time to Paris, and slightly more manageable than the Louvre in as far as size. Thursday nights are late opening so a nice thing to do before heading out to dinner perhaps.

IMG_9193

The following day we headed back into Paris – a very short 20 minute journey on the RER. I rather loved the old school look of this carriage that looked like it was a travelling library carriage  – how very civilised.

There is nothing quite like a crepe to kick start your day. The girls were thrilled with their nutella ones whilst Mr B and I went for the ham and cheese.

IMG_9263

Bellies full we headed to the spectacular French gothic cathedral of Notre Dame, which stood in all it’s glory in the cold, crisp February sunlight. The girls were familiar with this building owing to the fact that they have watched the  Disney movie ‘The Hunchback of Notre Dame’ more times than I care to remember. We walked off breakfast within its walls, marvelling at its grandeur and beauty.

IMG_9256

An absolute must if you are visiting Paris is Sainte-Chapelle, which is literally a stones throw away from Notre Dame. It was built by King Louis IX of France to house his collection of passion relics, including the Christ’s Crown of Thorns. You need to climb up the winding narrow staircase but once you’ve reached the top you will be rewarded with one of the most extensive 13th-century stained glass collection anywhere in the world. It is utterly breathtaking, especially when the sun is shining and reflecting through all the coloured glass in all it’s brilliance.

Another pit stop for food was required so we headed to A La Biche Au Bois on Avenue Ledru-Rollin, which offers hearty, honest French food away from the typical tourist trap restaurants.

IMG_9273

The staff at this restaurant were both jovial and charming and coupled with the fact that the food was great, it makes it a restaurant worth seeking out, and indeed booking as it gets packed.

Creme caramel or ile flottante anyone?IMG_9290

After all good lunches a walk is required so we sauntered over to my favourite and indeed oldest square in the whole of Paris…..Place de Vosges. After ambling around the square we decided to head north to Sacre Coeur in bohemian Montmartre. The sun was shining so we felt it was worth the effort to head there so we could admire the view of Paris and Sacre Coeur.

IMG_9307

The next few days we spent time relaxing in Versailles with our friends and visiting the famous Palace and grounds of the Versailles Palace. IMG_9337

If you ever find yourself in Versailles for the evening and want to splash out, the bar at the Trianon Palace Versailles is worth a visit as they serve delicious cocktails, but then again at €22 you would expect them to be pretty outstanding. If you are in town and want something more hip and low key on ambiance and price then I can recommend La Conserverie   a bar in the 2nd arrondissement. From the outside you probably wouldn’t notice it, but don’t be put off. For the brave who venture in you’ll find elegant, longing surroundings with a relaxed vibe. Needing a bite to eat then head to Restaurant Victor 101 bis, rue Lauriston in the 16th district of Paris. It has an old school French vibe, dishing up all the French classic with style and panache. IMG_2336

Back in Blighty I decided to continue with the French theme by rustling up some little french fancies known as ‘madeleines’. Small, bite size and wonderfully moist in the centre and a little crispy on the outside. They are best eaten straight from the oven. Deliciously warm. They often come in sweet flavours but work equally well savoury. I naturally gravitated towards making them savoury, although I think next time I will try cardamom ones. You can play around with the fillings by adding pancetta, sun-dried tomatoes, sage, rosemary or whatever takes your fancy.

IMG_2336

They take a matter of minutes to whisk together and then another 12-14 minute to cook in the oven. A perfect tea time treat.

Parmesan, Chive and Truffle Madeleines

2 eggs

50g parmesan, finely grated

100g plain flour, sifted

1/2 tsp baking powder

40ml truffle oil

3 tbsp butter, melted

2 tbsp chives, finely chopped

1 tsp salt

freshly ground black pepper

2 tbsp milk

  1. Preheat the oven to 180 degrees (if using fan or 200 if not).
  2. First blend the cheese and eggs using an electric whisk if you can (or by hand if you haven’t).
  3. Then add the flour, baking powder, salt and pepper.
  4. Now add the truffle oil, melted butter and chives.
  5. Finally add the milk and whisk so that it is smooth but still quite firm.
  6. Lightly grease the madeleine tray and add a heaped teaspoon of mixture to each compartment. Smooth the top where possible.
  7. Place in the oven for 12-14 minutes, or until bronzed on top. Use a tooth pick to see if it is done – it should come out nice and clean.

Eat immediately if possible whilst they are still warm with a cup of tea.

Note: instead of truffle oil you can use extra-virgin olive oil, chilli oil, basil oil. Experiment and see which you like. 

Paris Restaurants and Bars:

Bistrot Victoires – 6 rue Vrillère (R)

A La Biche Au Bois – 45 Avenue Ledru-Rollin (R)

Restaurant Victor – 101 bis, rue Lauriston (R)

Trianon Palace Versailles – 1 Boulevard de la Reine, Versailles (B)

La Conserverie Bar – 37 Rue du Sentier (B)

It was simply by chance that two of the restaurants I visited had part of my name in the title ;o)!

IMG_2369


Banana, Cinnamon and Nutmeg Loaf

IMG_9959

Having afternoon tea is very much a British thing to do. Granted we may not always sit down to tea and scones every afternoon, but given half the chance then we probably would. Copious amounts of tea is drunk throughout the day, but at tea time – around the hour of 4pm, a little sweet treat or savoury dainty might make an appearance if you are lucky.


IMG_9933

It wasn’t always the case. In fact it was Charles II wife, Catherine of Braganza from Portugal, who started the trend of tea drinking in the seventeenth century. From the English royal court it spread to London’s coffee houses and from there into the homes where civilised tea parties would take place.

IMG_9952


If you want a no fuss cake that is easy to whip up, moist and produces delicious baking smells when cooking then look no further. This banana, cinnamon and nutmeg loaf won’t win prizes for appearance in ‘The Great British Bake Off’ but what it lacks in appearance it makes up for in taste.


IMG_9941

So put on the kettle, pour yourself a cup of tea in your favourite fine bone china teacup and sit back and relax with a slice or two of this moist banana, cinnamon and nutmeg loaf.


Happy Days.


IMG_9955


Banana, Cinnamon and Nutmeg Loaf

2 eggs, beaten

90g butter

150g light Muscovado sugar

4 bananas, mashed

1/2 tsp cinnamon

1/4 tsp fresh grated nutmeg

250g self-raising flour

1. Preheat oven to 180 degrees.

2. In a large bowl mix the eggs, butter (which has been at room temperature) and sugar together and when it is smooth add the mashed banana, cinnamon, nutmeg and flour. Stir in throughly. I use a hand whisk but arm power works equally well if you do not have one.

3. Grease your non-stick loaf tin. I don’t tend to line my tin as I find that the loaf easily comes out of the tin when cooked.

4. Place in the oven for 45 minutes. It is done when you place a sharp knife into the centre of the cake and it comes out clean.

5. Place on a rack to cool slightly.

It is lovely to serve warm but equally lasts well for a few days.


Pecan Puffs

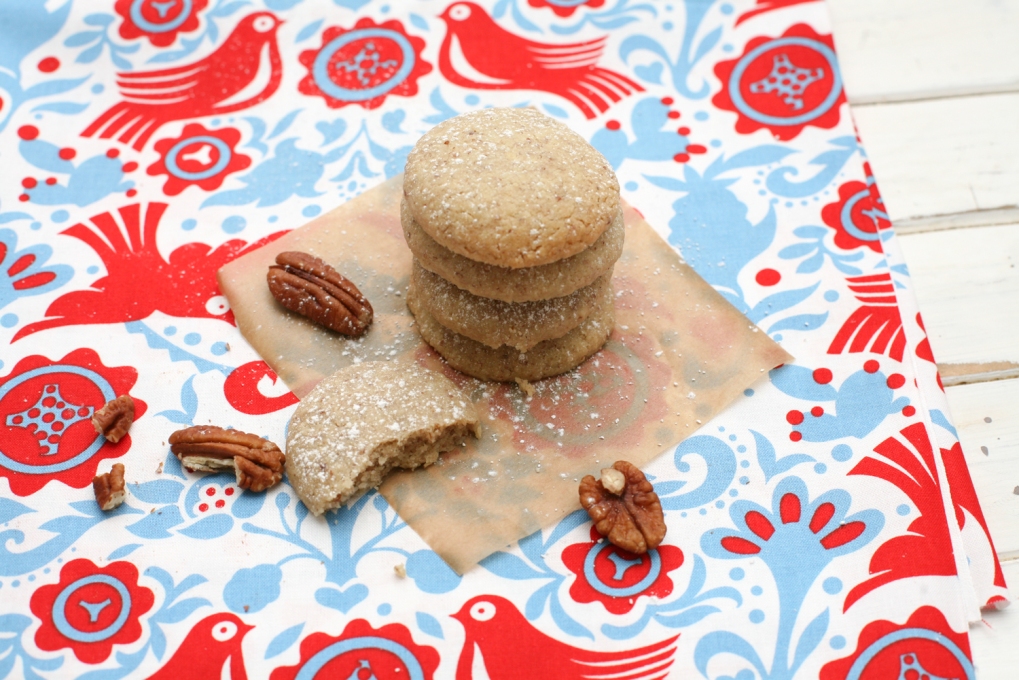
IMG_4052

When we arrived back from Hong Kong in the New Year we headed out to the countryside to stay with my parents in order to celebrate Christmas (part 2) with them, my siblings and their partners. The tree was down by this stage, twelfth night had long gone, but that aside my parents sweetly replicated the Christmas that they had had on December 25th again for us as we were back in the UK. Anyone passing by the house would have thought we had all gone completely mad as carols were playing and mulled wine was wafting through the house. We ate turkey, wore silly cracker hats and played parlour games. My mother went to town, as usual, on the food which we all greatly devoured.

It was whilst we were lazing away the hours that I stumbled across a little pot filled with the most delicious, crumbly biscuits I had ever eaten. They were completely heavenly as well as being very addictive and perfect to nibble away at whilst having a cup of tea (we English love our tea) by the fire in the late afternoon.

IMG_4043

It transpired that they had been sent from the US, lovingly made by a friend of my sister and her beau. Needless to say they did not last long as the whole family took a liking to them.

I urged my sister to track down the recipe so that I could try and make them myself. I had to do all the US conversions from cups to grams and somewhere along the line with my conversions they went wrong. They still tasted delicious but they were not as puff like as the originals as they were coming out of the oven a lot flatter.

IMG_4022

Finally after a few false starts I found the right balance of the ingredients and the delicious puffs returned. They are meant to be crumbly when you bite into them and certainly not the same texture as a biscuit. In as far as they are quick to devour they are also quick to make. Big A and Little Z love to get involved and prepare them with me as they are very straightforward to make.

I rather like the idea of putting them in little packets tied with a bow and given to friends and loved ones. How impressed will the receivers of such fancies be when they taste your pecan puffs. Trust me they will be begging you for the recipe. Send them this way of course. x

IMG_4034

Pecan Puffs

Inspired by Lainy in the US

Makes around 30 (depending on size)

240g unsalted butter, cubed at room temperature

120g pecan nuts, finely ground

240g plain flour, sieved

50g icing sugar

1 tsp salt

1 tsp vanilla essence

1. Finely grind the pecan nuts in a blender and place to one side.

2. Line a couple of baking trays with baking parchment and again place to one side.

3. In a large bowl add the sieved flour, icing sugar and salt.

4. Add the cubed butter to the flour bowl and using your hands begin to mix the ingredients together, softening the butter into the flour as you do so. Once it all begins to come together, add the vanilla essence and the ground pecan nuts.

5. Once all the ingredients have been thoroughly mixed together form a large ball and break off small pieces, a little smaller than a hens egg, but bigger than a quails, and roll in the palm of your hands into a ball and then slightly flatten, but not so much that it is completely flat.

6. Place each pecan puff on to a baking tray so that they are well spread out. I tend to leave a couple of inches around each puff . Whilst you are preparing the puffs preheat the oven to 160 degrees centigrade.

7. Place in the oven for 16 minutes and then leave to firm up before placing them on the cooling rack. When they are completely cool sift icing sugar over the top. Voila your pecan puff is ready to be devoured.


Rainbow Layer Cake

IMG_6263

I really hadn’t planned on making a blog post out of a rainbow layer cake, hence the rather limited, and not particularly styled photos, but the outcome was somewhat unexpected in that it looked and tasted rather good and definitely had the appropriate wow factor (from a child’s perspective!). I have never really been a big cake maker, or eater of cake for that matter, largely due to the fact that I don’t have a sweet tooth and by and large I tend to cook what I like eating – mainly savoury dishes that have herbs and spices in them of course!

However, when it comes to children’s celebrations a cake is very much required and so I tend to step up (well actually perhaps that is a little lie as I sometimes pass the buck to my mother, father, or cousin who are far better cake makers than me!) and usually opt for a Victoria sponge, chocolate or banana and walnut cake or maybe even some little cupcakes.

This time however, I thought I would give myself a bit of a challenge and try making a rainbow layer cake. Hey even if the cake were to taste bad, the looks alone would make up for it – well that’s kind of what I was thinking anyway.

Thankfully the cake ticked all the boxes and was surprisingly fun to make. It really felt like creating a cake from an artists colour palate.  I was also intrigued by the fact the recipe required soya milk. I don’t know why but I have never really had the need to drink soya milk, what with being a huge cows milk drinker (I need it when eating very spicy food). The taste of soya milk, however, completely surprised me as it was deliciously sweet and a genuinely lovely drink in its own right. I spotted soya milk with hazelnuts in the shops so will definitely be picking up a carton of that very soon.

So when you have a big celebration to prepare for try making this cake to wow the crowds, it won’t let you down.

IMG_6255

This cake had been slightly ‘child’ handled by the time this photo was taken, however, I assure you it looked a lot more pristine to begin with.

So here is what you need to do.

Rainbow Layer Cake

Adapted from Kitchen Tested

 (Melinda has some great step-by-step photos so check out her blog to get more of an idea)

325g plain flour

4 tsp baking powder

pinch of salt

225g margarine (I always use Stork for cake baking)

475g caster sugar

365 ml soya milk

5 egg whites

2 tsp vanilla extract

purple, blue, green, yellow, orange and red gel food colour (I use Dr Oetker’s food colours)

approx 550g  cream cheese style icing (if you are not making your own and want to save time Betty Crocker’s tastes good – 2 pots should be enough, but it depends on how much icing you like in and on your cake)

vegetable spray/oil

1. Preheat your oven(s) to 180 degrees. If you have just one you will need to cook the sponges in batches but this will not take long as they are quick to cook!

2. Line six 9 inch (round) baking tins with baking parchment. Spray or rub in a little oil into each tin so that the sponge will easily come away from the parchment after cooking.

3. Ideally mix the margarine and sugar together in an electric mixer if you have one, or by hand, to form a cream.

4. Gradually add the egg whites to the cream along with the vanilla extract.

5. In a separate bowl mix the sieved flour, baking powder and salt and then slowly add the flour mixture and the soya milk to the margarine cream, alternating as you do so. (eg: flour, milk, flour, milk etc). The mixture will seem fairly runny at this stage but do not worry as it will firm up nicely when cooking.

6. Pour the mixture equally into six individual bowls and then add one food colour per bowl. I tend to use the whole gel packet per bowl so as to get a bright, vivid colour. Mix in thoroughly and pour into the six baking tins.

7. Place in the oven for 15 minutes and then leave to cool on a wire rack before gently turning out and removing the baking parchment.

8. The purple sponge needs to be at the bottom. Gently smooth the cream cheese style icing on its surface before adding the blue sponge and repeat by adding the cream cheese style icing. Then add the green, yellow, orange and red, repeating the same process as you do so. It does not have to be particularly neat as you will be covering up with the outer rim icing! Once all the sponges are in place continue to evenly spread the icing over the sides of the sponges so that no sponge is showing. You could make this outer icing any colour you fancy, but I thought white worked well and showed off the rainbow effect within perfectly.

Sprinkle with edible glitter or hundreds and thousands and serve to your guests.


Mary’s Granola Bars

Mary McCartney has been gracing the pages recently of certain magazines here in the UK, namely The Saturday FT Magazine (April 21st 2012) and the June issue of ‘Red’ Magazine. Known for her talent behind the camera it was a revelation, albeit a positive one, that she has just produced a cook book called ‘Food‘ that she wrote and photographed. For those who are unaware, the McCartney clan are passionate vegetarians and Mary has clearly channelled her love of all things vegetarian into her own tome. Between the two magazines I now have just under 20 of her recipes, which should appeal to a wide audience in that they look straight forward to execute and appetising enough to warrant an attempt at making.

I thought that I would follow her take on the granola bar, which to all intense and purpose is a glorified healthy flapjack right? I am always thinking of little snacks to feed Big A and Little Z when I collect Big A from school, so thought Mary’s granola bar idea would be perfect to give them to fill the gap before supper.  I am also a huge fan of agave syrup, (which I also used in this recipe) which was right at the top of her ingredients list.

The recipe is so incredibly easy that it would be perfect for Big A (whose 6) to cook on her own, with a little overseeing from Mama of course! I followed the recipe religiously, but I think I will get creative next time and change some of the ingredients around. For example I think the bars would also be delicious with pecan nuts, hazelnuts, dates, dried cranberries, coconut. If you get carried away with some new ingredients that work do let me know and maybe next time I’ll follow your suggestion.

Granola Bars

Sourced from Mary McCartney’s recipes in The Saturday FT Magazine, April 21st 2012

Makes 12-14 slices

200ml agave syrup

50g butter

4 tbs vegetable oil

1/4 ground cinnamon

1 tbs vanilla extract

200g porridge oats

80g cornflakes

100g almonds, coarsely chopped

100g dried apricots, coarsely chopped

100g raisins or sultanas

2 tbs sunflower seeds

2 tbs pumpkin seeds

 1. Line a baking tray with baking parchment. I used a 25cm x 25cm tray. Preheat the oven to 180 degrees.

2. Heat the agave syrup in a pan for a few minutes and then add the  vegetable oil and butter. Take it off as the butter melts.

3. Add all the ingredients to the syrup mixture and gently fold in together so that all the ingredients are evenly covered in the syrup.

4. Transfer the contents of the pan to the baking tray and firmly press down evenly.

5. Bake in the oven for 15-20 minutes.

6. Take tray out of oven and leave to cool. When it is cool, cut the granola into square, rectangles – whatever shape takes your fancy! The baking parchment will come away easily once the granola has cooled.

7. Store in an air tight container.


Birthday Celebrations


It was big A’s 6th birthday on Friday. I can’t believe the years have flashed by so fast. It feels like only yesterday that she was born. Without doubt the BEST day of my entire life (and the birth of little Z, of course). It changes your life so dramatically and the amount of love that pours from you to your offspring brings an indescribable warmth and happiness. Its sounds very cheesy I know, but I promise its true.  Even friends who swore they weren’t at all maternal have their first baby and then BOOM, it hits them like a bolt out of the blue and they too become completely and utterly smitten for their newborn. Our bodies work in mysterious ways. I have very fond memories of the day both my daughters were born.

As is tradition at my daughter’s school, the birthday boy or girl takes in cakes for the class to share after lunch. So yesterday I baked away using adorable Moomin cupcake cases designed and created by my favourite cake case accessory company Kala:s Farm, who are based in Sweden.

To hear how I came across this fabulous little company to begin with click here.

Anyway according to big A the chocolate cakes, with a simple butter icing covered in lilac, gold, pink and green edible glitter, were a huge hit and all her friends loved the moomin cake cases.

Chocolate Cupcakes with Butter Icing 

serves 24 hungry children 

180 degrees for 25 minutes

Sponge

225g butter/soft margarine

225g caster sugar

225g self raising flour

4 eggs

2 tsp baking powder

2 tbsp cocoa powder

3 tbsp of boiling water

Butter Icing

225g butter

35g cocoa powder

375g icing sugar, sifted

little milk

1. Mix the butter (I use half butter half soft margarine), caster sugar, self raising flour, baking powder and eggs together in a blender. Equally you can do this manually in a large bowl with a wooden spoon.

2. Put the boiling water with the cocoa powder and stir until it is no longer lumpy. Leave to cool and then add to the sponge mix.

3. Place two teaspoons of cake mixture into each cupcake case, if you are using the same size cases as pictured here.

4. Place on a tray in a preheated oven at 180 degrees for 25 minutes. When they are cooked leave to cool completely before icing.

5. To make the butter icing literally mix all the ingredients together except the milk, which is best to add in gradually to reach the consistency you require. You will find that you will need very little – possibly one or two teaspoons.

6. Sprinkle with edible glitter and serve to an audience of delighted children.


Pastry Heaven

P8093022

Every so often an invitation turns up that you simply cannot refuse.  I was very fortunate to receive one of these golden tickets recently. It involved what promised to be, and indeed was, a truly memorable occasion, on a balmy September afternoon at the stunning location that is the  French Ambassador’s residence in London.

The event was a ‘Charity Champagne Afternoon Tea’, with all the money raised from the tickets and raffle going to support the  Ashinaga Scholarship in Japan, a wonderful cause that supports children who lost their parents in the earthquake and tsunami with their studies.

The tea was no ordinary tea however. It was more ‘Alice in Wonderland’ in its manifestation than an English afternoon cream tea. The reason being was that it was meticulously prepared by London’s finest pastry chefs and chocolatiers. The roster included Lauduree, The Lanesborough, The Wolseley, The Langham, Claridges, The Arts Club, Inamo, Le Manoir aux Quat’saisons, Melt, Roux Fine Dining, Valrhona and Rococo Chocolates. In short, it was foodie heaven and an enormous privilege.

The sun shone and guests spilled out onto the lawns of the embassy. It had a wonderful Great-Gatsby-esqe feel , indeed I would not have been surprised had Jay Gatsby sauntered across the lawn with a macaroon in hand.

I had to share with you some of the pastries that had been prepared for the occasion.

IMG_1272

These stunning creations were prepared by Nick Patterson, Head Pastry Chef at Claridges. I loved the way they were presented, with the little pink lights reflecting through a glass platform.

IMG_1611

The ‘Japanese flag’ inspired pastries were eagerly devoured.

IMG_1611

Laurent Couchaux, principle chocolatier from Rococo Chocolates created these wonderful chocolates. You can see which ones I was eating.

P8093022

These chocolate mousses went down a treat.

IMG_1272

These chocolate dainties were going like hot cakes!

IMG_1313

Special thanks go to the organisers: Fabien Ecuvillon, Consultant Chef and Founder of Pastry Network, Miho Nozawa, Dana Arce and Sachiko Bush. A truly memorable event.