Taramasalata

I adore making homemade taramasalata so thought perhaps you may too. For the uninitiated it is smoked cod’s roe made into a loose pate of sorts. Traditionally it is made with smoked mullet roe, but I tend to opt for cod’s roe, which you can find (or certainly request) from any fishmonger. I bought 300g which, with the skin removed,  came to 280g.

The store bought taramasalata is normally a lot pinker, but this is not it’s natural colour. You can of course add a pinch of paprika to give it more of a pink hue and a lovely flavour, but I tend to go au-natural and keep it in it’s natural colour.

It’s great for lunch, perhaps with a bowl of my homemade hummus too and some crisp bread and fresh vegetables to munch alongside.

People often ask about the bitter taste when making your own. The way to bypass this is to soak the cod’s roe, in its skin, in cold water for a couple of hours.

Taramasalata

makes a bowlful

280g smoked cod’s roe, skinned (after soaking)

4 slices of white bread (2 if they are large pieces)

3 small cloves of garlic

2 tbsp Greek yoghurt

juice of 1/2 lemon

freshly ground back pepper

4 tbsp olive oil

3 tbsp sunflower oil


  1. First soak the smoked cod’s roe in a bowl of cold water for a couple of hours.
  2. Then remove the skin and place in a blender.
  3. Add all the ingredients, except the oil, and blitz.
  4. Add the oils slowly so that it loosens the taramasalata.
  5. Taste test and add a little more lemon if required. If it is too loose simply add an extra piece of bread to thicken it.

Serve with crisp bread or fresh vegetables – such as carrots, celery and radishes .


The most delicious homemade prawn bisque

Have you ever had prawn bisque at a restaurant and wondered how you could recreate it back in your home? To remind you of those summer days spent by the sea, listening to the gentle lapping of the waves and the fishermans boats bobbing around in the water on the horizon. We associate food with memories and I hope my prawn bisque will bring back happy memories when you make it.  It’s surprisingly very simple indeed. Basically the next time you are cooking prawns in the shells – perhaps on the BBQ like we did.

OR even a curry – perhaps my Bengali prawn curry – make sure you keep the heads and tails – in fact the whole shell, as you will then be able to make the most exquisite prawn bisque afterwards. The pile of shells may not look pretty or particularly appetising, but I can assure you that after you’ve added the ingredients listed below and let it simmer gently for half an hour, all the flavours from the prawn shells are drawn out. Don’t worry about the heads and tails –  that all gets blitzed up and then after going through a sieve the bisque is completely smooth and delicate.

Seriously it is so good there will be no going back once you have made it once.


Prawn Bisque

serves 4 

All the prawn shells and heads from the prawns you used from your BBQ/curry. I had 800g of prawns and used all the shells

(even if I have a little less I still follow the same recipe and the same goes if you have a little more)

cover the prawns completely with boiling water

1 red onion,  chopped

1 garlic clove, chopped

4 bay leaves

5 black peppercorns

1 tsp salt

1 tbsp butter

1/2 tsp smoked paprika

juice of quarter of a lemon

1 tbsp tomato puree

1/2 (half) tsp white sugar, optional

salt to taste

1 tsp cornflour – 3 tsp cold water

  1. Place the prawns shell and heads in a deep pan and cover completely with boiling water.
  2. Add the bay leaves, peppercorns, salt, red onion and garlic to the pan and simmer for 30 minutes.
  3. Using a hand blender blend the contents of the pan. This might sound unusual to blend the shells and heads, but trust me the flavour that comes from them is incredible.
  4. Place the contents of the pan through a fine sieve. Use the back of a spoon to push all the goodness through. What comes through should be a completely fine liquid. Discard the remaining shells that have not gone through the sieve. Overall it will make around 800ml-1 litre of liquid.
  5. In the same pan add the butter and when it is melted add the tomato puree, smoked paprika, lemon juice and sugar. Add the prawn broth liquid and stir gently. Simmer for a couple of minutes.
  6. In a small bowl add the cornflour and cold water to make a smooth paste and then add the broth to thicken slightly. Simmer gently for a further few minutes. Add more water if necessary.
  7. Season further to taste and then serve. You could also easily freeze this once it has cooled ready to use on a separate occasion.

Speedy Indian Salmon Curry

Exhausted after a long day, with little energy or inclination to cook a complex dish that involves lots of marinating and blending? We’ve all been there right? Well this curry works a treat and literally takes 15 minutes to prepare and cook.  It’s a staple dish in my household and is always guaranteed to raise spirits and a smile. I’ve been cooking it for 20 years so felt it would be a good one to share with you all. I have used salmon but you can equally use trout or any firm fish in fact.

I find I use all the spices quite regularly so am guaranteed to have them in the house. My fridge also always has fresh ginger and curry leaves, which are either kept in my fridge of freezer (so I don’t get caught out). Same goes for fresh chillies.

I think you’ll be pleasantly surprised at how quick and easy this dish is and yet tastes really moreish. I often get asked do I eat the curry leaves and the answer is ‘yes’. I love the taste of them, but you can leave them to one side if you don’t fancy it. They will have already worked their magic flavouring the dish.

I often accompany it with some of my Bengali dal, which is my ultimate comfort food. A plain white or brown rice works well with this dish.

I would love to see how you get on so don’t forget to tag and link me on instagram if you make it @chilliandmint #chilliandmint.


Speedy Indian Salmon Curry

Serves 4

700g filleted salmon, cut into manageable portions (skin on or off as you prefer)

2 tbsp vegetable oil

1 medium onion, chopped

1 tsp nigella seeds

1 small tsp turmeric powder

1 tsp coriander powder

1 tsp cumin powder

2 fresh chilli, chopped in half (more if you like it hot)

half tsp chilli powder (optional)

2 inches  fresh ginger, peeled and grated

approx 10 fresh curry leaves

2 large tomatoes, finely diced

150ml water

1 tsp salt

handful of fresh coriander

1. Cut the salmon pieces into manageable sized portions and put to one side.

2. Warm the oil and when it is hot add the onions and fry on a medium heat for 6 minutes or until they begin to brown. At this point add the nigella seeds, fresh chilli, turmeric, chilli powder, cumin powder, coriander powder, grated ginger, curry leaves and salt and stir for 20 seconds.

3. Add the tomatoes and 100ml of water and mix all the ingredients together.

4. Gently place the salmon pieces, with the skin facing upwards (if skin is still on), into the sauce and let it simmer on a medium/low heat for 5 minutes. Place a lid on the pan.

5. Then using a spoon turn the salmon pieces over and add a further 50ml of water if necessary. It will only need a couple of minutes. If you prefer a thicker sauce add less water and vice versa. Its really not an exact science and more down to personal taste.

Serve with roughly chopped fresh coriander.


Homemade Gravlax with a Dill, Mustard and Lemon Dressing and Pickled Cucumbers

With Christmas fast approaching I thought a homemade gravlax recipe might come in rather useful. Smoked salmon always makes an appearance on Christmas day, but I think a homemade gravlax might make a welcome change. This Nordic dish is very simple to prepare as ultimately you are simply curing the salmon in salt, sugar, fresh dill and gin (or vodka/schnapps).

I tend to use the container that the salmon comes in to cure it, which makes it all very straight forward and fuss free. If you want to add a pink hue to the gravlax, simply add a small grated beetroot when you add the fresh dill to begin with. Sometimes I also like to add juniper berries, which I crush and add to the curing ingredients (no more than 2 tsp). I like to cure the salmon for 48 hours, by which time it has hardened and taken on the wonderful flavours it has been curing in.

The end result can be made into canapés, of presented as a starter in the middle of the table. I like to make a lemony, mustard and dill dressing and for some crunch pickled cucumbers works a treat.

Above gives you an idea on how it would look as a table centre piece for a starter and below as a canapé, or in my case, lunch with a mug of miso soup.


Homemade Gravlax

Serves 4-6 as canapés or starter

500g salmon fillet, skin on (bones removed) this one is perfect

100g fresh dill, finely chopped, leaves and stalks

2 tsp freshly ground white pepper

2 tbsp gin (or vodka or schnapps)

70g flakey sea salt

80g caster sugar

2 tsp freshly ground juniper berries, optional

1 small beetroot, peeled and grated, optional

  1. Using a hand blender (or by hand) other than the salmon, mix all the ingredients together to form a green sugary salty rub.
  2. Using the container that the salmon has come in, or a container that the salmon comfortably fits, add half the rub. Place the salmon on top – flesh side down – and then cover with the remaining rub. Make sure the salmon is completely covered. Cover with a lid or cling film and place back in the fridge for 48 hours, turning a couple of times throughout this period.
  3. Before serving, remove most of the rub by gently running it under some cold water. Pat dry with kitchen paper. You want some of the dill to remain on the salmon.


**********


Thirty minutes before serving you need to make the pickled cucumbers.

Pickled Cucumbers

1 whole cucumber, peeled and thinly sliced (a mandolin is great for this)

1 tbsp white wine vinegar

1 tsp flakey sea salt

1 tbsp caster sugar

1/2 tsp coriander seeds, optional


  1. Place all the ingredients in a bowl and leave in the fridge for 30 minutes.
  2. Squeeze out the excess moisture (there will be quite a lot), and then place in a serving bowl or on the serving platter.

**********


Whilst the cucumber is pickling, clean out an old jam jar with a lid.

Mustard and Lemon Dressing

2 tbsp Dijon mustard

1 small lemon, juice only (I like it quite lemony, so perhaps add 1/2 juice of a lemon first and add more once it is all mixed together)

1 tbsp caster sugar

pinch of flakey sea salt

50g finely freshly chopped dill

2 tbsp sunflower/olive oil


  1. Place all the ingredients in your jar, secure the lid and mix thoroughly. Taste test and add more salt/sugar/lemon to taste.
  2. Place in a bowl ready to accompany the gravlax and pickled cucumber.
  3. Store in the fridge if made ahead of time. It will last for well over a week in the fridge.


Smoked Mackerel Pate with Fresh Dill and Chives

I recently popped the photo above up on my instastories on instagram and a number of you asked for the recipe for the smoked mackerel pate. It is wonderfully versatile and can be used as a ‘dip’ with drinks or as a ‘starter; either way it’s a good option all year through. My mother used to make it a lot when I was a child, a recipe she originally found in ‘The Cooking Canon’ cookbook. Anyone else remember those retro little pocket recipe books? Anyway this is my version of smoked mackerel pate, it’s super easy and you can get as creative with it as you like. Perhaps alternate with different fresh herbs or sprinkle cayenne pepper on the top instead of chives, but personally I love it with fresh dill and a scattering of chives.


Smoked Mackerel Pate

1 pack/310g peppered mackerel fillets, skin removed

3 heaped tbsp creme fraiche

1-2 tsp horseradish sauce

1 handful of fresh dill, finely chopped

zest and juice of half a lemon

pinch of salt

1 tbsp chives, finely chopped

  1. In a blender add all the ingredients (except the chives), breaking up the mackerel as you place it in the blender. Blitz it briefly so you get a creamy pate. Add more creme fraiche/horseradish if it needs to be loosened up a little. Add more lemon if needed.
  2. Serve with chives scattered on top with the option of melba toast – I love these – and purple endive.


HAPPY DAYS


Cod, Potato and Spinach Curry


With the weather being pretty amazing here at the moment in the UK I like to cook quick speedy meals that are packed full of flavour and are not too laborious to make. I had a kilo of cod in my freezer, which I defrosted, so thought that a fish curry was called for, eaten in the garden. Bliss.

I love a good fish curry and have lots on my blog that I would recommend (not biased or anything!): Mild Indian cod currySri Lankan tuna curry, speedy salmon curry (excuse the dodgy photos on this one – it’s when I first started my blog), Bengali mustard fish curry.

The one I want to show you today takes 15 mins max – in fact most fish curries take no time at all. I used cod, but you could use any firm fish – pollock, salmon, trout, bhetki, tuna, monkfish. My cod was filleted and then I simply removed the skin and then cut it into slightly larger than bite size pieces. It will be in a red gravy and this is not because of tomatoes – there are none in it – instead from the paprika and Kashmiri chilli powder, the latter is not spicy hot, instead adds great colour to a dish. Do not be put off.


Cod, Potato and Spinach Curry

2 tbsp rapeseed oil

1 tbsp cumin seeds

1 red onion, finely chopped

1 tbsp coriander powder

1 tbsp garam masala powder

1 heaped tsp turmeric powder

5 garlic cloves, finely chopped

2 inches of ginger, skin removed and finely grated

4 fresh green chillies, sliced in half length ways (add less if you prefer less heat)

1 tbsp plain flour

1 tsp salt, to taste

1 heaped tsp paprika

1 tsp Kashmiri chilli powder

1 tsp mango/amchur powder

1 tsp sesame seeds

1 large potato, chopped into 1 inch cubes

250ml water

1 kg cod, filleted, skinned and cut into large bite size pieces

2 large handfuls of fresh spinach

1 tsp jaggery/brown sugar


  1. Use a large, wide, deep pan ideally. Heat the oil and when hot add the cumin seeds. They will sizzle almost immediately. After 10 seconds add the onion and move around the pan for a further couple of minutes before adding the coriander powder, turmeric and garam masala powder. Turn the heat down to prevent any of the spices burning. Move around the pan and then add the garlic and ginger.
  2. After about a minute or two add the flour, which will gently thicken the curry, and move around the pan. Add the paprika and Kashmiri chilli powder and then add the cubed potato.
  3. After a further minute add some water so that it covers the potato. Add the fish and coat in the masala. Add a little more water, to cover the fish and place a lid on the pan and cover for 5 minutes.
  4. Gently move the fish, without breaking it up, around the pan and add the mango powder, sugar and sesame seeds. Return the lid on the pan and simmer away for a further 3 minutes.
  5. Add the fresh spinach and continue to cook for a further 3 minutes or until the potato has softened. Add more water if you prefer a more saucy curry. Check on the taste and add more salt/sugar if necessary.
  6. Keep the lid on the pan to keep in the heat before serving. It works well with rice or Indian breads.


Mild Indian Cod Curry for the Whole Family

How have you all been? I hope you all enjoyed the bank holiday – for those of us based in the UK we were blessed with three days of brilliant sunshine. I’m aware I have not posted an Indian recipe for a while so I hope that this one will greatly please you.

If your spice cupboard is fairly limited and you want a quick but satisfying curry, then this mild cod curry definitely ticks the box. It’s a crowd pleaser for the whole family as it is only delicately spiced and the one fresh chilli that I do add, I make sure it does not go onto the plate of any unsuspecting guest or family member. I adore purchasing fresh curry leaves from my friends down in Tooting, but I find that they freeze really well, so I always have a good supply ready to use. If finding fresh is tricky, then dried will be a good stand-in, although fresh is ideal.

Mild Indian Cod Curry

serves 4

2 tbsp oil

10 fresh curry leaves

1 tsp cumin seeds

1/2 tsp of turmeric powder

1 thin green chilli, stalk removed

1 white onion, finely chopped

1 heaped tsp ginger paste

1 heaped tsp garlic paste

3 medium sized tomatoes, diced

1 heaped tsp of tomato paste

1 tsp salt

1 tsp caster sugar

1x400g can of coconut milk

1 large cod fillet, skinned and cubed


  1. Add the oil in a large non stick wide pan and when it is hot add the curry leaves, cumin seeds and turmeric powder. Move around the pan for 20 seconds before adding the onion.
  2. Gently cook away for 6 minutes before adding the garlic and ginger past. Cook for a further 4 minutes.
  3. Now add the tomatoes, tomato paste, salt and sugar and simmer gently for a few minutes.
  4. Add the coconut milk and let it simmer for a few minutes before adding the cod pieces.
  5. Continue to simmer for up to five minutes with a lid on the pan, stirring gently once or twice. You do not want to break up the cod pieces so be careful. Take off the heat to rest.

Serve with rice or paratha and some fresh lemon on the side. If you want some accompanying greens this recipe is great and super quick.


Arriving: Sri Lanka and Tuna Curry

I feel as if I have seen and eaten A LOT since I last wrote a post. For those who follow me on instagram  you’ll know that I’ve been galavanting around Sri Lanka with my family trying to experience as much as humanly possible in 12 days. Sitting on a beach for two weeks, just isn’t our thing.  We packed in a lot and as such feel as if we have been away for a lot longer. I have so much to tell that I thought I would break it down in a series of mini posts, to make it more interesting and accompany each post with a recipe that I was taught so you get a bit of travel tips and a recipe combined. Well that’s the plan – I hope you like it. First up – if you are planning or are just interested in Sri Lanka or just love history and travel then I really recommend you pick up a copy of both of these books. They are absolutely excellent and very well written.


After a long flight there is nothing better than arriving and acclimatising to your destination as quickly as possible. Horathapola Estate helped us to just that and I would return in a heartbeat.

It’s a good hours drive from the Colombo airport, in the countryside on a glorious old estate with plenty of charm and elegance. Arriving we were greeted by these two smiling gentlemen with fresh coconuts juice – the perfect drink in the midday sun.


Photo credit: Horathapolo Estate Instagram feed (check it out as it captures the estate beautifully)

The place is small and intimate – 5 bedrooms, so you are not going to find coach loads of tourists arriving here. Phew. They put us in the beautiful family lodge, which was a two bedroom cottage with two large bathrooms and four poster beds with, importantly, mosquito nets to keep the blighters at bay.

It has a beautiful pool to relax in, that you can even share with the odd passing holy cow – that was definitely a first. The wildlife wandering by and the sounds coming from the trees was enchanting – it almost has something mystical about the place.

Keen to explore the estate we were whisked off……well maybe not whisked but a slow plod, on a bullock cart around the grounds. This was the mode of transport for all Sri Lankans before the motor car, tuk tuk and train arrived. We were shown flora, fauna and wildlife – of particular interest was this:

The cashew nut. One single seed (or nut as we know it) comes from each fruit. We learnt that surrounding the seed is an acid that is an irritant to the skin – similar to the toxins found in poison ivy – and that long gloves need to be worn when opening up the seed. By properly roasting the cashew – outside as the smoke contains droplets that can seriously irritate the lungs – destroys the toxin. This laborous process, combined with the fact that only one seeds comes from a fruit, may explain why cashew nuts are so expensive. Indeed cashew nut curry in Sri Lanka is only really served at special occasions, such as weddings.

Staying at this beautiful estate was the perfect introduction to life in Sri Lanka. We immediately felt at home and eager to embrace our new surroundings. Eating a bowl of rasam (one of my absolutely favourite soups) – a deliciously fragrant and black pepper Sri Lankan soup, tasted heavenly after 10 hours on a plane.

In fact I could have eaten bowls of it, but restrained myself as supper was only a few hours away. The food at Horathapola Estate was Sri Lankan food at it’s best. When travelling I much prefer to eat food from that specific country, rather than Western food, which I can frankly eat anytime when I am home in London. I visited the kitchen and met the chefs and the food was all freshly made for the guests. I could not fault it – it wasn’t uber fancy, but to be honest I’m not really into that kind of food – and would definitely love to return in the future and stay for a little longer next time.

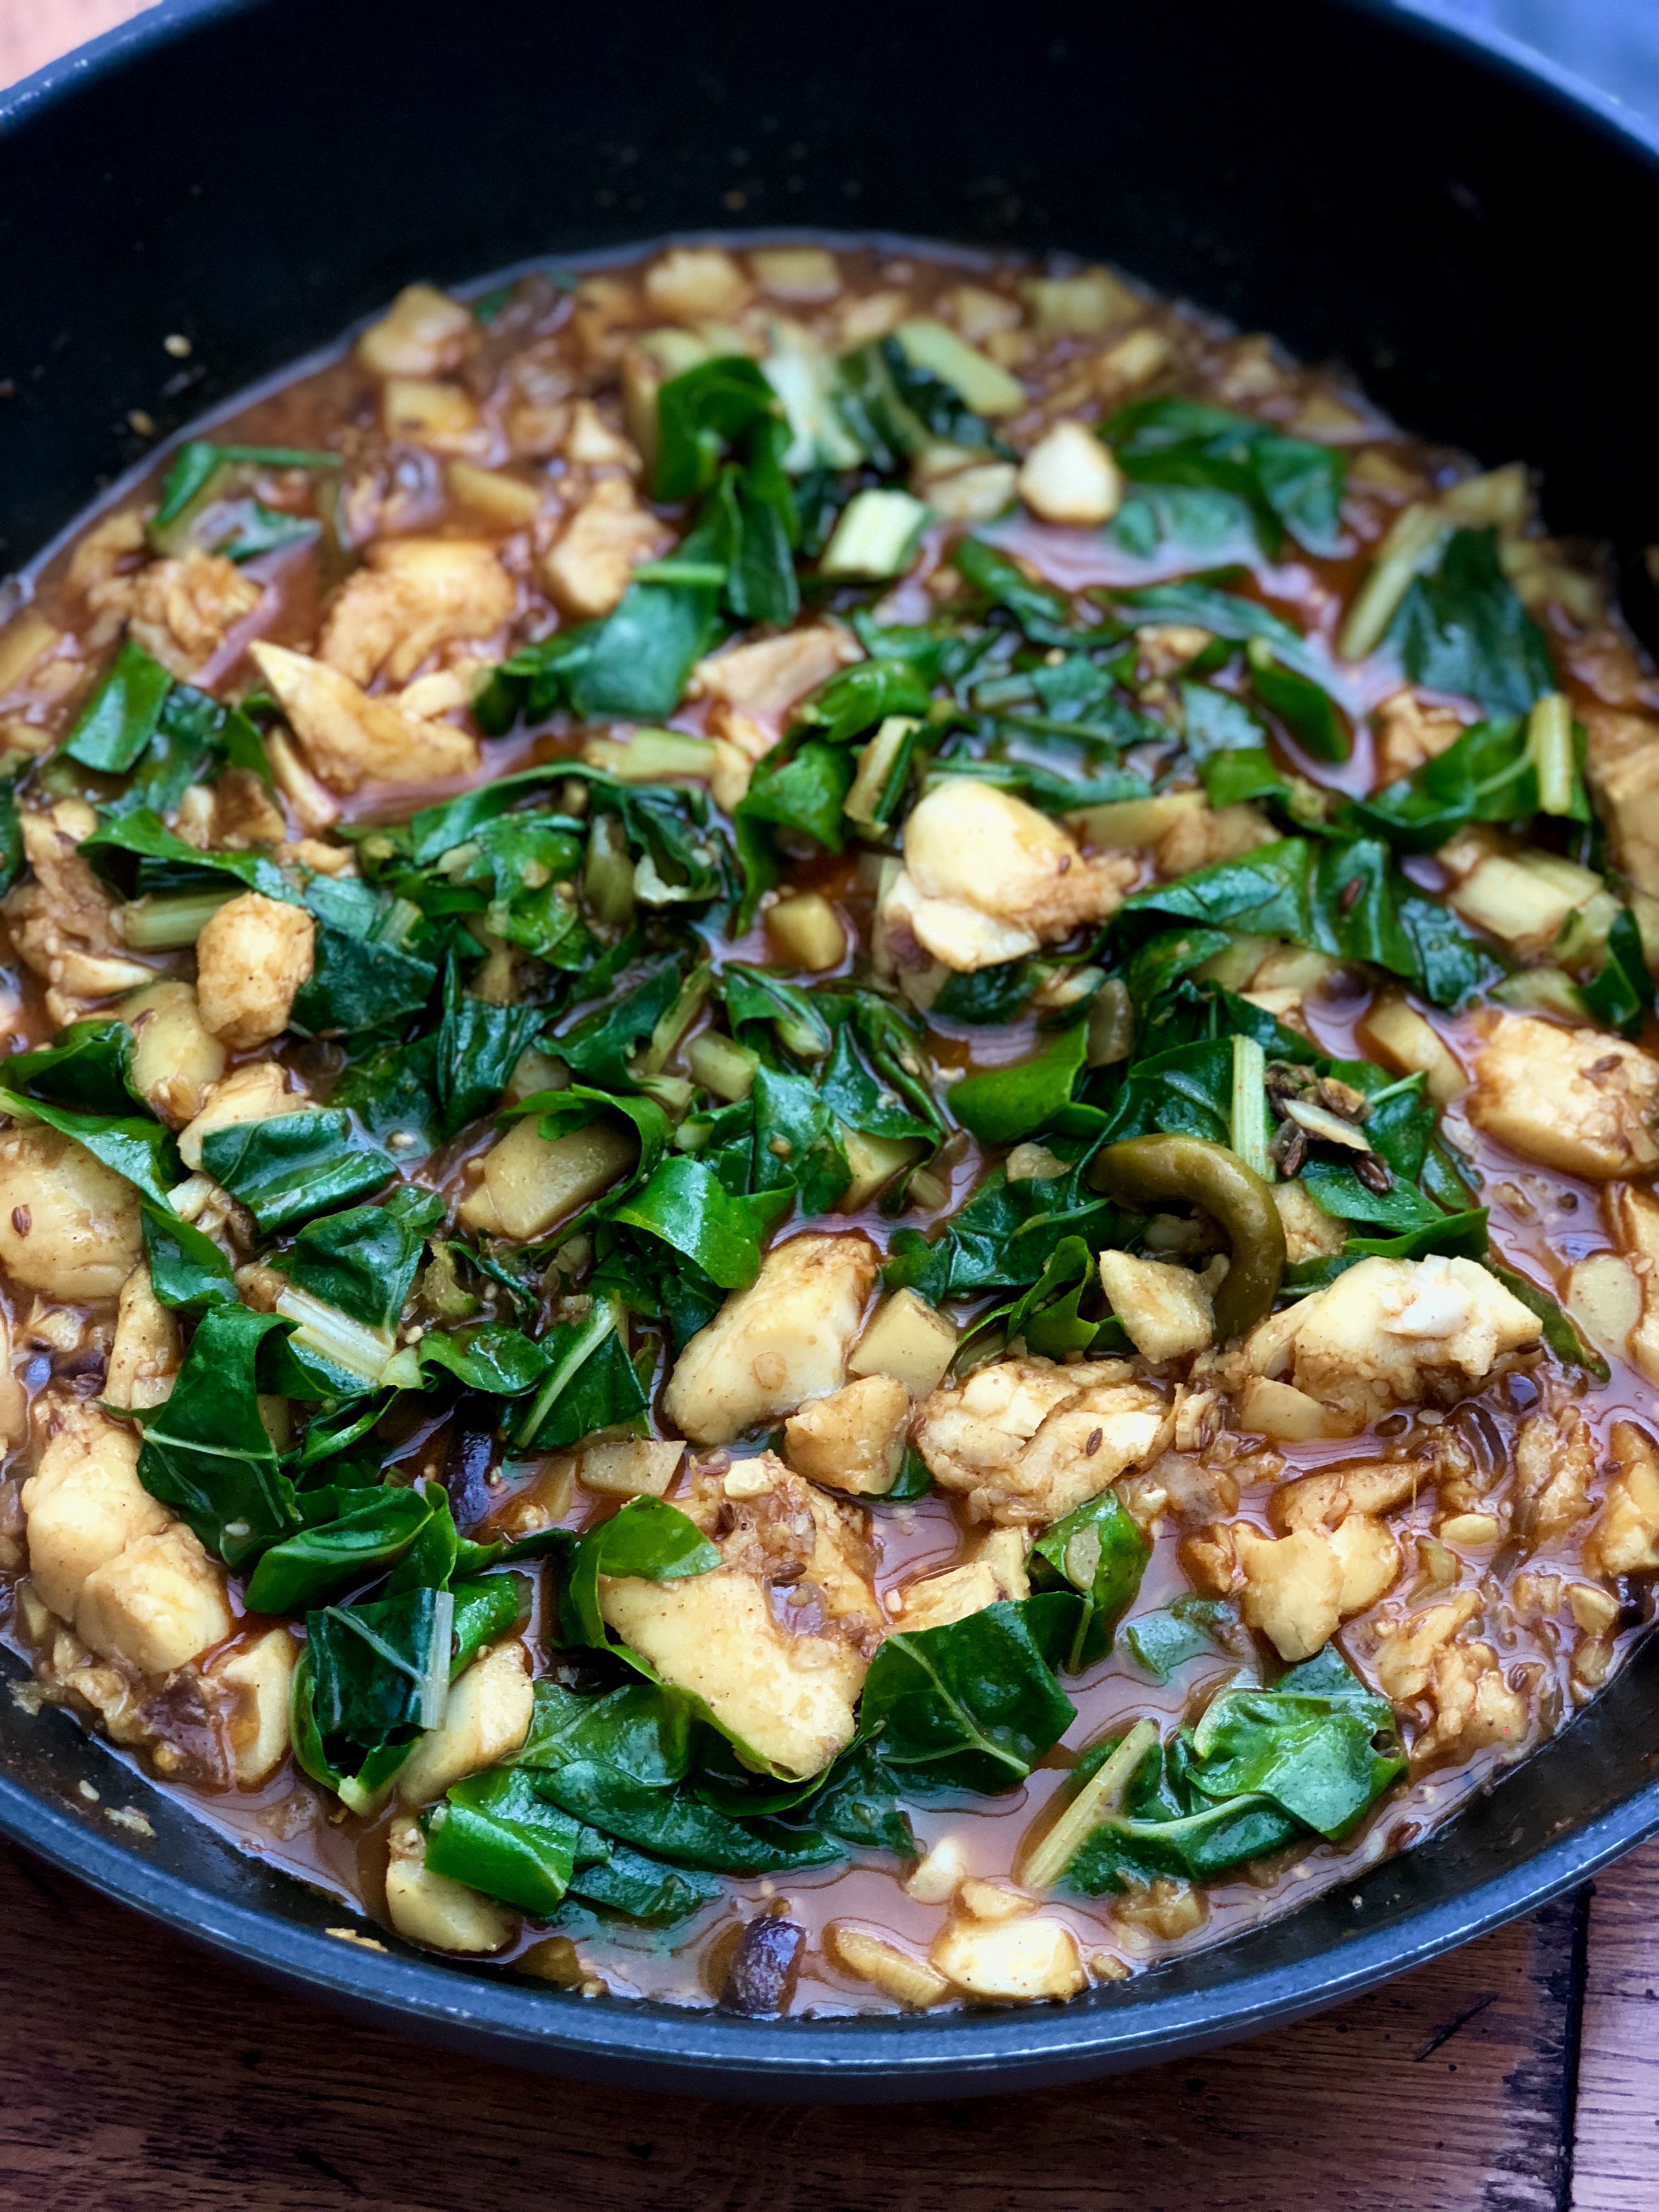
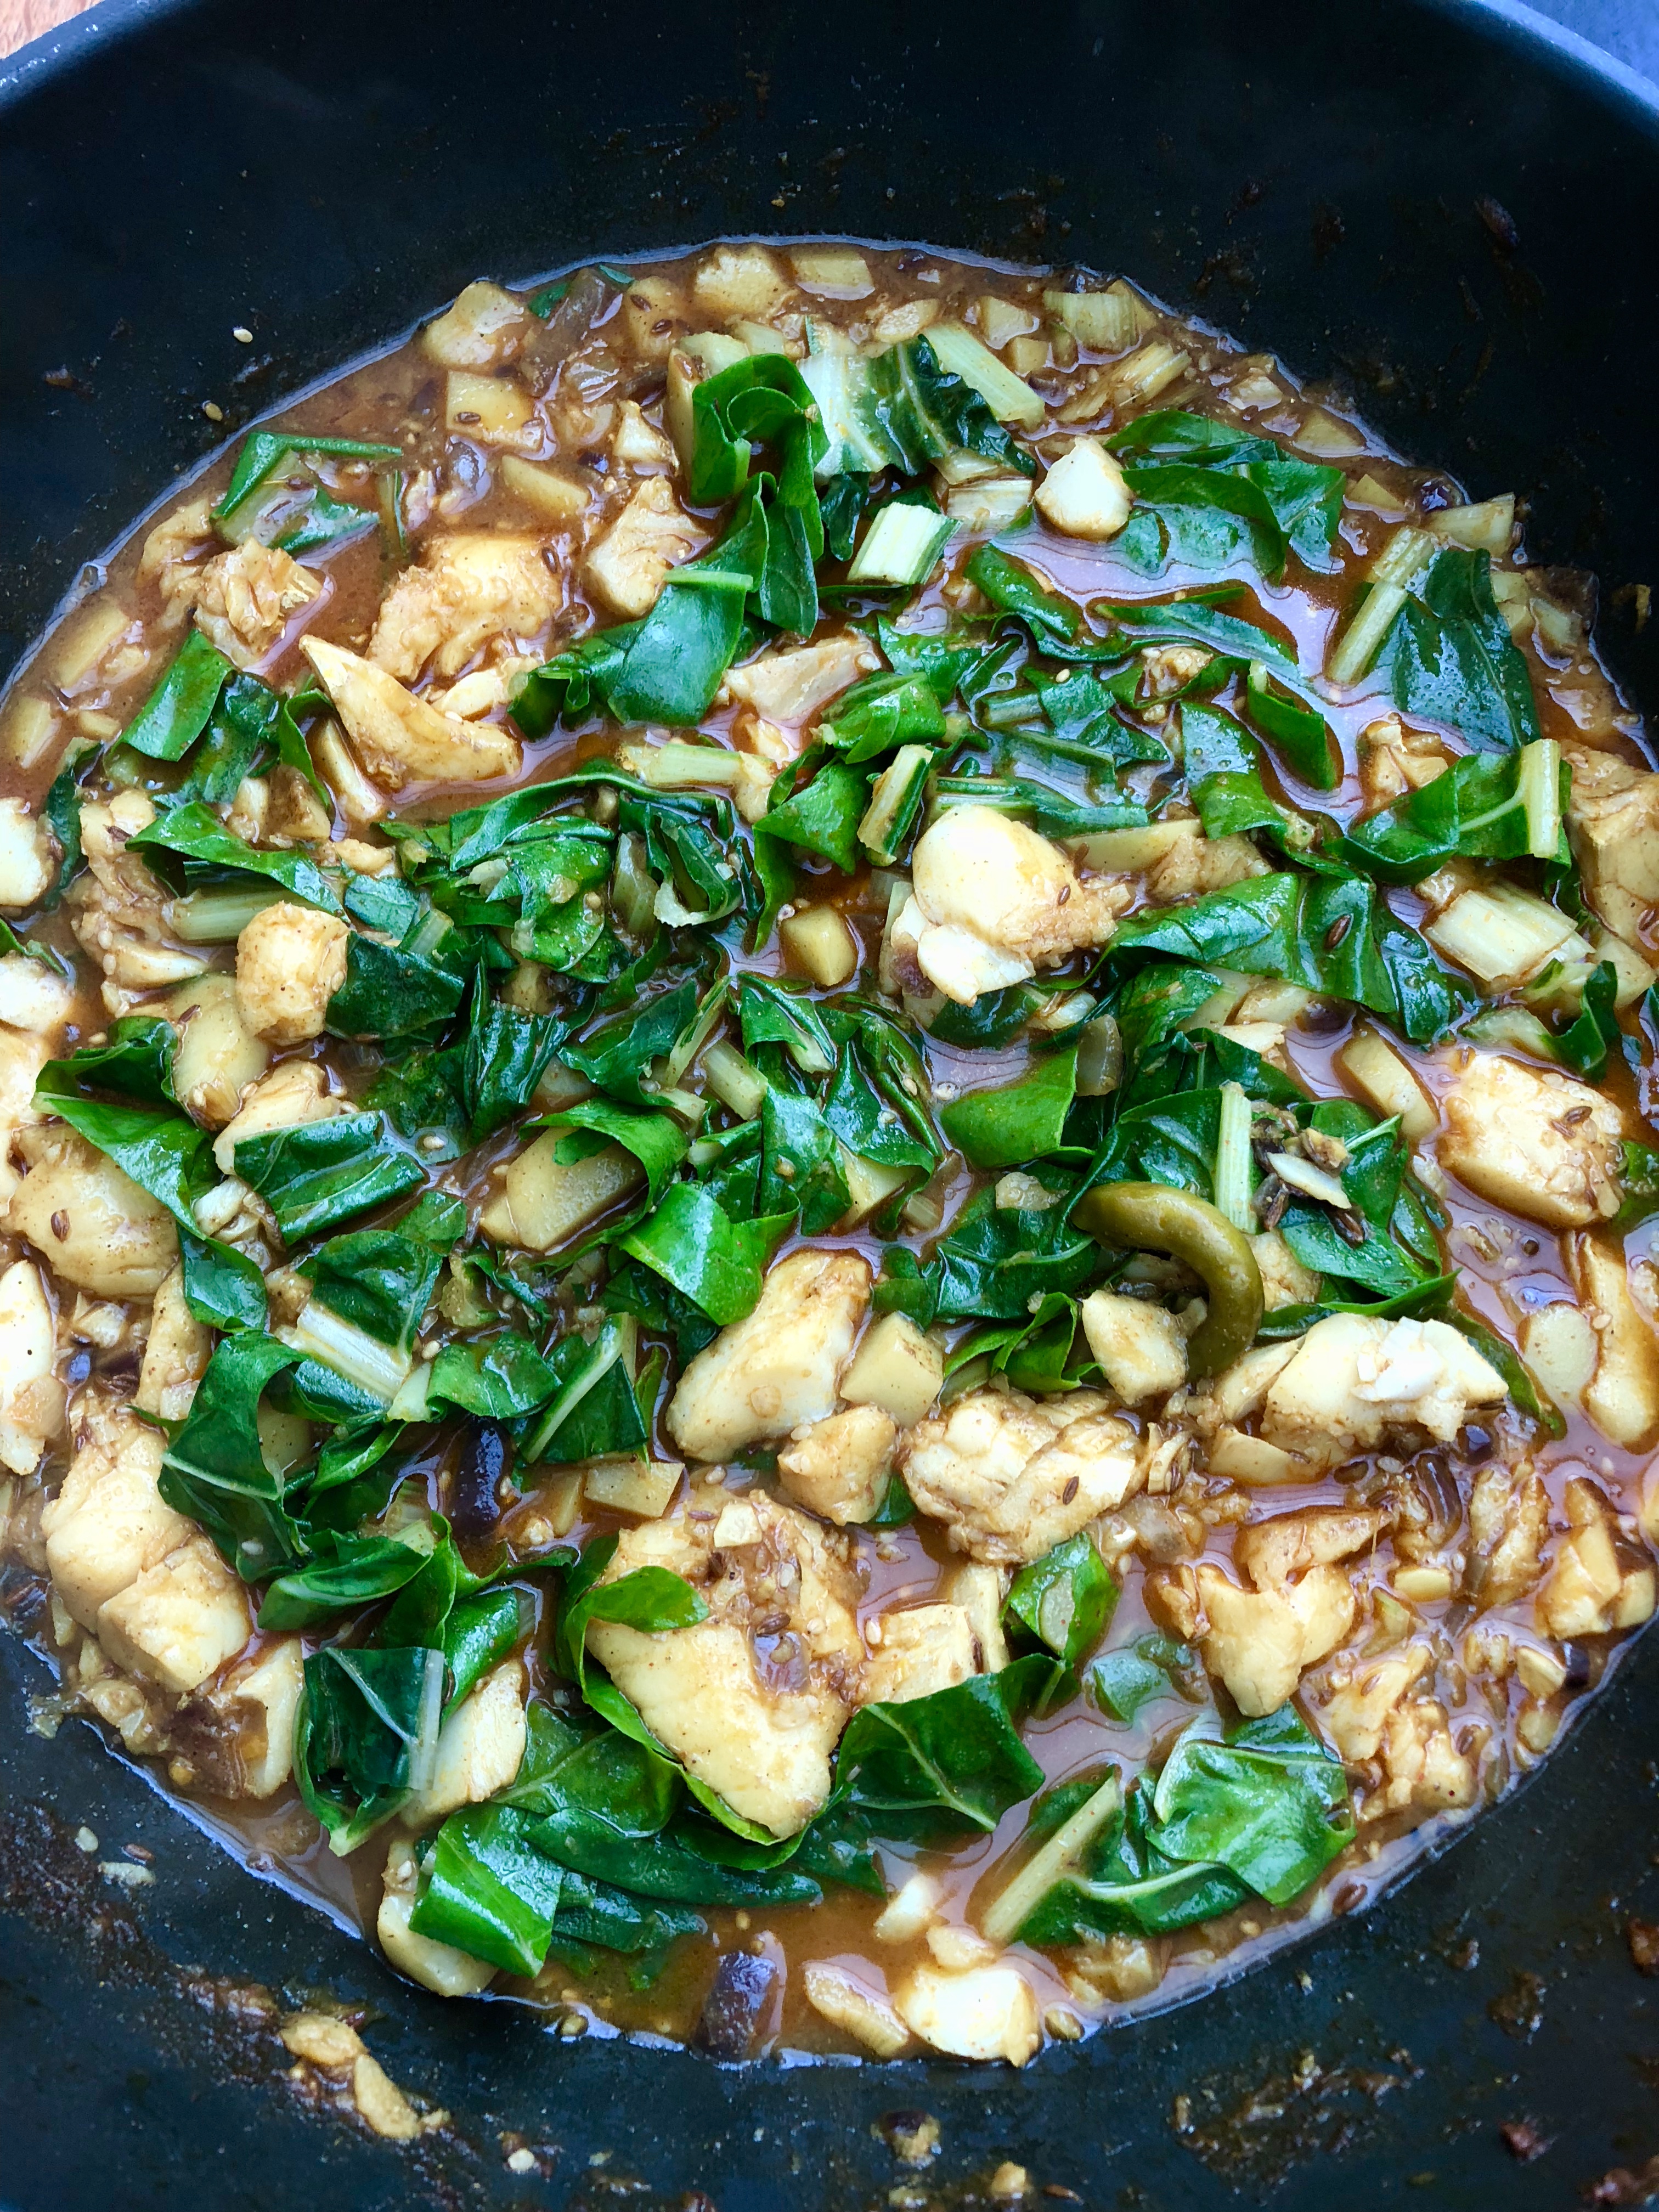
The first recipe I wanted to share with you today is a Sri Lankan tuna curry. I was taught the recipe by chefs I met later in my travels, and thought it was a great way to incorporate tuna into a curry. There are a couple of ingredients that you maybe unfamiliar with. The first is pandan leaves, also known as rampa. They have long green blade like leaves and add a distinct and aromatic flavour to a curry or even a dessert.  They are widely used in cooking in South Asia and I picked up mine from my local Sri Lankan grocers. You can easily find them on the internet – Amazon even sells them fresh, and Thai grocers will also stock them. You can freeze them, so a packet will last you for some time.

The other ingredient that you may not have come across is Sri Lankan roasted curry powder, which is deeply aromatic with a reddish hue. The spices are dry roasted before being blended together to create a powder. You can buy online or make your own, it really is pretty straightforward.

Sri Lankan Tuna Curry

Serves 4 (accompanied with some vegetable curries)

400g cubed tuna (bite sized)

1 tsp chilli powder

1 tsp Sri Lankan roasted curry powder

1/2 tsp freshly ground black pepper

100ml cold water

2 tbsp vegetable oil

1 lemongrass, cut in half

1 fresh green chilli sliced

1 pandan leaf, broken into 4

1/2 red onion, finely chopped

2 garlic cloves, thinly sliced

2 medium sized tomatoes, roughly chopped

6 tbsp thin coconut milk

1/2 tsp salt or to taste


  1. In a bowl add the cubed tuna, red chilli powder, black pepper and roasted curry powder and then add about 100ml of cold water. Mix together and set aside.
  2. In a pan add a little vegetable oil and when it is hot, but on a low to medium heat,  add the red onion, lemongrass, pandan leaves, garlic and allow to cook in the pan for a few minutes. Stir from time to time to stop the onions sticking to the base of the pan.
  3. Add the tomatoes and allow to soften before adding the tuna and spicy liquid that you had set aside.
  4. Add 2 tbsp of coconut milk – ideally the thinner milk, as opposed to the thicker cream. Gently turn the tuna at intervals, careful not to break it up. It is a firm fish so it should hold together well. Add a further 2 tbsp of coconut milk.
  5. Add the salt to taste and finally add a further 2 tbsp of coconut milk. Simmer gently. If you feel it is too spicy add a little more coconut milk.
  6. The tuna will be cooked within 10-15 minutes and place to one side, until ready to serve.


SaveSave


Marinated Gravadlax, Pickled Cucumber and a Honey Mustard Dressing


Growing up smoked salmon, or gravadlax, used to be a real treat, something that you would have very occasionally – at Christmas perhaps on Christmas morning or over Easter.  Somehow though over the years its become  rather ubiquitous and in some cases rather bland. Go to any sandwich store or deli and you’ll find it sitting there next to the cheese and pickle sarnies. The glamour and decadence seems to have gone.

I can help you change all that with a few simple steps. Marinated gravadlax is not only super easy (I know I tend to say that rather a lot but I sincerely mean it!) but it also tastes ridiculously good. You’ll also get tons of brownie points if you bring it out when guests are over.

I loosely followed Simon Hopkinson’s recipe – you can see it here and the video here. Rather confusingly it says that it only takes overnight to prepare and then in the body of the method it says 48 hours. Confusing. I researched other recipes and all the others were for 24 hours so I followed suit. As I did not finish it all in one sitting I returned the remaining portion of salmon back into the fridge with the marinade to see if the taste changed with another night in the fridge. I did not find any difference so I think I will continue with 24 hours.

So here is my step-by-step method.

Home Cured Gravadlax 

500g of fresh salmon fillet, skin on, bones removed (I bought this one)

85g caster sugar

70g sea salt

2 tbsp gin

2 tsp of fresh ground white pepper (next time I will try it with black or pink to see how it turns out)

80g fresh dill

  1. First make up the paste. Mix the sugar, salt, gin, pepper and dill in a blender or pestle and mortar.
  2. Take the salmon out of it’s packaging – do not throw this away as it is perfect size to marinate the gravadlax in over night.
  3. Distribute the  paste evenly on the bottom of the packaging tray and then once you have laid the salmon in – flesh side down – place the rest of the paste on top. Press down firmly.
  4. Cover with cling film and leave for 24 hours – turning a couple of times if you can.

Pickled Cucumber

1 whole cucumber, thinly sliced on a mandolin (I have this one)

2 tbsp white wine vinegar

2 caster sugar

1 sea salt

a little freshly ground white pepper (again pink or black could be good here)

  1. Mix all the ingredients together in a bowl and leave to macerate in the fridge for an hour.
  2. A fair amount of liquid will have formed so discard this and place the cucumber back in the fridge until ready to use.

Honey Mustard Dill Dressing

2 tbsp of yellow Dijon mustard

1 tsp caster sugar

1 tbsp of runny honey

squeeze of lemon juice, to taste

20g fresh dill, finely chopped

salt, to taste

pepper, taste

extra virgin olive oil

  1. Mix all the ingredients together, aside for the extra virgin olive oil. Gradually pour this into the dressing stirring as you do so. It will thicken, much like hollandaise.  Taste and add more salt/honey/lemon juice as your taste buds require.


I served all of the above on a bilini – mustard dressing then a little cucumber and then a thin slice of gravadlax. Equally you could present the gravadlax as a starter and slice it into strips at the table (or before) and keep the cucumber as a salad and the dressing for guests to serve themselves. A slice of rye on the side would be perfect.

I’m planning to do beetroot next and then start experimenting with flavours – juniper, orange zest, mint.

It will change the way you look at gravadlax going forward.


Fish Medley Chowder

img_4105

Pick up a paper or food magazine and the big topic for January always tends to be how to detox and various diets to go on to help shift the excesses of the Christmas season. We all start with good intentions but as the weeks of January roll into February the new exercise class or diet doesn’t seem to hold the same appeal in quite the same way.

img_4104

I tend to follow the old adage ‘everything in moderation’ and in January and February I do try to eat less meat, eat a lot of vegetables – especially greens, have a few vegetarian days per week and eat lots of fish. Exercise is important all year around and whilst I have been a little slack on this of late, other than great long walks over the Christmas hols most days, I will gradually get into it again once my daughters go back to school.

As I am still without a fridge  – the process of replacing my old (10 month old) one with AEG is painful to say the least, I have had to be well organised when it comes to feeding the troops. Thankfully my freezer – which is separate to the fridge – is working well and has been keeping us going with frozen fish.

For todays blog post I am going to share my fish medley chowder which is healthy, filling and a one pot meal to feed the family. They all love it and give it a big thumbs up.  I picked up a fresh fish mix – which is perfect for fish pie – in waitrose, which included Atlantic cod, smoked haddock and Atlantic salmon. It’s been sitting in the freezer ready for when I need to thaw it and cook. The fish was already cut to size so there really was minimum effort on my part. Give it a whirl. It is hassle free and whilst it is effectively a soup is substantial enough to be a whole meal.

Happy New Year to you all. I hope to put up lots of inspiring recipes over the course of this year for you all. Here is to happy, healthy eating.

Fish Medley Chowder

1 good slice of butter

1 leek

1 onion

small bunch of fresh thyme kept whole

2 bay leaves

1 large potato/2 medium size, cut into bite sized cubes

salt and pepper to taste

800ml milk

1 vegetable/fish stock cube

100ml boiling water

sweetcorn from one corn on the cob (frozen sweetcorn is also fine)

500g cubed smoked haddock, salmon, cod

handful of fresh flat leaf parsley

  1. Place the butter in the pan – I find my Le Creuset casserole pan works well – and when it is melted add the leeks, onions, thyme and bay leaves.
  2. After 4 minutes or so the leeks and onions will have softened and become more transparent. Add the cubed potato and a little salt and pepper to the pan.
  3. After a further couple of minutes add 500ml of milk along with the vegetable/fish stock cube and the boiling water.
  4. Cut the sweetcorn off the cob and add to the pan – frozen is fine, in which case throw in a couple of handfuls.
  5. Allow to simmer gently on a low heat for 10 minutes or until the potato has softened. Add the extra milk gradually over this time.
  6. Add the fish cubes to the pan. Do not move around the pan too much as you do not want them to break. Simmer gently for 8-10 minutes by which time the fish will be nicely cooked. Taste and season further if necessary.
  7. Remove the bay leaves and fresh thyme bunch from the pan before serving.
  8. Serve in deep bowls with fresh parsley scattered on top.