Seafood Paella

One of my summer objectives was to christen my paella pan, which I had received for my birthday. My thinking was to raise my beach BBQ game by cooking seafood paella on a homemade fire on the beach, instead of the usual BBQ fare. As it turned out transporting crockery for 10 (as I did not have any melamine bowls with me), was a daunting prospect so we made the decision to use the Weber BBQ at the cottage instead and eat in the garden as the weather has been so balmy. My paella pan was from http://www.thepaellacompany.co.uk and it’s important to buy one with a lid – especially if you do  end of cooking it on a sandy beach!

Whilst it requires a little forward thinking when it comes to the ingredients itself the actual cooking was really good fun and comparatively easy. You do need a long spatula – something like this would be perfect and I also had some oven gloves. The final result was delicious and whilst I cooked for 10 the amounts below could definitely stretch to 12-14 if required. Most of us had seconds and even the  dog had a little to try as well.

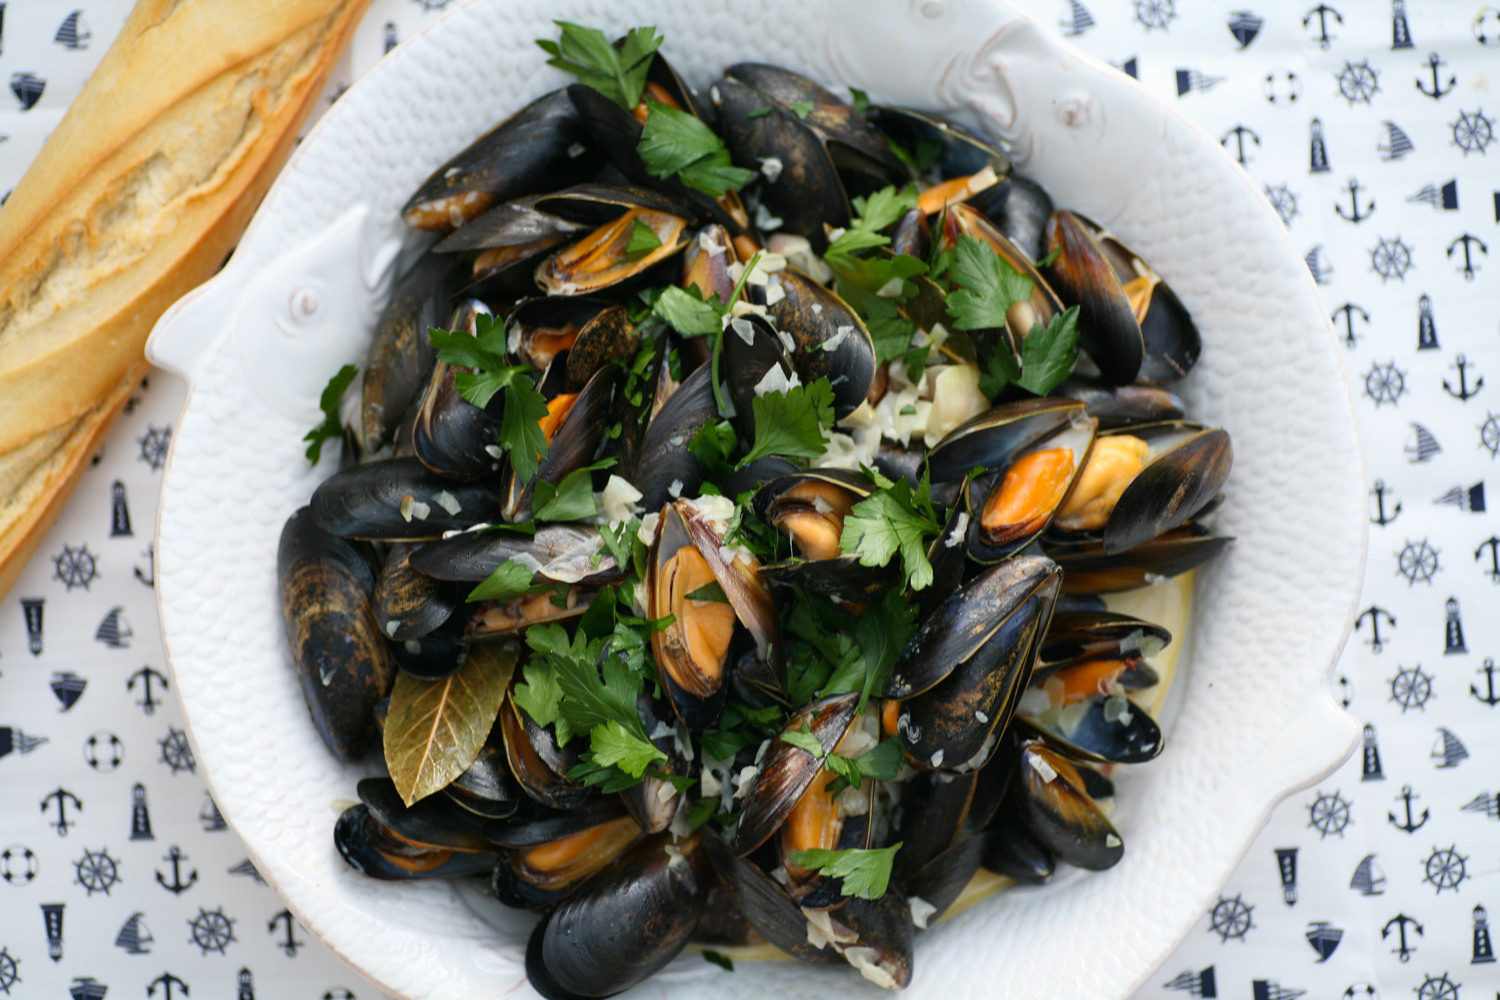
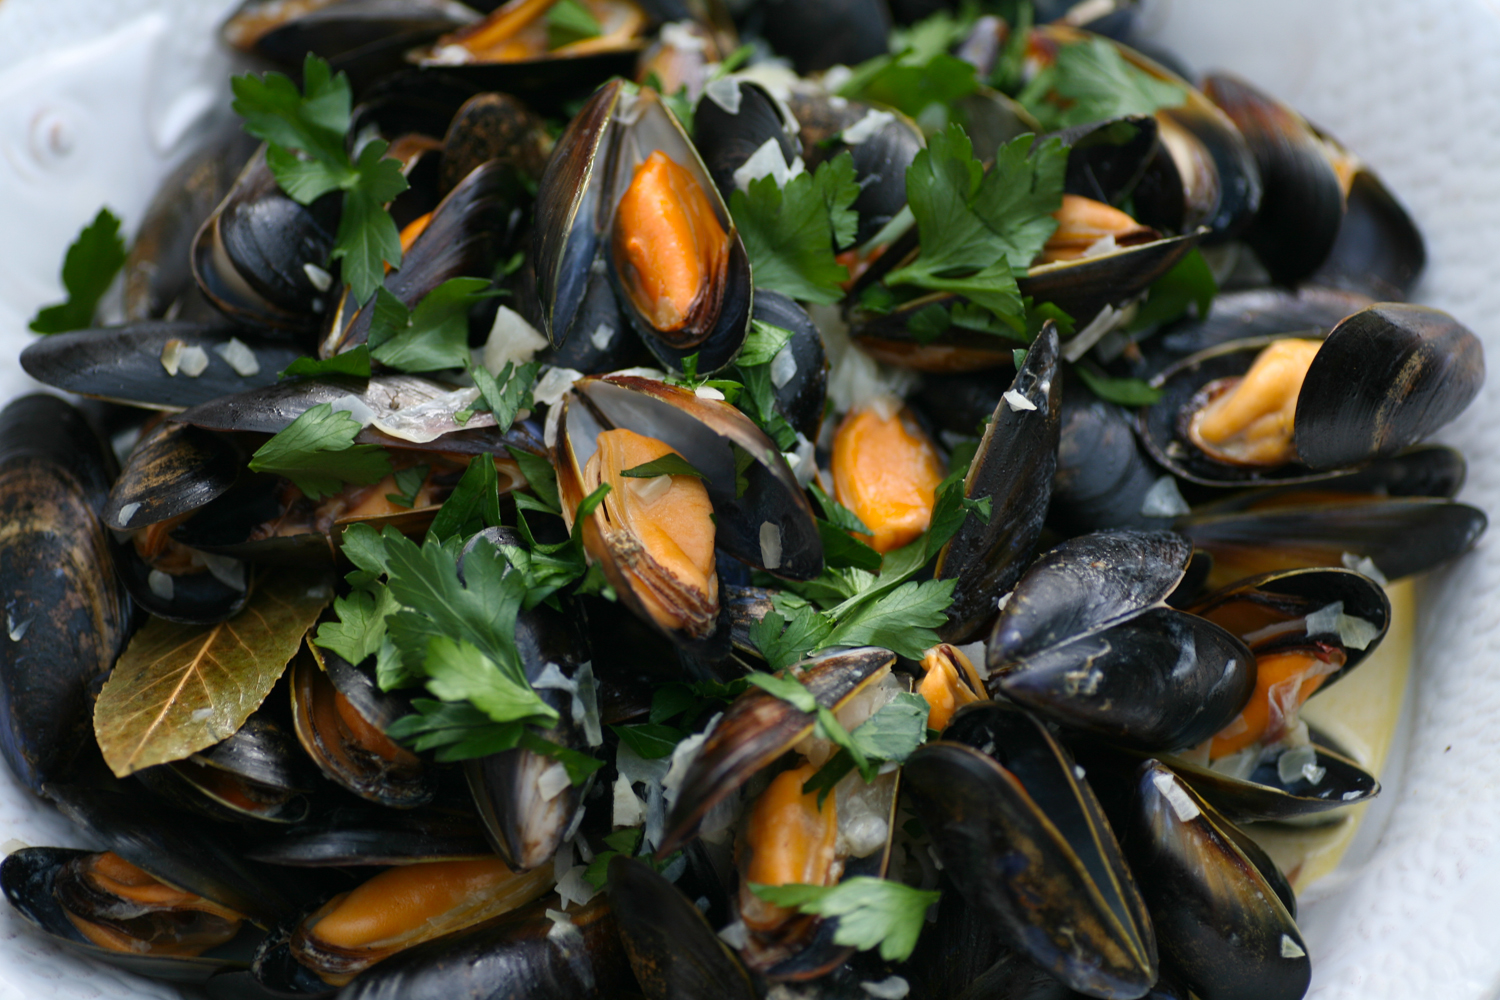
I had prepped and sourced all the correct ingredients – bomba rice being an absolute must. It is a short-grained variety grown in south Spain and unlike risotto rice does not require any stirring. It holds it’s shape during cooking and does not fall apart. You are aiming for the bottom of your rice to begin to char and crisp up on the bottom. In Spain when you are served up charred bits from the bottom, you known you have received the very best type of paella cooked with love and skill. I also rather handily found paella seasoning which you can source from Sous Chef.I popped in 3 sachets to my fish stock. I used fresh fish/seafood stock bought from Marks & Spencer. I can’t seem to see it online but you can certainly find it in the larger stores. Equally most fish mongers will have some, you can make your own, or use the cubed variety. Failing that opt for vegetable stock. The mussels you cook separately for 4-5 minutes and then remove 3/4 of the mussels from their shells.


I didn’t time how long it actually took to cook, but I would say that from the point of putting the oil in the pan to serving was around 30-40 minutes. It does depend on your heat source so please bear this in mind. From the time the rice goes in the pan it was 20-25 minutes max. I also didn’t measure the exact amount of extra boiling water I added or the exact amount of wine, but use your judgement. I added a little more liquid when I thought it looked too dry half way through cooking. I tasted the rice half way through and it was still a little too hard, so I added a little more water and replaced the lid back on the pan. I then tried again about 10-15 minutes later and it was perfect. You will notice I didn’t add any salt. This was because I felt the stock, chorizo and paella seasoning would contain it, but again use your judgement and taste and add a little if required.

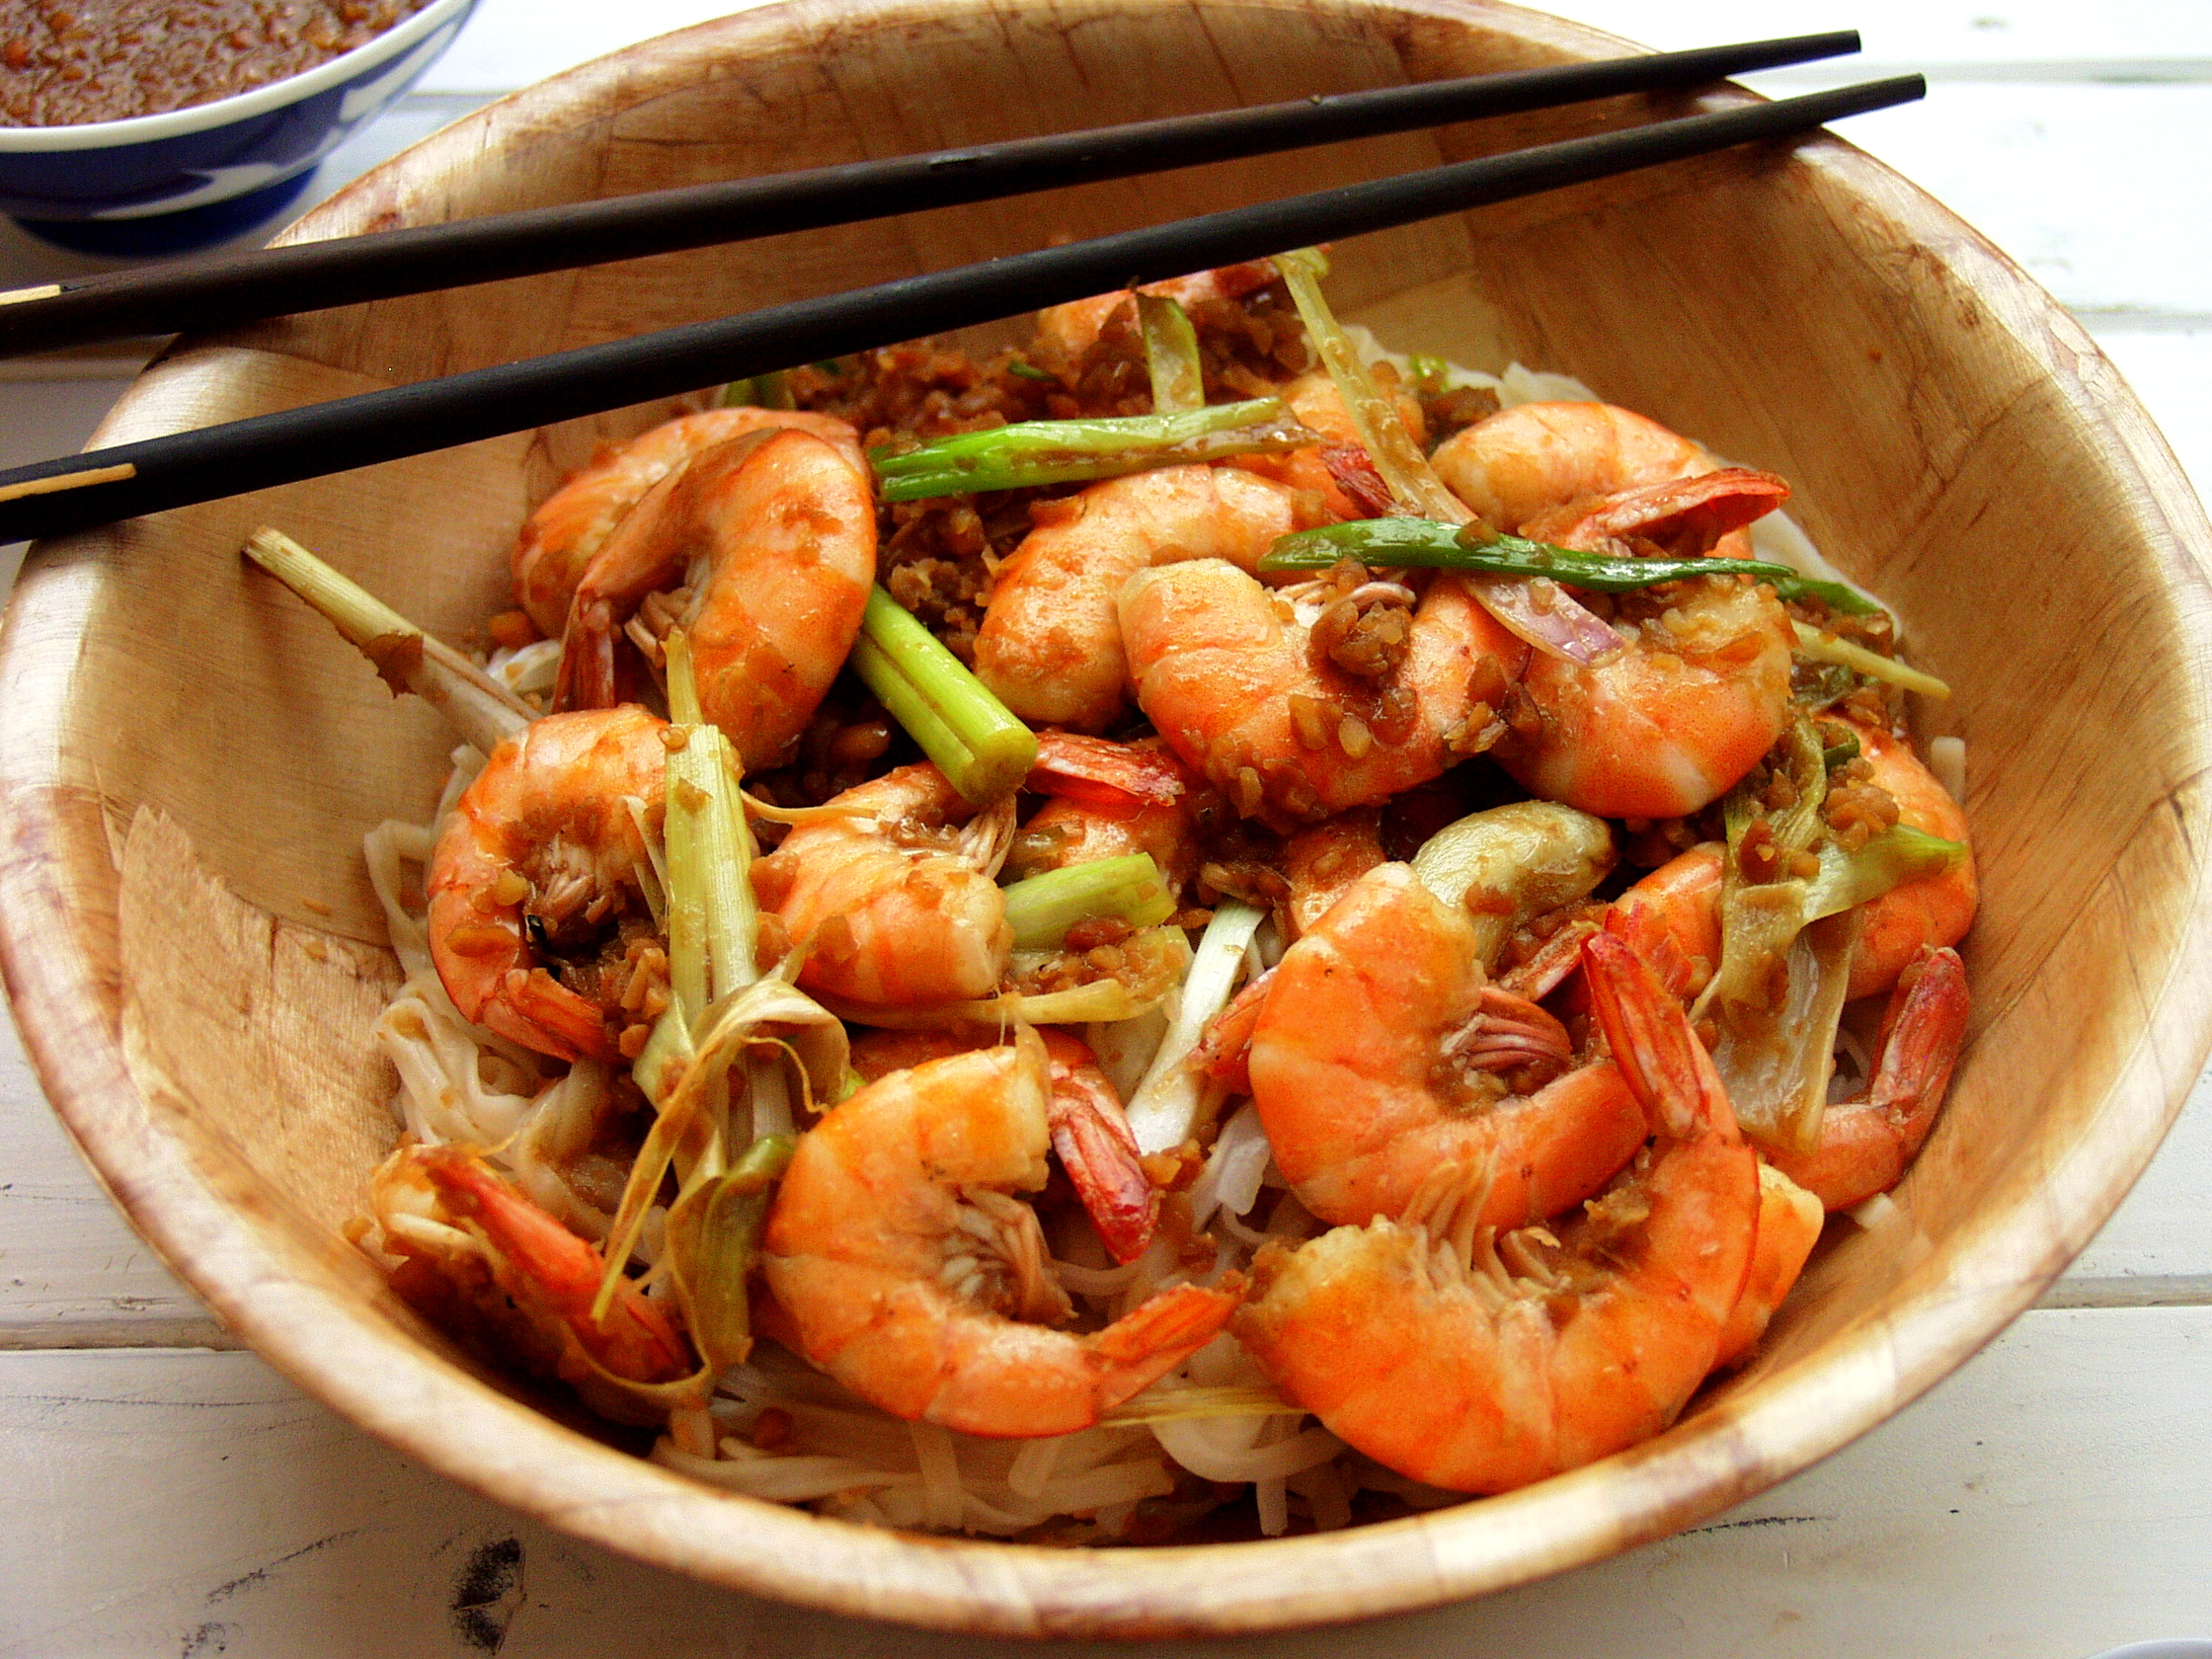
It was such a fun meal to cook and had all the summer wow factors when serving. Adults, teens and tweens alike loved it and even the dog. I’ll be using it again over the summer both in London on the BBQ and also on the beach.
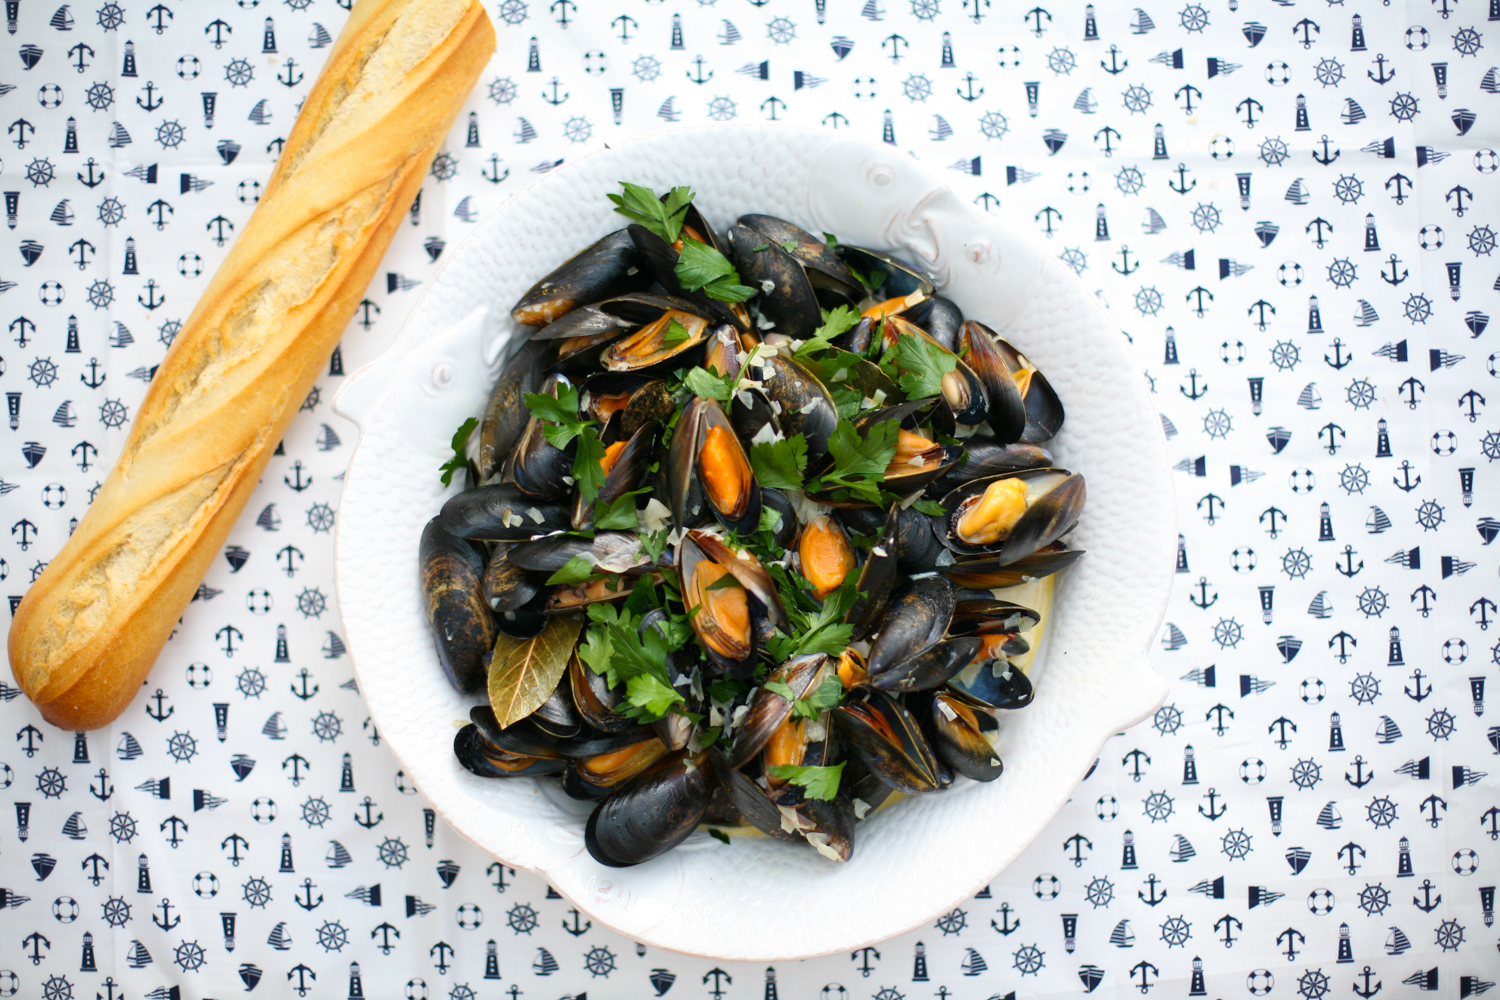
Seafood Paella

1.5 litres fish stock (or vegetable stock if you can’t find fish stock). I found fresh seafood/fish stock at M&S and used 3 packets which were around 400-500ml per packet.

3 packets of paella seasoning 

300ml white or rose wine

6 tbsp olive oil, approx

2-3 large white onions, finely chopped

1 head of garlic, finely chopped

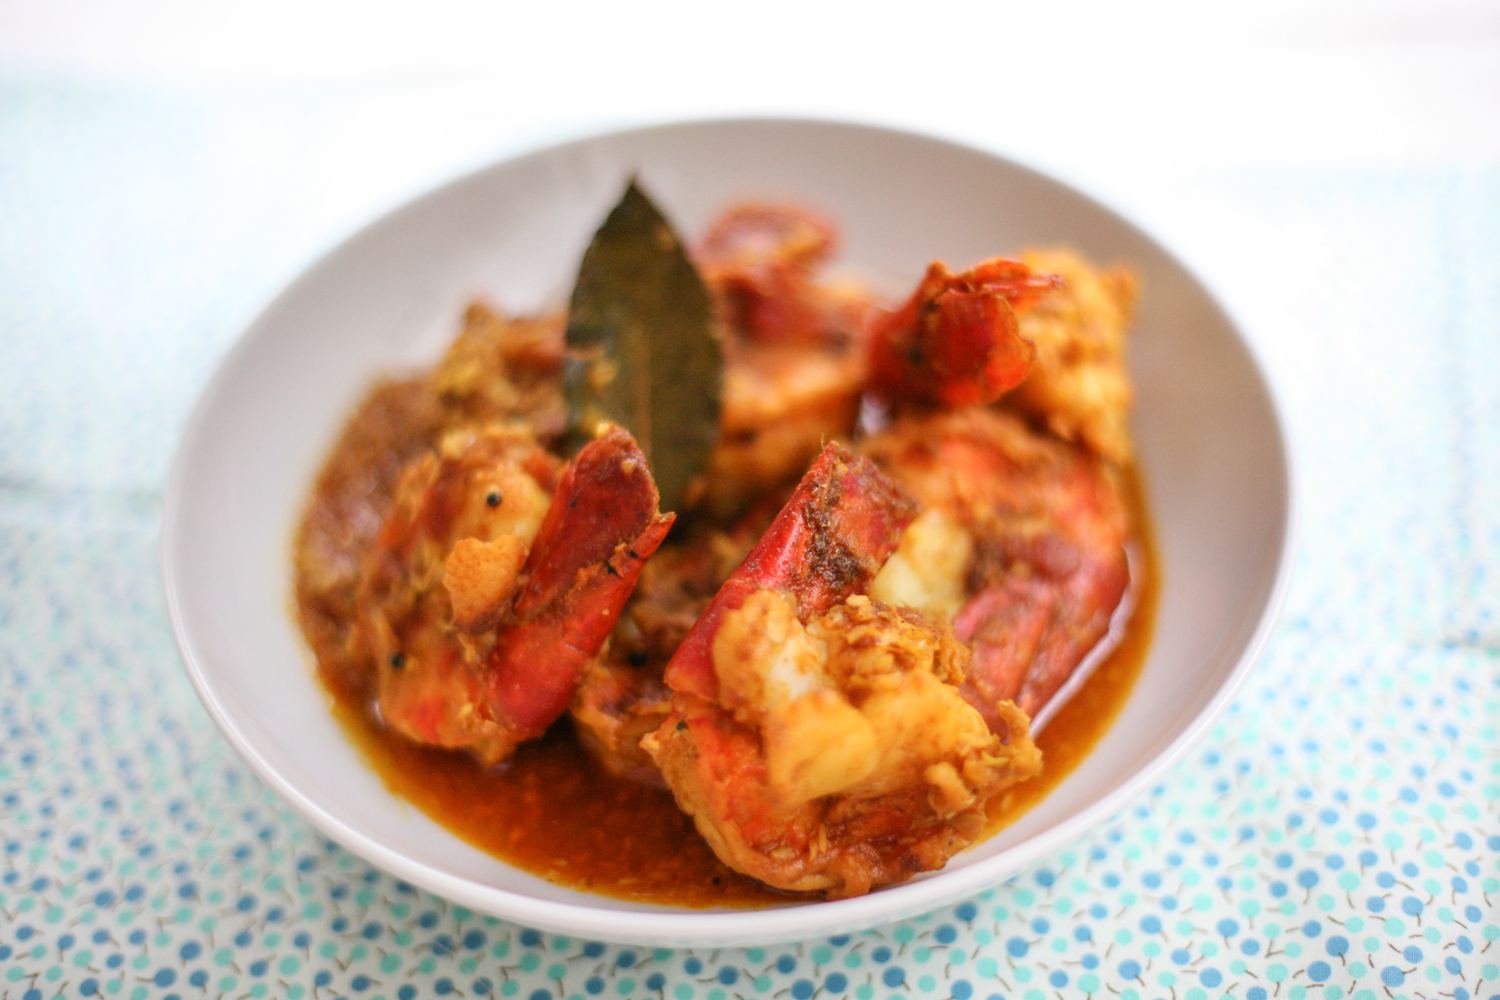
4 chorizo sausages, halved lengthways and then roughly chopped

1 tbsp smoked paprika flakes or smoked paprika powder

3 large tomatoes, diced

1 tablespoon tomato paste

5 large squid tubes, cut into rings

1.5kg bomba rice 

500ml boiling water, as required

2 glass of white wine + 1 glass of hot water

1.5kg mussels, beards removed and cleaned

1 handful of fresh parsley, roughly chopped

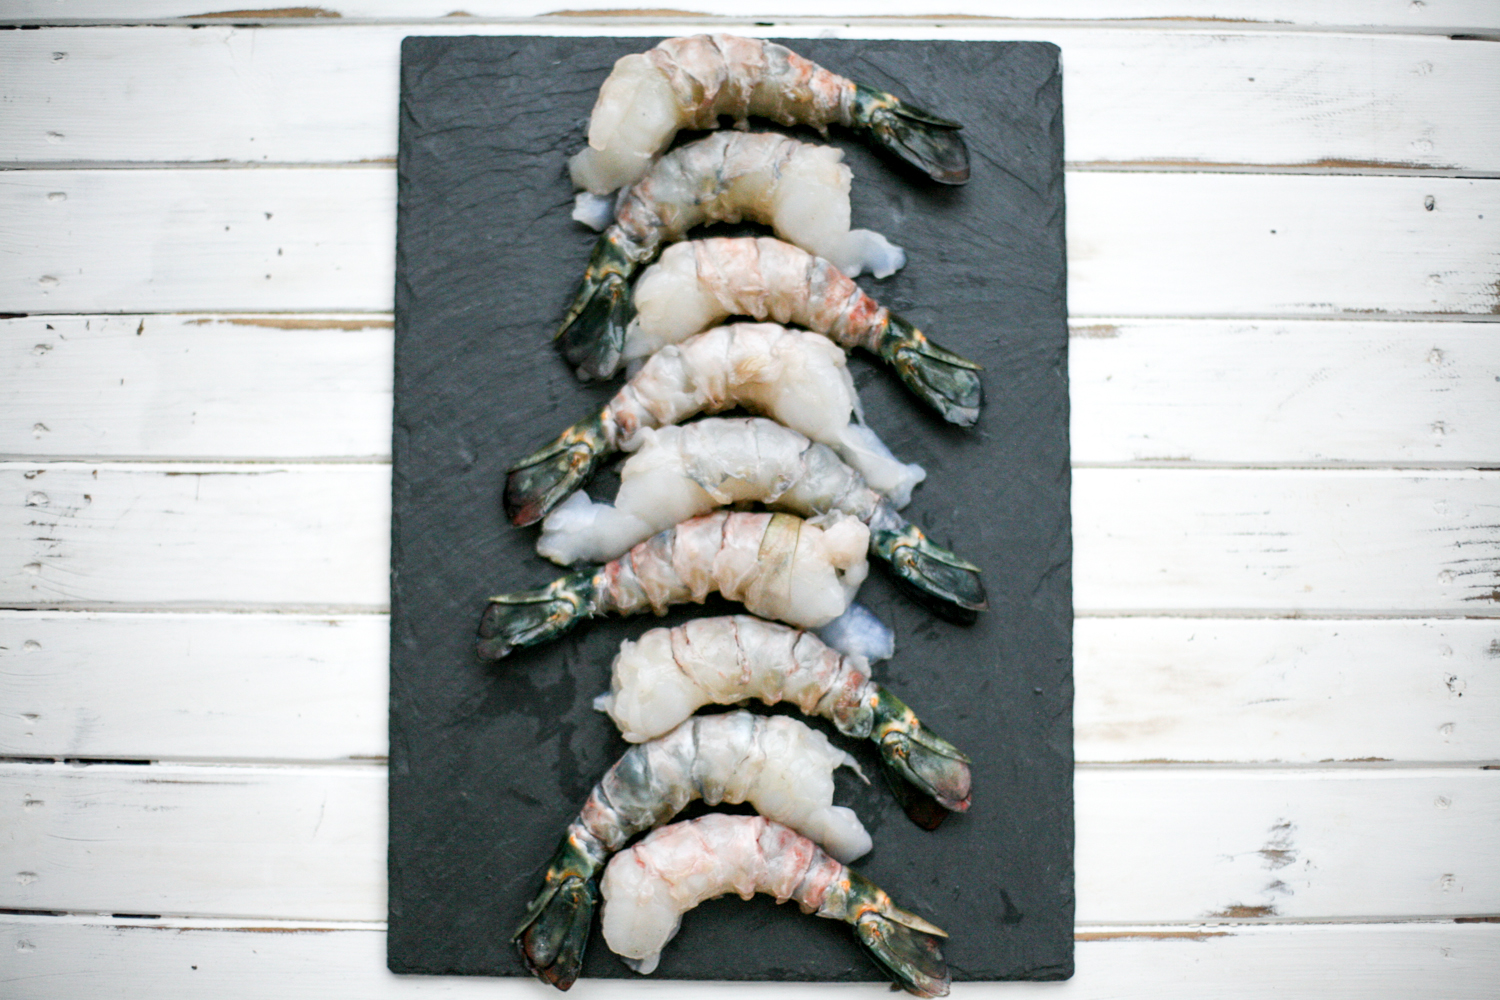
14 large king prawns shells and heads kept on

2-3 lemons, cut into 6 wedges per lemon


  1. If you are cooking this on the beach, proceed to step 9 first before continuing. Please note you will require a paella pan + a deep pan to cook the mussels
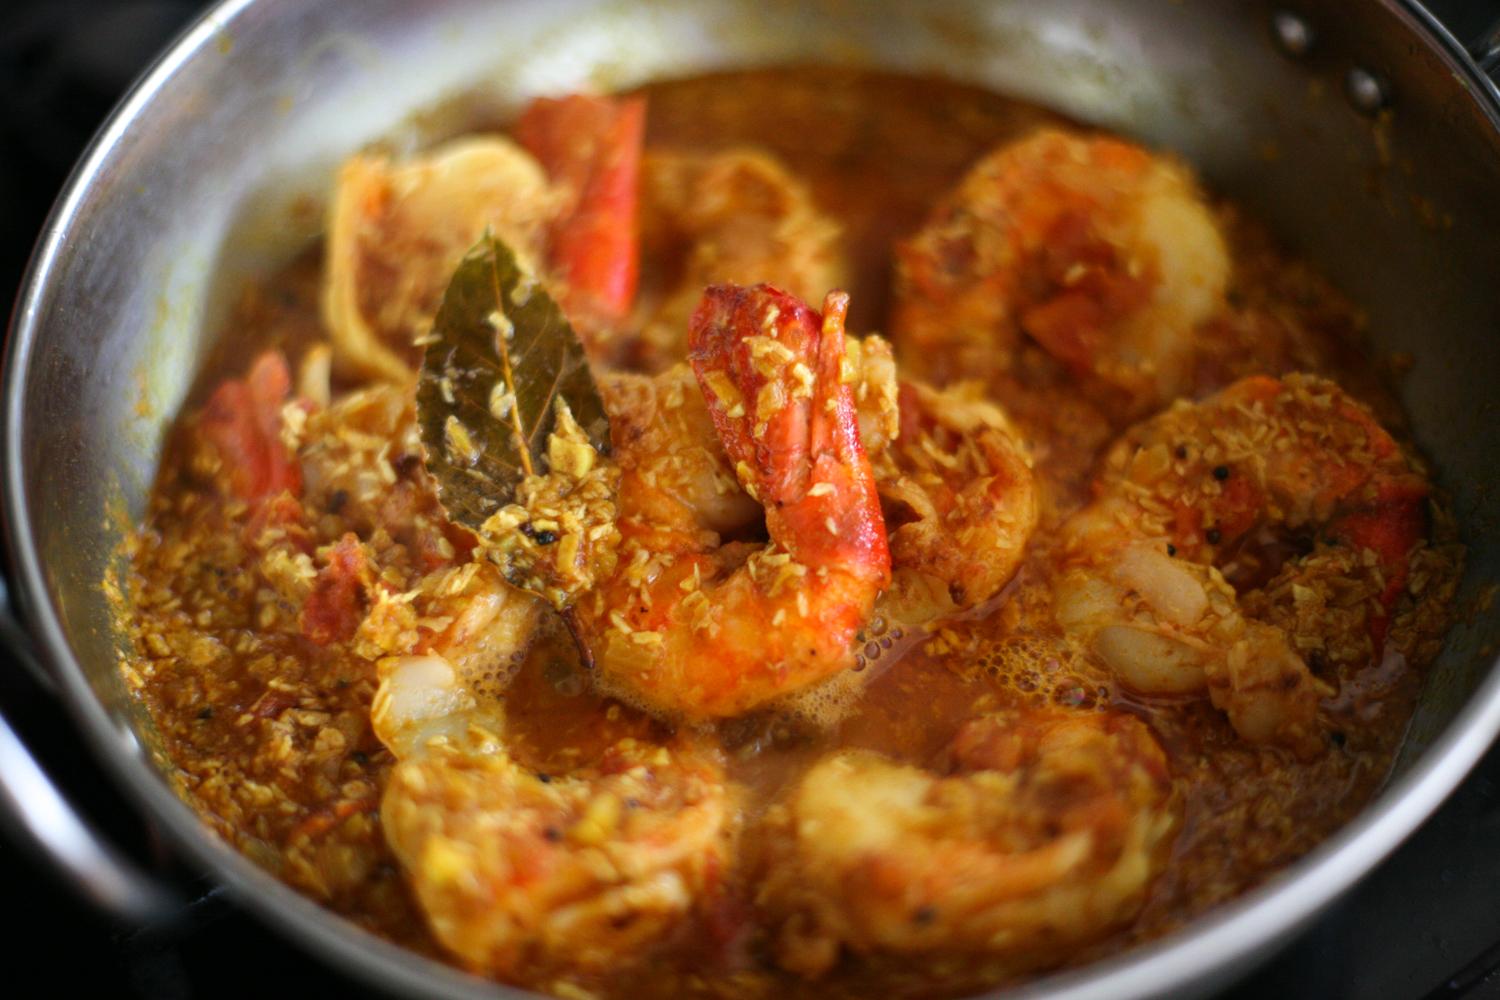
  2. In a deep saucepan bring the stock, paella seasoning and wine to the boil and then turn off the heat. You can do this on a BBQ or on a conventional hob. If cooking on a BBQ place the pan on a rack as opposed to directly on the hot coals.
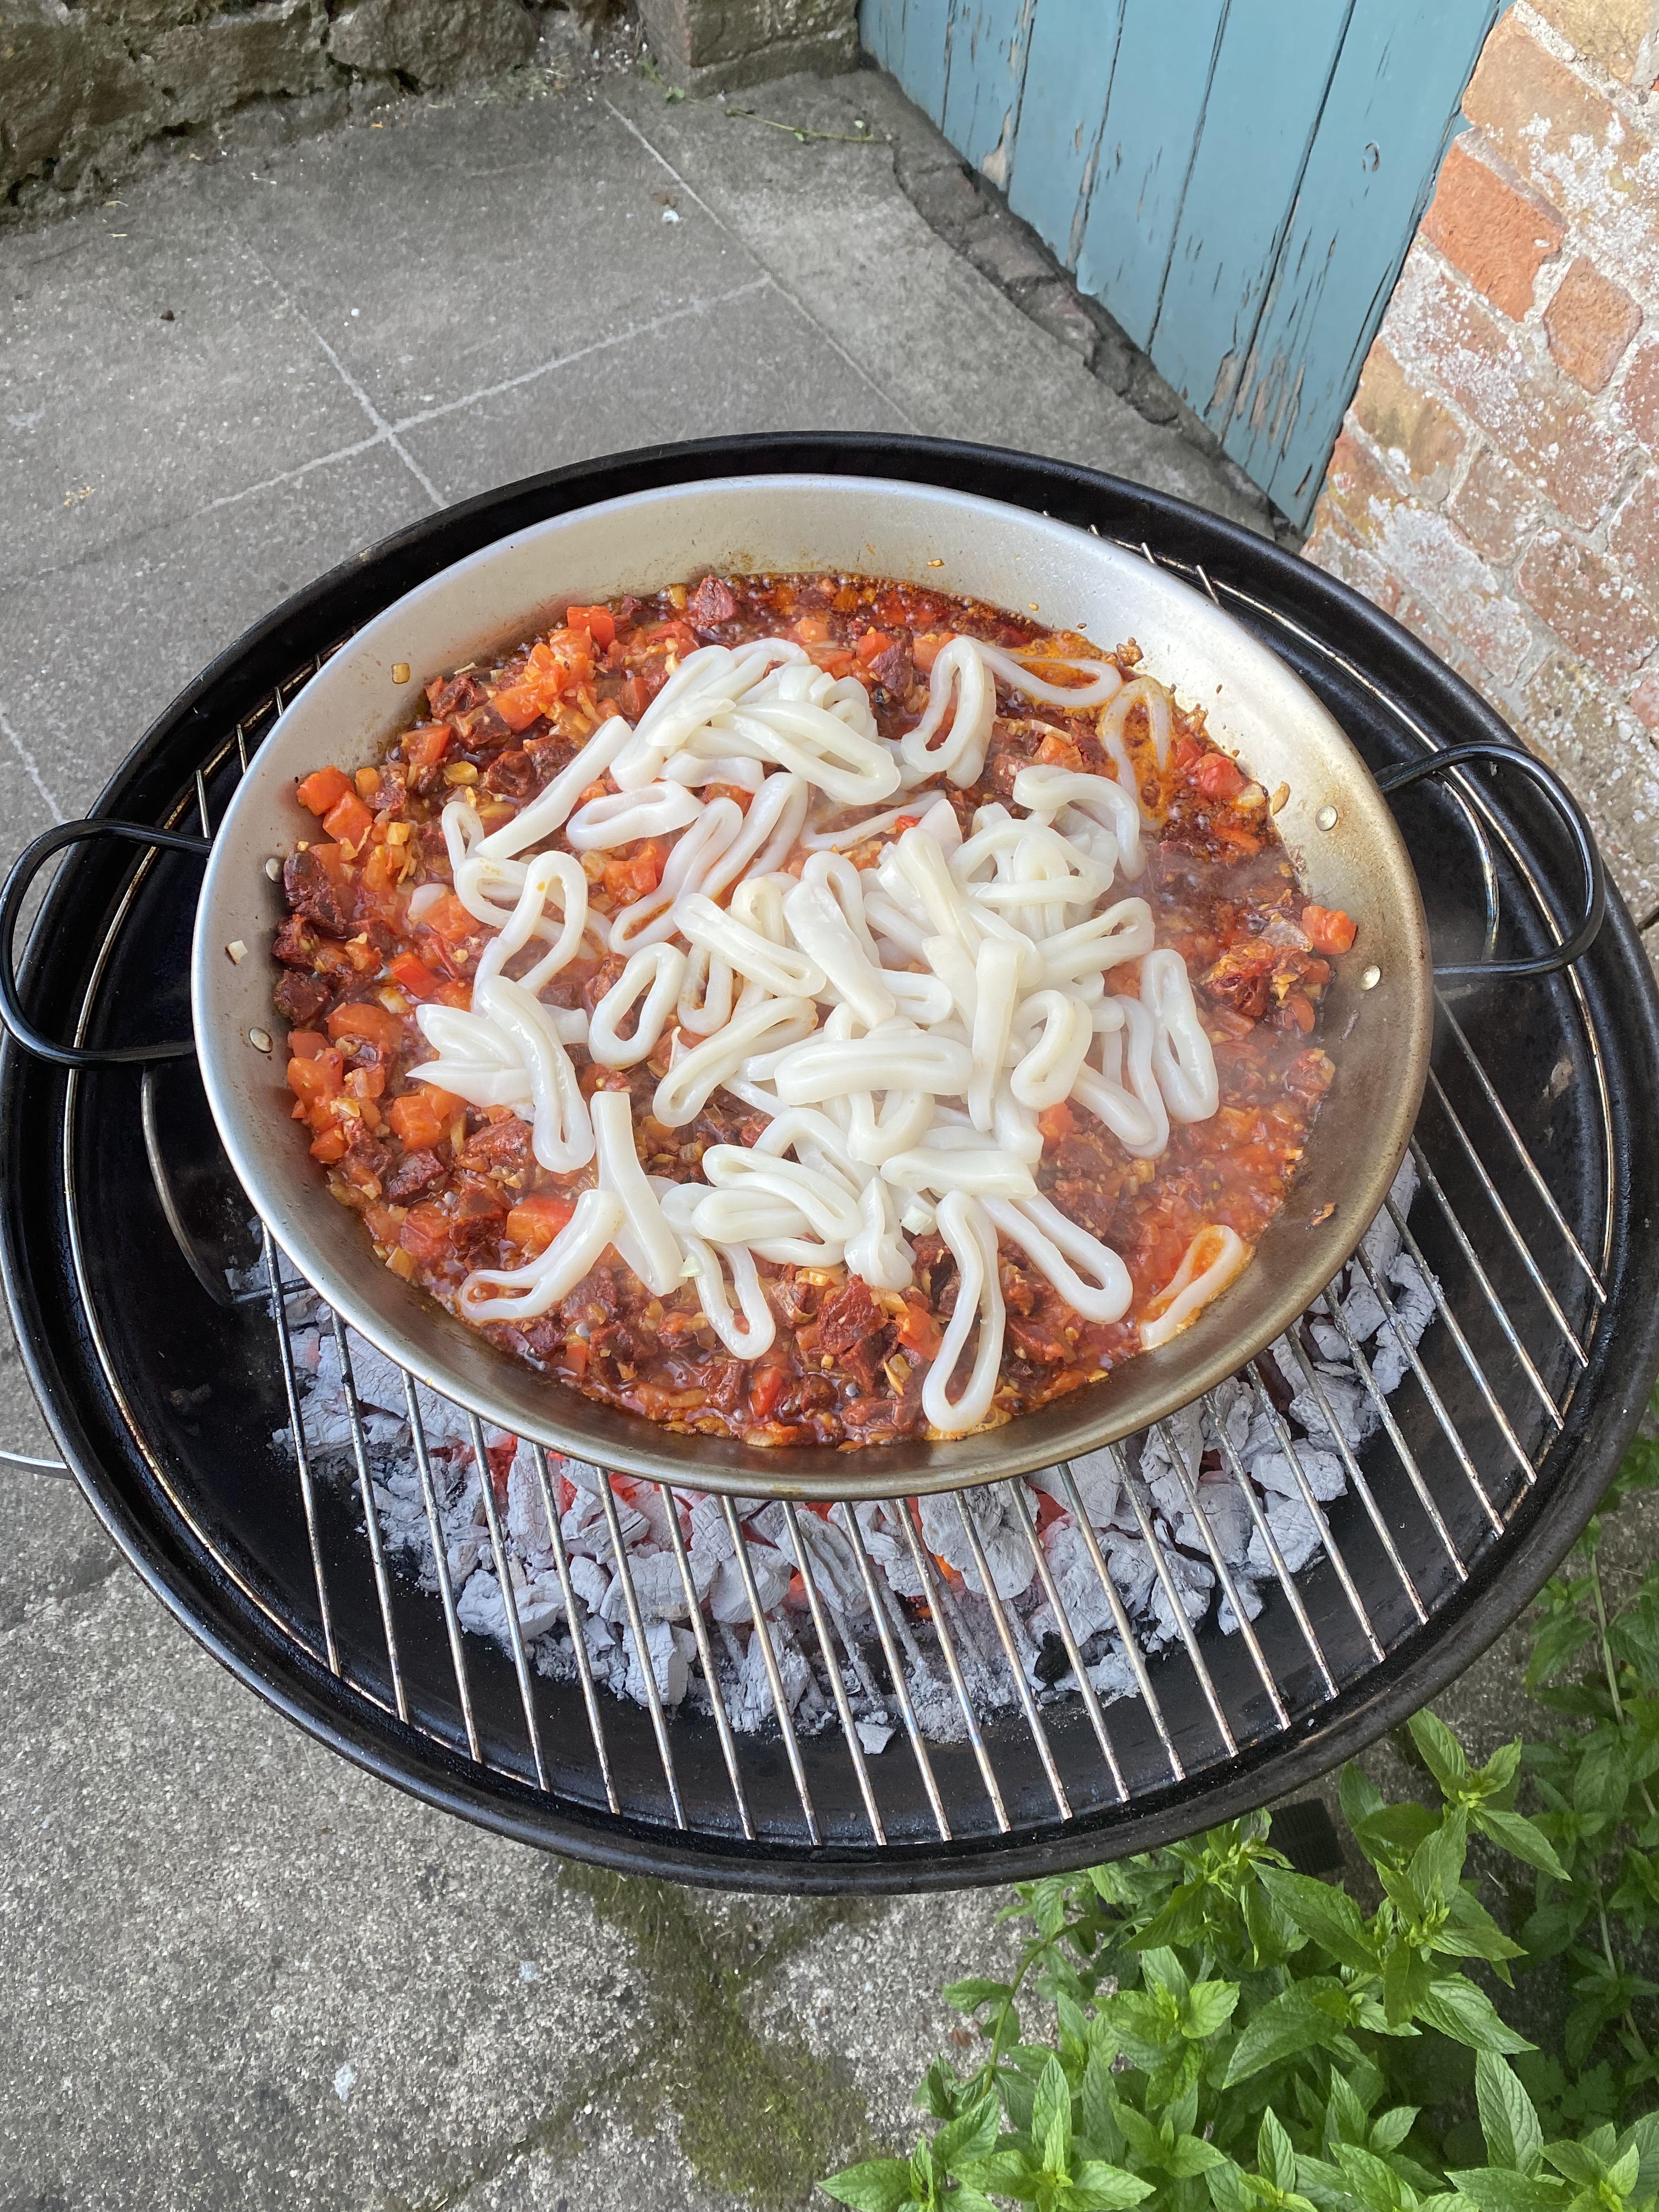
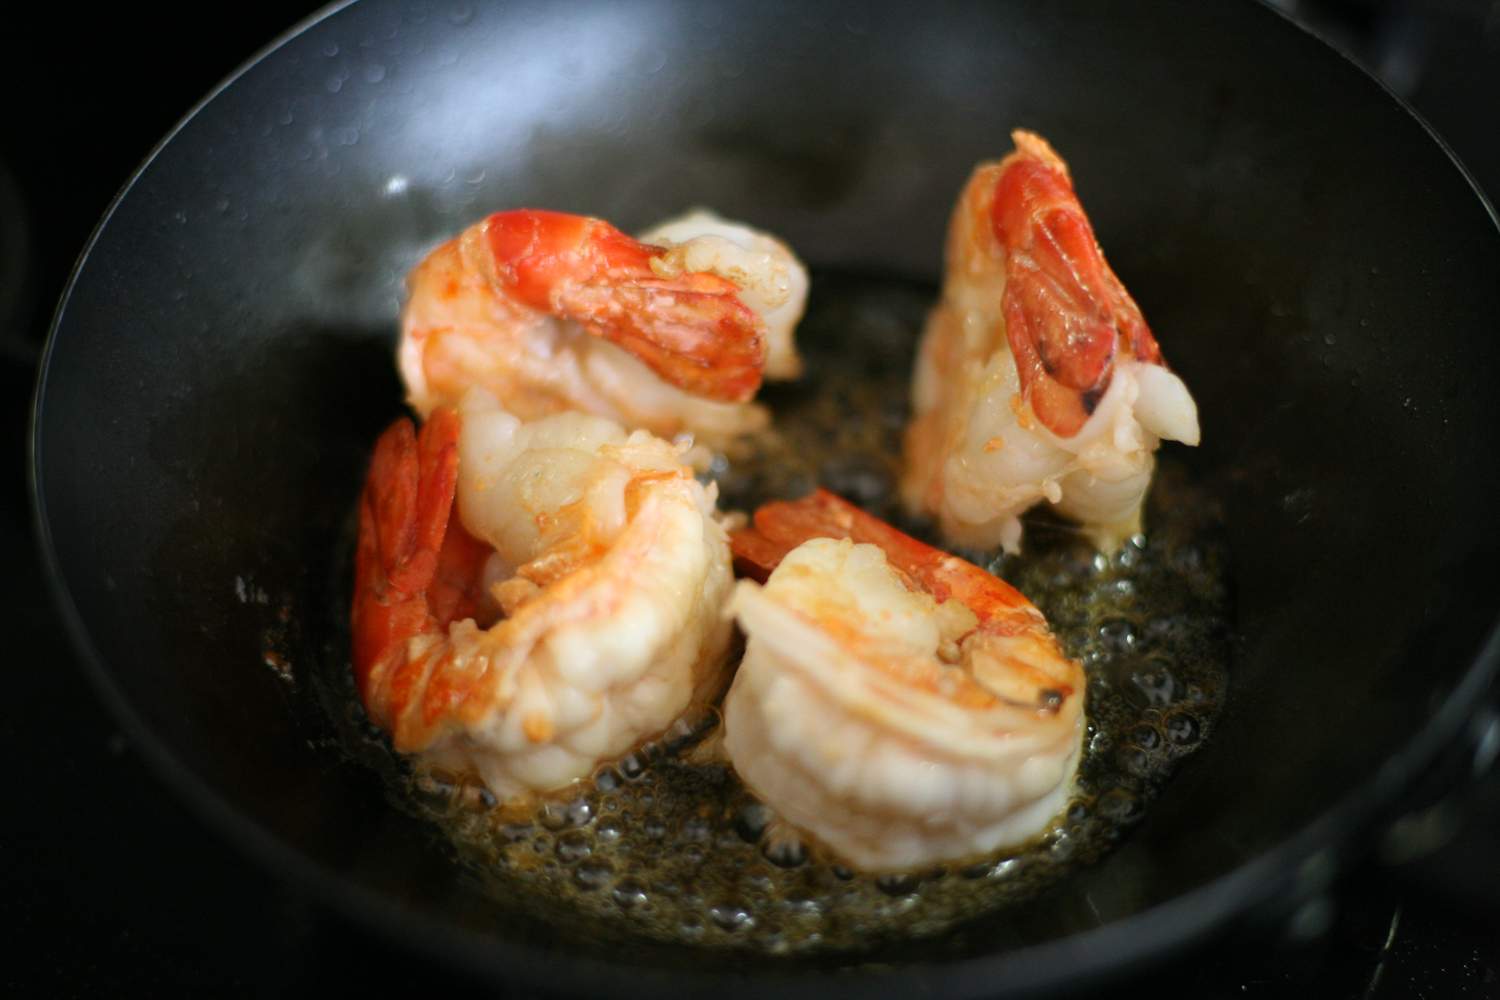
  3. Place your paella pan on your BBQ and then add the olive oil, allow it to warm up – it won’t take long if your BBQ is already nicely hot.
  4. Add the onions and move them around the pan. After a 3-4 minutes add the garlic and after a further minute add the chopped chorizo.
  5. Allow to soften for a couple of minutes moving around the pan to help with the cooking. If your heat source is not consistently hot it may require a couple more minutes.
  6. Add the smoked paprika flakes or powder, chopped tomato and paste and mix in well. Allow to soften for 2-3 minutes.
  7. Add the squid rings and a minute later add the bomba rice. Move the rice around the pan so that it is evenly spread out. After a minute add the fish stock that you had warmed up earlier.
  8. Stir in well and then place a lid on the pan ( I also add the outer BBQ lid, but if you are doing this on a stone BBQ on the beach you won’t be able to do the latter, but that’s fine)
  9. On a separate hob (if you are cooking this at your house and not at the beach) add 2 glasses of white wine and hot water and bring to the boil in the large deep pan with a lid –  use the same pan you warmed the stock. Add the mussels and give a good stir and then place a lid on the pan. Cover for 4 minutes and then add the chopped parsley. Check to see if the mussels have all opened and if not leave for another minutes or two giving a good stir. If it looks dry add a splash more white wine or water. Once they have all opened, remove from the pan and remove 3/4 of the mussels from the shell and place in a bowl. Place the rest of the mussels in another bowl and leave to one side.
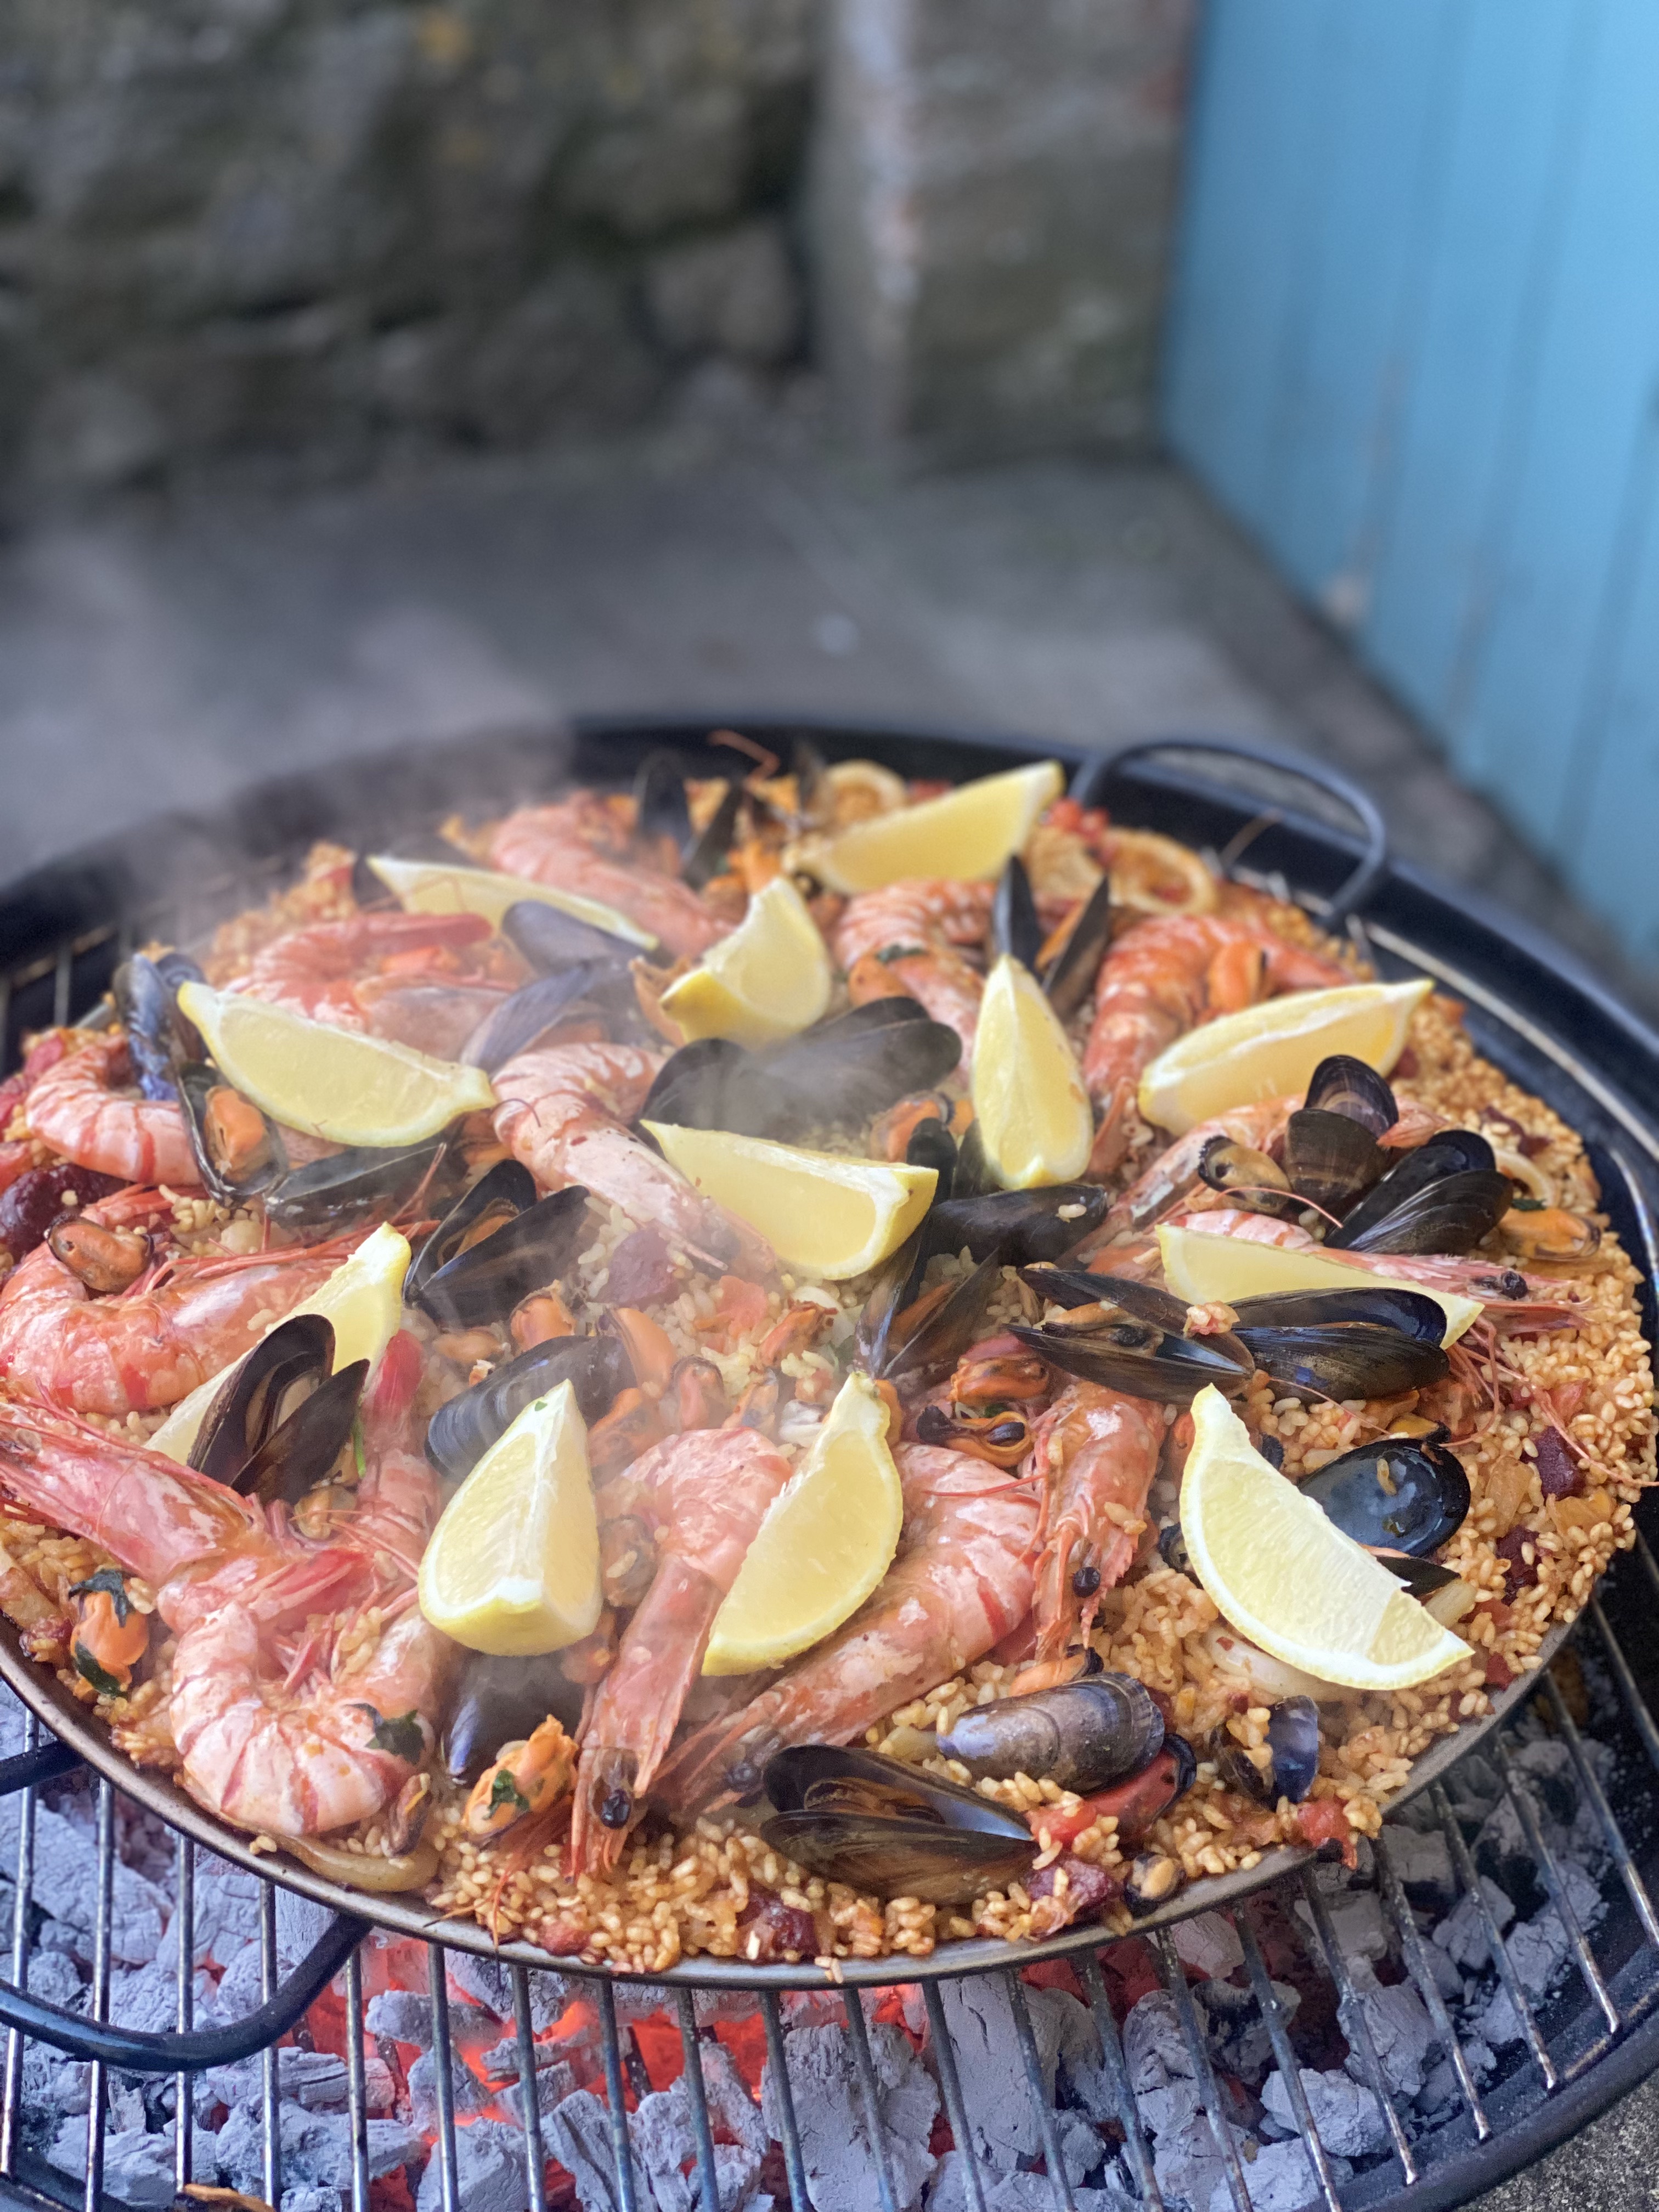
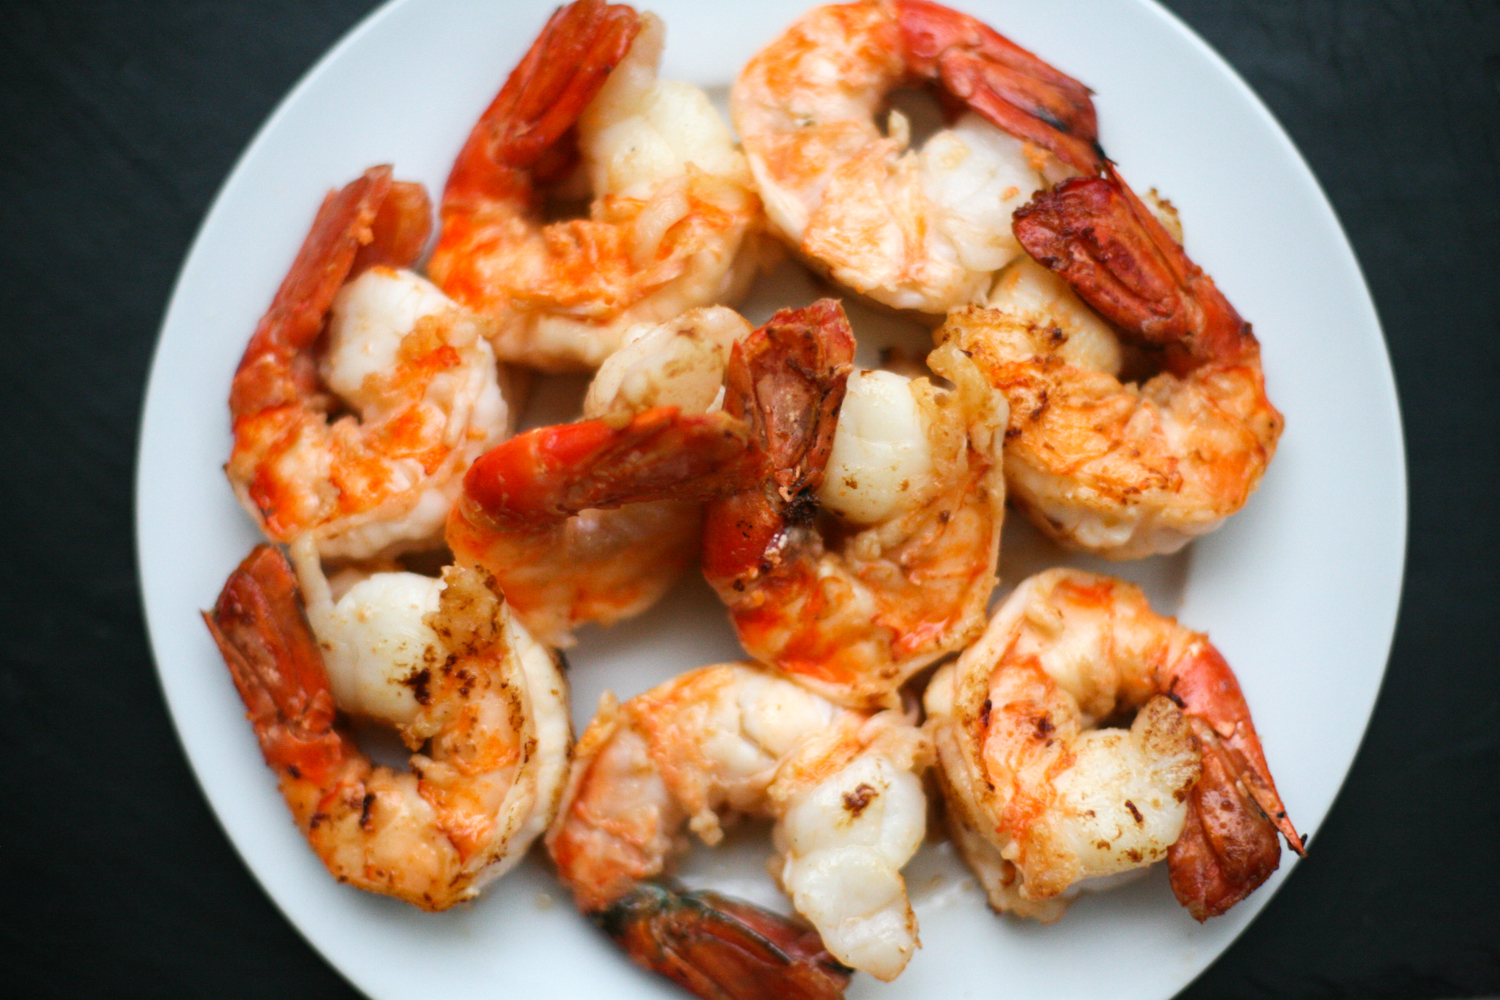
  10. After 18 minutes once the rice has been in the pan, spread the prawns around the side of the paella. You can of course use prawns which have been shelled but I think it looks more rustic and authentic to have them in their shells. Scatter the de-shelled mussels around the rice and those in the shells. Place the lid back on the pan.
  11. After 3 minutes, turn the prawns over and replace the lid once again and leave for a couple of minutes.
  12. Taste test to see if the rice is nicely cooked. It will not be a soft and glutinous like risotto rice as it holds its shape. Scatter the lemon wedges and serve.

If you make this let me know how you get on by posting a comment below. It’s a definite crowd pleaser and a great way to feed a large group of people.


Dreaming of Kerala – Squid Coconut Fry

IMG_2170

Kerala, often called ‘God’s own country’, is the perfect destination for the avid traveller who seeks adventure, beauty and tasty food. It encompasses so many different experiences and terrain in this sunshine state that no day is ever quite the same. Over the course of the last few weeks my family and I (and not other animals) spent time in Cochin, exploring their diverse places of worship as well admiring their famous Chinese fishing nets.

IMG_8310

The Western ghats, which provide the state, and much of the wider world, with tea, cardamom and coffee.

IMG_8541

The calming, slower pace of life in the emerald backwaters,

IMG_8731

and of course the palm fringed beaches of the coast and the gloriously warm Arabian sea.

IMG_8898

Along the way I met some wonderful people, both locals and fellow travellers, who all made our experience of Kerala very memorable. It was tough to say goodbye to the warm rays and friendly smiles and head back to a much colder London, which is now firming in the throes of winter.

During our travels I learned to cook a wealth of Keralan recipes from chefs and home cooks who welcomed us into their homes and kitchens. Meet some of them below. From left ‘Mummy’ from Philip Kutty’s Farm,  Sreeja  from Marari Beach Hotel and Moly from Cochin, who allowed me to shadow her for the day.

Prior to visiting the state I had a preconceived notion that a lot of the cuisine would be vegetarian, however this is not the case. In Kerala, Muslims, Hindus, Christians and Jews (there are only 6 now left in Cochin) live harmoniously and respectfully amongst one another. As such we feasted on chicken, lamb, pork and beef as well as delicious fresh and seawater fish, shellfish and a host of vegetarian dishes. Coconut oil and coconut in many forms, is the heart of many Keralan dishes along with the irresistibly sour tamarind and kokum, the latter being new to me. “Kera” in Malayalam (the language of Kerala) means coconut. As Kerala is abundant with coconut plants, it naturally got the name Kerala. Yes, many of the dishes in Kerala have heat, but with the cooling qualities of  coconut, many had their chilli bite tempered.

Over the coming months I will intersperse my blog posts with temptingly delicious Keralan dishes that will hopefully encourage you to try cooking them at home.

First up is ‘Squid Coconut Fry’, which in all honesty takes 10 minutes and that includes the prepping and cooking. So look no excuses not to give this a whirl. It is so good you’ll be cooking it time and time again. IMG_2160

 Squid Coconut Fry

Serves 2 (or 4 if serving with other dishes)

2 tbsp coconut oil

1/2 tsp mustard seeds

2 dried red Kashmiri chillies, halved and seeds removed if you like it less hot

10 pieces of thinly sliced fresh coconut or dried coconut slices

3 garlic cloves, thinly sliced

1 tsp ginger paste

1 fresh green chilli (2 if you like it hot)

10 curry leaves

1 small red onion, finely chopped

1/2 tsp salt

1/2 tsp chilli powder

1/2 tsp coriander powder

1/2 tsp turmeric powder

300g squid tubes, chopped into thin rings

1/4 juice of a lemon

1/4 tsp ground black pepper

1/4 garam masala

  1. First get all the ingredients ready as the dish takes no time to cook and you will want to eat it immediately. This dish is not good to be reheated.
  2. Heat the coconut oil in a pan. When it is hot add the mustard seeds and red chillies followed by the thin coconut slices. Keep the heat on a medium to low heat.
  3. After 20 seconds add the garlic, ginger, fresh green chilli and curry leaves.
  4. Move around the pan for a minute before adding the red onion and salt.
  5. Now add the chilli powder, coriander powder, turmeric powder and allow the flavours to come together in the pan. Allow the onion to soften for 3-5 minutes
  6. Add the squid and move around the pan. Cook for a further 3 minutes.
  7. Add the lemon, pepper and garam masala. Move the ingredients around the pan.

Serve immediately. All the wonderful flavours will have wrapped themselves around the squid culminating in the most appetising of dishes.

Quick and easy. I would serve with rice, a vegetable curry and a dal (see my recipe library).


Foraging for Cockles on the Welsh Coast

IMG_6931

There is something very rewarding about foraging for your own food, it’s like a treasure hunt for grown ups. I am no expert forager mind you and I would draw the line at foraging for mushrooms. I did a post a few years ago on foraging for samphire which you can read here.

This past week, however, I have been in a corner of Wales that even the locals requested I keep secret for fear that their corner of paradise will be overwhelmed by zealous visitors. The beaches are HUGE – think California expansive – stretching over a couple of miles long. This gives the treasure seeker a wonderful opportunity to forage for tasty goodies.

IMG_6951

We opted for cockles this time, but when I return to Wales I will also try for razor clams as the locals say they are also great to search for when there is a spring tide. Cockles are basically like small clams and you may have had them in southern Spain where they are referred to as ‘coquinas’. They also sell them in seaside towns in Britain, cold in little pots without their shells. That never particularly appealed, but hot with loads of garlic, parsley, lemon juice and zest and spaghetti certainly does.

The day we foraged was a little drizzly (the rest of the week was completely sunny, unlike the rain clouds over London I hear). The tide was a long way out and we searched between the shoreline and the sea. We looked for clues – cockle shells laying scattered on the beach surface and then would dig a hole about 1-2 inches deep and then feel around with our hands. Once you have found a couple you can normally find a whole group of around 10 or so. My daughters and I (Mr B had decided to take himself off for a walk along the 2.5 mile beach instead) lucked out and found over 250 in under an hour and a half. Result.

IMG_6850

We placed them in a pot (bucket is ideal) which we had filled with sea water. Overjoyed with our foraging success we went back to the cottage cleaned the cockles and then covered with fresh water and some sea salt. We then let them rest for a minimum of 6 hours (to overnight) before draining them thoroughly. We discarded any that remained open or did not shut firmly when you gently knocked the shell on a surface. We found that there were only 10 or so that were a bit suspect, the remaining 250 were ready for our feast.

IMG_6917

This amount could easily feed 6 people. We definitely over foraged but seeing as we had cooked them we decided it would be a shame to waste any so ate the lot. Piggie I know! Both my daughters (6 and 9) adored them. I am a big believer that if you make a scene about shellfish or any particular kind of food in fact, then your children will too and not want to eat them. If you show them how delicious they are and get stuck in then invariably they will too and not want to be left out.

IMG_6924

We feasted royally and before you ask, we all felt on top form the next day. They are great fun to forage for so have a go when you are next on the British coast.

Cockles with Garlic, Lemon, Parsley and Spaghetti

Serves 4-6 easily

250 cockles (I did not weigh them but guess it is around 1-1.2kg)

4 tbsp salt

1 tbsp butter

2 tbsp extra virgin olive oil

6 garlic, finely chopped

1 lemon, juice and zest

160ml white wine

2 large handfuls of flat leaf parsley

400g spaghetti

black pepper

  1. Clean the cockles thoroughly then cover with cold water and add the salt to allow the sand and grit to be dispelled. Leave to one side for a minimum of 6 hours to overnight so that the cockles can filter out the sand.
  2. When ready to cook, drain then and run them under fresh water. Make sure they shut firmly and discard any that do not close.
  3. Place the spaghetti in a pan of boiling water and simmer for around 10 minutes, then leave in the boiling water until ready to add to the cockle pan (no9)
  4. Heat a large deep pan with the butter and olive oil and when it is hot add the garlic. Keep on a medium low heat.
  5. Once the garlic softens after a couple of minutes, add the lemon zest and stir.
  6. Turn the heat up high and add the cockles. Add the lemon juice, white white and then place the lid on the pan. Shake the pan gently from side to side.
  7. After a minute check to see if some of the shells are opening. Keep the pan moving with the lid on.
  8. After another minute the shells should be open.
  9. Add the spaghetti and the parsley and mix all the ingredients together for 30 seconds before plating up and adding a little black pepper.

Any shells that have not opened then discard – do not try to prize open.


Scallops with Black Garlic, Black Pudding and a Balsamic Jus with Pea and Mint Quenelles

You’ll have to excuse me for this blog post. It slightly pains me to post it if I am being honest as the photographs are all wrong…in the sense that I took them in the evening with no light. This is a major no no for food photographs and normally I always shoot in daylight but for this post I could not reheat the dish and as much as I love scallops I really did not want to eat them for lunch and supper. So please overlook these dark shots and believe me when I tell you this is a seriously quick, tasty and stylish dish that is guaranteed to please anyone you present it to.

IMG_0711

Fresh scallops are wonderful, but I sometimes buy frozen from my local fishmonger and they work pretty well and are relatively good value. I am also a HUGE fan of black garlic. I wrote an article about black garlic for Country and Townhouse Magazine which you can read here. It will tell you all about them so have a peek at the article. Black garlic is beginning to pop up in some supermarkets but I sometimes just order it directly from either The Garlic Farm,  Merchant Gourmet or The South West Garlic Farm.

IMG_0719

Some people are squeamish about black pudding, but please people seriously there is nothing to get worked up about, unless you are vegetarian/vegan then I apologise. The fact is the saltiness from the black pudding works brilliantly with the scallops and the black garlic adds a umami (I wrote an article about this too – read here) sweetness that bursts in a flavour explosion in your mouth. I have added a balsamic jus to bind it all together and then added little quenelles (oval shape mounds of food) of pea and mint puree.

IMG_0726

The colours and flavours are magical. I think it probably works best as a starter or you could just add a few more scallops and black pudding to turn it into a main.

Scallops with Black Garlic, Black Pudding a Balsamic Jus and Pea & Mint Quenelles

Serves 4

1 tbsp olive oil

16 1/2 inch slices of black pudding

1 tbsp butter

16 scallops

16 slithers of black garlic

2 tbsp balsamic vinegar

1 tbsp boiling water (optional)

300g frozen peas

8 mint leaves

salt and pepper to season as required

1. First place the oil in a frying pan and when it is hot add the black pudding slices and cook on both sides for a couple of minutes, by which time they will have darkened in colour and crisped up slightly. Set aside in a warm place.

2. In a separate pan boil the peas and add the mint to infuse. After 5 minutes, drain and then puree using a blender. You can add a little chicken stock at this stage if you want a smoother more runny puree. Set aside in a warm place.

3. Using the pan that you cooked the black pudding heat the butter. Once it is melted and hot, but not burnt, add the scallops and gently heat for max 2 minutes on each side, so that a slight bronzing occurs on both sides. Add the black garlic once you have cooked one side of the scallops and then add the balsamic jus just before you take the scallops out of the pan. Ladle the balsamic jus over the scallops and then place them on a warm plate.

3. Raise the temperature slightly and add the boiling water if you want more of a jus and boil for a few minutes so the jus reduces and thickens slightly.

4. To plate up (use pre-warmed plates) add the black pudding followed by the scallop and then the black garlic. Next create quenelles with the pea and mint puree. They are easy to do. Watch the quick video below to show you how to do them.

5. Finally pour the jus over the scallops and around the plate.

Serve immediately so that it is still hot.


Turkey Revisited and Moule Mariniere

IMG_0508
Having been impressed by all that Turkey had to offer last year we decided to return for our summer foray this year, which is a little out of character as we tend to try somewhere new for summer travels. To be fair though, we were exploring  a new area – this time the Bozburun peninsula.
IMG_0470
I favour peace, tranquility and being away from the crowds of mass tourism, so nestling for a couple of weeks in the quiet village of Sogut at the very tip of the peninsula was absolutely the perfect base from which to explore the local area and enjoy the warm waters of the Aegean. It has been described as going back in time, not dissimilar to the south of Spain or France 40 years ago.
IMG_0241
The village itself is small and meanders down the hill towards the sea, offering breathtaking vistas of the nearby islands. The road came to an end at a picturesque harbour where a handful of wooden fishing boats bobbed gently up and down. Along the harbour were a few tavernas offering the freshest fish caught that very day. As the fish were bought in on the fishing boats the women would crouch over the rocks at the water’s edge gutting and cleaning the fish.
IMG_0298
Over the two weeks we alternated between these quaint little eateries (there were four in all) for our evening meal, sitting on the harbour wall, watching the sun gradually dip over the brow of the far away islands.
IMG_0406
Their menus were all fairly similar, but each had their own interpretation of the mezzes. We were somewhat surprised to see that samphire was offered every evening, cooked in garlic, lemon juice and olive oil. 2013 can definitely be remembered as the summer of samphire!
IMG_0566
It tasted less salty than the samphire found in the British Isles and when I asked where it grew, they pointed in-land as opposed to  seawards,  which might explain its less salty taste.
Octopus grilled with garlic, herbs, pink peppercorns and olive oil was another daily staple to the point that I fear that Mr B will start to have cold sweats if he doesn’t have it back at home now and again.  Needless to say a number of the mezzes consisted of aubergine and tomato fusions with the ubiquitous garlic and olive oil, as well as a broad bean based humous and another including beetroot.
We discovered a new soup that really appealed to us. Known as ‘tarhana’ it has been cited as the first ‘instant soup’ invented by Central Asian Turks. The dough that goes into making up the soup takes 5-6 days to ferment, so it really is a labour of love to make and as such I felt it probably wouldn’t get much of a following if I posted it as a blog post in its own right. If I am wrong then let me know and I may well do a post on it in the future.
IMG_0635
Apparently 100 years ago locals would eat a bowl of it for breakfast each morning before embarking on their day’s work. It is truly delicious, and eating it accompanied with a fresh tomato and pickled red cabbage salad and a round or two of gozleme filled with local cheese and cabbage definitely hit the spot.
IMG_0538
The Bozburun peninsular, or to be precise the village of Osmaniye, is one of the most prolific producers of pine honey in the world. We journeyed into the hills to visit the Honey House where we were taken on an informative tour of how honey is produced in the region. All those in the vicinity of the village earn their living from bee keeping and scattered all across the hillside you can see little blue and white boxes housing the bees.  True to its name, the honey itself has a distinctly pine taste to it and I was fascinated to learn that the bees collect a saliva off the pines that has been excreted onto the pine leaves by a totally different insect and it is this liquid that gives the honey its distinctive aroma and taste. You can find out more about the process here.
Other than eating we enjoyed seeing the local area and in particular the local ruins of Phoenix and Amos. The former was scattered all over the surrounding  countryside of Sogut and at a nearby beach – Phoenix Beach – which wins awards in my book as the most off-piste beach to reach, an adventure in itself – you can snorkel and see pots dating back thousands of years.
IMG_0586
I learnt that whilst it has not been thoroughly excavated, archeologists decided that concreting the pots and treasure of the past to the sea bed would be the best course of action to deter would-be-treasure hunters. Maybe this is common practice but I felt this was a rather unusual choice of action.
IMG_0551
We explored the ruins of Amos in 40 degree heat, which was not really the best time to explore the ruins thoroughly, but getting to the ruins took some time to reach as we meandered over the mountains and hairpin bends that make up the Bozoburun peninsular. After exploring the ruins of Patara, Tlos and Letoon last year the ruins of Amos and Phoenix were slightly disappointing, but nonetheless, I do still enjoy a good amble around an ancient ruin.
IMG_0530
As always the locals were friendly and welcoming and made our visit to their region a happy and enjoyable one. I was most impressed with Osman’s gold teeth (see above) – what a legend!
To continue with my seafood diet of the last two weeks I wanted to bring to you my version of the ubiquitous Moule Mariniere, which is long overdue.
IMG_6931
A foolproof recipe that is very quick to prepare and cook, economical and a family crowd pleaser. Enjoy. I hope you all had a wonderful summer holiday wherever that may have been. Leave a comment to fill me in.
IMG_6899
Moules Mariniere
Serves 4
1.5-2kg mussels, cleaned
2 tbsp butter
4 shallots, finely chopped
4 garlic cloves finely chopped
3 bay leaves
200ml single cream
200ml dry white wine
1 tsp salt (optional/to taste)
handful of fresh parsley to serve
crusty bread  to serve
1. Thoroughly clean the mussels under cold running water. Close the open ones with your hands or by tapping them gently and discard the ones that remain open or are broken. Remove any barnacles from the shell and pull away the beards. It’s easiest to pull the beards  back and forth and then they will release from the shell with a little tug.
2. In a pan that is large enough to comfortably fit all the mussels at once with extra room to move them around (if need be cook in two pans and then merge together at the end) melt the butter and then add the garlic, shallots and bay leaves. Once softened add the mussels and stir for a few seconds before placing the lid on top. Leave the mussels to cook in their own steam for 2-3 minutes.
3. Add the cream and white wine and give a good stir and leave for another minute or so.
4. Serve immediately in bowls topped with a scattering of fresh parsley. Serve with a crusty baguette to soak up the juices. Discard mussels that remain closed or are barely open.
IMG_6912

Bengali Prawn Curry

IMG_4683

This Bengali prawn curry is one that was passed on to me by my mother-in-law and is, without doubt, my favourite of all prawn curries. The sweet undertones from the desiccated coconut and prawns blends superbly with the black mustard seeds and chilli powder, giving it a gently kick. I love to cook it using the king of all prawns, but it tastes equally good if you cook it using the smaller varieties as well. I do prefer to keep the tails mind you, both for appearance and because it holds the prawns together well, so if you can find prawns with shells and tails on I would always opt for those as opposed to buying the ones that have already been shelled and deveined.

IMG_4611

The prawns will be a greyish colour when you buy them. I bought frozen prawns and then let them defrost slowly over night in the fridge before peeling and deveining them in the morning. They remind me of the giant grilled prawns I would eat most evenings when I was staying on the shores of Lake Malawi for my honeymoon, many moons ago.

IMG_4620

Within seconds of being gently cooked the prawns will turn a fabulous pink and begin to curl into themselves. They only need a minute or so cooking on each side to seal them.

IMG_4629

The sealed prawns waiting to go into the curry sauce. The meatiness of them makes them a very satisfying and filling meal.

IMG_4641

Once the prawns have been added to the curry sauce let them simmer gently for a few minutes, making sure you coat the prawns sufficiently in the delicious sauce. Sprinkle ground garam masala over the prawns and give a little stir, before serving with basmati rice.

Bengali Prawn Curry

Serves 3-4

600g prawns, peeled, deveined but tails left on (I used 9 frozen super king prawns)

1 medium sized white onion, finely chopped

3 garlic cloves, finely chopped

1 inch piece of fresh ginger, skin removed and grated

vegetable oil

2/3 bay leaves

1 tsp black mustard seeds

25g (or 4/5 tbsp) desiccated coconut

1 tsp turmeric powder

1 tsp sugar

1 tsp chilli powder (less if you prefer it less hot)

1 tsp cumin powder

1 tsp coriander powder

1 tsp salt (you may wish to add one more – taste first)

2tbsp chopped tin tomatoes

200ml boiling water

1 tsp ground garam masala

1. Heat a couple of tablespoons of vegetable oil in a fairly deep frying pan or karahi. On a low heat add the prawns, in stages if your pan is on the small side, so as to seal them. They will curl up slightly and take on a vibrant pinkish hue. After a minute or so turn them over so that both sides are sealed. Then turn them on to their backs so as the top side is also cooked. Remove from the pan and place on a plate to one side, whilst you finish cooking the remaining prawns.

2. Add a little more vegetable oil if it is running dry and keeping the oil at a low heat add the black mustard seeds. They will burst open and sizzle so make sure the oil is not too hot as they will spit! Add the bay leaves and stir with the black mustard seeds.

3. Add the onion, garlic and ginger to the pan and cook gently for around 5/6 minutes until they begin to bronze in colour.

4. Add all the spices apart from the garam masala, as well as the salt and sugar.  Stir together and add the tinned chopped tomatoes.

5. Add 200ml of boiling water and add the desiccated coconut. Bring to the boil gently stirring and add the prawns. Gently cover the prawns in the sauce and simmer for a few minutes. Taste and add more salt if necessary.

6. Add the ground garam masala over the prawns, give a quick stir and serve immediately.

Serve with basmati rice.


Macha Soul tea with Janice Leung and Satay Prawns with Garlic, Lemongrass and Spring Onions

OLYMPUS DIGITAL CAMERA
This blog post has been a long time coming and for that I apologise to you all. I initially wrote the post on the plane coming back from Hong Kong and was rather chuffed with myself as I had, for once, hours to compose and fine tune it.  I was really satisfied with the end result, but then tragedy stuck as I accidently deleted it upon my return owing to the fact that I wasn’t very familiar with my new computer. So this post is very much an abridged version of the original, which in hindsight was probably far too long and rambling anyway.

During my recent visit to Hong Kong I was fortunate enough to meet up with one of Hong Kong’s most dynamic food bloggers, Janice Leung, over a delicious cup of creamy ‘matcha soul’ tea, at a charming little tea house called Sinmei in Sheung Wan. Like many of Hong Kong’s gem eateries and cafes it was hidden on the 5th floor of a commercial building away from the hustle and bustle at street level. It was an oasis of calm and serenity with its mix of vintage Chinese and European furniture giving it a somewhat boho shabby chic vibe.

IMG_7166

Matcha soul tea at Sinmei
Prior to setting up her blog: e-ting food, Janice worked as Assistant Editor at Luxe City Guides, so knows her way around Hong Kong (and a number of other cities in fact) better than most. Most recently however Janice, along with her business partner Vincent Poon, have set up Island East Markets which is Hong Kong’s answer to an organic farmers market.
Janice’s motivation for setting up such an enterprise was down to the fact that she found it increasingly difficult to source good organic produce in Hong Kong; the nearest place for her was in Tao Po, over an hours journey from her house, or the  few stalls on Central Pier 7. Typically the fresh fruit and vegetables you see being sold in the various street markets in Hong Kong comes from mainland China where little or no knowledge is known about where or how it was grown and whether pesticides or fertilizers were used.
IMG_6960
A typical Hong Kong fresh vegetable stall
There was definitely a gap in the market to launch such an enterprise and having spent time traveling the globe as well as living and studying in Melbourne Australia, Janice had seen the positive effect that having a local farmers market had on the community and the farmers alike. She was keen to create an environment where people would want to spend time getting to know the vendors, trying the different foods on offer and a place that families could wile away a few pleasant hours on a Sunday.  As well as edibles and fresh produce, there is handcrafted goods made by local artisans, face painting for the kids and talented local bands. I also particularly like the idea that she has organised for local chefs to come and do food demonstrations using the local food on offer at the market to create delicious dishes that people can replicate at home.
There were a couple of key factors, however, that were paramount to the markets success; firstly she needed the support from the local organic farmers in Hong Kong – namely in the New Territories and secondly she needed a site. For the former she was directed to a body of around 70 farmers who were members of the Organic Farmers Association in Hong Kong, which is similar to the Soil Association in the UK. Using this list as a starting point she introduced the idea to the farmers who responded positively. The second factor could have proved tricky had the Real Estate company Swire Properties not offered them a site in Quarry Bay every Sunday. It was an incredible stroke of good luck that allowed the market to breath life. On Sunday’s the road is closed off to traffic and stalls are set up and a relaxed vibe is allowed to resonate.
So far the market has received a positive reception by vendors and customers alike and although it was closed over the Christmas period it opens up again from Sunday 27th January so if you are living or visiting Hong Kong in the future make sure you take some time out on a Sunday to visit Island East Markets on Tong Chong Street and see for yourself Hong Kong’s answer to an Organic Farmers Market, I know for sure that I will be paying it a visit upon my return in April, in fact I can’t wait!
——————————————————
OLYMPUS DIGITAL CAMERA
The recipe for you today was inspired by a visit to a restaurant called ‘The Chairman’ on Kau U Fong in Central. Similar to Janice’s way of thinking the restaurant is also pro ‘local’ and sourcing premium produce from the New Territories, as well as placing emphasis on home-made as opposed to ready-made. Additives and MSG have no place in their kitchen and whilst the menu may not have as widest selection of dishes compared to some restaurants, the dishes that are on offer hit the mark.
The dish below was inspired by one such dish that I sampled in the restaurant. I hope that I’ve done credit to the original.  After a few false starts on the home-made satay sauce, I think I have found one that hit’s the high note. I hope you ‘ll agree.
OLYMPUS DIGITAL CAMERA
Satay Prawns with Garlic, Lemongrass and Spring Onions with Rice Noodles
Inspired by a similar claypot dish at The Chairman Restaurant in Hong Kong
Serves 4-6 (depending if you are serving other dishes as well)
320g fresh King Prawns (heads removed, shell on or just tails on – up to you)
2 tbsp of ground nut oil
7 garlic cloves, peeled (I like my garlic)
3 spring onions, chopped into 2 inch pieces
2 lemongrass, chopped into 2 inch pieces and halved (white part only)
250g rice flat noodles
Peanut Satay
250g dry roasted peanuts, unsalted
1 tbsp Kecap Manis (sweet soy sauce)
1 and a half tbsp palm sugar (or regular if you don’t have this)
1 tbsp of tamarind concentrate (or pulp soaked in 25ml of warm water – you’ll need to squeeze it through a sieve if you do it this way)
pinch of salt
50 ml ground nut oil
200 ml water
for the spice paste you will need:
4 small dried red chillies, deseeded (or more if you want more of a kick)
3 shallots
2 lemongrass (remove the green part)
3 garlic cloves
1 inch fresh galangal (or ginger if you cannot source it)
1. First make the peanut satay sauce. Coarsely grind the peanuts in a blender or food processor (or pestle and mortar) and remove and place to one side.
2. Next place the spice paste ingredients in the food processor and whizz until they are form a smooth as possible paste.
3. If you are using tamarind pulp soak in warm water for 10 minutes and then press through a sieve.
4. Place the oil in a pan and add the spice paste ingredients and let simmer gently for a couple of minutes before adding the crushed peanuts and stirring together.
5. Add half the water, tamarind concentrate (or pulp), kecap manis, palm sugar, salt. Stir in throughly.
6. Place the remaining water, and add even more if necessary, and let similar for a few minutes. Taste test to see if the salt/sugar elements have the right balance. Let cool and place to one side.
————————————————
7. Heat a pan with groundnut oil and when the oil begins to bubble add the garlic and lemongrass and let it gently sizzle for a couple of minutes, stirring occasionally.
8. Add two tablespoons of homemade satay sauce to the pan and stir into the garlic and lemongrass.
9. Place the prawns into the pan and cover throughly with the peanut satay. Add another one or two tablespoons as required. After a couple of minutes add the spring onions and after a minute take off the heat.
10. In a separate saucepan boil the rice noodles for the time specified on the packet – will not be longer than 5 minutes. Drain the noodles and add a further tablespoon of satay sauce so that the noodles are also coated in the satay.
11. Transfer the noodles to a large main dish and place the prawns, garlic, lemongrass and spring onions on top and then let guests/family serve themselves.
Please note homemade satay sauce can be stored in the fridge for a couple of weeks and in the freezer thereafter.
OLYMPUS DIGITAL CAMERA


Crab, fennel, chilli flake and lemon bruschetta – an uplifting lunch for the start of the new school year

OLYMPUS DIGITAL CAMERA

School started again today for big A, so it was a return to the old routine of getting up early – although at the moment we have no problem there as the jet lag hasn’t completely worn off as yet.

After a breakfast treat of crepes with ham, cheese and eggs – for the girls, not me I might add, we did the school run. All morning whilst little Z and I were busying ourselves I was looking forward to trying out a recipe that I recently spotted in the Australian food magazine ‘Gourmet Traveller’. If you have not come across the magazine before I urge you to take a look at their website at the very least. The fusion of food and travel appealed to me and I thought that the articles were well written and interesting and the photographs stunning. Australia is approaching spring and of course we are heading towards autumn, so perhaps their recipes are slightly out of sink with what us Brits would be thinking about cooking. That said this recipe appealed to me greatly and I felt that it could easily bridge the seasons.

It’s an ideal snack, light lunch or starter and would go down nicely with a glass of crisp white wine. The combination of crab, fennel, lemon and chilli flakes is sublime and the fact that it is easy to prepare further adds to its appeal. I think you will agree this one is a winner.


Crab, fennel, chilli flakes and lemon bruschetta

Adapted from ‘Gourmet Traveller’

Serves 4

Sour dough loaf, sliced

120g tin of crab meat. By all means use freshly cooked crab meat if you have it to hand but I find the tinned variety reasonable and hassle free

1 tsp fennel seeds, crushed

juice of 1/2 a lemon

1/2 tsp of chilli flakes

25 ml of olive oil

half a lemon, thinly sliced. Meyer lemon if you can get hold of them. Equally you can substitute the lemons with 2 tsp of lemon juice and 1 tsp of finely grated rind. 

1/2 fennel bulb, thinly sliced

1 handful of flat leaf parsley, coarsely chopped

1 garlic clove, halved

*  Mix the crab meat, lemon juice, fennel seeds and chilli flakes together with your hands and add the olive oil.

* Now gently add the lemon slices (or finely grated rind – see above), fennel bulb and parsley and season to taste.

* Using a griddle pan, or in my case non-stick grill plates from my sandwich and panini maker, place a couple of slices of sour dough bread on the plates for approximately a minute. If you are using a griddle pan, turn the bread only once. Repeat until you have toasted enough bread for your needs.

* Once the bread is toasted sufficiently so that griddle lines appear, rub the cut-side of garlic onto the toast.

* Place the crab mixture on top of the toast and serve immediately.


King Prawn Noodle Broth – effortless joy in a bowl

OLYMPUS DIGITAL CAMERA

Do you ever feel too exhausted to cook in the evenings but want a fresh, healthy, comforting dish that you can prepare in lightening speed with very little effort? I think all of us do from time to time, I certainly did this evening. So I put together this wonderfully flavoursome broth in less than 10 minutes. I feel it cleanses the body and heightens ones senses. It’s definitely my kind of dish.

King Prawn Noodle Broth – Serves 2

190g  Jumbo king prawns (or any prawns will do)

1 bag/ 200g of udon noodles (double the amount if you are feeling hungry)

1 tamarind broth cube (Knorr make them)

1 garlic clove, finely sliced

6 thin slices of fresh ginger

half a red chilli, finely sliced

1 lime

1 spring onion, finely sliced

1/2 tsp of lemongrass paste

2 tsp of light soy sauce

1 tbsp sesame oil

1 tbsp of coriander, chopped

1. Thinly slice the garlic, ginger, red chilli and spring onion. Heat the sesame oil in a pan, and when it is hot, add the chopped ingredients and the lemongrass paste, and cook gently for a couple of minutes.

OLYMPUS DIGITAL CAMERA

2. Meanwhile put 600ml of boiling water in a pan on a low heat and break up the tamarind broth cube into the water. Then add the prawns and watch them reduce in size slightly – this will only take a couple of minutes – be careful not to over cook them!

OLYMPUS DIGITAL CAMERA

OLYMPUS DIGITAL CAMERA

3. Place the contents of the pan with the garlic, ginger, chilli, lemongrass and spring onion into the broth along with the udon noodles. Whilst I use udon noodles any type of noodles will work equally well. Experiment and see which you prefer. Cook the noodles for 3 minutes and during this time add the soy sauce and the juice from half a lime.

4. Serve piping hot with chopped coriander on the top with a lime quarter on the side.

If you are feeling under the weather or want a general ‘pick me up’ this warming broth is sure to reinvigorate you. Instead of prawns you could use chicken or for a vegetarian option: broccoli, sugar snap peas, mange tout or pak choi.