Lunching and Brunching in Berlin


Berlin has a wealth of wonderful brunch and lunch spots so my list is not exhaustive, but instead some of the places I (or my sources) visited and recommend. I travelled with my husband and two daughters (13 and 10) recently and we all enjoyed the offerings at each establishment. Have a read and if you visit any I would love to hear what you think or perhaps you have some that you would add to the list.

Cafe Krone: Oderberger Str 38

Mon-Fri: 9-4pm Sat-Sun: 9.30-6.30pm(Sun) and 7pm (Sat)

There is always a crowd waiting to eat at this buzzy hip eatery in Prenzlauer Berg, although the wait is never very long. It’s near to the Mauerpark flee market, as well as the smaller and more refined flee market, ‘Flohmarkt Arkonaplatz’, both of which operate on Sundays. Cafe Krone offers a range of delicious hot drinks and brunch options including: ‘shakshuka’, ‘eggs benedict’, ‘eggs cooked anyway’, ‘pancakes’, ‘croissants’ – basically something to appeal to every palate. A great place to relax and enjoy the Berlin buzz and plan your adventures for the day ahead.

Jabe  Alte Schönhauser Str. 7-8, Mitte

Mon-Fri: 11.30-4pm, Sat: 12-11.30pm, Sun: 1-9.30pm

If you fancy a Japanese fix then head to Jabe for some seriously tasty Japanese fare. There are a number of starters – or what they call ‘titbits’ to share, such as ‘tebasaki’, ‘grilled tako’, ‘tomorokoshi’, ‘and ‘gyoza’ and then mains including a wide range of ‘udon bowls’, for example: ‘teriyaki don bowl’, ‘salmon truffle bowl’ and ‘kitzune bowl’, as well as a four different types of ‘salmon sashimi’. The place has good zen – as you would expect from a Japanese eatery and is a good pitstop for lunch (or dinner).


Mischke Fleischerei Schönhauser Allee 144

Mon-Fri 8-6.30pm, closed wkends

This butchers shop is a great place to have lunch if you want something quick and typically German. There is a wide range  meats with sides and sauces at reasonable prices. You can order anything from soups to schnitzel, although we opted for the traditional German sausage, which they heat up for you. You can sit outside or perch at high stools at little tables. It’s authentic and tasty so definitely worth a look in when you are in Berlin.

photo credit @cecconisberlin

Cecconi  Torstrasse 1, 10119

Monday – Friday: 11.30am – midnight
Saturday: 11am – midnight
Sunday: 11am – 11pm

Nestled on the ground floor of private members club, Soho House Berlin, Cecconi’s offers the public weekend brunch options, as well as all week lunch and dinner. It’s focus is Italian food – with tasty homemade pasta and seafood dishes to tempt diners. It’s sophisticated cool vibes create the perfect setting to pass a couple of hours eating and drinking and generally just soaking up the Berlin atmosphere.

Monsieur Vuong Alte Schönhauser Str. 46

Mon-Thurs: 12am-11pm

Fri-Sun: 12am-12pm

Did you know that the Vietnamese community make up 1.16% of all Berliners? As such there are a host of delicious Vietnamese restaurants spread across the city, which is good news for Berliners and tourists alike. I adore Vietnamese food so it was only natural that I would find myself gravitating to this cuisine on more than one occasion on my recent visit to Berlin.

Monsieur Vuong lies in the heart of the Mitte district (not far from Jabe in fact). The restaurant stands out with its red and yellow awning and its red leather benches outside. Inside the walls are painted orange and pink and there is always a buzz that attracts a hip crowd. The menu is short – as all good menus should be – with changing specials every two days. The food was fresh, light and zingy with delicious cocktails on offer too.  Definitely worth a visit when you are in Berlin.


Photo credit @vaguesouvenir

Cafe Einstein Stammhaus  Kurfürstenstr. 58, 10785

Mon-Sun: 8am-midnight

If you are seeking old school Viennese glamour and charm, then make a bee line to Cafe Einstein Stammhaus in the Tiergarten neighbourhood – it’s the perfect place for bunch whilst reading a newspaper on wooden rolls. It is housed in an Italian neoclassical villa in one of Europe’s great old coffeehouses. It’s waiters are dressed in black and white suits, and marble-topped tables with leather banquettes make the Viennese-inspired cafe feel like a relic of pre-war Berlin. It’s great for breakfast, brunch, lunch or dinner and is the perfect place to get your apfel strudel fix.

Film aficionados will recognise the place as the tense cafe scene in Tarantino’s Inglourious Basterds.


W-Der Imbiss Kastanienallee 49, 10119

Sun – Thu: 12pm – 10pm
Fri – Sat: 12pm – 11pm

It was the amusing use of the logo (you’ll see what I mean when you look at the photo below) that initially caught our attention to this Vegetarian Indo-Mexi-Cali-Ital fusion restaurant. Quite a mix hey! We were drawn to the thali – which is the Indian version of Spanish tapas – lots of small dishes so you can try a wide range of things.  It was always busy when we passed by, so made a mental note to visit it before we left. It’s self service, albeit you give your order at the counter and in turn are given a number. When it’s called out they bring it to your table. It’s small and intimate inside with more tables outside for diners to spill out to. It’s fun, well priced and nice to have some Indian spice in another European city for a change.


Do you have any favourite brunch or lunch spots that you gravitate to when you are in Berlin? I would love to know so do share in the comments section below.


Snap Shot of India and a delicious Indian breakfast recipe – Pongal

Happy New Year to you all. I have just returned from three glorious weeks in colourful, warm-spirited India (hence my lack of blog posts). I have seen and experienced so much that it feels that I have been away for far longer. I feel uplifted and invigorated and have returned to cold chilly London with a positive outlook and excitement for the year ahead.

If you’ve never been to India then I urge you to go. It’s incredible and, like Africa, seeps into your soul and never leaves you. It’s frenetic, chaotic and providing you leave your Western ways and customs at home, you can acclimatise to the way of life there pretty quickly. It’s crowded, intoxicating and full on, but remember to breath and relax and you will begin to enjoy everything about this magical country. I was pretty active on Instagram so if you are keen to see some of the Indian street life, food and people, then please follow me over there as well. Here are few snaps to whet your appetite.

We spent 9 days in beautiful Kolkata, visiting family and generally relaxing and seeing more of the city. Followed by a two week tour of Rajasthan. I have lots of tips and suggestions on the food front, but I am presently writing an article that I hope to get into one of the magazines or newspapers – so watch this space. The photo of ‘papri chat’ below gives you an idea of how epic the street food is in Kolkata. It is commonly thought of as the street food capital of India.

The best way to get under the skin of any city is to pound the pavements on foot and see everything up close. It’s an overload of the senses and truly engaging. In Kolkata one day, we walked 10km along the Hooghly River – a distributary of the Ganges River – and saw everything from the Mullick Ghat Flower Market, people bathing in the river, a wedding couple, the cremation ghats (I particularly wanted to show my children this, as death is dealt with in very different way in India and it is nothing to be afraid of), the district of Kumortuli Pally – Kolkata’s Potter’s community, to the Marble Palace.

Rajasthan was the second part of our trip and whilst, on paper, the trip sounded rather exhausting, it was in fact not the case. We combined culture and sights with relaxing in beautiful surroundings and meeting the local people. Staying in the Aravalli Hills, in a stunning heritage hotel in a small rural village, was a highlight. It you are planning a trip to Rajasthan, make sure you book a night or two at Rawla Narlai – where you will get to meet this fine gentleman, who I think without doubt has the best attire of any hotel staff I have ever met.

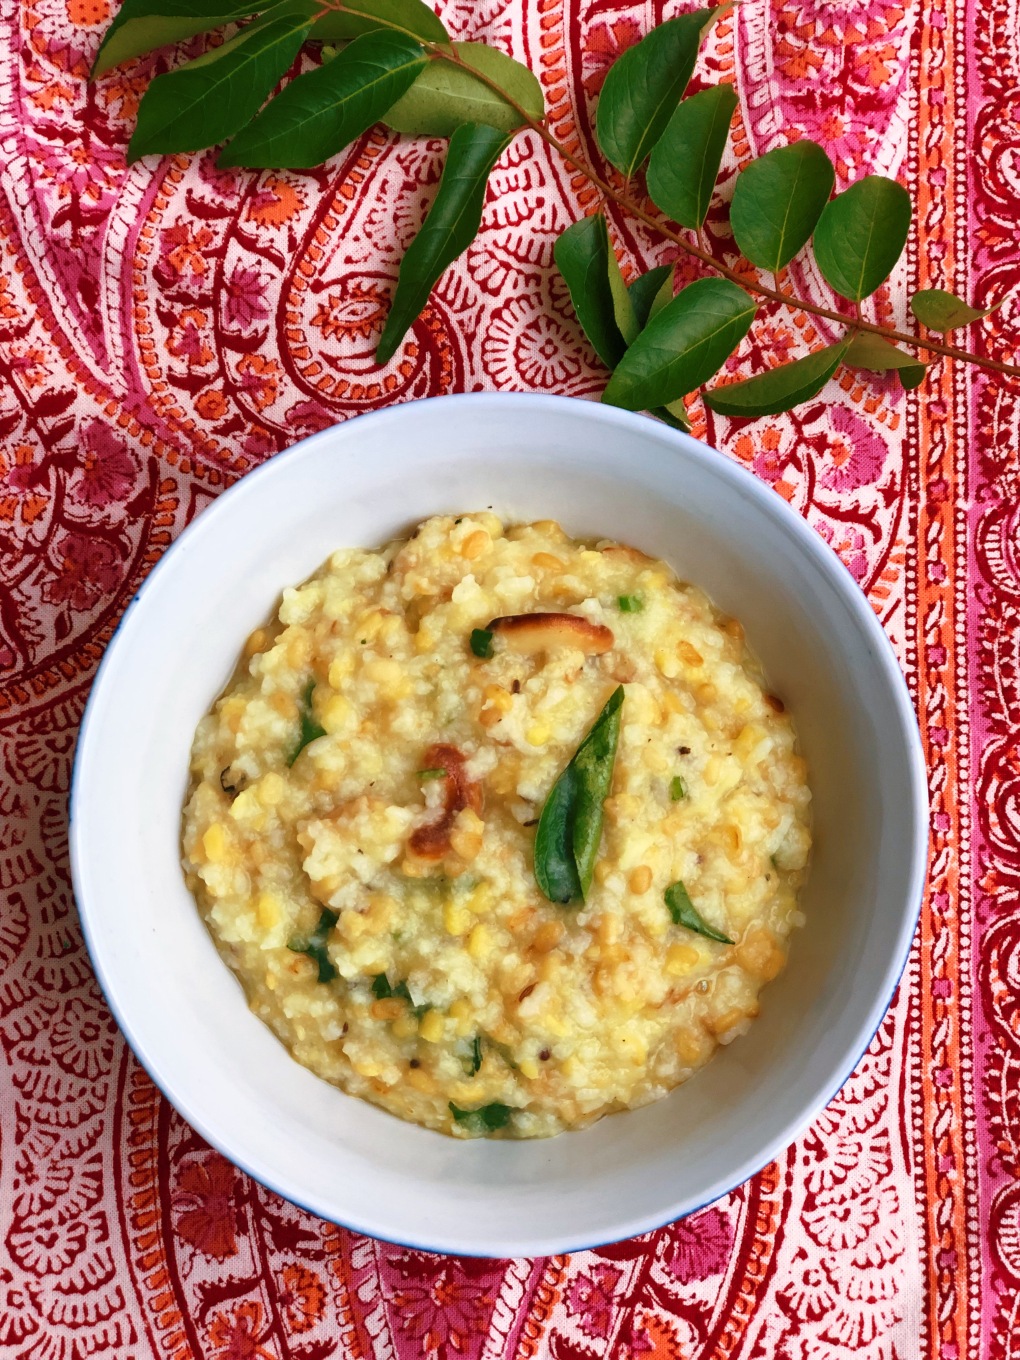
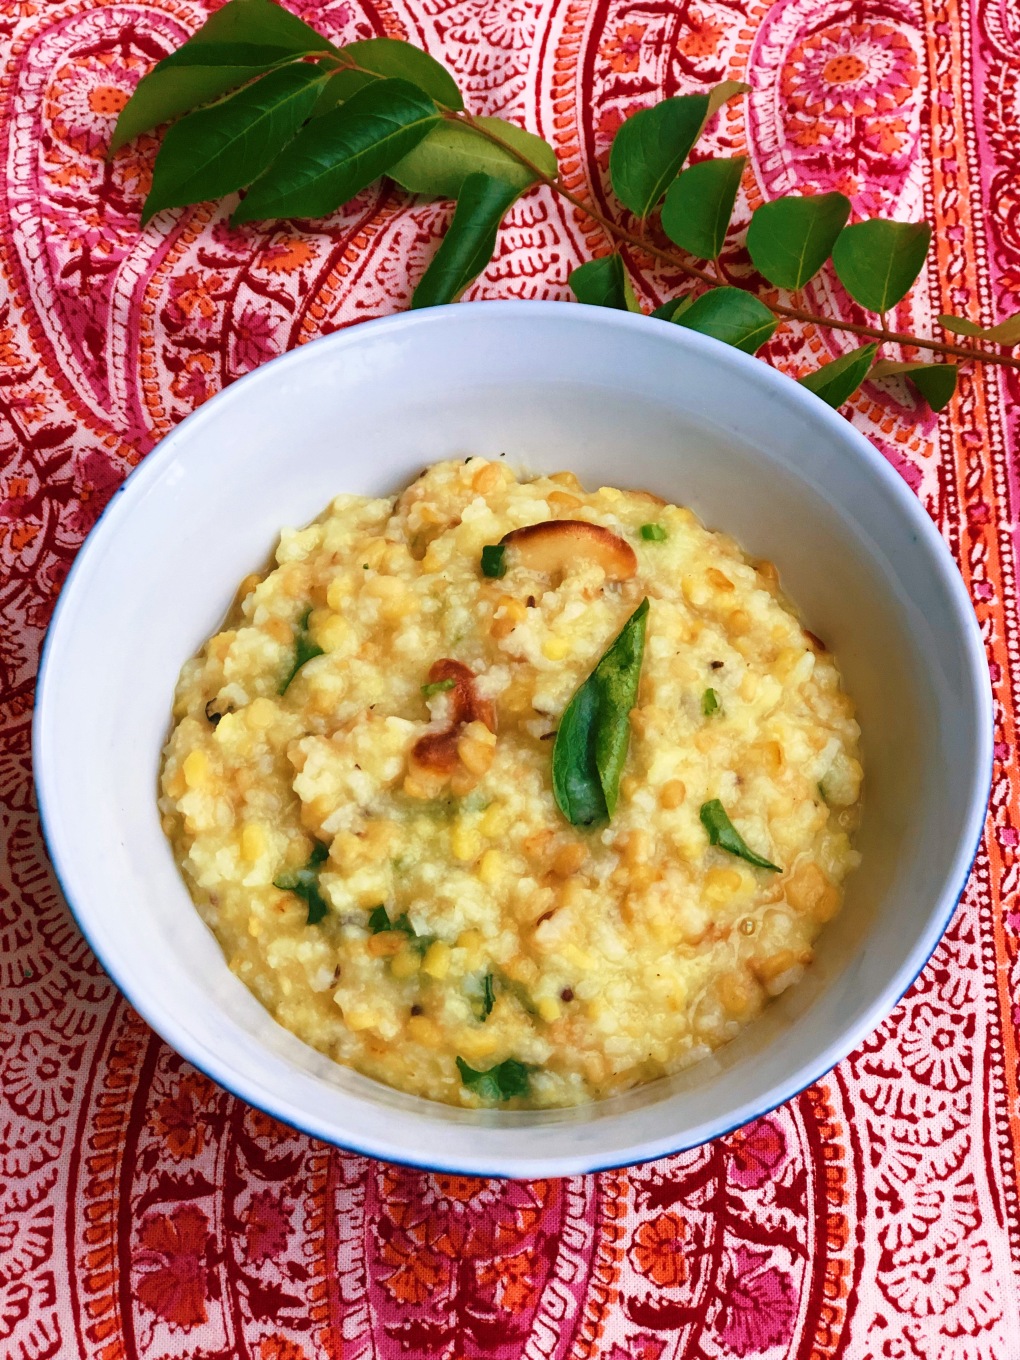
Without overloading you on my first blog post back, let me introduce the recipe that I wanted to show you today. To give you a brief back story, I was poorly for a few days with Delhi belly (not from street food but from a ‘smart’ hotel dinner). After eating next to nothing for a few days I wanted to eat comforting food that would ease me back. At our hotel in Delhi ‘pongal’ was on the breakfast menu. It’s actually a south Indian breakfast originating, I believe from Tamil Nadu. It is often referred to as ven/ghee/kara or milagu pongal but the one in the hotel simple said pongal, so I will go with that. It is made with rice and a small yellow lentil called moong dal – which you can order online from Asian Dukan in the UK. It didn’t look dreadfully appetising, but my goodness it tasted wonderful. A cross between a savoury porridge and dal – not dissimilar to Chinese congee, but in my mind – better.

I have a couple of other tasty Indian breakfast recipes on this blog – Upma  and Hoppers or Appam so thought this might be a good one to add to the list. You can make it the night before then leave it in the fridge until morning. Simply add a little boiling water to bring it back to life, and hey presto you have a deliciously subtle and tasty Indian breakfast. It’s also perfectly tasty to eat for lunch too so you can make a batch and eat it as you want over a couple of days.


Pongal

serves 4-6

120g basmati rice

120g yellow moong dal

900ml cold water

1 tbsp ghee (clarified butter)

10 approx cashew nuts

1/2 tsp cumin seeds

1/2 tsp mustard seeds

1/2 tsp roughly broken up black peppercorns

1 tsp grated/chopped fresh ginger

1 stem of fresh curry leaves (Sainsburys now sell them)

1 fresh green chilli, finely chopped, optional

pinch of asafoetida/hing

pinch of turmeric powder, optional

1tsp salt, to taste

handful of freshly chopped coriander, leaves and stems

  1. This first part is optional, but it gives the dish a slightly more smokey flavour. Dry roast the dal until it begins to bronze slightly. It will take a couple of minutes, but use a wooden spoon to move it around the pan so that it does not burn. You can omit this part and simply go to 2. should you wish.
  2. Add the rice to the same pan as the dal and place some water in the pan. Move the spoon around the pan then discard the water by gently pouring it out – you don’t need to use a sieve. Repeat twice and then add 900ml cold water.
  3. Leave to simmer for around 20-25 minutes, by which time the rice and dal will be soft and the water soaked up. If it becomes too dry simply add in a little more water.
  4. Using a potato masher, mash the rice and dal so that it gets broken up and more ‘mash’ like in appearance. Place to one side whilst you do the next steps.
  5. Using a frying pan, add the ghee. Once it has melted add the cashew nuts and gently move around the pan for 30 seconds before adding the cumin and mustard seeds, black pepper. They will begin to pop, so make sure that your heat is on low.
  6. Now add the fresh ginger, turmeric (optional), asafoetida, curry leaves and green chilli (optional). Move around the pan for 20 seconds or so and then add the contents of the pan into the rice and dal mixture.
  7. Move around the pan and add salt to taste. Add more water if necessary. Check to taste and heat up again if necessary. Add some freshly chopped coriander and serve.

With these cold, dark mornings we are having in the UK, what better way to start the day than with some delicate spices in a comforting bowl of Indian pongal.

More exciting Indian recipes and photos next week. Have a good weekend in the meantime.


Indian Scotch Eggs

On my first trip to Kolkata – 13 years ago – I was introduced to my new extended Indian family, going from home to home, meeting a bevy of smiles and warmth behind each door. Every household we visited offered food in great abundance – either a full meal or some delicious snacks. I struggled a little with the sweet treats, not having a sweet tooth, but the savoury snacks were something else.

As we normally saw three or four different families on average each day I had to be diplomatic when it came to eating. Not eating would be disrespectful, so I had to pace myself. One of life’s more pleasing conundrums. One snack that really stood out was Indian Scotch eggs, which were just so heavenly. Unlike your traditional Scotch egg which has sausage meat covering the egg, this one has spiced potato and has half a boiled egg per ball.

I have been trying to replicate the recipe ever since and I think I am pretty close so I wanted to share it with you all today.


Indian Scotch Eggs

makes 6 

5 medium potatoes, peel and boiled then mashed

1 tsp cumin seeds

1 tsp garam masala

1/2 tsp turmeric

1 tsp garlic-ginger paste

1 tsp salt, to taste

2 small fresh green chillies, finely chopped

handful of fresh curry leaves, finely chopped – optional

4 eggs

breadcrumbs – either freshly made, panko or bought

4 tbsp sunflower/vegetable oil for frying


  1. First peel and boil the potatoes until they are soft. This usually take around 10-12 minutes. Drain and then mash until smooth. Do not add any butter or milk. They must not be too wet.
  2. Meanwhile boil 3 of the eggs by placing them in a pan of cold water and then once it is simmering, turn it down and leave to cook for a further 8 minutes so that they are completely hard. Once cooked drain and immediately put in a bowl with ice and cold water – this will allow you to peel the egg really easily. Leave the eggs to sit for a few minutes before peeling them and leaving them to rest on a plate
  3. Add the spices, garlic-ginger paste, chillies, fresh curry leaves if using, salt and mix in thoroughly. Allow to cool before handling the potato.
  4. In a shallow bowl add the remaining egg and whisk.
  5. In a separate bowl add some breadcrumbs.
  6. Halve the eggs, lengthwise. Take a small amount of spiced mashed potato into your hand and place the egg, yolk side down, onto the mashed potato. Gently cover the whole egg with the potato to create a ball. Place to one side whilst you do the same to the remaining eggs.
  7. Now take one potato ball at a time and gently roll it in the whisked egg followed by the breadcrumbs then place on a plate. Complete the rest.
  8. Heat the oil and when it is hot gently fry each potato ball, a couple at a time, turning at intervals so that the breadcrumb coat bronzes nicely. Place to one side, whilst you complete the rest.
  9. They are wonderful eaten hot, but equally you can serve them at room temperature – perhaps perfect for a train journey.

I like to eat them with a chutney. My tamarind and date chutney works really well.


Shakshuka and Visiting the Dead Sea area of Israel

Our final leg of our Israel trip was to visit the Dead Sea. You can do a day trip from Jerusalem, but we felt it deserved more than a passing glance, besides there was quite a lot to see in the area.

We stayed on the Ein Gedi Kibbutz, which is located on the western shore of the Dead Sea, at the edge of the Judean desert. It was founded in 1953 with its primary focus on agriculture and tourism. The kibbutz is all lush and green owing to a natural water source that runs under it, but the neighbouring area is barren and desolate. There is a hotel within the kibbutz – but we stayed in an apartment at the top of Zahava’s house, who has lived on the kibbutz, with her husband, for over 30 years.

We booked through Airbnb, so it’s easy to find if you fancy going. She and her husband were wonderful hosts, who made us feel right at home. As it was an B&B, Zahava would arrive each morning with a huge tray of delicious food that set us up for the day. We ate on the veranda before the weather got too hot, overlooking the dead sea and Masada in the distance.

As we were based on the Kibbutz we also had all the facilities available to us – pools, tennis courts, running track, supermarket, as well as a restaurant in the hotel. (Its important to note that the Ein Gedi spa by the edge of the Dead Sea – is not located in the Ein Gedi Kibbutz or hotel, but nearby) One evening we also ate in the kibbutz part of the complex, which you would not be able to do if you were simply staying in the hotel. The calm rhythm of the kibbutz dictated out days. In the morning we would head out and explore and then come back and relax in the afternoon before a late afternoon hike in a wadi. The kibbutz is within the En Gedi Nature Reserve, where there are some truly phenomenal hikes.

It’s super hot here as it is the lowest part of the earth, so as well as carrying a lot of water, I also carry an umbrella and wear a swimming costume so that I can soak in every waterfall and pool we pass. Walking in 40 degrees, requires soaking in cold water as often as possible.

The wildlife is also pretty special here. There are a some venomous snakes – I only saw one at night on the perimeter of the Kibbutz, so it’s advisable to wear covered shoes when you are on the hikes.

We also saw lots of Nubian ibex – desert dwelling goats – clambering around precariously upon the slopes of the wadi. You need to be aware of sudden rock fall if they are climbing above you.

Historically the area is fascinating with huge swaths of tourists visiting spectacular Masada. Herod the Great built a large fortress on the plateau as a refuge for himself in the event of a revolt. He erected two palaces there between 37 and 31 BCE. According to Jewish Roman historian – Josephus, the siege of Masada by troops of the Roman Empire, at the end of the First Jewish–Roman War, ended in the mass suicide of 960 people (the Sicarii rebels and their families) hiding there.

The fortress is huge and had impressive ways of redirecting and saving fresh water at the fort, along with swimming pools, cold pools and spas. The mosaics found by archeologist are beautifully intact.

To reach this city you can either take the snake path before sunrise or else use the cable car. It’s one of Israel’s most popular sights but as we were in one of the first cable cars of the morning we pretty much had the place to ourselves.

The other great magnet of the area is the Dead Sea itself due to its medicinal qualities. Sadly the sea has dramatically shrunk in recent years causing great concern. You can read more about this here.

When you go to the Ein Gedi spa you now have to get on a little train pulled by a tractor from the spa to the waters edge. In the 1980’s the water was right up by the spa itself.  Despite the notion that it is impossible to drown in the dead sea, this is a myth and there have been cases of people drowning. You need to keep on your back, not your front, and don’t attempt to swim.

Due to the high salinity, the water feels very heavy, kind of like bathing in salty olive oil,  so if you are on your front you can find it hard to turn on your back. It feels oily and you want to make sure you don’t get any water in your eyes or mouths. Thankfully the showers are in on the edge of the sea so that you can immediately wash the salty water off you as you get out. The medical qualities of the dead sea mud are also well known so make sure you slather yourself in mud (this is back at the spa itself) and then wait for it to dry before showering if off. Your skin will be glowing and you will be feeling pretty radiant.

The other must-see in the area is over in the West Bank – The Dead Sea Scrolls or the Qumran Cave Scrolls. It’s about 30 minutes from Ein Gedi Reserve and a good place to stop on your way back to Jerusalem or Tel Aviv. There is an interesting museum there and you can hike all over the area, although those we saw hiking here had ropes and proper equipment so perhaps only for serious climbers.  The scrolls, which are ancient religious writings, were found by a shepherd in the 1940’s in 11 caves near the site of Qumram. You can see some of the caves in the photograph above.


I am going to leave you with a classic Israeli dish that is found throughout the Levant. Shakshuka is a delicious breakfast dish – although of course you can eat it at any time of day. It is basically poached eggs in a spiced tomato sauce with crumbled feta and parsley or coriander sprinkled on top. Everyone has their version but this is mine. It’s a big hit in my house and is super straight forward and easy to execute. Perfect for a filling breakfast before school/work as it takes 15 minutes to make from start to finish.

Shakshuka

serves 4-5

2 tbsp oil

1 white onion, finely diced

1 garlic clove, finely diced

1 sweet red pepper (these are the long ones, but bell peppers are also good), sliced lengthways and then finely sliced crossways

1 tsp cumin powder

1 tsp smoked paprika powder

1 tsp salt

1x 400g tin of plum tomatoes, chopped in the pan

3 large fresh tomatoes, finely diced

50ml water

4 eggs (or 5/6 depending on how many you are feeding)

To serve

1 handful of crumbles feta

1 handful of fresh coriander


  1. Heat a deep frying pan and add the oil.
  2. When hot, add the onions followed by the garlic and gently heat. After a couple of minutes, add the pepper, salt and spices. Move around the pan to soften for a further couple of minutes.
  3. Add both the tinned and fresh tomatoes and stir in well.
  4. Add the water and simmer to allow all the ingredients to soften and infuse. Leave for 8 minutes so that it thickens.
  5. Make a hole in the mixture and break an egg into this hole. Repeat, leaving a good gap between each egg.
  6. Place a lid on the pan and leave to simmer on a moderate-low heat for 3-5 minutes, by which time the eggs should be cooked but still soft. Leave for longer and increase the heat if they have not cooked sufficiently.
  7. Just before serving, scatter the feta cheese and fresh coriander. Spoon onto plates with some flatbread or sourdough to mop.


SaveSave

SaveSave

SaveSave

SaveSave

SaveSave

SaveSave

SaveSave

SaveSave

SaveSave

SaveSave

SaveSave

SaveSave

SaveSave

SaveSave

SaveSave


Indian Stuffed Paratha – easier than you think

The are sooooo many varieties of Indian flat breads to choose from that making the decision on which one to prepare, and eat, can be a tricky business. Paratha are easier to make than you would think. A dough like pancake all warm and pillowy, filled with whatever savoury filling you choose. If you are familiar with the ubiquitous chapati then paratha are considered a close relative. My recipe shows you how to make them with a spiced potato and spring onion filling but you can be as adventurous as you fancy. They are ever so delicious and work really well with just a simple dal. Often the most humblest of foods can be fit for a king or queen. The preparation is pretty minimal and if you are cooking for a few you can prepare the filling earlier on in the day.

So follow these simple steps to create your very own paratha at home.

I suggest making the filling first and then let it cool whilst you make the dough.

Roll out the dough so that it is thin, but not so thin that it splits. Place a round ball of the filling in your hand and then gently place it in the centre of the dough circle. Flatten slightly.

Pull up the edges so that the filling is completely covered.

Turn it over and place some sesame seeds or nigella seeds on top. Flatten it with your hand.

Then gently roll out the dough so that it flattens further. Be careful not to roll too thinly or the contents will escape.

Heat a tawa, or large frying pan, and when it is hot brush a little melted ghee (or butter/oil) on one side of the paratha and place that side into the pan. While this side is toasting, place melted ghee on the other side and then after a minute turn over. Leave for a further 30-60 seconds so that it is nicely bronzing but not burning and then remove from the pan and eat whilst still hot. If you are preparing a few then place in a warm oven while you prepare the next.


Stuffed Paratha

Serves 6

125g plain flour

125g chapati flour/wholemeal flour (you can just use plain flour in which case double up on plain)

1/2 tsp baking powder

2 tbsp yoghurt

1 tbsp oil

1 tsp sugar

1 tsp salt

60 ml water

filling

350g potatoes, approx 3 medium ones (equally you can use sweet potato)

1 spring onion, finely chopped

2 tbsp fresh coriander, finely chopped

1/2 tsp kashmiri chilli powder

1/2 tsp dry mango powder

1/2 tsp ground garam masala

1 green chilli, finely sliced (optional)

sesame/nigella seeds, to garnish

2 tbsp melted ghee/butter/oil

  1. In a large bowl add all of the dry ingredients and mix well, then add the yoghurt and oil.
  2. Slowly add in the water so that a dough forms. Use your hands to form a ball, knead for around 7 minutes so that the dough is pliable and soft. Cover with cling film whilst you make the filling.
  3. To make the filling, boil the potatoes and when soft, drain and mash them.
  4. Add the rest of the ingredients and mix thoroughly.
  5. Returning to the dough, break them into 6 even balls. Using your hands initially flatten a ball, sprinkle with a little flour and using a rolling pin roll into 6-7inch diameter circles.
  6. Using your hands scoop up some of the mashed spiced potato and create a small ball and flatten this is the middle of the dough.
  7. Move the sides of the dough up to the centre so that the spiced potato is securely covered up.
  8. Turn over the round parcel and spoon some sesame seeds on the top and then gently roll out the dough with the spiced potato filling into a round circle once again.
  9. Heat up a frying pan or tawa. When it is getting hot, melt the ghee and then brush some onto the surface of the paratha and place ghee side down onto the pan.
  10. Leave for up to a minute and brush the paratha again with ghee before turning over for a further minute. When the paratha is sufficiently bronzed place onto a warm plate and cover whilst you do the rest or pop in a warm oven.

Paratha are wonderful to have with dal or a curry or if you are really organised, for breakfast, now isn’t that worth getting up for.


How to make Egg Hoppers/Appam

How do you breakfast? On the go, sitting down at your kitchen table or perhaps at your office? With good intentions we try at least to have a ‘proper’ breakfast as a family before we  go our separate ways. My eldest daughter catches a coach to school and is out the house like a whirlwind by 7.20am and my youngest needs to at school by 8am and invariably I drive/scoot with her. As we approach Autumn and the darkness intrudes further into our mornings, I think it is important to fill your belly with some satisfying food before embarking on the challenges of the day ahead.

I always try to think of something new and exciting to feed my crew for breakfast and we often talk about it the night before. I thought it might be interesting and helpful if I create a ‘breakfast’ section under my recipe library and over the coming months I will put new ideas up here on my blog. I would love to hear what you think.

First up are my hoppers (Sri Lankan term) or appam (Keralan term). They are a typical breakfast in Sri Lankan and south India and are often eaten with a sambar or dal and a chutney. They have a coconut flavour and are made of rice flour. You do need to invest in a hoppers pan – something like this would be perfect, but my family are such fans of them that the investment made sense. I went and stayed with pals in the Cotswolds this summer and made a batch (15) for lunch one day for everyone to have with meat and vegetable curries and dal. All the kids – ranging from 4 to 14 gave them a thumbs up and for most it was the first time they had tried them.  I’m sure if you give them a try you (and your kids) will be pleasantly surprised. If you are going to make them for breakfast before school/work I would advise activating the yeast (the first part in the instructions below) before you jump in the shower. Then when you are out you can then add it to the rice flour and coconut milk, whisk and then leave to rest whilst you get changed. It’s a multi-tasking kind of breakfast. Equally it is great to have at lunch or supper, so don’t feel limited to cooking these at breakfast time.

Next week I am going to post a sambar recipe for you (which you will be able to prepare in advance) but today I simply ate them with a bowl of my marrow dal (see below) – but any of my dals would work equally well accompanying the hopper/appam.


Hoppers/Appam

Makes around 6

4g/1 tsp dried yeast

1 tsp white sugar

35ml lukewarm water (warm to the touch but not hot!)

200g rice flour

1x400ml tin of coconut milk

pinch of salt

  1. First you need to place the yeast, sugar and water into a bowl and give a good stir. Leave the mixture for 15-20 minutes to allow the yeast to activate.
  2. Meanwhile, in a large bowl add the rice flour, coconut milk and salt and once the yeast mixture has frothed, and therefore activated, add it to the mixture and whisk so that the batter is smooth and thick.
  3. Leave to rest at room temperature for at least 1/2 an hour.
  4. Warm your pan and put one ladle full of the mixture into the pan. Slowly swirl the mixture around the edge of the pan so that the mixture has reached almost up to the top of the pan. I usually swirl it around a couple of times so that all the sides are coated. Place the pan on a low heat (the reason my edges look a little bronzed is that I had the heat too high ;o) and place the lid on top of the pan.
  5. If you are going to make an egg hopper crack an egg into the centre of the pan and place the lid on top. Leave for around 3-4 minutes so that the sides are a little crispy and the egg is cooked sufficiently but is still soft in the centre. If you would rather not have an egg simply place the lid on the pan and leave for 3-3.5 mins
  6. If you are using a non-stick pan the hopper will easily slide onto a plate and serve immediately with sambar/dal and some chutney.

Dal ideas to accompany the hoppers

Bengali Dal recipe

Sri Lankan Dal recipe

Red Onion Dal recipe

Toor Dal recipe  

Marrow Dal recipe


Vietnamese Tofu Banh Mi Sandwich

img_2823

I have a love affair going on when it comes to the ubiquitous Vietnamese sandwich known as banh mi. If the truth be told I love them in every form: pork, chicken, fish, beef, tofu – you name it and I pretty much love all the varieties that you can have. I love the cruchiness and sweet and sour piquant from the pickle, combined with the freshness of the coriander, the spices from the marinaded tofu/meat/fish, the chilli and the freshness from the baguette. Every bite has so much action going on for the palate – sweet, sour, umami chilli notes.

img_2848

They are not as much of a chore as you’d expect if you make them at home. I tend to buy the baguette, but if you have time on your hands, then I can totally recommend The Banh Mi Handbook by Andrea Nguyen to show you how to make the traditional baguette as well. Father Christmas kindly popped it in my stocking a few years back – such a thoughtful fella!

img_2853

I’ll talk your through it step by step, but once you’ve made the pickle – this takes no time at all – you’re pretty much all set. The pickle also lasts up to a month in the fridge so there is no need to use it all in a couple of days.  I am going to show you how to do the tofu version, but if you prefer to make it with chicken or pork then the same marinade can apply.

img_2852

I used the silken firm tofu, which you need to handle with care. Some brands are firmer than others, but ultimately if it falls apart a little it doesn’t really matter once it is in the baguette.

There are a few ingredients that you really need to get hold of before making a banh mi:

  • daikon (also known as mooli or white radish) – it looks similar to horseradish but has a lot milder flavour. I pick mine up from my local Indian grocer.
  • carrots
  • rice wine vinegar
  • a crunchy baguette
  • maggi seasoning sauce – according to Andrea Nguyen for a ‘first class banh mi, drizzle on some maggi sauce; it will boost each bite with an umami hit’ – she goes on to explain that ‘it is practically synonymous with banh mi’. I picked mine up from my local Asian supermarket but you can also order it from Ocado here
  • chillies to give the heat injection
  • fresh coriander
  • cucumber to add texture and crunch
  • mayonnaise (vegan if you want to keep the whole meal vegan)
  • sriracha sauce
  • 1 litre jar for the pickle


So to begin with you need to prepare the pickle. Trust me it is quick and easy to make.


Carrot and Daikon Pickle

500g daikon, peeled and cut into matchsticks *

2 large carrots, peeled and cut into matchsticks (as above)

1 tsp salt

2 tsp caster sugar

100g caster sugar

300ml rice wine vinegar

250ml warm water

1 litre storage jar (can be slightly bigger but no smaller)

  1. After peeling, cut the carrot and daikon up into equal size matches and place them in a bowl.
  2. Sprinkle the salt and the teaspoons of sugar over the carrots and daikon and gently massage them gently for a few minutes using your hands. This will make them become softer and more bendy.
  3. Wash and drain them thoroughly under some cold water before placing them into your jar.
  4. In a separate jug mix the rice wine vinegar, caster sugar and warm water so that the sugar dissolves and then pour into the jar with the carrots and daikon. Discard any left over brine. If you need a little extra brine to cover the carrots and daikon simply add a little more warm water.
  5. Refrigerate for up to a month.

*the exact size of the matchsticks is irrelevant, obviously not too big, but do make sure that the carrot and daikon matchsticks are of similar size if possible.  I have seen them super skinny and slightly wider like mine below. Both ways taste delicious. 

img_2855


Matchstick daikon and carrots above and with salt and sugar ready to be massaged below.

img_2854

Once your carrot and daikon pickle is resting it’s now time to make the marinade for your tofu. I slice my block of tofu gently into about about 9slices. You don’t want to cut them too thin or they will easily break.

Place them gently in a bowl and add the marinade, which consists of: tamari (or soy sauce), 1/2 lime and zest, 1 tsp of minced garlic, 1 tsp minced ginger and cracked pepper. Coat evenly and then leave to marinade for around 20 minutes. Heat some groundnut (or sunflower) oil in a pan and then let the tofu  cook gently on each side for around 3-5 minutes before turning over. It wants to be nicely bronzed.

Tofu Marinade

349g firm tofu (or similar size pack), sliced

2 tbsp tamari (or soy sauce)

1/2 lime, juice and zest

1 tsp minced garlic

1 tsp minced ginger

liberal amount of cracked pepper

1 tsp groundnut/sunflower oil

  1. Slice the tofu gently into approximately 9 pieces and then place in a bowl and cover with the marinade ingredients.
  2. Leave to marinade for 20 minutes.
  3. Heat  the pan with oil and gently space out the marinated sliced tofu. On a medium low heat, leave the tofu for around 3 minutes to see if it is nicely bronzing. If it is then carefully turn it over for a further 3 minutes. Leave a little longer if it requires more time to bronze.
  4. Remove from pan and leave to cool whilst you prepare the rest of the sandwich.

If you are using pork or chicken make sure to slice the the meat thinly and leave to cook for longer on both sides. 

img_2851

The next part is easy. You simply mix a couple of tablespoons of mayonnaise (homemade, vegan or shop bought) and add sriracha to taste. I usually find that around 1/2 tbsp works really well.


Sriracha Mayo

2 tbsp mayonnaise (homemade, vegan or regular shop bought)

1/2 tbsp sriracha, or to taste

  1. Mix the two ingredients together to form a salmon pink sauce. Taste and add more sriracha if necessary.

The next part is the assembling. First you need to slice the baguette, but not all the way through.  Take out some of the white bread part within – this allows more space for the fillings. Now follow the instructions below.

Assembling the Bahn Mi

few drops of maggi seasoning sauce

1/4 cucumber, thinly sliced

handful of fresh coriander

2 red chillies, chopped – optional

  1. Spread out the sriracha mayo evenly along the baguette followed by a few drops of maggi seasoning sauce.
  2. Next add the cucumber, tofu followed by some of the pickled carrot and daikon. You can also add some thinly spiced fresh red chillies for extra heat if necessary or omit this part and just add the fresh coriander.

It sounds terribly long winded but I assure you that it really doesn’t take that long at all. The pickle will last for ages and is pretty quick to make in the first place. The marinading is straightforward and the sriracha mayo takes seconds. So give it a whirl. Trust me you’ll become as addicted as me about banh mi.


Crispy Savoury Donut known as Medu Vada

IMG_2627I want to introduce you to a new kid in town that will seriously impress you.

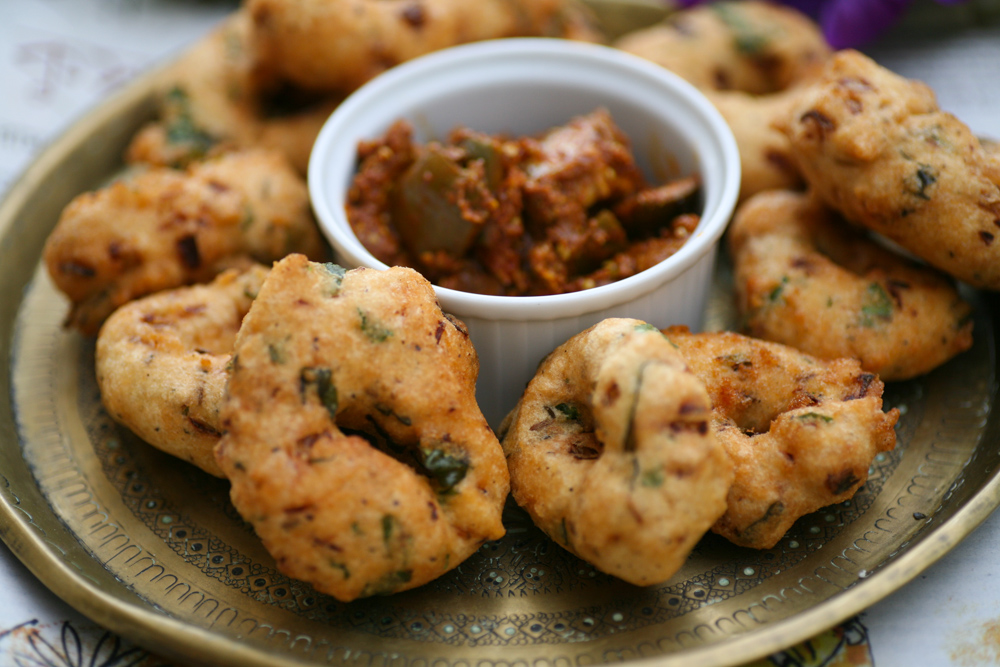
Step aside donut and cronut (croissant and donut pastry) and make way for the Indian savoury donut known as ‘medu vada’. These savoury delicacies look very similar to their saccharin cousins the donut, but are filled with lots of wonderful spices instead of sugar.

IMG_2620

They are really fun to make and you can add your own twists to make them your own. They are a little bit naughty in that they are fried, but hey a little bit of fried deliciousness now and again is absolutely fine in books. They are made of urad dal – the white dal you can easily find in any Asian grocers-  that is soaked for at least 3 hours and then blended to form a soft fluffy paste.

IMG_2635

My daughters find them equally irresistible so they really are a treat for the whole family. They are typically eaten in southern India and Sri Lanka either at breakfast time or as a snack with a coconut chutney or possibly a dal or sambal. I could quite happily eat them for my breakfast but more often then not I make them for an afternoon snack with a cup of warming tea.

They are crispy on the outside and have a soft texture on the interior.

IMG_2619

My recipe makes around 13 little donuts, but if you want to make more just double up on the ingredients. There are no set rules here other than not making the dough too wet.

Medu Vada – Indian Savoury Donuts

Makes 13

175g white urid dal

1/2 tsp salt

1 medium white onion, finely chopped

1/4 tsp asafoetida/hing

1 tsp cumin seeds

1 tsp fresh ground black pepper

1/4 tsp baking powder

1 handful of fresh coriander, roughly chopped

 12 fresh curry leaves, chopped (optional)

1 green/red fresh chilli finely chopped (optional)

  1. Soak the white urid dal in a bowl covered with water for at least 3 hours.
  2. Strain the dal and place into a blender. Blend and if needed add literally a tsp at a time of water to loosen it slightly. Do not over water. You want it to have the same consistency as a fluffy light dough.
  3. Place the lentil dough into a large bowl and with your hand lift the dough, folding it over so that it gets air into it about 15 times.
  4. Add all the ingredients and mix well with your hands or a spoon.
  5. Heat a pan with cooking oil and when it is hot wet one of your hands and create a small ball (a little larger than a golf ball) and then place your thumb in the centre to create a hole through the dough. Then gently loosen the dough off your hand and place into the hot oil. Be careful when doing this as the movement from placing the dough into the pan and removing your hand needs to be super quick.
  6. Place a few donuts in the pan at once and leave them to bronze on one side for a couple of minutes, before turning them over with a slotted spoon for another couple of minutes.
  7. You are looking to get a yellowy bronze hue as opposed to brown, so be careful to watch them closely.
  8. Remove them from the pan and place on kitchen paper to soak up any excess oil.
  9. Continue to make the rest.
  10. If you are planning to serve them as a snack when friends come over simply place them in a preheated oven that has subsequently been turned off. They should stay warm for a good hour.

They are perfect to eat with a chutney, dal or sambal (see links in the body of my post).

Note: 

  • I often don’t add chilli so that all my family can comfortably eat them. For those who like the chilli kick, you can serve them with a hotter chutney, which keeps all parties happy.


A tasty breakfast treat – spiced semolina (Upma)

IMG_1731

Semolina and I did not start out on a good footing.

For a few years when I was young I attended a convent – not as a nun, but as a pupil, and the nuns had a habit of being very strict. You had to eat every morsel on your plate and were not allowed to leave the table until your plate was clean.

IMG_1724

The food in the early 80’s was not something you would particularly blog about and the puddings that were dished up to us were well, how can I put this politely, not that appetising. The gruel that I particularly disliked was sloppy semolina with a dollop of sweet jam. I found it so hard to eat that on one occasion after the dining hall had emptied and I was sitting all alone and the minutes were ticking by I decided that when Sister was not looking I would deposit the contents of my bowl into my pocket. I did it like a stealth ninja and no one found out, other than my mother, who is such a sweetie she didn’t seem to make much of a fuss.

IMG_1714

Fast forward 34 years and I now love semolina – but only if I eat it the savoury way. In India a hugely popular breakfast snack is spiced semolina known as ‘Upma’. It is so quick and easy to put together it takes minutes to create a really warming bowl of goodness. I eat it at any time of day in all honesty – breakfast, snack, lunch, supper – you name it, it is super versatile. You can also add whatever vegetables need to be used up in the fridge, so it’s a win win in my book.

IMG_1742

Spiced Savoury Semolina – Upma

Serves 2-3 (or for 4 if eating as a snack)

2 tbsp vegetable oil

1 tsp black mustard seeds

12 fresh curry leaves

1 fresh green chilli finely chopped

1 banana shallot or small onion, finely chopped

1 tsp salt

20g fresh ginger, finely grated

1/4 tsp turmeric powder

1 carrot, finely cubed

60g green beans chopped in half

40g red peanuts

150g course semolina (sooji)

275ml water

  1. Heat a pan with the oil and when it is hot add the mustard seeds, curry leaves and fresh chilli. The mustard seeds will begin to splutter after 20-30 seconds so then add the shallot/onion and salt and lower the heat. Allow the shallot to soften for around 5 minutes.
  2. Add the fresh ginger and turmeric and stir gently.
  3. Now add the carrot and beans or another vegetable that needs using up along with the red peanuts.  After 1 minute add the water and leave to simmer for up to 5 minutes or when the vegetables have softened.
  4. Add the semolina gradually and stir constantly so that it does not clump together too much. Once it has soaked up the water – you can add a little more water if needed at this stage – place a lid on the pan and switch off the heat so that it can steam for a few minutes before serving.

Indian Eggy Toast

IMG_7795

If you ever feel a little lethargic/hungover/sleepy (delete as appropriate), in the mornings, my Indian take on French toast will sharpen up your senses and give you that necessary skip in your step to take on the day ahead. Drinking coffee has never rocked my boat, although I do love the smell of freshly ground coffee and would so love to love drinking it, however, I find that a burst of chilli for breakfast – yes for breakfast – does awaken the endorphins rather well.

IMG_7804

I also thought that it may give you some ideas on what to feed the masses if you have a number of guests staying over for Christmas. We often decamp down to my parents for part of the Christmas break and as there is ten of us we all help with the share of the cooking. This recipe is so quick that by the time someone else has laid the table you have already made a pile of these delicious beauties ready for the taking. It’s quick to rustle up more should they be a hit so its a win win – stress free and super quick.

I have added two chillies below, but by all means add only one if you want a more subtle approach

Indian Eggy Toast

produces 6/7 toasts

2 tbsp of vegetable oil

sourdough bread, sliced

4 eggs

2 chillies, finely chopped (1 if you prefer it less hot)

a small handful of fresh coriander, chopped

1 tomato, finely chopped

pinch of rock salt

optional: 1 inch fresh ginger, finely grated

1. In a large bowl whisk the eggs and then add the chilli, fresh coriander, tomato, rock salt and fresh ginger (if using).

2. Slice the sourdough bread and then soak the bread in the egg mixture on both sides.

3. Heat the oil in a frying pan and when it is hot place the soaked sourdough into the pan. Leave to bronze on one side for a couple of minutes before turning for a further couple of minutes on the other side.

4. Serve immediately with some Sriracha chilli sauce or my chipotle sauce if you have some already made up. Both work a treat.