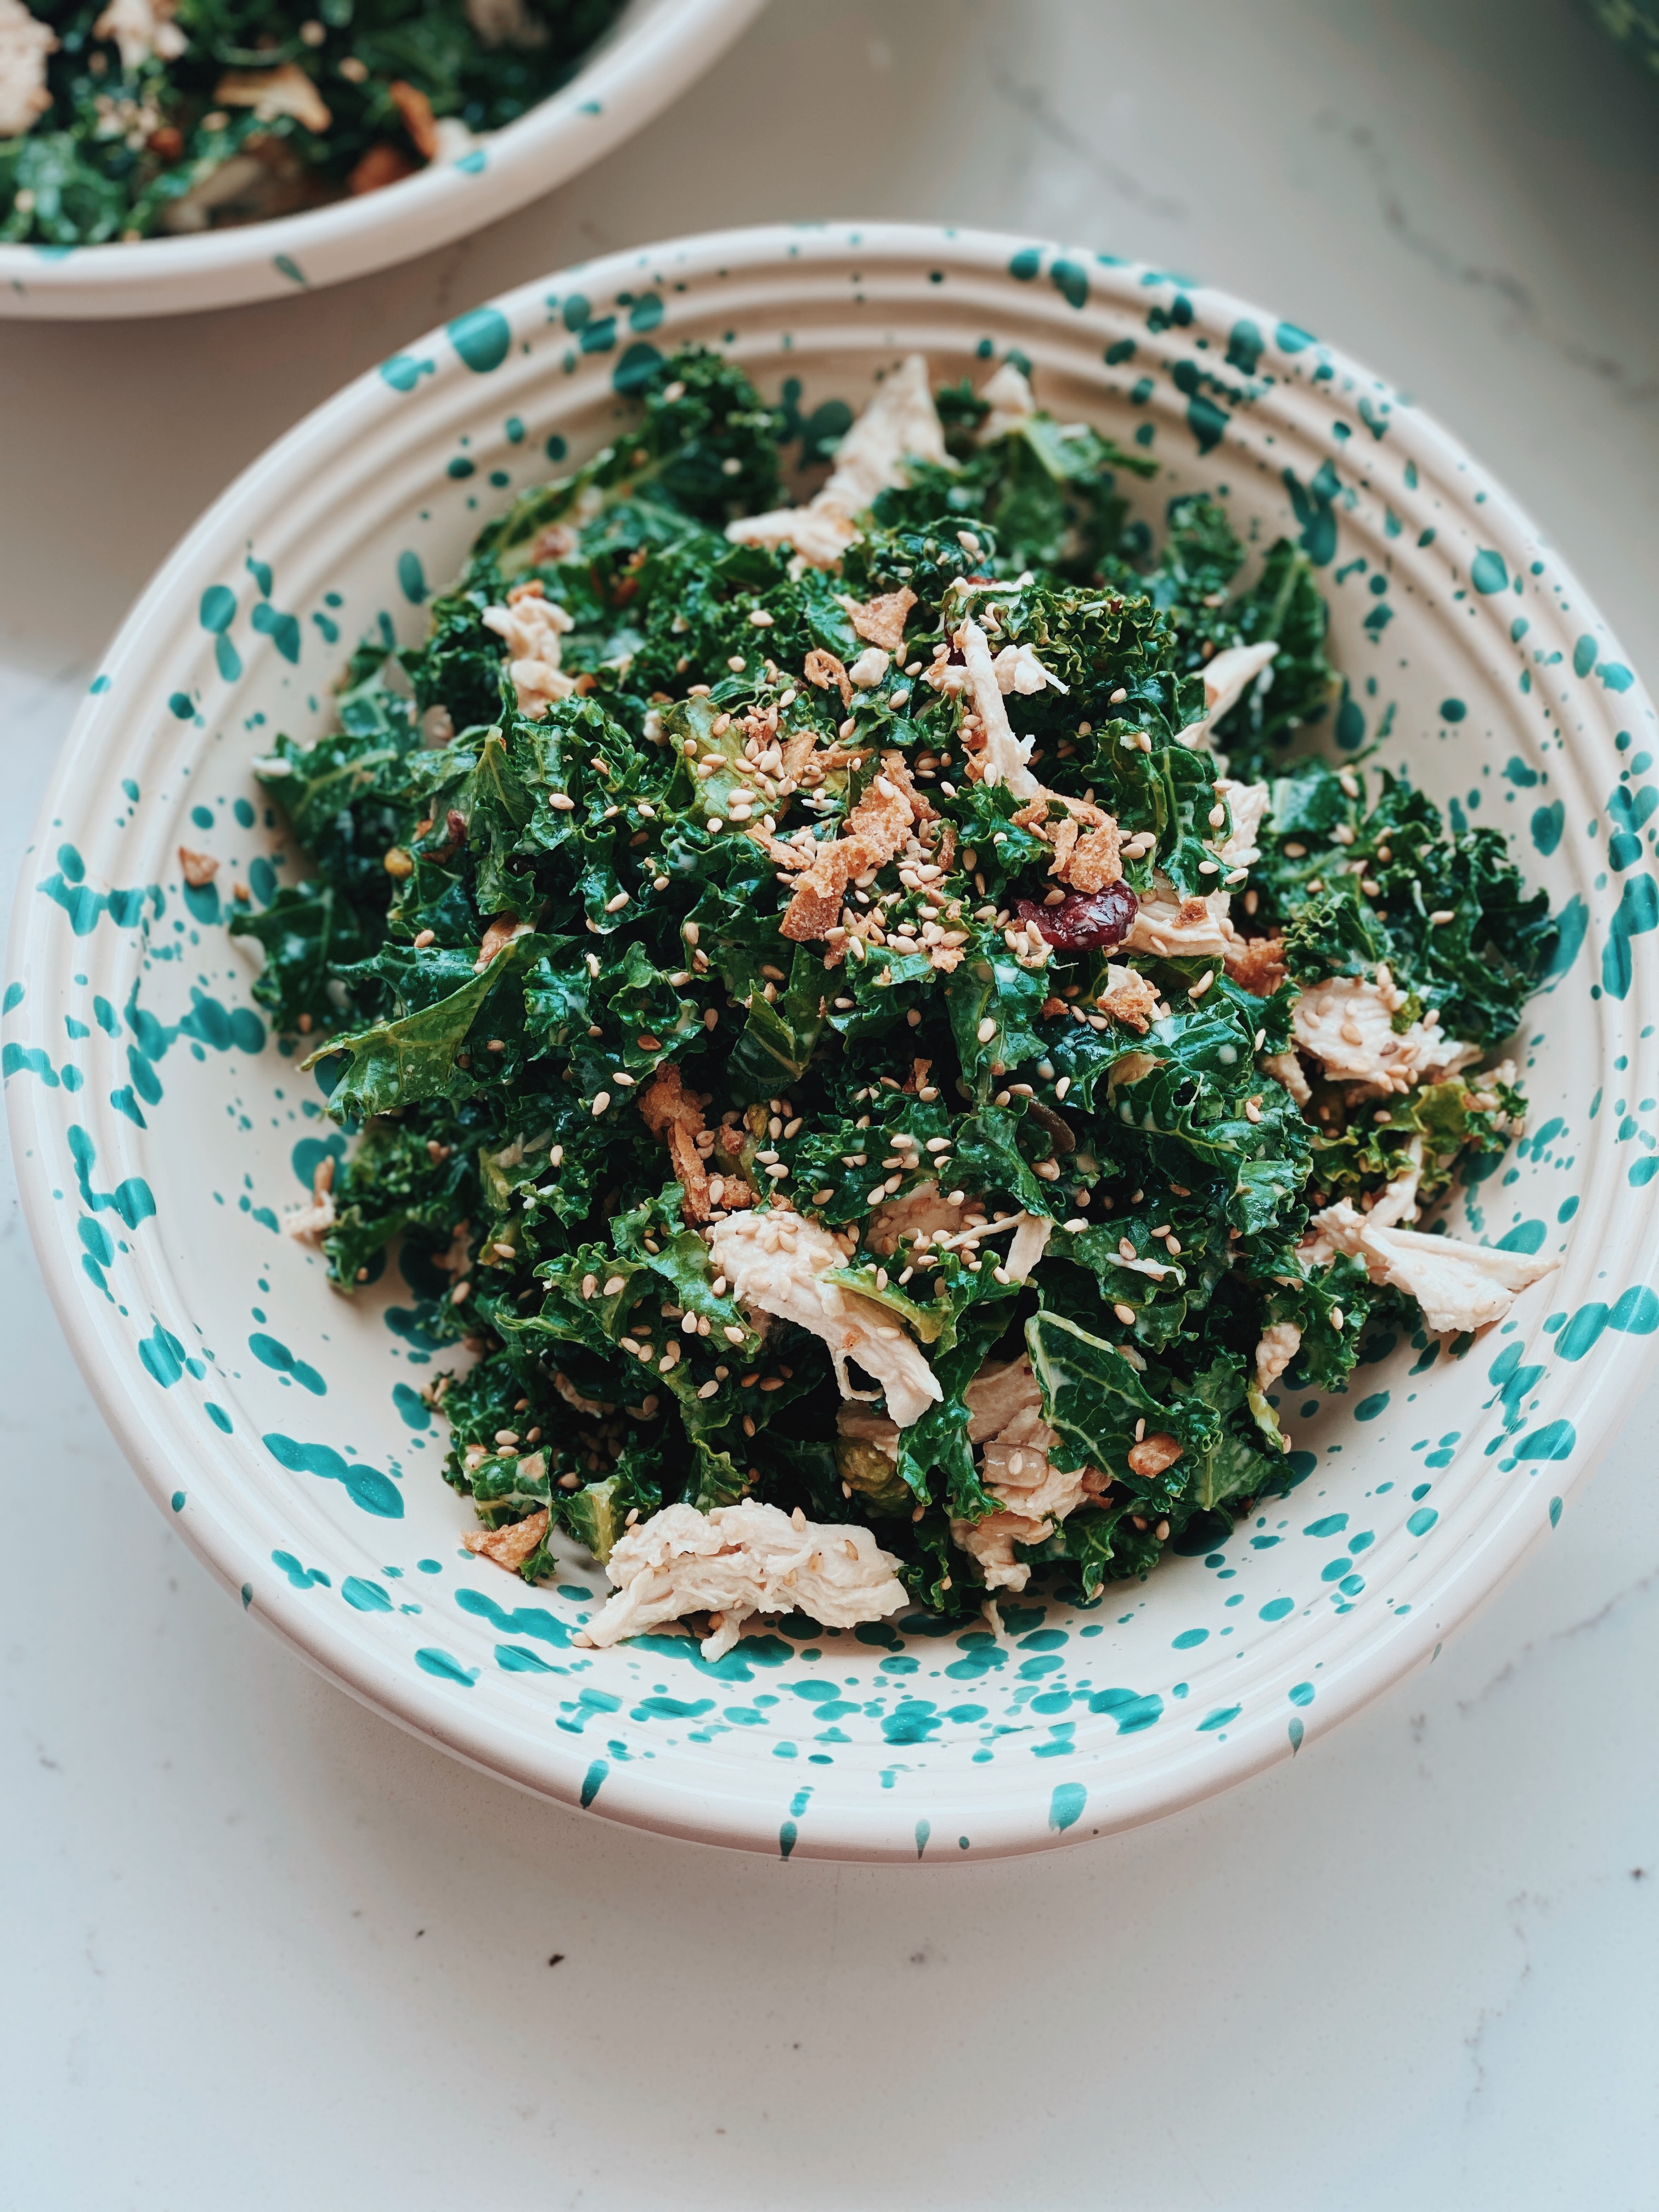
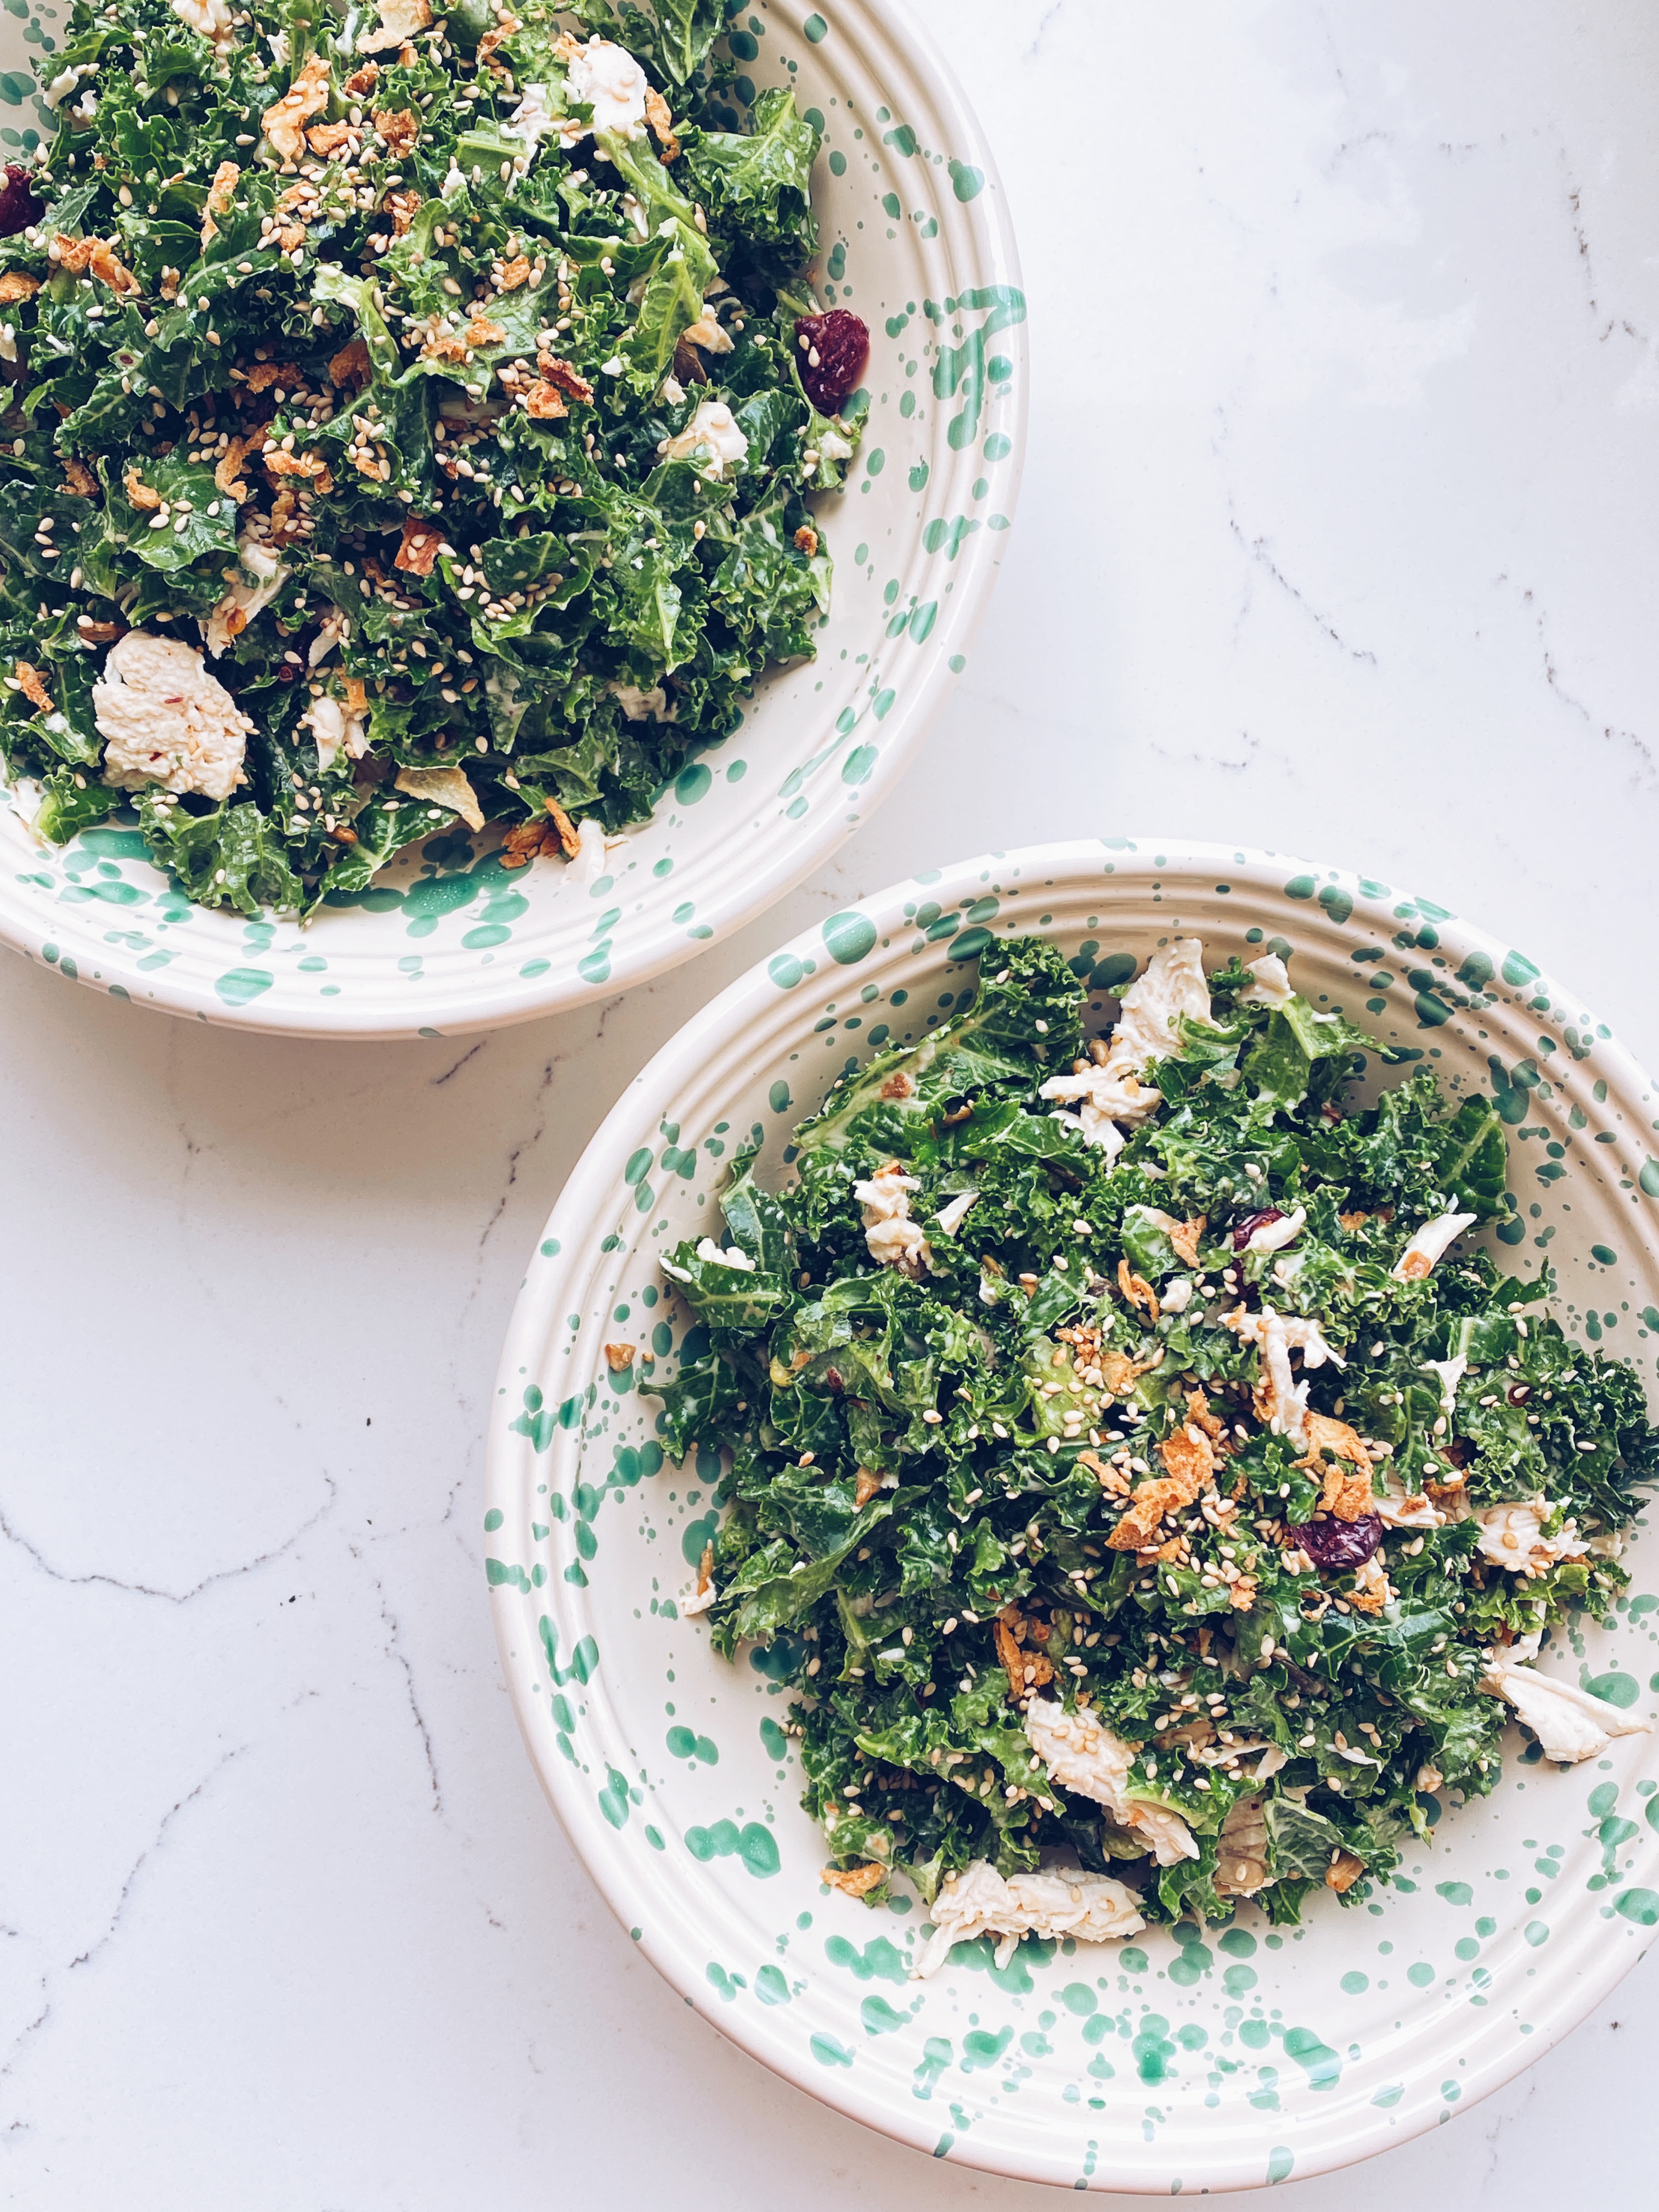
Kale, Chicken and Dried Cranberry Salad with a Spiced Tahini Dressing

It’s been a while I know. I continue to be very focused on marketing my cookbook ‘Chilli & Mint: Indian Home Cooking from a British Kitchen’  – have you got your copy yet ;o)? I’ll pop a branded tote in for free for those who order through me (whilst stocks last). If you are overseas then the best way is Book Depository which offers free shipping.

It’s on its second print run, which I am thrilled about and is now stocked in Selfridges and Harrods as of this January 2023, as well as Waterstones, Foyles, Hatchards, some Daunts stores and a number of independent bookshops and lifestyle stores. Physical copies are now being sold in bookshops in Australia and I was particular chuffed to see copies in Waterstones Amsterdam recently.

I’ve also been in India for part of February, researching more recipes that may find their way in book 2 in the future – watch this space.

For this post however, I thought I would tempt you with one of my go-to salads at the moment. I adore an interesting salad that is packed full of flavours and textures and is relatively quick to put together. This one is no exception and is perfect as a meal unto itself for lunch or supper. If you are vegetarian then obviously omit the chicken and add crispy tofu perhaps as an alternative.

You don’t even need to cook the kale. Instead it requires massaging with the dressing to soften it and break it down a little. Tahini is a staple in my house and you are always going to find a pot of chilli oil lurking in my fridge. For this recipe Lee Kum Kee’s – chi chow chilli oil – which you can find at most large grocery stores these days – works wonders with the tahini and rice wine vinegar. I urge you to pick up a pot next time you are doing the grocery shopping. The dressing was inspired by one I had seen in Nik Sharma’s fab new cookbook The Flavour Equation.

Added extra’s that would work a treat would be avocado and grated carrot. I leave it to you to get as creative as you see fit.

Kale, Chicken and Dried Cranberry Salad with a Spiced Tahini Dressing

Serves 4

2 chicken breasts, skin removed (do not throw them away)

250g kale, stalks removed and washed

small handful of dried cranberries

small handful of crispy onions 

1 tbsp white sesame seeds

3 tbsp super seeds salad topper by Good4u


Spiced Tahini Dressing

50g tahini

40ml rice wine vinegar

1-2 tbsp Lee Kum Kee’s chiu chow chilli oil

1 tbsp boiling water, to loosen

fine sea salt to taste


  1. Remove the chicken skin from the chicken breasts and place to one side. Place the breasts in a pan and cover with boiling water and simmer gently for 12-15 minutes. Remove from pan and then shred using two forks.
  2. If you have chicken skin do not throw it away. Instead, stretch it out on some baking parchment and sprinkle with a little flakey salt, black pepper, chilli flakes and olive oil. Place in a pre-heated oven – 180 degrees fan (or 200 if not using a fan) for 10-15 mins until crispy. You can then break this up and onto the salad before serving.
  3. Next make  the dressing. You want the dressing to not be too thick so add a little more boiling water if it needs loosening. Taste test to check the balance of the vinegar/tahini/chilli oil works for you and adjust accordingly.
  4. Remove any large stalks from the kale and wash throughly and then dry with kitchen paper. Then place into a large mixing bowl.
  5. Next pour 2/3 of the dressing over the kale and massage in with your clean hands.
  6. Add the shredded chicken, dried cranberries, sesame and super seeds. By all means add shredded carrots and/or avocado at this stage  if you wish to add more ingredients.
  7. Divide into bowls and top with a few more super seeds, the crispy onions and the crispy chicken skin if you have included this step.
  8. Drizzle over the remaining dressing and enjoy.


Quince Khoresh – an Iranian savoury dish

I have been absent from my blog now for far too long. Marketing my book has been my priority, and whilst it is very time consuming, I have been enjoying the process immensely. For those who have been hibernating in a cave for the past year my book –  ‘Chilli & Mint: Indian Home Cooking from a British Kitchen’ was published almost a year ago and has now been gracing the shelves of many a bookshop and online. I’ve just had a second print run released, which is great news (whoop for joy), so please do think about buying one if you haven’t already or to gift it to friends or family. It is available from all good bookshops  here in the UK, and the usual places online. For those in Oz, the best place to purchase is from Book Topia here, worldwide more generally – then either Book Depositary here , or of course Amazon.

Alongside my bookshop events and marketing the book in general, I am continuing to run my ‘spice tour and Indian cooking class’. The other day, one client noticed some quince sitting in my fruit bowl and asked me what I planned to do with them. Interestingly it had been on my mind as I did not want to go down the quince jam/jelly route. My client – who is of Iranian decent – suggested ‘Quince Khoresh’,  which is a meat and quince dish with sour, sweet and salty notes. Everything fell into place and she kindly sent me a recipe to follow.

In short, I adored the dish but the measurements of sugar, for me, were way too sweet, so I have adjusted here to what I think will be better. In the food notes of the actual recipe (whose recipe it does not say sadly) it talks about how quince was valued for its aphrodisiac powers and how it was customarily given to brides on their wedding nights. The seeds apparently are used in herbal teas to sooth coughs.

I’d love to hear how you get on with the dish and let me know what you think of the sugar balance. Do you need more than I suggest, which sugar do you use? Pop your thoughts and feedback in the comments below.

Quince Khoresh

Serves 6

3 onions, peeled and thinly sliced

1kg stewing lamb (you can also use chicken, beef or veal if you prefer)

6 tbsp rapeseed oil (or oil of your choice)

1 tsp salt

1 tsp freshly ground black pepper

1/4 tsp ground cinnamon

3 large quinces, peeled, core removed and quartered

50g sugar (I used caster but use what you have to hand – the original recipe asked for 150g of sugar but for me this was way too much – adjust according to your taste)

50ml balsamic vinegar

50ml fresh lime juice

1/4 tsp saffron dissolved in two tablespoons of hot water

100g yellow split peas (but you could also: toor or chana dal use jarred/tinned chickpeas)

1-2 potatoes, diced into bite sized (optional – I only added these as I had peeled ones which needed using up in the fridge. The original recipe does not mention potatoes


  1. Use a large deep caste iron pot, add 3 tbsp of the oil and then bronze the onions over the course of 8-10 minutes.
  2. Next add the lamb, salt, pepper and cinnamon and allow to brown on all sides. This will take around 10 minutes. Then add 800ml of water and simmer covered for an hour (30 mins if using chicken).  IF you are using yellow split peas, toor or chana, soak first for a few hours- or overnight if you are that organised – then add them to the pan at this early stage. If using jarred or tinned then add them at stage 4.
  3. Meanwhile, core and peel the quince and then quarter then. Using a skillet, add a couple of tablespoons of oil and allow then to brown on both sides, which will take around 10 minutes. Place to one side.
  4. After the meat has been cooking for an hour (30 mins if using chicken), add the sugar, vinegar, lime juice, saffron water and tinned/jarred lentils and potatoes (if using – not a prerequisite for this recipe – see notes above). Allow to simmer for a further 45 minutes and add a little more water if required.
  5. Taste test and adjust the seasons as required.
  6. Serve alongside some steamed rice.


Book signings and a quick and easy brunch idea!


As Storm Eunice thrashes outside and trees are being uprooted (I hear a few planes fly over on their way to Heathrow and OMG I would not want to be onboard – those brave souls and skilled pilots). I realise it has been a long time since I last posted here so thought I would check in with you all and let you know what I have been up to and give you a very easy and delicious bunch option that is perfect for the weekend.

So since my book launch at the end of November it has been a whirl of promoting and marketing the book; in many respects the hard work has only just begun. I have learnt so much, and continuing to do so, about the publishing industry since embarking on this new venture. Book sales have been going well to date, but ultimately it’s all about getting the word out there to a wide audience and for people to be cooking the recipes and loving them and then gifting the book to their friends so on and so forth. Whilst my book can be found in all the wonderful large bookshops (Waterstones, Hatchards, Daunts and Foyles) the smaller independent bookshops are now getting in on the action, so as to speak, and are kindly selling my book too. I have been visiting some of them to sign some copies. 

Seeing your book in the window of a much loved bookshops is definitely one of those pinch me moments. The legendary ‘Books For Cooks’ in Notting Hill had it in the window along with some other wonderful books on recipes from India and Pakistan. I’ve been down in West Sussex for a few days this week so popped into both Petworth Bookshop and Steyning Bookshop to sign their copies. If you have a much loved bookshop near you do let me know in the comments below and I’ll make sure they are stocking a few copies. Also if you have bought a copy please please do write a review online aka Amazon. You don’t have to have bought from Amazon to write a review, as long as you occasionally buy items from there you can write a review and reviews REALLY help with the algorithms and getting word to a wide audience. For those abroad Amazon is a way that can easily get hold of a copy of my book for now. 

So a great brunch idea which is perfect for one or a bunch of friends is my take on the egg and avocado toast. My version has toasted seeded sourdough which is then layered with avocado cubes, diced tomatoes, finely sliced spring onions, crumbed feta and finely grated boiled egg and drizzled with a good quality extra virgin olive oil, sea salt flakes and black pepper. You can even sprinkle with dried chilli flakes or chipotle flakes if you fancy. The flavour combinations work so well and grating your boiled egg is a revelation. So simple to compile and tastes so good. 


Grated Boiled Egg, Avo, Tomato, Feta and Spring Onion Toasts

Makes 2 portions (or 1 if you are feeling hungry)

1 boiled egg

1 ready to eat avocado, skin removed and diced

2 small/medium tomatoes, diced

1 tbsp feta, crumbled

1 spring onion, finely sliced

2 pieces of toasted seeded sourdough

toppings: extra virgin olive oil, sea salt flakes, black pepper, dried chilli flakes or chipotle flakes


  1. Begin by boiling your egg. Place it in a saucepan of cold water and submerge it. Bring to the boil and then cook on a rolling gently boil for 8 minutes. Remove from the pan and run under cold water as you peel it. 
  2. Toast your sourdough and place on a plate(s)
  3. Dice the avocado and tomatoes and then add onto the toast. Add the feta crumbled and spring onions and then grate the hard boiled egg on top.
  4. Drizzle the extra virgin olive oil and add the salt, pepper and chilli flakes as you wish. 

Devour and enjoy. 


EXCITING NEWS: MY COOKBOOK IS AVAILABLE TO PRE-ORDER WORLDWIDE

I have been ever so quiet on my blog now for a long time. I do apologise to those who have waited patiently for a post. It’s not that I haven’t wanted to blog, but more a case as I have been focusing all my energy and attention on my cookbook, which is launching late November this year. It is all very EXCITING.

I hope you love the cover above. I wanted something striking and beautiful and I think my publishers have excelled.

As the title states this book is really for anyone who wants to learn how to cook delicious, healthy, Indian home cooking. These are authentic recipes you will see being cooked in households across India. The recipes are very accessible with all of the ingredients being readily available. Since Lockdown I have been teaching a number of Zoom classes with people who in many cases are new to Indian cookery. These recipes have been tried and tested by the uninitiated and work efficiently. The book features recipes I have learned from my Indian family (my husband is of Indian descent) and from my travels to India and Sri Lanka over the last 23 years. There are 106 recipes in total. 70 are vegan (or can be easily adapted to be) and the remaining 36 have meat and/or fish/shellfish.

To give you a snapshot of some of the recipes photographed see the slideshow below.

This slideshow requires JavaScript.


I’ll show you a sneak peek of the back of the book too, which I absolutely love. It’s a photo I took of my magnificent guide when I was staying in the Aravalli Hills in Rajasthan. I don’t think I have seen a more splendid attire for a sunrise walk.

So the exciting thing for you is that you can pre-order  the book now. For the first 100 folks to order through me, who have seen this post,  I will also send a little gift as a thank you with each order. All you need to do is go to www.chilliandmintcookbook.com it’s that easy. Pop a comment below too if you have time.

If you are based outside the UK OR are wanting to send the book overseas then the best way for you to order is through Book Depository . I won’t be able to send the extra gift this way, but at least you get a copy of the book.

So please share on all your social media platforms to spread the word. Pre-orders are immensely helpful as they are a good early indicator of a book’s success, and can lead to retailers increasing their initial orders, it really is that simply.

Thank you so much in advance for your loyal support.

Torie


Seafood Paella

One of my summer objectives was to christen my paella pan, which I had received for my birthday. My thinking was to raise my beach BBQ game by cooking seafood paella on a homemade fire on the beach, instead of the usual BBQ fare. As it turned out transporting crockery for 10 (as I did not have any melamine bowls with me), was a daunting prospect so we made the decision to use the Weber BBQ at the cottage instead and eat in the garden as the weather has been so balmy. My paella pan was from http://www.thepaellacompany.co.uk and it’s important to buy one with a lid – especially if you do  end of cooking it on a sandy beach!

Whilst it requires a little forward thinking when it comes to the ingredients itself the actual cooking was really good fun and comparatively easy. You do need a long spatula – something like this would be perfect and I also had some oven gloves. The final result was delicious and whilst I cooked for 10 the amounts below could definitely stretch to 12-14 if required. Most of us had seconds and even the  dog had a little to try as well.

I had prepped and sourced all the correct ingredients – bomba rice being an absolute must. It is a short-grained variety grown in south Spain and unlike risotto rice does not require any stirring. It holds it’s shape during cooking and does not fall apart. You are aiming for the bottom of your rice to begin to char and crisp up on the bottom. In Spain when you are served up charred bits from the bottom, you known you have received the very best type of paella cooked with love and skill. I also rather handily found paella seasoning which you can source from Sous Chef.I popped in 3 sachets to my fish stock. I used fresh fish/seafood stock bought from Marks & Spencer. I can’t seem to see it online but you can certainly find it in the larger stores. Equally most fish mongers will have some, you can make your own, or use the cubed variety. Failing that opt for vegetable stock. The mussels you cook separately for 4-5 minutes and then remove 3/4 of the mussels from their shells.


I didn’t time how long it actually took to cook, but I would say that from the point of putting the oil in the pan to serving was around 30-40 minutes. It does depend on your heat source so please bear this in mind. From the time the rice goes in the pan it was 20-25 minutes max. I also didn’t measure the exact amount of extra boiling water I added or the exact amount of wine, but use your judgement. I added a little more liquid when I thought it looked too dry half way through cooking. I tasted the rice half way through and it was still a little too hard, so I added a little more water and replaced the lid back on the pan. I then tried again about 10-15 minutes later and it was perfect. You will notice I didn’t add any salt. This was because I felt the stock, chorizo and paella seasoning would contain it, but again use your judgement and taste and add a little if required.

It was such a fun meal to cook and had all the summer wow factors when serving. Adults, teens and tweens alike loved it and even the dog. I’ll be using it again over the summer both in London on the BBQ and also on the beach.

Seafood Paella

1.5 litres fish stock (or vegetable stock if you can’t find fish stock). I found fresh seafood/fish stock at M&S and used 3 packets which were around 400-500ml per packet.

3 packets of paella seasoning 

300ml white or rose wine

6 tbsp olive oil, approx

2-3 large white onions, finely chopped

1 head of garlic, finely chopped

4 chorizo sausages, halved lengthways and then roughly chopped

1 tbsp smoked paprika flakes or smoked paprika powder

3 large tomatoes, diced

1 tablespoon tomato paste

5 large squid tubes, cut into rings

1.5kg bomba rice 

500ml boiling water, as required

2 glass of white wine + 1 glass of hot water

1.5kg mussels, beards removed and cleaned

1 handful of fresh parsley, roughly chopped

14 large king prawns shells and heads kept on

2-3 lemons, cut into 6 wedges per lemon


  1. If you are cooking this on the beach, proceed to step 9 first before continuing. Please note you will require a paella pan + a deep pan to cook the mussels
  2. In a deep saucepan bring the stock, paella seasoning and wine to the boil and then turn off the heat. You can do this on a BBQ or on a conventional hob. If cooking on a BBQ place the pan on a rack as opposed to directly on the hot coals.
  3. Place your paella pan on your BBQ and then add the olive oil, allow it to warm up – it won’t take long if your BBQ is already nicely hot.
  4. Add the onions and move them around the pan. After a 3-4 minutes add the garlic and after a further minute add the chopped chorizo.
  5. Allow to soften for a couple of minutes moving around the pan to help with the cooking. If your heat source is not consistently hot it may require a couple more minutes.
  6. Add the smoked paprika flakes or powder, chopped tomato and paste and mix in well. Allow to soften for 2-3 minutes.
  7. Add the squid rings and a minute later add the bomba rice. Move the rice around the pan so that it is evenly spread out. After a minute add the fish stock that you had warmed up earlier.
  8. Stir in well and then place a lid on the pan ( I also add the outer BBQ lid, but if you are doing this on a stone BBQ on the beach you won’t be able to do the latter, but that’s fine)
  9. On a separate hob (if you are cooking this at your house and not at the beach) add 2 glasses of white wine and hot water and bring to the boil in the large deep pan with a lid –  use the same pan you warmed the stock. Add the mussels and give a good stir and then place a lid on the pan. Cover for 4 minutes and then add the chopped parsley. Check to see if the mussels have all opened and if not leave for another minutes or two giving a good stir. If it looks dry add a splash more white wine or water. Once they have all opened, remove from the pan and remove 3/4 of the mussels from the shell and place in a bowl. Place the rest of the mussels in another bowl and leave to one side.
  10. After 18 minutes once the rice has been in the pan, spread the prawns around the side of the paella. You can of course use prawns which have been shelled but I think it looks more rustic and authentic to have them in their shells. Scatter the de-shelled mussels around the rice and those in the shells. Place the lid back on the pan.
  11. After 3 minutes, turn the prawns over and replace the lid once again and leave for a couple of minutes.
  12. Taste test to see if the rice is nicely cooked. It will not be a soft and glutinous like risotto rice as it holds its shape. Scatter the lemon wedges and serve.

If you make this let me know how you get on by posting a comment below. It’s a definite crowd pleaser and a great way to feed a large group of people.


Roasted Sweet Potato, Chickpeas, Courgette and Tomatoes with Hummus and Zhoug

We all need a bit of hot stuff in our lives right? So look no further than the Yemenite hot sauce, commonly known as ‘Zhoug’ or ‘Zhug’ when you need to jazz up your lunch or supper. Its cousins would be Argentinian ‘chimichurri’, Moroccan ‘chermoula’, Italian ‘salsa verde’ and Indian ‘coriander chutney’. It takes seconds to whip together – yes really – and lasts for a few days in the fridge in a sealed jar.

I made a batch today, which I whizzed up in my mini-blender and then drizzled it over my lunch. It is made up of fresh parsley and coriander, freshly roasted cumin seeds, which I then ground to a powder, lemon juice, olive oil, water, salt, sugar, garlic, crushed cardamom seeds and a couple of jalapeño chillies. Simple hey. So zingy and fresh with just the right heat. You can add more chillies if you want to bring up the heat levels, but I think 2 jalapeños really hits the right note for me.

My lunch itself was easy as it literally cooked itself. I popped a sweet potato, some tomatoes – halved, chickpeas rubbed in smoked paprika in the oven for 40 mins at 180 degrees fan. I then sliced up some courgettes and pan fried them for a few minutes and then hey presto. I had some of my homemade hummus in the fridge so added a dollop of that and then drizzled my zhoug on top. If I had had some Aleppo red pepper flakes I would have added a pinch of those on top too.

Yemenite Zhoug

30g fresh coriander, leaves and stalks

20g fresh parsley, mainly leaves

2 jalapeño chillies, seeds removed (but keep them in if you want it hotter)

2 tbsp lemon juice

3 tbsp olive oil

2 tbsp water

1/2 tsp salt flakes

pinch of sugar

1 tsp cumin seeds, dry roasted and then ground to a powder

3 green cardamom pods, husks removed and seeds crushed

  1. In a saucepan dry roast the cumin seeds for a minute so they begin to bronze and the aroma is released. Allow to cool and then blend to a powder using a pestle and mortar or blender.
  2. Using a mini-blender add the fresh herbs, ground cumin, crushed cardamom seeds, lemon, salt, sugar, water and olive oil. Blitz to form a smooth paste. Add a little more water as required to make it runnier.
  3. Keep in a sealed container in the fridge and use within a few days.


Roasted Sweet Potato, Chickpeas, Courgette and Tomatoes

serves 2

1 large sweet potato, kept whole, but pierced with a fork

5 medium tomatoes, halved

olive oil to drizzle

1x 400g jar of chickpeas, strained and washed

1 tsp smoked paprika

1/4 tsp salt flakes

1 courgette, peeled to give a striped effect

1 tbsp of hummus per serving

extra virgin olive oil to drizzle


  1. Preheat the oven to 180 degrees fan. You want to cook the sweet potatoes and tomatoes for 40-45 minutes.
  2. Keep the sweet potato whole, with the skin on. Prick the skin with a fork a few times.
  3. Slice the tomatoes and place them in an ovenproof dish. Drizzle with olive oil and salt flakes, then add the sweet potato to the preheated oven.
  4. Drain the chickpeas and then dry them with some kitchen roll before adding the smoked paprika.  Mix in well and then place them in the oven 10 minutes after the sweet potato and tomatoes have been cooking.
  5. In a saucepan, add a little oil and then add the sliced courgettes. Allow them to begin to bronze and then remove. This will take between 5-7 minutes.
  6. To plate up, remove the skin from the sweet potato (optional) and slice up. Add some to a bowl along with some chickpeas, courgette, tomatoes. Add a dollop of hummus and some zhoug and finally a drizzle of extra virgin olive oil.


Bottle Gourd Curry (you can also make this with marrow or courgette)

Happy New Year everyone. What a strange old year it’s been already and we are only a couple of weeks in. Here in the UK we are on national lockdown so we are all hunkering down and mainly staying confined within the four walls of our homes, with fleeting escapes of freedom with exercising and grocery shopping. A 5km run has never been so thrilling! I was picking up some spices for my zoom classes this morning (I’m sending them to folks in the UK who join my zoom class) and saw some dudhi – also known as lauki, calabash or bottle gourds – for sale and thought it would be good to buy a couple so that I could (a) tell you more about them and (b) show you a fab recipe that you will love.


Whilst I realise that unless you live near an Asian grocer you are not going to be able to get hold of these vegetables, the good news is that you can replace them with marrow or courgette which will work equally well. They are not dissimilar to a small, thinner marrow, with a light green smooth skin and white flesh. When harvested young they are a perfect vegetable to eat. They are primarily grown however for their fruit, which when dried forms a woody hollow vessel that can be used as a container for food and water but also as fishing floats, musical instruments and even clothing. It is a native of Africa but recent DNA research suggests that it was “domesticated three times: in Asia, at least 10,000 years ago; in Central America, about 10,000 years ago; and in Africa, about 4,000 years ago”. A cool fact that might appeal to you, is that this vegetable grows on a plant that has large white flowers that only open up at night.


Similar to a marrow or courgette the bottle gourd works really well in dal.  In Bengal, where my husbands family are from, they sometimes serve it with prawns to make a fantastic curry. Today though, I thought I would show you a curry, which uses them as the star ingredient.

Bottle Gourd Curry (replace with marrow or courgette)

500g bottle gourd, skin removed and the flesh cut into bit sized cubes or use marrow or courgette (you can keep the skin on the courgette)

2 tbsp sunflower/rapeseed oil

2 dried red chillies

pinch of asafoetida

1 tsp cumin seeds

1 Indian bay leaf, broken in two (called tej patta)

1 red onion, finely chopped

 1 tsp salt

1 inch of ginger, finely grated (or 1 tsp ginger paste)

3 garlic cloves, grated (or 1 tsp garlic paste)

2 large tomatoes or 4 medium tomatoes, chopped

1/2 tsp ground turmeric

1/2 tsp ground coriander

1/2 tsp ground Kashmiri chilli

400ml water


  1. First prepare the bottle gourd (marrow or courgette) and place to one side.
  2. Heat a large deep pan and add the oil.
  3. When it is hot add the dried chillies, Indian bay leaf, asafoetida and cumin seeds which will begin to sizzle.
  4. After 20 seconds, add the onion and salt and let the onion soften completely and begin to bronze – between 6-8 minutes before adding the garlic and ginger.
  5. Stir in the garlic and ginger so that raw smell dissipates, which takes a few minutes.
  6. Next add the chopped tomatoes and stir into the onion. Add the ground spices and leave to simmer with a lid on for 5 minutes. The tomato should have softened considerably.
  7. Add the bottle gourd (marrow or courgette) and then add the water. Simmer on a medium heat for 20 minutes. A lot of the water will have soaked up leaving a thick spiced tomato coating over the gourd.

I ate mine on its own with a squeeze of lemon, but you could also have some rice on the side or a chapati, luchi or naan bread. It makes a delicious vegan lunch or supper.

Let me know how you get on if you make it.

Food is definitely a way to keep us all uplifted and glowing through these surreal times, I hope you agree.


Turkey For Days – Noodle Broth

MERRY CHRISTMAS to you all. How have you all been getting on? It has certainly been a different, quieter Christmas for many of us here in the UK and indeed the world. With the last minute tier changes, we, like most people, ended up having Christmas just the four of us. Naturally we would not have opted for quite so big a Turkey had we known we would just be four of us, but that said there is so much we can do with leftover turkey that it really didn’t matter that there is a lot to get through.

In addition, we also have a spiced gammon – one of my absolute favourite Christmas treats. So in short, we are well stocked for quite some time, the trick is to think of new and inventive ways to use up all the leftovers. I cooked the gammon with stock ingredients and made sure not to throw them away. This combined with a fabulous turkey stock and vegetables for that, created both the beginnings of a broth, as well as a lot of soft delicious onions, garlic, leeks, carrots, celery, dried red chillies. Last night I blitzed all these vegetables with a little stock and added a splash of lemon juice to create a delicious soup, which appeared creamy and yet had no cream. It was delicious and it made enough for two meals.


Today, the family were craving a noodle broth so I created a fragrant spiced broth with shredded turkey, which definitely hit the spot. To be fair you can add whatever leftover meat or veg you ate at Christmas – lamb, goose, chicken, ham, it will work with it all.

I realise that perhaps not all the ingredients I have added everyone will have as their store cupboard staple, but follow this recipe loosely to create your own version. For me I always have a stash of Sichuan peppercorns and throwing these into a broth gives an addictive zing to the dish. I also added some black and white whole peppercorns, which I roughly smashed, alongside the Sichuan peppercorns, in a pestle and mortar.


Drizzled on top is my chilli oil, which I think I will do as a separate blog post with step by step instructions as it is so good that you will want to make it time and time again as it really elevates any Asian dish. Chilli oil in China is as ubiquitous as tomato ketchup is in the US and for me the former always packs a greater punch.

To make a meat stock you simply need the carcass of whichever meat you used at Christmas. Cover it with water and add an onion, leek, garlic (chopped in half), celery, bay leaves, black and white peppercorns, a couple of dried chillies, star anise. Simmer gently, on a low heat, for a couple of hours. Then remove the bones, but keep the vegetables and strain the stock. The vegetables can be used in a broth or blended to make the soup described above.

Turkey Noodle Broth

2 tbsp vegetable oil

1 white onion, finely chopped

3 garlic cloves, roughly chopped

1 thumb size piece of ginger, finely grated or finely chopped, skin removed with the back of a tsp

2 lemongrass, outer skin removed and both ends and then finely chopped

2 tsp Sichuan peppercorns, crushed

1 tsp black peppercorns, crushed

1 tsp white peppercorns, crushed

1 green chilli, roughly chopped

leftover turkey, roughly chopped (i didn’t actually weigh home much we put in, but use your discretion)

7 brown mushrooms, roughly chopped

2 carrots, roughly chopped

2 handfuls of finely sliced cabbage

turkey stock (again didn’t measure this but enough for over bowlfuls of broth)

3 tbsp light soy sauce

2 tbsp fish sauce

1 tbsp Chinkiang Vinegar

salt to taste

4 nests of noodles of your choice -boil these in a separate pan according to packet

crispy shallots, to serve

coriander, to serve

enoki mushrooms, to serve

chilli oil, to serve

  1. Heat the oil in a deep pan and then add the onion, garlic, ginger and the crushed Sichuan peppercorns, black and white peppercorns. Move this around the pan for a minute and then add the chilli.
  2. Add the leftover turkey and mushrooms and move around the pan for a couple of minutes and then add the turkey stock to cover.
  3. Simmer gently and then add the carrots and cabbage.
  4. In another deep pan boil some water and add the noodles – 1 nest per person – and simmer for a few minutes (according to packet), then strain and keep to one side.
  5. Returning to the main pot add the soy sauce, Chinkiang vinegar, fish sauce and check the balance of the broth. Add more soy sauce if required. Simmer for 7 minutes, so that the carrots have softened.
  6. In deep bowls, first add the noodles and then ladle on the broth.
  7. Add some enoki mushrooms to the top of each bowl – once submerged slightly they will soften and are perfect to eat like this. Add some fresh coriander, crispy shallots, chilli oil or Sriracha of your choice.
  8. If I had some lime I would also add a splash of lime on top before eating.


A couple of other ideas for leftovers is:

Turkey Tikka Masala

Chiang Mai Noodle Broth

Turkey, Ham and Leek Pie


How have YOU been using up your leftovers? Leave a comment below so that we can all see.


Chicken Tikka Masala – always a crowd pleaser

Chicken tikka masala and butter chicken are both firm curry house favourites here in the UK. They are very similar in that they both have a mild tomato sauce with Indian spices. The main difference is the amount of butter and cream. The butter chicken, as the name suggests has a lot more more butter and a less intense tomato sauce. It is also cooked in a pan where as the chicken tikka masala is charred and cooked in a tandoor or grill before it enters the sauce and pan.

To be honest, I rarely cook this type of curry and I have never seen any family members in India cook it either. Whilst cooking in the tandoor is very much Indian, the history of this curry is disputed with many saying that was ‘created’ for a Western palate by a British Pakistani chef in Scotland in the 1970’s whose customer requested a mild tomato sauce for their chicken tikka pieces. It was such a hit that it became a firm fixture on the menu with other curry houses following suit. I certainly remember it being a standard curry to order at university curry nights out.

Whether it is truly authentic or not it is much loved across the UK. It is creamy and more buttery than my usual curries, but eaten now and again is a complete joy.


Chicken Tikka Masala

Serves 4-6 (if serving with other dishes)

4 chicken breast, cut into bite sized pieces

marinade

3 tbsp full fat natural yoghurt

1 tsp ground turmeric

1 tsp Kashmiri chilli powder

1 tsp ground paprika

1 tsp ground garam masala

1 tsp ground coriander

1 tsp ground cumin

juice from half a lemon

1 tsp salt

1 heaped tsp garlic paste

1 heaped tsp ginger paste


Creamy tomato sauce

1 tbsp ghee (clarified butter) or regular butter

2 tbsp oil

2 white onions, finely chopped

1 heaped tsp ginger paste

1 heaped tsp garlic paste

1 tbsp tomato puree

1 tsp ground turmeric

1 tsp ground cumin

1 tsp ground coriander

1 tsp ground garam masala

1 tsp Kashmiri chilli powder

1 tsp ground paprika

1x tin tomatoes or 400g fresh tomatoes, blitzed

200ml water

1 tsp jaggery/brown sugar

1 tsp salt

pinch freshly ground black pepper

150ml double cream

1 tbsp butter

1 tbsp dried methi/fenugreek leaves OR coriander leaves

  1. First you need to marinate the chicken. Mix all the marinade together and then cover tightly with cling film/foil and place in the fridge for an hour – to overnight.
  2. Spread your marinated chicken out on a large baking tray and brush with a little oil. Place under a hot grill (240 degrees C) for 10-15 minutes so that it begins to char. Turn over halfway so that it chars on all sides. It does not need to be cooked all the way through at this stage as it will finish off cooking in the sauce. Do keep an eye on it though when it is under the grill as it can char very quickly and you don’t want it to be completely burned.
  3. In a deep wide pan (a wok would work well) heat the ghee/oil and gently fry the onion so that it begins to bronze – this will take around 6 minutes. Add the ginger and garlic paste.
  4. Add all the spices followed by the blitzed tomatoes, black pepper, salt and jaggery/sugar and water. Allow to simmer on a gentle heat for 7 minutes, by which time the sauce will have thickened sufficiently.
  5. Add the chicken to the pan and coat in the tomato sauce. Gently pour in the double cream and the final tablespoon of butter and simmer on a low heat for  15 minutes. Taste test to see if more salt is required.
  6. Finally add the dried fenugreek or fresh coriander. Drizzle a little more double cream before serving.


Mexican White Beans with Courgette and Tomato

How have you all been? I’ve been rather busy in the lockdown whirl and my blog has been taken a bit of a backseat recently. I wanted to rectify that with my fabulous speedy white beans recipe that is jammed packed full of flavour, takes about 15 minutes to whip together, is nutritious and super reasonable. Whilst everything is pretty readily available, there is one little caveat and that is Mexican arbol chillies. I often have a ready supply of Mexican chillies as they are great in so many dishes, adding a deep smokey and piquant edge to a dish. I often put an order into Mextrade who have a great selection of Mexican goods. Do go check them out.

The chilli arbol are often referred to a ‘birds beak chilli’ or a ‘rat’s tail chilli’ and look similar to a slightly larger  dried Thai red chilli. They are fiery and hot so you only need a couple in this dish. I soak them first in a bowl of boiling water for 10 minutes before finely chopping them for this recipe. You can decide whether you want to keep the seeds in or not.  Of course use any chilli you have to hand, but I like the smokiness that this Mexican chilli brings to the dish. One of my other favourite Mexican chillies is a chipotle, and they are perhaps easy to come by in supermarkets, so opt for that if you can’t find the arbol, although I would only add a couple as they are a lot larger to the arbol, although less fiery hot.

The other key ingredient here is the white beans. I am a huge believer that the white beans in the jars taste so much better than the tinned. The beans themselves are haricot beans and I always pick up jars of them when I see them. You can find them all over the place from Spanish and Italian delis to Turkish and Asian grocers so do look out for them.

This recipes is a great, speedy lunch or filling supper option and tone down or up the Mexican chillies depending on your audience. To serve I added a few Gosh Falefel on the side, which I am a huge fan of, although it is more than filling without them.


Mexican White Beans with Courgette and Tomato

serves 4

3 Mexican chilli arbol, soaked for 10 mins in boiling water and then finely chopped

2 tbsp olive oil

1 red onion, finely diced or sliced

1/2 tsp salt

2 large cloves of garlic, roughly chopped

2 bay leaves

1 courgettes, peeled and diced

pinch of freshly ground black pepper

5 medium tomatoes, finely chopped

1x vegetable stock cube + 100ml boiling water

1x 570g jar of white haricot beans, drained

1 tsp Worcestershire sauce

200ml boiling water


  1. First cover the chilli arbol in boiling water and leave to soak for 10 minutes.
  2. Next heat the oil in a large, wide pan and then add the onions and salt. Allow to soften for 5 minutes before adding the garlic and bay leaves.
  3. Remove the chillies from the water and remove the stalks and finely chop. Remove the seeds if you like it less hot.
  4. Add them to the pan and then add the courgettes, black pepper. Allow the courgette to begin to bronze before adding the freshly chopped tomatoes. Allow to simmer gently.
  5. Now add the vegetable stock and boiling water and place a lid on the pan and increase the heat for a couple of minutes.
  6. Now add the white beans and Worcestershire sauce. Simmer for a further few minutes and add more water to loosen if required. If you require the sauce to thicken then place a lid on the pan and increase the heat for a couple of minutes.
  7. Check the seasoning and add a little more salt if required.
  8. Ladle into bowls and serve.