Pork Larb – the national dish of Lao

IMG_0141


Larb originates from Lao but is also eaten in North Eastern Thailand where many of the Thai people are of Laotian decent. It is, put simply, a meat mince salad (pork, chicken, turkey or duck) that is placed in a lettuce ‘cup’ and then eaten in a couple of delicious bites. They have a similar lettuce wrap recipe in Korea known as ‘Ssambap’ – ssam meaning ‘wrap’ and bap meaning ‘rice’.


IMG_0129

My version has replaced the rice, (which is traditionally toasted then roughly ground (Khao Khua) and sprinkled on the top of the mince when serving to help soak up any of the juices) with roughly ground shelled and oven roasted unsalted peanuts. I like the crunch and taste of the nut combining with the minced meat and fresh herbs. If you want to stay true to the original recipe then just add ground toasted rice in place of peanuts. Try both and see which works for you.

IMG_0120

The combination of fresh crunchy salad leaves, fragrantly spiced mince meat and fresh mint and thai basil (or coriander, but I had run out otherwise I would have thrown that in too) is satisfyingly tasty that one, or three in fact, is never quite enough. It is perfect as a canapé, or as a starter whereby guests can put together their own wraps before popping them in their mouths. Personally I love eating with my hands so any excuse to get everyone to throw themselves into this enjoyable pursuit gets the thumbs up in my books.

IMG_0102

If you tone done on the chilli this dish is also a hit with kids (although my 8 yr old has it as is) as it is a little bit different, packed full of flavours and quite simply good fun to eat, which bottom line is what food and eating should all be about. My dish is more Laotian in style and substance, minus the rice sprinkle. The north east Thailand variety varies again omitting fish sauce and lime juice and instead uses a wide range of spices including cinnamon, star anise, long pepper, cumin, cloves amongst others. I’ll post this version in the future.

IMG_0127

Throw yourself into it, try something different. I can assure you that you one wrap is never enough. This will become a firm family favourite I can guarantee.
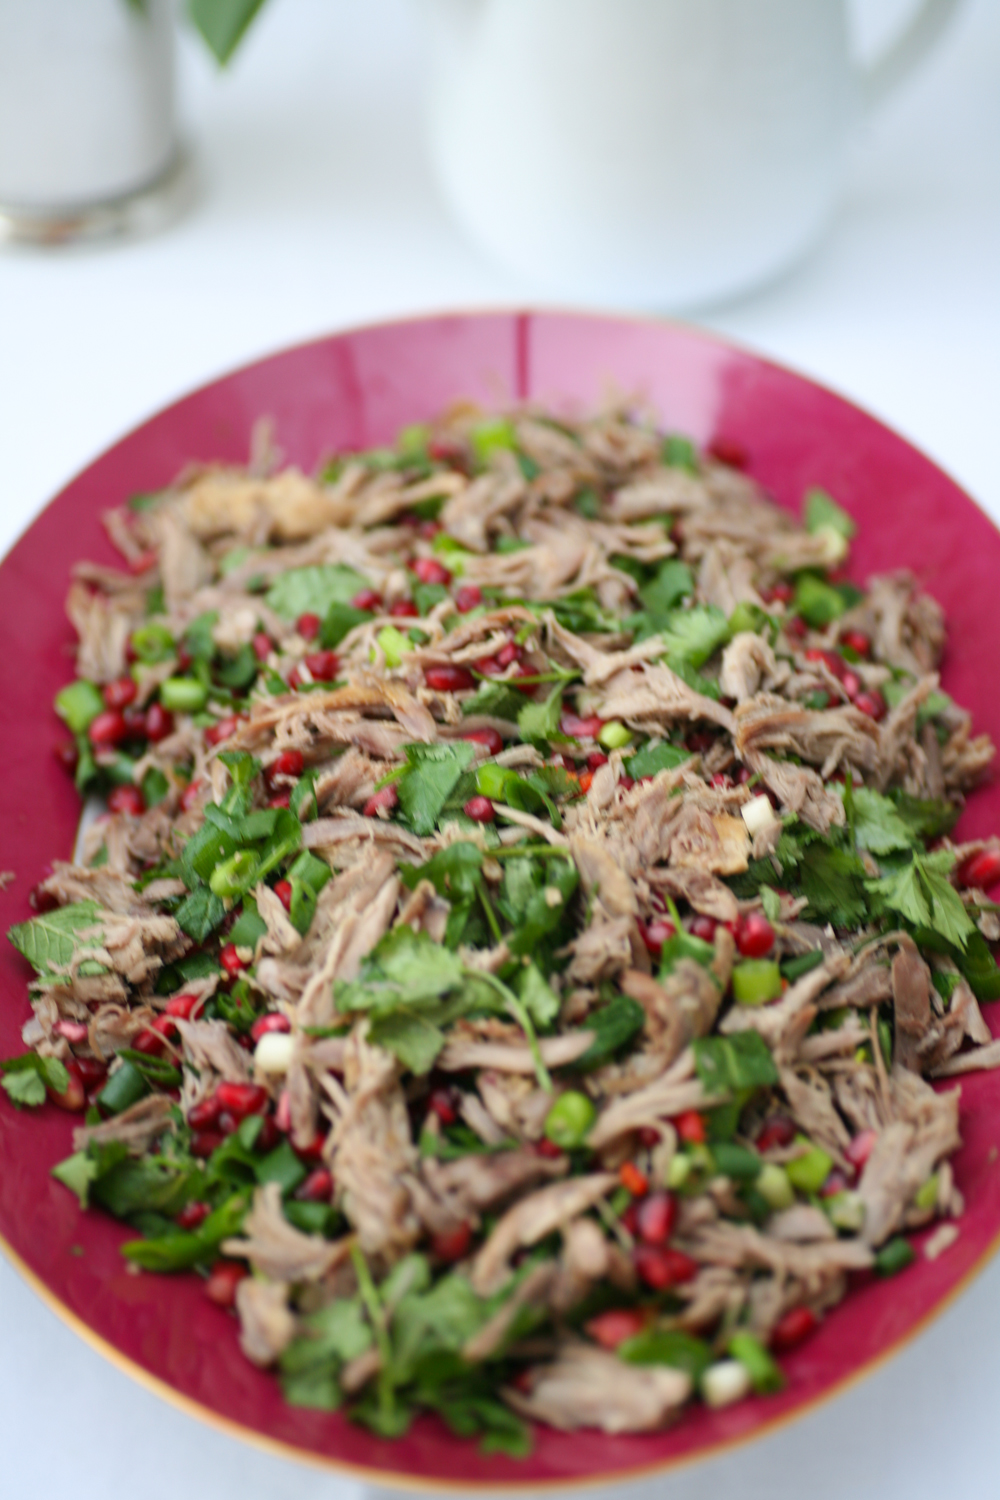
Pork Larb 

Serves 15 as a canapé or 6-8 as a starter

2 tbsp sunflower oil (or peanut oil if you have it)

2 banana shallots, finely sliced

1 tsp grated ginger

1 tsp grated garlic

1 tsp lemongrass paste

2 small red chillies, finely chopped (take the seeds out if you like it less hot)

1 kg pork mince

2 limes, juice only

5 tbsp fish sauce

1 tbsp light soy sauce

2 tbsp caster

1/2 tsp red chilli flakes

***********

30g shelled and oven roasted unsalted peanuts, roughly chopped

5 little gem lettuces or similar lettuce

handful of fresh thai basil

handful of fresh mint leaves

handful of coriander leaves

limes wedges to serve

1. In a large pan heat the oil on a medium heat and then add the shallots and fry gently. (Equally 1 large red onion also works well if you cannot get hold of shallots).

2. When the shallots have softened add the garlic, ginger, lemongrass and fresh red chilli and stir together gently.

3. Add the pork mince and move around the pan until all the pink meat has become brown. This will take around 8-10 minutes.

4. Add the fish sauce, light soy sauce, lime juice, caster sugar and red chilli flakes and stir into the mince. Leave to cook on a low heat for a further 5 minutes. Just before serving throw in a few fresh herbs and give a good stir.

5. To serve place a tablespoonful of the mince onto the lettuce cup followed by a couple of mint, Thai basil and coriander leaves and a sprinkling of peanuts (or rice if you want to stay totally traditional). Add a splash of lime juice as required.

It can be eaten at room temperature or slightly warm.

* If your mince has juice, cook it for a little longer with the lid off the pan. That should do the trick. If there continues to be some juice, it is best to strain the mince as it is easier to eat on the lettuce cups if there is no juice. 

you can replace the pork mince, with chicken, turkey, duck or I reckon even tofu would work well.


Chicken, Ginger and Spring Onion Gyoza/Jiaozi/Pop Sticker

IMG_8706

Mention the worked ‘gyoza’ in my household and you will hear yelps of delight – and that’s not just from the children. These moreish savoury dumplings are incredibly addictive and are a great little starter or snack, although you can off course have them as a main meal along with some steamed greens with soy and garlic perhaps.

Japan and China both have their version of the dumpling, although these dumplings first originated from China and were then adopted by the Japanese. The Chinese dumplings are known as jiaozi if they are boiled or steamed and guo tie if they are fried, in Japan – gyoza and the US – pot sticker.

The Chinese variety have slightly thicker wrappers and have a far wider combination of fillings than their Japanese counterparts. They are often steamed, whereas the Japanese gyoza are fried for a few minutes and then steamed for a further few minutes. The fillings I typically use for the vegetarian are tofu and shiitake mushrooms, or the meat variety filled with pork, chicken or duck or the seafood version, which tends to be prawn. Whatever takes your fancy these little dainties will be forever cherished by those who sample them.

IMG_8670

Now the question is to lovingly prepare your own wrappers or to buy some from your local Asian grocers or online. Basically it will come down to time on your part. Making your own takes a little time, but its the perfect activity to do with a mate who comes over for coffee – just rope them in they’ll love the experience or even with the kids. Shop bought is pretty cheap, as you can see for the price sticker I left on above, and are likely to be more uniform in thickness, but I’ll leave it to you to decide which suits your lifestyle.

IMG_8662

For those who wish to make their own it is SO simple. Seriously you only need a couple of ingredients and then a bit of kneading.

IMG_8653

Homemade Gyoza Wrappers

Makes around 20

210g plain flour, seived

125ml warm water

 pinch of salt

1. Stir the salt into the warm water until it completely dissolves.

2. Place the sieved flour into a large bowl and add the warm water. Using a wooden spoon mix the flour and water together and then use your hands to create a ball.

3. Kneed the dough on a cold surface for around 10 minutes, when it will be soft and springy to touch. Sprinkle more flour onto the dough if it is getting too sticky.

4. Wrap in cling film and place in the fridge for 30 mins.

5. Take small balls of the dough – about the size of apricot – and flatten it with your hand. Gently roll the dough into a round shape, turning it after every roll. Using a round cookie cutter (or the bottom of a saucer) cut out a round circle and cover gently with flour and place in a pile.

6. Continue until the dough has been used up. You should make around 20 dough wrappers with the proportions above. Whilst you prepare the filling place a damp cloth over the wrappers so they do not dry out.

IMG_8655

So now you have the wrappers ready to go you need to prepare the filling. Whether you want to use chicken, pork mince, prawn, duck or shiitake mushrooms and tofu the rest of the ingredients remain the same.

IMG_8680

Whilst using Chinese cabbage is the most authentic, use whatever green cabbage you have in your fridge. Place two large leaves in a pan of boiling water for 1 minute and then drain and pat completely dry with kitchen paper. You then want to slice and cut them up as small as you can. You can blitz everything in a blender but I tend to often take the slightly slower version of cutting by hand. Today I used chicken and as I tend to find minced chicken hard to source so I bought boneless chicken thighs and cut up them up into small pieces. I also added spring onions, chopped garlic, finely grated ginger, soy sauce, sesame oil, salt and pepper and hey presto you have your filling. You can get creative and add any other ingredient you think might work – how about carrot, fresh chilli, five spice.

IMG_8687

Wrapping the dumplings is rather satisfying and you will begin to get into a rhyme with them. Don’t overfill the gyoza, instead putting a teaspoonful in the centre and then, using your finger tip, wet the low half rim of the circle. You then want to fold over the gyoza in half and then begin to pleat from left to right, making sure the filling is securely inside the parcel. It is definitely a case of the more you do the better you become. My 8 year old is a complete natural and can do multiple pleats across the top. You only pleat one side of the gyoza s0 do not turn over and attempt to do more on the other side.

IMG_8721

The above photo shows half of the gyoza pleated. I finished doing this row, but did not turn it over to attempt to do the other side. To pleat you simply use your thumb and forefinger to make small pleats going over the last. Make sure you press the top together so that it is firmly stuck together – you don’t want them opening up in the pan.

IMG_8693

So you can see some are neater than others above. They will still taste delicious even if you haven’t got the perfect symmetrical pleating!

IMG_8708

Dumpling Filling

to fill around 20 dumplings

2 large leaves from a green cabbage/Chinese leaf cabbage

2 garlic cloves, finely sliced

20g ginger, peeled and finely grated

3 spring onions, finely sliced into small pieces

1 tsp sesame oil

1 tsp soy sauce

1 tsp mirin rice wine

275g boneless chicken thighs/or chicken mince (or duck, pork mince, tofu and shiitake mushrooms)

100 ml water

************

Dumpling Dipping Sauce

3 tsp rice vinegar

6 tsp soy sauce

1 tsp chilli oil (optional)

1 tsp sesame seeds

**********

1. Finely chop all of the ingredients and then bind together using your hands.

2. Place a heaped teaspoon of the ingredients onto one of the wrappers in the centre.

3. Wet the rim of the lower half of the wrapper using your finger.

4. Fold the wrapper in two and then pleat from left to right across the top, making sure to firmly seal the top of the wrappers.

5. Bend the wrapper slightly so that it is in a crescent moon shape and so it can stand up unaided. Place to one side whilst you prepare the rest.

6. Using a large nonstick pan add a tablespoon of sesame oil and when hot add the dumplings so that they are standing up and not sticking to one another. Fry them for 3 minutes, by which time they will have bronzed underneath. If they have not bronzed sufficiently leave them to fry for a little longer.

7. Add 100ml of water to the pan and place a lid on the top. Leave to steam for a further 3-4 minutes so that the water has completely dissolved.

8. Mix the ingredients of the dipping sauce together and then place to one side in a little bowl.

9. Serve immediately with the dipping sauce.

IMG_8719


Moroccan Giant Couscous Salad and a Mung Bean, Carrot and Feta Salad

IMG_8380

I had a few girlfriends over for lunch this week and thought it might be helpful to give you the low down on some of the things I prepared which allowed me to have a stress free time. Planning ahead is absolutely essential. There is nothing worse than having to fret over food last minute when all you really want to be doing is catching up with everyone. I tend to opt for large healthy salads and then prepare a hot soup of some sorts to warm the belly and soul.

IMG_8373

So first up was a mung bean, carrot and feta salad with cumin, caraway and fennel seeds. It requires some forward planning in that you need to soak the lentils overnight, but other than that it is very straightforward and ticks all the boxes for healthiness and importantly tastiness.

IMG_8388

Then I prepared my Vietnamese inspired salmon, cucumber, red onion and grapefruit salad with a mirin lime dressing. I posted it on my blog about a year ago. Check out the recipe here.

IMG_8390

Then I made one of my absolute favourite salads – a miso soy chicken with spinach, lentils, slow baked tomatoes, green  (you can use puy, beluga whatever takes your fancy) lentils and pine nuts. Recipe here. I opted to make my own slow baked tomatoes – you can find a recipe for them at the bottom of the post if you click here. Very easy to prepare and taste so delicious.

IMG_8389

To balance out the flavours, palate and colours I then prepared a Moroccan influenced salad of giant couscous, Moroccan spices, sultanas, pine nuts, fresh mint and pink lady apples. Recipe below.

IMG_8387

Excuse the rather hazy shot of the final ‘salad’, but I opted for shredded duck with pomegranate, spring onions, mint and coriander with a raspberry vinegar dressing. I posted the recipe here on my blog a while ago.

The hot soup that I prepared I completely forgot to take a photo of – so I will do a separate blog post on that another time – but it was a red lentil (I am slightly obsessed by these delicious little beauties), coconut milk and smoked paprika with a chilli oil and fresh coriander sprinkled on top.

Needless to say I cooked far too much of everything so will be eating tasty leftovers for the next few days!

IMG_8386

I’ll leave you with a pretty flower shot. I am so pleased that finally some of the wonderfully colourful and sweet smelling flowers are beginning to grace our florists.

Until next week folks…..

Moroccan Giant Couscous Salad

Serves 4-6

Inspired by a similar recipe from Red Magazine online

300g giant couscous

1 tbsp butter

50g sultanas

1 tsp smoked paprika

1/2 tsp cinnamon powder

1/2 cumin powder

2 shallots, finely chopped

1 garlic, finely grated/chopped

2 tbsp toasted pine nuts

handful of fresh mint, chopped

zest of a lemon

1 red chilli, finely chopped (half if you prefer it less hot)

2 pink lady apples, diced and cored

1. Place the couscous in a pan and completely cover with boiling water. Simmer gently for 6-8 minutes so that the couscous is soft. Strain and run under the cold tap. Shake off the water as much as you can. Place to one side.

2. Using the same pan melt the butter and then add the sultanas so that they are completely coated in the melted butter.  Now add the ground cinnamon, cumin and smoked paprika and simmer for one minute and then place to one side.

3. Dice and core the apple (if serving at a later stage hold off on cutting up the apple until almost ready to serve as it will begin to bronze), deseed the chilli and finely chop. Finely chop the shallots and grate the ginger and garlic cloves.

4. In a mixing bowl add the couscous, the sultanas with all the spices and butter juice and mix together. Now add the shallots, ginger and garlic and continue to fold into the couscous.

5. Scatter the apple on top along with the mint and lemon zest and serve.

Leftovers can easily be stored in the fridge for a couple of days.

*******************

Mung Bean, Carrot and Feta Salad with Cumin, Caraway and Fennel Seeds

Adapted from Yotam Ottolenghi’s recipe in ‘The Guardian’

Serves 4-6

300g dried green mung beans

1 tbsp chilli oil (or olive if you prefer to have less of a kick)

1 tbsp olive oil

1 tsp cumin seeds

1 tsp fennel seeds

1 tsp caraway seeds

2 tbsp white wine vinegar

2 garlic cloves, peeled and finely chopped

1/2 tsp dried chilli flakes

3 good sized carrots cut in to batons

1 tsp salt

1/2 tsp sugar

150g feta, crumbled (not finely)

handful of freshly chopped coriander

1. Soak the dried mung beans overnight in water that completely covers them.

2. The following day, rinse them a couple of times in cold water and then place them in a pan and cover with boiling water. Simmer gently for 25-30 minutes to soften them but so they still retain a bit of a bite.

3. Drain and rinse through cold water and set to one side in a large bowl.

4. In a small pan add the chilli oil (or olive see above) and when hot add the seeds and allow them to start popping, which will take no longer than 30 seconds. Stir a couple of times and then transfer the seeds and oil into the large bowl with the drained mung beans.

5. Add the white wine vinegar, garlic, chilli flakes and stir in together.

6. In a separate large shallow pan lay the carrot batons and almost cover with cold water. Add one further spoonful of olive oil along with the sugar and salt. Simmer on a high heat for 7 minutes by which time the carrots will have soften and the water will have drastically reduced – drain any excess. The sugar will allow the carrots to slightly caramelise.

7. Add the carrots to the mung beans and stir in gently. Add more salt if necessary. Transfer to a serving platter and crumble with feta.

Again this stores well in the fridge for a couple of days.

IMG_8394


Duck Vindaloo

IMG_4092

Sometimes I think it’s good to eat a meal that really makes you feel alive, something that has some real zing to it. I understand though that loving chilli and things hot and spicy really divides opinion and that it is definitely something that you build up a tolerance to over time, similar to swimming in cold water in fact. It’s good to have a gradual build up rather than jumping in at the deep end whether it be cold water or chilli. On this basis I have shown you how to cook a hot vindaloo as well as a more mild version, but one that still has a pleasant kick to it.

I rather like using duck for a change, but should you wish you could also easily cook this with chicken. Pork vindaloo is probably the most well known Goan version – which you can follow the recipe to HERE, however, duck adds an interesting and tasty alternative, which I urge you to try.

I suggest you probably try the more subtle version first and then gradually build up the chilli content should you require more of a kick. I would love to hear how you get on so do leave a message in the comments box below….go on, don’t be shy.

Duck Vindaloo

Serves 4 (or 2 if you are very hungry)

4 duck legs (or 1 duck jointed)

2 sticks of cinnamon

5 cloves

2 green cardamom pods, slightly split open

3 white onions

10 garlic cloves

2 inches of fresh ginger

5 dried red chilli (2 if you prefer it milder) I use the small Thai variety

5 small green chilli (2 if you prefer it milder) I use either serrano or finger chillies. Use Jalapeno if you prefer it less hot

1 tbsp cumin seeds

1 tsp turmeric

3 tbsp white wine vinegar

5 small/medium potatoes, peeled and quartered

1 tbsp sugar

1-2 tbsp butter/ghee

300ml water

1. Place the duck in a deep pan filled with cold water so that it covers the duck legs. Prick the duck a few times with a fork so that the spices can penetrate into the meat. Add the cinnamon stick, cardamom pods and cloves to the pan and bring to the boil and then simmer gently for 1 hour.

2. Using a blender, blend the onions, garlic, green chillies and fresh ginger. In a spice grinder grind the cumin seeds and dried chillies and then transfer them to the blender with the onions, garlic etc.

3. Add the turmeric, sugar and white wine vinegar and give it another final blast in the blender so that a smooth paste is formed.

4. Once the duck has been boiling for one hour, drain the water away and place to one side.

5. Heat a frying pan/karahi/wok and add the butter/ghee and when it has melted brown the duck legs on both sides and place to one side.

6. Using the same pan add the blended curry paste to the pan and gently fry until it becomes dry. You may need to stir it a few times to make sure that none of it burns on the bottom – cook on a relatively low heat!

7. Add the potatoes and duck to the paste along with the water and simmer gently until the water has disappeared and the potatoes have softened. You may need to add a little more water if the potatoes have not cooked through and the water has dried up.

8. Serve with rice or chapati along with a dal (see my recipe library for a list of my dals)


Duck, Pomegranate, Coriander and Mint Salad with a Raspberry Vinegar Dressing

Long gone are the days when salads consisted of a few lettuce leaves, some tomatoes and grated carrots, a la 1970’s. Today there are so many inventive recipes that ordering, cooking and most importantly, eating, salads has been given a new kudos and a certain status that it is now totally acceptable to serve up a salad or two as the main dish when guests come over.

Personally I like them to be colourful and a little bit unexpected in as far as ingredients and taste go. Mixing and marrying ingredients that are salty and sweet and creating the right ying yang within the dish is so important. Over the last year I have cooked a few that stand out for me – check them out here – watermelonmangotofulentil. If you cook a couple when friends come over you’ll have a real feast and they can all be cooked in advance so that there is no stress when your guests arrive. People often like a choice so I normally prepare two or three. Leftovers the day after also work providing you keep them in the fridge.

 I had a very similar duck salad to the one I have cooked here at a friend’s house a couple of years ago and was eager to share it with you. Other than the fact that the duck needs to cook slowly in an oven for an hour and half, the dish is very straightforward to make and will definitely get a positive response from those you serve it to. The raspberry vinegar you can buy at large supermarkets here in the UK and I am sure they have something similar overseas. The sweetness mixed with the duck and salad is really tasty. You do need to get hold of duck legs (ideally with the skin on) as opposed to breast, as the meat is far more succulent on the bone.

Which salads stand out for you? Post a comment to let me know and perhaps you’ll see your salad idea up here on my blog over the summer – with all credit to you.

Who said salads are boring?

Duck, Pomegranate, Coriander and Mint Salad with a Raspberry Vinegar Dressing

Serves 4

4 duck legs

110g pomegranate seeds

1 handful of fresh mint, chopped

1 generous handful of fresh coriander, chopped,

5 spring onions, finely chopped

1 red chilli, finely chopped

4 tsp of raspberry fruit vinegar

rock salt and ground black pepper

70g lambs lettuce

 1. Place the duck legs in a preheated oven at 150 degrees (if using a fan oven and 10 degrees more if not) for an hour and a half. Cooking the duck slowly at a low heat will allow the meat to become tender and the fat to reduce considerably.

2. I used the speedy option of pre-prepared pomegranate seeds but obviously if can get hold of fresh pomegranate I encourage you to use them. Tapping the fresh pomegranate gently on its side will allow the pips to dislodge from the pith allowing them to break free more easily. I used 110g but if you use a little more that is absolutely fine, it does not have to be exact with regards to the pomegranate seeds. Place them and the juice into a mixing bowl.

3. Finely chop the spring onions and add to the mixing bowl along with the fresh chopped coriander and mint.

4. Finely slice a red chilli and if you prefer it to have less of a kick remove the seeds. Add to the mixing bowl. If you are feeding this dish to young children then obviously just omit the chilli part.

5. When the duck legs are cooked it is important to let them cool completely before shredding them with a fork. I tend to remove most of the skin, but it is up to you.

6. Place the duck into the mixing bowl and add 4 tsp of raspberry fruit vinegar and mix in well to the ingredients. Add salt and pepper to taste.

7. Place the lambs lettuce on a serving dish and lay the the duck salad across the top and serve.