Roasted Sweet Potato, Chickpeas, Courgette and Tomatoes with Hummus and Zhoug

We all need a bit of hot stuff in our lives right? So look no further than the Yemenite hot sauce, commonly known as ‘Zhoug’ or ‘Zhug’ when you need to jazz up your lunch or supper. Its cousins would be Argentinian ‘chimichurri’, Moroccan ‘chermoula’, Italian ‘salsa verde’ and Indian ‘coriander chutney’. It takes seconds to whip together – yes really – and lasts for a few days in the fridge in a sealed jar.

I made a batch today, which I whizzed up in my mini-blender and then drizzled it over my lunch. It is made up of fresh parsley and coriander, freshly roasted cumin seeds, which I then ground to a powder, lemon juice, olive oil, water, salt, sugar, garlic, crushed cardamom seeds and a couple of jalapeño chillies. Simple hey. So zingy and fresh with just the right heat. You can add more chillies if you want to bring up the heat levels, but I think 2 jalapeños really hits the right note for me.

My lunch itself was easy as it literally cooked itself. I popped a sweet potato, some tomatoes – halved, chickpeas rubbed in smoked paprika in the oven for 40 mins at 180 degrees fan. I then sliced up some courgettes and pan fried them for a few minutes and then hey presto. I had some of my homemade hummus in the fridge so added a dollop of that and then drizzled my zhoug on top. If I had had some Aleppo red pepper flakes I would have added a pinch of those on top too.

Yemenite Zhoug

30g fresh coriander, leaves and stalks

20g fresh parsley, mainly leaves

2 jalapeño chillies, seeds removed (but keep them in if you want it hotter)

2 tbsp lemon juice

3 tbsp olive oil

2 tbsp water

1/2 tsp salt flakes

pinch of sugar

1 tsp cumin seeds, dry roasted and then ground to a powder

3 green cardamom pods, husks removed and seeds crushed

  1. In a saucepan dry roast the cumin seeds for a minute so they begin to bronze and the aroma is released. Allow to cool and then blend to a powder using a pestle and mortar or blender.
  2. Using a mini-blender add the fresh herbs, ground cumin, crushed cardamom seeds, lemon, salt, sugar, water and olive oil. Blitz to form a smooth paste. Add a little more water as required to make it runnier.
  3. Keep in a sealed container in the fridge and use within a few days.


Roasted Sweet Potato, Chickpeas, Courgette and Tomatoes

serves 2

1 large sweet potato, kept whole, but pierced with a fork

5 medium tomatoes, halved

olive oil to drizzle

1x 400g jar of chickpeas, strained and washed

1 tsp smoked paprika

1/4 tsp salt flakes

1 courgette, peeled to give a striped effect

1 tbsp of hummus per serving

extra virgin olive oil to drizzle


  1. Preheat the oven to 180 degrees fan. You want to cook the sweet potatoes and tomatoes for 40-45 minutes.
  2. Keep the sweet potato whole, with the skin on. Prick the skin with a fork a few times.
  3. Slice the tomatoes and place them in an ovenproof dish. Drizzle with olive oil and salt flakes, then add the sweet potato to the preheated oven.
  4. Drain the chickpeas and then dry them with some kitchen roll before adding the smoked paprika.  Mix in well and then place them in the oven 10 minutes after the sweet potato and tomatoes have been cooking.
  5. In a saucepan, add a little oil and then add the sliced courgettes. Allow them to begin to bronze and then remove. This will take between 5-7 minutes.
  6. To plate up, remove the skin from the sweet potato (optional) and slice up. Add some to a bowl along with some chickpeas, courgette, tomatoes. Add a dollop of hummus and some zhoug and finally a drizzle of extra virgin olive oil.


Bottle Gourd Curry (you can also make this with marrow or courgette)

Happy New Year everyone. What a strange old year it’s been already and we are only a couple of weeks in. Here in the UK we are on national lockdown so we are all hunkering down and mainly staying confined within the four walls of our homes, with fleeting escapes of freedom with exercising and grocery shopping. A 5km run has never been so thrilling! I was picking up some spices for my zoom classes this morning (I’m sending them to folks in the UK who join my zoom class) and saw some dudhi – also known as lauki, calabash or bottle gourds – for sale and thought it would be good to buy a couple so that I could (a) tell you more about them and (b) show you a fab recipe that you will love.


Whilst I realise that unless you live near an Asian grocer you are not going to be able to get hold of these vegetables, the good news is that you can replace them with marrow or courgette which will work equally well. They are not dissimilar to a small, thinner marrow, with a light green smooth skin and white flesh. When harvested young they are a perfect vegetable to eat. They are primarily grown however for their fruit, which when dried forms a woody hollow vessel that can be used as a container for food and water but also as fishing floats, musical instruments and even clothing. It is a native of Africa but recent DNA research suggests that it was “domesticated three times: in Asia, at least 10,000 years ago; in Central America, about 10,000 years ago; and in Africa, about 4,000 years ago”. A cool fact that might appeal to you, is that this vegetable grows on a plant that has large white flowers that only open up at night.


Similar to a marrow or courgette the bottle gourd works really well in dal.  In Bengal, where my husbands family are from, they sometimes serve it with prawns to make a fantastic curry. Today though, I thought I would show you a curry, which uses them as the star ingredient.

Bottle Gourd Curry (replace with marrow or courgette)

500g bottle gourd, skin removed and the flesh cut into bit sized cubes or use marrow or courgette (you can keep the skin on the courgette)

2 tbsp sunflower/rapeseed oil

2 dried red chillies

pinch of asafoetida

1 tsp cumin seeds

1 Indian bay leaf, broken in two (called tej patta)

1 red onion, finely chopped

 1 tsp salt

1 inch of ginger, finely grated (or 1 tsp ginger paste)

3 garlic cloves, grated (or 1 tsp garlic paste)

2 large tomatoes or 4 medium tomatoes, chopped

1/2 tsp ground turmeric

1/2 tsp ground coriander

1/2 tsp ground Kashmiri chilli

400ml water


  1. First prepare the bottle gourd (marrow or courgette) and place to one side.
  2. Heat a large deep pan and add the oil.
  3. When it is hot add the dried chillies, Indian bay leaf, asafoetida and cumin seeds which will begin to sizzle.
  4. After 20 seconds, add the onion and salt and let the onion soften completely and begin to bronze – between 6-8 minutes before adding the garlic and ginger.
  5. Stir in the garlic and ginger so that raw smell dissipates, which takes a few minutes.
  6. Next add the chopped tomatoes and stir into the onion. Add the ground spices and leave to simmer with a lid on for 5 minutes. The tomato should have softened considerably.
  7. Add the bottle gourd (marrow or courgette) and then add the water. Simmer on a medium heat for 20 minutes. A lot of the water will have soaked up leaving a thick spiced tomato coating over the gourd.

I ate mine on its own with a squeeze of lemon, but you could also have some rice on the side or a chapati, luchi or naan bread. It makes a delicious vegan lunch or supper.

Let me know how you get on if you make it.

Food is definitely a way to keep us all uplifted and glowing through these surreal times, I hope you agree.


Mexican White Beans with Courgette and Tomato

How have you all been? I’ve been rather busy in the lockdown whirl and my blog has been taken a bit of a backseat recently. I wanted to rectify that with my fabulous speedy white beans recipe that is jammed packed full of flavour, takes about 15 minutes to whip together, is nutritious and super reasonable. Whilst everything is pretty readily available, there is one little caveat and that is Mexican arbol chillies. I often have a ready supply of Mexican chillies as they are great in so many dishes, adding a deep smokey and piquant edge to a dish. I often put an order into Mextrade who have a great selection of Mexican goods. Do go check them out.

The chilli arbol are often referred to a ‘birds beak chilli’ or a ‘rat’s tail chilli’ and look similar to a slightly larger  dried Thai red chilli. They are fiery and hot so you only need a couple in this dish. I soak them first in a bowl of boiling water for 10 minutes before finely chopping them for this recipe. You can decide whether you want to keep the seeds in or not.  Of course use any chilli you have to hand, but I like the smokiness that this Mexican chilli brings to the dish. One of my other favourite Mexican chillies is a chipotle, and they are perhaps easy to come by in supermarkets, so opt for that if you can’t find the arbol, although I would only add a couple as they are a lot larger to the arbol, although less fiery hot.

The other key ingredient here is the white beans. I am a huge believer that the white beans in the jars taste so much better than the tinned. The beans themselves are haricot beans and I always pick up jars of them when I see them. You can find them all over the place from Spanish and Italian delis to Turkish and Asian grocers so do look out for them.

This recipes is a great, speedy lunch or filling supper option and tone down or up the Mexican chillies depending on your audience. To serve I added a few Gosh Falefel on the side, which I am a huge fan of, although it is more than filling without them.


Mexican White Beans with Courgette and Tomato

serves 4

3 Mexican chilli arbol, soaked for 10 mins in boiling water and then finely chopped

2 tbsp olive oil

1 red onion, finely diced or sliced

1/2 tsp salt

2 large cloves of garlic, roughly chopped

2 bay leaves

1 courgettes, peeled and diced

pinch of freshly ground black pepper

5 medium tomatoes, finely chopped

1x vegetable stock cube + 100ml boiling water

1x 570g jar of white haricot beans, drained

1 tsp Worcestershire sauce

200ml boiling water


  1. First cover the chilli arbol in boiling water and leave to soak for 10 minutes.
  2. Next heat the oil in a large, wide pan and then add the onions and salt. Allow to soften for 5 minutes before adding the garlic and bay leaves.
  3. Remove the chillies from the water and remove the stalks and finely chop. Remove the seeds if you like it less hot.
  4. Add them to the pan and then add the courgettes, black pepper. Allow the courgette to begin to bronze before adding the freshly chopped tomatoes. Allow to simmer gently.
  5. Now add the vegetable stock and boiling water and place a lid on the pan and increase the heat for a couple of minutes.
  6. Now add the white beans and Worcestershire sauce. Simmer for a further few minutes and add more water to loosen if required. If you require the sauce to thicken then place a lid on the pan and increase the heat for a couple of minutes.
  7. Check the seasoning and add a little more salt if required.
  8. Ladle into bowls and serve.


Cooking a Sri Lankan Curry For Critical NHS

Hi everyone,

Hope you are all keeping well and remaining upbeat in these uncertain times. This week I am doing a collaboration with the effervescent British-Sri Lankan interior designer and boutique hotel and villa owner of Kalukanda House in Sri Lanka, Dee Gibson. She also happens to be a fellow south west Londoner like myself.

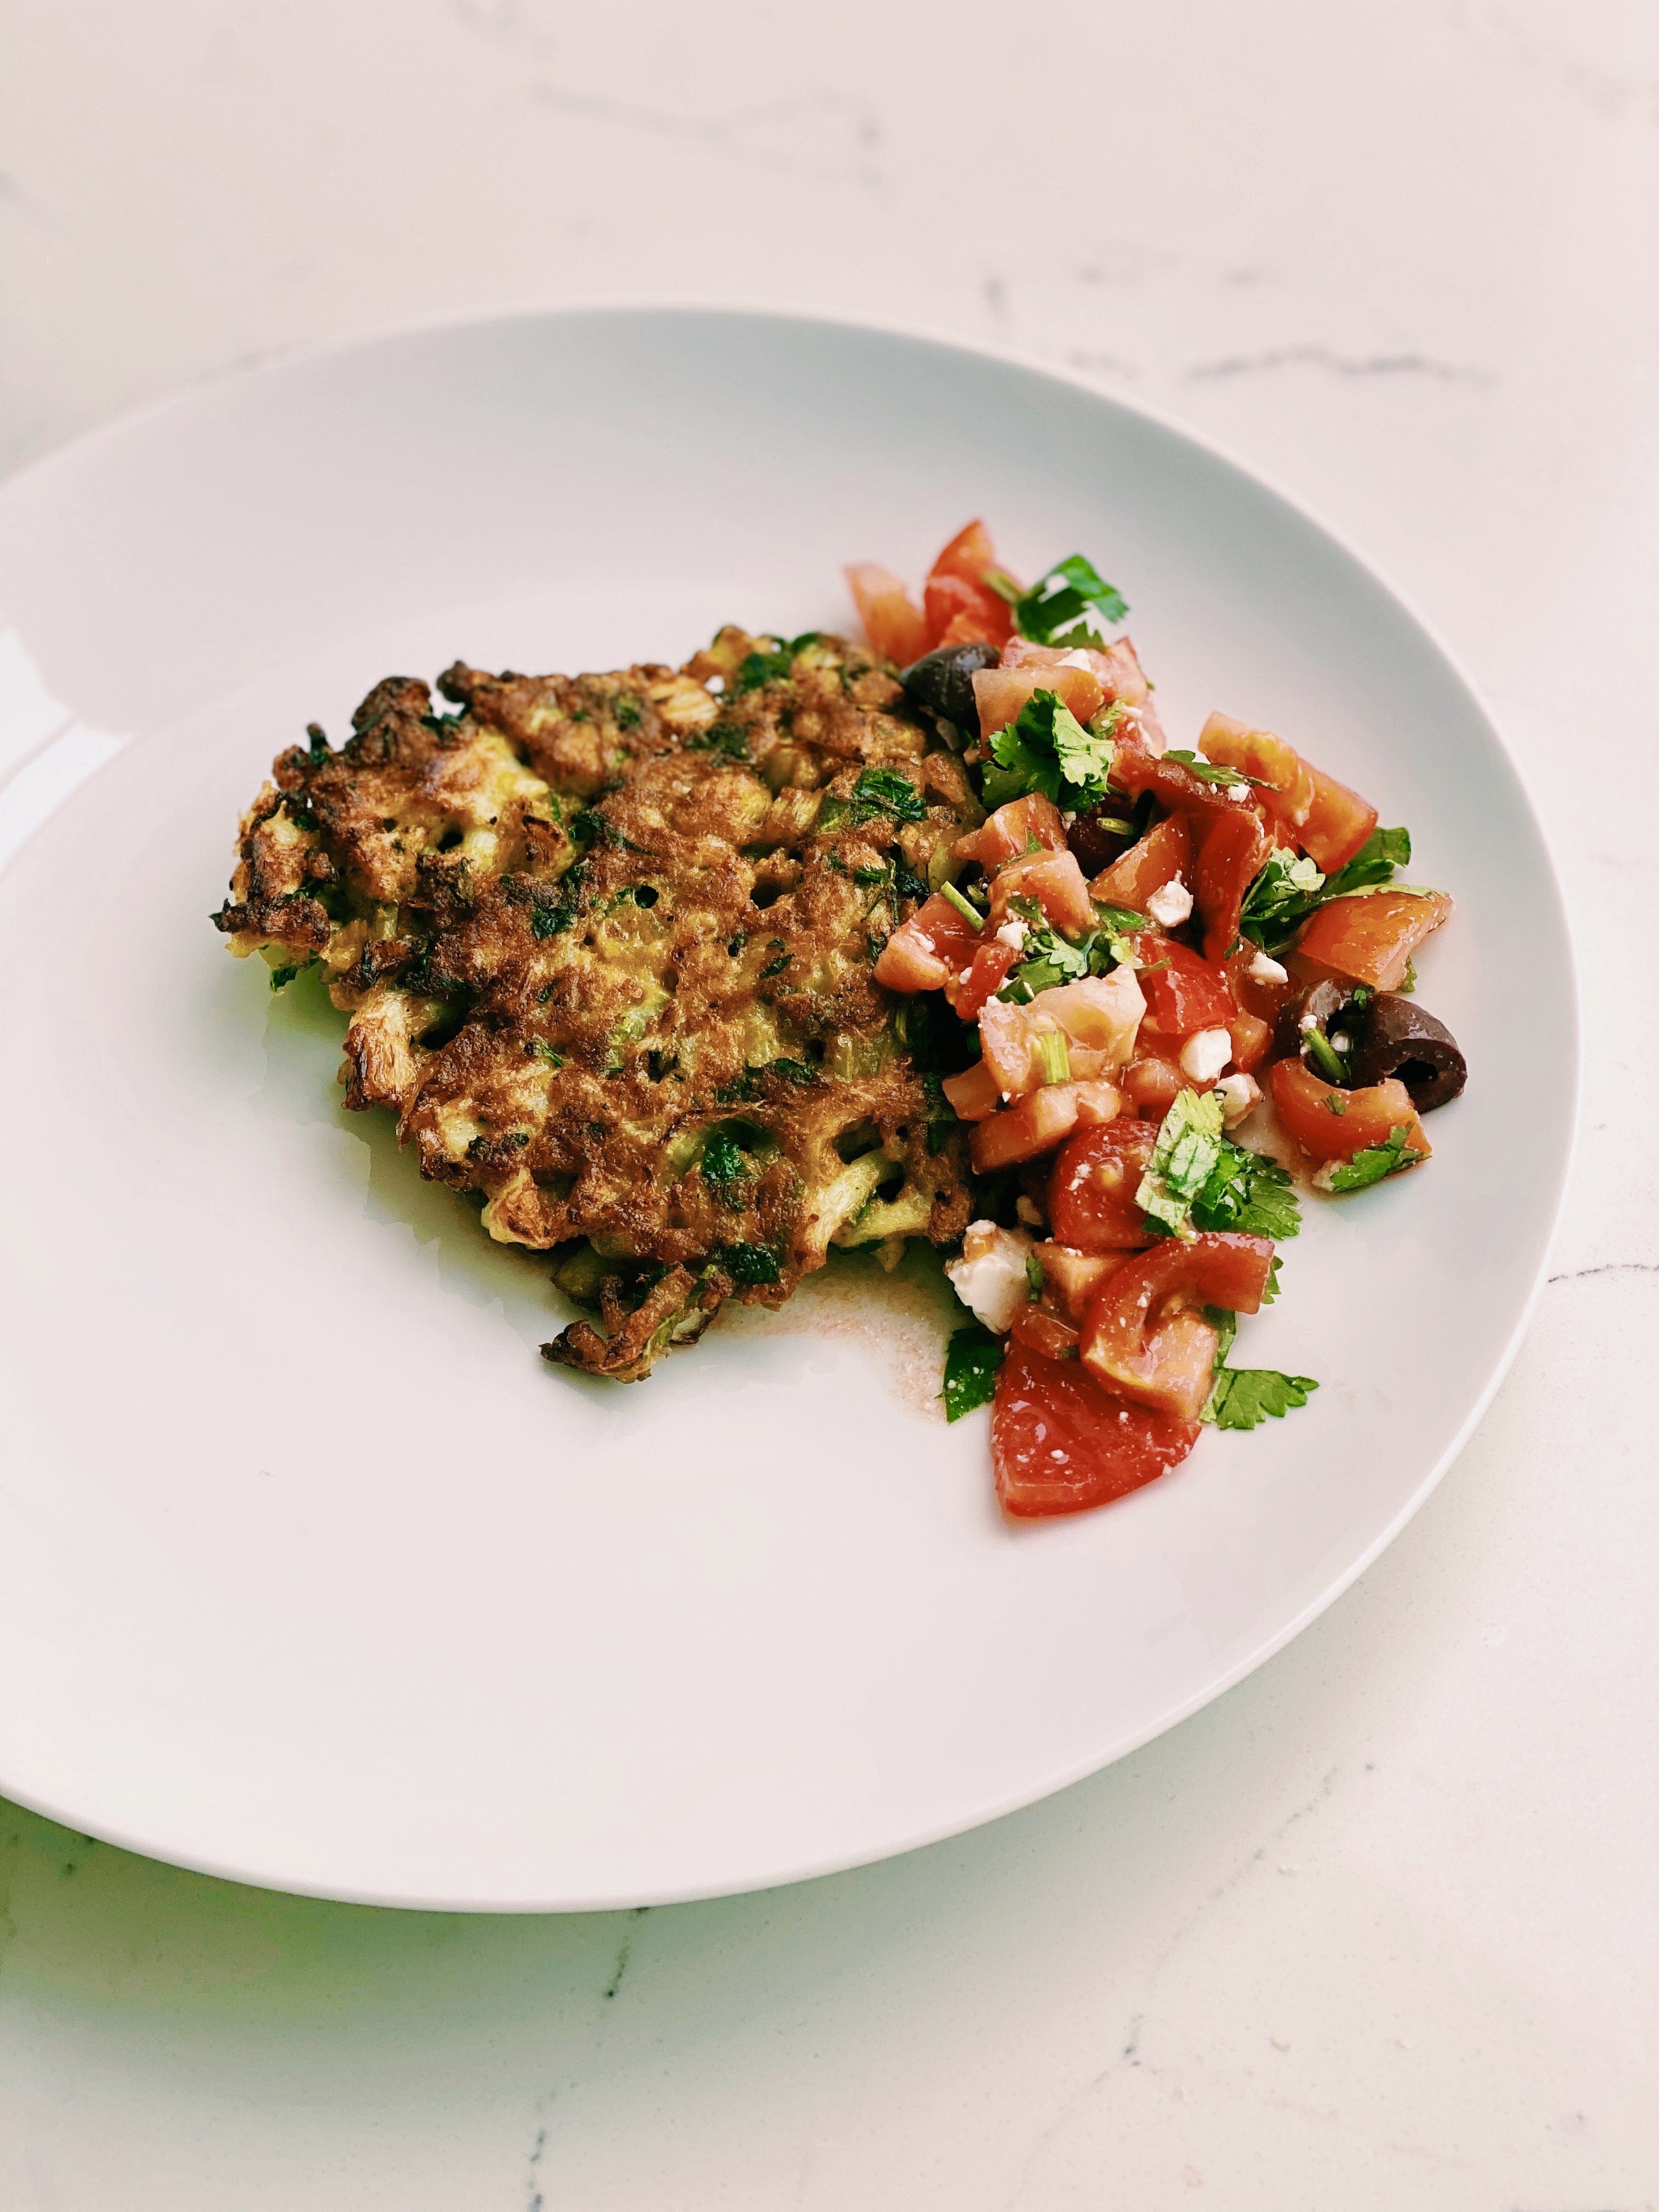
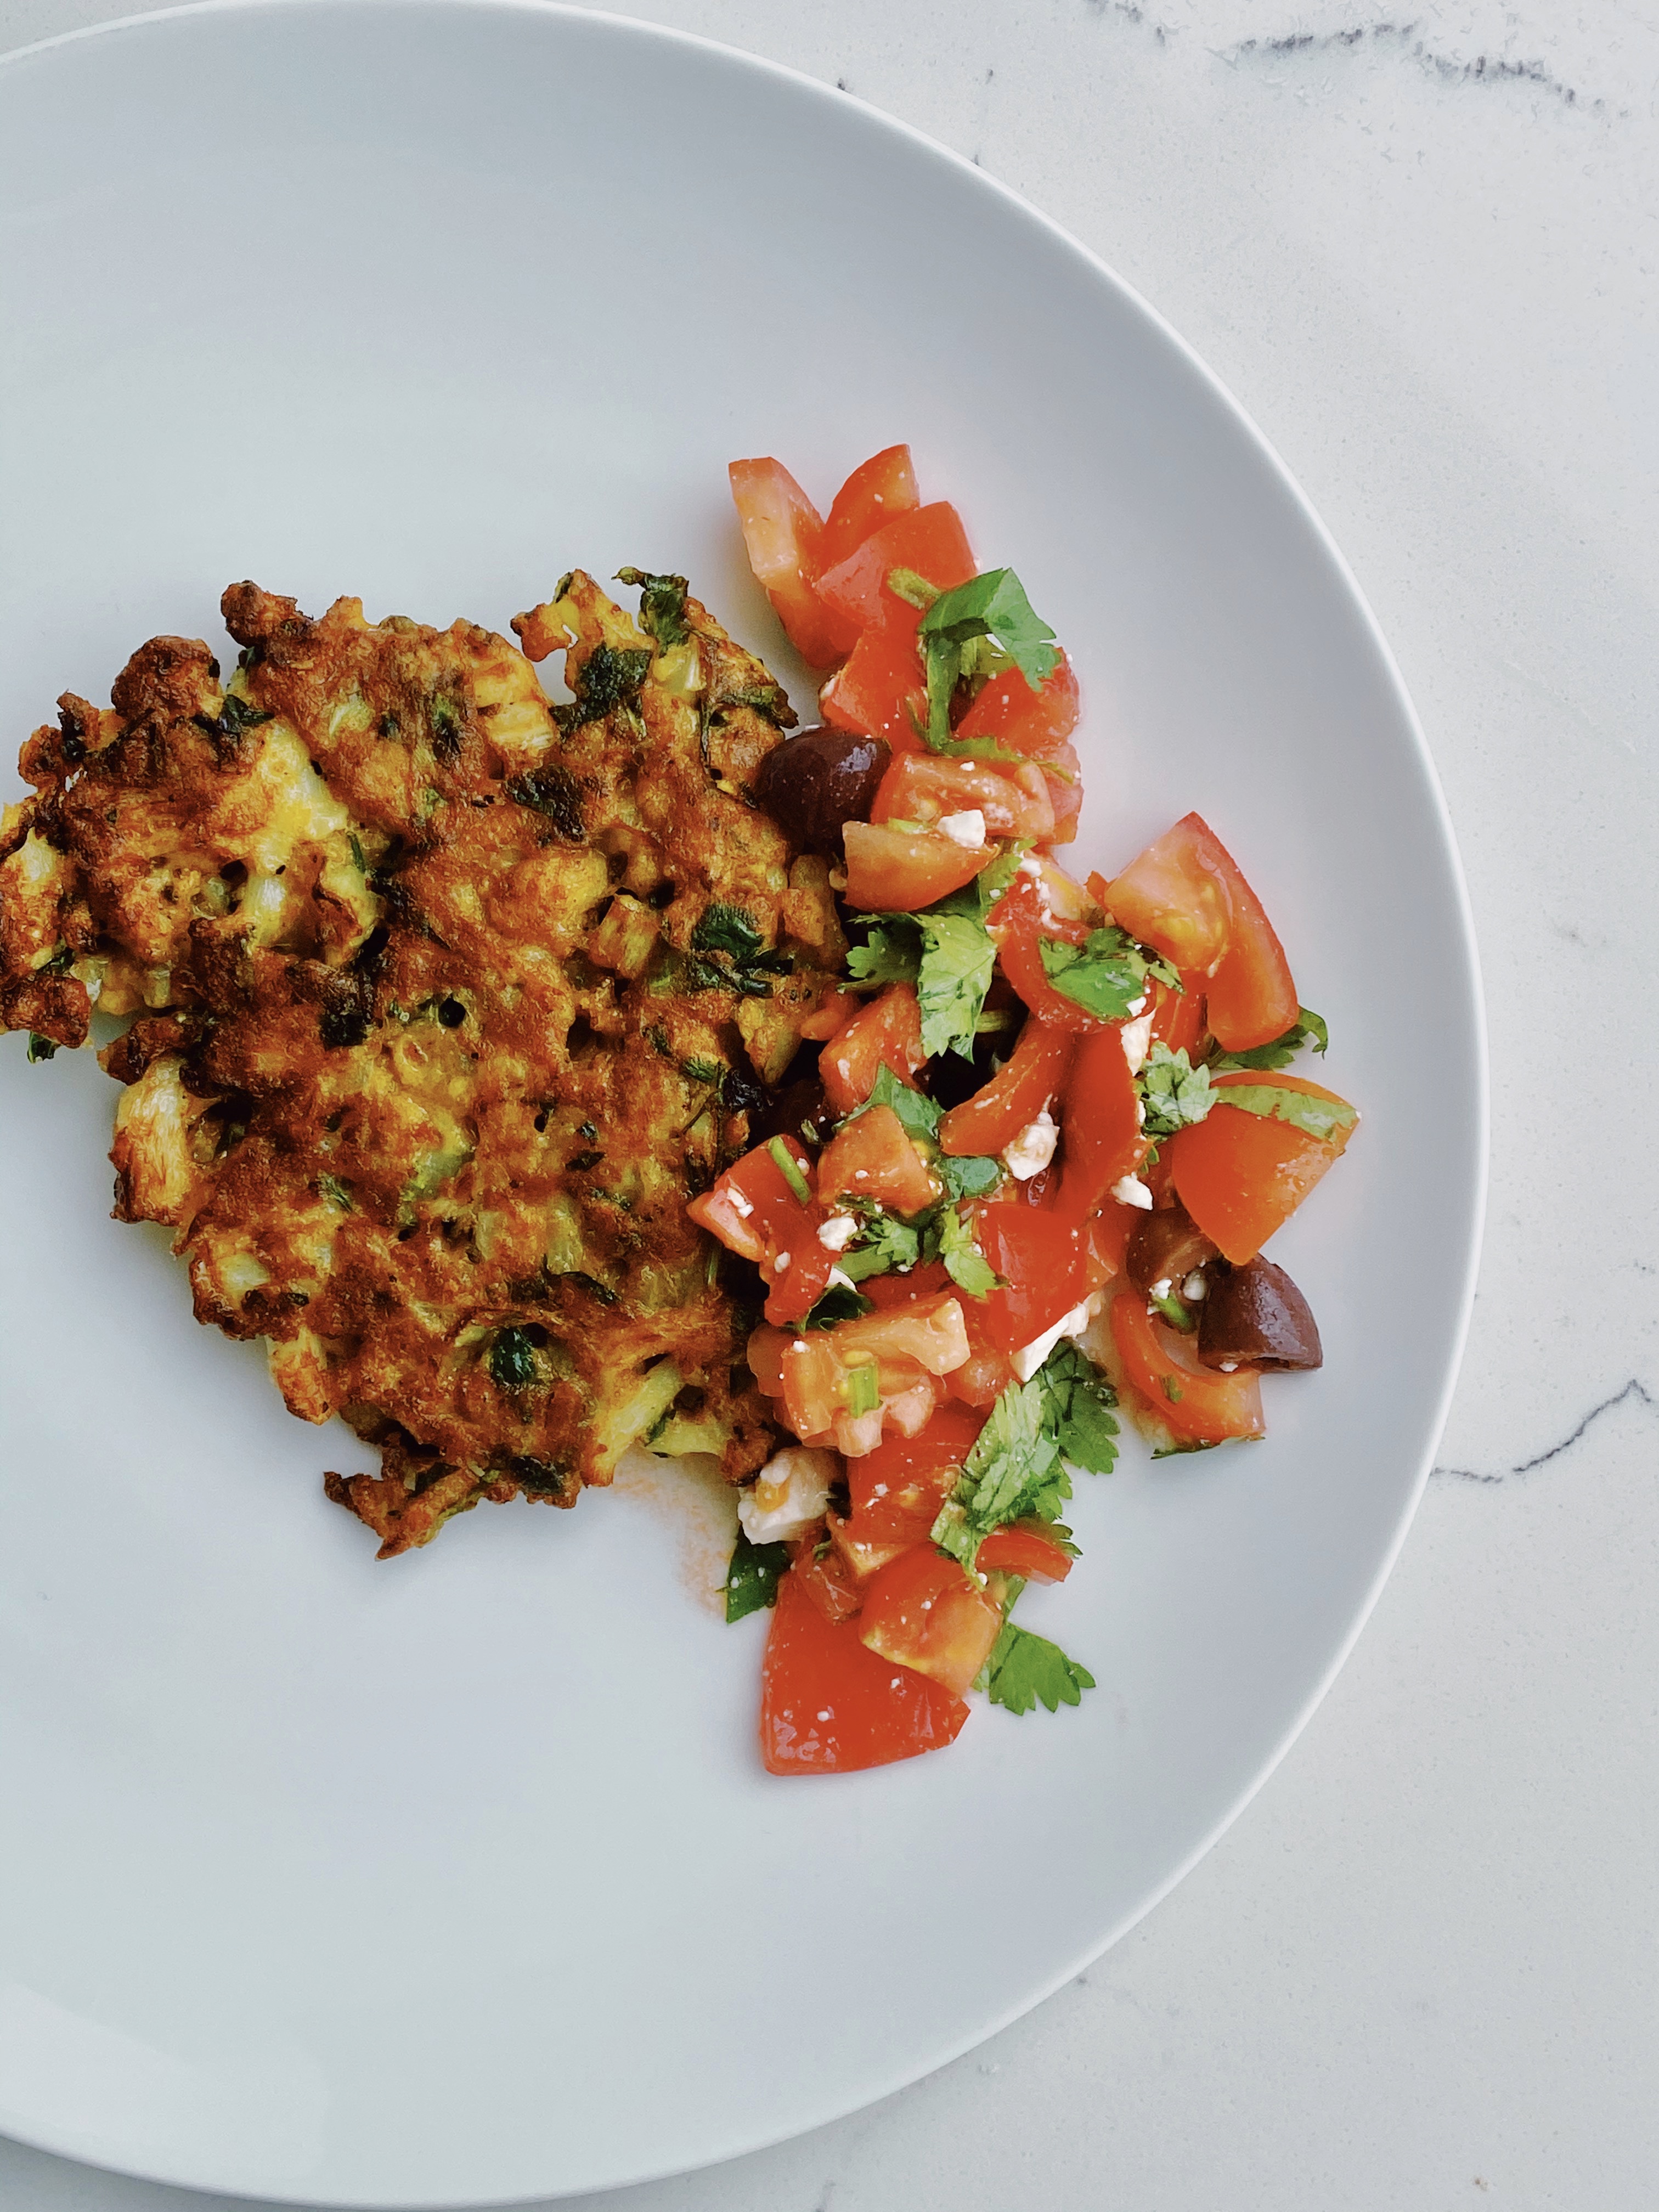
Photo credit: Kalukanda House

Dee has worked super hard over the past few years bringing her expertise in design to create Kalukanda House from scratch. The original building had to be pulled down as it was structurally unsound. You can read all about the incredible transformation here.

The finished result is beautifully designed and a real oasis of tranquility and peace. It is fully staffed and can be rented exclusively or on a more boutique hotel set up.

Photo Credit: Kalukanda House

Dee contacted me earlier this week to see if I would come up with an exciting recipe for Kalukanda House and one that we can encourage readers to cook and in return donate a money to ‘support front line critical care staff’  – Critical NHS

By supporting the critical care frontline staff at St Georges and other London hospitals over the next few weeks and months, will in turn support the local shops and restaurants in doing so. They have decided to set up a PayPal pool where you can send donations, which you can see here here.

My recipe will be going on Dee’s blog, as well as her social media feeds – instagram @kalukandahouse as well as Youtube (Kalukanda House) so we would LOVE it if you are able to cook it and share it on your feeds. Any donation – however small – will be of immense help.

So the recipe I want to share with you is twofold. Firstly it is a home-made Sri Lankan roasted curry powder. If you don’t have all the spices, please do not stress and simply use the ones that you have. You can even use a bought one or a curry powder  you have at home that needs using up!

If you do make my one however (which I hope you will) you do need to grind it up either with a pestle and mortar or a spice grinder -I use this one. You then have a delicious curry powder that you can use on many occasions going forward – just remember to store it in a sealed jar.

The main event however, is my vegan Sri Lankan butternut squash curry. It is super easy and I hope you have most of the ingredients already in your store cupboards. If you are on instagram I’ve done short films of me cooking both recipes on my IGTV so have a look.

Best of luck and please tag me #chilliandmint and #kalukandahouse if you make it and are on instagram. Otherwise please write in the comments box below and I will get back to you. Let’s try and raise some money together for Critical NHS.


Sri Lankan Roasted Curry Powder

makes a small pot

2 tbsp coriander seeds

1 tbsp cumin seeds

1 tbsp fennel seeds

1 tbsp uncooked basmati rice

1 tsp black peppercorns

1 tsp black mustard seeds

1/2 tsp fenugreek/methi seeds

5 cloves

5 green cardamom, opened

10 fresh/frozen or dried curry leaves


I haven’t added any dried chillies but you can add a couple if you wish to make this a ‘hotter’ curry powder.

If you don’t have any of the spices above, leave them out and you have created your own new version of a Sri Lankan curry powder.

  1. Warm a frying pan and then add all the spices, rice and curry leaves.
  2. Keep on a low heat and move around the pan so that they do not burn. Wonderful aromas will be released.
  3. After 5 minutes the spices, rice and curry leaves will be nicely bronzed so transfer to a bowl to cool and remove the green husks of the cardamom pods and discard.
  4. Then either pound in a pestle and mortar or use a spice grinder to grinder to form a smooth powder.
  5. Store in a sealed jar for a couple of months.

The curry powder works well with all meat curries, as well as vegetarian/vegan curries too.


Sri Lankan Butternut Squash Curry

serves 4-6

1 tbsp coconut oil

1 tsp black mustard seeds

1 tsp fennel seeds

10 curry leaves (if you have them)

1 red onion, sliced into half moons

4 cloves garlic, thinly sliced

1.5 inches of fresh ginger, finely diced

1 tsp salt

900g butternut squash, cubed

1 tsp turmeric powder

1/2 tsp Kashmiri chilli powder

1 heaped tsp Sri Lankan roasted curry powder

1x400ml tin of coconut milk

300ml water

a couple of 2 inch pandan leaves, optional


  1. Heat a deep pan and add the coconut oil. If you don’t have coconut oil, you can use vegetable or groundnut oil.
  2. Add the mustard, fennels seeds and curry leaves if you have them. Allow them to sizzle in the pan for 30 seconds, before adding the onions.
  3. Now add the garlic and ginger and stir into the spices and add the salt to help soften the onion. Move around the pan for a couple of minutes.
  4. Add the butternut squash followed by the turmeric, Kashmiri chilli powder and Sri Lankan roasted curry powder and mix well.
  5.  Add the coconut milk, saving a little of the creamier part for later, add the water as well.  IF you have them add the pandan leaves, but absolutely not essential if you don’t have them to hand.
  6. Stir and then cover for 15-20 minutes, checking intermittently and giving a good stir.
  7. Add the remaining coconut milk. Check the seasoning and using a sharp knife check to see if the butternut squash is soft.

Serve with a scattering of fresh coriander leaves and some lemon or lime wedges. Serve alongside basmati rice, chapati or paratha.

If you want to add more heat to this curry you can add fresh or dried chillies when you add the mustard and fennel seeds to begin with.


A Couple of Simple and Yet Tasty Lunch Ideas

Hi everyone. How are you all doing? The days seem to be flying by don’t you think? Have you managed to get yourself into a rhythm that suits you and your lifestyle?  I’m loving all the cooking and baking that everyone seems to  be doing on instagram. Being stuck inside seems to have unleashed inner domestic culinary gods and goddesses in us all; it is wonderful to see. It seems everyone is baking banana bread and making their own hummus – I can almost smell it when I step outside on my daily exercise.

Meal times have always been a special time for my family to get together, update each other on each others days and news and during this period of uncertainty they have become even more sacred. We take it in turn to cook as it’s a good way to relax and focus the mind and we try and come up with interesting things to cook, to keep the diet varied and interesting. I thought it might be helpful to share a couple of lunch, or indeed supper ideas, that we have eaten recently that were super simple, require few ingredients and take 15 mins max to cook.

First up is my spaghetti alla puttanesca – also known as prostitutes pasta – as it can be made quickly, in between other obligations, hence the prostitute allusion! My version is similar to the Neapolitan in that omits anchovies as I think it makes the dish just too salty. I also add spinach because I LOVE spinach and you can add fresh chillies or chilli flakes but I have omitted these this time round.

The main ingredients are tomatoes, garlic, black olives and capers and together they work so well with the spaghetti. You can use linguine too, whichever you have to hand.


Spaghetti Alla Puttanesca

serves 4-6

Spaghetti/linguine (enough for 4-6 or however many you are feeding)
2 tbsp olive oil
8 medium tomatoes, quartered
4 garlic cloves, sliced
2 large tbsp of stones black olives, halved

1 tbsp capers
salt
pepper
3 large handfuls of fresh spinach
1 cup pasta water

1. Fill a large pan with boiling salted water and add the spaghetti/linguine.

2. Heat a large wide pan with olive oil then add the tomatoes 🍅 followed by the garlic. Stir

3. Add the olives and capers. Season with salt and pepper. Simmer for a few minutes to allow everything to soften and meld together.

4. Check to see the spaghetti is cooked and when it is to your liking add it to the sauce, mix well with tongs and then add the spinach.

5. Add a cup of the pasta water to loosen and continue to fold in together. Simmer for a couple of minutes.

6. Serve immediately.

It’s deliciously sweet from the tomatoes and salty from the olives and capers and I love the taste of spinach and garlic binding it all together.

The other easy meal is “cauliflower fritters”. I was inspired by Sami Tamimi (Yotam Ottolegnhi’s business partner) who made them on his instagram feed. If you are on instagram have a look at him cooking them on his feed – you can find him @sami_tamimi.  I made a few changes in that I added a heaped tsp of curry powder and some black urfa chilli from my favourite spice provider in the US Burlap & Barrel. If you live stateside I highly recommend you ordering some of their spices. They are incredible. I always try and pick some up when I am in the US or have friends bring some over. I also only used plain flour, but you can use chickpea/bread flour or whatever you have to hand.

I also decided they would go really well with a simple tomato, fresh coriander, black olive and feta salad on the side, instead of his suggestion of a yoghurt raita or tahini dip, but it’s totally up to you.

Spiced Cauliflower Fritters

serves 4 (makes around 11 large fritters)

1 cauliflower, chopped into even size piece and the green leaves washed

 2cups/ 300g flour or enough to form a batter (you may need to add a little more so adjust as need be)

3 eggs

water – a little to loosen the batter

1 white onion, finely diced

1 large handful of fresh parsley, finely sliced

1/4 tsp cinnamon powder

1/2 tsp turmeric powder

2 tsp cumin powder

1 heaped tsp of curry powder

1-2 tsp chilli flakes (black Urfa chilli, Allepo chilli flakes, red pepper flakes)

1 heaped tsp salt

pepper


*********

Tomato salad

8 tomatoes, roughly chopped

1 tbsp black olives, stone removed and halved

handful of fresh coriander (or parsley) chopped

1 tbsp feta, broken up


  1. First boil a large pan of water and then add the cauliflower, including the green stalks, which you keep at full length at this stage.
  2. Meanwhile mix the flour with the eggs, water, spices, parsley, salt, pepper and white onion.
  3. When the cauliflower has completely softened – around 6-8 mins, drain and remove the green stalks.
  4. First thinly slice the green stalks and add them to the batter.
  5. Using a knife or potato masher, roughly break up the cauliflower so that it is broken down but not like mashed potato.
  6. Turn it out into the batter and mix together.
  7. Heat a large pan with a little vegetable or sunflower oil – you want to shallow fry  NOT deep fry.
  8. Using a large spoon turn out some of the cauliflower batter into the pan and flatten with the back of the spoon. Fill up the pan – I find three work well as you don’t want to over crowd the pan. Leave the fritters to bind together and bronze. If you touch them too early they will break apart.
  9. Leave to bronze on both side. This will take around 3-4 minutes per side. If it is not bronzed sufficiently leave for a little longer.
  10. Once both sides have bronzed, turn out to a plate with some kitchen roll and keep in a warm oven whilst you continue with the others.
  11. Prepare the tomato salad whilst the fritters are bronzing and place in a bowl ready to serve.
  12. Once all the fritters are ready serve and eat whilst still hot.


Happy New Year and Toor Dal with Fresh Coconut and White Poppy Seeds

Happy New Year and a warm welcome to my new (and old of course!) followers who have recently signed up to this blog.

January is a funny old month. The revelries from Christmas and the New Year are well and truly over and we all look forward to making a fresh start in the new year. With goals, aims, hopes and plans whirling away in our heads, it’s like shedding a skin and growing a new one. Veganuary has gained a lot of momentum over the last few years, with increasing numbers introducing more vegan recipes into their diets and some even making the transition to become fully vegan. Whilst I have no plans to ‘do’ veganuary, I naturally eat a number of vegan meals throughout the year without even really thinking about it. Indian food is heavily focused on vegetables with the large majority in India having a vegetarian diet. On this blog I have a number of recipes which would work really well if you want to bring more vegetarian or vegan meals into your culinary repertoire. Here are just a few.

Upma (a savoury breakfast semolina eaten in India)

Dale Bora (a delicious street snack from Kolkata)

Indian sprout and carrot curry

Beetroot curry

Cauliflower with dried fenugreek/methi

Black pepper tofu

Aubergine, peanut and tomato curry

Indian corn on the cob

Butternut, lemongrass, coconut and spinach curry

For my first recipe for 2020 however I thought I would show you a new dal recipe, which just happens to be vegan. I have loads on my blog – just pop the word ‘dal’ in the search box on the right when you go to my blog. Dals all taste so different that I could make a different one each day of the week and they would be completely unique.

This one uses the toor dal, which is also known as ‘pigeon pea’. It looks similar to the chana dal, which is a split chickpea. You don’t need to soak it but it does take around 50 minutes to soften sufficiently if you are using the stove top. When it is gently boiling away you will need to remove, with a spoon, the scum that will form whilst cooking. You may also need to add more water if it looks to become too dry. I never measure out the water and instead go more from sight and add a little more here and there when required.

Excuse the rather dark muted photos of the dal – I cooked it in the afternoon and when I was ready to photograph the light had gone so had to use the lights from my kitchen which give it a pretty awful glow. Anyway you get the gist. I ate it along with a butternut squash curry I made and a cabbage curry mopped up with some homemade luchi – which are also known as poori. Most delicious and all coincidentally vegan.

 Toor Dal with Poppy Seeds and Fresh Coconut

250g toor dal, washed through a couple of times with cold water

900ml water

2 tbsp rapeseed/sunflower oil

1 white onion, finely chopped

30g grated fresh coconut (or desiccated)

a small handful of fresh coriander

100ml water

1 tsp cumin seeds

1 tsp brown mustard seeds

2 tsp white poppy seeds

10 fresh curry leaves (you can freeze them – much better than dried which have lost their taste)

1 heaped tsp ginger-garlic paste

1 tomato, finely chopped

1 green chilli, finely chopped

1 tsp turmeric powder

1 tsp coriander powder

1/2 tsp Kashmiri chilli powder

1/2 fresh lemon, juice only

salt to taste

  1. First rinse the toor dal and then place it in a pan and cover completely with water. Start by adding 900ml water and you can add more later once the water has soaked up. It will take around 50 minutes to soften. Scum will form on the top so just remove this with a spoon and discard. You know the dal has softened when you can easily pinch one toor dal between your thumb and forefinger. Continue to add a little more water if it has all been soaked up.
  2. Meanwhile in a frying pan, add a tablespoon of oil and gently fry the onion and the fresh coconut so that they begin to lightly bronze. Remove from the pan and then blitz in a blender with some fresh coriander and then leave to one side.
  3. Using the same pan add the rest of the oil and add the cumin, mustard and poppy seeds. They will begin to sizzle almost immediately. Be careful of the spluttering.
  4. Add the fresh curry leaves and the ginger-garlic paste – fresh or store bought. Move around the pan and then add the tomato and fresh chilli.
  5. Return the blitzed onion-coconut-fresh coriander to the pan and stir so that all the ingredients are nicely mixed together.
  6. Now add the turmeric, coriander, Kashmiri chilli powder, lemon juice and salt.
  7. Once the dal has softened turn the contents of the frying pan into the dal and mix together. Check the salt levels.
  8. Leave to simmer for a few more minutes, then you are ready to serve.


Fennel and Preserved Lemon Soup

As those who have been following this blog for a while will know, I absolutely ADORE soups. I’m happy to eat them all year round for breakfast (yes, in Vietnam you eat pho – which is their version of a soup/broth – for breakfast), lunch or supper. I am always trying to think of new pairings that might work well and since I had some fennel in my fridge that needed to be eaten I thought I would use that as the star ingredient and built up a few other ingredients around them.

I always have preserved lemons in my fridge so I decided to use them along with a leek. My other go to ingredient, which completely elevates dishes and which I do go on about a lot on my instatories, is my garlic confit. Seriously it takes very little effort to make a batch, stores in the fridge for ages, and really adds huge flavour to a host of dishes. In fact, it would make a great Christmas gift for any foodie friends or family. It shows thought and I bet the receiver would love you forever (although I am sure they already do ;o) anyway I digress.

The other ingredients are vegetable stock – I literally just used a stock cube, water, pepper and salt. I decided to top each soup with a parmesan crips and some of the fennel fronds to add a bit of umami to the dish (coming from the parmesan). If you are on instagram go to my stories and you can watch me cooking the dish on my instastories.

I think this soup would be a good one over the Christmas season if you are cooking for large groups. We always have a starter at each meal when the whole family gets together, so I will be definitely adding this one to my repertoire over Christmas.


Fennel and Preserved Lemon Soup

Serves 4-6

3 tbsp garlic confit including around 5 garlic cloves from the confit

2 fennel, finely chopped (fronds removed and placed to one side)

1 leek, finely sliced

1-2 preserved lemons, finely chopped

1.2 litres water

1 vegetable stock cube

salt and pepper


Parmasan Crisps

will make 6

50g parmesan, finely grated

freshly ground black pepper


  1. Finely cut the fennel, removing the fronds and placing them to one side – you can use these later when serving the soup.
  2. Finely cut the leeks.
  3. Heat a large deep pan an add the garlic confit – oil and a few of the garlic cloves. This is what will really give the soup flavour and depth. Move around the pan and then add the fennel, leeks and a little salt and allow them to sweat and soften for 5-6 minutes.
  4. Add the preserved lemon. Add one to begin with, you can easily add one more later if you want it more lemony.
  5. Add the vegetable stock and boiling water and allow to simmer gently for 10 minutes.
  6. Using a hand blender, blend the soup so that it is completely smooth. You many need to add more water if you want it less thick in consistency. Taste test and then add a little more salt and freshly ground pepper. Also check on how lemony the soup is. If you would like it more so, add one more preserved lemon. It’s really down to personal preference so taste test and see what you think. Personally I like to add two.
  7. To make the parmesan crisps, preheat the oven to 200 degrees. Line a baking tray with greaseproof paper.
  8. Finely grate the parmesan and then place them in round piles and flatten to approx 2 inches in diameter on the greaseproof paper. Space them out as they will spread slightly. Add a little freshly ground black pepper on top.
  9. Heat in the oven for 6-8 minutes, so that they begin to lightly bronze, then remove and allow to cool.
  10. When serving the soup place a couple of ladles in each bowl and then add a parmesan crisp, some fennel fronds and sound freshly ground pepper.

Delicious. I hope you agree.


Indian Sprout and Carrot Curry – perfect for this time of year

This recipe I posted way back in 2012 (yes my blog has been running for that long!), but unless you scroll my recipe library you are unlikely to know it is even there. Quite frankly, it’s fab and will win over even the non-sprout lover amongst us. Seriously. Basically, by adding a touch of spice, it elevates the humble sprout. We are beginning to see them in the shops so I urge you to give this recipe a whirl when you are next mulling over what to cook. Give it to your family, flat mates, friends and don’t tell them what it is and I can bet you they will love it and ask for more. Mention the word ‘sprout’ however and then they may not even give the dish a chance.

My mother-in-law originally taught me this many years ago and now it’s a firm favourite in my Indian culinary repertoire.  If you cook it alongside a dal it makes a perfect vegan meal. I suggest my go to ‘Bengali Red Split Lentil Dal’ would be the perfect accompaniment. Both dishes can be prepared and cooked within 30 mins and  are very affordable, healthy and tasty. It’s a win win win.

Indian Sprout and Carrot Curry

Serves 4

325g sprouts, finely sliced

300g carrots, grated

1 green chilli, finely sliced (optional)

2 tbsp vegetable oil

1 level tsp turmeric

1 tsp nigella seeds (kalo jeera)

1 tsp salt

100ml water

1. Finely slice the sprouts, grate the carrots and, if using, finely chop the chilli. I tend to leave the seeds in, but to make it less spicy just remove the seeds.

2. Heat a pan with oil and add the nigella seeds. After 10 seconds add the chilli and turmeric and stir in together for a further 10 seconds.

3. Add the sprouts and carrots and stir well with the other ingredients. Continue to stir continuously on a medium heat so that the carrots and sprouts soften and do not burn. Use a wooden spoon to press down on the ingredients as you gently stir.

4. After a few minutes of stirring add 50ml of water and stir into the curry. You may find that you do not need to use the remaining 50ml of water if the sprouts and carrots are sufficiently softened. Add the salt to taste. Continue stirring for a further 5-7 minutes and the dish will be done.

Nigella seeds (above)


10 Minute Vegetable Noodle Broth

Earlier this week I popped the photo above onto my instagram feed. It was a last minute speedy photo, not really styled, but a quick snap before I dived in. I hadn’t given it much attention but thought I would pop it up on my feed. It was simply a quick broth that I had thrown together in 10 minutes one lunch time. I hadn’t made the broth from scratch by boiling up the bones/veg, it was a quick fix that hit the spot and fast.

It had such a positive response with a number of people asking me for the recipe that I thought I would pop it up on my blog so you can all see how quick and easy it is to prepare.

In fact I have popped up very similar recipes on my blog to this one over the last few years. Check out the following. All equally delicious and pretty simple to make as you will see.


Fragrant Lemongrass and Ginger Salmon Broth

Chiang Mai Noodle Broth

Miso Chilli Vegetable Noodle Broth

King Prawn Noodle Broth


So for the one I made earlier this week the magic ingredient is my garlic confit. Have you tried making it? I popped it up on a post in the summer and all I can say is that it is now my fridge staple.

If you haven’t made a batch then simple add olive oil and add 4 garlic cloves, finely chopped. Let me know how you get on if you make it and tag me #chilliandmint @chilliandmint on your instagram feeds. Happy lunch time eating all. Life’s too short to rely on sandwiches and salads every lunch.

10 Minute Vegetable Noodle Broth

serves 2

2 tbsp of garlic confit oil or regular olive oil if you have not made my recipe above

4 garlic confit cloves or 4 regular garlic cloves, chopped

2 inch piece of fresh ginger, skin removed and finely chopped into batons

3 spring onions, sliced at an angle

1 red or green chilli, finely chopped, optional

1 heaped tbsp of white miso paste

1 pint boiling water

1 tbsp light soy sauce

8 broccoli florets, chopped in half

2 large handfuls of fresh spinach

2 packets of udon noodles

2 eggs

10 cherry tomatoes, chopped in half

handful of fresh coriander

sprinkling of Japanese togarashi


  1. Gently lower the eggs into a pan of boiling water. If you want soft boiled eggs leave for 6 minutes max and if you want hard leave them for 8 minutes.
  2. In another pan, heat the garlic confit oil and garlic in a pan. If you have not made a batch of garlic confit – do seriously – you won’t look back after you have made one batch. Otherwise use olive oil and some fresh garlic roughly chopped. Move around the pan for a few minutes.
  3. Add almost all the  ginger batons, spring onions and chilli (if adding) followed by the miso paste and light soy sauce. Move around the pan for 20 seconds and then add the boiling water. I never actually measure out the water so add a pint and if you think it needs more, which it may well do add a little more.
  4. Add the udon noodles and broccoli and simmer gently for 3-4 minutes.
  5. Add the tomatoes, spinach and leave for 1 minute before turning off the heat. Taste test the broth and add more miso paste, soy sauce, boiling water to your liking.
  6. Remove the eggs from the pan and run under cold water whilst you remove the shell – you will find it easier to remove the shell this way. Cut them in half lengthways.
  7. Ladle the broth and noodles into deep bowls then add a good handful of fresh coriander, the remaining fresh ginger batons and place the eggs on top. Sprinkle some Japanese togarashi on top.

I often like to add a little Sriracha on top.

So easy and great for lunch or supper whether you are on your own or with company.

Slurping compulsory. Enjoy.


Toasted Sourdough with Soft Goats Cheese, Fig, Hazelnut and Honey

Eating for one need not be boring or unexciting. Working from home does allow me to make something delicious at lunch time, instead of the rather insipid sandwiches that certain chains offer. For those who follow my instastories will know I regularly make speedy veggie miso broths, interesting healthy colourful salads and sometimes a Scandinavian open sandwich: known in Danish: smørrebrød, Norwegian: smørbrød, Swedish: smörgås or macka. You can get creative as you like but they always look and taste good. I adore sourdough and invariably always have some in the house, so making an interesting open sandwich is a win win.

A fridge staple for me is soft goats cheese. Even if you think you may dislike goats cheese try the soft variety as it is less strong, deliciously creamy and has a wonderful taste. We all love it in my family. I cut a couple of slices of sourdough and pop them under the grill for a couple of minutes until they are toasted to my liking. I then slather soft goats cheese on top, quarter some fresh figs, scatter some nuts – hazelnuts or walnuts work really well, and then drizzle some sweet honey. So simple and yet super satisfying. If I have any fresh mint in the fridge/garden (which I didn’t today) I would roughly chop some leaves and throw them on it too. You get salty flavours from the goats cheese working so well with the luscious, soft figs and the fragrant honey.

It’s also a great weekend lunch idea for the family or if you have some friends coming over. To make it more substantial you could make a soup – something like my pea and mint would work really well.


Toasted Sourdough with Soft Goats Cheese, Fig, Hazelnut and Honey

for one (increase proportions if you are feeding others)

2 pieces of sourdough bread, toasted

1-2 large figs quartered

1 tbsp soft goats cheese

1 tbsp hazelnuts/walnuts, roughly chopped

drizzle of honey on top


  1. Toast the sourdough on both sides under the grill, in a toaster or in a griddle pan.
  2. Slather goats cheese on top.
  3. Add the quartered figs and scatter the nuts.
  4. Top with fragrant honey.
  5. Devour.


So simple and yet deliciously effective.