Bottle Gourd Curry (you can also make this with marrow or courgette)

Happy New Year everyone. What a strange old year it’s been already and we are only a couple of weeks in. Here in the UK we are on national lockdown so we are all hunkering down and mainly staying confined within the four walls of our homes, with fleeting escapes of freedom with exercising and grocery shopping. A 5km run has never been so thrilling! I was picking up some spices for my zoom classes this morning (I’m sending them to folks in the UK who join my zoom class) and saw some dudhi – also known as lauki, calabash or bottle gourds – for sale and thought it would be good to buy a couple so that I could (a) tell you more about them and (b) show you a fab recipe that you will love.


Whilst I realise that unless you live near an Asian grocer you are not going to be able to get hold of these vegetables, the good news is that you can replace them with marrow or courgette which will work equally well. They are not dissimilar to a small, thinner marrow, with a light green smooth skin and white flesh. When harvested young they are a perfect vegetable to eat. They are primarily grown however for their fruit, which when dried forms a woody hollow vessel that can be used as a container for food and water but also as fishing floats, musical instruments and even clothing. It is a native of Africa but recent DNA research suggests that it was “domesticated three times: in Asia, at least 10,000 years ago; in Central America, about 10,000 years ago; and in Africa, about 4,000 years ago”. A cool fact that might appeal to you, is that this vegetable grows on a plant that has large white flowers that only open up at night.


Similar to a marrow or courgette the bottle gourd works really well in dal.  In Bengal, where my husbands family are from, they sometimes serve it with prawns to make a fantastic curry. Today though, I thought I would show you a curry, which uses them as the star ingredient.

Bottle Gourd Curry (replace with marrow or courgette)

500g bottle gourd, skin removed and the flesh cut into bit sized cubes or use marrow or courgette (you can keep the skin on the courgette)

2 tbsp sunflower/rapeseed oil

2 dried red chillies

pinch of asafoetida

1 tsp cumin seeds

1 Indian bay leaf, broken in two (called tej patta)

1 red onion, finely chopped

 1 tsp salt

1 inch of ginger, finely grated (or 1 tsp ginger paste)

3 garlic cloves, grated (or 1 tsp garlic paste)

2 large tomatoes or 4 medium tomatoes, chopped

1/2 tsp ground turmeric

1/2 tsp ground coriander

1/2 tsp ground Kashmiri chilli

400ml water


  1. First prepare the bottle gourd (marrow or courgette) and place to one side.
  2. Heat a large deep pan and add the oil.
  3. When it is hot add the dried chillies, Indian bay leaf, asafoetida and cumin seeds which will begin to sizzle.
  4. After 20 seconds, add the onion and salt and let the onion soften completely and begin to bronze – between 6-8 minutes before adding the garlic and ginger.
  5. Stir in the garlic and ginger so that raw smell dissipates, which takes a few minutes.
  6. Next add the chopped tomatoes and stir into the onion. Add the ground spices and leave to simmer with a lid on for 5 minutes. The tomato should have softened considerably.
  7. Add the bottle gourd (marrow or courgette) and then add the water. Simmer on a medium heat for 20 minutes. A lot of the water will have soaked up leaving a thick spiced tomato coating over the gourd.

I ate mine on its own with a squeeze of lemon, but you could also have some rice on the side or a chapati, luchi or naan bread. It makes a delicious vegan lunch or supper.

Let me know how you get on if you make it.

Food is definitely a way to keep us all uplifted and glowing through these surreal times, I hope you agree.


Coconut and Lemongrass Prawns

I’ve just returned from a relaxing week in Wales, where the sun shone in all it’s glory and we spent the days exploring the coast line, swimming in the sea, eating tasty food and just generally relaxing. It was so good to have a change of scene after lockdown.

Returning to London I rather fancied eating prawns so set about making a curry – not an Indian one this time but more of a Burmese inspired dish with lemongrass, coconut and lime. I had recently been sent a most delicious pot of Maya’s Nørrebro Chilli Sauce. The name and back story immediately caught my attention. I’m loving the chilli on the viking helmet!

Maya was born and raised in Denmark in an area of Copenhagen called…you guessed it…… Nørrebro, to India parents. The chilli sauce is nod to her Indian origin with the design and aesthetics being very much Danish in style. The sauce tastes absolutely delicious and has no preservatives, salt or sugar and could be used in a number of ways. I’ve eaten it at breakfast with my wilted spinach and tomatoes, with scrambled eggs, avocado toast, but today I thought it would really work well in a prawn curry.

It tasted so delicious I thought I would share the recipe for you all to try. Maya has recently launched her business so I know would love some support, especially in these rather challenging times for anyone in the food business. You can order your jar here.


When you buy your prawns make sure to buy them with the shells on so that you can also make my prawn bisque with the shells. It takes around 10 minutes to remove the shells, although I like to keep the tails on – for aesthetic reasons mainly, if I’m honest. Pop the turmeric powder and a little salt over the prawns whilst you prep the other ingredients.

I added 2 tbsp of Maya’s chilli sauce, but start with one and then add the other a little later to see if the heat works for you. This is not meant to be a super hot blow-your-head-off curry, but one that the whole family can eat and enjoy that is full of delicious flavours.

Coconut and Lemongrass Prawns

Serves 4

900g prawns, remove shell but keep tails on and devein. Keep the shells to make this

1 tsp turmeric powder

1/2 tsp salt

1 tbsp vegetable oil

***

2 tbsp vegetable oil

1 red onion, finely chopped

1 heaped tbsp fresh ginger, grated

3 garlic cloves, grated

2 lemongrass, ends and outer skin removed and cut into 3 pieces each

1 tbsp Maya’s Nørrebro Chilli Sauce

1 tsp salt

400ml coconut milk

2 tbsp fish sauce

1 tsp jaggery/brown sugar

2 medium sized tomatoes, blended

1 more tbsp Maya’s Nørrebro Chilli Sauce, optional

1 lime, juice only


  1. In a bowl add the prawns, turmeric powder and salt and mix well. Leave for 10 mins
  2. In a frying pan heat the oil and add half the prawns so that they bronze. A couple of minutes on each side will be sufficient. Remove and leave on a plate whilst you gently fry the remaining prawns.
  3. In a slightly deeper pan than a frying pan, heat the oil and when it is hot add the red onion. Leave to lightly bronze which will take around 6-8 minutes.
  4. Add the grated ginger and garlic and lemongrass and mix well.
  5. After a couple of minutes add the coconut milk, jaggery/brown sugar and fish sauce. If there is any turmeric water from the bowl the prawns were in add this too.
  6. Add Maya’s Nørrebro chilli sauce and stir well. Leave to simmer whilst you blend the tomatoes in a chopper.
  7. Add the tomatoes and stir. Simmer for a further few minutes before adding the prawns. Keep the heat low and cover.
  8. Taste test the sauce and add one more tbsp of Maya’s Nørrebro chilli sauce if required. I did and it tasted heavenly.
  9. From the time the prawns are in the sauce they will only need 5 minutes before they are cooked.

Serve with some steamed rice and I finely chopped some savoy cabbage and added it to a pan with oil and fresh garlic which had softened. I then add a couple of tbsp of soy sauce and allow the cabbage to soften.

I was kindly gifted a pot of Maya’s Chilli Sauce, but all my view and opinions are my own.


Butter Chicken

After quite a number of requests, I bring you my butter chicken recipe this week. It’s definitely a crowd pleaser, liked by all ages, owing to its creamy tomato flavour. As the name suggest it contains butter – quite a lot if I’m honest – and cream, so perhaps this is one that you cook once in a while as opposed to each week. It’s delicately spiced as opposed to spicy so by default appeals to most palates. It is the one curry that using the breast meat works well. Typically I would always suggest using chicken thigh or the whole chicken cut into pieces by your butcher, but for butter chicken breast meat is perfect.

Whilst it is super straightforward to make there are a few stages to consider. You need to marinate the meat – minimum an hour or even overnight if you are really organised. After this you then char the chicken in a pan (grill also works well). Using the same pan you lightly bronze the onion and blitz that into a smooth paste. Next step is to create a buttery, creamy tomato sauce before adding the onion and meat and allowing it to simmer and infuse together. It can be cooked in advance so is certainly a good one if you are entertaining. I think you are going to like it. If you are on instagram and you make please tag me @chilliandmint #chilliandmint

Have a good week everyone.

Butter Chicken

Serves 6 (if serving with other dishes)

750g chicken breast or thigh (boneless), cut into bite sized pieces

marinade

3 tbsp full fat natural yoghurt

1 tsp turmeric powder

1 tsp Kashmiri chilli powder

1 tsp garam masala powder

1 tsp coriander powder

juice from half a lemon

1 tsp salt


onion puree

1 tbsp ghee (clarified butter) or regular butter

2 tbsp oil

2 white onions, roughly chopped


creamy tomato sauce

75g salted butter

400g passata (or fresh tomatoes)

1 tsp garam masala

1 tsp Kashmiri chilli powder

1 tsp jaggery/brown sugar

1 tsp salt

pinch freshly ground black pepper

150ml double cream

1 tbsp dried methi/fenugreek leaves


  1. First you need to marinate the chicken. Mix all the marinade together and then cover tightly with cling film/foil and place in the fridge for an hour – to overnight.
  2. Once you have marinated the chicken sufficiently heat the ghee/butter in a frying pan.  Add the pieces of chicken so that they sealed and charred on both sides. This takes about 3-4 minutes on each side. They won’t be completely cooked at this stage so don’t try and nibble a piece quite yet! You will need to char the chicken in batches so that it does not overcrowd the pan. You do not want to steam it so don’t overcrowd the chicken or put a lid on the pan.
  3. Once all the chicken pieces have been charred, place in a bowl and keep to one side.
  4. In the same pan add the ghee and gently fry the onion so that it begins to bronze – this will take around 6 minutes. Remove from the pan, with all the charred scrapings from the bottom and blitz into a smooth paste using a small blender.
  5. In a deep pan/karahi, add the butter. When it is melted add the spices followed by the passata, black pepper, salt and jaggery/sugar. (If you are using fresh tomatoes, cook for 5 minutes in the pan and then blitz these too into a smooth paste and then return to the pan to follow the next steps.) Allow to simmer on a gentle heat for 7 minutes, by which time the sauce will have thickened sufficiently.
  6. Add the double cream, onion puree, chicken and dried fenugreek. Simmer gently for 15-20 minutes on a low heat. Taste test and add more salt (and butter if you fancy) if needed.

To serve add a pinch more dried fenugreek and a drizzle of double cream. Equally fresh coriander on top would work well to serve.

It is delicious eaten with naan or rice. Accompanying dishes that would work well would be my chana dal and I will be eating mine with my tindora/ivy gourd curry.


Goan Pork Curry for Sunday Supper

On Sundays we tend to have our ‘main’ meal now in the early evening, where we can all sit down and break bread together. We eat very little meat in the week these days, but on Sunday we like to indulge and have a roast or perhaps a curry. This evening we will be having a Goan pork curry, which is deliciously spiced – not chilli hot as my youngest daughter is 9 years old. It’s a great one you can make advance, either the day before or in the morning of the day you are making it.

I’ll be accompanying it with some plain basmati rice and my beetroot curry.

Do you have a main family meal on Sundays? Do you go for the traditional English roast or something more exotic?

Let me know in the comments below.


Goan Pork Curry

Serves 4

2 tsp cumin seeds

1 tsp peppercorns

1 tsp cardamom seeds, remove seeds from the pod

4cm stick of cinnamon bark

2 tsp black mustard seeds

2 dried red chillies (4 if you want more chilli heat)

1tsp fenugreek seeds

1 tsp cardamom seeds, remove seeds from the pod

2 inch fresh ginger, peeled and finely grated

1 whole head of garlic, all cloves peeled

2 white onions, peeled and chopped

1 tsp salt

4 tbsp white wine vinegar

4 tbsp of vegetable oil

750g of boneless pork, cut into bite sized cubes

1 tsp light brown sugar

2 tsp ground coriander

1 tsp of turmeric

250ml water

********

1.  Dice the pork into bite sized mouthfuls and set aside in a bowl.

2. Heat a frying pan and add the cumin seeds, red chillies, peppercorns, cinnamon bark, black mustard seeds and fenugreek seeds. Move around the pan so that the aromas are released but they do not burn. This will take under 1 minute. Place them into a small bowl to cool. Add the cardamom seeds to the bowl.

3. After a few minutes, place them into a spice grinder to create a masala. Return the powdered masala into the small bowl.

4. In the same frying pan, fry the onions until they begin to bronze. This will take around 10 minutes.

5. Whilst the onions are bronzing, peel the garlic and the fresh ginger (use the back of a teaspoon to do this – it is really easy this way), and grate the fresh ginger. Place in a hand blender, add a splash of water and blend to form a smooth paste. Place in a small bowl and place to one side.

6. Once the onions have bronzed transfer them to the same hand blender and blend until smooth. Add the vinegar to make the consistency smooth. The reason for putting vinegar in this recipe is to help soften the pork when cooking.

7. In the same frying pan, heat half the oil and gently fry the pork cubes so that they too begin to bronze. Remove with a slotted spoon.

8. In a new deeper pan, add  the remaining oil and add the ginger-garlic paste you have created. Add the turmeric and coriander powder and then return the pork to the pan along with the onion puree and masala blend. Fold all the spices into the pork. Add the water and cook on a low heat for 45-55 mins, stirring intermittently.

I like to serve this with a simple plain basmati rice and a vegetable curry as a side dish.


Cod, Potato and Spinach Curry


With the weather being pretty amazing here at the moment in the UK I like to cook quick speedy meals that are packed full of flavour and are not too laborious to make. I had a kilo of cod in my freezer, which I defrosted, so thought that a fish curry was called for, eaten in the garden. Bliss.

I love a good fish curry and have lots on my blog that I would recommend (not biased or anything!): Mild Indian cod currySri Lankan tuna curry, speedy salmon curry (excuse the dodgy photos on this one – it’s when I first started my blog), Bengali mustard fish curry.

The one I want to show you today takes 15 mins max – in fact most fish curries take no time at all. I used cod, but you could use any firm fish – pollock, salmon, trout, bhetki, tuna, monkfish. My cod was filleted and then I simply removed the skin and then cut it into slightly larger than bite size pieces. It will be in a red gravy and this is not because of tomatoes – there are none in it – instead from the paprika and Kashmiri chilli powder, the latter is not spicy hot, instead adds great colour to a dish. Do not be put off.


Cod, Potato and Spinach Curry

2 tbsp rapeseed oil

1 tbsp cumin seeds

1 red onion, finely chopped

1 tbsp coriander powder

1 tbsp garam masala powder

1 heaped tsp turmeric powder

5 garlic cloves, finely chopped

2 inches of ginger, skin removed and finely grated

4 fresh green chillies, sliced in half length ways (add less if you prefer less heat)

1 tbsp plain flour

1 tsp salt, to taste

1 heaped tsp paprika

1 tsp Kashmiri chilli powder

1 tsp mango/amchur powder

1 tsp sesame seeds

1 large potato, chopped into 1 inch cubes

250ml water

1 kg cod, filleted, skinned and cut into large bite size pieces

2 large handfuls of fresh spinach

1 tsp jaggery/brown sugar


  1. Use a large, wide, deep pan ideally. Heat the oil and when hot add the cumin seeds. They will sizzle almost immediately. After 10 seconds add the onion and move around the pan for a further couple of minutes before adding the coriander powder, turmeric and garam masala powder. Turn the heat down to prevent any of the spices burning. Move around the pan and then add the garlic and ginger.
  2. After about a minute or two add the flour, which will gently thicken the curry, and move around the pan. Add the paprika and Kashmiri chilli powder and then add the cubed potato.
  3. After a further minute add some water so that it covers the potato. Add the fish and coat in the masala. Add a little more water, to cover the fish and place a lid on the pan and cover for 5 minutes.
  4. Gently move the fish, without breaking it up, around the pan and add the mango powder, sugar and sesame seeds. Return the lid on the pan and simmer away for a further 3 minutes.
  5. Add the fresh spinach and continue to cook for a further 3 minutes or until the potato has softened. Add more water if you prefer a more saucy curry. Check on the taste and add more salt/sugar if necessary.
  6. Keep the lid on the pan to keep in the heat before serving. It works well with rice or Indian breads.


Thai Jungle Curry and Review of “Mae’s Ancient Thai Food” by Carole Mason and Ning Najpinij

I bought a new exciting cookbook recently all about Thai heritage cooking called “Mae’s Ancient Thai Food” by Carole Mason and Ning Najpint. Bold, bright and bursting with a wonderful range of recipes that you actually want to cook straight away.  The book is an ode to Ning’s mother – Kobkaew – who sadly passed away, but was a known figure in the culinary world both in Thailand, and more globally. Her recipes and articles appeared in a number of magazines including: Vogue USA, Australian Gourmet, Tatler, as well as David Thompson’s books, “Thai Food” and “Thai Street Food”. It seemed a fitting tribute therefore for Carole, her protege and friend, and daughter – Ning, to create a beautiful cookbook dedicated to Kobkaew – known affectionately as ‘Mae’ (mother) to both her daughter and her beloved students.

Thai cooking does require a little forward thinking to get the fresh ingredients. One ingredient that is as ubiquitous in Thailand and Thai cooking as onions are to British fare, is coriander root. The bad news folks is that hard to track down, although not impossible in the UK.  Carole is trying to spread the word that this needs to change so that second and third generation Thais living in the UK, and those who are passionate about Thai cooking, don’t lose touch and knowledge of heritage Thai cuisine. She has even placed “we love coriander root” on the front of the book itself to signal its importance in Thai cooking. If larger supermarkets could start stocking it, and we all start using it, her campaign will be achieved. In the meantime if you can’t track it down  you could use a good handful of coriander stalks and leaves to create the colour and then add a teaspoon of coriander root powder, which is easier to source in the UK.

Other than the obvious ingredients, who will have to go to an Oriental supermarket to source some things or go online to the suppliers that Carole outlines in her book. She clearly explains techniques and explanation of the various Thai ingredients you may not be familiar with. The chapters are then split into: curries,  soups (including hangover cures), salads, seafood, dips, nibbles and canapés, vegetables, noodles and stir frys and desserts.

Jumping out at me is: Muu Parlow – Pork and Egg Soup, Gaeng Som – Prawn and Papaya curry, Gaenglean – Good Old Fashioned Soup, Nahm Prik Pao – Thai Chilli Jam (HELLO yes please), Yam Plate Too – Mackerel Salad, I could go on as they all sound so good.


So what type of person would this book suit?

Personally, I think anyone who loves cooking and trying out new recipes and does not flinch at the thought of sourcing a few ingredients will LOVE it. Those who want their meal on a plate with minimum effort and the thought of searching for a particular ingredient causes them to break out in a sweat, then perhaps this isn’t for them. I only own one other Thai cookbook so for me this book was screaming out at me to be bought. Oh yes, and you need to like chilli as chilli is definitely a cornerstone in Thai cooking.

Publishing a cookbook is never easy, especially when you self-publish, which is the route that Carole and Ning went down. It is an incredible achievement but now comes the equally hard work of spreading the word. So folks feel free to retweeted and forwarded this post (or photo on instagram) as much as possible. Blogging is an amazing community of wonderful folk,  so lets help ‘Mae’s Ancient Thai Food’ gets the notice it deserves. I bought the book myself and all my views are my own (as they always are) in case you are wondering.

So are you intrigued by what I cooked? ……

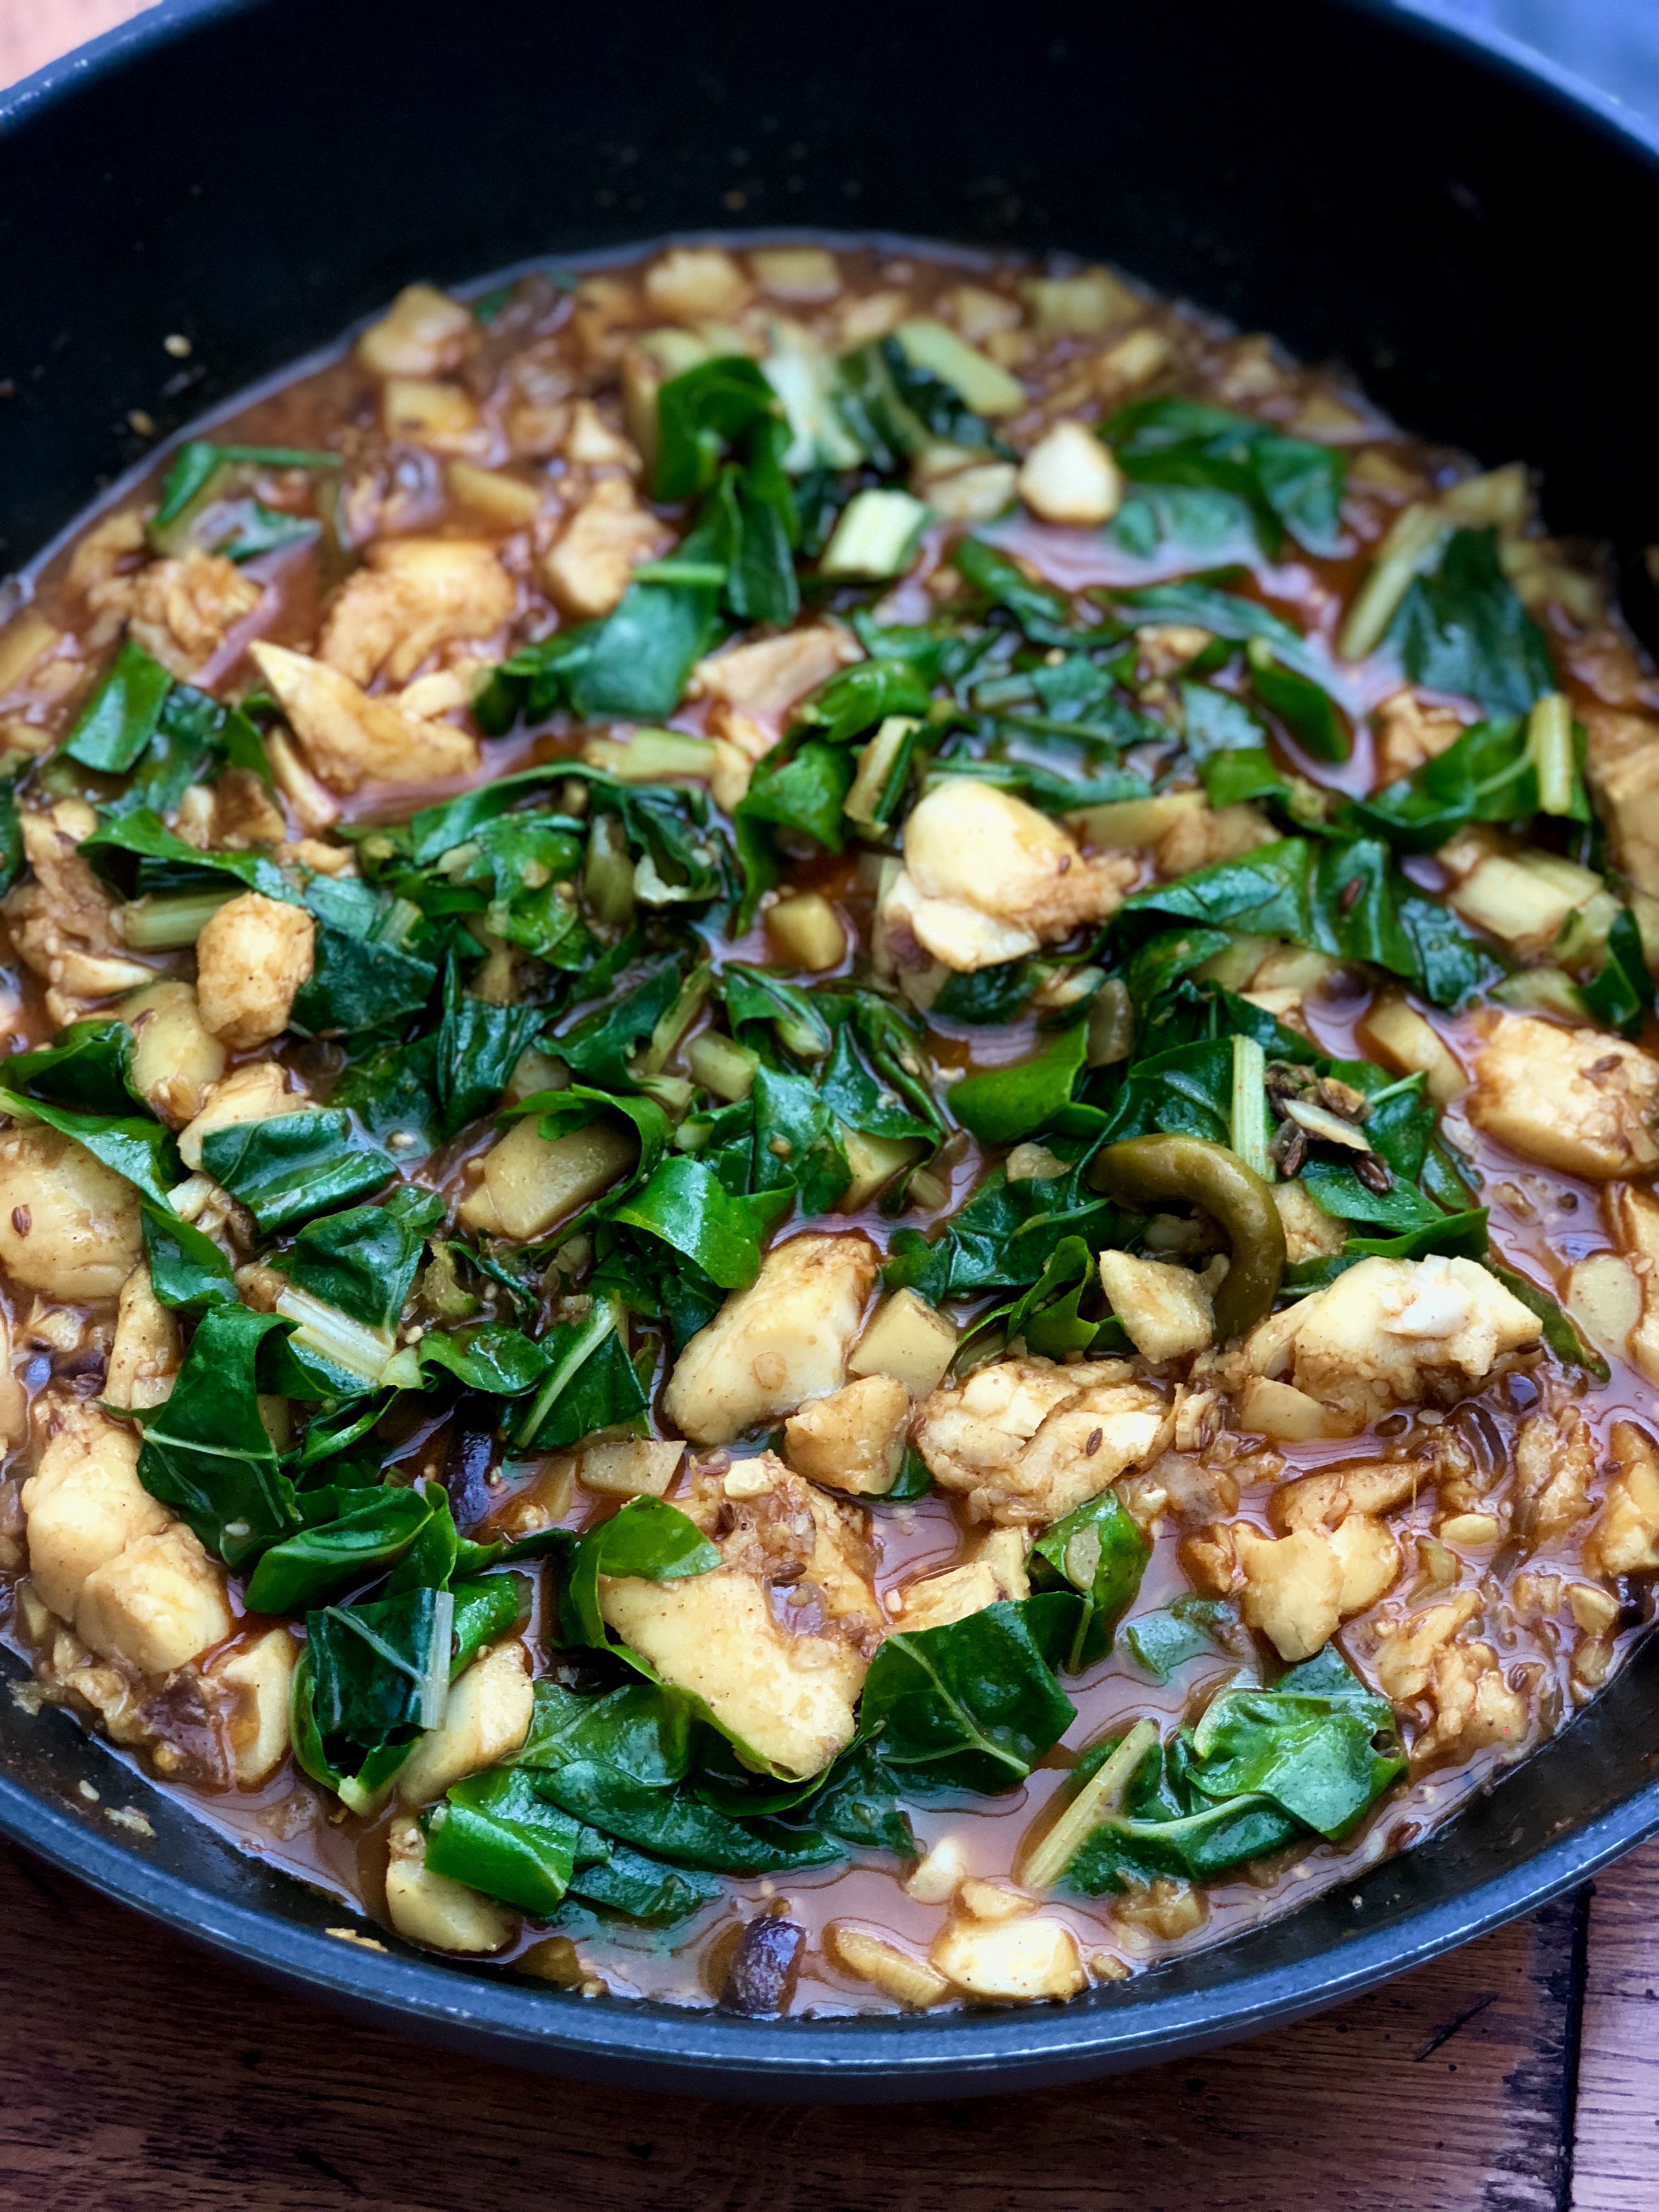
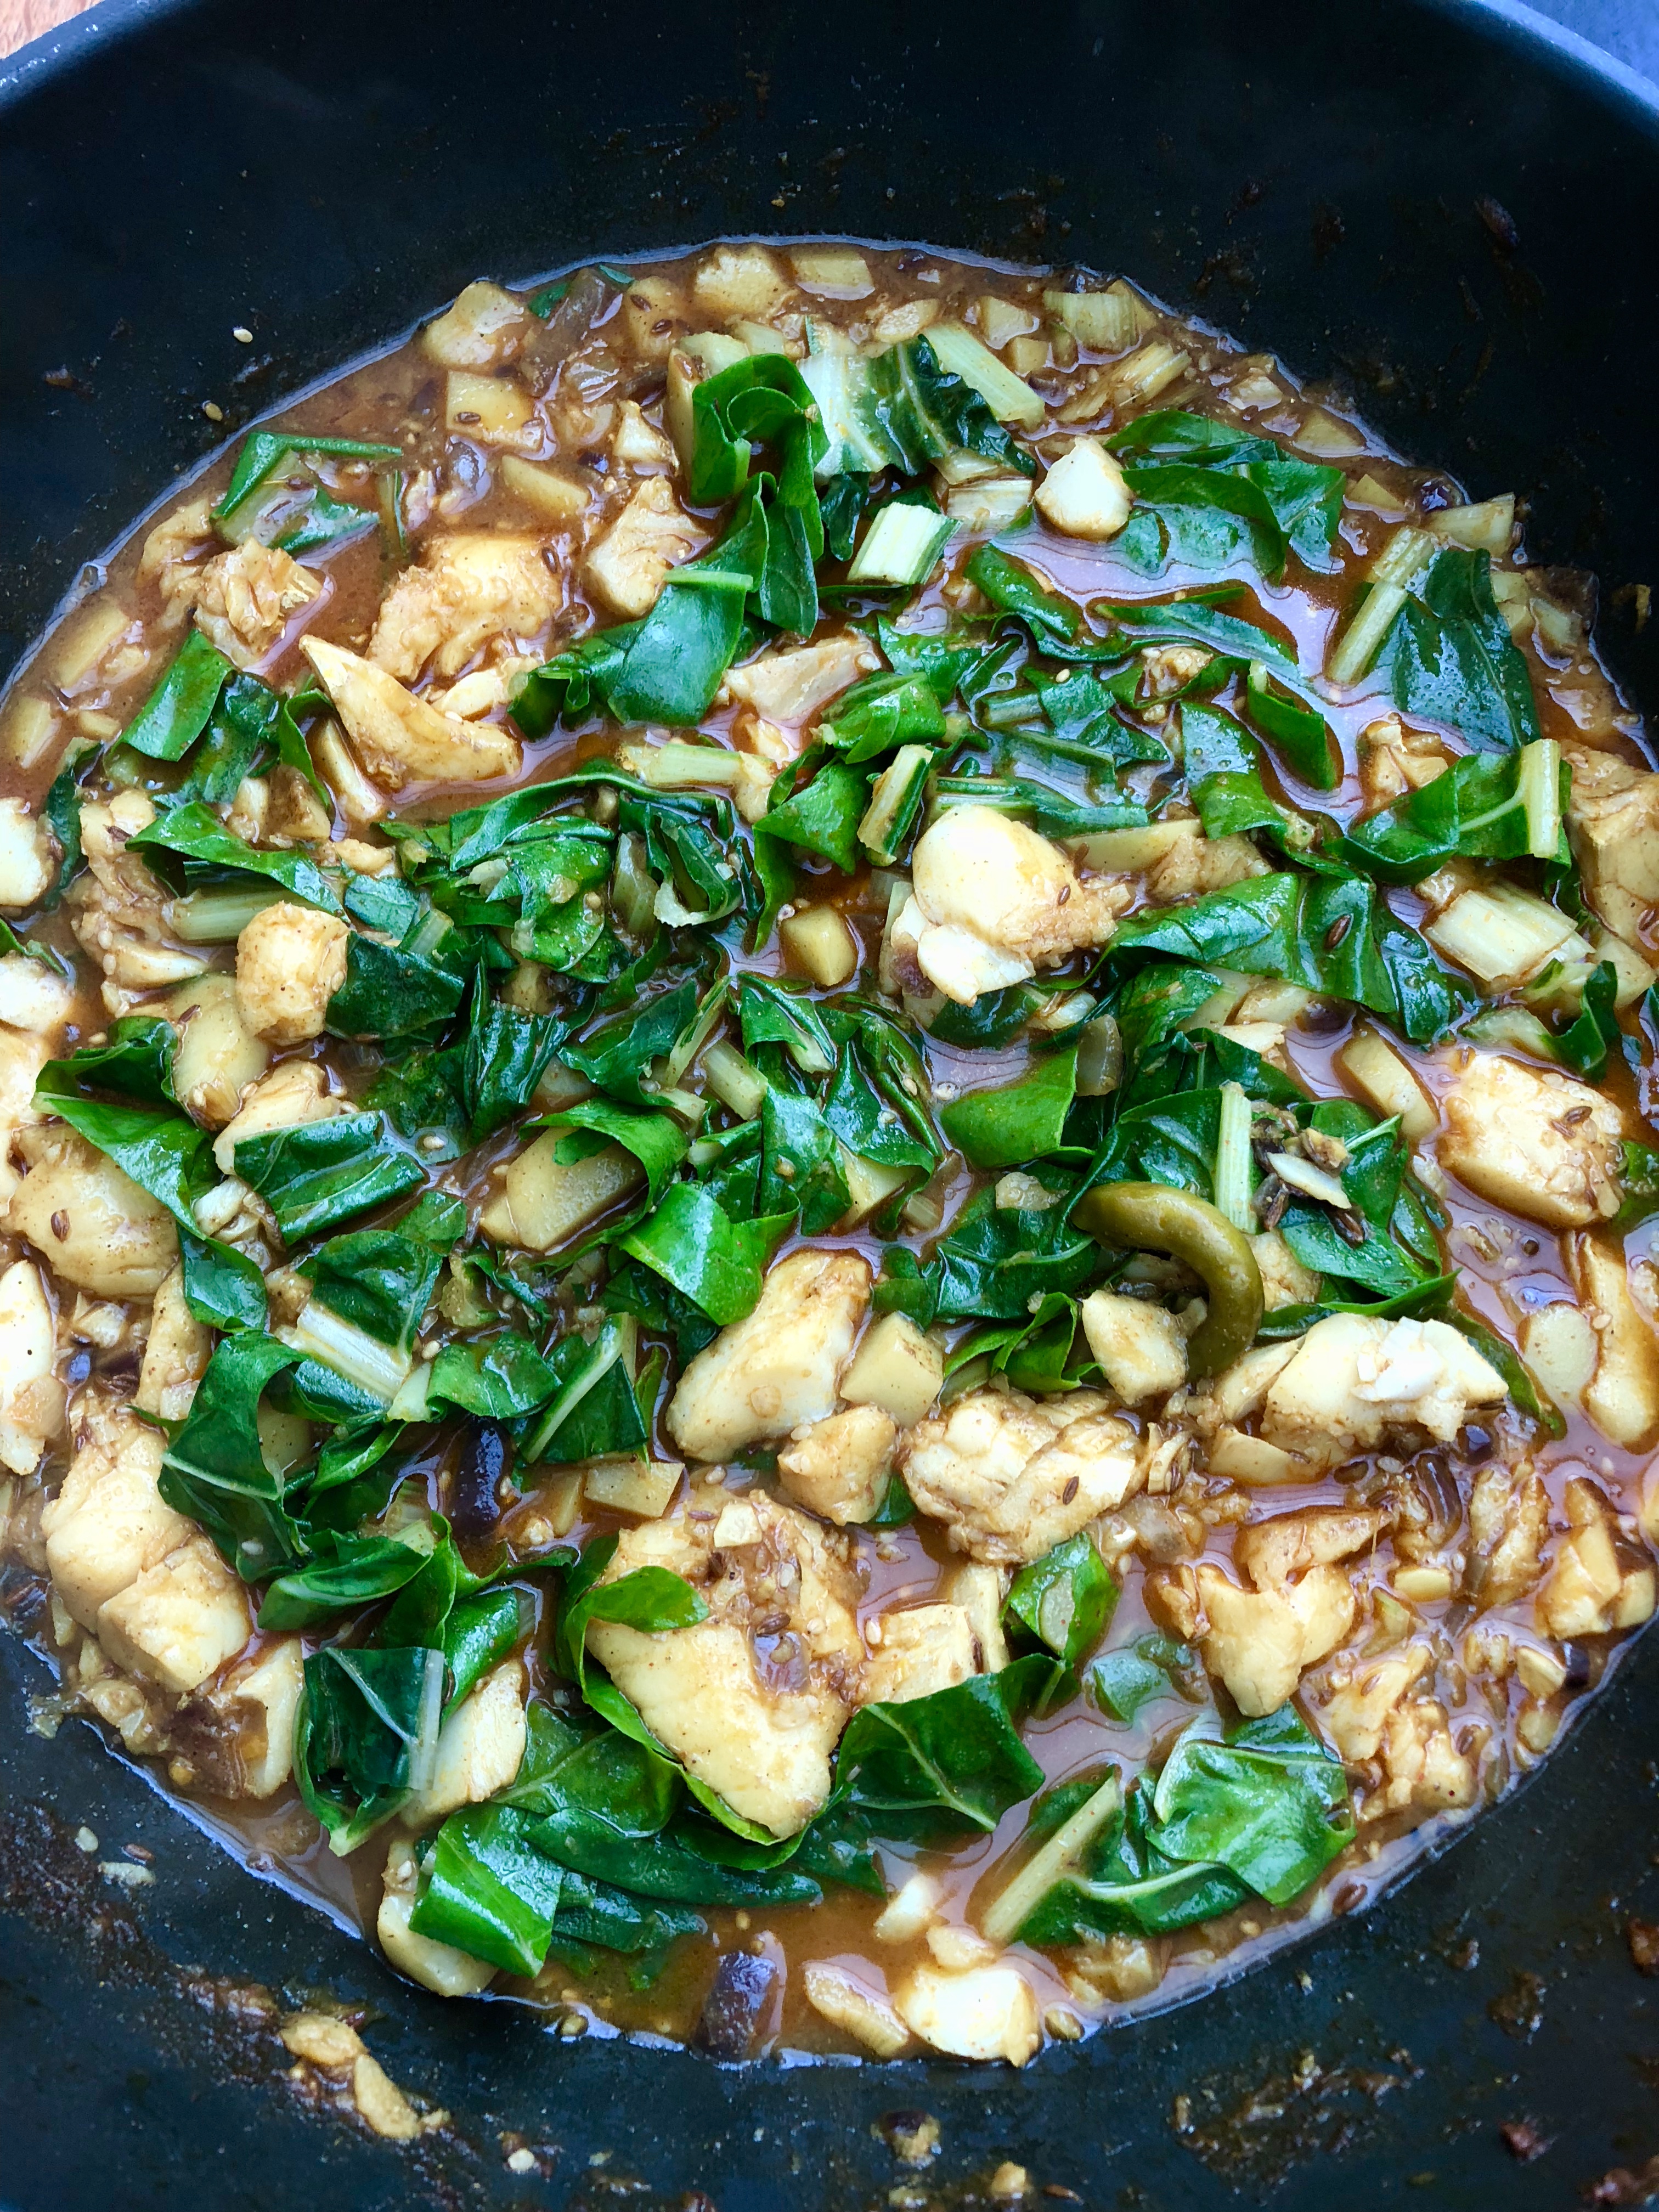
I went for “Gaeng Pah – Jungle Curry”. Packed full of flavour and zing, but no coconut milk. Now I will be honest that I did change some of the ingredients because if you can’t get hold of a particular ingredient then replace it with something similar, its not worth getting too stressed about.

So these are the changes I made:

I converted everything from cups to grams, cause that’s how I roll.

coriander root – I replaced with coriander stalks and a few leaves and coriander root powder

small green apple aubergine – I used one courgette, peeled in striped and cut at angles

snake beans – I used regular beans and also added sugar snaps (cause I love my green veg)

holy basil – I could not source it so used Thai basil

I added 1 tsp of caster sugar – you could also add palm sugar. Carole does not add either.

The recipe was a triumph and I think I went back for thirds. It feeds around 4 people.

First I made some fresh chicken stock – which is super straightforward:

Fresh Chicken Stock

4 chicken wings on the bone

10 white peppercorns

3 garlic cloves,

half an onion, peeled

a lump of ginger

if you live in a country that you can get hold of coriander root or Chinese celery pop them in

bay leaf

  1. Simply cover the wings with water and an extra 3 inches of water on top and bring to the boil and simmer for 30 mins.
  2. Strain the stock and remove the flesh from the chicken wings and keep for another time. I also keep the garlic too. Discard the rest.
  3. Either use of freeze the stock.


Gaeng Pah – Jungle Curry

Serves 4

Jungle Curry Paste

10 small green Thai chillies

a pinch of salt

1 coriander root OR a handful of coriander root and leaves and 1 tsp of coriander root powder

2 whole lemongrass, finely chopped

1 shallot, finely sliced

1 tbsp galangal, sliced

3 garlic cloves, sliced

1 tsp coriander seeds dry roasted and ground

10 white peppercorns

1 tsp of shrimp paste

  1. To save time, although not authentic (sorry Carole) I popped all the ingredients into my little mini blender, added a couple of tablespoons of water and blended together. If you have time however using a pestle and mortar will give you a better, more authentic paste. Carole has laid out the steps to do this properly – in short – hardest ingredients first one at a time until they make a paste before moving onto the next. Add the dried ingredients last and the shrimp paste. Pound until smooth.

Other Ingredients

1 batch of jungle curry paste (as above)

3 tbsp of vegetable/rapeseed oil

300g chicken sliced diagonally (I used thigh, but use breast if you prefer or you could use white fish)

1 tbsp fish sauce

750ml chicken stock (or fish stock if you are going down the fish route)

1 courgette, peeled to create stripes and cut into diagonally strips

100g green beans, cut in half

100g sugar snap peas

1x227g tin of bamboo shoots (drained weight 140g)

1 tbsp grachai, peeled and shredded (I had never used this but my local Thai grocer had it so was able to use it. Finger shape and size but with a similar skin to ginger or turmeric.

5 young green peppercorn strips, washed and left whole

5 kaffir lime leaves, de-veined and torn


a handful of thai basil leaves, washed and stalked removed

1 lime, quartered to serve

2 red chillies, cut into fine strips to decorate to serve


  1. First make the paste above.
  2. Next heat the oil in a pan and add the curry paste, stirring gently to let the aromas develop.
  3. Add the chicken (or fish) and stir into the paste.
  4. Heat the stock and add it to the pan and bring to a rolling boil for 10 minutes.
  5. Add the courgettes, beans, sugar snaps, bamboo shoots and after a couple of minutes add the grachai, green peppercorns, kaffir lime leaves and Thai basil.
  6. Taste and add more fish sauce. I added a little caster sugar, but you may find you don’t need to.
  7. Serve with a quarter of fresh lime per serving and some fresh red chilli strips.

I ate mine with a bowl of rice.

You can buy Carole and Ning’s book  here or if you are based in London it is now stocked at the heavenly bookshop “Books For Cooks” in Notting Hill.


SaveSave

SaveSave

SaveSave

SaveSave

SaveSave

SaveSave

SaveSave

SaveSave

SaveSave

SaveSave

SaveSave

SaveSave

SaveSave

SaveSave

SaveSave

SaveSave

SaveSave

SaveSave

SaveSave

SaveSave

SaveSave

SaveSave

SaveSave

SaveSave

SaveSave


Cambodia, VB6 and a review of “My Vegan Travels” by Jackie Kearney

Sunset in Kep, Cambodia

Happy New Year everyone. As you’ve probably gathered from my lack of posts I have been off the grid for a few weeks, which has been bliss – although I was still posting on instagram so do check out my feed if you are interested. My family decided to cheat winter for a few weeks and headed off to Cambodia to see the ancient ruins, visit the capital and then head south to laidback Kep – which was once where the Cambodian royals and wealthy would head to relax and enjoy themselves; before the Khmer Rouge destroyed much of the town.

Angkor Wat Temple complex

Back in London and it has all been a bit of a shock with the cold, blistery weather and getting dark so early in the day. I reluctantly packed away my flip flops and got out my winter boots. January is a funny old month. We all start with such good intentions.

Most friends seem to be attempting a “dry January” and “veganuary” has now been thrown into the mix. Read more about it here if the term is new to you.

Sacred prays in Angkor Wat complex

I can get my head around being more vegetarian, or at least a diet which has a heavy vegetable focus, but vegan……now that involves a lot of thought and planning. Whilst I was pondering veganuary, I read about a rather interesting “diet” or let’s just say “way of life” which, in my view, seemed more attainable and realistic. There is a lot of chat about it in the media at the moment. It is called the VB6 diet. Now don’t get me wrong I do not follow diets and have never been on one, but this VB6 caught my attention.

Lotus flower arrangement in Siem Reap

The diet was given life by New York Times’ lead food writer Mark Bittman and literally means “Vegan Before 6pm”. I am increasingly convinced we all need to eat more vegetables and fruit and less meat and fish. Like Mark however, I am not going to become vegan anytime soon, but a swing of the pendulum towards more of a plant based diet is definitely attractive on many levels. I would prefer to eat meat and fish less often but the quality of what I eat to be high and ultimately know exactly where the produce has come from. By eating it less frequently does allow us to buy better quality meat and fish when we do actually buy it.

Drying out fish on the shores of Tonle Sap – the 4th largest freshwater source of fish in the world

The VB6 diet came about when Mark was told by his doctor that he was overweight, his cholesterol and blood sugar were too high and that intervention by surgery was one possible option. He discussed these findings with another doctor who suggested that becoming vegan was another way that could help him. Knowing that becoming a true vegan was out of the question he decided to adapt and become vegan throughout the day but in the evening from 6pm he could eat what he wanted. It made a lot of sense as he could be sociable in the evening with friends and eat how he always has done. He is also really realistic that sometimes he may deviates from the plan and he readily admits he has milk in his coffee in the morning, but for the most part he continues to be vegan in the day time.

A shrine in Phnom Penh

So has it worked?

Absolutely. He has lost a good amount of weight – 36 pounds then gained a little to plateau to around losing 26 pounds. The diet seems sensible and also not really very restrictive in the grand scheme of things. He talks to the Huffington Post here about the diet. Have a read, it’s really interesting. I definitely plan to pick up a copy of his book and see what he has to say in more detail. You can order it here if you are interested.

Buddhist shrine in Angkor Wat

Which brings me to a rather lovely book that was recently sent to me, called “My Vegan Travels – Comfort Food Inspired by Adventure” by Jackie Kearney. I don’t own a vegan cookery book so was not too sure on what to expect. What I discovered is a hugely informative book with recipes that actually sound and look (if the five photos below are anything to go by) delicious.

Photography credit above: Clare Winfield, published by Ryland Peters & Small

At first glance there did seem to be quite a number of ingredients in each recipe but that has never phased me. If you are someone who likes 5 ingredients, then this book is probably not for you. For anyone who has a keen interest in cooking and a willingness to try something new then you will love it. The chapters are slit into “No Place Like Home”, “European Summers”, “Asian Comfort” and “Americana”. I obviously gravitated to the “Asian Comfort”.

I think that to become full-time vegan does involve a commitment to actually stock your pantry/cupboard/fridge very differently. Leafing though the pages I found a couple of Cambodian recipes. Again I never come across Cambodian recipes so both of them really appealed to me. I opted on one though which I think is a real January mood-pick-me-up. It’s called “Num Banh Chok” – a Cambodian yellow curry with rice noodles and I cannot tell you how AWESOME this recipe is. I gave it to my father-in-law who has been recovering from a bout of flue and he couldn’t stop saying how delicious it was. It is now firmly part of my culinary arsenal and I will be cooking it again and again hence forth. I LOVED it.

I thought that the recipe tied in so well with this post and me having just come back from beautiful Cambodia, as well as the VB6 article, which I had been mulling over.

Now a couple of things to note. I made one change –  I added fried tofu instead of banana flower. I do love banana flower but it is tricky to find, certainly if you live outside London or not near any Vietnamese grocers. I thought it wasn’t very realistic for others to find if I found it tricky. Secondly, the vegetable with holes in it is called “lotus root”. I admit lotus root is also not that easy to find. My usual Asian grocers did not have it so they sent me off to a Chinese grocers that did. So folks aim for Chinese/Thai/Vietnamese/Japanese grocers near you. It is not stocked in your local supermarket. You can buy it online at places like Amazon and Fresh Oriental – here. You can also buy it frozen, but fresh is best if you can locate it. Galangal is not as hard to find, but again you may need to head to your South East Asian grocer.

Once you have the ingredients the recipe is a piece of cake to make. Do try it and let me know. If this recipe is anything to go by I can’t wait to try making the other Cambodian recipe “Khmer croquettes” (photo below) very soon. Don’t they look temptingly moreish.

Photography credit above: Clare Winfield, published by Ryland Peters & Small

Cambodian Yellow Curry with Rice Noodles

adapted from “My Vegan Travels” by Jackie Kearney, published by Ryland, Peters & Small

Serves 4

(1/2= half)

To make the Spice Paste

2 6cm/2 inch thumbs of fresh turmeric (or 1 1/2 tsp powdered)

1/2 tsp paprika

4 garlic cloves

5cm/2 inch thumb of ginger

5cm/2 inch thumb of galangal

4-6 dried red chillies, soaked in boiling water for 10 minutes

1 small red onion

2 lemongrass stalks, ends trimmed and outer layer removed

10 kaffir lime leaves


To make the curry

2 tbs coconut/vegetable oil

900ml/4 cups vegetable stock or water, plus extra if needed

2-3 tbs vegan fish sauce or light soy sauce

1 tbs agave syrup or brown sugar

200g/7oz lotus root, peeled and cut into thick slices (or use cauliflower florets(

1/2 butternut squash, peeled and cubed

150g green or runner beans, trimmed

400ml/14 oz can of coconut milk

1-2 rock salt, to taste

100g/3 1/2oz Chinese leaf, roughly torn ( I used choi sum, but chard, beet leaves also works)

100g fried tofu cubes (I picked this up at Hoo Hing)


To serve

1 packet of thin rice thread noodles, soaked in hot water for 20 minutes

drizzle of chilli oil/chilli (optional)

50g/1/2 cup of roasted peanuts, roughly chopped (optional)


  1. First place your rice noodles in a bowl and cover with hot water and leave whilst you get on with making the dish.
  2. New place all the spice paste ingredients in a blender/food processor and blitz until smooth. Easy hey.
  3. In a large non stick pan/wok, heat the oil and fry the curry paste.
  4. Add the stock/water, vegan fish sauce/light soy sauce and agave nectar/brown sugar and bring to the boil then add the lotus root and squash and simmer for around 8 minutes.
  5. Then add the green/runner beans and simmer for another couple of minutes before adding the coconut milk and more stock if needed; it should be a soupy consistency.
  6. Salt to taste and bring back to the boil. Make sure the butternut squash is soft. The lotus root will not be as soft!
  7. Stir in the choi sum and then remove from the heat, allowing it to wilt completely.
  8. Drain the rice noodles from the water. They should be soft and ready to eat.
  9. Place in a bowl and ladle the curry broth on top. Sprinkle with peanuts and chilli oil if necessary.

More instalments from Cambodia next week.

SaveSave

SaveSave

SaveSave

SaveSave

SaveSaveSaveSave

SaveSave

SaveSave

SaveSave

SaveSave

SaveSave

SaveSave

SaveSave

SaveSave

SaveSave

SaveSave

SaveSave

SaveSave

SaveSave

SaveSave

SaveSave


Keralan Chicken Stew

IMG_2208

Recently my family and I spent the day with a local Keralan family in Cochin: Lt. Col. Mathens, Moly and Philip. The intention was to spend the day with them cooking and eating so you can imagine how excited I was about this. After a good hours drive from our hotel we arrived at their house, still in Cochin but away from the old centre.

Before the cooking began we were given a guided tour of their garden, which grew all manner of spices, vegetables and fruit. They had planted this magnificent oasis themselves when they had bought the property some years before. It had been shrub land, but with such fertile soil, sunny weather and good rains in the monsoon, the vegetable garden had thrived beyond belief. There was no reason to go to the market to buy fresh produce as they had such a bounty waiting for them in the garden.

How many of the above can you recognise? Let me know in the comments box below.

We were showed at least thirty different vegetables, fruit and spices and to see them growing in their natural habitat was hugely memorable – although looking back through my photographs I cannot be certain about a couple of the plants. A return trip is necessary perhaps to further my education? Any excuse really!

After our garden tour we made our way to the kitchen where Moly explained the different dishes we would be cooking and the others she had prepared earlier that would accompany our feast.

IMG_2193

One of the dishes she showed us was her Keralan chicken stew. A couple of things that stood out with the way that she actually prepared the stew.

Firstly it was cooked on the bone, like all authentic curries should. Secondly she add the coconut milk in two stages. To begin with she added the thin coconut milk and at the very end she added the thicker, creamer coconut. The third point was that she added the thin coconut milk when some of the chicken was still pink. She did not measure anything as such, so I frantically took notes as to the approximate amount she was adding into her stew.

It does have a chilli kick to it with pepper, cardamom and clove notes resonating through the dish. By all means reduce the amount of chillies to suit your palate. I added a teaspoon of Kashmiri chilli powder, but this is not necessary and looking back in my notes I don’t believe Moly added it so for the recipe below I have omitted it although when I was testing the recipe I did add it, hence the photos have a red/orange hue to the dish. Yours will not have this in quite the same way if you follow the recipe below.

She did not measure out the coconut milk, but as it generously covered the chicken I think she must have used the equivalent of two tins of coconut milk or thereabouts. I find some brands of coconut milk have a thick creamy coconut milk at the top and a more water milk at the bottom. If you can try and get hold of these types of coconut milk.

Keralan Chicken Stew

serves 6

2 tbsp coconut oil

1 tsp mustard seeds

2 red onions , finely diced

3 garlic cloves, finely diced

7 Kashmiri chillies

2 potatoes cubed

1 whole chicken (approx 1.2kg) skinned and chopped into 10-12 pieces

1tsp cardamom seeds

4 little pieces of cinnamon bark

1 1/2tsp fresh ground black pepper

10 cloves

2 tsp salt

1 tsp ginger powder

400ml tin of coconut milk

160ml tin of coconut cream

  1. In a deep pan – I find my Le creuset casserole works well – add the coconut oil. When it is hot add the mustard seeds and move around the pan for 10 seconds before adding the onion, garlic and dried chillies. Leave to cook in the pan for 3 minutes. Keep on a medium low heat.
  2. Now add the cubed potatoes and stir into the other ingredients and allow to cook away for a further 3 minutes.
  3. Add the chicken and stir before placing the lid on the pan for 5 minutes. Some of the chicken will have whitened but do not be alarmed if some of the chicken is still a little pink at this stage.
  4. Add the cardamom, cloves, cinnamon bark, ginger powder and black pepper.
  5. Add the coconut milk and the salt. Put the lid back on the pan and allow to simmer for 30 minutes, stirring at intervals.
  6. Test to see that the potato is soft and the chicken is cooked. Add more salt if necessary.
  7. At the very end turn the heat down very low and add the coconut cream and stir into the stew. It is important that you do not let it boil as the coconut cream will split.

Serve with rice, luchi, chapati or the traditional Keralan appam.

IMG_2190


Coconut Chutney (and a top tip at removing a coconut shell)

IMG_1775

Have you ever had trouble getting into a coconut or rather removing the outer shell so that the sweet flesh within is easy to tuck into? If you have then you are going to love the following tip.

All you need to do is the following:

  1. Place the coconut in the freezer for 30-45 mins.
  2. Remove from the freezer and then use a rolling pin to bang down on the coconut whilst holding it in your other hand. The outer shell will break away.
  3. Easy hey!

IMG_1751

Drinking the coconut milk is a whole lot easier this way I find.

So on to the coconut chutney.

Once you have the naked coconut you then need to peel it – the outer skin comes away so easily. Then it is simply a matter of grating the coconut.

IMG_1759

Using a whole coconut does produce a lot of coconut chutney, but I find it lasts for up to a week in the fridge no problem. A dollop on the side of some spiced semolina – upma, from my previous post, works wonders or equally it would be great with any south Indian curry. In southern India they eat coconut chutney as part of breakfast, lunch or supper so if you take a similar attitude it will be used up pretty fast!

IMG_1768

Coconut Chutney

1 coconut

2 tbsp chana dal, roasted

2 fresh green chillies

*****

tempering

2 tbsp vegetable/coconut oil

1/2 tsp black mustard seeds

1/2 tsp cumin seeds

pinch of asafoetida/hing

2 dried red chillies

7 curry leaves

1 tsp salt

  1. Remove the shell from the coconut by placing it in a freezer for 30 minutes and then banging down on it carefully with a rolling pin.
  2. Remove the skin from the coconut using a potato peeler and then grate the coconut.
  3. In a frying pan dry roast the chana dal so they begin to bronze slightly. Let them cool and then use a spice grinder to grind them up.
  4. Place in a smaller blender along with the grated coconut and fresh green chillies. You will need to add a little water to loosen it up (the amount of water added depends on how thick you like your chutney! I tend to use 300ml). Blend to form a smooth paste. Add a little salt to taste.
  5. In a frying pan heat the oil and when it is hot add the mustard and cumin seeds, the dried chillies, curry leaves and hing. Move around the pan for 20 seconds before pouring over the coconut chutney.
  6. Stir into the chutney and serve.

IMG_1788


Simple Chicken Curry – when your spice cupboard is bare

IMG_1252

If you are starting out cooking curries or if you are running low on spices, then this is the curry for you as it only requires chilli powder – I tend to opt for the Kashmiri chilli powder for it’s deep red colour and its subtle heat. It also includes onions, ginger, garlic, tomatoes and chillies, which are pretty much fridge staples for me and I’m guessing you too! So it is ridiculously straightforward to make with minimum fuss.

IMG_1232

I like to use boneless and skinless chicken thighs for this curry, but breast meat is fine too – it’s really up to you. Like with most curries it can be cooked well in advance and then slowly reheated adding a little water if necessary. You can reduce the amount of fresh chillies if you want it less hot, but I find adding two fresh green chillies is fine for my 9 year old – I would cook a separate curry however for my 5 year old.

IMG_1246

Simple Chicken Curry

Serves 4

9 garlic cloves, roughly chopped

2 red onions, roughly chopped

2 inch piece of ginger, skin removed and roughly chopped

2 fresh chillies, roughly chopped

4 medium sized tomatoes roughly chopped

1 tsp of Kashmiri chilli powder

2tbsp water

*****

2 tsp groundnut oil

800g boneless and skinless chicken thigh, chopped into bite sized pieces

1 tsp salt

coriander to garnish (optional)

1. Using a blender add the garlic, onions, chillies, tomatoes, ginger and chilli powder. Depending on how juicy your tomatoes are you may need to add a little water to make the paste smooth.

2. Heat the groundnut oil in a pan and add the chicken. Move it around the pan for a couple of minutes so that it whitens. Remove from the pan with a slotted spoon and place to one side.

3. Using the same pan add the paste and gently fry for 45 minutes so that it thickens and allows the flavours to come through.

4. Return the chicken to the pan and add the salt. Simmer gently for a further 7 minutes, coating the chicken in the spiced tomato sauce.

5. Serve with a coriander garnish with either rice or flat bread.

IMG_1247