Daler Bora – Bengali Lentil Fritters

Close to where we were staying in Kolkata there was a guy who set up a food stall in the late afternoon to make daler bora – Bengali lentil fritters. He would fry them upon request and serve them piping hot in little paper bags. They were so addictively good that one bag was never enough. We would munch them as we strolled back to our hotel, pausing often at the tea wallah for our last masala chai of the day.

It became a habit and one that the whole family enjoyed. Upon arriving back in London I decided that life without daler bora was incomplete, so after a bit of tweaking I came up with the perfect recipe to cook them in the home. They are light, crisp and not at all oily. They must be eaten hot and freshly made. Try them and let me know how you get on.


Daler Bora – Bengali Lentil Fritters

350g red spit lentils (masoor), soaked for 2 hours

Handful of fresh coriander

1 medium sized onion, chopped

1 inch of fresh ginger, skin removed and finely grated, optional

2 green chillies, finely chopped

1 tsp salt

1tsp turmeric powder

Sunflower or Vegetable oil for frying

sprinkling of chaat masala

  1. Once the red split lentils have soaked, drain them and then place in a blender along with the rest of the ingredients.
  2. Use a small deep pan and place enough oil in the pan so that the daler bora will float.
  3. Wait for the oil to be at the right heat – drop a little of the batter in the pan and if it fizzles and rises to the top then the oil is ready.
  4. Use two teaspoons and heap one teaspoon with the blended dal and use the other to gently push the blended dal into the oil. I usually fry one first and then try it to check for the right chilli and salt levels. If it needs any more of either of these then this is the time to add a little more.
  5. Place around 10 in the pan and then allow them to bronze. If the oil is at the right heat they should be done in 1-2 minutes. Turn them over half way with a slotted spoon.
  6. Once bronzed remove with the slotted spoon and place on kitchen roll and sprinkle a little chaat masala on top. This will give the lentil fritters a pleasing tang.
  7. Eat whilst still hot.

They are great dipped into an Indian chutney. My tamarind and date chutney works a treat.


Bengali Egg Curry

IMG_7385

When I was staying in the heart of Kolkata, I was often woken from my deep slumber by the egg (dim) or milk (dudha) wallah shouting out in his crescendoing voice each morning. It was my regular wake up call to get out of bed and embrace the day ahead. There was something very charming about the wallah selling the fresh eggs and milk as he pushed his cart slowly down our road. Bengalis love eggs as much as I do. To this day, a picnic is not a proper picnic without a hard boiled egg. So when I was introduced to Bengali egg curry many moons ago, it was an immediate hit. Easy to execute, it makes for a most satisfying protein rich meal.

For the adventurous, this also serves as a wonderful late Sunday brunch with a kick.

IMG_7364

After boiling the eggs, remove the shell and place a cross with a sharp knife at the top of each egg and make a few other incisions on the skin and then cover them with turmeric and salt. Shake the bowl gently so that the eggs are properly covered in the turmeric.

IMG_7370

Fry the eggs in a pan so that the outer skins darken and harden. Then place to one side.

IMG_7427

Bengali Egg Curry

Serves 4

6 eggs, hard boiled

1 tsp turmeric

1 tsp salt

4 tbsp vegetable/mustard oil

2 onion, blended into a paste

4 garlic cloves, blended into a paste

2 inches of fresh ginger, blended into a paste

2 bay leaves

1 tsp cumin powder

2 tsp coriander powder

1/2 tsp sugar

1 tsp kashmiri red chilli powder

1 plum tomato from tin and a little juice (or 1 fresh tomato)

1 tsp garam masala

1.  Boil the eggs in water for 5 minutes and then strain under cold water and peel off the shells.

2. Place a small cross incision at the top of each egg as well as a few prick marks over their sides so that they do not explode during cooking. Place in a bowl and cover with turmeric and salt.

3. In a pan heat up some oil and when hot carefully lower the eggs into the pan and let them sizzle away for a few minutes so that the sides are bronzed and the skins harden. Remove from the pan and place to one side.

4. With an electric blender, blend the onion, garlic and ginger to form a paste. Add a little water so that the paste runs smooth. In the same pan that you cooked the eggs in, add a little more oil before adding the onion/garlic/ginger paste and simmer gently, moving the paste around in the pan with a spoon. When it dries up add a little boiling water and continue to heat through.

5. Add the chilli, coriander and cumin powder as well as the bay leaves and fold into the paste. Now add the chopped plum tomato and a little  tomato juice (about 2 tbsp) and leave to simmer.  Add a little more boiling water and let it simmer gently.

6. Return the eggs to the pan and fold into the paste along with the garam masala. Simmer for a few more minutes and add a little more salt if necessary.

Serve with some plain basmati rice or naan bread.

IMG_7395


Panch Phoron – Bengali Five Spice and Red Split Lentil Dal

IMG_7307

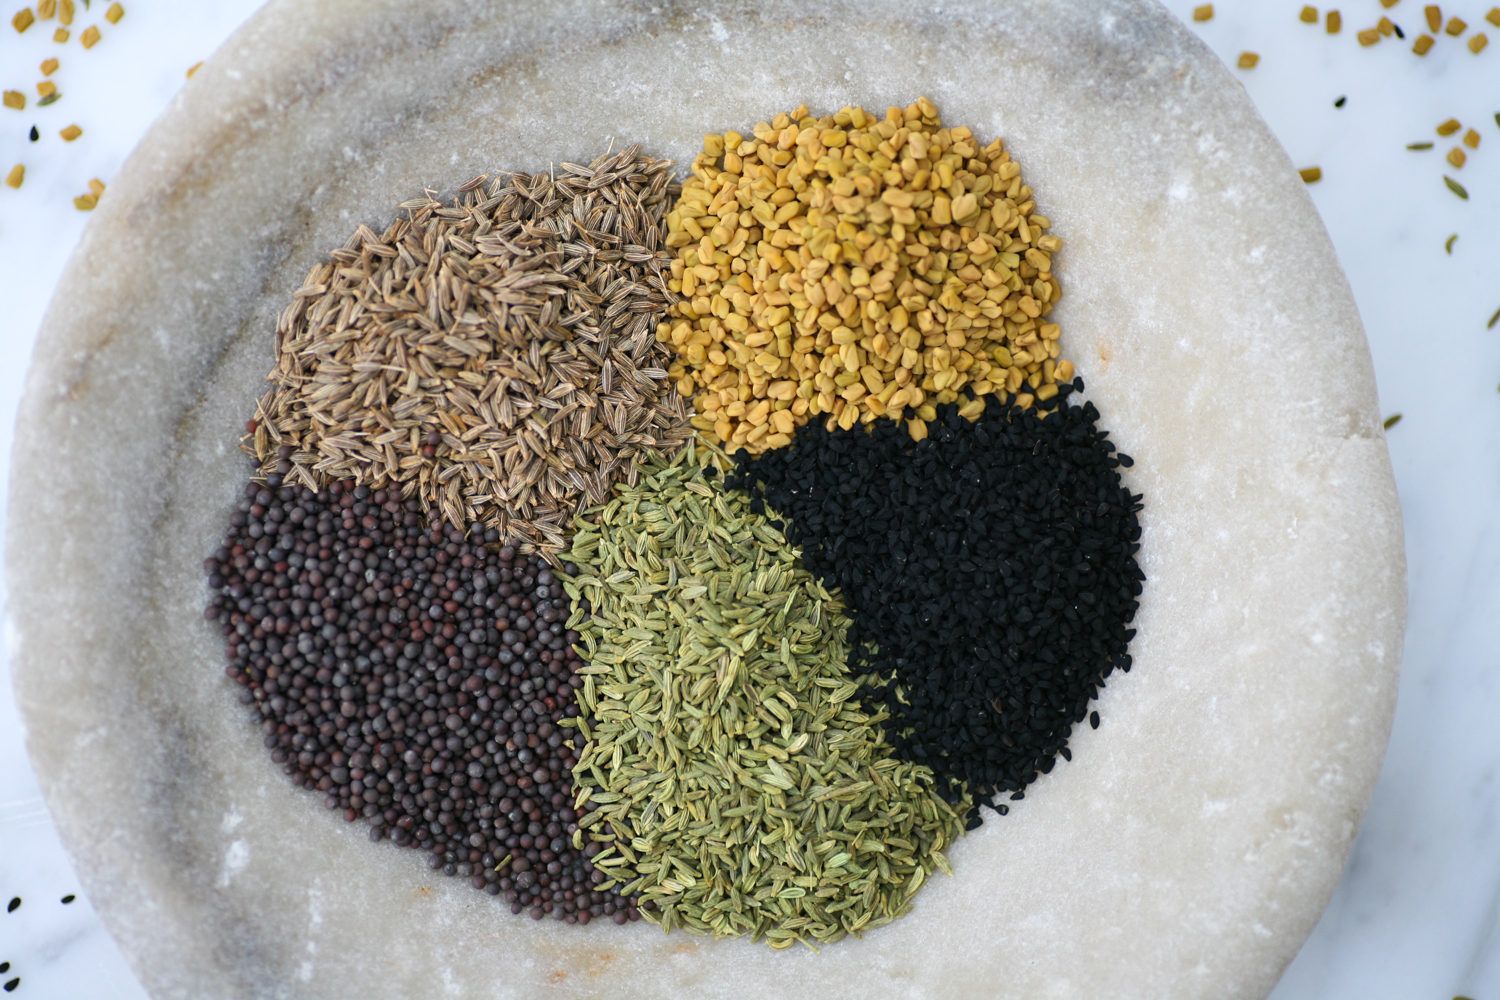
From top right going clockwise: fenugreek, nigella, fennel, black mustard, cumin seeds

We’ve all heard, and no doubt use, Chinese Five Spice, but the Indian equivalent, Panch Phoron, for some reason is not given as much PR and voice in the West and yet across Bengal, it is a spice mix that is commonly used in every home and very much cherished.

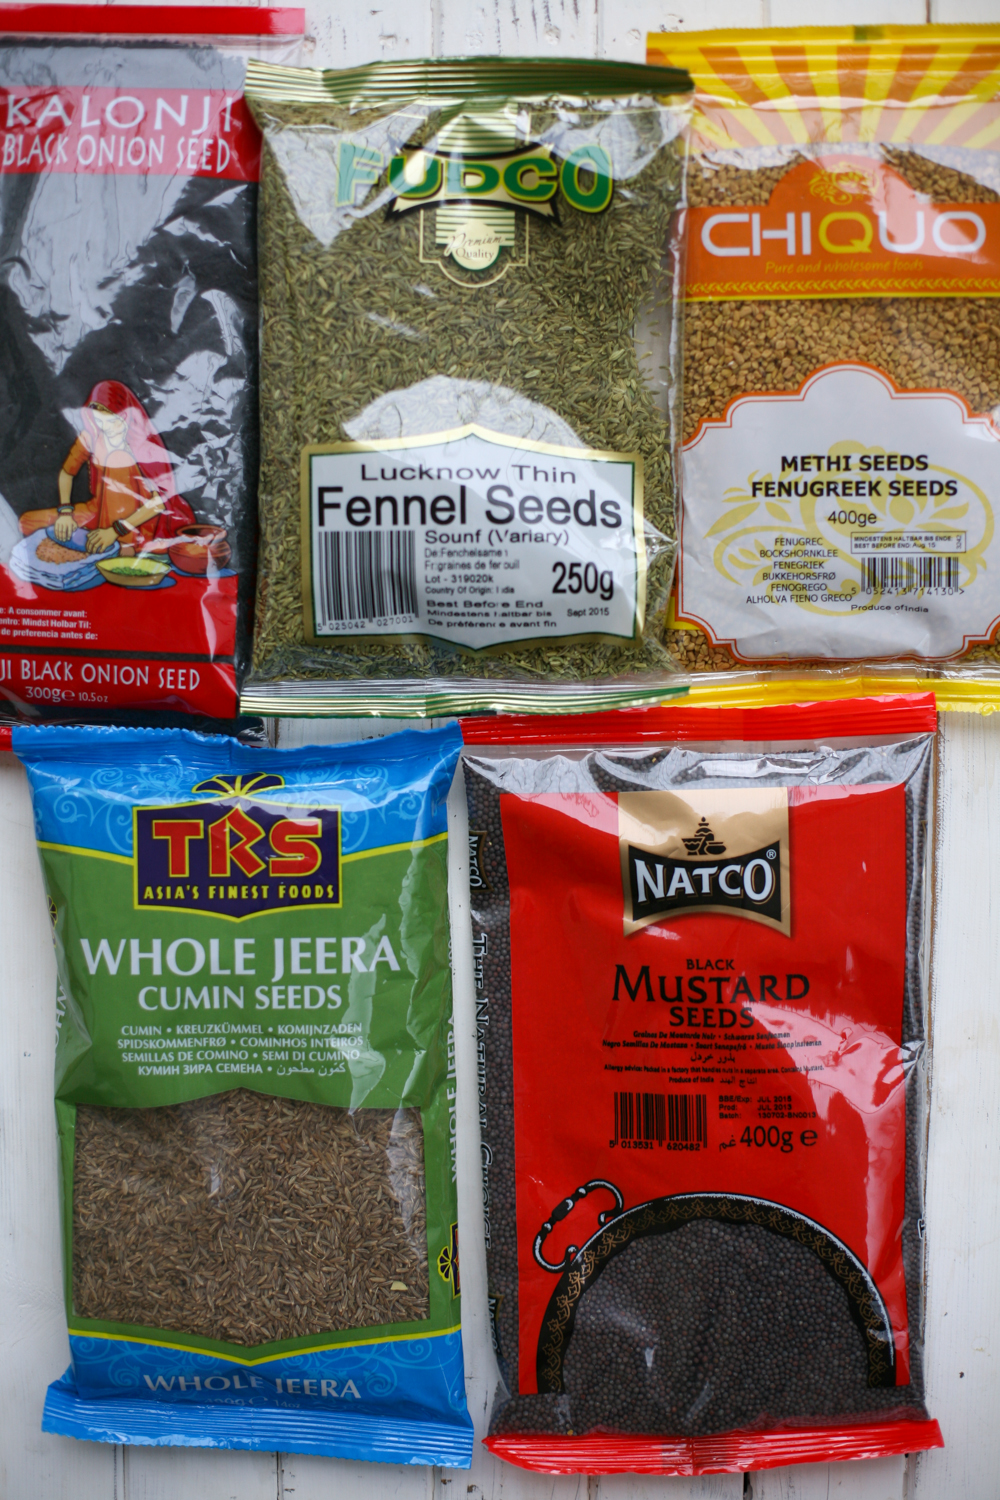
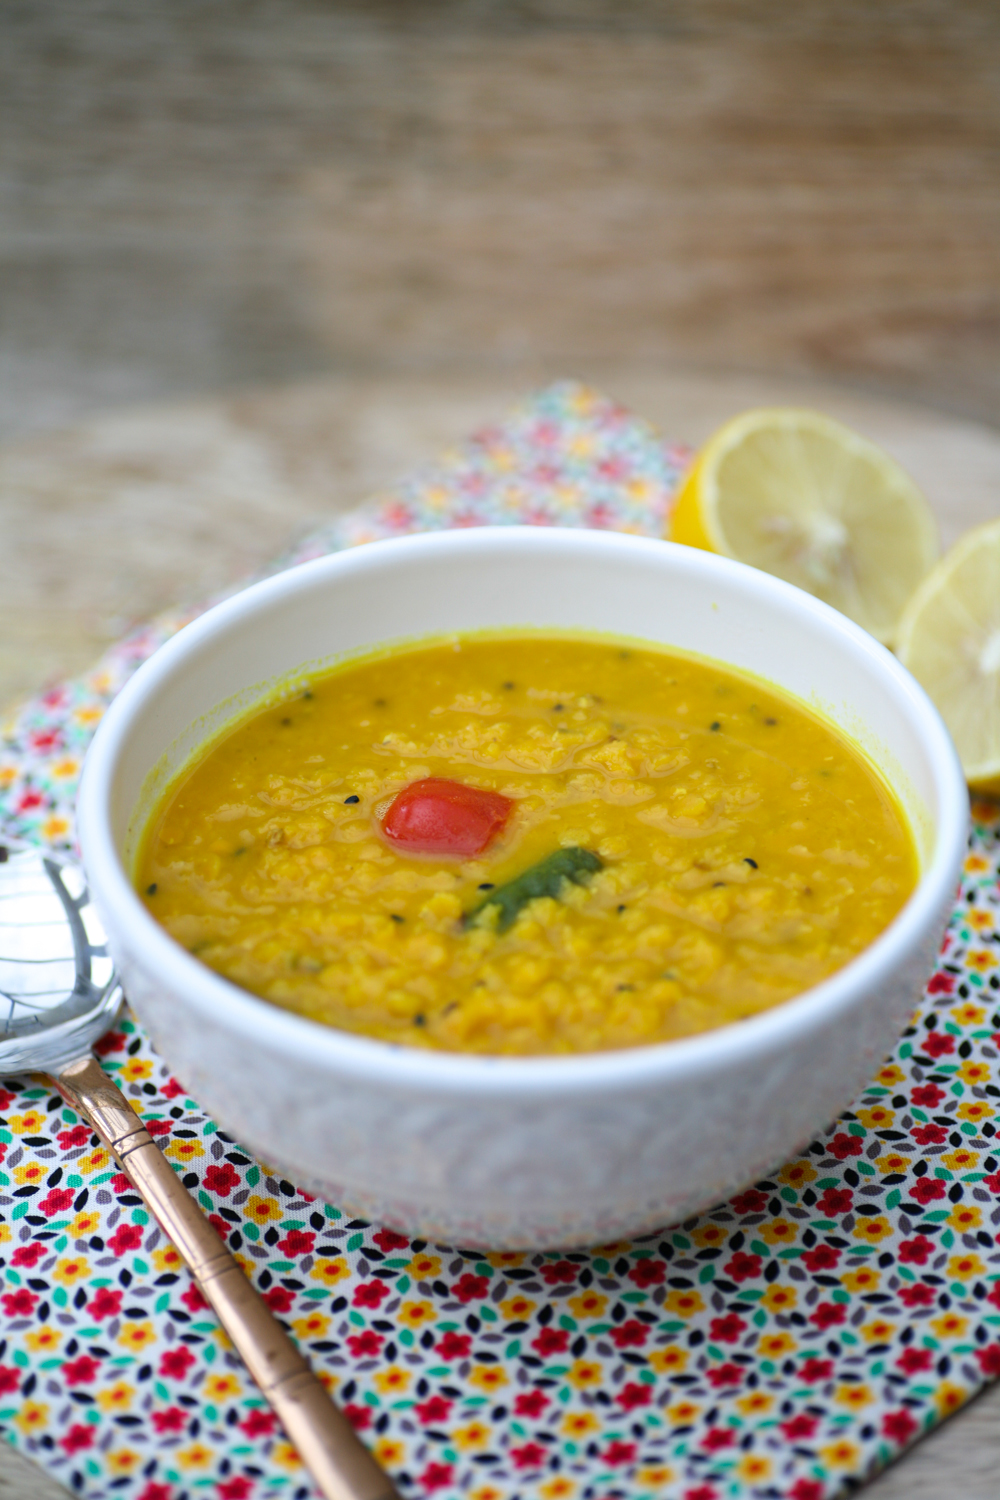
When I launched my blog way back in 2011 one of the first recipes that I posted was my absolute comfort food – red split lentil dal. I cook it often as it is ridiculously easy and provides me with a quick-fix nourishing meal. You can choose whatever vegetable, if any, you need to use up, giving the dal a different twist every time you prepare it. A key seasoning to the dal, which imparts the unmistakable flavour, is panch phoron and whilst I am able to source it from a local Indian supermarket, I know that for some people getting their hands on this magic ingredient could be harder.

IMG_7292

So I wanted to show you how to make your own panch poron. Panch in Bengali is five and phoron is spices and these five spices are: nigella seeds (other wise known as black onion seeds, Kalonji or kalo jeera), fennel seeds (mouri or saunf), fenugreek seeds (methi), black (brown or yellow) mustard seeds (rai) and cumin seeds (jeera). The aromatic spices working together provide a  considerable depth of flavour to any dish and especially to dal.

IMG_7312

Unlike most spice mixes these are not ground to a powder but are cooked whole, either dry roasted in pan or placed in a little oil until they begin to pop and release their flavours – this is known as tempering. There are significant health benefits from eating the spices. In short: cumin aids digestion, fennel contains vitamin a, e and c as well as anti-oxidants, fenugreek aids metabolism, mustard seeds contains omega 3 fatty acids as well as being a good source of selenium and magnesium, nigella seeds balance the hormonal system and have healing qualities.

They store for months in an air tight container so if you make up a batch that should last you for some time as you only need a teaspoon or two every time you use it in a dish.

IMG_7321

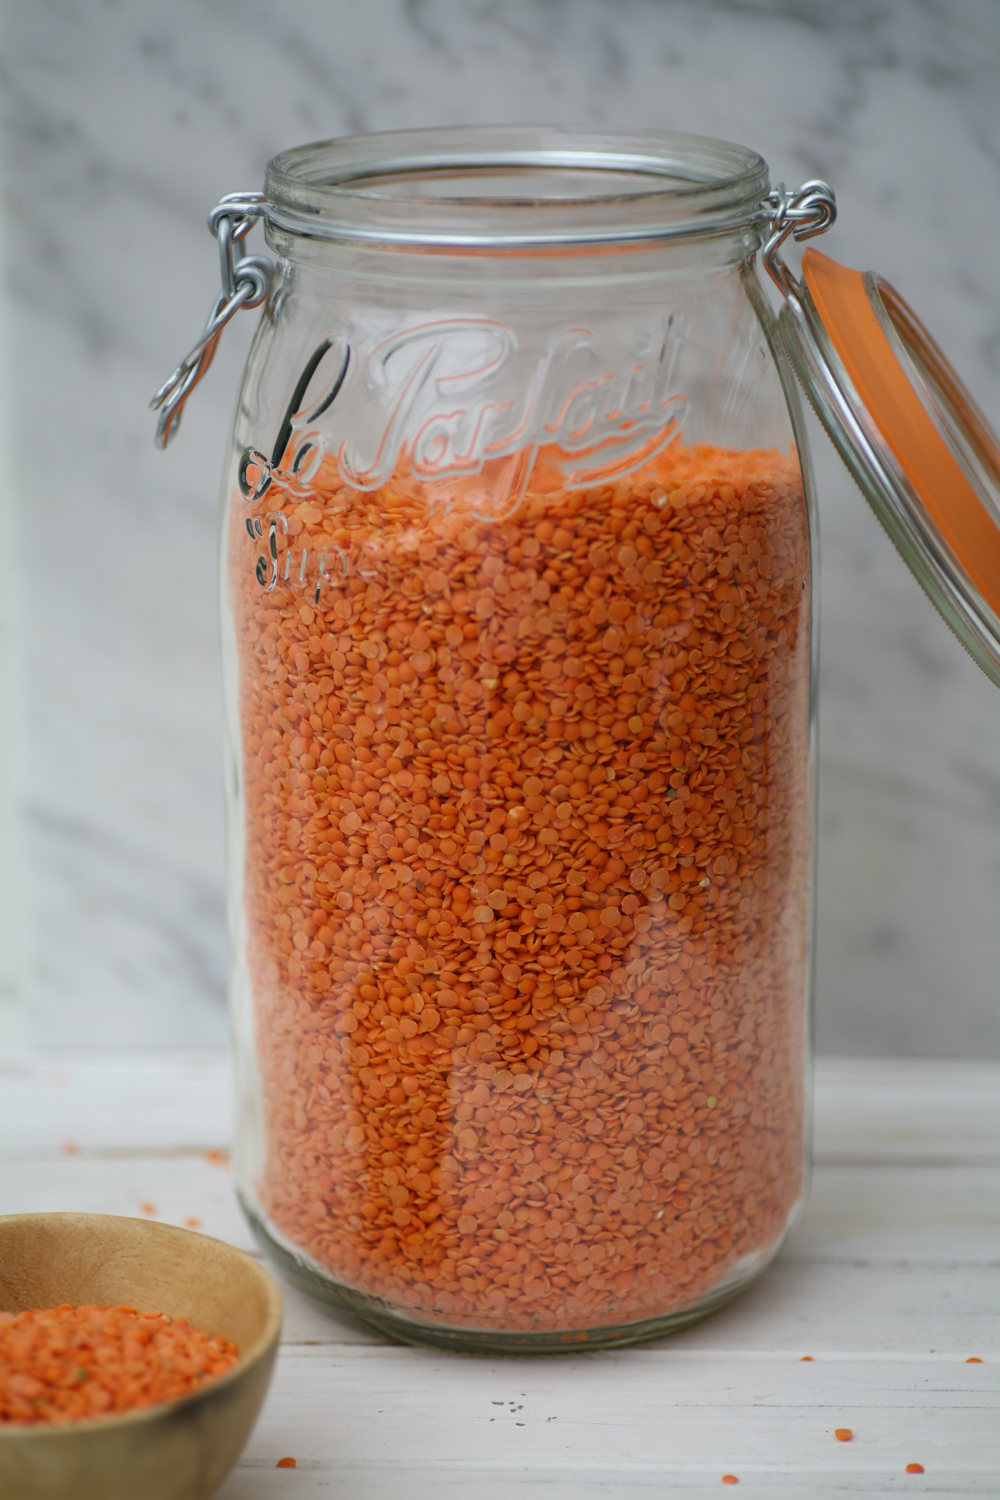
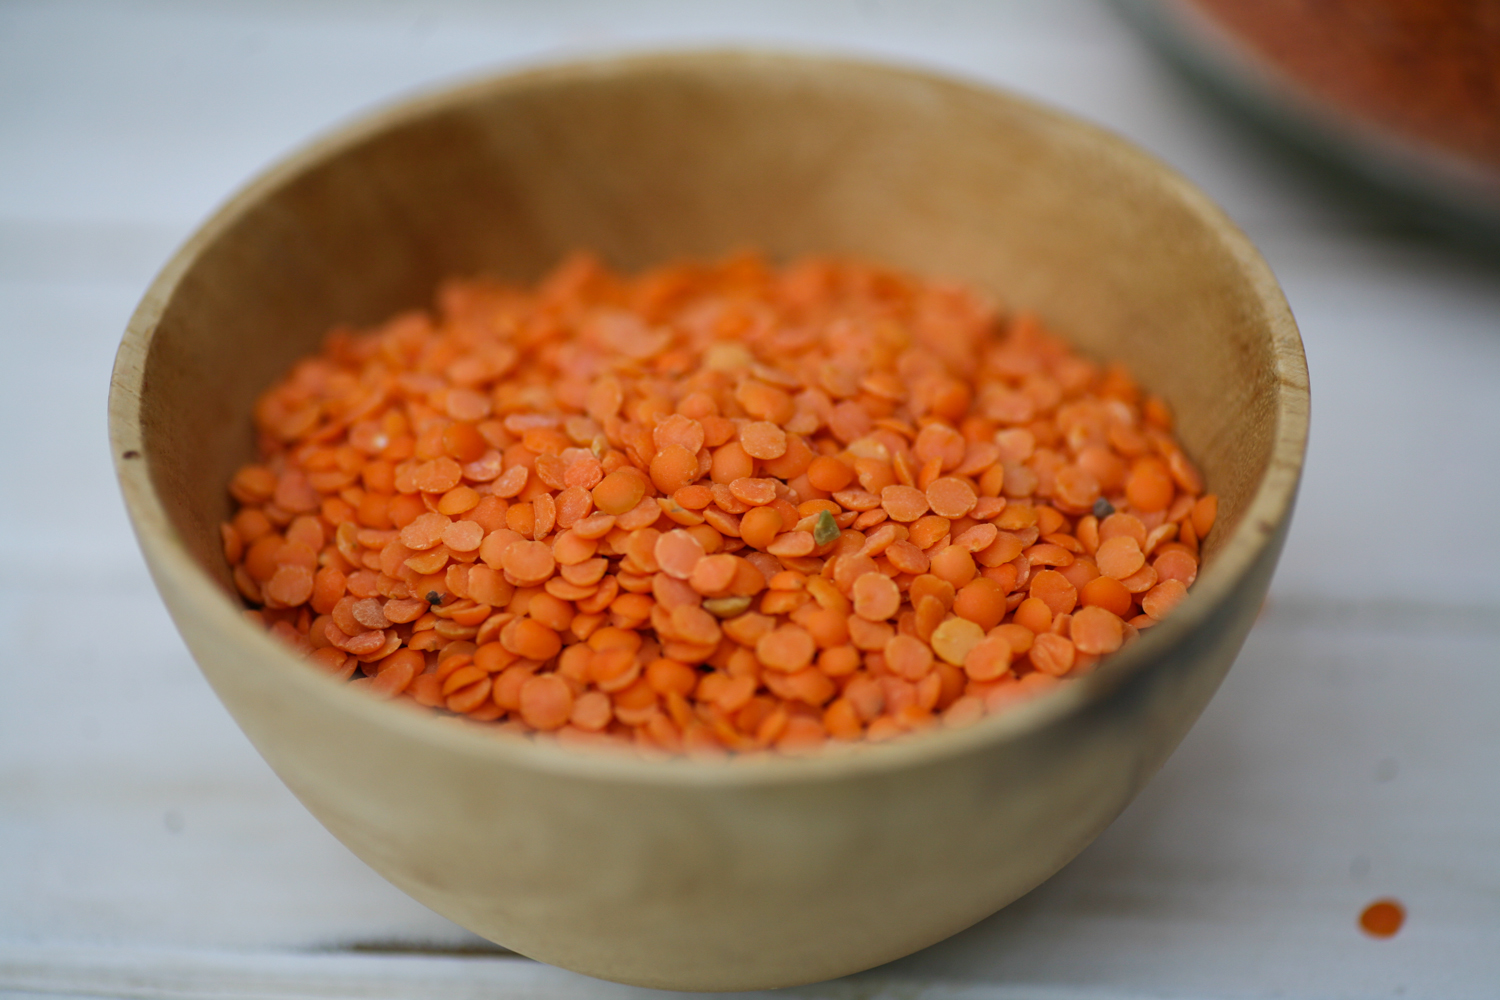
There are a couple of lentils that do not require soaking over night and take a very short time to cook. Masoor dal or red split lentils, as they are more commonly known, are a staple in my store cupboard. From cleaning thoroughly to cooking, the dal takes no longer than 20 minutes to prepare – and that’s being generous – on average it’s a 15 minute meal to prepare and cook. Oooh Jamie Oliver would be so proud!

IMG_7322

Red split lentils are also very reasonable to buy so all in all this dish is healthy, speedy and economically friendly. A win win surely!

IMG_7358

I eat this dish all year round and like to change the consistency from a more runny, soupy dish to a thicker dal that may be eaten the Indian way, with your hands, accompanied by some rice or naan.  When the months turn colder I tend to gravitate more and more towards dals and soups to warm me up so this really is the perfect autumn meal to give me that inner glow.

Panch Phoron – Bengali Five Spice

Makes enough to last you for months

3 tbsp cumin seeds

3 tbsp fennel seeds

3 tbsp fenugreek seeds

3 tbsp mustard seeds (I tend to use black, but brown/yellow is also fine)

3 tbsp nigella seeds (black onion seeds)

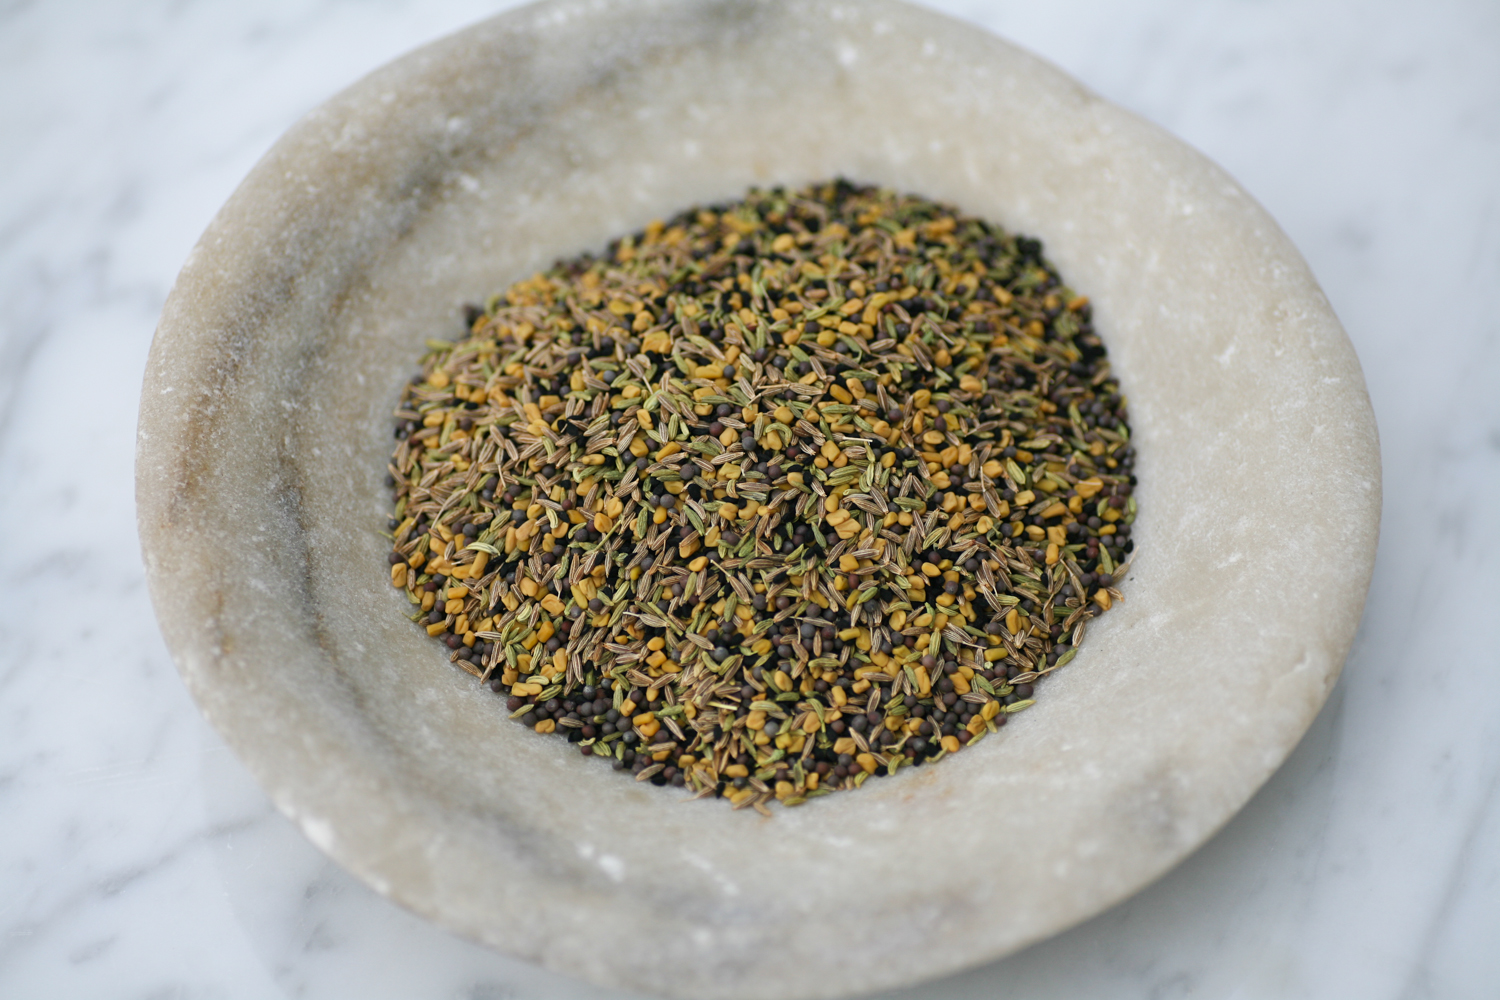
1. In a bowl mix all the seeds together thoroughly and place in an air tight container.

********************************

Red Split Lentil Dal

Serves 2

200g red split lentils (masoor dal)

500ml of water, add more if you would like it a thinner consistency

1 tbsp oil (mustard,vegetable or sun flower oil)

1.5 tsp panch phoron

2 fresh chilli (red or green), chopped in half

1 tsp turmeric

1 tsp salt

5 cherry tomatoes (or carrots, courgette, marrow, peas etc)

optional

fresh coriander, to serve

lemon wedge, to serve

1. Boil the kettle and meanwhile rinse the red split lentils under the tap so as to fully clean them. Then place the boiling water in the pan with the lentils. Boil for about 10 minutes on a low heat, the lentils will become less orange in colour during the boiling.  If you are going to add a carrot you need to add it to the lentils at this stage so that they are soft in time. Please note you may need to add more water if the water is completely soaked up by the lentils.

2. In a frying pan warm the oil and when it is hot add the panch phoron, fresh chilli and turmeric. Once the panch phoron begins to pop and release the flavours – this will be around 15 seconds, give it a quick stir and then add a ladleful of the watery dal into the frying pan and mix the ingredients together.

3. Now place the contents of the frying pan back into the main pot with the red split lentil and stir.

4. Add the quartered tomatoes (or peas, courgette, marrow, spinach) at this stage and simmer gently for a few minutes.  Add salt to taste.  If you want it more soupy, add more water and if you want it thicker, let it simmer for longer.


Bengali Prawn Curry

IMG_4683

This Bengali prawn curry is one that was passed on to me by my mother-in-law and is, without doubt, my favourite of all prawn curries. The sweet undertones from the desiccated coconut and prawns blends superbly with the black mustard seeds and chilli powder, giving it a gently kick. I love to cook it using the king of all prawns, but it tastes equally good if you cook it using the smaller varieties as well. I do prefer to keep the tails mind you, both for appearance and because it holds the prawns together well, so if you can find prawns with shells and tails on I would always opt for those as opposed to buying the ones that have already been shelled and deveined.

IMG_4611

The prawns will be a greyish colour when you buy them. I bought frozen prawns and then let them defrost slowly over night in the fridge before peeling and deveining them in the morning. They remind me of the giant grilled prawns I would eat most evenings when I was staying on the shores of Lake Malawi for my honeymoon, many moons ago.

IMG_4620

Within seconds of being gently cooked the prawns will turn a fabulous pink and begin to curl into themselves. They only need a minute or so cooking on each side to seal them.

IMG_4629

The sealed prawns waiting to go into the curry sauce. The meatiness of them makes them a very satisfying and filling meal.

IMG_4641

Once the prawns have been added to the curry sauce let them simmer gently for a few minutes, making sure you coat the prawns sufficiently in the delicious sauce. Sprinkle ground garam masala over the prawns and give a little stir, before serving with basmati rice.

Bengali Prawn Curry

Serves 3-4

600g prawns, peeled, deveined but tails left on (I used 9 frozen super king prawns)

1 medium sized white onion, finely chopped

3 garlic cloves, finely chopped

1 inch piece of fresh ginger, skin removed and grated

vegetable oil

2/3 bay leaves

1 tsp black mustard seeds

25g (or 4/5 tbsp) desiccated coconut

1 tsp turmeric powder

1 tsp sugar

1 tsp chilli powder (less if you prefer it less hot)

1 tsp cumin powder

1 tsp coriander powder

1 tsp salt (you may wish to add one more – taste first)

2tbsp chopped tin tomatoes

200ml boiling water

1 tsp ground garam masala

1. Heat a couple of tablespoons of vegetable oil in a fairly deep frying pan or karahi. On a low heat add the prawns, in stages if your pan is on the small side, so as to seal them. They will curl up slightly and take on a vibrant pinkish hue. After a minute or so turn them over so that both sides are sealed. Then turn them on to their backs so as the top side is also cooked. Remove from the pan and place on a plate to one side, whilst you finish cooking the remaining prawns.

2. Add a little more vegetable oil if it is running dry and keeping the oil at a low heat add the black mustard seeds. They will burst open and sizzle so make sure the oil is not too hot as they will spit! Add the bay leaves and stir with the black mustard seeds.

3. Add the onion, garlic and ginger to the pan and cook gently for around 5/6 minutes until they begin to bronze in colour.

4. Add all the spices apart from the garam masala, as well as the salt and sugar.  Stir together and add the tinned chopped tomatoes.

5. Add 200ml of boiling water and add the desiccated coconut. Bring to the boil gently stirring and add the prawns. Gently cover the prawns in the sauce and simmer for a few minutes. Taste and add more salt if necessary.

6. Add the ground garam masala over the prawns, give a quick stir and serve immediately.

Serve with basmati rice.


Fine Green Bean and Potato Curry

After every few days if I have not had Indian food (basically my chilli fix) of some capacity I start craving dal, vegetable curry or some succulent fish or meat curry. They are always fun to make and really do not take long to prepare once you know how and best of all they are always guaranteed to bring a smile to Mr B’s face after the stresses of commuting in London town. I am a total believer that the way to a man’s heart is through his stomach – although the same could be said for me come to think of it.

As delicious as steamed or boiled fine green beans are in their own right, this Bengali dish just takes them to a new level and gives them their own identity. It’s definitely one of those dishes that you can rustle up in a short space of time and enjoy with dal (or a meat/fish curry) and some Indian bread or rice, to create a really delicious, healthy (let’s just ignore the cooking oil this once!) and low cost meal.

The ingredient list is short and I always have them in my store cupboard. The only spice that maybe unknown to some of you is kalo jeera – which is also known more widely as nigella seeds. They are really easy to come by and are pretty mainstream even in the supermarkets. I have used mustard oil, but if you do not have this to hand a simple vegetable oil will be equally suitable.

 Fine Green Bean and Potato Curry

Serves 2-3 (accompanied by a dal)

350g fine green beans

1 large potato, peeled and cut into small cubes

2 tbsp mustard oil (or vegetable oil)

1 tsp nigella seeds

1 tsp turmeric

150ml boiling water

2 tbsp of chopped tinned tomatoes

1/2 tsp salt

1/4 chilli powder (optional)

1. Heat the mustard or vegetable oil in a pan and when it is piping hot add the nigella seeds. After 10 seconds add the potato and green beans and stir to coat the vegetables in the nigella seeds.

2. Add the turmeric, salt, chilli powder (optional) and chopped tomatoes and stir once again. After a few minutes add 50 ml of boiling water, stir and place a lid on the pan. Keep on a low heat and simmer gently.

3. Once the water has completely dried up add a further 50 ml of  boiling water, which will help soften the potato and green beans. You will probably need to add a further 50ml of boiling water during cooking as you want the beans and potato to be soft and not crunchy. The dish should be ready between 20-25 minutes. It can be stored easily in the fridge for a couple of days should you not finish it all in one sitting – although if you are like me, you will.

Happy eating.