Indian Scotch Eggs

On my first trip to Kolkata – 13 years ago – I was introduced to my new extended Indian family, going from home to home, meeting a bevy of smiles and warmth behind each door. Every household we visited offered food in great abundance – either a full meal or some delicious snacks. I struggled a little with the sweet treats, not having a sweet tooth, but the savoury snacks were something else.

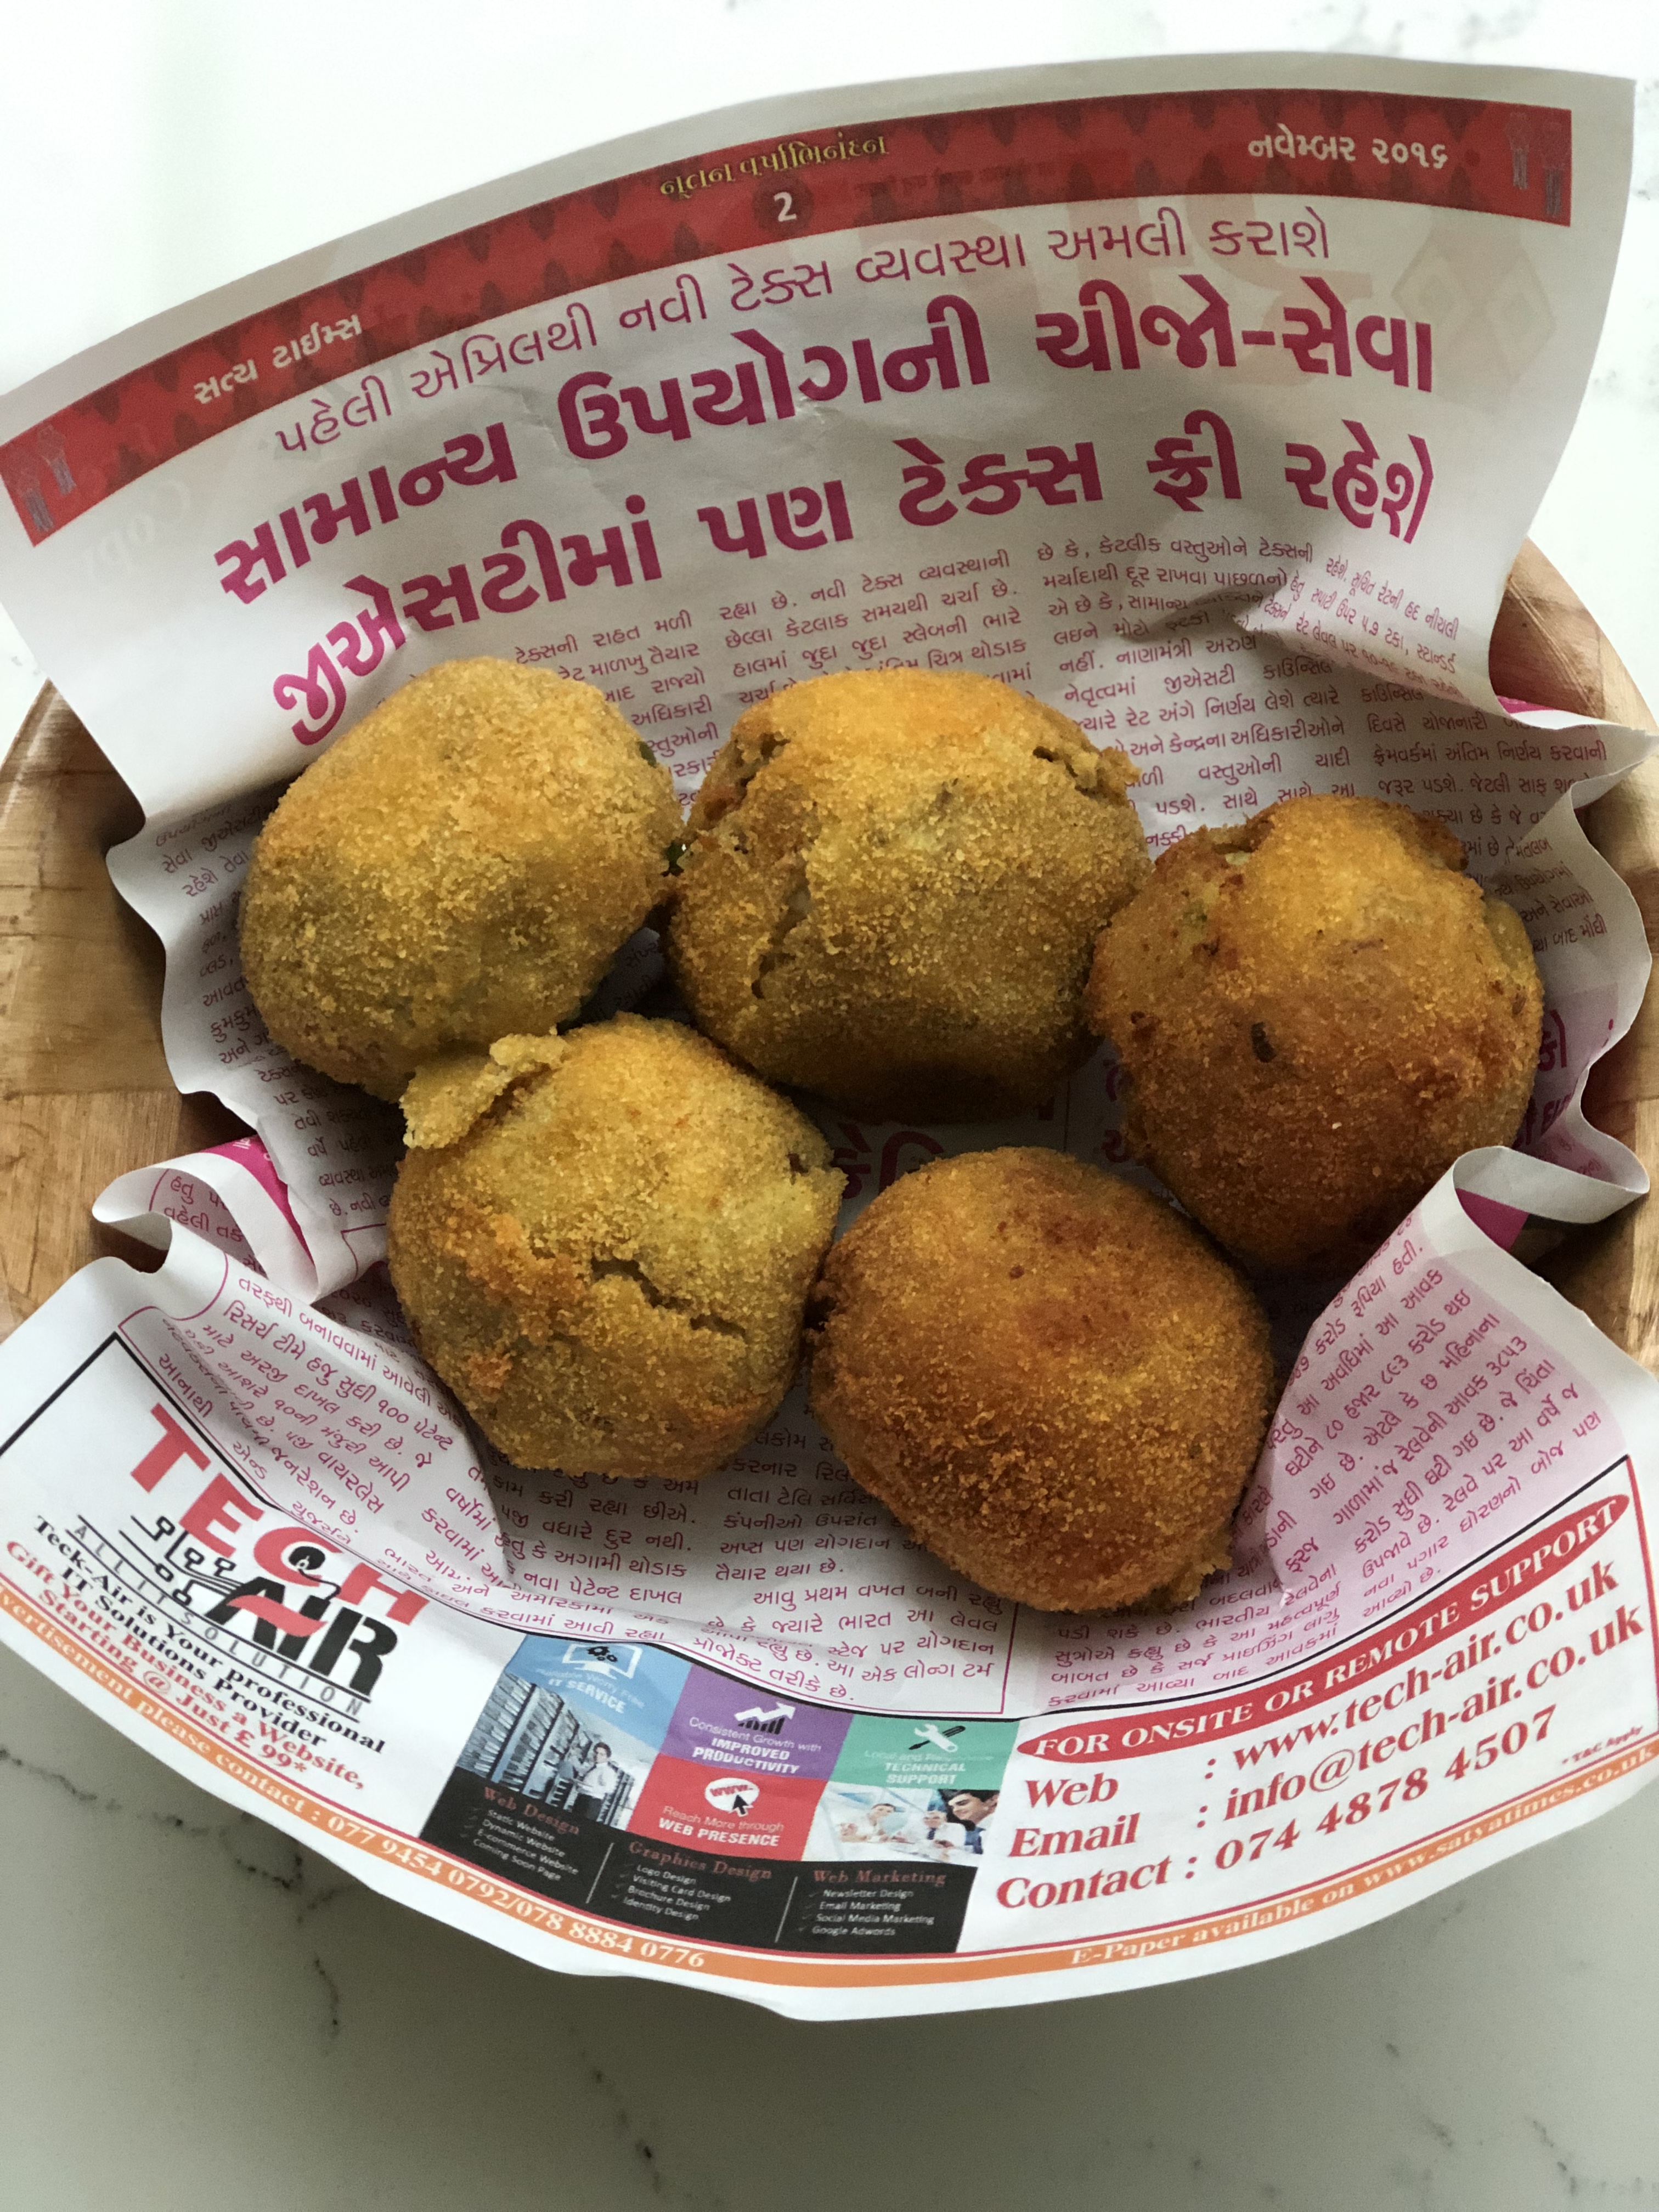
As we normally saw three or four different families on average each day I had to be diplomatic when it came to eating. Not eating would be disrespectful, so I had to pace myself. One of life’s more pleasing conundrums. One snack that really stood out was Indian Scotch eggs, which were just so heavenly. Unlike your traditional Scotch egg which has sausage meat covering the egg, this one has spiced potato and has half a boiled egg per ball.

I have been trying to replicate the recipe ever since and I think I am pretty close so I wanted to share it with you all today.


Indian Scotch Eggs

makes 6 

5 medium potatoes, peel and boiled then mashed

1 tsp cumin seeds

1 tsp garam masala

1/2 tsp turmeric

1 tsp garlic-ginger paste

1 tsp salt, to taste

2 small fresh green chillies, finely chopped

handful of fresh curry leaves, finely chopped – optional

4 eggs

breadcrumbs – either freshly made, panko or bought

4 tbsp sunflower/vegetable oil for frying


  1. First peel and boil the potatoes until they are soft. This usually take around 10-12 minutes. Drain and then mash until smooth. Do not add any butter or milk. They must not be too wet.
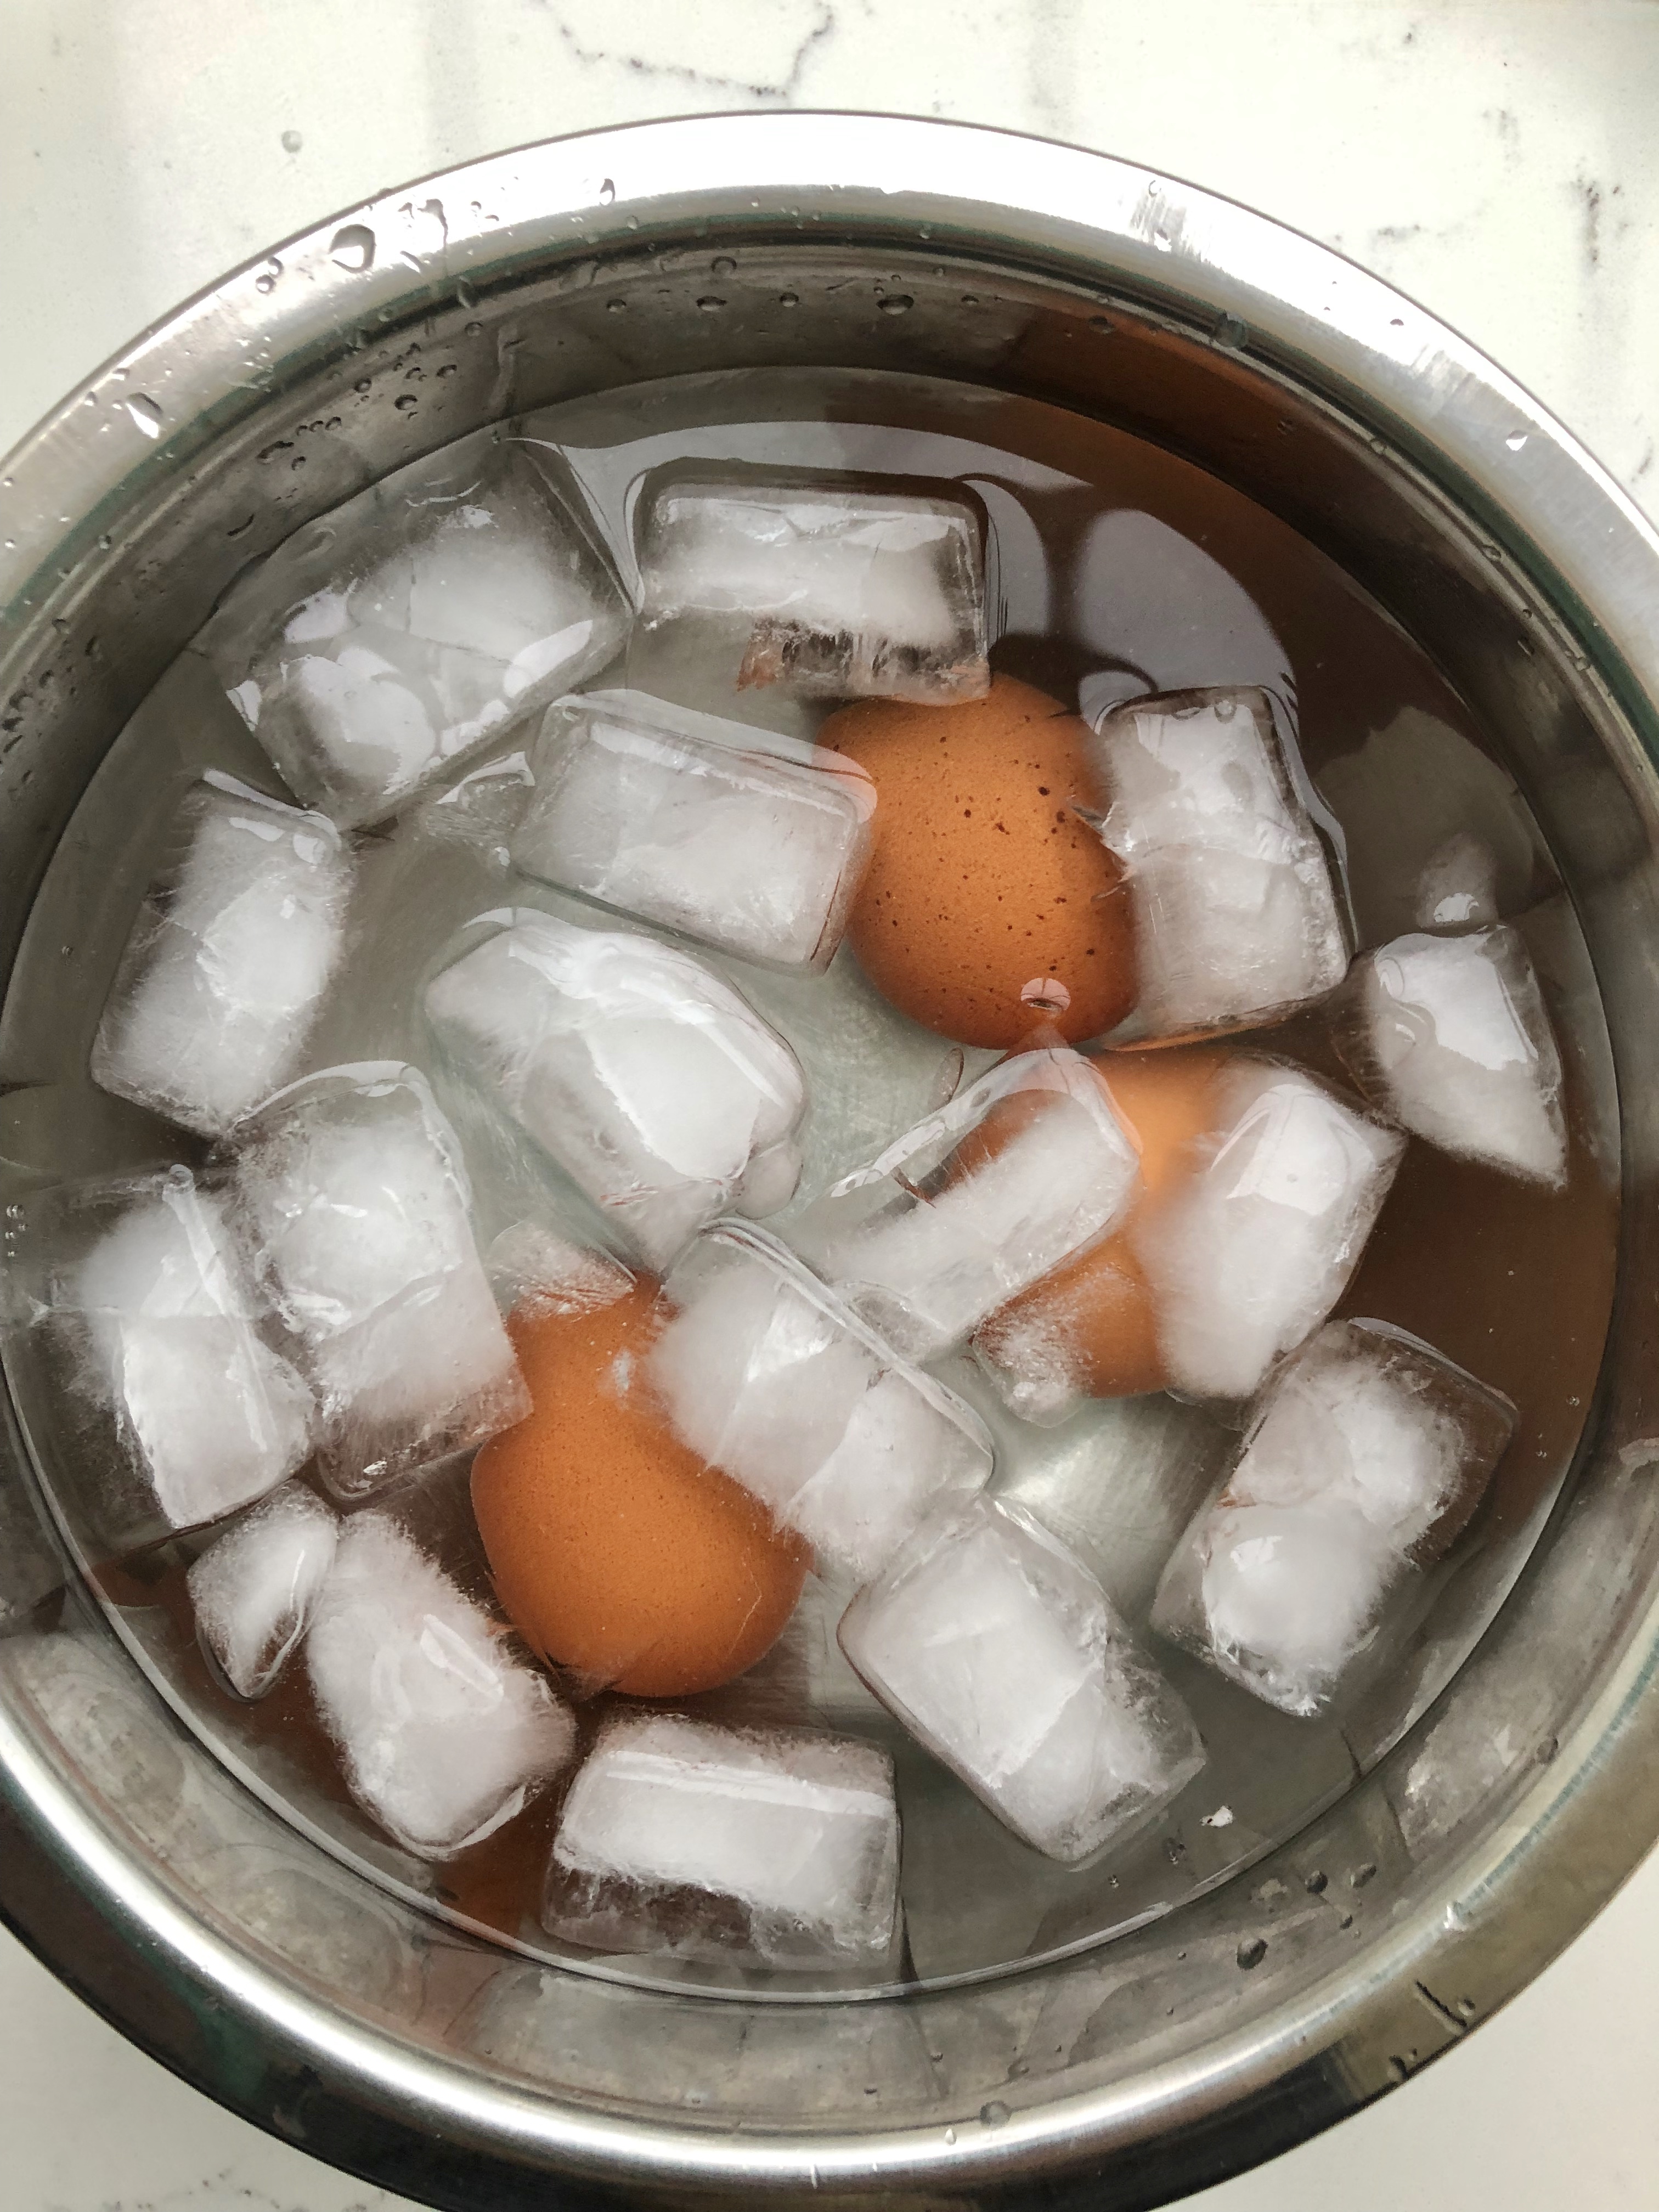
  2. Meanwhile boil 3 of the eggs by placing them in a pan of cold water and then once it is simmering, turn it down and leave to cook for a further 8 minutes so that they are completely hard. Once cooked drain and immediately put in a bowl with ice and cold water – this will allow you to peel the egg really easily. Leave the eggs to sit for a few minutes before peeling them and leaving them to rest on a plate
  3. Add the spices, garlic-ginger paste, chillies, fresh curry leaves if using, salt and mix in thoroughly. Allow to cool before handling the potato.
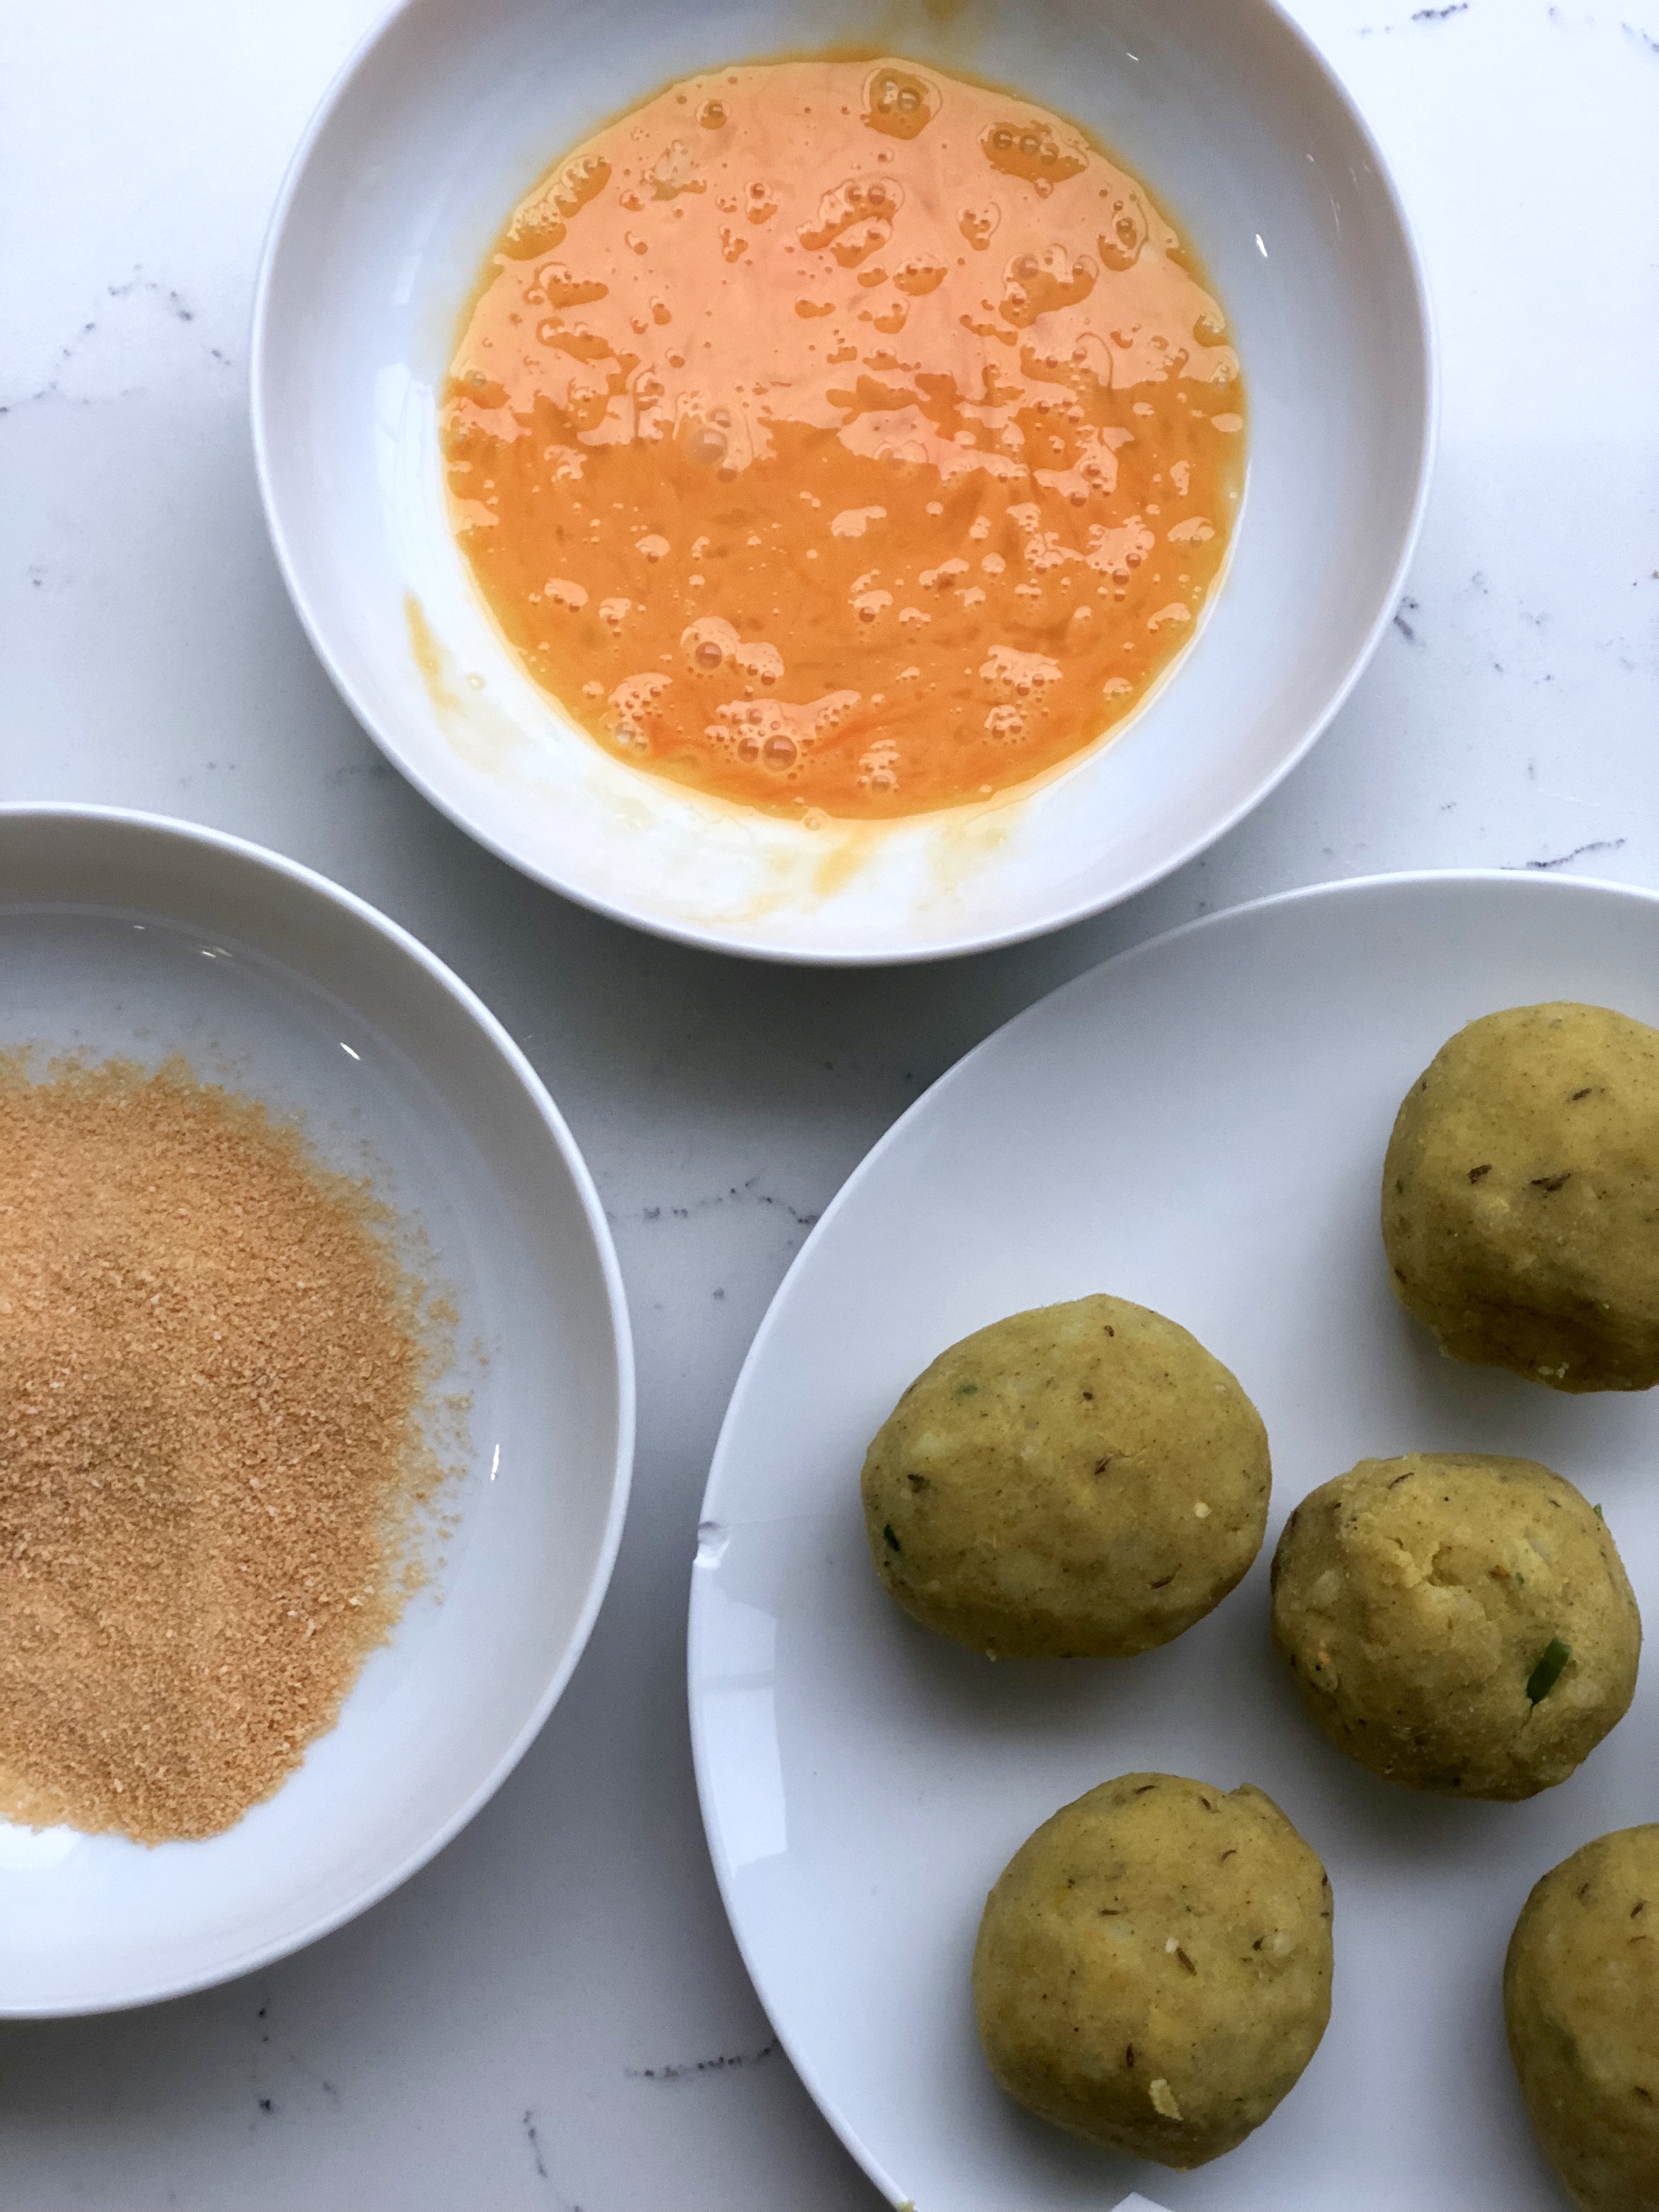
  4. In a shallow bowl add the remaining egg and whisk.
  5. In a separate bowl add some breadcrumbs.
  6. Halve the eggs, lengthwise. Take a small amount of spiced mashed potato into your hand and place the egg, yolk side down, onto the mashed potato. Gently cover the whole egg with the potato to create a ball. Place to one side whilst you do the same to the remaining eggs.
  7. Now take one potato ball at a time and gently roll it in the whisked egg followed by the breadcrumbs then place on a plate. Complete the rest.
  8. Heat the oil and when it is hot gently fry each potato ball, a couple at a time, turning at intervals so that the breadcrumb coat bronzes nicely. Place to one side, whilst you complete the rest.
  9. They are wonderful eaten hot, but equally you can serve them at room temperature – perhaps perfect for a train journey.

I like to eat them with a chutney. My tamarind and date chutney works really well.


Indian Chana Dal – Sweet and Salty

As some of you may know I am a BIG dal fan. Huge in fact, I love the stuff, and I am always trying to convert the uninitiated. Dal is an Indian lentil soup, or porridge of sorts, that can vary in consistency depending on personal preference. There are so many varieties, using a wide range of lentils, that there is at least one to appeal to every palate. For the most part (some need soaking) they are quick and very easy to make. Once you have bought a few staple ingredients for your pantry, you will find that cooking dal is a very economical meal to cook and, for many in the Indian subcontinent, an essential source of inexpensive protein.

Chana dal, also known as cholar or yellow split lentil, is one of my personal favourites. It is absolutely delicious with delicate sweet undertones coming from the coconut and sultanas. I use desiccated coconut, however in India as coconuts are more readily available, they often use shavings of freshly fried coconut. I eat it for lunch or dinner, although out in India it is even served up for breakfast!

Unlike the red split lentil dal, which I spoke about in an earlier blog, you need to think a little ahead for this dal as the yellow split lentils need to soak for a number of hours. I always soak them over night, but if you check on the packet you will probably find that you can soak them in the morning and they will be ready to cook by the afternoon/evening.

Chana Dal

Serves 4-6

300g of chana dal, soak overnight

1 tbsp of oil

1 tsp panch phoron

3 bay leaves

1/2 tsp turmeric

1/2 tsp chilli powder (more if you prefer it hot)

sultanas, handful

1 tsp of ghee/butter (optional)

1 tsp of sugar

1 tsp salt

2 tsp of desiccated coconut

  1. Before cooking soak the lentils overnight ideally or at least for a few hours.
  2. After soaking, remove the water and refresh with more water. Boil on a low heat, until soft, approx. 20 mins (45mins + if not soaked). You will know they are soft when you are able to squeeze them easily between your fore finger and thumb. If they are still a little hard, leave them to boil for longer.
  3. In a new pan heat a tablespoon of oil on a low heat. Add the panch phoron, bay leaves, turmeric, chilli powder, sultanas, salt and sugar.
  4. Move around the pan for 20 seconds max, so that it does not burn, and add a couple of spoonfuls of chana dal and stir into the pan. Then transfer all of the contents of the pan into the original pan. Add more salt if necessary.
  5. Add the ghee/butter if using. Sprinkle the desiccated coconut over the top of the dal and let it simmer for a few minutes.

Other additions to this dal is to add fresh green or dried red chillies instead of chilli powder. If you have fresh coconut to hand then thinly slice it into pieces (no more than a handful) and bronze initially in a little ghee, remove and place to one side. Scatter on top at the end instead of the desiccated coconut.

SaveSave

SaveSave

SaveSave

SaveSave

SaveSave

SaveSave

SaveSave


The Perfect Steamed Lemon Chicken

I have always been massively underwhelmed when ordering lemon chicken at Chinese restaurants to the extent that I never order it anymore as I don’t want to have further disappointments. It’s always far too sweet and the chicken looks too white and unappealing. So you can guess how delighted I was when I recently tried Neil Perry’s ‘Steamed Lemon Chicken’ recipe that actually tasted really good. I am a HUGE fan of the Australian chef  and his beautifully presented book ‘Balance and Harmony’. It was in his book that I found this recipe that is now one of my absolute favourites.

The beauty of Perry’s ‘Steamed Lemon Chicken’ is that it is really really easy. Seriously it is definitely going to become one of my ‘go to’ recipes that I can rustle up really quickly and yet can also be perfect to offer guests coming around for dinner.  Steaming the chicken really retains the flavour and tenderness through the use of steam and is one of the most healthy forms of cooking. It’s a win win.

The key with a good lemon chicken is to buy thighs and not breast meat folks as it is so much more tasty and tender. Seriously, do not think about buying breast meat for this recipe as it really won’t taste half as good. Trust me on this one.

The only alterations I have made to Perry’s recipe are:

1) As I did not have peanut oil to hand I used ground nut oil as an alternative.

2) Neil Perry’s recipe uses 350g of chicken and I have used 550g so my chicken needed more steaming time. He suggested 25 minutes but mine needed closer to 40 minutes.

Steamed Lemon Chicken

Serves 2-3

550g free-range or organic chicken thigh fillets, skin on (if possible), each cut into 3 pieces

1 1/2 (one and a half) lemons, quartered lengthways

a pinch of freshly ground white pepper

2 spring onions (scallions), cut into julienne

Marinade

1 tbsp shaoxing

1 1/2 tbsp light soy sauce

1 1/2 tbsp oyster sauce

2 tsp sesame oil

1 tbsp peanut/ground nut oil

2 tsp sea salt

1 tbsp sugar

 1. Place the chicken thighs in a shallow heatproof bowl and squeeze the lemon juice over the chicken and add the lemon skins to the bowl.

2. Prepare the marinade and add to the bowl of chicken and mix thoroughly using your hands and leave for at least 30 minutes so that the marinade can infuse the chicken with it’s wonderful flavours.

3. Firmly cover the bowl with foil and place into a large bamboo steamer (you can also use a steam oven if you do not have a bamboo steamer – both work equally well).

4. Place the bamboo steamer on a rack over a pot/wok of rapidly boiling water – you will need to place a couple of  inches of water into the pot. Put the lid on and steam the chicken for 40 minutes.  You will need to turn the chicken once during cooking so be careful when removing the lid and foil as the steam will be very hot. To check the chicken is cooked sufficiently make a small incision into the flesh to see that it is fully cooked and not pink! If it is not quite done, continue to steam for a further few minutes. If you cook with a smaller amount of meat – 350g – steam for 25 minutes.

5. Carefully remove the bowl from the steamer and place the chicken onto plates, or a warmed central plate and sprinkle with ground white pepper and spring onions.  Serve with rice.


A special curry for REAL foodies

I’ve been procrastinating about sharing this blog recipe with you all for some time now as I know that if I mention three certain words I would guess that possibly 80% of you will just reach for your mouse or control pad and head straight out of this blog entry, quicker than you can say…….

CHICKEN

LIVER

CURRY

Ahhhhhh I said it. Is anyone still there?

Anyone?

Anyone?

Phew at least there are still a few of you still curious to find out more.

I think our fear and loathing of liver stems largely from our school days where it was rather unceremoniously dumped on our plates with some watery greens and some white looking mush that vaguely resembled mashed potato. It wasn’t great, I admit – and thats coming from someone who actually liked her school food.

My opinion of liver changed completely when my mother-in-law started cooking chicken liver curry for me. It completely took me by surprise, so much so that I thought that I would try and convert a few of you. A real bonus as well is that chicken livers are so cheap to buy that even if you give this a shot once and you absolutely loathe it (which you won’t) then you are not wasting loads of money. It’s not as if I am asking you to try making lobster thermidor!

Chicken Liver Curry

Serves 4

Preparation time: 10 minutes

Cooking time: 35 minutes

1 large potato, diced

500g chicken livers

1 large onion, chopped

2 inch ginger, grated

2 small fresh red or green chilli (optional), chopped in two

1 large tsp of ground turmeric

1 tsp of ground coriander

1 tsp of ground cumin

1 tsp of salt

5 garlic cloves, kept whole

1 cinnamon stick, broken up

3 cardamom, opened up slightly

1 small tsp of vindaloo curry paste

100 ml water

a few glugs of olive oil

1. Peel and dice a large potato and then fry it gently in some olive oil for 5 minutes, stirring occasionally so that the cubes don’t get stuck at the bottom of your saucepan. Make sure that you are using a pan that is deep enough to hold all the ingredients and some water. After 5 minutes spoon out the potatoes and put to one side.

2. Fry the onions in the pan that the potatoes were in. You may need to add a little more oil at this stage.  After 6 minutes the onions should begin to be turning brown. At this stage add the grated ginger (and fresh chillies if you are using them – I tend not to for this curry) and stir into the onions.

3. Add the chicken livers and let them turn a whiter colour. Do not add any further ingredients until they have become paler in appearance, this should not take longer than 10 minutes. If you are cooking with rice, this is the perfect time to start boiling your rice so that the curry and rice are ready around the same time.

4. Now add the ground turmeric, ground cumin, ground coriander, salt, garlic and the potato to the chicken livers. Stir well, but gently, so that all the spices are mixed up evenly.

5. Add the broken up cinnamon stick, cardamom and vindaloo curry paste. Gently add a little boiling water – I tend to add the water in two stages of 50ml each. You may find that you do not need this much so add a little at a time. It will help soften the potatoes and garlic.

Serve with rice and dal.  I really think you will be pleasantly surprised. Let me know how you get on.