Brown Lentil, Smoked Sweet Paprika and Parsley Soup

Continuing on the theme of lasts weeks post I wanted to show you a recipe that incorporates garlic confit.

So who has made it yet? Be honest!

Basically garlic confit is great in soups, stews, broths and pastas. It adds warmth, flavour and many delicious notes to a dish.

You will wonder how on earth you survived without it until now.

The soup I wanted to show you I’ve made a few times since my discovery of garlic confit. It takes minutes to prepare and is addictively delicious. The brown lentils I use are the ones in glass jars, as I just think they taste a whole lot better. If you can only find the tinned ones then absolutely use those – it will still taste great.

I love soups whatever the weather but I know that it is not customary to eat hot soups in hot weather here in the UK. In India it is quite different and hot soups are eaten even in 35 degrees heat. This recipe does have autumnal tones and I think that it will appeal to a wide audience as the days get cooler – at least I hope so.

Brown Lentil, Smoked Sweet Paprika and Parsley Soup

Serves 4-6

3 tbsp oil from the garlic confit

8 confit garlic cloves

1 small white onion, finely chopped

2 medium tomatoes, finely chopped

1/2 tsp smoked sweet paprika

400g brown lentils

1 tbsp tomato puree

800ml of stock – vegetable or chicken

salt to taste

2 tbsp fresh flat leaf parsley chopped

juice of half a lemon


  1. In a large deep pan – I love to use my Le Creuset pot – add the garlic confit oil, along with 8 garlic confit cloves. Allow to heat up and then add onion and allow to soften.
  2. Add the tomatoes and smoked sweet paprika to the onion and garlic confit.
  3. When the tomatoes have softened, add the brown lentils and the tomato puree followed by the stock.
  4. Allow to come to the boil and then simmer gently for 10 minutes. Add salt to taste and then add the fresh flat leaf parsley and lemon juice.
  5. Serve immediately with some crusty bread.


Vietnamese Chicken Herb Salad

IMG_0254

When time allows I enjoy getting my weekly fruit and veg from my local market. Thankfully I live a short hop, skip and jump away from a seriously good one in West London, where the stalls are bursting with colourful produce and the stallholders have an infectious energy and enthusiasm for their produce. Bowls of fruit and veg go for £1 and when you buy herbs it’s two large bunches for a £1 – to ask for one just won’t do – so I invariably  end up with rather a huge amount of coriander, mint, parsley and dill.

IMG_0233

Dill, mint and coriander remind me of fond times in Vietnam – the food is so fragrant, largely due to mint and dill being in so many dishes, Cha Ca La Vong being a perfect example – you can see the recipe here. As I ended up with two huge bundles of cos lettuce, I decided to create a Vietnamese inspired chicken salad for our Saturday lunch. Something that could be thrown together quickly and that would appeal to the whole family.

IMG_0245

It was a success and we polished it all off in one sitting. Since then I have cooked it again (I still have lots of herbs to get through) and photographed it for you so that you too can prepare it at home. The dressing I use for the salad is the typical Vietnamese dressing of nuoc cham, which adds zing and sweetness, the perfect combo.

IMG_0237

Vietnamese Chicken Herbed Salad

Serves 4

450g chicken breasts

1 tbsp olive oil

black pepper

large cos/romaine lettuce, 6 leaves

handful of fresh coriander

handful of fresh mint leaves

handful of fresh dill

1 red chilli, finely sliced

2 spring onions, cut on the diagonal

**********

Nuoc Cham Sauce

1 tbsp fish sauce

1 tbsp rice vinegar

1 lime, juice only

1 garlic, finely chopped

3 tbsp water

1.5 tbsp white sugar

1. Cover the chicken breasts in the olive oil and season with a little black pepper. Meanwhile heat a griddle/cast iron pan and when it is hot place the breasts into the pan and bronze on each side for just under 2 minutes a side. Place on a baking tray in a preheated oven 180 degrees for 20 minutes.

2. Break off the lettuce leaves and cut into mouth size chunks and place in a large mixing bowl. Add the dill, mint and coriander leaves along with the finely sliced red onion, spring onions. If serving to children as well slice the red chilli and place in a separate side dish. Mix together gently using your hands.

3. Prepare the nuoc cham sauce by mixing all the ingredients together. If it needs to be a little sweeter add some more sugar, if you prefer it more sour add more lime.

4. Pour half the dressing over the salad and gently toss. Pour the remaining dressing in a small jug so that you can add more dressing over the individual salad portions as needed.


Chickpea, Chorizo and Cod Stew with Fresh Parsley

IMG_8582

My household are on a bit of a cod roll this week. There’s rather a lot of it in the freezer so we decided to cook cod a different way for three nights running – a little bit of a challenge and to prove that you can cook with the same key ingredient in different ways and make it taste completely different. Yesterday it was a Kerala fish curry with my toor dal and tonight we are having my three C stew; the three C’s being chickpea, chorizo and cod. It’s so darn delicious you’ll have to have especially strong willpower to stop yourself picking up your plate and licking every last drop of sauce. I find serving it with fresh crusty bread normally works a treat where mopping is concerned.

IMG_8577

Like most of the recipes on my blog it is very straight forward and if you don’t eat meat you can simply leave out the chorizo as you will still get the wonderful smokiness from the sweet paprika. The basic sauce can be cooked in advance and then the cod added five minutes before you are ready to eat, so it’s also perfect if you are cooking for a crowd and want to just enjoy the moment instead of slaving over a stove when they arrive. I also find that it works well as a very comforting and satisfying mid week meal. In fact it’s perfect to eat at any time, although I would probably pass if it were served at breakfast.

IMG_8589

Like a good old Victoria sponge cake there are many versions of cooking this dish, but here is mine. Let me know what you think. Oh and for those wondering what I will do tomorrow night, well I’ll probably do a tom yam broth with cod instead of prawns or maybe my Cha Ca La Vong – recipe here we’ll see which way the wind will blow in the morning.

Have a good weekend folks.

Chickpea, Chorizo and Cod Stew

Serves 4

3 tbsp olive oil

1 large white onion, chopped

4 garlic cloves, sliced

150g spicy Spanish chorizo, sliced or cubed

1 tsp sweet paprika

1 tsp rock salt

1/2 a 400g tin of plum tomatoes

1 tsp of tomato puree

100ml red wine

300ml boiling water

2 tsp agave nectar (or caster sugar)

400g tin of chickpeas, drained (240g after drained)

500g cod, skinned and cut into 2cm cubes

handful of fresh flat leaf parsley, roughly chopped

optional: bread for mopping up the juices

1. In a large pan heat the olive oil on a medium heat and when hot add the onion and fry gently for 5 minutes before adding the garlic and cooking for another 3 minutes so that the onion is soft and beginning to bronze.

2. Add the chopped chorizo and continue to fry for a further 3 minutes. Add the sweet paprika, rock salt and stir into the ingredients, which will have taken on a deep red colour.

3. Add the plum tomatoes, which you then need to cut up, red wine, tomato puree, boiling water, chickpeas and agave nectar. Let the sauce gently bubble away for 20 minutes. If it becomes too dry add a little more boiling water. Taste and see if you like the balance of sweet and salty, adjust if necessary.

4. Five minutes before eating add the cod and cover with the sauce. Do not stir too much as you do not want the cod to flake. If you can place a lid on the pan as it will allow the fish to cook through nicely.

5. Serve into bowl/plates with a scattering of fresh parsley on top and fresh bread to mop up the sauce.


Turkey Revisited and Moule Mariniere

IMG_0508
Having been impressed by all that Turkey had to offer last year we decided to return for our summer foray this year, which is a little out of character as we tend to try somewhere new for summer travels. To be fair though, we were exploring  a new area – this time the Bozburun peninsula.
IMG_0470
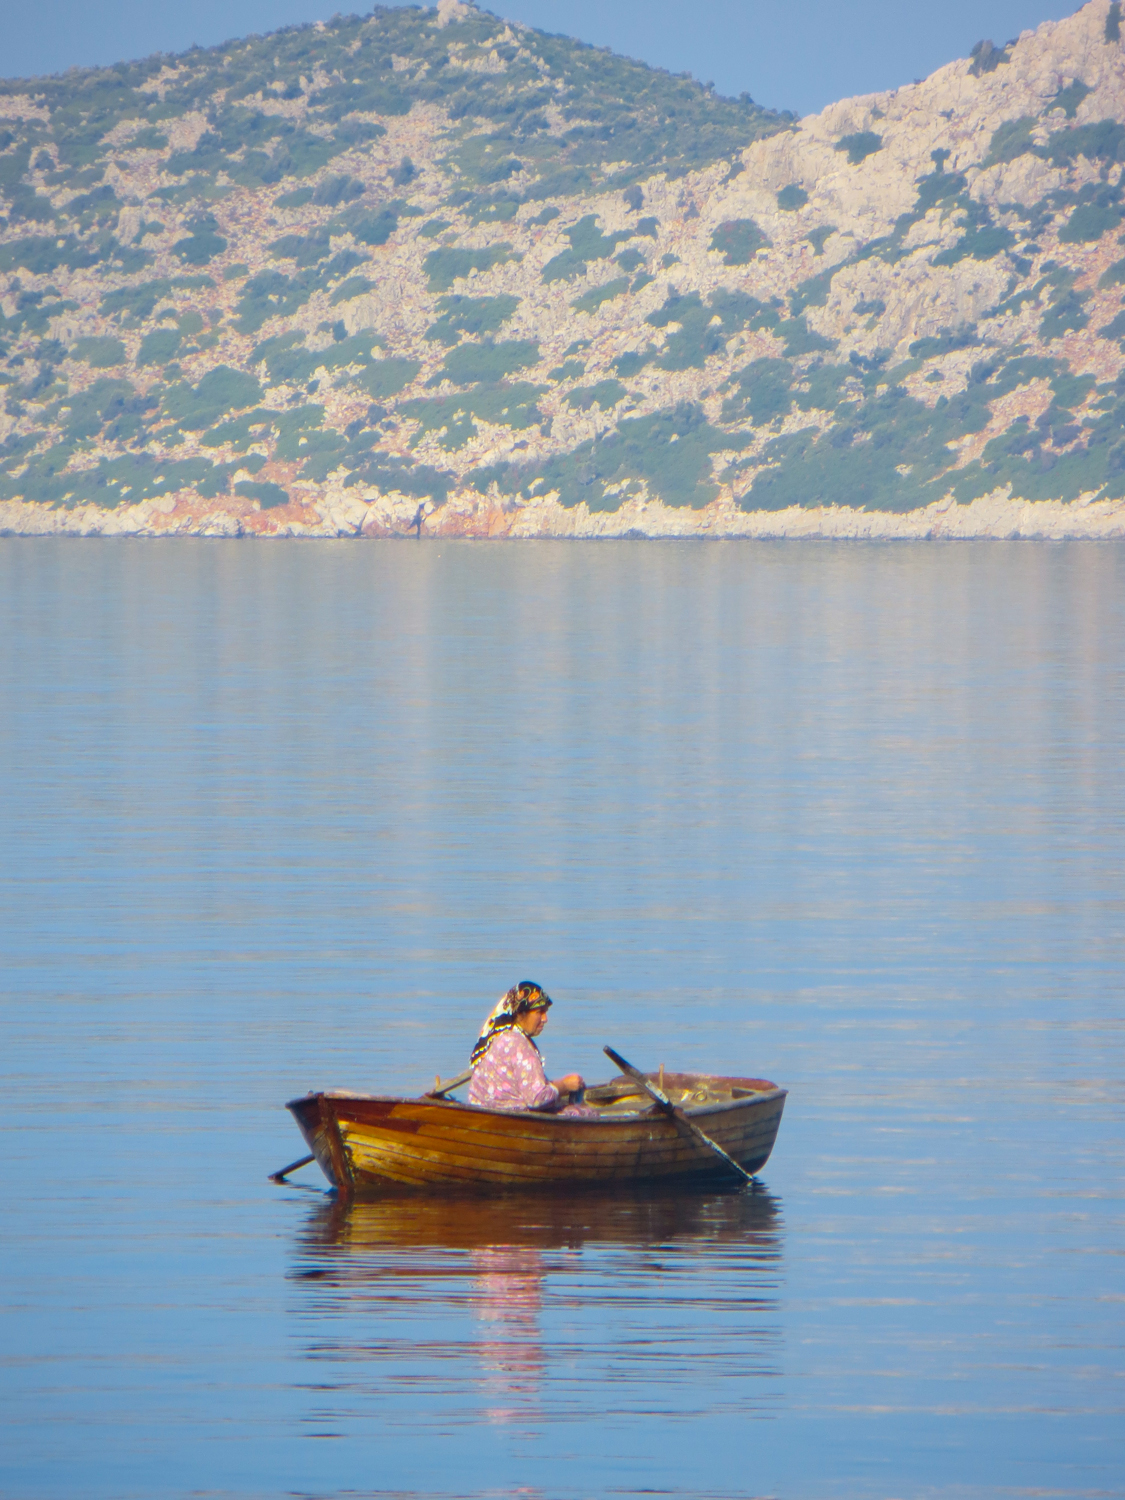
I favour peace, tranquility and being away from the crowds of mass tourism, so nestling for a couple of weeks in the quiet village of Sogut at the very tip of the peninsula was absolutely the perfect base from which to explore the local area and enjoy the warm waters of the Aegean. It has been described as going back in time, not dissimilar to the south of Spain or France 40 years ago.
IMG_0241
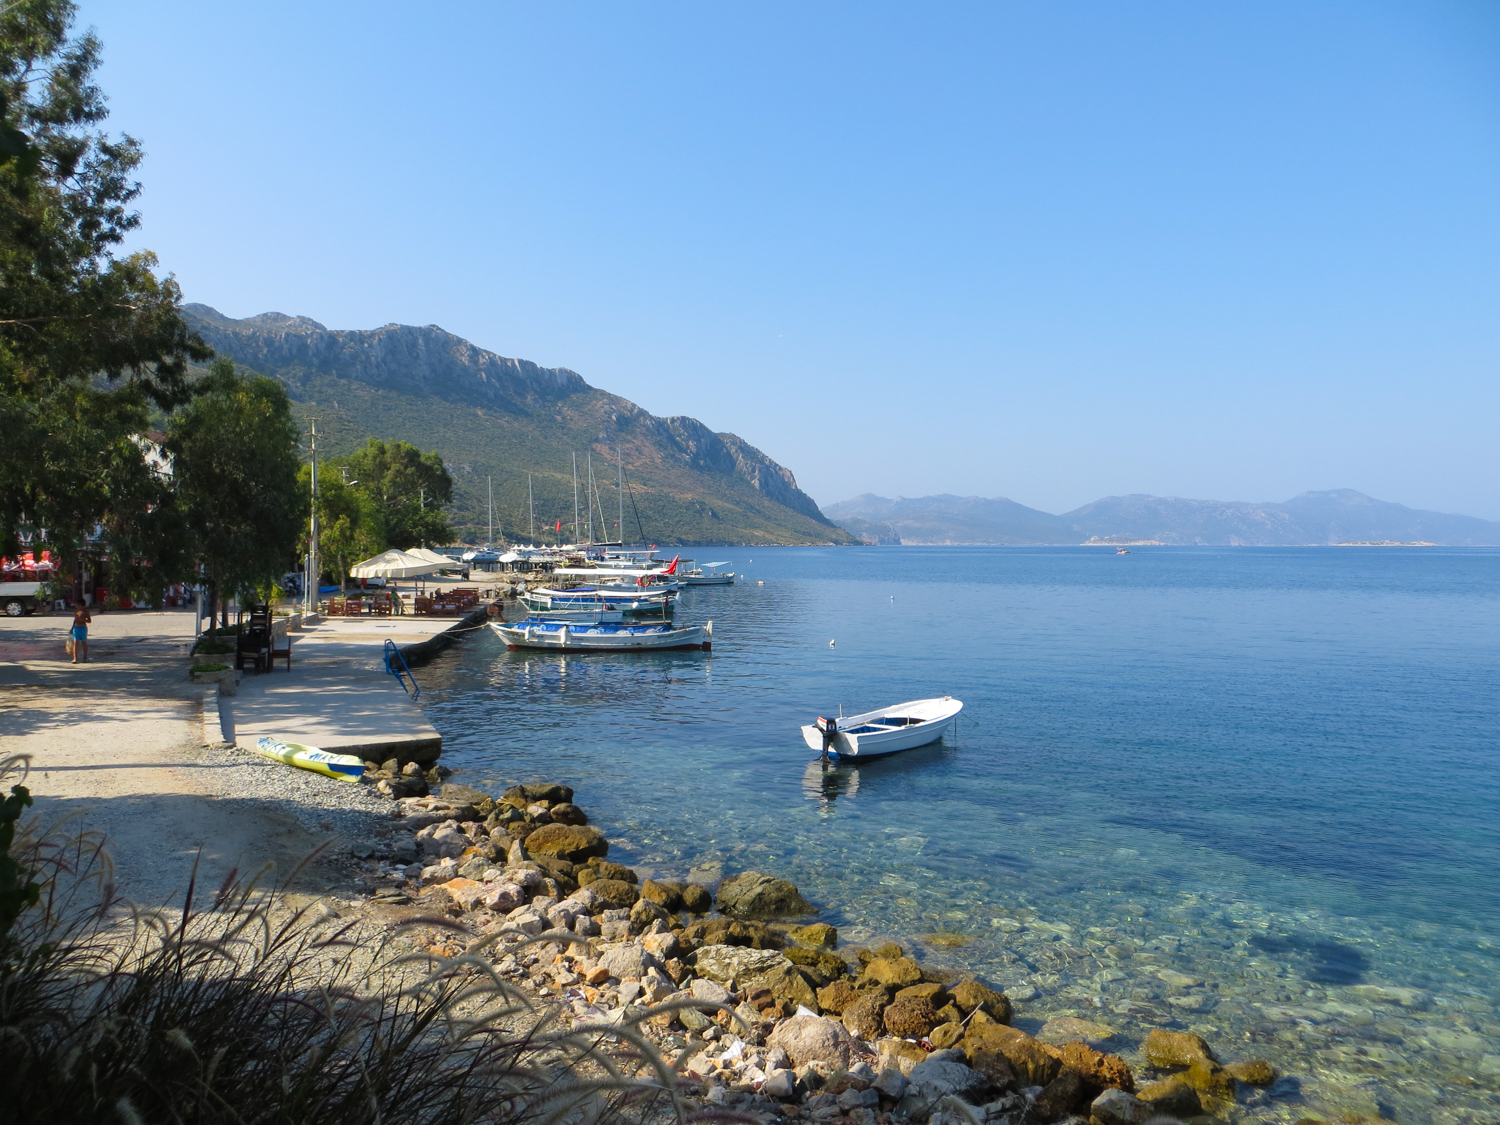
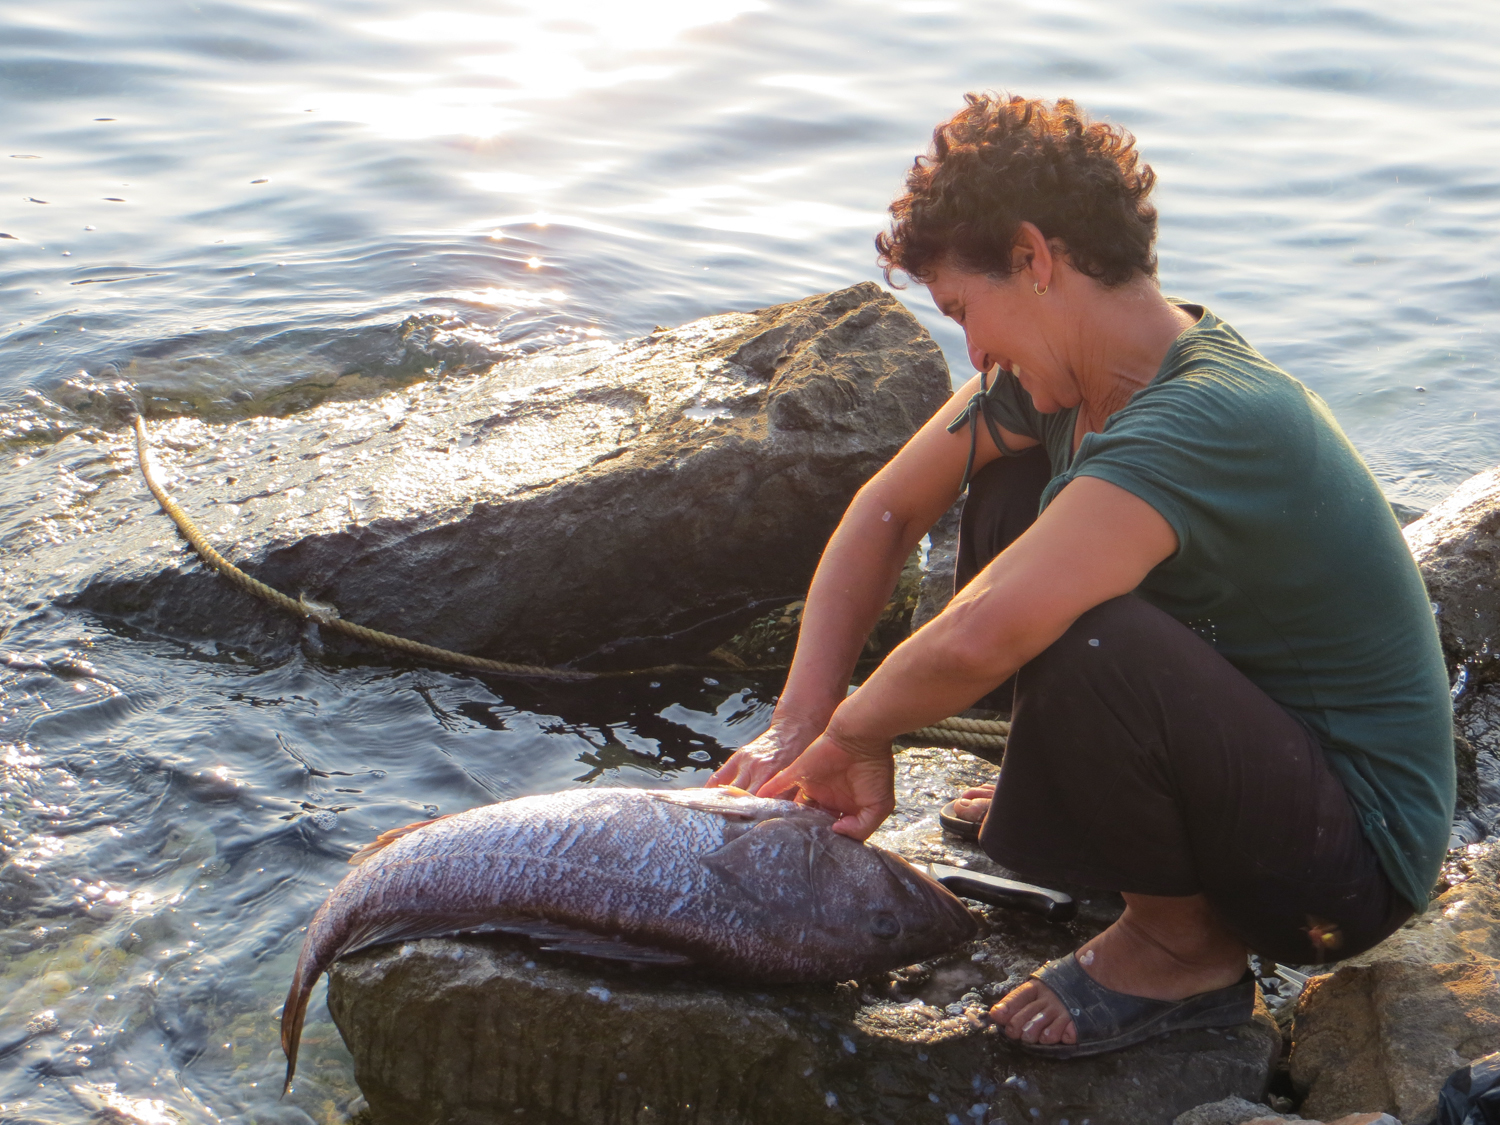
The village itself is small and meanders down the hill towards the sea, offering breathtaking vistas of the nearby islands. The road came to an end at a picturesque harbour where a handful of wooden fishing boats bobbed gently up and down. Along the harbour were a few tavernas offering the freshest fish caught that very day. As the fish were bought in on the fishing boats the women would crouch over the rocks at the water’s edge gutting and cleaning the fish.
IMG_0298
Over the two weeks we alternated between these quaint little eateries (there were four in all) for our evening meal, sitting on the harbour wall, watching the sun gradually dip over the brow of the far away islands.
IMG_0406
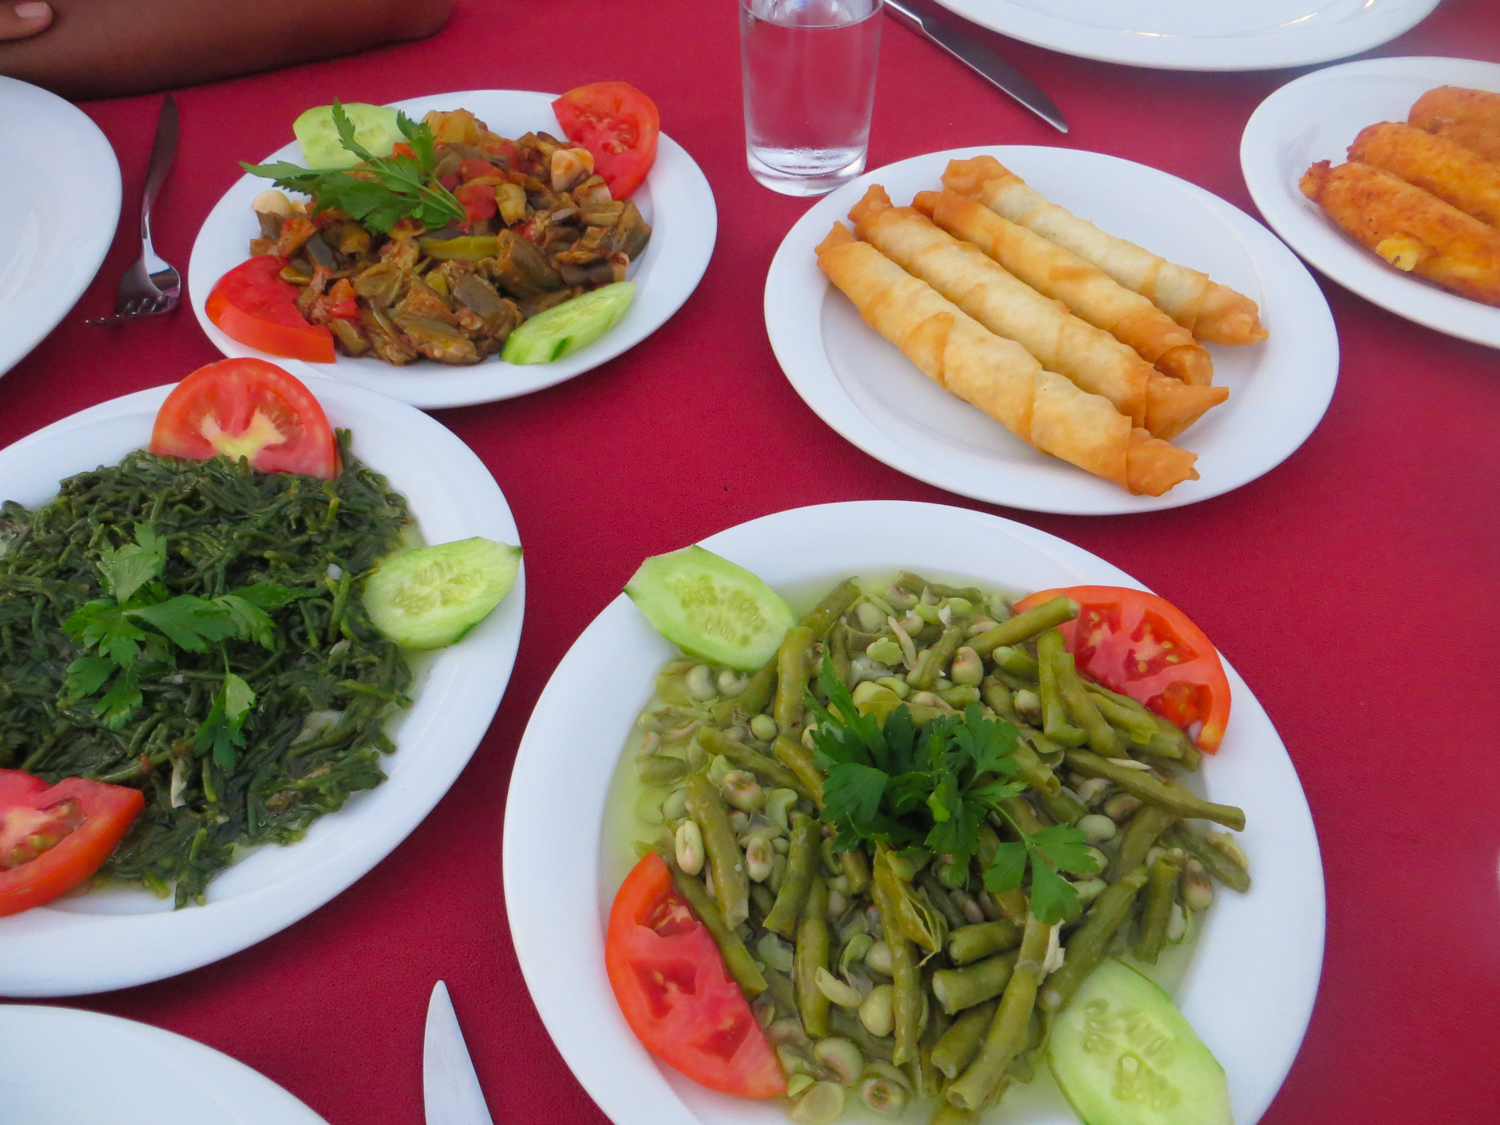
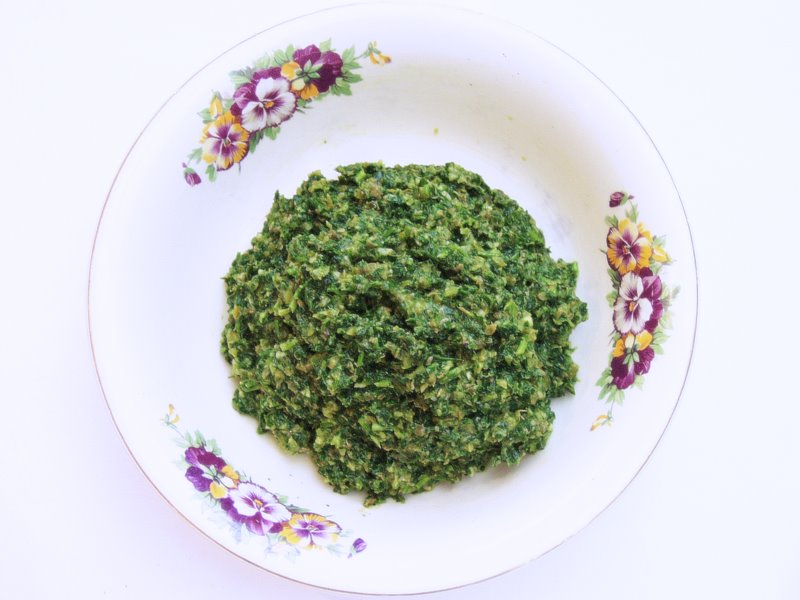
Their menus were all fairly similar, but each had their own interpretation of the mezzes. We were somewhat surprised to see that samphire was offered every evening, cooked in garlic, lemon juice and olive oil. 2013 can definitely be remembered as the summer of samphire!
IMG_0566
It tasted less salty than the samphire found in the British Isles and when I asked where it grew, they pointed in-land as opposed to  seawards,  which might explain its less salty taste.
Octopus grilled with garlic, herbs, pink peppercorns and olive oil was another daily staple to the point that I fear that Mr B will start to have cold sweats if he doesn’t have it back at home now and again.  Needless to say a number of the mezzes consisted of aubergine and tomato fusions with the ubiquitous garlic and olive oil, as well as a broad bean based humous and another including beetroot.
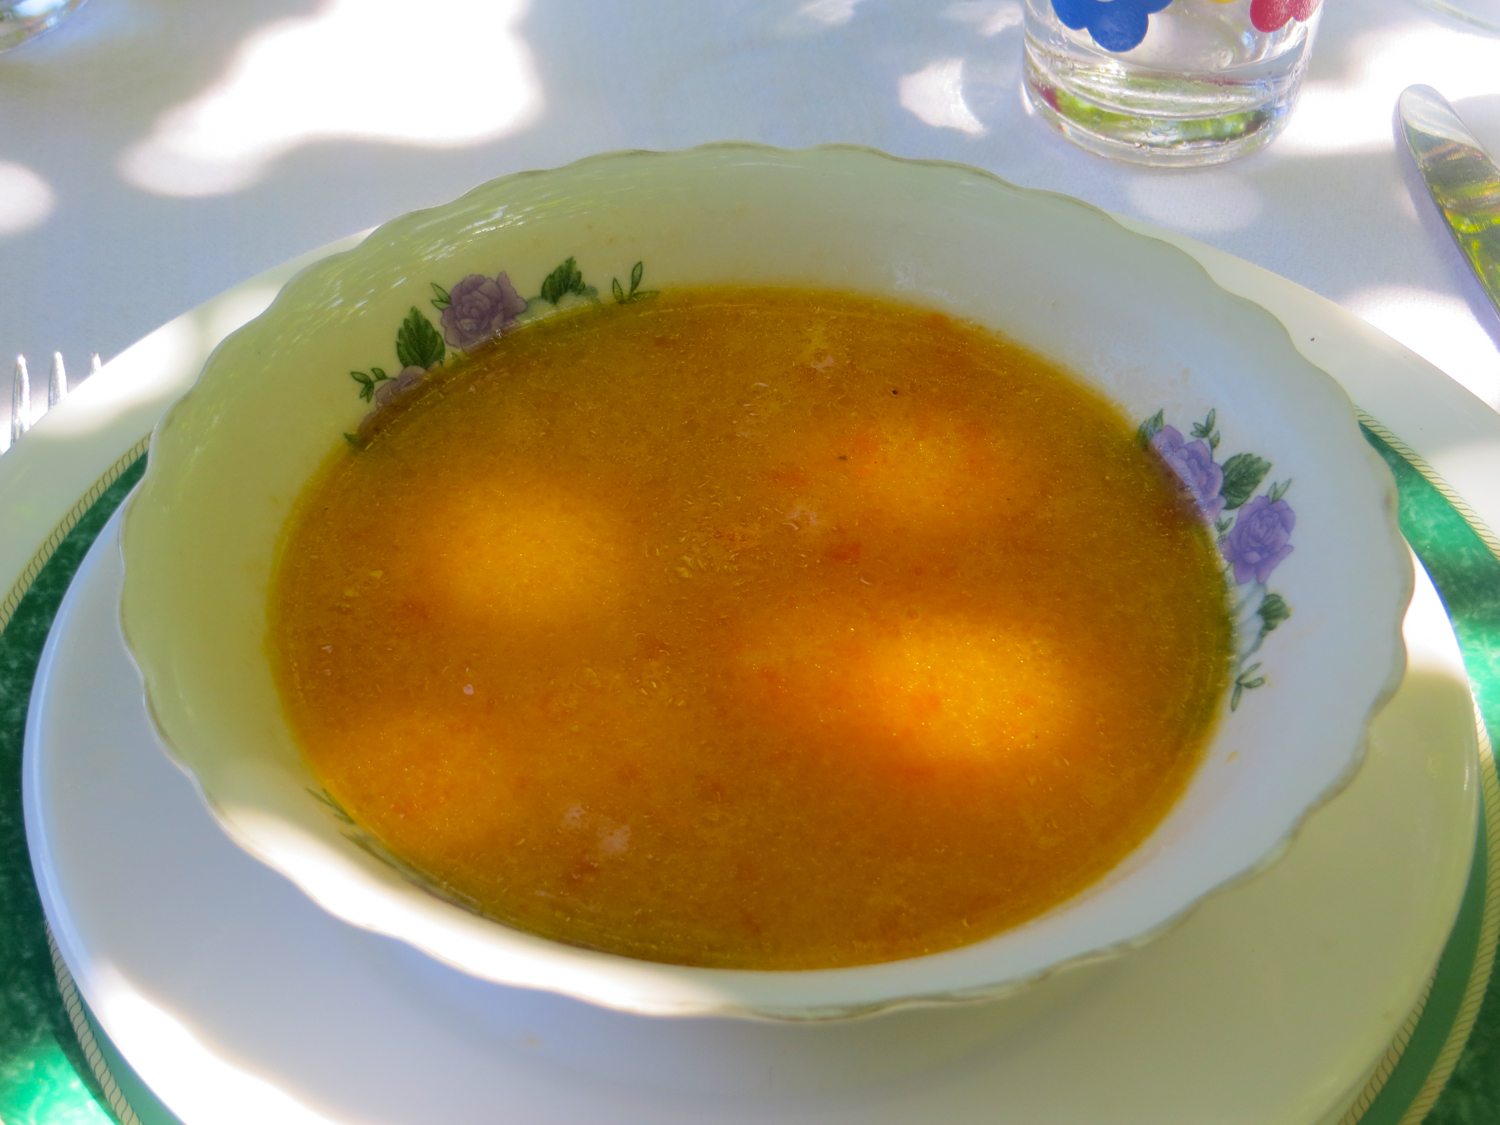
We discovered a new soup that really appealed to us. Known as ‘tarhana’ it has been cited as the first ‘instant soup’ invented by Central Asian Turks. The dough that goes into making up the soup takes 5-6 days to ferment, so it really is a labour of love to make and as such I felt it probably wouldn’t get much of a following if I posted it as a blog post in its own right. If I am wrong then let me know and I may well do a post on it in the future.
IMG_0635
Apparently 100 years ago locals would eat a bowl of it for breakfast each morning before embarking on their day’s work. It is truly delicious, and eating it accompanied with a fresh tomato and pickled red cabbage salad and a round or two of gozleme filled with local cheese and cabbage definitely hit the spot.
IMG_0538
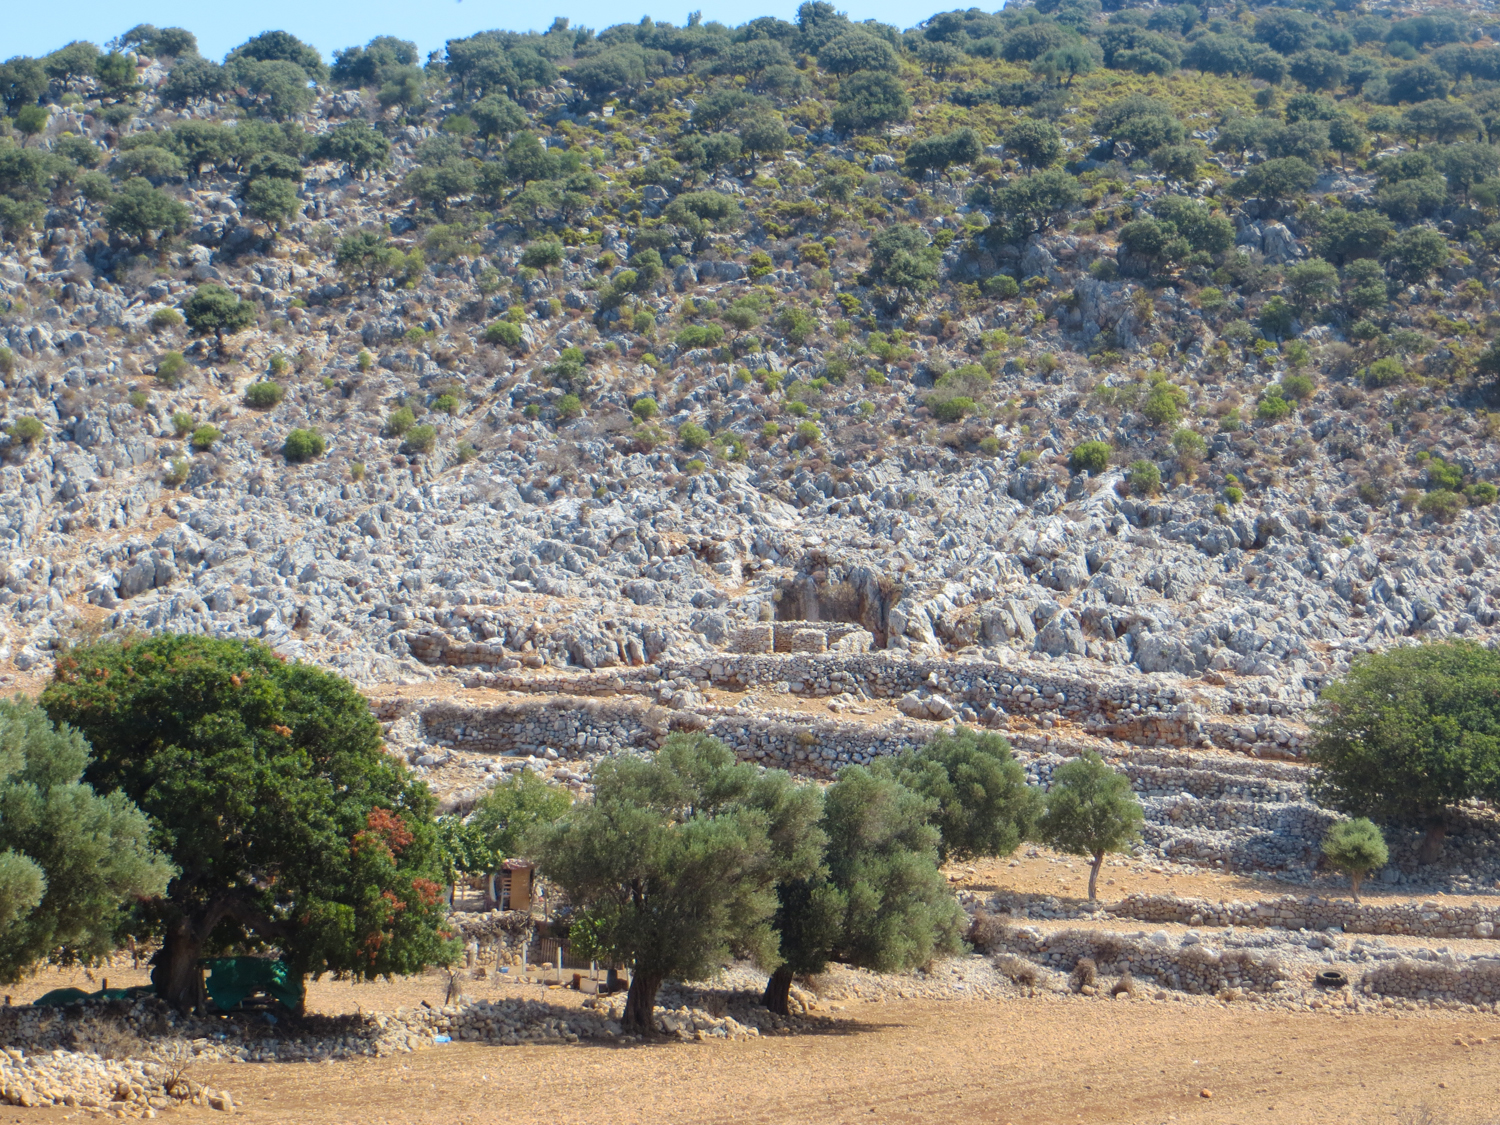
The Bozburun peninsular, or to be precise the village of Osmaniye, is one of the most prolific producers of pine honey in the world. We journeyed into the hills to visit the Honey House where we were taken on an informative tour of how honey is produced in the region. All those in the vicinity of the village earn their living from bee keeping and scattered all across the hillside you can see little blue and white boxes housing the bees.  True to its name, the honey itself has a distinctly pine taste to it and I was fascinated to learn that the bees collect a saliva off the pines that has been excreted onto the pine leaves by a totally different insect and it is this liquid that gives the honey its distinctive aroma and taste. You can find out more about the process here.
Other than eating we enjoyed seeing the local area and in particular the local ruins of Phoenix and Amos. The former was scattered all over the surrounding  countryside of Sogut and at a nearby beach – Phoenix Beach – which wins awards in my book as the most off-piste beach to reach, an adventure in itself – you can snorkel and see pots dating back thousands of years.
IMG_0586
I learnt that whilst it has not been thoroughly excavated, archeologists decided that concreting the pots and treasure of the past to the sea bed would be the best course of action to deter would-be-treasure hunters. Maybe this is common practice but I felt this was a rather unusual choice of action.
IMG_0551
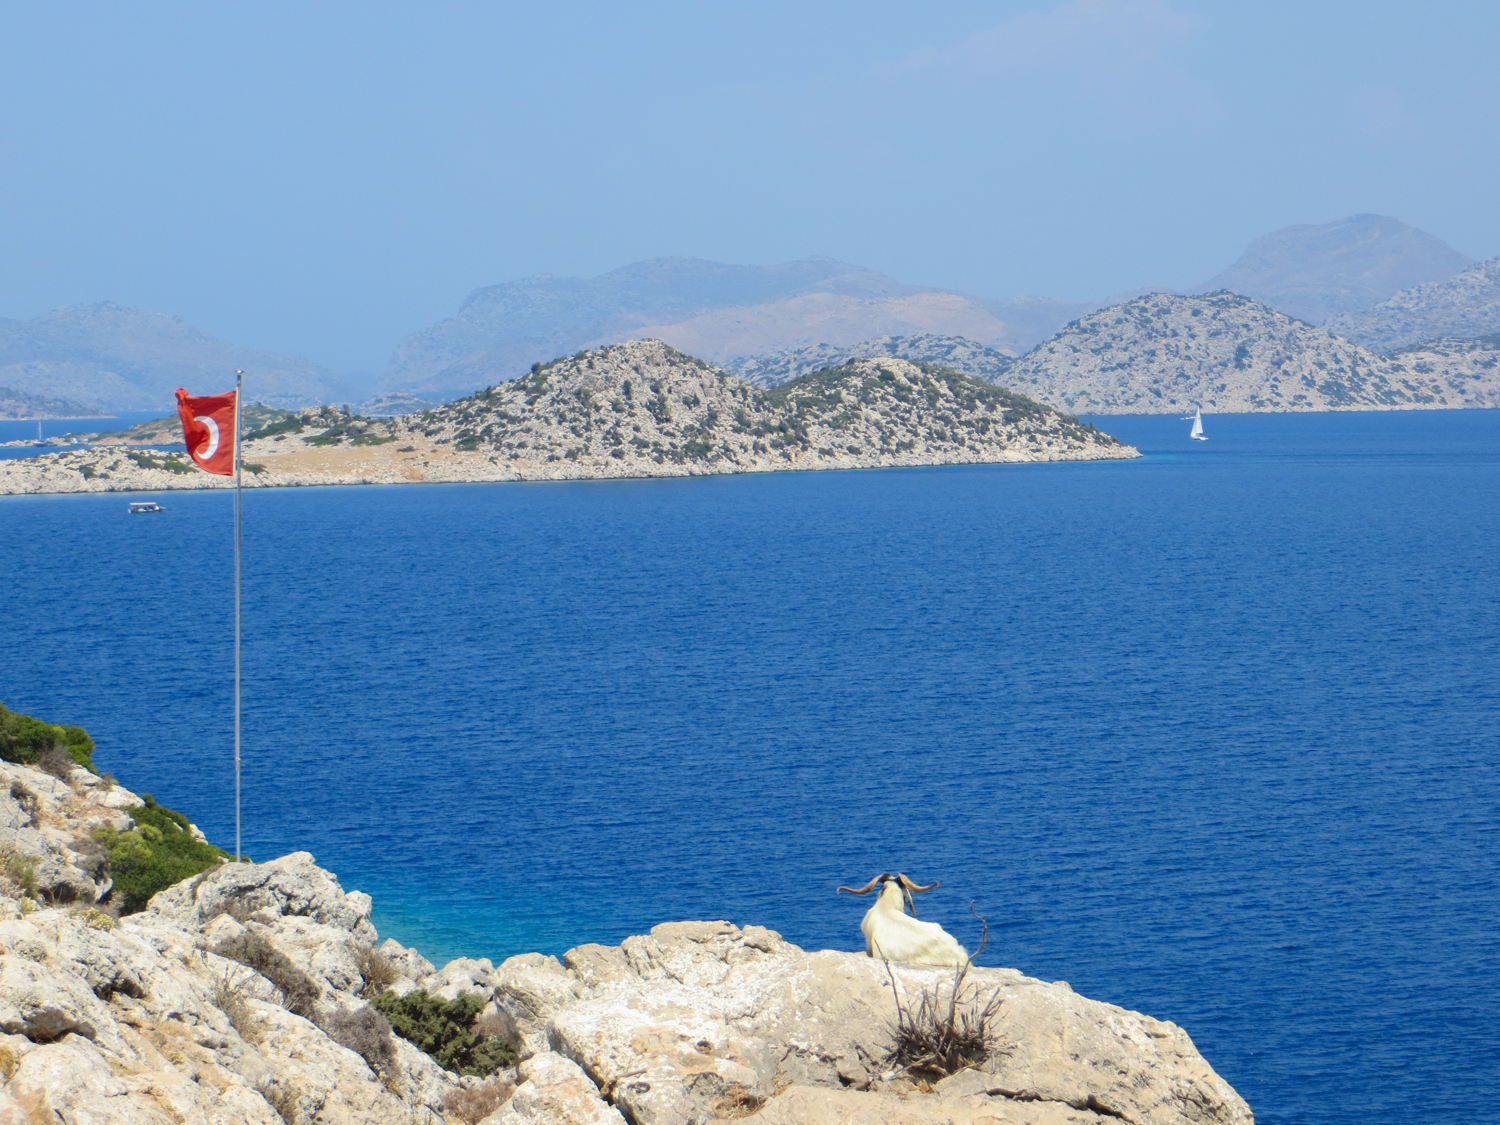
We explored the ruins of Amos in 40 degree heat, which was not really the best time to explore the ruins thoroughly, but getting to the ruins took some time to reach as we meandered over the mountains and hairpin bends that make up the Bozoburun peninsular. After exploring the ruins of Patara, Tlos and Letoon last year the ruins of Amos and Phoenix were slightly disappointing, but nonetheless, I do still enjoy a good amble around an ancient ruin.
IMG_0530
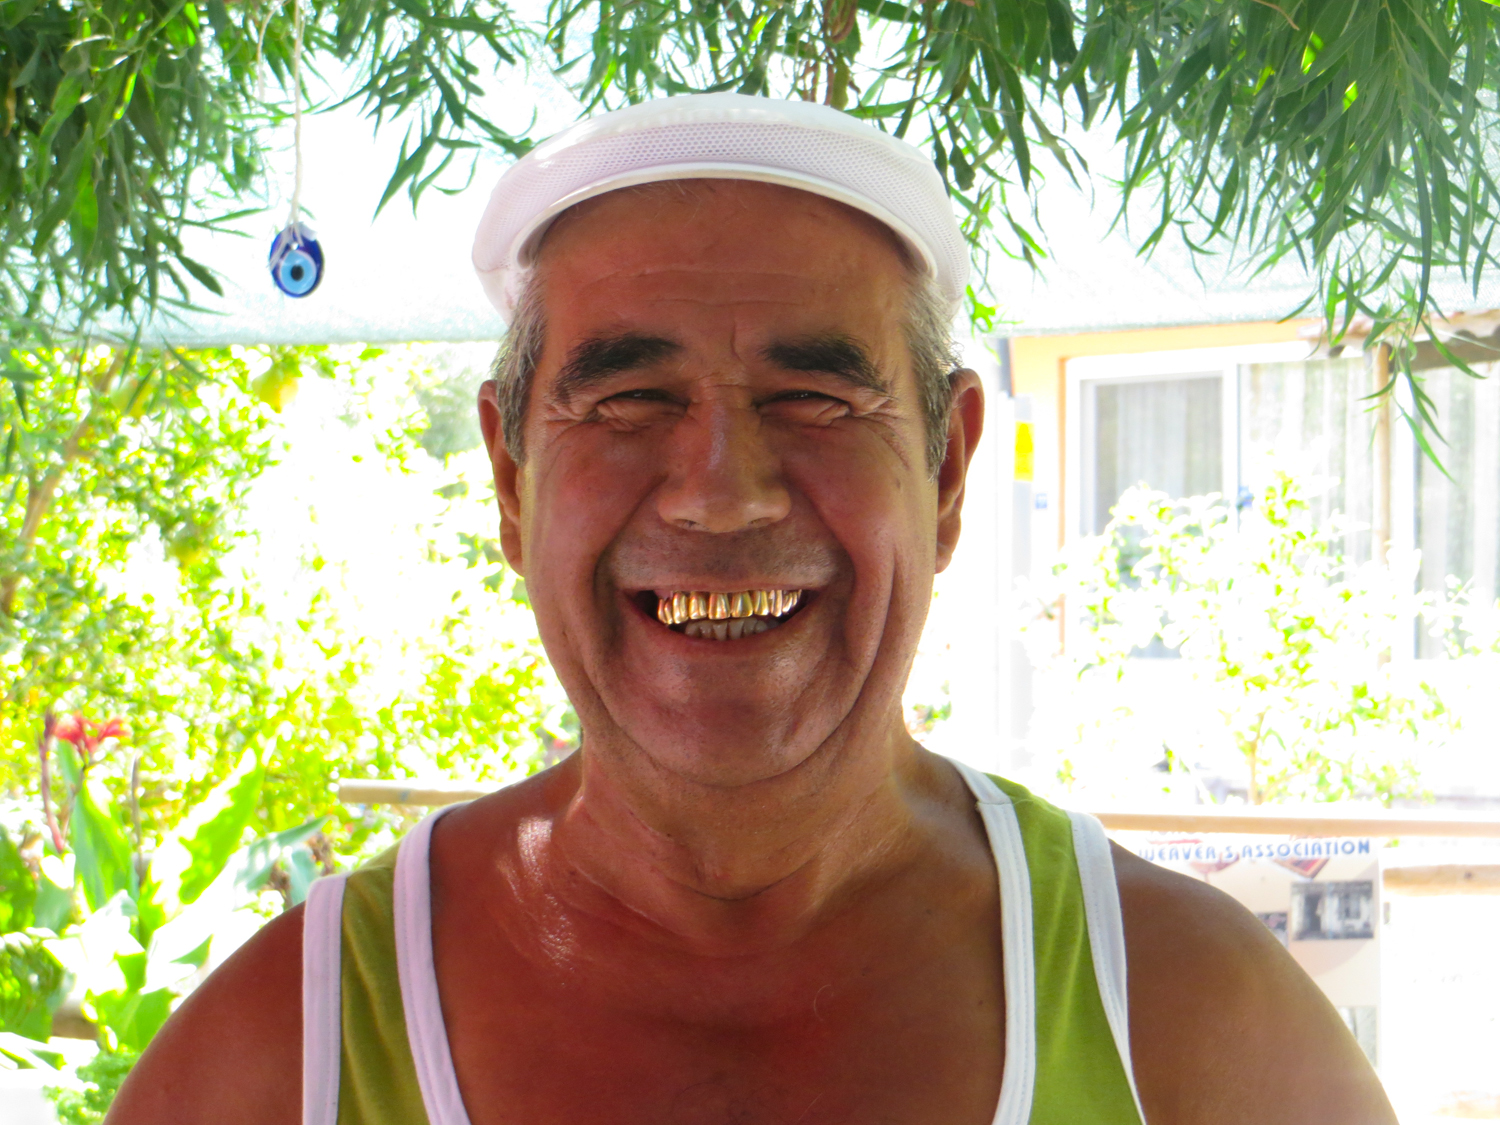
As always the locals were friendly and welcoming and made our visit to their region a happy and enjoyable one. I was most impressed with Osman’s gold teeth (see above) – what a legend!
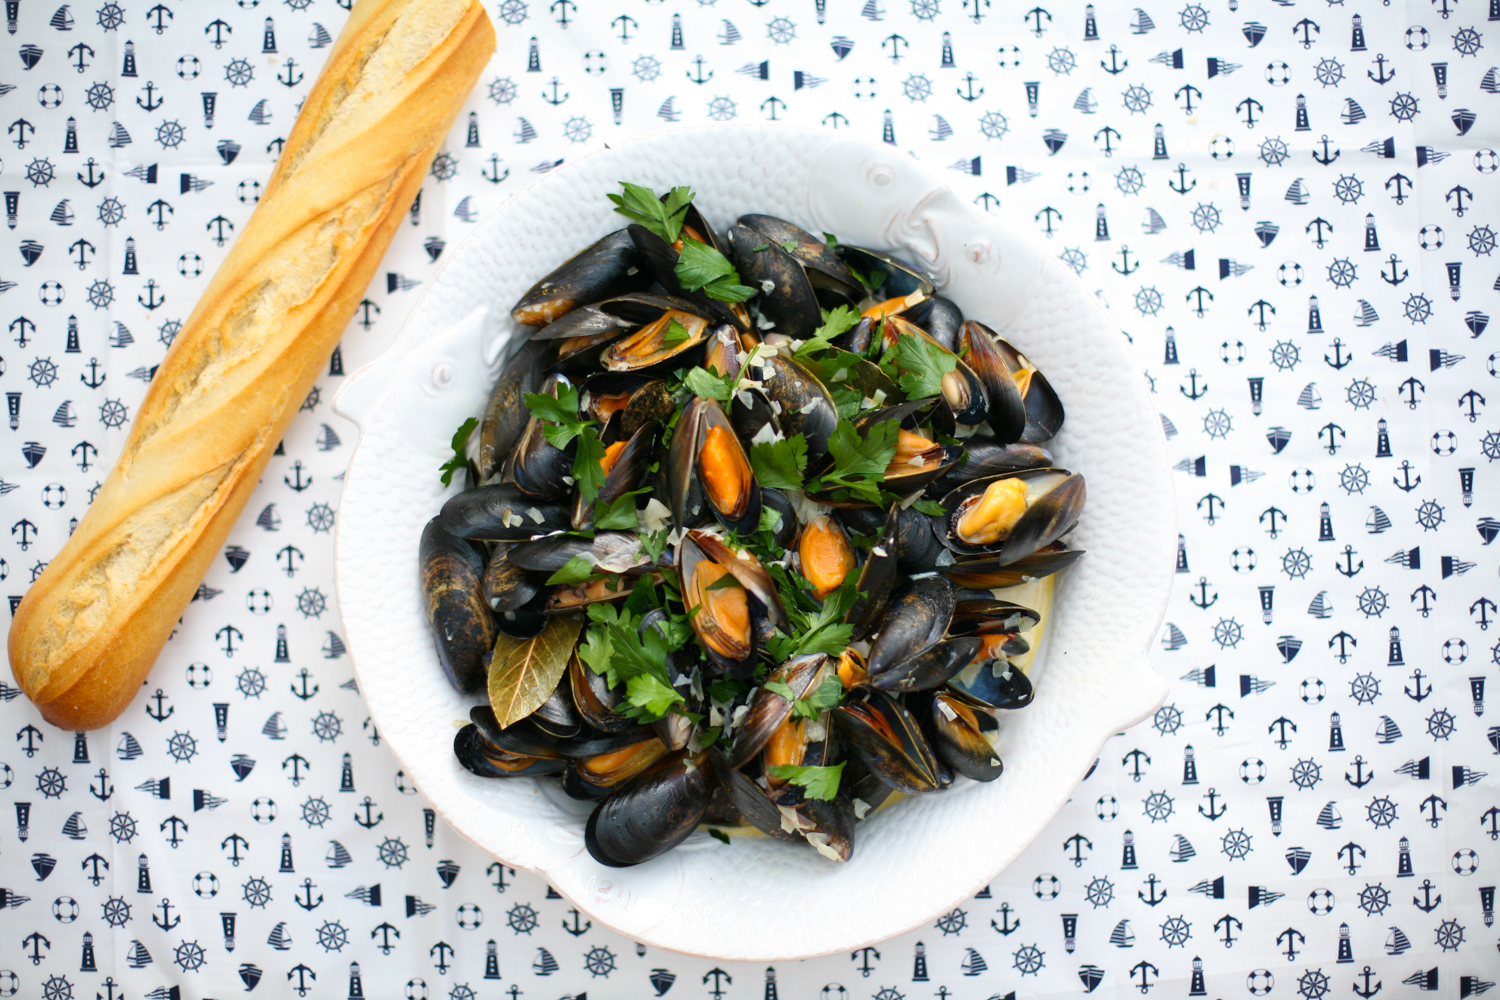
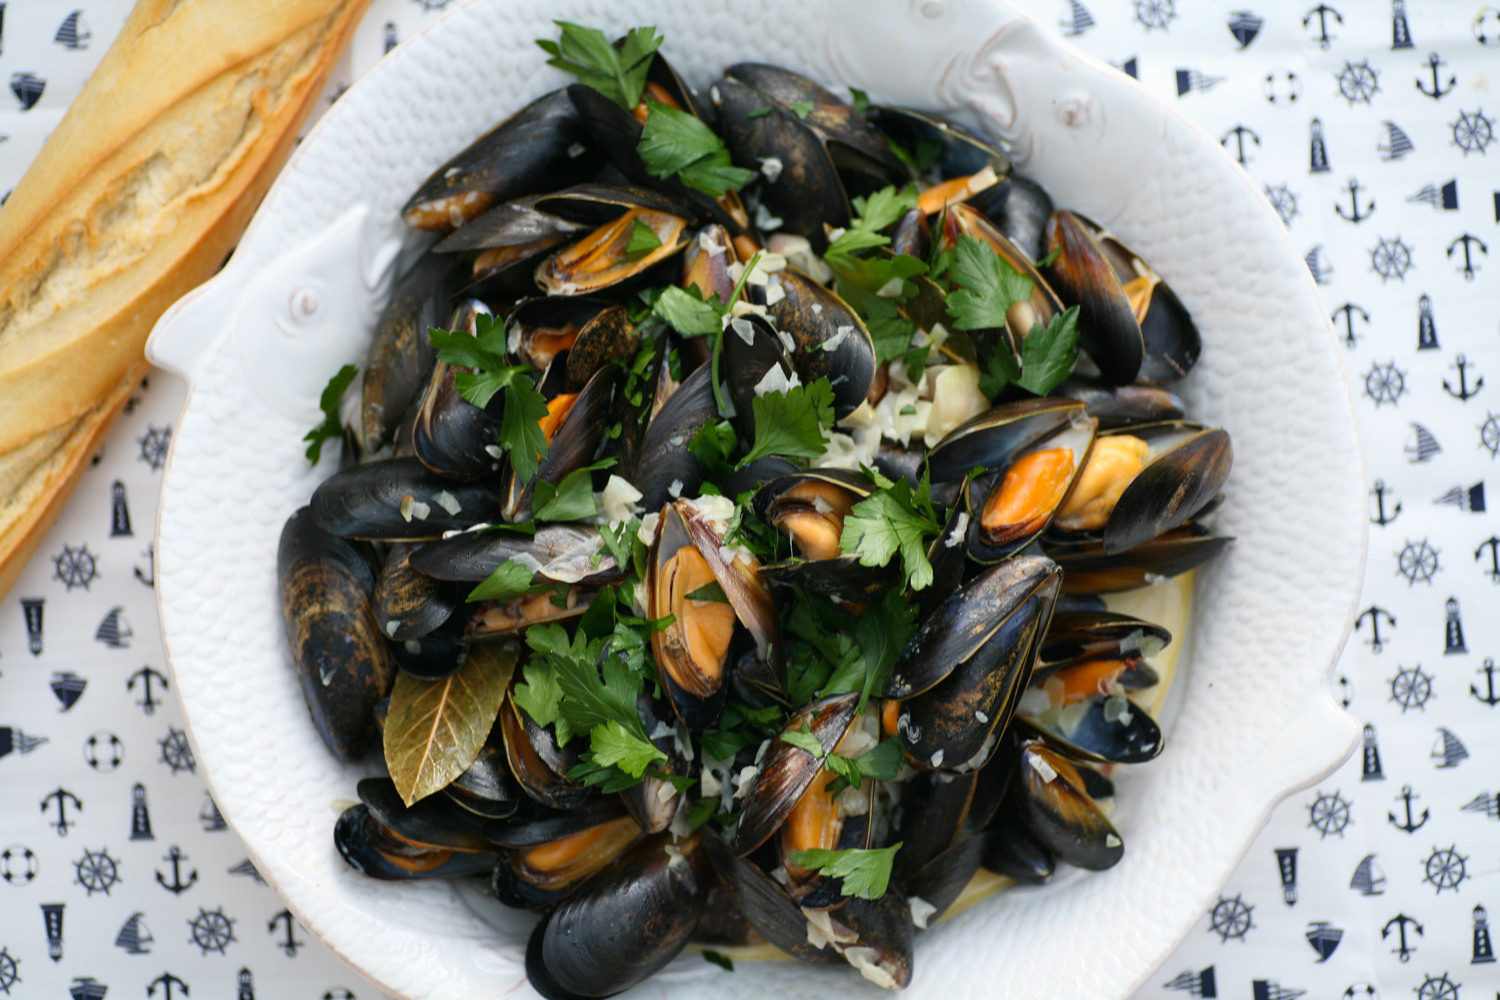
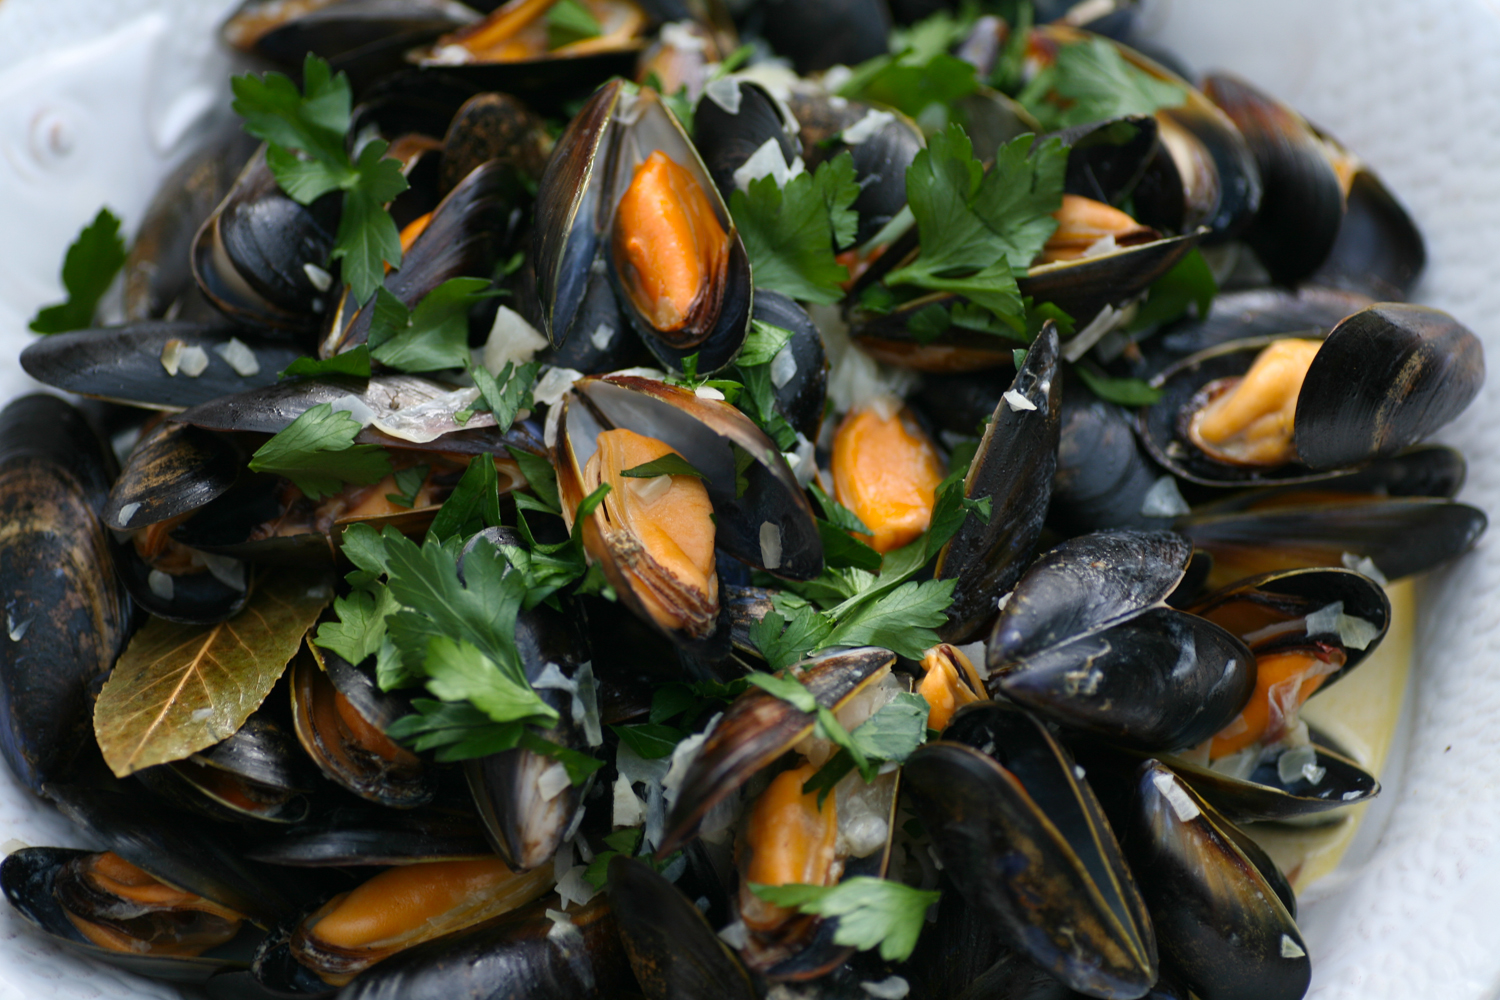
To continue with my seafood diet of the last two weeks I wanted to bring to you my version of the ubiquitous Moule Mariniere, which is long overdue.
IMG_6931
A foolproof recipe that is very quick to prepare and cook, economical and a family crowd pleaser. Enjoy. I hope you all had a wonderful summer holiday wherever that may have been. Leave a comment to fill me in.
IMG_6899
Moules Mariniere
Serves 4
1.5-2kg mussels, cleaned
2 tbsp butter
4 shallots, finely chopped
4 garlic cloves finely chopped
3 bay leaves
200ml single cream
200ml dry white wine
1 tsp salt (optional/to taste)
handful of fresh parsley to serve
crusty bread  to serve
1. Thoroughly clean the mussels under cold running water. Close the open ones with your hands or by tapping them gently and discard the ones that remain open or are broken. Remove any barnacles from the shell and pull away the beards. It’s easiest to pull the beards  back and forth and then they will release from the shell with a little tug.
2. In a pan that is large enough to comfortably fit all the mussels at once with extra room to move them around (if need be cook in two pans and then merge together at the end) melt the butter and then add the garlic, shallots and bay leaves. Once softened add the mussels and stir for a few seconds before placing the lid on top. Leave the mussels to cook in their own steam for 2-3 minutes.
3. Add the cream and white wine and give a good stir and leave for another minute or so.
4. Serve immediately in bowls topped with a scattering of fresh parsley. Serve with a crusty baguette to soak up the juices. Discard mussels that remain closed or are barely open.
IMG_6912

Fish Balls in a Sweet Smoked Paprika and Tomato Sauce

IMG_5401

After spending the whole of the Easter holidays in Asia, both Hong Kong and Vietnam, it is great to finally come home to London;  as the saying goes: ‘absence makes the heart grow fonder’. Whilst I loved ever minute of our travels from exploring new environs, cultural sites, the beach (of course) and experiencing the amazing cuisine that both countries have to offer, there is something wonderfully homely and satisfying about preparing your own meals and sourcing your own ingredients. Mark Bittman from ‘The New York Times’ has written a fascinating article on why home cooked food is the way to go. Check it out here.  Crazy as this may sound, I kind of missed not getting stuck into some serious cooking, that said I was very lucky to get a place at ‘The Green Bamboo Cooking School’ in Hoi An, which gave me a wealth of new exciting Vietnamese recipes to cook and share with you all.

Hong Kong is pork crazy and whilst I love my pork, I decided that fish and vegetarian meals were going to be on the menu, certainly for the first week or two once I returned. The very first meal I cooked when I got back were these lovely fish balls, which are so easy to put together. Big A loved getting involved and helping me to prepare them. I made a large batch and then had the leftovers for lunch the following day.

Serve with couscous, rice or pasta and you have yourself a simple and deliciously healthy meal. I did not put any fresh chilli in either the sauce or fish balls, but you could easily pop in a finely chopped one if you are in need of that extra spicy kick!

IMG_5433

Fish Balls in a Sweet Smoked Paprika and Tomato Sauce

adapted from Yotam Ottolenghi and Sami Tamimi’s recipe ‘Cod Cakes in Tomato Sauce’ in their book Jerusalem.

Serves 4

sauce

glug of olive oil

2 small/medium sized white onions, finely chopped

1/2 (half) tsp of sweet smoked paprika – I use and totally rate this one

1 heaped tsp cumin powder

1 tsp salt

125ml white wine

1 tin of chopped tomatoes, blended

1 tsp caster sugar

4 garlic cloves, finely chopped

150ml water

fish balls

600g cod (or any white fish that has been sustainably caught), boned and skin removed

100g white breadcrumbs

2 tsp ground cumin

1 tsp salt

2 eggs

1 large handful of flat leaf parsley

1 large handful of fresh coriander

1. First you need to start making the sauce. Place a glug (a little) olive oil into a large frying pan and when it is hot add the onions. Stir and turn the heat down slightly to make sure that they do not burn. As they begin to soften after a few minutes add the sweet paprika, cumin powder and salt and then after a couple more minutes add the garlic and stir together. Leave to cook steadily for a few minutes.

2. Next add the white wine and stir into the spiced onions and let simmer for a couple of minutes before adding the blended tinned tomatoes (it is not essential to blend, but I like having the sauce slightly smoother for this recipe) and caster sugar. Stir together and simmer gently for 20 minutes on a low heat so that the flavours can mature and work together.

3. Meanwhile in a large mixing bowl use your hands to blend all the fish ball ingredients together and then roll in the palm of your hands small, bite sized, round fish balls. I made around 30 with these proportions.

4. In a large frying pan heat a glug of olive oil. When it is hot gently place the fish balls in the pan so that they are lightly bronze. I suggest doing this in stages as it takes no more than a few minutes cooking time – remember to turn them over so that they are bronzed all over.

5. After you have bronzed your first batch place them gently in the sweet smoked paprika and tomato sauce and continue to add the rest of the fish balls until they are all sitting in the sauce. Add a little water – around 150ml, or a little more if needed, so that the fish balls are just covered and then let simmer on a low heat for a further 15 minutes. Add more seasoning if necessary.

6. Serve hot with couscous, rice or pasta.

Good old comfort food. Enjoy. It’s good to be home.


Beat this Borscht

I hadn’t planned on posting this Borscht recipe on my blog. I’ve cooked Borscht numerous times in the past and it’s always been…well…..fine…but never really much more than that. I then found a new recipe in my soup bible called ‘500 Soup Recipes’, ok my secret’s out, I AM A BIG SOUP FAN, but those who follow me I think you kind of already new that, right?

Anyway, this Borscht recipe is different from all the other Borscht recipes I’ve cooked in the past, namely that it is not smooth. Instead the beetroot are cut into thick strips, rather like chips in fact, along with the carrots and celery and because of this and the muslin bag full of herbs and spices, gives the soup an added dimension that really makes it a winner. I have followed the recipe loosely but the end result got the definite thumbs up from both myself and Mr B.

Beetroot is easy to find at this time of year and since I had just over half a dozen in my fridge that were beginning to look a little bit sorry for themselves, I decided to dedicate a recipe solely to them, well almost solely! The colour is a brilliant deep crimson and stains like crazy, so unless you like living on the edge, definitely don’t wear white when eating or cooking this dish.

As its January Mr B and I are on a bit of a health drive so we didn’t bother with the sour cream, with scattered dill or chives on top. It would have probably made a prettier photograph, but hey my waist line is thanking me for it.

Give it a try and please let me know how you get on, I’d love to hear what you think. Do you prefer it to the smooth variety that is more ubiquitous?

Borscht

Adapted from 500 Soup Recipes by Tim Smart and Bridget Jones

Serves 4-6

7 medium/small uncooked beetroot, peeled

2 carrots, peeled

2 celery sticks

2 tbsp butter

2 onions, sliced

2 garlic cloves, sliced

4 tomatoes, chopped

1 bay leaf

1 large handful of fresh parsley

2 cloves

4 whole peppercorns

2 pints of vegetable stock

75 ml cider vinegar, or to taste

sugar, to taste

salt and pepper, to taste

1 muslin

1. Peel the beetroot and carrots and cut into fairly thick strips. Also cut the celery into bit sized pieces. Heat the butter in a large pan and when it is melted add the sliced onion and stir on a low heat for 5 minutes.

2. Now add the beetroot, carrots and celery and cook for a further 5 minutes before adding the garlic and chopped tomatoes. Stir into the other vegetables and leave to simmer for a further 2 minutes.

3. Using a large piece of muslin, place the bay leaf, fresh parsley, cloves and peppercorns into the centre and tie the four corners together with a piece of string. Place the muslin  into the pan with the end of the four corners sticking out over the top of the pan slightly. Add the stock and make sure that all the vegetables and muslin pouch are submerged as much as possible. Bring to the boil and then simmer for 1 hour 15 minutes or until the vegetables are tender.

4. Discard the muslin pouch and add the cider vinegar. Pour in a little at a time and taste so that it creates the right balance of sweet and sour. Add a sprinkling of sugar if necessary. Season, stir and then ladle into bowls. Add a dollop of sour cream on top with either dill or chives.


In the mood for ‘Italian Salsa Verde’

OLYMPUS DIGITAL CAMERA

My family has been craving greenery. We spent the last week in the beautiful Var valley in France and whilst we had some wonderful dishes we felt that perhaps, without sounding too rude, French food is slightly stuck in a 1970’s time warp and is due a food revival. Meticulously prepared and presented, the food still remains pretty rich and creamy with lots of unpasteurized cheese not much veg and basically not ideal if you happen to be under 10, pregnant or health conscious. Before you ask, no I am not pregnant, but one of the friends we went with is, and she found it slightly restrictive on what she could actually eat. A favourite dish that one of our party devoured was scallops in a creamy curried sauce, similar to coronation chicken in taste – the sauce that is; surprisingly delicious but a little 70’s kitsch you have to agree. If only I’d taken a photo as evidence.

So back in Blighty we gathered some fresh herbs to make an Italian Salsa Verde to detox our bodies from all the cheese and cream laced food we had eaten across the waters.

Italian Salsa Verde 

Not to be mistaken with French sauce verte, German green sauce, Mexican salsa verde and Argentinian chimichurri

1 large handful of fresh mint

1 large handful of fresh basil

2 large handfuls of fresh flat leaf parsley

3 pieces of chopped garlic

6 anchovies chopped

1 large handful of chopped cornichons or gherkins

1 large handful of capers

2 tbsp of olive oil

3 tbsp of red wine vinegar

1 dsp (dessert spoon) of dijon mustard

pepper

salt

1. Finely chop the garlic, cornichons, anchoives. If you are doing it all by hand then you will also need to finely chop the fresh flat leaf parsley, mint and basil, if however you are like me and you want to save time, use a blender. Also add the capers and olive oil at this stage.

OLYMPUS DIGITAL CAMERA

2. After an initial quick blend – so that it is NOT smooth in consistency, add the red wine vinegar and dijon mustard. Season to taste although you will probably find that the saltiness of the anchovies suffice.

OLYMPUS DIGITAL CAMERA

OLYMPUS DIGITAL CAMERA

The girls loved it so much they even ended up licking out the remainder from the blender with a spoon. How sweet !


3. Salsa Verde is so versatile that it can be eaten with meat, fish, poultry or vegetables. I decided to serve mine with grilled chicken, vine tomatoes and borlotti beans on the side, and hunks of crusty bread to mop up the salsa. Delicious and not too 70’s !

OLYMPUS DIGITAL CAMERA

SaveSave