Banana, Cinnamon and Nutmeg Loaf

IMG_9959

Having afternoon tea is very much a British thing to do. Granted we may not always sit down to tea and scones every afternoon, but given half the chance then we probably would. Copious amounts of tea is drunk throughout the day, but at tea time – around the hour of 4pm, a little sweet treat or savoury dainty might make an appearance if you are lucky.


IMG_9933

It wasn’t always the case. In fact it was Charles II wife, Catherine of Braganza from Portugal, who started the trend of tea drinking in the seventeenth century. From the English royal court it spread to London’s coffee houses and from there into the homes where civilised tea parties would take place.

IMG_9952


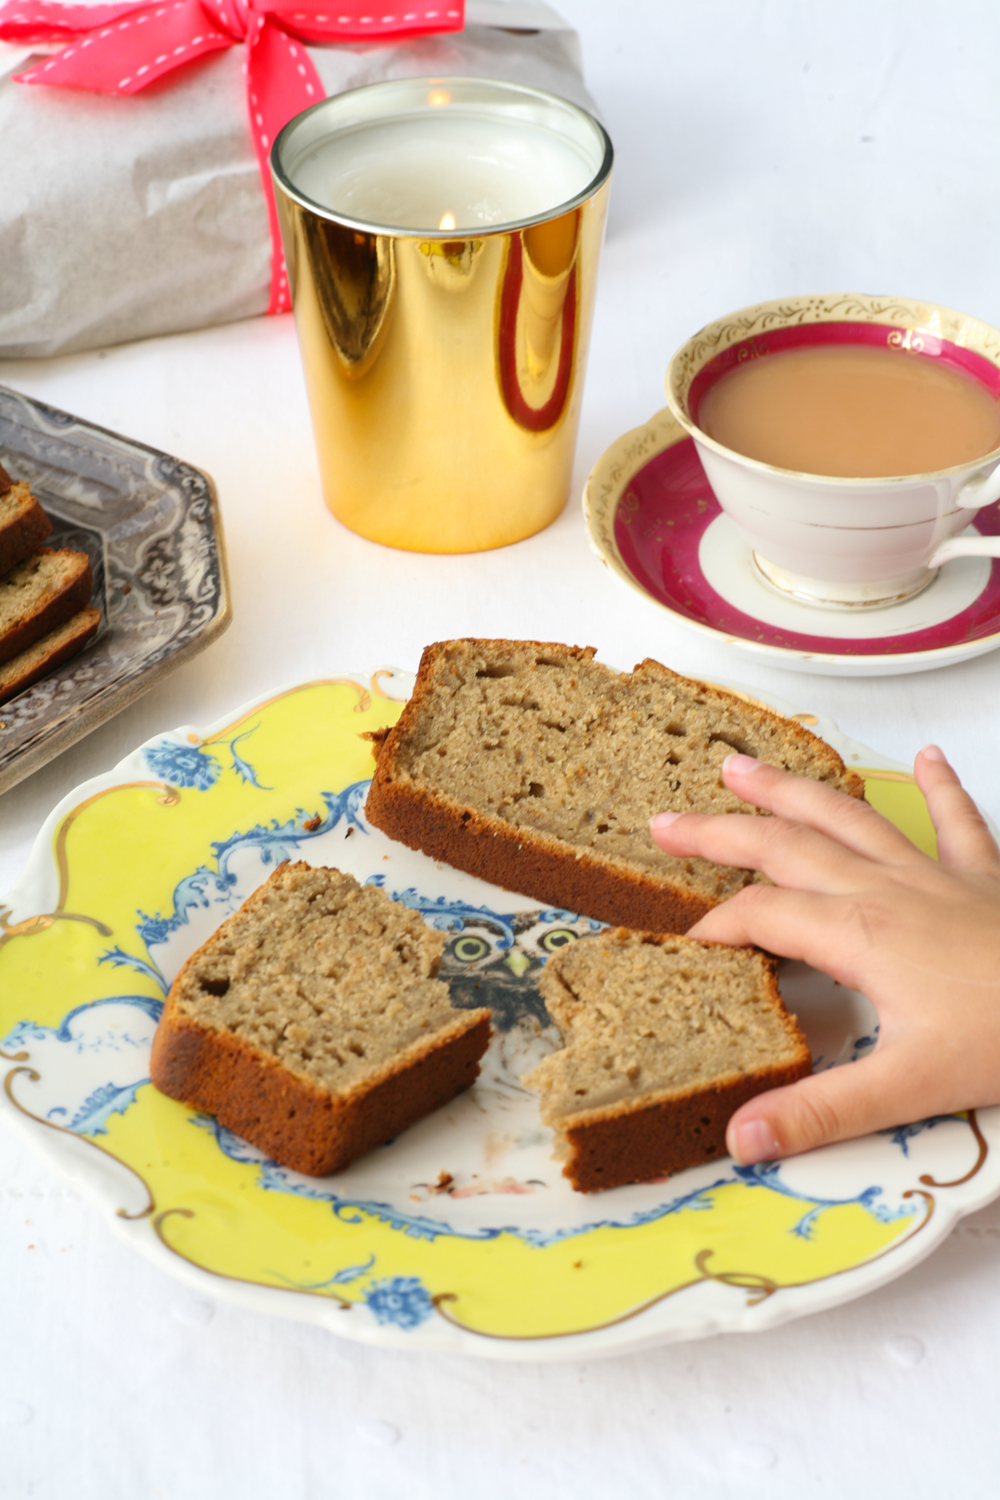
If you want a no fuss cake that is easy to whip up, moist and produces delicious baking smells when cooking then look no further. This banana, cinnamon and nutmeg loaf won’t win prizes for appearance in ‘The Great British Bake Off’ but what it lacks in appearance it makes up for in taste.


IMG_9941

So put on the kettle, pour yourself a cup of tea in your favourite fine bone china teacup and sit back and relax with a slice or two of this moist banana, cinnamon and nutmeg loaf.


Happy Days.


IMG_9955


Banana, Cinnamon and Nutmeg Loaf

2 eggs, beaten

90g butter

150g light Muscovado sugar

4 bananas, mashed

1/2 tsp cinnamon

1/4 tsp fresh grated nutmeg

250g self-raising flour

1. Preheat oven to 180 degrees.

2. In a large bowl mix the eggs, butter (which has been at room temperature) and sugar together and when it is smooth add the mashed banana, cinnamon, nutmeg and flour. Stir in throughly. I use a hand whisk but arm power works equally well if you do not have one.

3. Grease your non-stick loaf tin. I don’t tend to line my tin as I find that the loaf easily comes out of the tin when cooked.

4. Place in the oven for 45 minutes. It is done when you place a sharp knife into the centre of the cake and it comes out clean.

5. Place on a rack to cool slightly.

It is lovely to serve warm but equally lasts well for a few days.


Coconut Infused Corn on the Cob with Cumin and Black Mustard Seeds

IMG_9899


Corn on the cob is one of those things that represents the beginning of Autumn for me, although this year we seem to be having a late Indian summer, which is a little bit surreal as the conkers are already falling from the horse chestnut trees. After the rains of last night the air remains warm and humid, the birds are singing and it almost feels like Asia. Whilst I love the traditional way of eating corn on the cob – with lots of butter and maybe a pinch of paprika and a squeeze of lime, I do rather like my Indian version, which makes a refreshing change.


IMG_9916


If you are using fresh corn on the cob it is hard, but not impossible, to cut through the cob to make 3 or 4 smaller pieces. Use a sharp knife and press down firmly. Once you have made an inroad into cutting it you will find that you can simply break off the section. Equally if you want to cook this dish all year round – which I do – you can use frozen sweetcorn which you can buy already chopped up into smaller pieces, which makes it a lot easier and even quicker.

IMG_9902


If you are having an Indian feast why not cook this dish alongside my laal maas or bengali chicken curry or perhaps bengali mustard fish curry or aubergine, peanut and tomato curry as well as a satisfying dal and perhaps some Indian greens. Equally if you are wanting a quick and light supper then this dish and a dal or vegetable curry would be perfect.

*****************

Coconut Infused Corn on the Cob with Cumin and Black Mustard Seeds

Serves 4

1kg frozen mini corn cobs or fresh corn on the cob chopped into smaller pieces

160ml coconut milk

1 tsp salt

2 dried red chillies, broken into smaller pieces

1 tbsp sunflower oil

1 tsp cumin seeds

1 tsp black mustard seeds

1 fresh green chilli

1/2 juice of fresh lime

1 handful of freshly chopped coriander/cilantro leaves

1. On a medium heat place the sweetcorn pieces, coconut milk, salt and dried red chillies in a large pan and place the lid on. If you are using frozen sweetcorn cook for 3 minutes and if you are using fresh cook for 10 minutes. Stir at intervals so that the sweetcorn pieces are nicely covered with coconut milk.

2. Meanwhile in a separate pan heat the oil and then add the cumin and black mustard seeds. Once they begin to pop after 20 seconds add the contents of the pan to the larger pan with the sweetcorn. Stir well.

3. Add the fresh green chilli, fresh coriander and lime juice and let simmer for a further 4 minutes with the lid off so that the coconut milk reduces slightly.

4. Serve immediately and pour the remaining liquid over the cob pieces so they soak up all the delicious flavours.


Black Sesame Paste Soba Noodles with Salmon and Spring Onions

IMG_9857


There are some plates of food that when presented in front of you you are a little bit sceptical that the dish will actually taste good. This dish, being predominately grey and black with only a splattering of green and white from the spring onions and the delicate pink from the salmon, is a case in point. You are going to have to trust me on this one when I say that this meal is seriously delicious. It also ridiculously quick (I know I know I say that with most of the dishes I put up on my blog) – it takes the amount of time that you cook your salmon in the oven – 15 minutes.


IMG_9858


Black sesame seeds may require a bit of effort to hunt down – I found mine at my local Asian grocers, but other than that you should be able to get hold of the rest of the ingredients pretty easily. If you don’t have tamari, just use soy sauce – they are very similar.


IMG_9868

I ate mine with a hot cup of fresh lemon verbena tea, which I have become rather addicted to since I was sweetly given a bag full of the stuff last weekend. Have you tried it before? Does anyone grow it in their gardens? Is it easy to maintain? I’d love to know as lemon verbena has a wonderful aroma and taste.

IMG_9864

I hope you get to try this dish very soon. I adore buckwheat soba noodles – I tend to buy the Clearspring variety – they look like this. They’re wheat free noodles, low in fat and a great source of protein and fibre. Go on give this dish a go and leave me a comment below.


Black Sesame Paste Soba Noodles with Salmon and Spring Onions

Adapted from Heidi Swanson’s ‘Super Natural Everyday’ – Black Sesame Otsu

Serves 4

black sesame seed paste

1 tsp sunflower seeds

1 tsp pine nuts

60g black sesame seeds

1 1/2 tbsp demerara sugar

1 tbsp sesame oil

1 1/2 tbsp tamari/soy sauce

2 tbsp brown rice vinegar

pinch of cayenne pepper

*************

350g buckwheat soba noodles

4 salmon fillets – skin removed (optional)

3 spring onions, finely sliced

1 tbsp extra virgin olive oil

**************

1. Preheat your oven (I use a fan oven – if you are not increase the temperature by 10 degrees) to 180 degrees. Equally you can steam the salmon if you prefer. Using a cooking brush gently wipe each salmon fillet with sesame oil. Place in a non stick dish and cook for 15 minutes.

2. Meanwhile, in a frying pan dry roast, on a low heat, the pine nuts and sunflower seeds for a couple of minutes so they begin to bronze. You will need to keep moving the pan to prevent burning. As the pine nuts begin to bronze add the black sesame seeds and move them around the pan for a minute. Transfer to a spice grinder (or pestle and mortar).

3. After whizzing the ingredients for 10-15 seconds so that they are properly blended, transfer the paste into a mixing bowl and add the remaining ingredients to make the black sesame paste. Place to one side.

4. Place the soba noodles in a pan of boiling water and cook according to instructions – should be around 5 minutes on a low heat. Before draining save 100ml of the noodle water and leave in a jug. Drain the soba noodles and run under cold water to prevent further cooking. Before adding the soba noodles to the black sesame paste, remove 1/4 of the paste and place in a separate cup. Add the soba noodles to the large mixing bowl with the remaining black sesame paste, the 100ml of noodle water, extra virgin olive oil and almost all of the spring onions and gently stir into the paste.

5. Serve a generous portion of noodles to each bowl or plate and place the salmon fillet on top along with a dollop of remaining black sesame paste which you have reserved and a scattering of spring onions.

It can be eaten at warm, room temperature or cold. You can replace the salmon with trout or even with tofu gently fried. It would in fact make an original and tasty lunch box alternative.


Decadent Dal Makhani

IMG_9781

This gloriously decadent dal originates from the Punjab region of North India where black urid beans, also known as black gram, are eaten in abundance. It happens to be my husband’s absolute favourite king of dals. Creamy and rich from the butter, ghee (or oil) and double cream (oh don’t let that put you off!) and yet zings of ginger, garlic and tomato accompanied with a delicious spicy masala.

IMG_9792

Whilst we are lucky to still have some warm days, soon the weather will be turning and this dal is definitely one to bookmark for when there is a chill in the air.

IMG_9785

In the Punjab this dal is eaten on special occasions, such as weddings and religious ceremonies. When all the pomp and glory happens you can guarantee that dal makhani will be offered to guests. Do try it and let me know how you get on.

IMG_9808

Hope you all have a lovely weekend.


Dal Makhani

Serves 4-6

250g black urid beans (also known as black gram)

20g fresh ginger, peeled and grated

3 garlic cloves, grated

2 green chillies, finely sliced

241g tin of red kidney beans (this was the amount once drained)

1 tsp salt

*********************

tadka 

2 tbsp sunflower oil or ghee

1 tsp cumin seeds

1/2 tsp fenugreek seeds

pinch of asafoetida/hing

2 garlic cloves, grated

2 tbsp tomato puree

*********************

Just before serving

1 tbsp butter

40ml double cream

1/2 tsp Kashmiri chilli powder

1/2 tsp garam masala

salt to taste

1. Ideally soak the urid beans overnight submerged in a bowl of water. Equally if you plan on eating them in the evening you can soak them in the morning for around 6 hours.

2. Once the lentils have soaked (see above) drain them and then wash them with clean water and drain 3 times so as to get rid of any impurities.

3. Place them in a large deep pan and completely cover so that the water is just above the beans. You can always add more water during the cooking process if it all gets soaked up. Add the finely grated ginger and garlic as well as the green chilli and salt. Bring to the boil and then simmer for 20 minutes. The scum that comes to the top when cooking can be removed with a spoon and discarded.

4. After about 20 minutes the dal should have softened and much of the water reduced. Press a bean between your thumb and forefinger and it should easily be squashed. If it needs to soften a bit more leave it simmering for a further 5 minutes.

5. Strain the lentils and then place them back in the pan along with the drained tinned red kidney beans. Add 100ml of water and simmer for a couple of minutes.

6. In a separate small frying pan add the oil (or ghee if you are feeling a little bit naughty) and when it is hot gently add the cumin and fenugreek seeds. They will begin to pop after about 30 seconds so proceed to add the garlic, asafoetida and then after a minute add the tomato puree and stir in together. Simmer on a low heat for a further minute.

7. Place the contents of the frying pan into the large pan with the urid and red kidney beans and give a good stir. If it is too thick add a little more water. It is very much down to personal taste on how thick or soupy you wish your dal to be. Simmer together for 10 minutes.

8. A few minutes before serving add the butter, double cream, Kashmiri chilli powder and garam masala. Give a good stir and add more salt as required.

Oh so delicious. I hope you agree.

Do leave a comment below. I love to hear from my readers.