Indian Toor Dal with Tamarind and Ginger

IMG_7774

After the excesses of weekend feasting Monday nights in my household are vegetarian and usually include a dal of some sorts. This past weekend has been a whirl of celebration with my eldest daughter’s birthday sleepover followed by a large family lunch to celebrate, as well as squeezing in a celebration dinner in honour of our talented artist friend, Adele Henderson (you heard it hear first folks) who was displaying some of her charcoal paintings at the prestigious Mall Galleries in London.

IMG_7780

Like soups, which I am a huge fan of, dal is the ultimate homely and warming comfort food. There are hundreds of varieties from all over India, Pakistan and Bangladesh and each week I try and cook a different one from the week before. Some require soaking, and others you can cook straight away. This week I have used toor dal (similar looking but smaller in size to channa dal), which I try to soak if I have the time (either overnight if you are very organized or simply for 20 mins). This simply makes the cooking time quicker, but is not essential to the cooking process. My usual routine is to soak the lentils on Sunday night and then to cook the dal on Monday morning. The whole cooking and preparation time takes no longer than 45 minutes (if you have not soaked and less if you have) so can easily be done prior to leaving the house, or returning later in the day.

This dal contains some wonderful flavours that work so well together. Asafoetida, or hing as it is also known, should be used with caution as it has a pungent smell, but adding a good pinch really adds a depth of flavour, which keeps you coming back for more. If you can use fresh curry leaves then use them, otherwise dried is fine. Fresh curry leaves are wonderfully fragrant and again really add great flavours to the dish. Then there is the sweet and sourness from the tamarind. I tend to opt for concentrate as it is easier to come by in regular grocery shops, however if you have some tamarind you can soak it and then strain it and add the tamarind pulp that is strained through the sieve.

IMG_7739

I tend to cook a generous amount of dal so that I can hopefully have some leftover to eat on Tuesday along with a fish curry; one less thing to prepare is always a bonus.

IMG_7742

Indian Toor Dal with Tamarind and Ginger

400g toor dal

3 tbsp vegetable/sunflower oil

1 tsp of fenugreek/methi seeds

1 tsp cumin seeds

1 tsp black mustard seeds

10 fresh curry leaves

2 inches fresh ginger, finely grated/chopped

a good pinch asafoetida/hing powder

2 small chillies, chopped into three

2 tomatoes, chopped

1/2 tsp chilli powder

2 tsp turmeric powder

1 tsp tamarind concentrate

100ml water

2 tsp salt

1. Soak the toor dal in a bowl of water for 20 minutes or overnight if you are well organized. This simply makes the cooking time a little quicker but is not essential (unlike some lentils which you have to soak over night – red kidney beans and green mung beans for example). Make sure the water is sufficiently above the level of the dal. You rinse it through after so the exact amount is irrelevant.

2. Once the 20 minutes soaking are up, rinse the dal through a sieve and place in a large pan and cover with boiling water. This time the water should only be a little bit above the dal.  Gently cook the dal so that it softens, this will take around 20-35minutes (more of you have not soaked). You may need to add more water if it gets soaked up whilst softening. It’s not an exact science so don’t worry too much on water amounts – sometimes I have it more ‘soupy’ in consistency than others. Remove the scum from the top of the pan, which occurs when  cooking the dal.  When it has softened, leave to rest whilst you finish off preparing the rest of the ingredients. To test it has softened squeeze a lentil between your thumb and forefinger. If it soft it is ready for the next stage, however, if the lentil remains hard you will need to boil it a little longer.

3. In a large karahi or frying pan heat up the oil and then add the fenugreek/methi, cumin and black mustard seeds. They will begin to pop so make sure you keep the heat low. Move them around the pan for 30 seconds before adding the curry leaves and give a good stir.

3. After three minutes cooking time add the chillies, fresh tomatoes and asafoetida/hing,  fresh ginger, chilli powder and turmeric and mix in well together.

4. Once the tomatoes have softened – this will take a few minutes, add the tamarind concentrate and water and stir.  You now want to deposit the pan with the toor dal into your karahi/frying pan with the other ingredients, or vice versa, depending on which pan is larger.  Stir in well together and add a little extra boiling water to clean the pan and then turn that water into the main pan.

5. Add the salt to taste and leave to simmer for a further 5 minutes.

Serve with rice or Indian bread or simply on its own. I often like to squeeze in a little fresh lemon or lime as well.

IMG_7736Cumin seeds top right, black mustard seeds bottom and fenugreek seeds top left.


Aloo Shaak – Potato Curry

IMG_7716

Back in my university days I often used to make myself aloo shaak when I had the munchies. It was so quick, cheap and easy that it made a perfect snack to nourish my hunger. I would place it in a bowl with a dollop of natural set yogurt on the side and then dip the potato cubes into the natural yoghurt. Happy memories.

To this day I continue to cook it and often serve it up with a dal for a vegetarian supper, or as a complimentary dish if I am cooking a larger Indian banquet with a meat and/or fish curry. At this time of year when the cold sets in this bowl of carbs is highly appealing and is easy to feed to the whole family. As I only chop the chillies in two I find that it does not make the dish too chilli, unless of course you actually munch on the chilli – which I always leave for the adults to do.

IMG_7727

On the subject of munching chillies, if you are feeling a little under the weather I really recommend eating a cooked chilli either in a dish like this or one of my dal dishes (see under Recipe Library). Packed full of vitamin c, they give the immune system a good burst and can bring you back to the land of the living if you are feeling under the weather. Just remember if you ever find the chilli too hot, don’t drink a glass of water as that will spread the heat across the tongue, milk and yoghurt however are able to numb it as they contains a protein called ‘casein’, which breaks the bond between the the pain receptors in your tongue and capsaicin, which is an oil found in chilli – the seeds are always the hottest part so you can remove these if you prefer less of a kick.

Aloo Shaak – Potato Curry

Serves 4

600g sweet potatoes, roughly 1 inch cubes

600g white potatoes, roughly 1 inch cubes

3 tbsp vegetable oil

2 green chillies, chopped in two

2 tsp cumin seeds

1 heaped tsp turmeric powder

2 tsp rock salt

Optional: fresh coriander to serve and/or a dollop of natural set yoghurt

1. Place the cubed potatoes in a pan of boiling water for 13 minutes. You want them to begin to be soft, but not completely soft that they just fall apart!

2. Strain the potatoes. In a large pan heat the oil and add the cumin seeds, chillies and turmeric powder. Let the sizzle for 30 seconds before adding the potatoes and coating them in the seeds and powder.

3. Cook the potatoes on a medium low heat for a further 7 minutes, turning carefully a couple of times. Add the salt, stir one last time and then serve. If you find the potatoes are still a little hard, add a little water and place the lid on the pan and they will soften after a couple of minutes.

an alternative way to cook this is to omit the first step and let them fry in the oil with the cumin seeds, turmeric powder and fresh chilli, immediately. Once they begin to bronze add a little water and let them soften. At university I  tended to opt for this version, but now I find that parboiling them first ensures that they soften to how I want them. 

If you like this potato recipe you may also like to try my ‘Curried Potatoes’ another time.


Lamb and Spinach Curry – a warming curry for cold winter nights

IMG_7698

Given the recent drop in temperature my cravings for comforting meat dishes grows. Lamb works so well in curries that through the winter months I am always digging into my recipe library (see above) to cook either my lamb keema, my rezala, which is heavenly if you haven’t tried it already, or my goat curry, which you can cook with lamb instead.

With a lamb and spinach curry on my mind I set out to buy the ingredients – most of which I had at home, however the lamb and spinach needed to be procured. I picked up some halal lamb from my local butcher, so much better priced than supermarkets I might add, which was mostly off the bone. Personally I rather like meat on the bone as it tastes so much better, but I know that it can put off some guests who are unaccustomed to eating meat in this way. After purchasing a few other sundries, I arrived home and realised that I had forgotten the fresh spinach.  I decided to improvise and use the frozen spinach that I always have a packet of in the freezer. It works really well so don’t stress if you too go down the route of frozen as opposed to fresh spinach.

IMG_7673

I have a propensity to always cook more food than one can eat in a single sitting so that I can stretch the meal over two days. So whilst the meat quantity looks a lot it can be eaten in one go if you have 4-6 guests or over two days if you are feeding 2-4. As is always  the case with my blog the amount of chilli you put in is up to your own individual taste. If it were just me and Mr B eating it I would spice it up a lot more than if we are sharing it amongst guests.

IMG_7694

Lamb and Spinach Curry

Serves 4-6

3 tbsp vegetable oil

2 white onions, sliced

4 bay leaves

2 inch fresh ginger, finely grated

5 garlic cloves, crushed

1.4 kg diced lamb (mainly off the bone)

5 cardamom pods, seeds taken out

1 tsp cumin seeds

1 finger sized piece of cinnamon bark, broken up

2 tsp Kashmiri red chilli powder

2 tsp ground coriander

1/2 tsp ground turmeric

salt and pepper to taste

400g tin of tomatoes

700g frozen spinach (or fresh if you remember!)

500ml water

1. Heat a large casserole dish (or any that you can use both on a hob and in an oven) and add the oil followed by the sliced onions and bay leaves. Keep on a low heat for 10 minutes so that they soften and begin to brown in colour. If they remain translucent, increase the heat for a couple of minutes, stirring to make sure they do not burn.

2. Whilst the onions are cooking prepare the spice mix of cardamom seeds, cinnamon bark and cumin seeds in either a spice grinder (one of my favourite kitchen tools) or pestle and mortar. Add the ground turmeric, coriander and red chilli powder and place to one side.

3. Add the ginger and garlic to the onions and give a good stir. Remove from the pan and place in a bowl, whilst you bronze the lamb.

4. On a medium heat add a little more oil to the pan, if needed, lightly brown the lamb in batches.  This should only take a few minutes per batch. Return the cooked onion, garlic, ginger to the pan and add the spice mix. Stir into the meat and onions before adding a little salt and pepper, tinned tomatoes, spinach and water. Heat on the stove for 10 minutes before transferring to a preheated oven set at 150 degrees ( if using a fan oven), ten degrees higher if not. Place a piece of parchment paper over the casserole dish followed by the lid and leave to cook slowly in the oven for 1hour 30mins hours, stirring a couple of times during cooking. Leave to rest for 10 minutes before serving.

5. Taste before serving to check the salt/chilli level and adjust if necessary. I find this curry is great to make ahead of time as it tends to taste even better once it has rested for a while. When you are ready to eat simply heat up gently on the hob.

Serve with rice or naan bread.

What hearty, warming curries do you like to make and eat as the winter evenings draw in? Are there any curries you would like to see me make on this blog? Leave a comment below and let me know….don’t be shy now ;o)


An Indian twist on ‘Greens’

IMG_7668

Growing up I am sure we’ve all encountered our parents encouraging us to ‘eat our greens’ and reluctantly forcing, the invariably boiled, greens into our mouths. I have nothing against greens, far from it, I think they are delicious, I just think that a little helping hand from a few Indian spices goes a long way to making a fairly bland dish into an elevated one that you actually want to eat! There was a great article in the Observer back in September 2013 by journalist Tim Lott (see here)  which discusses the issues parents have surrounding making their children eat greens or green vegetables in general. The crux of the matter is that if it doesn’t taste good they are simply not going to enjoy or want to eat it. Also if we use the health mantra on them constantly this in itself is going to be a turn off.  We seem to be caught up in our own worry of putting healthy things in their months, but if we perhaps stand back and relax they will too and a natural love of these healthy foods will develop.

You’ll see in my recipe that I have added fresh chilli to the dish. I find my eldest daughter likes chilli, but with my four year old I simply omit it as she isn’t quite ready for the chilli kick! Chillies range hugely in heat levels so start off with the very mild ones – they tend to be the large ones you buy in the supermarkets. The smaller the chilli the hotter they tend to be in general.

Whilst the dish I want to show you today is vegetarian I also find that greens and kale work wonderfully well with chorizo (or any pork product really) and butter beans. If you have a moment take a look at my caldo verde recipe – here, for inspiration. It’s hearty and straightforward and perfect for cold winter days.

IMG_7657

Indian Greens

Serves 4

1 bunch of greens, washed and finely sliced

2 garlic cloves, sliced

2 small green chillies, finely sliced

2 tbsp sunflower/vegetable oil

2 tsp nigella seeds

1 tsp turmeric

1 tsp salt (to taste)

1. After preparing the greens, garlic and chilli add the oil to a large pan. When the oil is hot add the nigella seeds and turmeric followed by the garlic and chilli. Reduce the heat and stir to avoid the garlic burning.

2. Add the greens and stir thoroughly so that they become totally covered in the other ingredients. Keep stirring for a few minutes and then place the lid on the pan. You may find that you need to add a little water at this stage.

3. Simmer gently and the greens will wilt and reduce in size. Add the salt to taste and more water if necessary. The dish will take no longer than 10 minutes to cook in total.

Simple, straightforward and totally satisfying.

I like to eat them with a dal or my Indian potato curry (blog post on this soon).


Green Tomatoes – Two Ways

IMG_7506

During half time we went and spent some time at my parents house, which is hidden away in the depths of the Sussex countryside. Life slows down and allows you to become at one with nature. I love living in the city and am not the type to rush out to rolling green hills at every opportunity, but that said now and again it really does ones soul the world of good. Breathing in fresh air, getting properly muddy and having walks in the woods. Also if the truth be told I love my folks wood burning fire that warms the house and wafts woody smells throughout.

IMG_7572

My mother is Mrs green fingers and has an enviable vegetable patch, which supplies my father and her with bountiful crops of endless vegetables and fruit. She has been overrun with green tomatoes this year and had a couple of troughs full sitting in her pantry so I asked if I could take one to make into a chutney and a relish back in London.

IMG_7585

The result has been pleasing and I wanted to share both recipes with you. They are perfect to bring out with pretty much any cold meat, especially any type of pork product.

IMG_7596

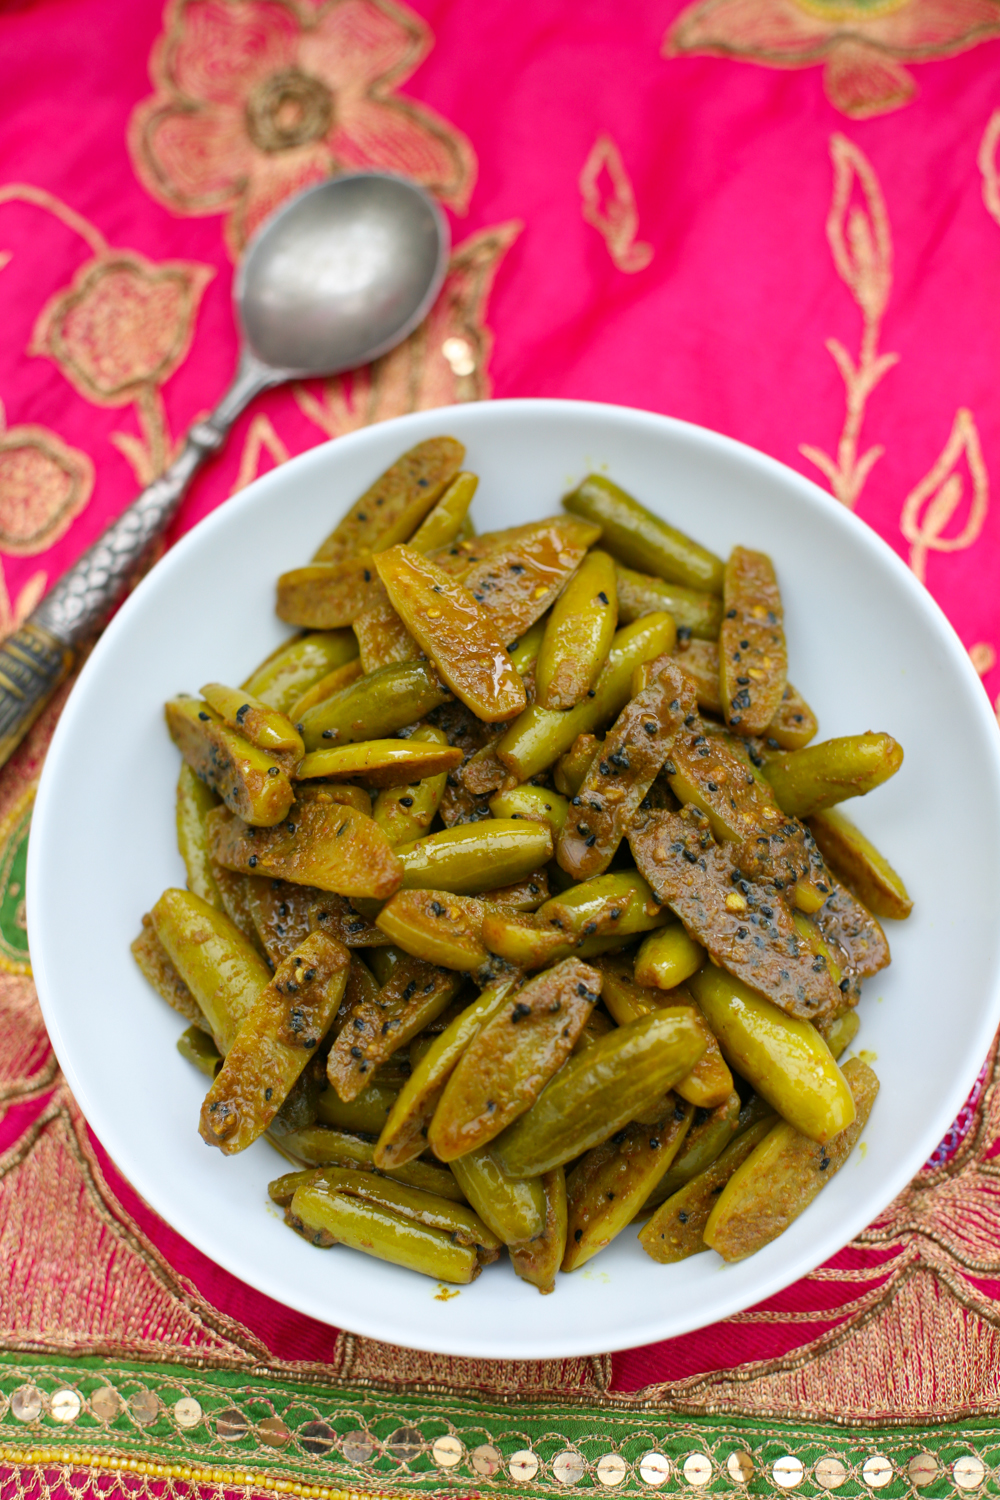
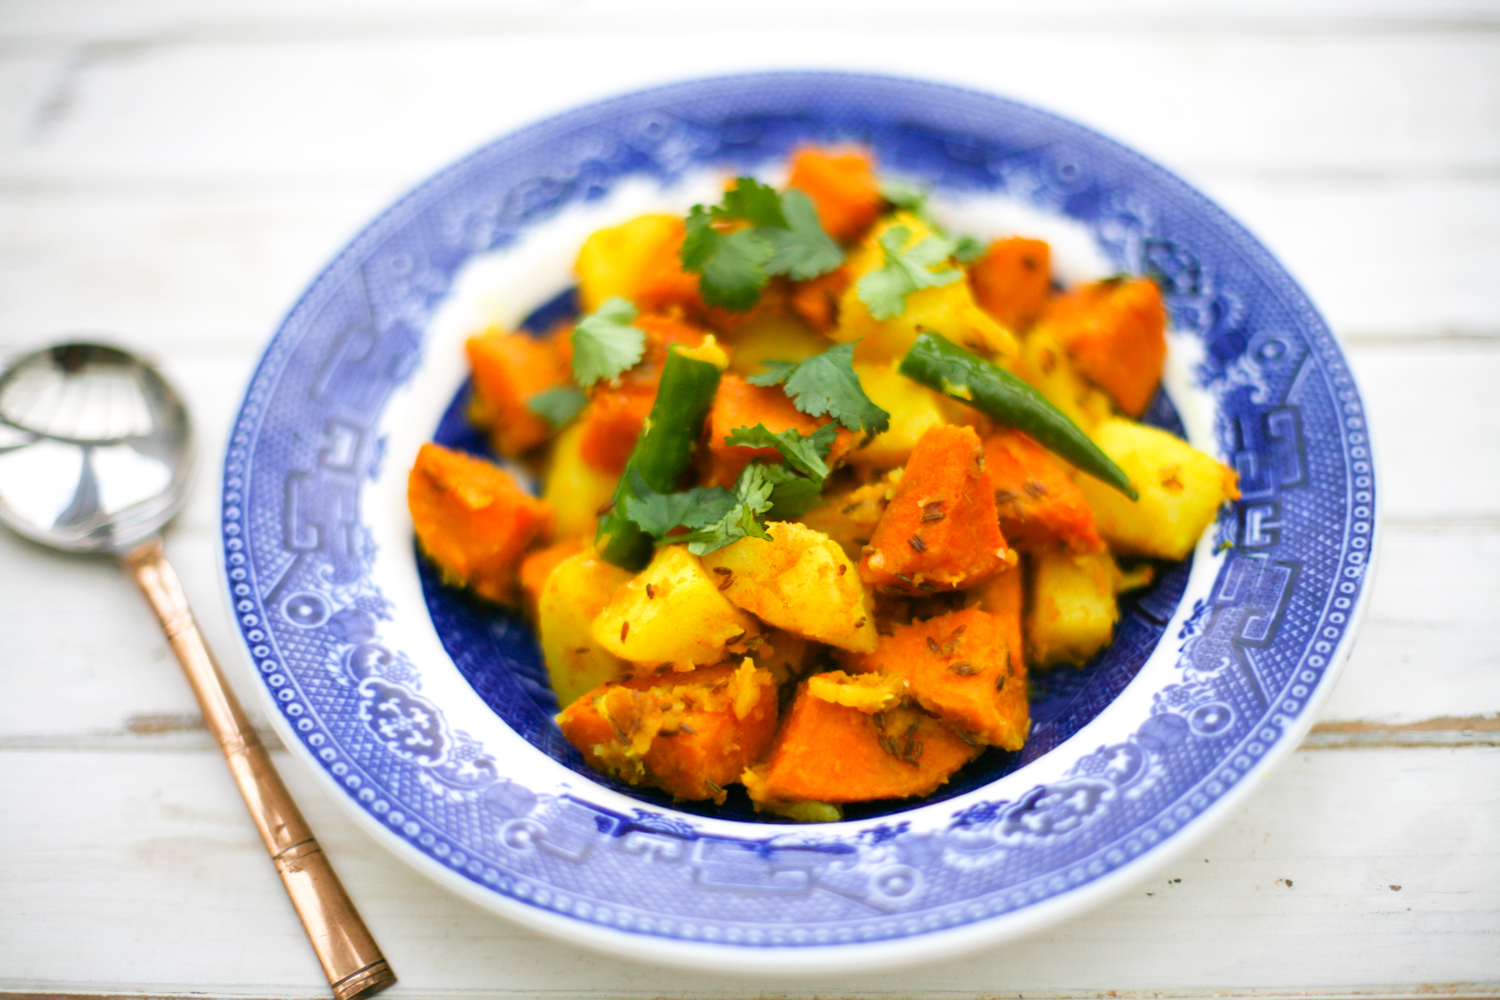
The photo above and below are of the cucumber and green tomato relish.

IMG_7606

Green tomatoes are simply tomatoes that have not ripened in the sun. Change in weather can mean that some of your crop just aren’t able to make the transition from green to red. That said you can bring the whole plant inside and there are ways to help them turn red – see here for tips, but my mother had already picked the remaining tomatoes, most of which were green.

IMG_7515

To eat raw, whilst still green, would not be advisable as they are tart, however by cooking and making into a chutney or relish brings them into their own and sweetens them enough to make a fabulous little preserve.

IMG_7523

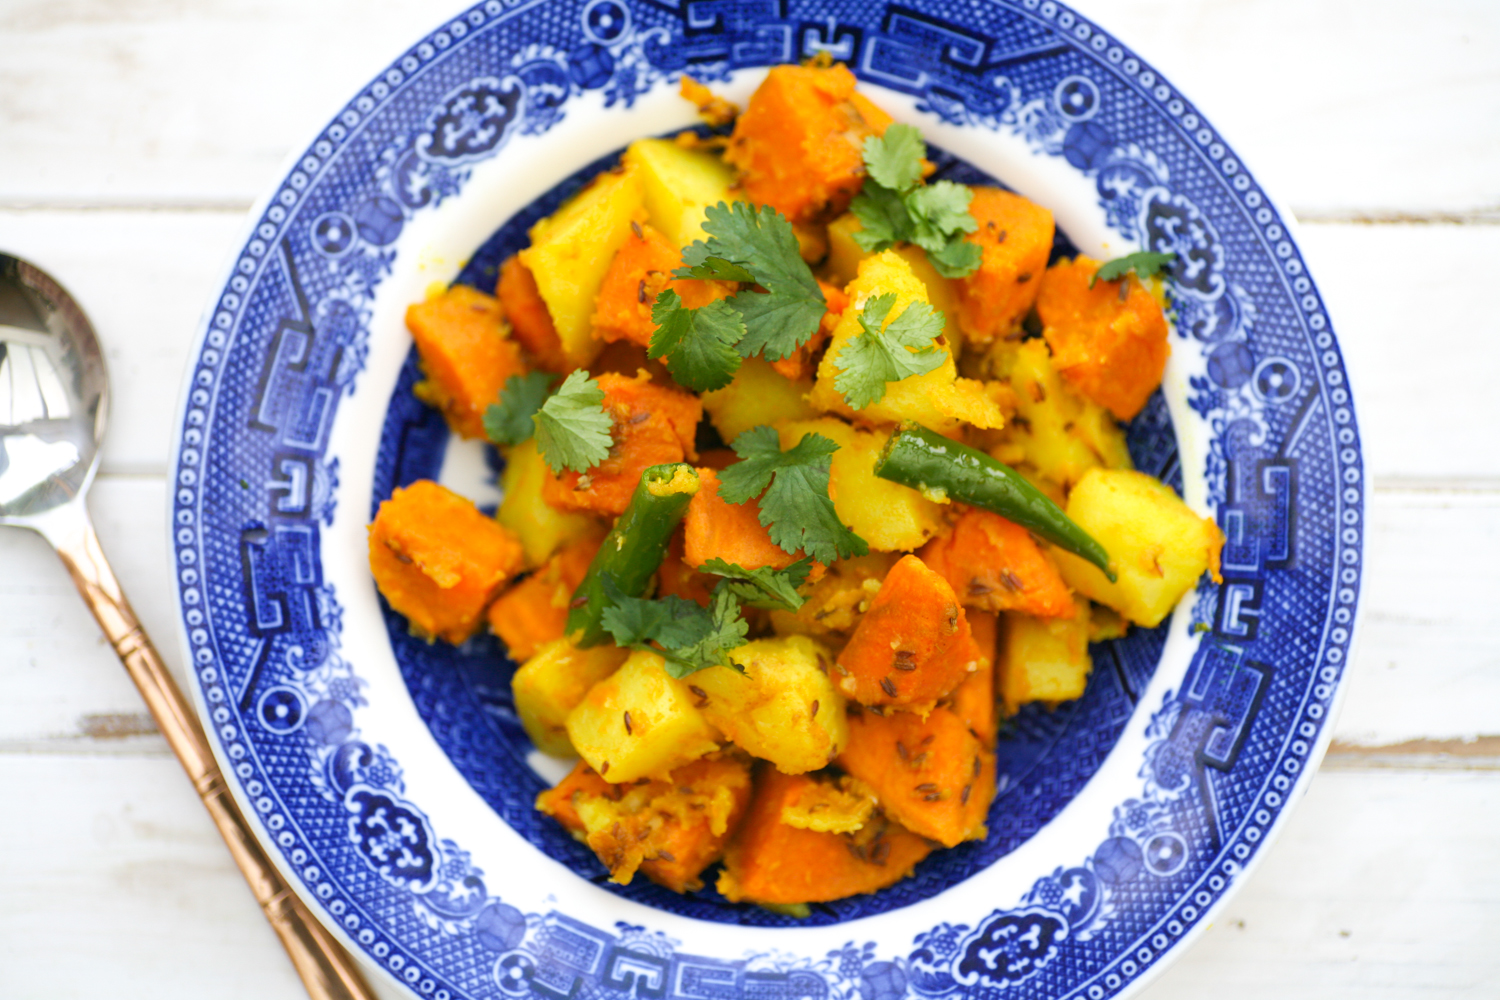
Both recipes require a fair amount of chopping so if you can gather in helpers that will certainly speed up the laborious part of the preparation.  The above photo shows the layered vegetables in the colander sprinkled with salt – they leave them like this overnight.

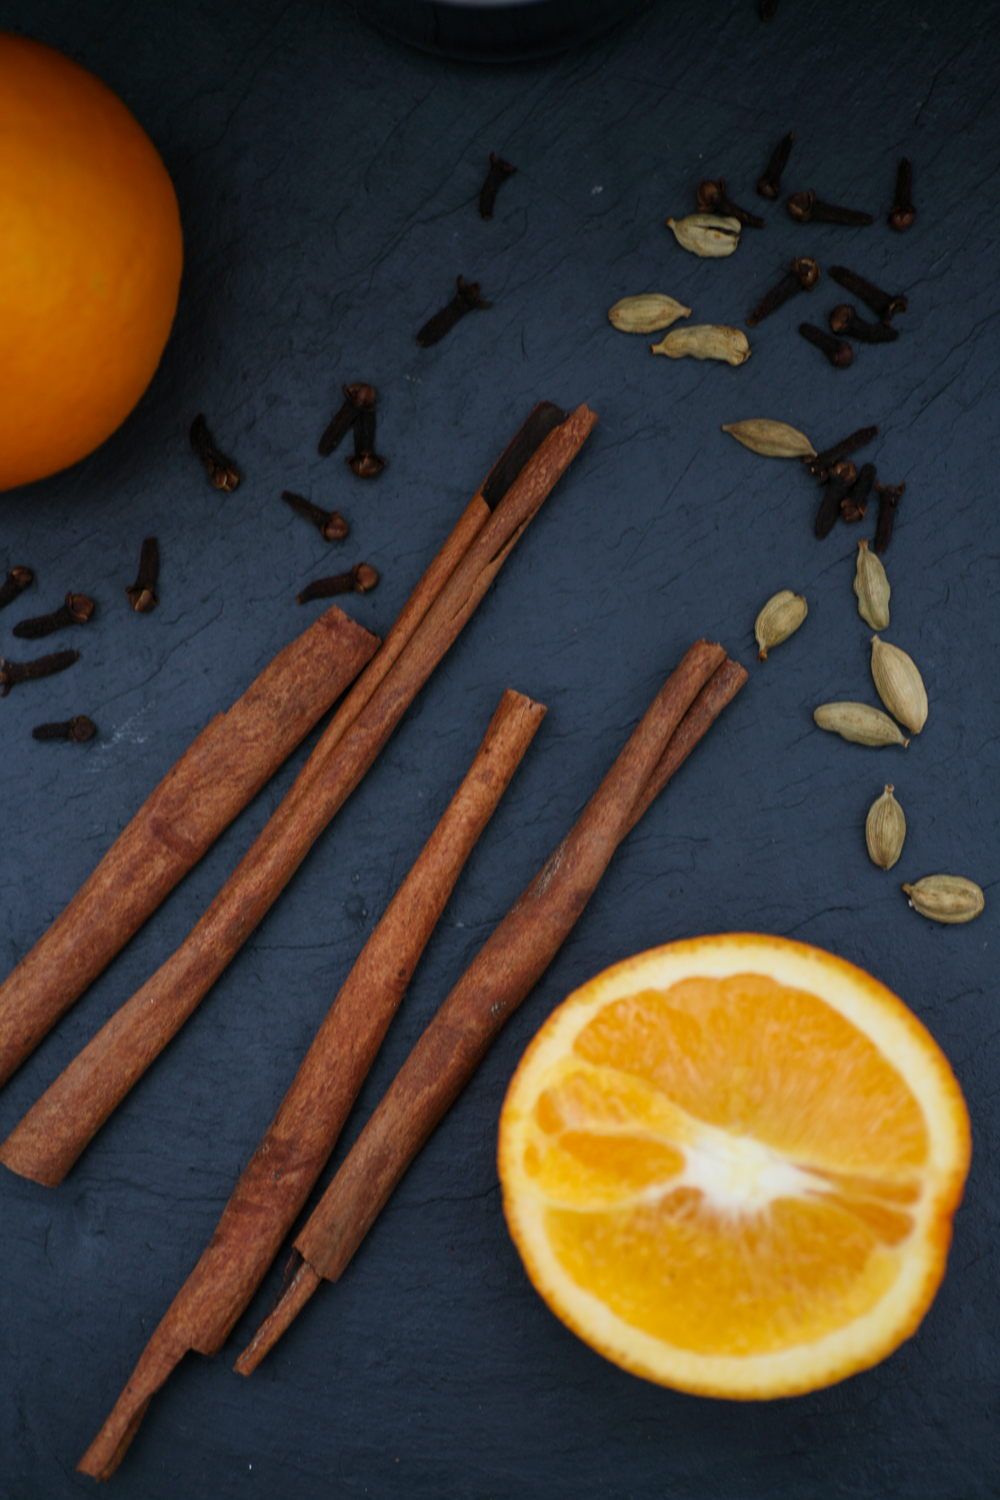
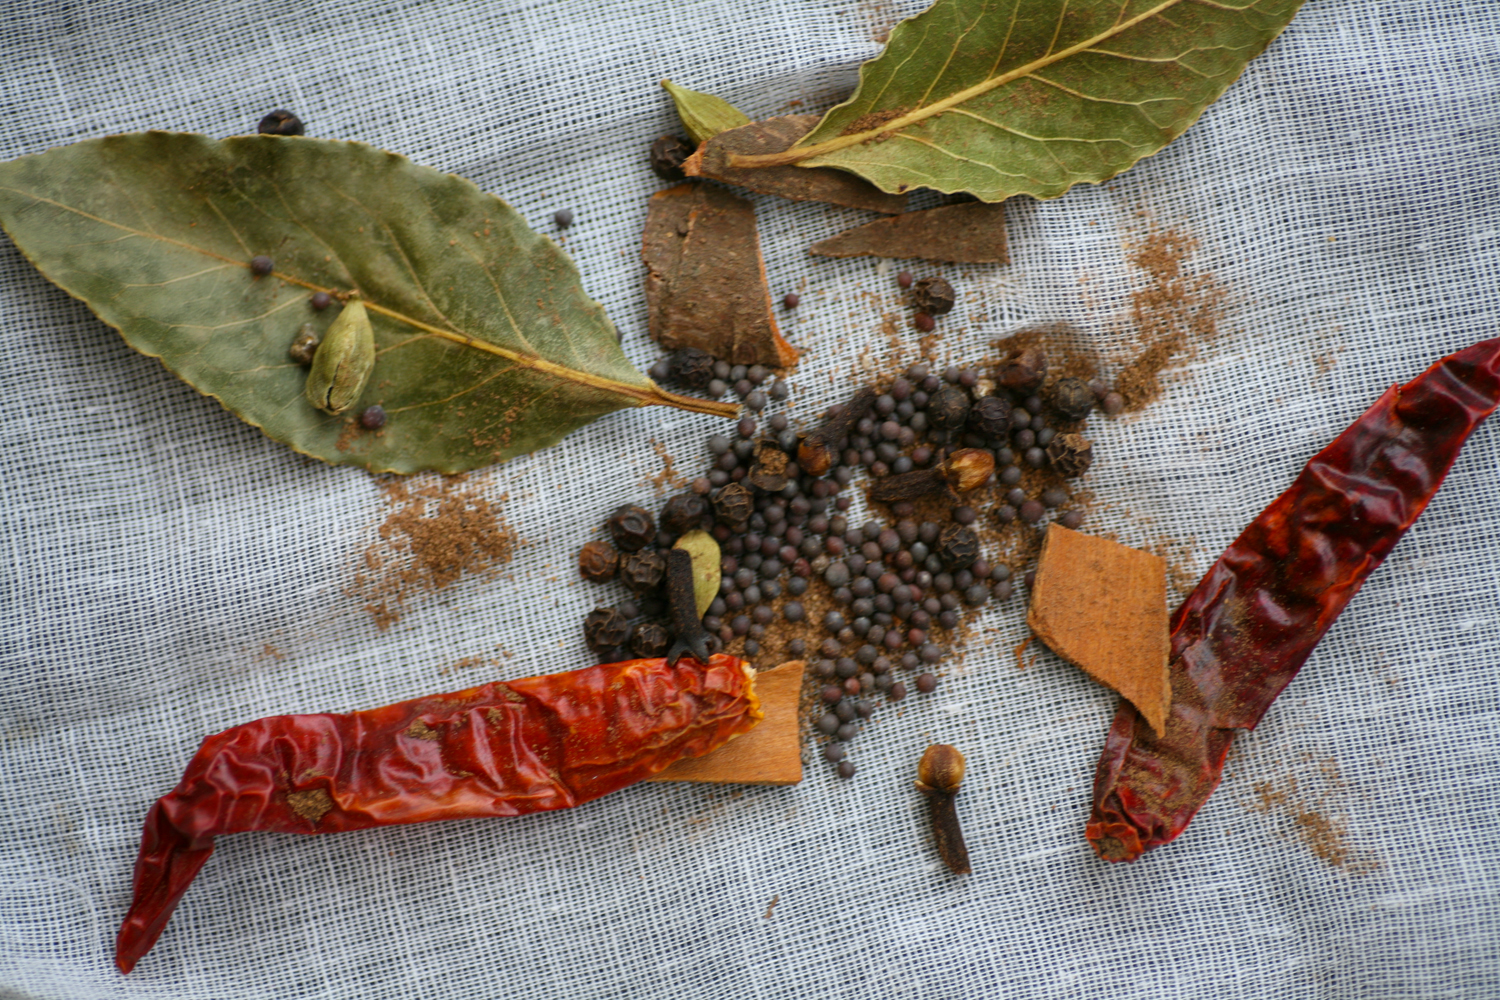
The photo below is the pickling spice that is used in the chutney but not the relish!  I have made my own pickling spice – you can add whatever you fancy, but I decided upon bay leaves, green cardamom, black mustard seeds, dried chillies, whole cloves, cinnamon bark, allspice and peppercorns.

IMG_7534

Once you have made either the relish or chutney – or both, once sealed in jars, leave to rest in a dark, cool place for a couple of weeks for the chutney and 1 week for the relish. The chutney will last longer – around a year, whilst the relish should be eaten within 6 months. Once open store in the fridge and eat with in a couple of weeks.

Both recipes below I have adapted from ‘The Complete Book of Preserves & Pickles’ by Catherine Atkinson and Maggie Mayhew

Green Tomato Chutney

makes approx 8 jars. I mainly use Wares of Knutsford 250ml Mason jars

2.3 kg green tomatoes, chopped

600g cooking apples, chopped – cored and peeled

600g onions, chopped

4 garlic cloves, crushed

1.5 tbsp salt

1 small muslin bag full of pickling spice (see below)

800ml cider vinegar

600g granulated sugar

**********************************

Pickling spice

1/2 tsp allspice

2 bay leaves

3 green cardamom pods

1 tsp black mustard seeds

2 inch piece of cinnamon bark, broken into pieces

4 cloves

5 peppercorns

2 dried red chilli

1 small piece of muslin cloth

some string

You can also add dried ginger, cassia, coriander seeds

1. After roughly chopping all the tomatoes, apples, onions and garlic place them in a large pan (or two if you need to) and add the salt. Add the muslin full of pickling spice, securely tied, along with half the vinegar and bring to the boil.

2. Once it has reached boiling point, reduce the heat and let it simmer for an hour stirring at regular intervals to aid with the softening of the ingredients.

3.  In a separate pan add the remaining cider vinegar and sugar and gently heat, stirring until the sugar has completely dissolved. Once this has happened pour into the main pan and give a good stir. The chutney needs a further hour and a half to simmer and become thick.

4. In the last half hour of number 3. wash the jars and lids in hot soapy water and then place in a cold oven. Turn the oven on to 110 degrees and then let the jars and lids (do not place the lid on the jar) sterilise for 30 mins.

5. Once the jars and lids have sterilised and the chutney has become thick remove the muslin and then spoon the hot chutney into the warm jars and seal. I find this wide neck funnel, immensely useful during this process as it means I keep the rims of the jars clean. I tend to put a waxed disc on top (was side down), although I think with the two piece gold disc and screw band lid it is probably not necessary.

6. Label and store in a cool dark place and leave to mature for a couple of weeks before opening. It will last for up to a year.

IMG_7539

Cucumber and Green Tomato Relish

Makes approx 5 jars

2 cucumbers, cubed 1cm

900g green tomatoes, cubed 1cm

4 onions, finely chopped

1.5 tsp salt

350ml white vinegar

150g demerara sugar

200g granulated sugar

1tbsp plain flour

1/2 tsp mustard powder

1.  Layer the cubed cucumber, green tomatoes and finely sliced onions in a colander placed over a bowl and sprinkle each layer with salt. Leave to drain for minimum 6 hours or overnight if you can.

2. Removing the salty liquid and place the vegetables in a large pan along with 320ml of the white vinegar. The remaining 30ml of white vinegar will be used later! Add both sugars to the pan and gently heat, stirring to allow the sugars to dissolve. Simmer gently for 40 minutes.

3. In a bowl add the flour, mustard powder and remanding white vinegar to form a paste and then add to the relish. Simmer for a further 20 mins or until the mixture is thick.

4. Similarly to point 4. in the instructions for the green tomato chutney, sterilise the jars and then spoon the contents of the relish into each one, remember to push the relish down firmly so that there are no air bubbles. Add the waxed disc, waxed side up (if using) and place the gold disc and screw top lid on top.

5. Store in a cool dark place for a week before using. Use within 6 months. Once opened store in the fridge and eat within a couple of weeks once opened.


Cha Ca La Vong – Vietnamese Fish with Turmeric, Ginger and Dill

IMG_7485

The melodic sounding ‘Cha Ca La Vong’ is one of Hanoi’s famous dishes consisting of white fish (often Vietnamese Snakehead fish) along with fresh turmeric, galangal, ginger, the pungent smelling Vietnamese shrimp paste, spring onions, rice noodles and a generous helping of fresh dill, coriander and mint and a scattering of peanuts.

My version is all of the above except no galangal (unless I happen to chance upon it), turmeric powder instead of fresh turmeric and no Vietnamese shrimp paste. I also find cod or tilapia work best for me, but basically you can use any thick white fish that has been filleted and does not have a propensity to fall apart.

IMG_7466

The flavour combinations work so well and I find it refreshing to give dill centre stage once in a while as I tend to find that it only ever gets partnered with salmon, trout and creme fraiche. The textures also really compliment each other, from the soft and yet delicately fried fish, to the crunchy nuts, the fresh flavoursome herbs and the filling noodles.  I like to accompany the dish with my sweet and sour nuoc cham dipping sauce – see here (at the bottom of the post).

IMG_7439

It’s one of those dishes which is perfect for guests to get stuck in and help themselves.  Part of the fun of it is to create the dish yourself, choosing the amounts of herbs that suit your requirements. I also find that when guests help themselves there is far less wastage as people, on the whole, tend to take what they are going to eat.  Both my daughters adore the dish and for my youngest I tend to make up a separate nuoc cham dipping sauce without fresh chilli.

*****************

Cha Ca La Vong – Vietnamese Fish with Turmeric, Ginger and Dill

Serves 4

600g cod or tilapia, cut into 2 inch chunks

1 tbsp fresh ginger, finely grated (equally you could use ginger paste)

2 garlic cloves, finely chopped (or as above)

1 tbsp fish sauce

1 tsp turmeric powder

1 tsp sugar

1 tbsp plain flour

3/4 tbsp of vegetable oil

6 spring onions, thinly cut on the diagonal

bunch of fresh dill

bunch of fresh coriander

bunch of fresh mint

1 generous handful of unsalted peanuts, slightly crushed

300g rice noodles

1. Place the fish chunks, turmeric, ginger, garlic, flour, sugar and fish sauce in a bowl and gently mix in together so that the fish is completely coated in the turmeric. Cover and leave to marinade in the fridge for a few hours or overnight.

2. Cook the rice noodles according to the packet (normally I boil them for 4 mins) and drain. Run cold water through them and place to one side. When ready to serve pour boiling water through it once, drain and place in a serving bowl.

4. In a different bowl place the fresh coriander and mint and in another place the peanuts.

5. Prepare the nuoc cham dipping sauce. For four people you will need to make two batches of this – see here.

6. In a frying pan add the oil and when it is hot add the fish in batches along with any remaining ginger and garlic from the marinade. Leave for a 2-3 minutes so they begin to crisp before turning over for another couple of minutes. Place the fish on kitchen roll whilst you are cooking the remaining fish chunks.

7. Once the fish has crisped up sufficiently add the dill and the spring onions for up to a minute before placing in a large serving bowl.

8. Allow guests to serve themselves, showing them how to layer up the dish by first placing the noodles in a bowl, followed by the fish, spring onions and dill, mint and coriander, peanuts and then a little nuoc cham dipping sauce over the top.


Bengali Egg Curry

IMG_7385

When I was staying in the heart of Kolkata, I was often woken from my deep slumber by the egg (dim) or milk (dudha) wallah shouting out in his crescendoing voice each morning. It was my regular wake up call to get out of bed and embrace the day ahead. There was something very charming about the wallah selling the fresh eggs and milk as he pushed his cart slowly down our road. Bengalis love eggs as much as I do. To this day, a picnic is not a proper picnic without a hard boiled egg. So when I was introduced to Bengali egg curry many moons ago, it was an immediate hit. Easy to execute, it makes for a most satisfying protein rich meal.

For the adventurous, this also serves as a wonderful late Sunday brunch with a kick.

IMG_7364

After boiling the eggs, remove the shell and place a cross with a sharp knife at the top of each egg and make a few other incisions on the skin and then cover them with turmeric and salt. Shake the bowl gently so that the eggs are properly covered in the turmeric.

IMG_7370

Fry the eggs in a pan so that the outer skins darken and harden. Then place to one side.

IMG_7427

Bengali Egg Curry

Serves 4

6 eggs, hard boiled

1 tsp turmeric

1 tsp salt

4 tbsp vegetable/mustard oil

2 onion, blended into a paste

4 garlic cloves, blended into a paste

2 inches of fresh ginger, blended into a paste

2 bay leaves

1 tsp cumin powder

2 tsp coriander powder

1/2 tsp sugar

1 tsp kashmiri red chilli powder

1 plum tomato from tin and a little juice (or 1 fresh tomato)

1 tsp garam masala

1.  Boil the eggs in water for 5 minutes and then strain under cold water and peel off the shells.

2. Place a small cross incision at the top of each egg as well as a few prick marks over their sides so that they do not explode during cooking. Place in a bowl and cover with turmeric and salt.

3. In a pan heat up some oil and when hot carefully lower the eggs into the pan and let them sizzle away for a few minutes so that the sides are bronzed and the skins harden. Remove from the pan and place to one side.

4. With an electric blender, blend the onion, garlic and ginger to form a paste. Add a little water so that the paste runs smooth. In the same pan that you cooked the eggs in, add a little more oil before adding the onion/garlic/ginger paste and simmer gently, moving the paste around in the pan with a spoon. When it dries up add a little boiling water and continue to heat through.

5. Add the chilli, coriander and cumin powder as well as the bay leaves and fold into the paste. Now add the chopped plum tomato and a little  tomato juice (about 2 tbsp) and leave to simmer.  Add a little more boiling water and let it simmer gently.

6. Return the eggs to the pan and fold into the paste along with the garam masala. Simmer for a few more minutes and add a little more salt if necessary.

Serve with some plain basmati rice or naan bread.

IMG_7395


Panch Phoron – Bengali Five Spice and Red Split Lentil Dal

IMG_7307

From top right going clockwise: fenugreek, nigella, fennel, black mustard, cumin seeds

We’ve all heard, and no doubt use, Chinese Five Spice, but the Indian equivalent, Panch Phoron, for some reason is not given as much PR and voice in the West and yet across Bengal, it is a spice mix that is commonly used in every home and very much cherished.

When I launched my blog way back in 2011 one of the first recipes that I posted was my absolute comfort food – red split lentil dal. I cook it often as it is ridiculously easy and provides me with a quick-fix nourishing meal. You can choose whatever vegetable, if any, you need to use up, giving the dal a different twist every time you prepare it. A key seasoning to the dal, which imparts the unmistakable flavour, is panch phoron and whilst I am able to source it from a local Indian supermarket, I know that for some people getting their hands on this magic ingredient could be harder.

IMG_7292

So I wanted to show you how to make your own panch poron. Panch in Bengali is five and phoron is spices and these five spices are: nigella seeds (other wise known as black onion seeds, Kalonji or kalo jeera), fennel seeds (mouri or saunf), fenugreek seeds (methi), black (brown or yellow) mustard seeds (rai) and cumin seeds (jeera). The aromatic spices working together provide a  considerable depth of flavour to any dish and especially to dal.

IMG_7312

Unlike most spice mixes these are not ground to a powder but are cooked whole, either dry roasted in pan or placed in a little oil until they begin to pop and release their flavours – this is known as tempering. There are significant health benefits from eating the spices. In short: cumin aids digestion, fennel contains vitamin a, e and c as well as anti-oxidants, fenugreek aids metabolism, mustard seeds contains omega 3 fatty acids as well as being a good source of selenium and magnesium, nigella seeds balance the hormonal system and have healing qualities.

They store for months in an air tight container so if you make up a batch that should last you for some time as you only need a teaspoon or two every time you use it in a dish.

IMG_7321

There are a couple of lentils that do not require soaking over night and take a very short time to cook. Masoor dal or red split lentils, as they are more commonly known, are a staple in my store cupboard. From cleaning thoroughly to cooking, the dal takes no longer than 20 minutes to prepare – and that’s being generous – on average it’s a 15 minute meal to prepare and cook. Oooh Jamie Oliver would be so proud!

IMG_7322

Red split lentils are also very reasonable to buy so all in all this dish is healthy, speedy and economically friendly. A win win surely!

IMG_7358

I eat this dish all year round and like to change the consistency from a more runny, soupy dish to a thicker dal that may be eaten the Indian way, with your hands, accompanied by some rice or naan.  When the months turn colder I tend to gravitate more and more towards dals and soups to warm me up so this really is the perfect autumn meal to give me that inner glow.

Panch Phoron – Bengali Five Spice

Makes enough to last you for months

3 tbsp cumin seeds

3 tbsp fennel seeds

3 tbsp fenugreek seeds

3 tbsp mustard seeds (I tend to use black, but brown/yellow is also fine)

3 tbsp nigella seeds (black onion seeds)

1. In a bowl mix all the seeds together thoroughly and place in an air tight container.

********************************

Red Split Lentil Dal

Serves 2

200g red split lentils (masoor dal)

500ml of water, add more if you would like it a thinner consistency

1 tbsp oil (mustard,vegetable or sun flower oil)

1.5 tsp panch phoron

2 fresh chilli (red or green), chopped in half

1 tsp turmeric

1 tsp salt

5 cherry tomatoes (or carrots, courgette, marrow, peas etc)

optional

fresh coriander, to serve

lemon wedge, to serve

1. Boil the kettle and meanwhile rinse the red split lentils under the tap so as to fully clean them. Then place the boiling water in the pan with the lentils. Boil for about 10 minutes on a low heat, the lentils will become less orange in colour during the boiling.  If you are going to add a carrot you need to add it to the lentils at this stage so that they are soft in time. Please note you may need to add more water if the water is completely soaked up by the lentils.

2. In a frying pan warm the oil and when it is hot add the panch phoron, fresh chilli and turmeric. Once the panch phoron begins to pop and release the flavours – this will be around 15 seconds, give it a quick stir and then add a ladleful of the watery dal into the frying pan and mix the ingredients together.

3. Now place the contents of the frying pan back into the main pot with the red split lentil and stir.

4. Add the quartered tomatoes (or peas, courgette, marrow, spinach) at this stage and simmer gently for a few minutes.  Add salt to taste.  If you want it more soupy, add more water and if you want it thicker, let it simmer for longer.


Hearty Venison Casserole with Star Anise, Nutmeg and Pink Peppercorns

IMG_7260

Our desire for comfort food begins to kick in around Autumn. For me this is a time to start cooking stews and casseroles – meals that are warming after a long walk in the fresh air. The game season is upon us so it is easy to pick up grouse, partridge, pheasant, snipe, rabbit and also venison. Game is extremely lean and surprising good value, so there tends not to be a week that goes by when my family do not eat some form of game over the Autumn/Winter months.  I’ll be putting up some more game recipes with a spiced twist over the coming weeks to give you some ideas on how to cook it.

IMG_7258

Unlike other game, venison doesn’t actually taste particularly ‘gamey’ and approximates beef. It is however far leaner and has more protein than any other red meat and is packed full of vitamin B’s.  So from a health perspective, it’s a great red meat to include in your diet. Now is the time to buy wild venison as they are are in good shape from their summer feeding, however, farmed venison is available year round.

IMG_7274

This recipe is a homegrown and has a delicious taste to it resonating from the star anise, nutmeg and pink peppercorns that work so well with the venison, mushrooms and red wine gravy. It’s different for sure but surprisingly works really well, so it has become a household staple recipe for us. Eaten warm,with crusty bread and a glass of red wine by a roaring fire, ok maybe I’m getting carried away but you get the picture, and you too will feel a warm happy glow as it nourishes your body. So try it and let me now what you think. If you have never tried venison before give it a go, you will be very pleasantly surprised by how good and lean it is. Just get those Bambi thoughts out of your head!

IMG_7286

Hearty Venison Casserole with Star Anise, Nutmeg and Pink Peppercorns

Serves 4

1 tbsp olive oil

1 tbsp butter

3 star anise

2 onions, finely chopped

1kg venison, diced

3 carrots, chopped into 1 inch pieces

3 turnips, cut into 1 inch pieces

1/2 tsp nutmeg

1tsp heaped pink peppercorns and a few extra to garnish

175ml red wine (1 small glass)

175ml vegetable stock

200g mushrooms, quartered

crusty loaf, to serve

1. Place the olive oil and butter in a casserole pot. When it is hot add the star anise and after 20 seconds add the onions and lower the heat slightly so they do not burn.

2. When the onions have softened add the venison, carrots, turnips* nutmeg and pink peppercorns and give a good stir. Leave to brown for a few 5 minutes, stirring and turning the meat over at intervals.

3. Add the red wine and vegetable stock and turn the heat up for 10 minutes, before reducing the heat to a simmer for a further 40 minutes or until the carrots have softened and the venison is cooked. In the last ten minutes add the mushrooms and stir into the casserole.

4. Serve warm in bowls with an extra scattering of pink peppercorns, crusty bread on the side and a glass of red wine.

-The reason for adding 1 tbsp of butter is to help keep the venison moist. As it is such a lean meat without a little help from fat it will dry out!

*I have added turnip since I have made this version and I find it works really well. 

-You can also add potatoes to the pot if you want to avoid crusty bread.

-Best to avoid eating the thistle!


Tlayudas – Mexican Open Pizza and Homemade Guacamole

IMG_7052

Homemade guacamole packs a punch well above the bought stuff.  I know this my trade mark line (yawn yawn!), but it really is a breeze to make and is so tasty you’ll be wishing you had bought more avocados. As well as being a moreish dip – I kid you not, if I leave the room with a bowl of guacamole and tortilla chips, when I return the contents of the bowl will be clean – it’s also the perfect filler for the Mexican pizza Tlayudas, pronounced something along the lines of (clae-yoo-das).

These pizzas can be made with Middle Eastern flat breads/pittas a supply of which I always have in my freezer. It’s simply a case of piling on all the ingredients, with the flat breads sitting directly on a frying pan and then folding them over slightly to give the appearance of an thick taco. You can fill the flat breads with whatever takes your fancy, however I find that guacamole; shredded, poached chicken; mozzarella; pecorino; spiced sun blushed tomatoes; spinach; tarragon and rocket really hits the spot.

Be warned eating this is not a tidy pastime. However, you can get seriously involved and at one with your food.

Let me know if you give them a whirl and leave a comment below.

IMG_7036

Homemade Guacamole

adapted from Thomasina Miers’s book Mexican Food Made Simple

Serves 4

1/2 a red onion, finely chopped

2 serrano green chillies (1 if you prefer it less spicy), finely chopped

3 large ripe avocados, stoned and skin removed

1-2 limes, juice

pinch of rock salt

handful  of freshly coriander, chopped

black pepper

1. After finely chopping the red onion and chillies (I tend to leave the seeds in to give it that extra kick) place them in a bowl and  mash them together a little before adding the avocado. If you don’t have a pestle and mortar I find a good sized bowl and an end of a rolling pin work really well.

2. Add the juice of one lime and stir well into the guacamole, along with the salt, pepper and the chopped coriander.

3. Taste and add the juice of a further lime if needed – down to personal choice. I love it limey so tend to add two.

4. Give a good stir and spoon into a serving bowl/dish.  Place in the fridge whilst you are preparing the ingredients for the Tlayudas. Do not prepare too far in advance as the avocado will begin to discolour.

IMG_7059

Tlayudas, Mexican Open Pizza

adapted from Thomasina Miers’s book Mexican Food Made Simple

Serves 4

2 chicken breasts, poached and shredded

1 large bag of spinach

1 tsp of butter

4 large Middle Eastern flat breads

a bowl of homemade guacamole, see above

2 large mozzarella balls, torn into smaller pieces

16 slow baked tomatoes with chilli 

2 handfuls of rocket

1 handful of fresh tarragon

rock salt and pepper

pecorino or cheddar cheese for grating

1. Poach the chicken (in boiling water for up to 20 mins) and then shred it using a fork.  Place to one side.

2. Place a saucepan on low heat and add the butter. Once it has melted add the washed spinach and cook for a minute until the spinach just wilts. Remove from the pan and strain the spinach, pressing down firmly with a spoon so that the water is removed as far as possible. Place to one side.

3. Heat up a large frying pan and when it is hot add a flat bread and press down gently. Sprinkle a drop of water and turn the flat bread over. Now you need to work quickly. Spoon on a generous helping of guacamole followed by the chicken, mozzarella, slow baked tomatoes in chilli, spinach, rocket, salt, pepper and some grated pecorino/cheddar.

4. The flat bread will begin to crisp up quickly and the mozzarella begin to melt, so carefully begin to fold the flat bread over. With a spatula lift the pizza onto a plate and serve immediately.

5. Repeat until everyone is served.

Dive in and enjoy. Don’t forget the napkins.