As those who have been sweetly following my blog for a while now will know, I adore healthy, appetising salads that combine and fuse together different meats, fish, vegetables, fruits and pulses. Whilst a simple green or rocket salad tastes sublime with a splash of lemon or a vinaigrette, I always like to prepare new flavour combinations that really lift a salad and take it to a new dimension. If you take a look under my recipe library above you will see a good variety of salads that I like preparing and eating. Purests may well say they are not salads as they are substantial meals unto themselves, but in my book they come under ‘salads that rock’, I hope you agree.

At the moment, wonderful vibrant red chard is available so I bought a bunch hoping to do something creative with it. I adore the brightness of the stems – similar looking to rhubarb. When it is young it is similar to spinach in that it can be digested raw or cooked. Rich in nutrients, it’s a winner in a salad from a health and looks perspective.
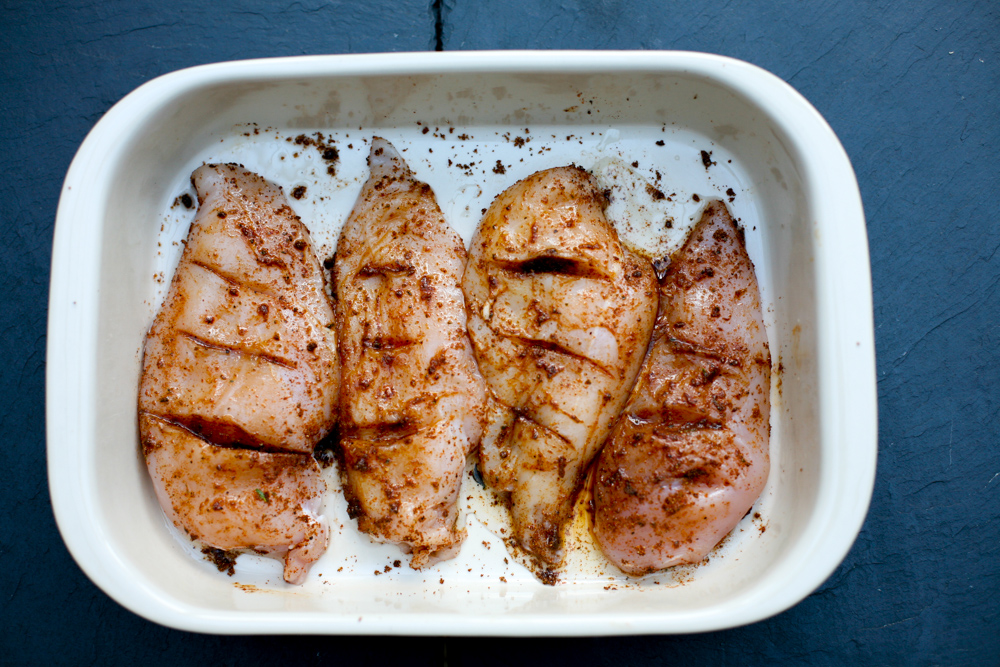
When you make my Cajun rub, make sure you properly smother it over the chicken breasts. I find that making a few incisions into each breast helps release the flavours all through the chicken.

I would be lying if I said that I have been eating quinoa (pronounced keen-wah) and bulgar wheat for years, but the truth of the matter is that aside from health food stores, it wasn’t readily available. Today, however, it is accessable in most mainstream food stores, certainly in London. My packet looked like this. After rinsing it through with cold water it simply needs boiling for 12 minutes and viola it is ready to eat.
Have you got any great salad combinations that work well together? If so I would love to hear so leave a comment below so we can all share ideas.
Homemade Cajun Chicken Salad with Quinoa, Bulgar Wheat and Red Chard
Serves 4-6
to make the Cajun rub
1/2 tsp ground cinnamon
1/2 tsp cayenne pepper
1 tsp garlic powder
1/2 tsp rock salt
1/2 tsp black pepper
1/2 hot paprika
2 tsp of fresh thyme
1/2 tsp fresh nutmeg
2 tbsp olive oil
*********
500g chicken breasts (4 chicken breasts, skins removed)
120g red and white quinoa with bulgar wheat
1 litre fresh cold water
250g new potatoes
150g fresh red chard, chopped into fine short strips
2 handfuls of fresh seedless red grapes, halved
1/2 lemon juice
seasoning
1. Preheat the oven to 180 degrees.
2. Start by making the Cajun rub. Combine all the ingredients, except the olive oil. Stir together and if you have a spice grinder give them a quick whizz in there so that they are perfectly blended together.
3. Lay your chicken breasts in an ovenproof dish and make a few incisions into the breasts so that you can push the rub into the incisions to give it that extra flavour. Place the Cajun rub all over the chicken breasts on both sides and then add the olive oil so that that the chicken is not dry.
4. Place in the oven for 25 minutes, turning the breasts once during cooking.
5. In a pan boil the 1 litre of water and when it is boiling add the red and white quinoa and bulgar wheat and leave to simmer for 12 minutes. Then drain and leave to one side.
6. Boil the new potatoes for up to 15 minutes in a separate saucepan with boiling water. Drain and leave to one side
7. Wash the red chard and pat dry. Finely slice the shard – as if you were making coleslaw. Wash the grapes and slice in half.
8. Finely slice the Cajun chicken, making sure not to get rid of the Cajun juices that will remain in the ovenproof dish.
9. In a mixing bowl add a little of the chicken, chard, quinoa and bulgar wheat, grapes and new potatoes. Give them a gentle mix with your hands before adding the same ingredients again in small portions so that they all mix well together. Add the lemon juice and the Cajun juices in the ovenproof dish. Season as necessary. Transfer to a serving bowl/platter.
It can be eaten at room temperature or when the chicken, potatoes, quinoa and bulgar wheat is still warm.