Boneless Southern Indian Chicken Curry

IMG_8635

I am guessing that most households will eat chicken at some point in an average week and whilst I do cook a number of chicken curries on the bone, it is always good to have some boneless chicken curries up your sleeve that you can whip together relatively quickly on a given evening. Cooking meat on the bone allows the meat to be more tender and succulent, but that said I know that having bones in a meal can really put some eaters off. So I hope this curry will be a happy compromise in that it is tasty, quick and bone free, therefore perhaps appealing to a wider audience.

IMG_8632

Whilst it does contain coconut milk the tomatoes balance out the sweetness to the extent the coconut doesn’t dominate this dish, instead giving it a subtle creaminess. I also find that adding just two chillies allows my eldest child, who is 8 yrs old, to really enjoy eating it as she does not find it too spicy. So if you find yourself wondering what to do with some chicken breasts in the fridge over the course of next week give this south Indian curry a go, you won’t be disappointed.

Boneless Southern Indian Chicken Curry

Serves 4

650g chicken breasts or thighs, cut into bite sized morsels

1 level tsp of turmeric powder

1/2 tsp of Kashmiri chilli powder

2 tbsp vegetable oil

1 tsp black mustard seeds

1 red onion, chopped

2 inches of ginger, peeled and finely grated

4 garlic cloves peeled and finely grated

************

curry paste

2 green chillies, chopped

1 red onion, chopped

3 garlic cloves, chopped

1 inch of ginger, peeled and chopped

1/2 tsp of black peppercorns

1/2 tsp ground cumin

1 tsp ground coriander

2 tbsp water

****************

5 tomatoes, peeled, skinned and chopped (put in boiling water for 3 mins then peel easily)

 2 limes, juice

250 ml coconut milk

salt to taste

fresh coriander leaves to serve

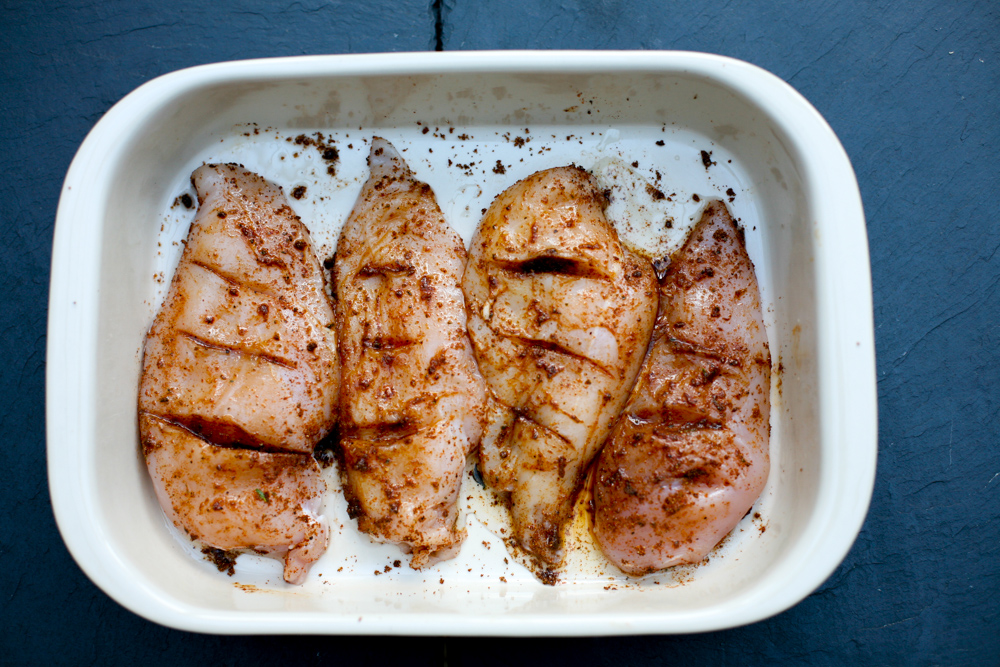
1. First marinate the chicken breasts at room temperature for up to an hour. Mix thoroughly with the turmeric and Kashmiri chilli powder and cover.

2. Prepare the chopping and grating of the onion, garlic and ginger for both the paste and the sauce and place to one side.

3. Place all the curry paste ingredients in a blender and blend into a smooth paste. Add a little more water if it needs help reaching a smooth quality. Place to one side.

3. Heat up a large pan with the oil and when it is hot add the mustard seeds. They will begin to pop within about 20 seconds  – move them around the pan to release the fragrance and then add the onion and stir into the oil and seeds. Cook the onions for 5 minutes, by which time they will begin to soften before adding the garlic and ginger. Cook for a further minute before adding the curry paste and stiring thoroughly. Let simmer away for a further couple of minutes.

4. Add the chicken and stir into the sauce so that it is coated and begins to cook. After 8-10 minutes the chicken should have turned white, with no pink bits remaining, and will begin to bronze in places.

5. Add the softened tomatoes (you can remove the pips but I tend to use it all up, bar the skin!), lime juice and coconut milk and simmer for a further 20 minutes to allow the flavours to work together and for the chicken to be thoroughly cooked through. Season to taste.

If the sauce needs to be juicier then simply add a little water. If it is too juice then cook with the lid off for a little longer.

Serve with fragrant rice or some Indian flat bread.

IMG_8629


Moroccan Giant Couscous Salad and a Mung Bean, Carrot and Feta Salad

IMG_8380

I had a few girlfriends over for lunch this week and thought it might be helpful to give you the low down on some of the things I prepared which allowed me to have a stress free time. Planning ahead is absolutely essential. There is nothing worse than having to fret over food last minute when all you really want to be doing is catching up with everyone. I tend to opt for large healthy salads and then prepare a hot soup of some sorts to warm the belly and soul.

IMG_8373

So first up was a mung bean, carrot and feta salad with cumin, caraway and fennel seeds. It requires some forward planning in that you need to soak the lentils overnight, but other than that it is very straightforward and ticks all the boxes for healthiness and importantly tastiness.

IMG_8388

Then I prepared my Vietnamese inspired salmon, cucumber, red onion and grapefruit salad with a mirin lime dressing. I posted it on my blog about a year ago. Check out the recipe here.

IMG_8390

Then I made one of my absolute favourite salads – a miso soy chicken with spinach, lentils, slow baked tomatoes, green  (you can use puy, beluga whatever takes your fancy) lentils and pine nuts. Recipe here. I opted to make my own slow baked tomatoes – you can find a recipe for them at the bottom of the post if you click here. Very easy to prepare and taste so delicious.

IMG_8389

To balance out the flavours, palate and colours I then prepared a Moroccan influenced salad of giant couscous, Moroccan spices, sultanas, pine nuts, fresh mint and pink lady apples. Recipe below.

IMG_8387

Excuse the rather hazy shot of the final ‘salad’, but I opted for shredded duck with pomegranate, spring onions, mint and coriander with a raspberry vinegar dressing. I posted the recipe here on my blog a while ago.

The hot soup that I prepared I completely forgot to take a photo of – so I will do a separate blog post on that another time – but it was a red lentil (I am slightly obsessed by these delicious little beauties), coconut milk and smoked paprika with a chilli oil and fresh coriander sprinkled on top.

Needless to say I cooked far too much of everything so will be eating tasty leftovers for the next few days!

IMG_8386

I’ll leave you with a pretty flower shot. I am so pleased that finally some of the wonderfully colourful and sweet smelling flowers are beginning to grace our florists.

Until next week folks…..

Moroccan Giant Couscous Salad

Serves 4-6

Inspired by a similar recipe from Red Magazine online

300g giant couscous

1 tbsp butter

50g sultanas

1 tsp smoked paprika

1/2 tsp cinnamon powder

1/2 cumin powder

2 shallots, finely chopped

1 garlic, finely grated/chopped

2 tbsp toasted pine nuts

handful of fresh mint, chopped

zest of a lemon

1 red chilli, finely chopped (half if you prefer it less hot)

2 pink lady apples, diced and cored

1. Place the couscous in a pan and completely cover with boiling water. Simmer gently for 6-8 minutes so that the couscous is soft. Strain and run under the cold tap. Shake off the water as much as you can. Place to one side.

2. Using the same pan melt the butter and then add the sultanas so that they are completely coated in the melted butter.  Now add the ground cinnamon, cumin and smoked paprika and simmer for one minute and then place to one side.

3. Dice and core the apple (if serving at a later stage hold off on cutting up the apple until almost ready to serve as it will begin to bronze), deseed the chilli and finely chop. Finely chop the shallots and grate the ginger and garlic cloves.

4. In a mixing bowl add the couscous, the sultanas with all the spices and butter juice and mix together. Now add the shallots, ginger and garlic and continue to fold into the couscous.

5. Scatter the apple on top along with the mint and lemon zest and serve.

Leftovers can easily be stored in the fridge for a couple of days.

*******************

Mung Bean, Carrot and Feta Salad with Cumin, Caraway and Fennel Seeds

Adapted from Yotam Ottolenghi’s recipe in ‘The Guardian’

Serves 4-6

300g dried green mung beans

1 tbsp chilli oil (or olive if you prefer to have less of a kick)

1 tbsp olive oil

1 tsp cumin seeds

1 tsp fennel seeds

1 tsp caraway seeds

2 tbsp white wine vinegar

2 garlic cloves, peeled and finely chopped

1/2 tsp dried chilli flakes

3 good sized carrots cut in to batons

1 tsp salt

1/2 tsp sugar

150g feta, crumbled (not finely)

handful of freshly chopped coriander

1. Soak the dried mung beans overnight in water that completely covers them.

2. The following day, rinse them a couple of times in cold water and then place them in a pan and cover with boiling water. Simmer gently for 25-30 minutes to soften them but so they still retain a bit of a bite.

3. Drain and rinse through cold water and set to one side in a large bowl.

4. In a small pan add the chilli oil (or olive see above) and when hot add the seeds and allow them to start popping, which will take no longer than 30 seconds. Stir a couple of times and then transfer the seeds and oil into the large bowl with the drained mung beans.

5. Add the white wine vinegar, garlic, chilli flakes and stir in together.

6. In a separate large shallow pan lay the carrot batons and almost cover with cold water. Add one further spoonful of olive oil along with the sugar and salt. Simmer on a high heat for 7 minutes by which time the carrots will have soften and the water will have drastically reduced – drain any excess. The sugar will allow the carrots to slightly caramelise.

7. Add the carrots to the mung beans and stir in gently. Add more salt if necessary. Transfer to a serving platter and crumble with feta.

Again this stores well in the fridge for a couple of days.

IMG_8394


Tlayudas – Mexican Open Pizza and Homemade Guacamole

IMG_7052

Homemade guacamole packs a punch well above the bought stuff.  I know this my trade mark line (yawn yawn!), but it really is a breeze to make and is so tasty you’ll be wishing you had bought more avocados. As well as being a moreish dip – I kid you not, if I leave the room with a bowl of guacamole and tortilla chips, when I return the contents of the bowl will be clean – it’s also the perfect filler for the Mexican pizza Tlayudas, pronounced something along the lines of (clae-yoo-das).

These pizzas can be made with Middle Eastern flat breads/pittas a supply of which I always have in my freezer. It’s simply a case of piling on all the ingredients, with the flat breads sitting directly on a frying pan and then folding them over slightly to give the appearance of an thick taco. You can fill the flat breads with whatever takes your fancy, however I find that guacamole; shredded, poached chicken; mozzarella; pecorino; spiced sun blushed tomatoes; spinach; tarragon and rocket really hits the spot.

Be warned eating this is not a tidy pastime. However, you can get seriously involved and at one with your food.

Let me know if you give them a whirl and leave a comment below.

IMG_7036

Homemade Guacamole

adapted from Thomasina Miers’s book Mexican Food Made Simple

Serves 4

1/2 a red onion, finely chopped

2 serrano green chillies (1 if you prefer it less spicy), finely chopped

3 large ripe avocados, stoned and skin removed

1-2 limes, juice

pinch of rock salt

handful  of freshly coriander, chopped

black pepper

1. After finely chopping the red onion and chillies (I tend to leave the seeds in to give it that extra kick) place them in a bowl and  mash them together a little before adding the avocado. If you don’t have a pestle and mortar I find a good sized bowl and an end of a rolling pin work really well.

2. Add the juice of one lime and stir well into the guacamole, along with the salt, pepper and the chopped coriander.

3. Taste and add the juice of a further lime if needed – down to personal choice. I love it limey so tend to add two.

4. Give a good stir and spoon into a serving bowl/dish.  Place in the fridge whilst you are preparing the ingredients for the Tlayudas. Do not prepare too far in advance as the avocado will begin to discolour.

IMG_7059

Tlayudas, Mexican Open Pizza

adapted from Thomasina Miers’s book Mexican Food Made Simple

Serves 4

2 chicken breasts, poached and shredded

1 large bag of spinach

1 tsp of butter

4 large Middle Eastern flat breads

a bowl of homemade guacamole, see above

2 large mozzarella balls, torn into smaller pieces

16 slow baked tomatoes with chilli 

2 handfuls of rocket

1 handful of fresh tarragon

rock salt and pepper

pecorino or cheddar cheese for grating

1. Poach the chicken (in boiling water for up to 20 mins) and then shred it using a fork.  Place to one side.

2. Place a saucepan on low heat and add the butter. Once it has melted add the washed spinach and cook for a minute until the spinach just wilts. Remove from the pan and strain the spinach, pressing down firmly with a spoon so that the water is removed as far as possible. Place to one side.

3. Heat up a large frying pan and when it is hot add a flat bread and press down gently. Sprinkle a drop of water and turn the flat bread over. Now you need to work quickly. Spoon on a generous helping of guacamole followed by the chicken, mozzarella, slow baked tomatoes in chilli, spinach, rocket, salt, pepper and some grated pecorino/cheddar.

4. The flat bread will begin to crisp up quickly and the mozzarella begin to melt, so carefully begin to fold the flat bread over. With a spatula lift the pizza onto a plate and serve immediately.

5. Repeat until everyone is served.

Dive in and enjoy. Don’t forget the napkins.


Vietnamese Chicken Rissoles with Shallots, Lemongrass and Garlic

IMG_6830

Vietnamese chicken rissoles, or patties if you prefer, are the perfect simple lunch/supper to prepare for all the family. Little Z, who is four, is always a bit unsure about eating chicken, however, disguising chicken as rissoles seems to really work as they are softer and therefore easier to eat than regular chicken pieces. Other than the dipping sauce, there is no chilli in the rissoles, so they really are family friendly.

IMG_6836

When preparing the rissoles you really want to make sure that the lemongrass and garlic is well chopped up. I chopped them with a knife to begin with before putting them into my spice grinder for a finer texture. The chicken and the shallots also need to be chopped up before whizzing them in a food processor.

IMG_6862

Once the all the ingredients have been combined place some oil into the palms of your hands which will allow you to easily shape your rissoles without them sticking to your hands. Roll them into a ball before flattening them slightly to give a pattie appearance. Cooking time is really short. After heating oil in a pan place five patties in your frying pan and leave them for 3 to 4 minutes before turning them over for a further 3 to 4 minutes. Make sure that the heat is consistent and they do not burn.

IMG_6876

I like to eat them with a fresh salad of tomatoes, red onions and coriander with splashes of nuoc cham sauce over the top, although my daughters prefer theirs with white rice noodles and splashes of light soy sauce. Any leftovers can be stored easily in the fridge and then enjoyed the following day in a baguette with shredded carrots, cucumber and fresh cucumber – similar to the Vietnamese sandwich – Bahn Mi. More on these glorious sandwiches another time.

Chicken Rissoles with Shallots, Lemongrass and Garlic

Makes 15 rissoles (yes myself and a little someone ate two before the photos above)

adapted from the recipe I learnt earlier this year from Van at her fabulous Green Bamboo Cooking School in Hoi An

500g boneless chicken breasts, chopped and then blended

4 lemongrass sticks, finely chopped/blended

4 garlic cloves, chopped/blended

3 banana shallots

2 eggs

1/2 tsp five spice powder

1/2 tsp cayenne powder

6 tbsp plain flour + extra for stopping the rissole sticking to your hands

1 tbsp caster sugar

salt and pepper

oil for frying

1. Finely chop the lemongrass and garlic, initially by hand and then in a spice grinder/blender./mortar and pestle. You want the lemongrass especially to be as fine as possible.

2. After roughly chopping the chicken and shallots place them in a blender until a chicken paste forms. Add the finely chopped lemongrass and garlic and pulse once again. Transfer to a large bowl.

3. Add the eggs, flour, spices and all the other ingredients. Mix well with your hands.

4. Place a little oil in the palm of your hands and then roll some of the chicken paste into your hands to create a ball and then gently press down to create the flattened rissole.

5. Heat a large frying pan with oil and when it is hot gently lower the rissoles into the pan. I usually do mine in batches of 5. Leave the rissoles to cook well on one side (3 to 4 minutes should be sufficient) before turning over and cooking for a further 3 to 4 minutes.

6. When they have browned, place the rissoles onto some kitchen paper to cool.

7. Serve with nuoc cham dipping sauce and a fresh salad

Nuoc Cham Dipping Sauce

juice of 1 lime

2 tbsp sugar

3 tbsp fish sauce

1 tbsp garlic, finely chopped

fresh chilli, finely chopped (optional/to taste)

1. Initially mix the lime juice with the sugar thoroughly before adding the rest of the ingredients. Continue to mix together. This sauce can be made ahead of time and can store easily.


Zereshk Polow – Iranian Chicken with Barberries and Rice

IMG_6663

Fairly recently I picked up a bag of dried barberries (also known as Zereshk or Pipperages) in one of my local Middle Eastern food stores. I do tend to like fruits in savoury dishes, this is customary in Middle Eastern cooking and so I had an inkling that I would probably love them. I posted a photo of my new purchase on twitter and one of my followers,  Sophia – who writes the blog ‘Real Simple Food’ – sweetly tweeted back saying how she enjoyed eating a savoury dish called ‘Zereshk Polow’ growing up, which used barberries.

IMG_6689

I did a bit of digging around on the internet and came up with a number of recipes for the dish. It immediately appealed to me as it incorporated chicken, rice, saffron, turmeric, yoghurt, milk, rice, onions – what’s not to like?

IMG_6685

Since my discovery of the dish I have cooked it a number of times, simplifying it from some of the more detailed ones on the web and those that are rich in butter and egg. The dish originates from Iran although I discovered that barberries are not as exotic as we are led to believe as they once grew in abundance all over Europe, US and Asia. Over time they were eradicated as they were responsible for creating a fungus that caused damage to wheat crops. There were a wide variety of barberries growing in sixteenth century Britain and one of the most loved was called ‘Nutmeg Barberry’, which would typically be served as a garnish for fish such as pike. English kitchens would also use the fruit to make jellies, jams and even ice cream – now there’s an idea!

The barberries themselves are bursting with a citric, tart flavour, not dissimilar to little lime explosions. Their crimson colour adds a jewel like quality to the dish, not unlike pomegranate seeds in their appearance, and this complements the turmeric and saffron in an explosion of colour. It looks inviting don’t you think? As they are dried, they store really easily. When cooking all you need to do is give them a thorough wash and then pop them in the frying pan for around 30 seconds, continuing to move them around the hot pan so that they puff up slightly.

IMG_6726

The final part of the cooking  requires some layering of ingredients before placing in the oven for 30 minutes. See photos below.

IMG_6753

Zereshk Polow (Iranian Chicken with Barberries and Rice

3 large handfuls of basmati rice

3 small red onions (totally 125g weighed), finely sliced

500g chicken breasts/thighs, cut into substantial pieces

4 tbsp butter

1 tsp turmeric

50g dried barberries

1 tsp sugar

4 tbsp milk

1 pinch of saffron

3 tbsp plain yoghurt

pinch of rock salt

1. Wash the rice thoroughly in cold water and place into a pan and pour in enough boiling water so that the water is roughly a thumb nail higher than the rice. (I tend to find this calculation works for me!) Cook on a low heat until the rice has absorbed the water and the rice has softened.  Remove from the pan and place in a bowl.

2. Soak the barberries in cold water for 10 minutes. In a pan melt a tablespoon of butter then add the strained barberries followed by the sugar. Move the barberries around the pan so that they begin to puff up. They burn really easily so keep them moving for max 30 seconds and then place to one side.

3. In a small bowl add the milk and saffron, stir and allow to rest. Once the liquid has taken on a yellow hue add the yoghurt and mix thoroughly into the milk and saffron.

4. In a large pan add two tablespoons of butter and gently fry the onions so that they bronze slightly. Gently place the onions into a bowl to rest.

5. Place the chicken in a bowl with the turmeric and mix in throughly. Add another spoonful of butter to the same pan that the onions were in and gently brown the chicken on both sides. Then add 150ml cold water to the pan and allow the chicken to gently simmer uncovered for 15 minutes.  Remove the chicken and place in a bowl to one side and place the liquid with all the extra bits from the bottom of the pan into another bowl.

6. Now for the layering:  In the same pan that you have cooked the onions and chicken – I find my Le Creuset casserole pot works superbly –  add the final tablespoonful of butter and make sure that it fully coats the bottom and the lower sides. Add a layer of rice so that it completely covers the bottom of the pot then place the chicken pieces on top. Next add another layer of rice mixed with the barberries. Then add the onions on the top followed by the yoghurt saffron milk and finally the juicy liquid that you have kept to one side.  Scatter a pinch or two of rock salt over the top.

7. Place in a preheated oven at 150 degrees centigrade  (300F) for 30 minutes with the lid on, allowing the flavours to blend together.

8. Serve straight from the pot when it is still deliciously hot.


Miso Chicken, Slow Baked Tomatoes and Fresh Spinach Salad

IMG_6527

Here in the UK we are enjoying a flashback to the summer of 1976, apparently. I was only one at the time so have no recollection of the ‘great summer’ but we are now into weeks, not days, of glorious warm sunshine with temperatures climbing up to 33 degrees in west London. When the weather is hot I love to get creative with my salads and try out different flavour and ingredient combinations. This one I created awhile ago when a friend, who has certain culinary likes and dislikes was coming over to supper. I started with the miso chicken and spinach and then built from there, digging out interesting ingredients from my fridge and pantry along the way. The overall mix of flavours works really well to the extent that I have now cooked this salad multiple times and thought you would appreciate having it too. It’s great for a picnic, lunch or supper, is hugely versatile and if you keep the chilli oil marinade to one side for guests to help themselves, then the whole family can enjoy the dish.

Miso Chicken Slow Baked Tomatoes and Fresh Spinach Salad

Serves 4-6

 For the Chicken Marinade

500g chicken breasts

3 garlic cloves, grated

1 inch ginger, peeled and grated

2 tbsp sweet white miso paste

1 tbsp sesame oil

1 tbsp light soy sauce

*******

parchment paper

3 tbsp pine nuts, toasted

250g puy lentils

1 avocado, chopped

6 slow baked tomatoes marinated with chilli

chilli oil from the slow baked tomatoes (see above)

250g fresh spinach

1. First you need to flatten the chicken breasts as they will cook under the grill more evenly and quicker if they are thinner. Place a large strip of parchment paper underneath the chicken breasts and another similar sized piece on top. Then using a rolling pin gently hit the chicken pieces which will begin to flatten. Check to see how they are looking and if they need to be a little flatter continue to hit them with the rolling pin. If you overly bash them they will begin to break apart so flatten them to the extent that they still keep in tact.

2. Place the flattened chicken breasts into a freezer bag and then add the grated ginger, garlic, sweet white miso paste, soy sauce and sesame oil. Using your hands massage the ingredients thoroughly into the chicken pieces. Place in the fridge for 30 minutes or longer if you can.

3. Heat up a small frying pan and when it is hot add the pine nuts being careful not to burn them as they toast quickly. Keep them moving around the pan and after a minute they should have toasted nicely.  Place to one side.

4. Heat your grill (you could also use a griddle pan or BBQ!) to 200 degrees centigrade and place the marinated chicken directly onto your oven rack. Place some baking parchment/foil underneath to catch all the bits than fall through the rack – these will also taste great in the salad.  The breasts will need around 6 minutes each side. If they look a little undercooked leave them for a minute or two more and vice versa.

5. In a large mixing bowl add the spinach, chopped/sliced avocado, puy lentils – for speed I often use the Merchant Gourmet brand – see here, pine nuts and slow baked tomatoes marinated in chilli. Whilst you can of course slow bake your own and marinate them in chilli oil (which I will get around to doing so at some point – will make a great blog post) I opt for the Sacla brand – see here. Chop the tomatoes up slightly and then gently mix all the above ingredients together.

6. Once the chicken has cooled slightly slice into stripes and mix gently into the salad along with the bits that had fallen through the rack. Add a little of the chilli oil from the slow baked tomatoes and place extra in a small pouring jug.

7. Transfer the salad to a serving bowl and allow guests to serve themselves. I find it is best eaten at room temperature.

It is surprisingly filling and leftovers the next day taste equally good, so just refrigerate if you have some left over.

IMG_6544


Homemade Cajun Chicken Salad with Quinoa, Bulgar Wheat and Red Chard

IMG_5544

As those who have been sweetly following my blog for a while now will know, I adore healthy, appetising salads that combine and fuse together different meats, fish, vegetables, fruits and pulses. Whilst a simple green or rocket salad tastes sublime with a splash of lemon or a vinaigrette, I always like to prepare new flavour combinations that really lift a salad and take it to a new dimension. If you take a look under my recipe library above you will see a good variety of salads that I like preparing and eating. Purests may well say they are not salads as they are substantial meals unto themselves, but in my book they come under ‘salads that rock’, I hope you agree.

IMG_5529

At the moment, wonderful vibrant red chard is available so I bought a bunch hoping to do something creative with it. I adore the brightness of the stems – similar looking to rhubarb.  When it is young it is similar to spinach in that it can be digested raw or cooked. Rich in nutrients, it’s a winner in a salad from a health and looks perspective.

IMG_5520

When you make my Cajun rub, make sure you properly smother it over the chicken breasts. I find that making a few incisions into each breast helps release the flavours all through the chicken.

IMG_5528

I would be lying if I said that I have been eating quinoa (pronounced keen-wah) and bulgar wheat for years, but the truth of the matter is that aside from health food stores, it wasn’t readily available. Today, however, it is accessable in most mainstream food stores, certainly in London. My packet looked like this. After rinsing it through with cold water it simply needs boiling for 12 minutes and viola it is ready to eat.

Have you got any great salad combinations that work well together? If so I would love to hear so leave a comment below so we can all share ideas.

Homemade Cajun Chicken Salad with Quinoa, Bulgar Wheat and Red Chard

Serves 4-6

to make the Cajun rub

1/2 tsp ground cinnamon

1/2 tsp cayenne pepper

1 tsp garlic powder

1/2 tsp rock salt

1/2 tsp black pepper

1/2 hot paprika

2 tsp of fresh thyme

1/2 tsp fresh nutmeg

2 tbsp olive oil

*********

500g chicken breasts (4 chicken breasts, skins removed)

120g red and white quinoa with bulgar wheat

1 litre fresh cold water

250g new potatoes

150g fresh red chard, chopped into fine short strips

2 handfuls of fresh seedless red grapes, halved

1/2 lemon juice

seasoning

1. Preheat the oven to 180 degrees.

2. Start by making the Cajun rub. Combine all the ingredients, except the olive oil. Stir together and if you have a spice grinder give them a quick whizz in there so that they are perfectly blended together.

3. Lay your chicken breasts in an ovenproof dish and make a few incisions into the breasts so that you can push the rub into the incisions to give it that extra flavour. Place the Cajun rub all over the chicken breasts on both sides and then add the olive oil so that that the chicken is not dry.

4. Place in the oven for 25 minutes, turning the breasts once during cooking.

5. In a pan boil the 1 litre of water and when it is boiling add the red and white quinoa and bulgar wheat and leave to simmer for 12 minutes. Then drain and leave to one side.

6. Boil the new potatoes for up to 15 minutes in a separate saucepan with boiling water. Drain and leave to one side

7. Wash the red chard and pat dry. Finely slice the shard – as if you were making coleslaw. Wash the grapes and slice in half.

8. Finely slice the Cajun chicken, making sure not to get rid of the Cajun juices that will remain in the ovenproof dish.

9. In a mixing bowl add a little of the chicken, chard, quinoa and bulgar wheat, grapes and new potatoes. Give them a gentle mix with your hands before adding the same ingredients again in small portions so that they all mix well together. Add the lemon juice and the Cajun juices in the ovenproof dish. Season as necessary.  Transfer to a serving bowl/platter.

It can be eaten at room temperature or when the chicken, potatoes, quinoa and bulgar wheat is still warm.

IMG_5546


Chicken, Mango and Avocado Salad

IMG_4273

Grey days deserve brightening up and there is no better way to lift ones mood, than to indulge in a rather bright and summery looking salad….. in winter. I recently had this salad at a cheery little deli/restaurant on the Kings Road (they have two branches now at differing ends of the Kings Road) called Megan’s, where the staff are attentive and cheerful and there is a constant flow of customers coming in to have breakfast, lunch or to indulge in tea and cake, either to-go or to linger for a while in the warm haven of the restaurant. There is a positive buzz, not least because the food is fresh and inviting and made on the premises. It’s casual, unstuffy eating where you queue in line at the salad and hot bar and take your pick.

What initially attracted me to the chicken, mango and avocado salad was the colour – the bold yellow balancing beautifully with the reddish pink of the radish and the green from the salad leaves and coriander. The blend of flavours and textures complimented each other so well and I like the fact that the chicken had been delicately romancing with the dressing.

I took a mental note of what was in the salad and swore to conjure up a similar one in my home and then to share with you all when I had got it right. Of course it works brilliantly in the summer months, but I think a splash of colour and a healthy salad in the winter is fabulously refreshing. You can choose to have your grilled chicken warm or at room temperature, both work equally well so it is up to your personal preference.

What recipes do you cook when you need to brighten up your day?

IMG_4256

Chicken, Mango and Avocado Salad

serves 4

Romaine lettuce, chopped

300g chicken breasts

1 avocado

1 mango

bunch of coriander, roughly chopped

approximately 6 radishes, sliced

salt and pepper

dressing

1 tsp dijon mustard

1/2 tsp whole grain mustard

3 tbsp olive oil

1 tbsp white wine vinegar

1 clove of garlic, crushed

1. Preheat the grill to 180 degrees and cook the chicken for around 20 minutes, turning half way through.

2. Slice, cut and chop the remaining salad ingredients and place in a large bowl.

3. Mix the dressing ingredients together and place to one side.

4. When the chicken is cooked, slice the chicken breasts into strips of edible bites and place into the large bowl.

5. Add a little of the dressing and then gently toss together with all the salad ingredients.

6. Place in a serving platter for guests to serve themselves, with a small jug with the remaining dressing on the side.


Musakhan – Palestinian Roasted Chicken with Sumac

I wanted to introduce you to a wonderful bold spice that is probably unfamiliar to some of you.

Step forward, Sumac. 

This wonderfully flavoursome spice derives from the berry of a plant called ‘Rhus Coriaria’ that ranges from bright red to plum in colour and is grown wild throughout the Middle East and some parts of the Mediterranean. Whilst you can buy the berry whole, it is more often purchased dried coarsely or finely ground. The Romans used it as a souring agent as it has similarities to lemons in its tangy, tart taste.

Whilst ambling around the spice market in Turkey this summer, I purchased some to last me for quite some time.  However, like most things these days it is also available closer to home and can be purchased at most supermarkets or Middle Eastern food stores.

So as to appreciate fully the qualities of the spice I thought a straightforward version of the ubiquitous Palestinian dish,  Musakhan, would be a great place to start. The ingredients are simple and yet make a most appetising meal that can be enjoyed by all the family. It’s definitely a meal that you have to roll your sleeves up and get stuck in, so as to speak, and it requires you to eat it ideally with your fingers – far more satisfying. A number of the recipes for this dish talk about the  sumac chicken and onions (and sometimes also allspice and saffron!) on a flat bread that then gets toasted and scattered with toasted pine nuts, but I thought I would create the dish in a wrap form to make it easier to pick up and eat. I leave it to you to consume in either the flat or rolled form, both will be equally delicious I assure you.

Musakhan

Adapted from moodfoodblog.com

1 whole chicken

75g sumac

6 onions (mix of red and white ideally), thinly sliced

3 tbsp olive oil

juice of 1 lemon

100ml chicken stock

salt and pepper

10-12 Middle Eastern flat bread

1. Place the half the sumac, 1 tablespoon of olive oil, lemon juice, salt and pepper over the chicken and leave to marinade for a few hours or overnight

2. Preheat an oven to 180 degree and roast the chicken for 1 hour or until cooked

3. Meanwhile, place the rest of the olive oil in a pan and gently fry the onions along with the rest of the sumac until the onions are  soft

4. Add the chicken stock to the onions and stir in thoroughly for a couple of minutes

5. When the roast chicken is cooked leave to cool slightly and then shred the chicken, using a fork, from the carcass. There will be lots of juices from the chicken and sumac so place these into a dish with the shredded chicken.

If you want to keep the remains of the carcass you could make this chicken soup.

6. On the Middle Eastern flat breads place the shredded chicken, soft juicy onions and wrap tightly and place back into the oven for a couple of minutes to heat through. Then serve immediately with a quarter of lemon on the side.

As an alternative you could serve the shredded chicken hot and warm up the flat breads and let your guests serve themselves and create their own wraps, in the same way that you would make your own duck spring roll!

I served mine with a green salad which was full of olives, gherkins and tomatoes. A garlicky yoghurt or raita would also work exceptionally well.

Smother the uncooked chicken with the sumac, olive oil, lemon, pepper and salt and leave to marinade for a couple of hours or if you are really well planned, overnight! I love the bright redness of the spice.

Shred the roasted chicken and mix it with all the juices that have come from the roasting. The taste is divine.

Be careful not to overfill or you will find it hard to warp and then hold and eat.

The finished product. Roasted chicken with sumac, lemon and onion wrap. They are totally addictive and I assure you it is easy to polish off quite a few.


Nigella’s Italian Roast Chicken with Leeks, Peppers and Black Olives and Leftover Chicken Soup

We had a family gathering last weekend and I wanted to cook a no fuss meal that would literally cook itself freeing me up to enjoy my guest’s company. So while we all sipped on our Aperol with Prosecco – a drink that I was introduced to this summer when we at our friend’s wedding in South Tyrol (and which has apparently become very in vogue in London this summer!) and caught up on each others news, the chicken and vegetables were nicely roasting in the oven without any need for stirring or turning over.

I paired them with good old roast potatoes (that I had parboiled first and then drained and given a good shake in the saucepan before putting them on a roasting dish with a splash or two of olive oil) that are always a home run at a family occasion. Couscous would work equally well or even mashed potato.

The saltiness from the black olives and the sweetness from the peppers and leeks worked a treat and together they created a delicious gravy to pour over the succulent meat and roast spuds.

I love it when guests can help themselves to what they want as this tends to avoid wastage as they only take what they are going to eat and also it’s a fun and relaxing way to all share a meal together. I chopped (no carving here) the chicken up so that there were lots of options on what meat they could dig into. Around the side I scattered the leeks, peppers and black olives and in a separate gravy jug I gathered all the juices.

With the remaining two carcasses I made some homemade stock, which I then turned into a delicious chicken soup for lunch the followingday. Easy, healthy and no wastage – other than the bones.

Italian Roast Chicken with Leeks, Peppers and Black Olives

adapted from Nigella Lawson’s latest series Nigellissima on the BBC 

Serves 8 (simply halve the quantity for serving 4 people)

2 whole chickens (1.3kg)

2 whole fresh lemons – halved

6 fresh rosemary sprigs

8 leeks, washed and trimmed

6 peppers – red/yellow/orange, quartered

300g black olives

good splash of olive oil

sea salt and pepper

1. Prepare the peppers and scatter them on a large roasting tray along with the leeks, which should be cut to 3 inches in length and then halved. Evenly spread the black olives over the vegetables along with two sprigs of fresh rosemary.

2. Take off any string on the chickens and place a whole lemon – cut in two, into the inside of each chicken along with two rosemary springs in each. Season with pepper and salt and splash the chickens and vegetables liberally with olive oil.

3. Place in a preheated oven at 180 degrees if using a fan oven (200 degrees if not!)  for approximately 1 hour 15 minutes – or until the chickens are bronzed and roasted and the juices are running clear when you cut into the chicken with a sharp knife.

4. Serve on a warm large platter with the chickens cut up in the centre and the vegetables and olives surrounding the meat so that your guests can help themselves.

5. There will be a good amount of juices left in the roasting dish, which you need to transfer to a gravy dish for people to pour over their food.

I served mine with roasted potatoes however, couscous or mashed potato would work equally well.

Homemade Chicken Soup

Serves 4

left over chicken (1 or 2) carcass

1 large carrot, chopped into three

1 medium sized onion, chopped in two

3 bay leaves

water to cover the carcasses

a good glug (half a wine glass) of cheap white wine

1 chicken stock cube (optional)

2 tbsp single cream

juice of half a lemon

pepper and salt

1. Place the chicken carcasses in a large pot and cover with water. Make sure that there are no lemons remaining within the chicken carcasses when you are making the stock.

2. Add the carrot, onion, bay leaves and wine to the pot and simmer gently for an hour and then set aside to cool.

3. Strain the liquid through a sieve and return to the pot along with the carrot and onion. Place the chicken carcasses on the side and remove all the remaining meat with your hands and place into the pot. The meat with easily come away from all the bones. Bits of rosemary will also be on some of the meat from when you first roasted it. Add this to the pot as well as it adds a lovely taste to the soup.

4. Gently heat up the liquid once again and add the single cream, one chicken stock cube (optional), juice from half a lemon, some more water if you want it to go further. Season to taste.

5. Using a hand blender, blend the liquid until it is smooth.

6. Serve piping hot with a quarter of lemon on the side should guests which to add a little more lemon and some crusty bread.