Fiery Chettinad Chicken

IMG_0969

Chettinad is a region in the southern eastern state of Tamil Nadu in India. The cuisine is commonly regarded as one of the most fiery and aromatic.

IMG_0932

It is famous for its dry masalas that use a wide array of spices including, rather surprisingly, star anise, as well as more commonly used Indian spices such as cumin, cloves, black peppercorns, cinnamon, cardamom, coriander seeds, fennel seeds and whole red chillies. Similarly to the rest of southern India, coconut and tamarind are also often used in cooking.

IMG_0946

The Chettinad people have always been successful traders, travelling far afield throughout Asia. This can be seen in their cuisine as they use a wide range of spices and techniques, clearly influenced by their travelling merchant ancestors.

IMG_0971

My recipe is perfect if you crave some spice. For those at the korma end of the spectrum probably ought to give this a wide birth, but for those who like a flavoursome kick THIS is the curry for YOU. My kids definitely would not eat it, but Mr B and I are big fans and I hope that some of you out there will be also. If you prepare it in the morning ready to eat in the evening it works a treat. You could also cook it a day in advance if you are feeling super organised.

If any of you cook this please let me know what you think. It really isn’t that hot if you are used to eating spice, so be brave and give it a go. It would be great on a hot summer’s eve with a cold beer – check out my brother’s beer here or a chilled lassi such as this one.

Chettinad Chicken

Serves 4-6

800g chicken thighs, cut into bite sized pieces

1 tsp turmeric powder

1/2 lemon, juice only

****

Masala

2 tbsp coriander seeds

1 tbsp cumin seeds

1 tbsp black peppercorns

2 tsp fennel seeds

1 cinnamon stick

3 cardamom pods, seeds only

6 dried red chilli

6 cloves

4 fresh or dried bay leaves

2 star anise

60g desiccated coconut

100ml cold water

****

3 tbsp ground nut oil

14 fresh curry leaves

2 red onions, finely sliced

2 tsp salt

2 tsp garlic paste (or fresh garlic made into a paste)

2 tsp ginger paste (as above)

3 fresh tomatoes, chopped

75-100ml cold water

****

fresh ginger batons to serve

****

1. First cut the chicken thighs into bite sized pieces and cover with the turmeric and lemon juice. Mix in thoroughly and then place to one side whilst you make the masala.

2. Heat up a non stick pan and when it is hot add all the spices (but not the desiccated coconut) and move them around the pan for just over a minute so as to lightly toast them and release the flavours.

3. Place them in a spice grinder. I have this one which is excellent and Debenhams is selling it at the moment for £18. Best investment ever. (I am not on commission to say that!)

4. Whizz them around the spice grinder and then take out half the powder and then add the desiccated coconut or as much of it as you can. Whizz again and remove some more powder and put the remaining coconut in the spice grinder. Transfer to a bowl and add 100ml of cold water to create a thick paste.

5. In the same non stick pan add the ground nut oil and when it is hot add the fresh curry leaves, red onions and salt and gently fry for 8-10 minutes. Add the garlic and ginger paste and move around the pan so that it does not spit.

6. Add the tomatoes and continue to cook for a couple more minutes before adding the masala paste.

7. Add the turmeric lemon chicken and cover fully with the masala paste. Add the remaining water and leave to simmer for 45 minutes, or until the liquid has become virtually dry. Stir at intervals.

To serve place a few fresh ginger batons on top of the curry. It goes really well with rice or Indian breads. It is always good to have a bowl of fresh yoghurt on the side as this dish is renowned for being fiery.


Chicken and Egg Kathi Roll – a Kolkata speciality

IMG_0457

Snow is forecast for London this week and our boiler has decided that this is the week to completely pack up on us *weeps*. Whilst we wait for a new one to be found and fitted, a small fan heater keeps me from freezing in the study. To keep mood and spirits up I have decided that comfort food is what is needed. Step forward ‘chicken and egg kati rolls’.

They are the perfect lunch time (or anytime come to thing of it) snack to perk you up and give you a feeling of happy blissful contentment.

IMG_0441

My husband is originally from Kolkata and these rolls, or wraps if you will, are very popular in the city. They are a cross between a Mexican burrito and a Lebanese chicken shawarma. In short, they are ridiculously delicious and one is never enough. Take a look at the locals in action on this little YouTube clip below.

I have seen some have a little egg omelette inside as well as the chicken, but I find the way that I prepare them below (and also in the video clip) works efficiently and quickly and allows you to wrap the Kathi roll more easily.

IMG_0426

 To save time you can buy your chapatis (or you could use paratha) but I find that making your own is pretty quick and easy and whilst not as circular as the store bought ones are equally delicious. I use a tawa, which is a flat disc like frying pan, which I picked up at my local Indian store, but if you do not have one a regular frying pan will work equally well.

IMG_0435

There are three steps to making these rolls – 1) the chicken filling, which can be made in advance, 2) the chapatis with the egg coating on one side, 3) the coriander and mint chutney, which can also be made in advance.

IMG_0438

They are best eaten straight away when they are hot. You can make a number of the chapatis with the egg topping and place them in a low warm oven to keep warm, whilst you prepare the rest or you can serve them as and when you prepare the chapatis.

IMG_0452

 My coriander and mint chutney is great with any of my curries and can be stored in the fridge for a week. I like to pop a couple of teaspoonfuls in my kathi roll to give it that extra kick. With a squeeze of lime on top then you have yourself a truly delicious treat.

IMG_0462


Coriander and Mint Chutney

1 handful of fresh coriander, washed and chopped

1 handful of fresh mint, washed and chopped

1 (or 2 if you prefer it hotter) small green chilli, chopped

1 small onion, chopped

5 garlic cloves, roughly chopped

1 tbsp fresh ginger roughly chopped

1 tsp cumin seeds

½ tsp sugar

salt to taste

1-2 tbsp lemon juice

  1. Place all the ingredients into a small blender and blend until you have a smooth paste. Taste and add more salt/sugar as necessary.
  2. Store in an airtight container in the fridge until ready to use.


******

Indian Chapatis with an egg coating

 Makes around 6-8 depending on the size of your chapatis

 200g chapatti (wholemeal) flour

 1 tsp sea salt

 2 tbsp sunflower oil

 125ml warm water

3 eggs, whisked

  1. In a large bowl place the flour, salt and oil and rub together with your fingertips. Gradually add the water so that a dough forms and all the flour is gathered up into one large dough ball.
  2. Place the dough ball on a floured surface and kneed for around 8 minutes so that the dough is soft and springs back when you poke it with your finger.
  3. Cover the dough with cling film and leave to rest for 20 minutes.
  4. Kneed once again for a couple of minutes, before breaking the dough up into smaller dough balls the size of large ping pong balls.
  5. Roll out the small dough ball so that it is circular and thin.
  6. Heat your frying pan or tawa on a medium heat and when it is hot add the chapati (do not add any oil). When you begin to see the chapati form bubbles, after about 30 seconds, you can have a look underneath to see if it is beginning to lightly bronze in places. If it is turn over carefully and using a folded over tea towel press down on the chapati and it will begin to puff up. Press down where the puffing occurs to help the air circulate around the chapati. Do not worry if yours does not puff up every time, it will still taste good.
  7. Gently pour a little of the whisked egg mix onto the side of the chapati that has bronzed slightly and using the back of a spoon swirl it around the whole of the chapati and  then carefully turn it over so that the egg cooks onto the chapati.
  8. Place the chapati onto a warm plate and keep in a low heated oven whilst you prepare the rest of the chapatis.

******

Spiced Tomato Chicken filling

2 tsp vegetable/sunflower oil

1 small red onion, finely chopped

1/2 tsp salt

3 medium tomatoes, chopped

1 tsp ginger paste

1 tsp garlic paste

1/2 tsp turmeric

1/2 tsp coriander powder

1/2 tsp cumin powder

1/2 tsp chat masala

1/2 tsp Kashmiri chilli powder

300g boneless chicken thighs, cut into bite sized pieces

1/4 tsp garam masala

To serve

1 red onion, finely sliced

2 limes, quartered

2 tsp coriander and mint chutney (see recipe above)

1. In a pan heat the oil and add the onion and salt and allow the onion to soften for around 5 minutes.

2. Add the garlic and ginger and stir with the onion so that it does not burn.

3. Add all the spices, aside for the garam masala and mix well with the onion, garlic and ginger.

4. Add the chopped tomato and allow to soften for another 5 minutes.

5. Add the chicken and stir into the other ingredients. Place a lid on the pan and allow to cook, stirring at intervals for 15 minutes.

6. Remove the lid and cook for a further 5 minutes so that all the sauce is absorbed and the dish looks dry.

7. Before turning off the heat add the garam masala and stir. Taste and season with more salt if necessary.


Vietnamese Chicken Herb Salad

IMG_0254

When time allows I enjoy getting my weekly fruit and veg from my local market. Thankfully I live a short hop, skip and jump away from a seriously good one in West London, where the stalls are bursting with colourful produce and the stallholders have an infectious energy and enthusiasm for their produce. Bowls of fruit and veg go for £1 and when you buy herbs it’s two large bunches for a £1 – to ask for one just won’t do – so I invariably  end up with rather a huge amount of coriander, mint, parsley and dill.

IMG_0233

Dill, mint and coriander remind me of fond times in Vietnam – the food is so fragrant, largely due to mint and dill being in so many dishes, Cha Ca La Vong being a perfect example – you can see the recipe here. As I ended up with two huge bundles of cos lettuce, I decided to create a Vietnamese inspired chicken salad for our Saturday lunch. Something that could be thrown together quickly and that would appeal to the whole family.

IMG_0245

It was a success and we polished it all off in one sitting. Since then I have cooked it again (I still have lots of herbs to get through) and photographed it for you so that you too can prepare it at home. The dressing I use for the salad is the typical Vietnamese dressing of nuoc cham, which adds zing and sweetness, the perfect combo.

IMG_0237

Vietnamese Chicken Herbed Salad

Serves 4

450g chicken breasts

1 tbsp olive oil

black pepper

large cos/romaine lettuce, 6 leaves

handful of fresh coriander

handful of fresh mint leaves

handful of fresh dill

1 red chilli, finely sliced

2 spring onions, cut on the diagonal

**********

Nuoc Cham Sauce

1 tbsp fish sauce

1 tbsp rice vinegar

1 lime, juice only

1 garlic, finely chopped

3 tbsp water

1.5 tbsp white sugar

1. Cover the chicken breasts in the olive oil and season with a little black pepper. Meanwhile heat a griddle/cast iron pan and when it is hot place the breasts into the pan and bronze on each side for just under 2 minutes a side. Place on a baking tray in a preheated oven 180 degrees for 20 minutes.

2. Break off the lettuce leaves and cut into mouth size chunks and place in a large mixing bowl. Add the dill, mint and coriander leaves along with the finely sliced red onion, spring onions. If serving to children as well slice the red chilli and place in a separate side dish. Mix together gently using your hands.

3. Prepare the nuoc cham sauce by mixing all the ingredients together. If it needs to be a little sweeter add some more sugar, if you prefer it more sour add more lime.

4. Pour half the dressing over the salad and gently toss. Pour the remaining dressing in a small jug so that you can add more dressing over the individual salad portions as needed.


Spanish Baked Chicken and Pea and Mint Soup with Crumbled Feta

IMG_9453

It’s always good to have some quick, easy and tasty recipes up your sleeve if you feeding a crowd. I know how it is difficult to decide what to pair up with what in as far as a starter, main and dessert is concerned. I always find it helpful in cookery books when they give suggestions. It’s surprising how many do not actually do this!

IMG_9445

Both these recipes turned up on my blog when I first started back in 2011 and I felt that the photos needed a little improving so decided to re post with new ones that I recently took. They are both definitely ‘go-to’ recipes for me. Hearty food with wonderful herbs, but light and fresh – perfect for summer days.

IMG_9414

They are so quick and easy to prepare that if you have friends coming over or you are doing your own catering on holiday, they take no time and will not cause you any stress. The dessert I accompanied these dishes with was Rose and Summer Berry Skinnifreddo, which I found on fellow food blogger Kellie’s blog – kelliesfoodtoglow.com. It was wonderfully fresh, colourful and healthy and  complements my starter and main beautifully. Her blog is really rather lovely so do take some time to look around it – I am sure you will be inspired.

IMG_9440

The above photo is of the chicken after marinading but before cooking

Spanish Baked Chicken

Sourced and inspired by Simply Recipes

serves 4-6

3.5 pounds/1.6kg  chicken thighs

100 ml red wine vinegar

100ml olive oil

1 handful fresh oregano

100g raisins/sultanas

1 tsp garlic powder

1/2 tsp salt

pepper

100g stoneless green olives

4 bay leaves

150 ml white wine

2 tbsp brown sugar

1. Cut the excess fat off the chicken thighs, pierce the skin with a fork and place in a large mixing bowl. Then add all the ingredients, except the white wine and brown sugar, to create the wonderful marinade. You don’t have to stick rigidly to the amounts for the olives and raisin/sultanas ingredients – if you love olives throw in a little more and same goes for the raisins/sultanas. Really mix all the marinade thoroughly over the chicken using your hands. Cover with foil and place in the fridge overnight or for as many hours as you can.

2. Transfer the chicken and the marinade to an oven proof dish. I often use a couple of dishes so that the chicken thighs are evenly spread out. Then pour the white wine and sprinkle the brown sugar over the chicken thighs.

3. Place in a pre-heated oven at 180 degrees centigrade for 50 mins remembering to spoon the marinade over the chicken during cooking. This will ensure the chicken has a golden brown glow when it is cooked.

****************************

Pea and Mint Soup with Crumbled Feta

Serves 4

4 spring onions, sliced

50g butter

700g frozen peas

1 pint/600ml milk

1 pint/600ml of vegetable stock

one handful of fresh mint (or two if you like it really minty)

black pepper

salt

75g feta

1. Melt the butter slowly in a pan, careful not to burn the butter. When melted add the sliced spring onions and stir into the butter for 5 minutes. Stir in the peas, vegetable stock and mint and leave to simmer for around 20 minutes (30 minutes if you are using fresh peas).

2. Puree the soup to the consistency that you require. Then add in the milk – if you like a thicker consistency then add less milk than the amount given above. Season to taste with salt and pepper.

3. Immediately before serving sprinkle each portion with crumbled feta.


Dried Ginger and Lentil Spiced Chicken Balti and the Curry For Change Campaign

IMG_9027

For the month of June folks, I’m going to share recipes that include some of the ingredients that were kindly sent to me by Natco foods as part of the ‘Curry for Change campaign’ competition. As part of the competition, food bloggers had to use at least 3 ingredients to come up with an original curry that would be easy to replicate at home by YOU.  Check out the varied array of goodies they sent me. My mind was working in overdrive to come up with a curry that would appeal from a taste and ease perspective.

I’m curious as to what you would have created using some of the ingredients below…..leave a comment for us all to see.

IMG_8956 But first let me take a few steps back to explain what ‘Curry for Change Campaign’ is all about and how you too can get involved.

In short, the campaign is about raising awareness of families who suffer from hunger across the world and how by cooking or eating a curry can help support a wonderful charity called ‘Find Your Feet’. The charity helps rural communities in Asia and Africa by giving them the knowledge and skills to become self sufficient and feed their families and communities. Rather than just offering handouts the charity gives the communities knowledge, understanding and education that allows them to bring themselves out of poverty and hunger. You can read more about the charity – here.

IMG_9032

You are probably wondering how eating or cooking a curry is going to actually help these communities?

Well a number of well-known Indian restaurants across the capital, in June, have thrown themselves into the campaign by creating a number of special dishes to help raise money for the cause. For those of you who are keen cooks, however, you can sign up for a Curry for Change event pack http://www.curryforchange.org.uk  for you to host a spicy night in with friends. All your friends need to do is to donate what they would spend on a typical Indian take-out. The pack includes spices from Natco Foods, cooking tips and recipes from the campaign ambassadors. On top of that you will also have my recipes over the month to give you more ideas on what to cook as well as my extensive list of recipes in my recipe library.

IMG_9013

So what are you waiting for? Do leave comments below and let us know how you get on. Spread the word on this exciting campaign. I’ll be giving you details of who won the competition in my next post ;o)….so watch this space.

Dried Ginger and Lentil Spiced Chicken Balti

5 tbsp vegetable oil

10g dried ginger

1 tbsp shredded coconut

500g chicken breast, cut into bite sized pieces

1 tsp turmeric

1 white onion, finely chopped

1 tsp garlic paste

2 tsp salt

1x 4 inch piece of cassia bark, broken in two

2 green chillies, stalk removed but kept whole

1 tsp Kashmiri chilli powder

6 large tomatoes (900g), finely chopped

400g boiling water

100g yellow split peas

*******

to make the Tarka

1 tsp cumin seeds

2 dried red chillies

10 fresh curry leaves (or dried if you can’t get hold of fresh)

Ingredients in bold were part of the Natco hamper sent to me.

1) Heat a large deep pan with 1 tablespoon of oil. When it is hot add the dried ginger and move around the pan for under a minute. Remove the ginger and place in a spice grinder/blender along with the shredded coconut.

2) In a bowl add the chicken pieces, turmeric powder, the ground dried ginger and shredded coconut as well as one tablespoon of vegetable oil. Stir well so that all the chicken pieces are coated. Leave to rest whilst you prepare the rest of the dish.

3)  In the same large deep pan that you heated the dried ginger, add 3 further tablespoons of vegetable oil. When it is hot add the onion and gently fry it until it begins to brown in colour. Add the garlic paste, salt, Kashmiri chilli powder and cassia bark and stir for a few minutes.

4) Add the spiced chicken pieces to the pan and stir into all the other ingredients. Place a lid on the pan and allow the chicken to whiten and begin to bronze in places. Stir at intervals. This will take around 10 minutes.

5) Add the chopped tomatoes and the boiling water, which will allow the yellow split peas to cook easily. Continue to cook the curry on a medium heat for 20 minutes with the lid on. Then remove the lid and simmer for a further 10 minutes.

6) In a separate small pan heat one tablespoon of vegetable oil and when it is hot add the cumin seeds, dried red chilli and curry leaves –  this will be the tarka. The cumin seeds will begin to sizzle almost immediately. Move the ingredients around the pan for one minute and then pour into the main pan when ready to serve.

Serve with either plain rice, naan, paratha or puri.

Note: If you prefer less of a sauce keep the lid off the pan for a little longer, which will allow the sauce to thicken and reduce.

    IMG_9039  


New York Wanderings and a Traditional Bengali Chicken Curry

IMG_1529

I’ve been doing a spot of travelling since my last blog post, hence the slight delay. Mr B and I celebrated our 10 year wedding anniversary with a long weekend in New York. It’s been a decade since I last visited so was really eager to catch up with friends and immerse myself in a city that has the most wonderful, infectious energy and of course, never sleeps.

IMG_1515

We parked ourselves in The Standard, East Village with it’s fabulous vistas spanning the whole of Manhattan with it’s floor to ceiling windows; I never tired of the view from our bedroom.

photo-15

The hotel totally lived up to our (high) expectations and the staff made a real effort to make our stay extra special. Would I return? Most definitely.

IMG_1497

Sunrise on our first morning from our room

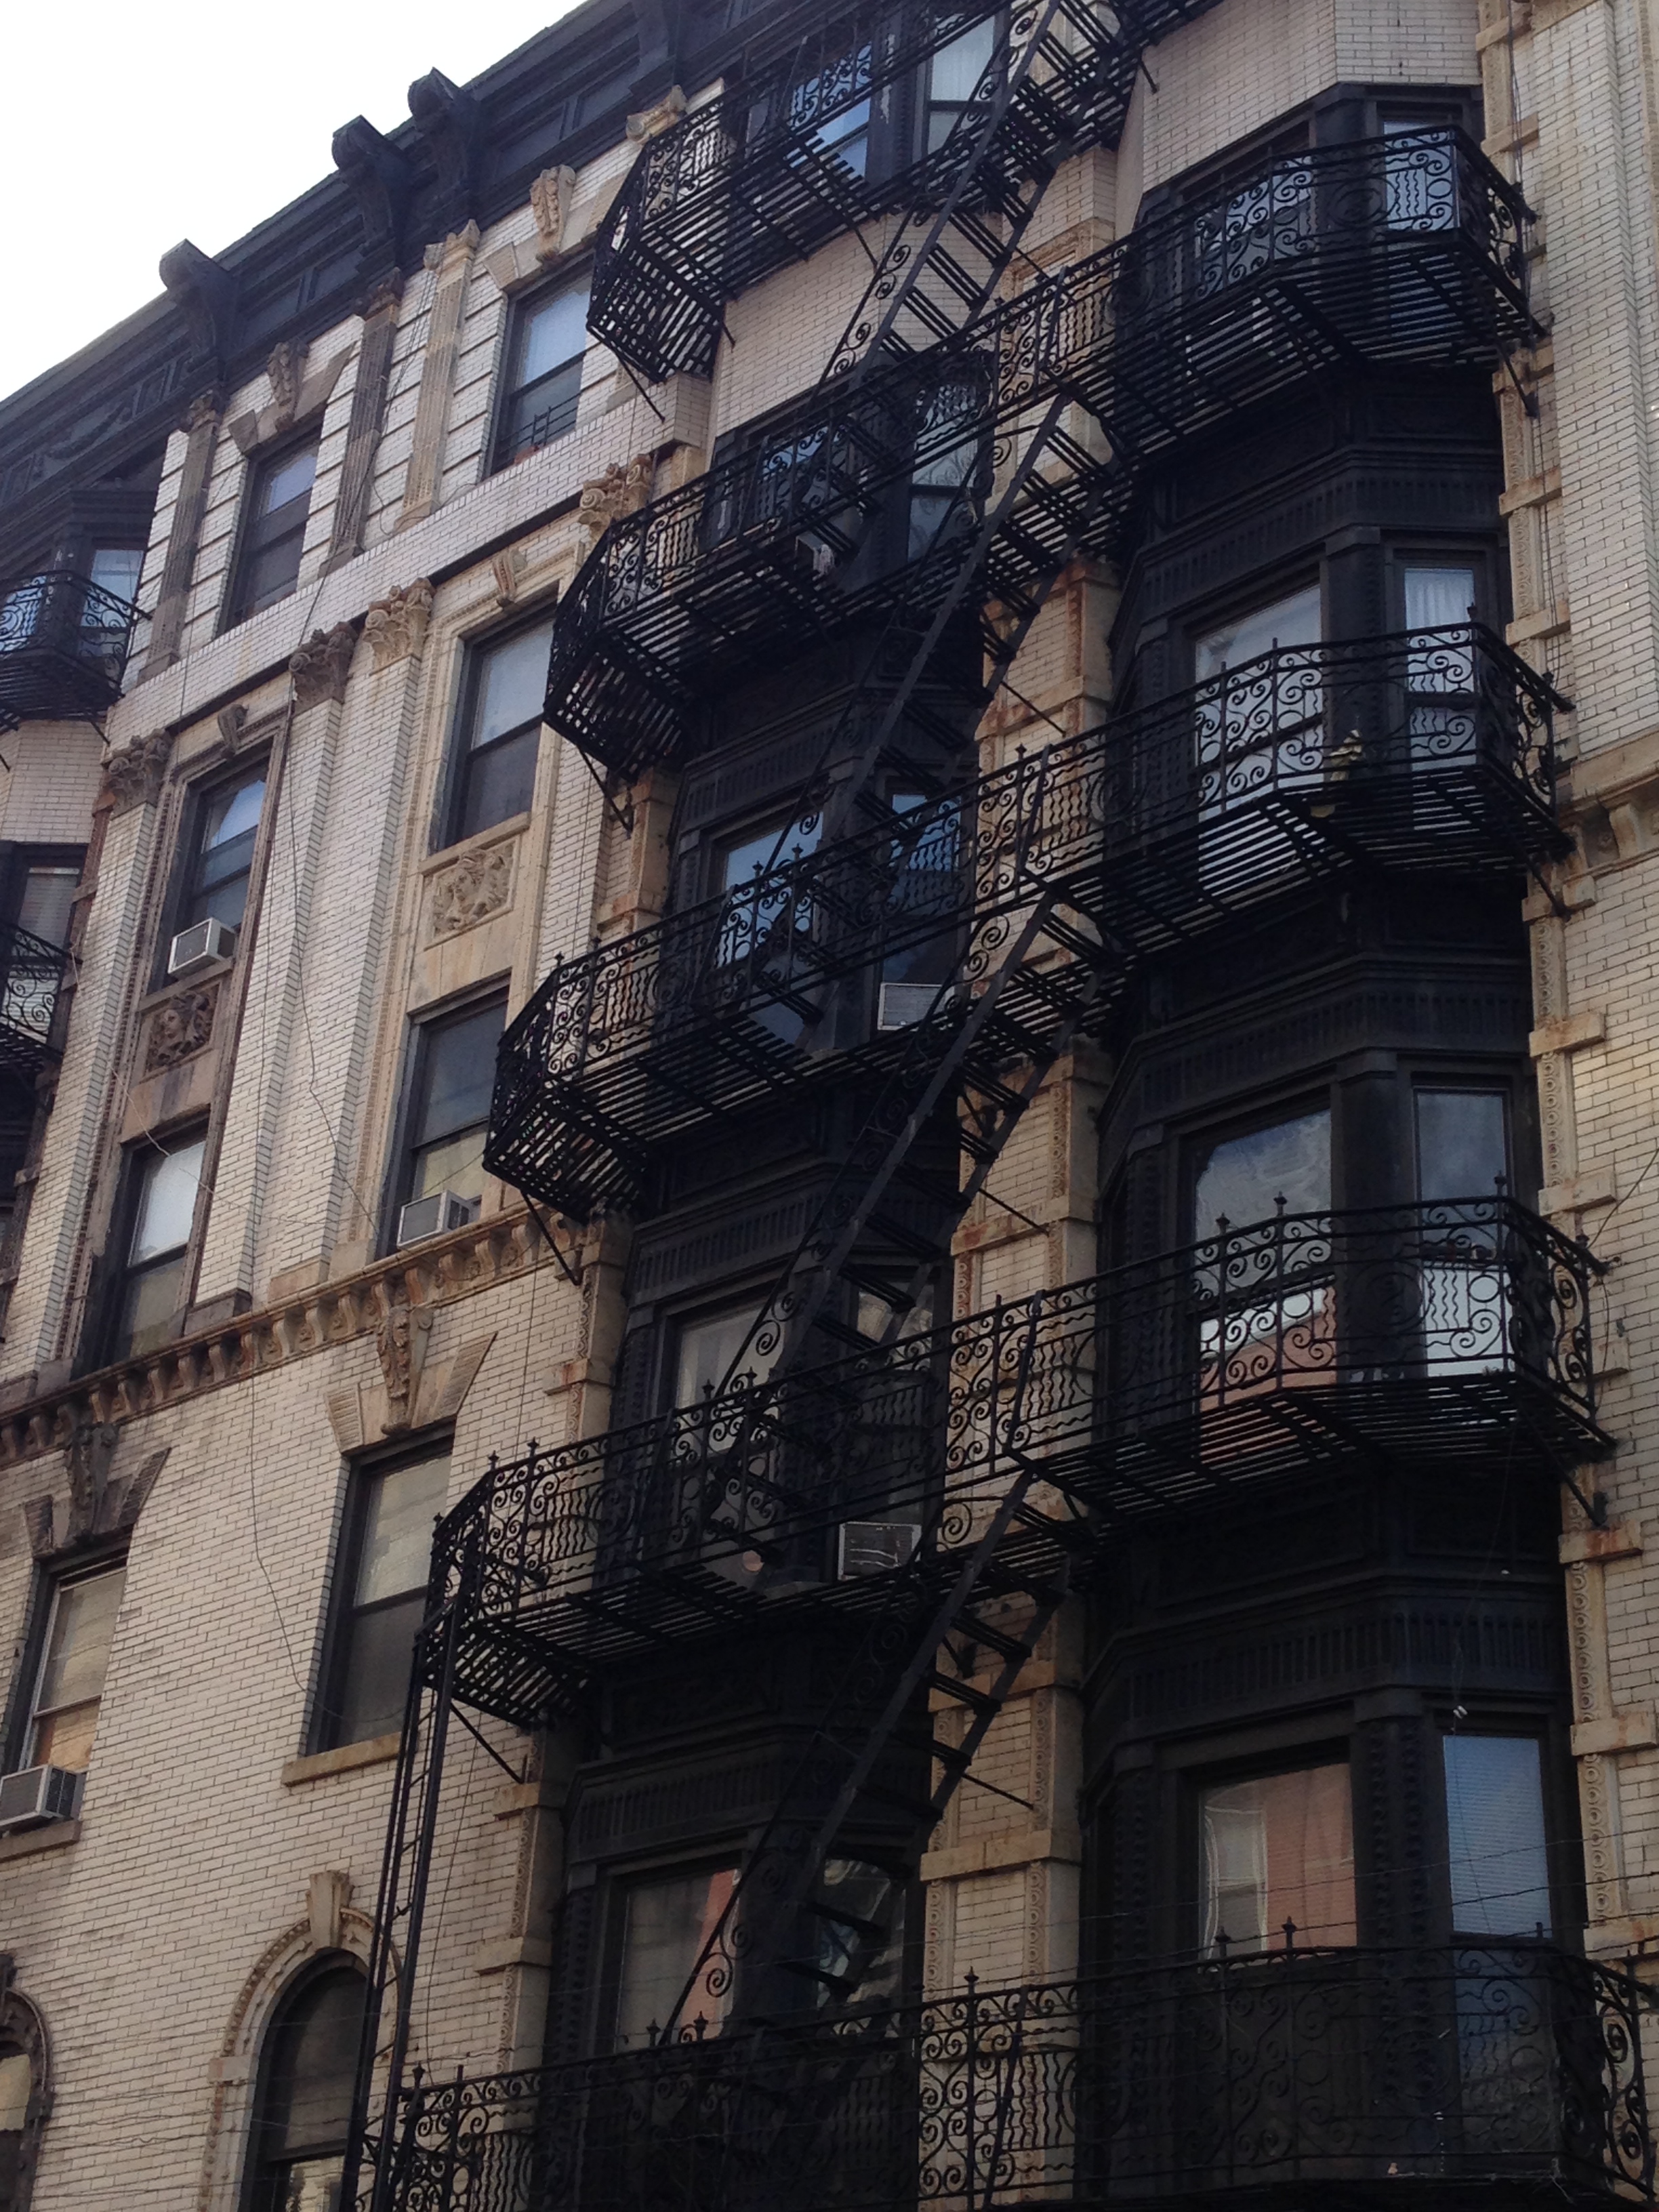
We walked and walked and walked for hours on end, exploring the little streets in the Villages and Soho with it’s stunning wrought ironwork on the sides of the buildings.

photo-14

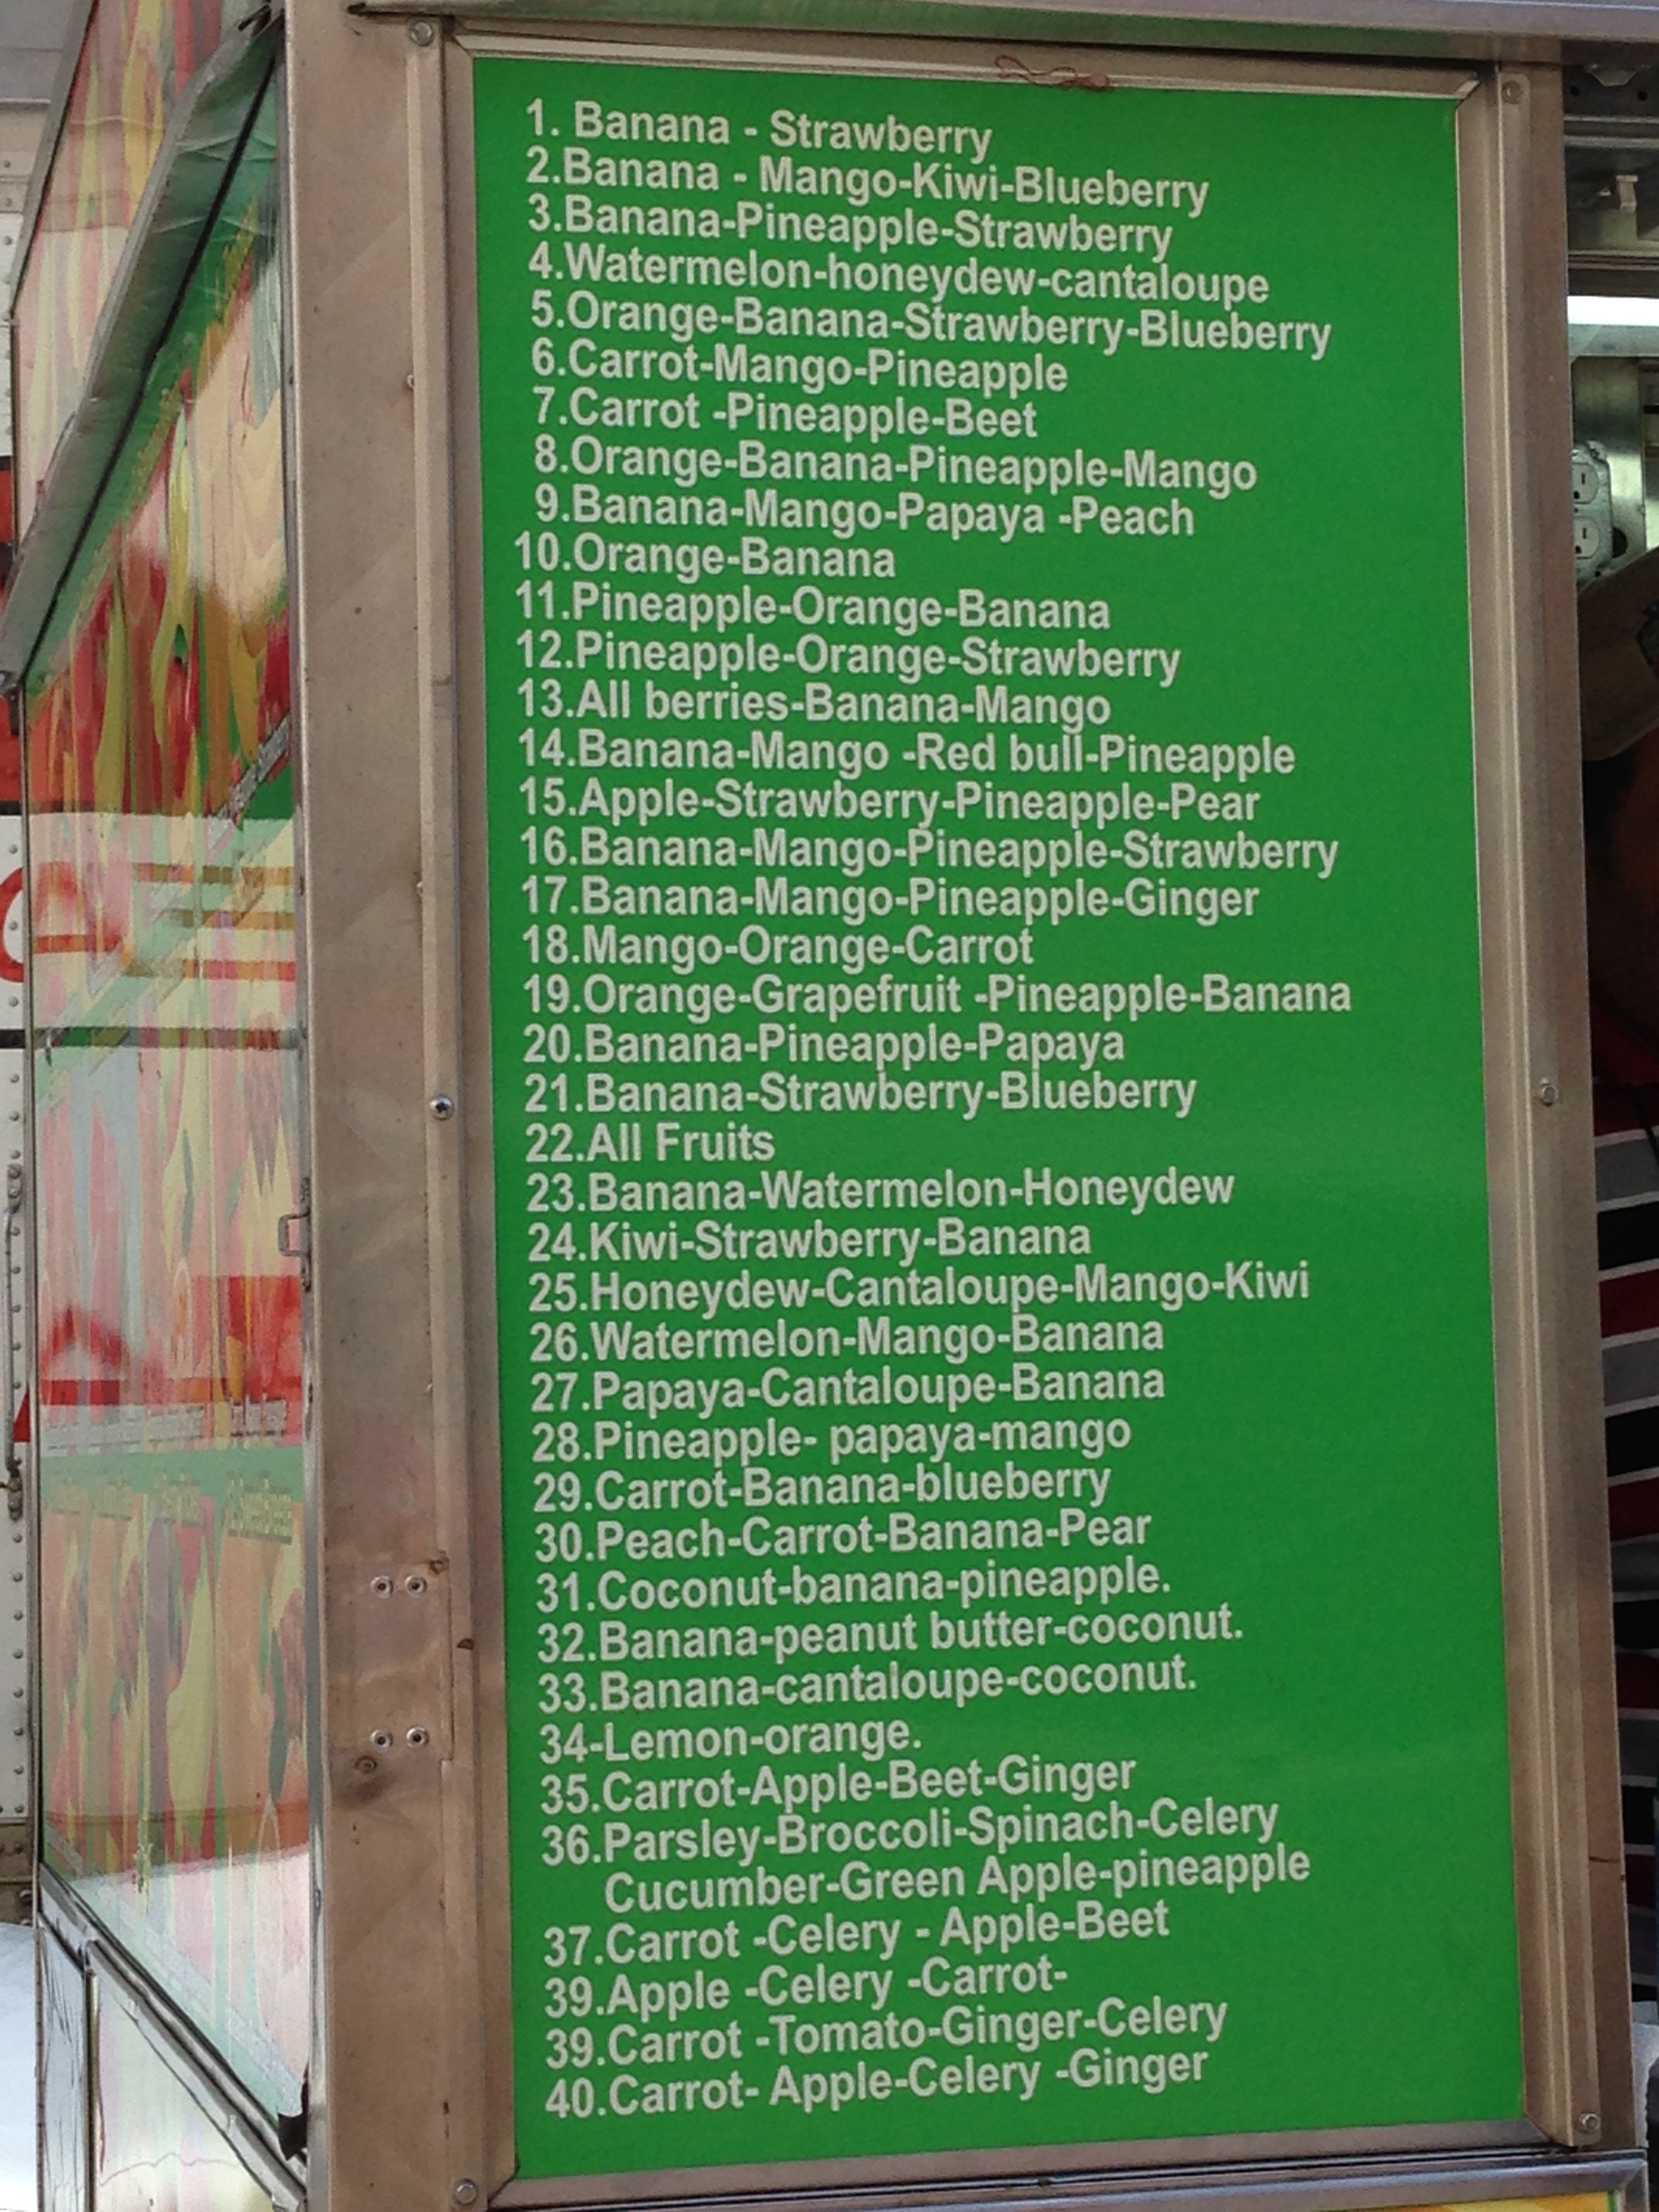
To give us bursts of energy we would refuel with fresh juices from the juice trailers parked in the streets. With around 80 different juice combinations to choose from it was hard to decide which one to pick. At around $4 a pop they are great value and ridiculously healthy – a win win.

photo-16

They cleanse the body and totally refresh the tired wanderer. Competitively priced and they would do so well here in London – a great business idea for a budding entrepreneur!!

IMG_1518

The stunning High Line with the old tracks visible

The High Line really impressed us – a great example of urban regeneration. It’s a stunning elevated greenway mile that used to be the New York central rail road spur, known as the West Side Line. It spans the meat packing district all the way up to Chelsea and is cleverly designed with shrubs, plants and trees interspersed with benches and seating areas around and on top of the old tracks. I particularly loved the raised seating, similar to an amphitheatre that looks over one of the roads with a huge glass window.

IMG_1537

Clever designs and architecture throughout the High Line

Instead of watching a movie you sit and watch the traffic buzz beneath you. Later in the day when I was passing underneath it in a taxi it almost looked like an advertising poster, and then I saw the people moving around. A clever effect and a fun way to be creative with the old rail road.

IMG_1535

Walkways along the High Line 

The peace and serenity that the High Line offers is a welcome respite from the manic life that goes on down below. If you are planning a trip my recommendation would be to go early as it definitely becomes crowded as the run rises higher in the sky.

IMG_1506

Me sitting on the attractive wooden seating on the High Line

Friends beckoned us over to Brooklyn, a place I definitely want to explore further on my next visit, to an area that is gentrifying and that has become rather hip – called Dumbo. Looking across at Manhattan from the Brooklyn side of New York, gave a new perspective to this sprawling city. The sun was shining and the crowds were out and if the ice cream queue at The Brooklyn Ice Cream Factory had anything to go by the area of Dumbo has become hugely popular.

IMG_1543

Looking back at Manhattan from Dumbo in Brooklyn

A couple other must-see destinations for foodies is the Italian food emporium of Eataly, which is just by the famous Flatiron building, which in itself is a piece of interesting architecture worth seeing.

IMG_1563

 The famous Flatiron building

It’s only a matter of time before we’ll see an Eataly in London, having already got branches outside the US in Dubai, Japan, Istanbul and Italy itself.  The shop is bursting at the seams with delicious Italian produce, and yet it has a calm serenity that makes wandering around it very pleasant indeed. There are bars and a couple of cafes (the one on the roof is perfect for sunny summer days and has a huge selection of beers) and it’s quite acceptable to browse around the store with a glass of wine in your hand. All very civilised if you ask me.

photo-17

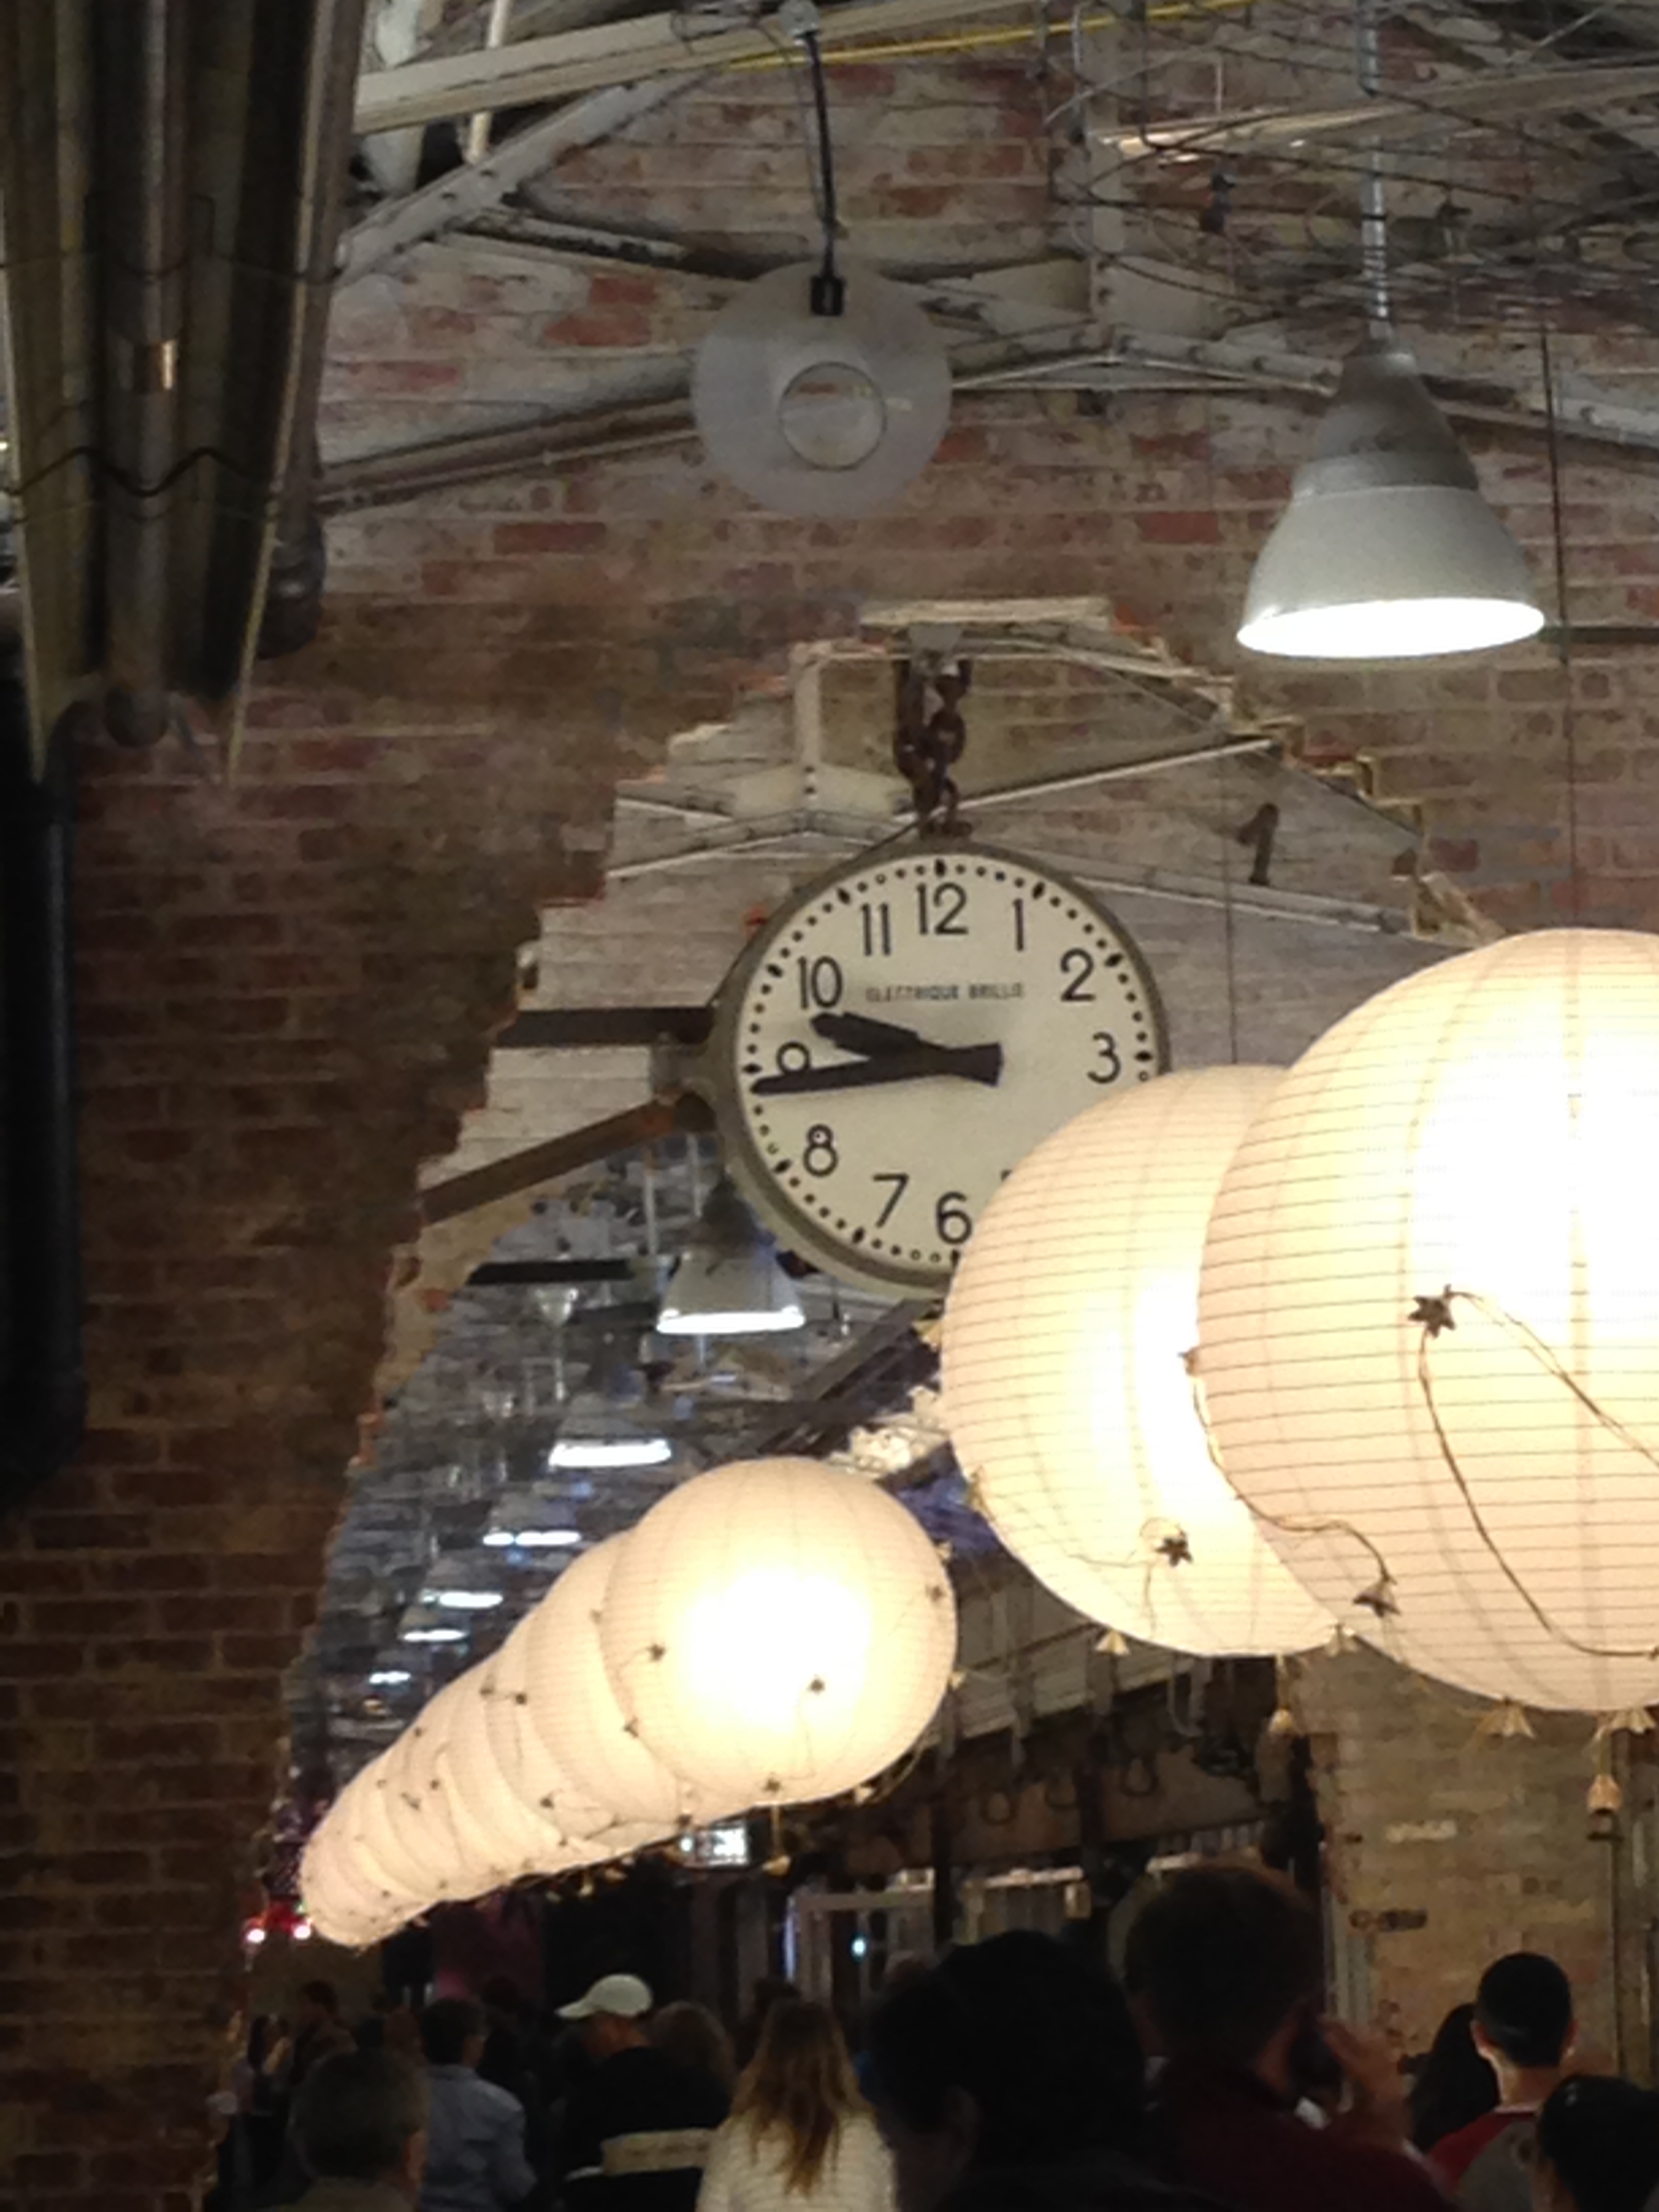
The other food mecca worth seeking out is Chelsea Market, not far from the High Line, so perhaps the perfect pit stop after a High Line stroll. It’s a stunning food court with a great atmosphere and an incredible choice of eateries, bars and cafes.

photo-18

strolling through Chelsea Market – loving the exposed bricks

Aside from eating, walking and socialising we managed to squeeze in a little culture with a visit to the ‘The Frick Collection’ . Based in the Upper East Side it gave us a great excuse to explore the neighbourhood and central park. The collection itself is fascinating and housed in the mansion of the wealthy industrialist Henry Frick, one of America’s greatest art collectors who died in 1919. His house contains many masterpieces of paintings, sculptures and decorative art that the public are freely allowed to view and admire. He bequeathed the house and all it’s contents to the public upon his death. It’s a relatively small collection so won’t take too long to amble around so is easy to fit into a quick stop in New York. Go visit.

New York is jammed full of incredible restaurants. A list of some of those we visited is listed below:

The Dutch – happening bar with tasty American food and an exciting wine list. Based in Soho.

Lafayette – sister restaurant to The Dutch (we did not realise this at the time). Larger in size to The Dutch and a little more formal. More French style menu.

Atrium – This Dumbo restaurant is buzzy with a delicious brunch/lunch menu. Mr B found the pulled pork bun too small for his liking – I on the other hand found the size spot on. Interesting foliage structure upon the main wall.

Spice Market – based in the Meatpacking District across the road from Soho House. Old kid on the block but still going strong. Large restaurant so not intimate and filled with locals, but seriously tasty Asian food.

Noho Star – Neighbourhood cafe in East Village. Highly recommend the spicy Mexican Huevos Rancheros. Deeeelish.

Cafe Standard – Within the Standard Hotel East Village, this hip eatery is always buzzing and has a great menu with delicious juices.

*******************

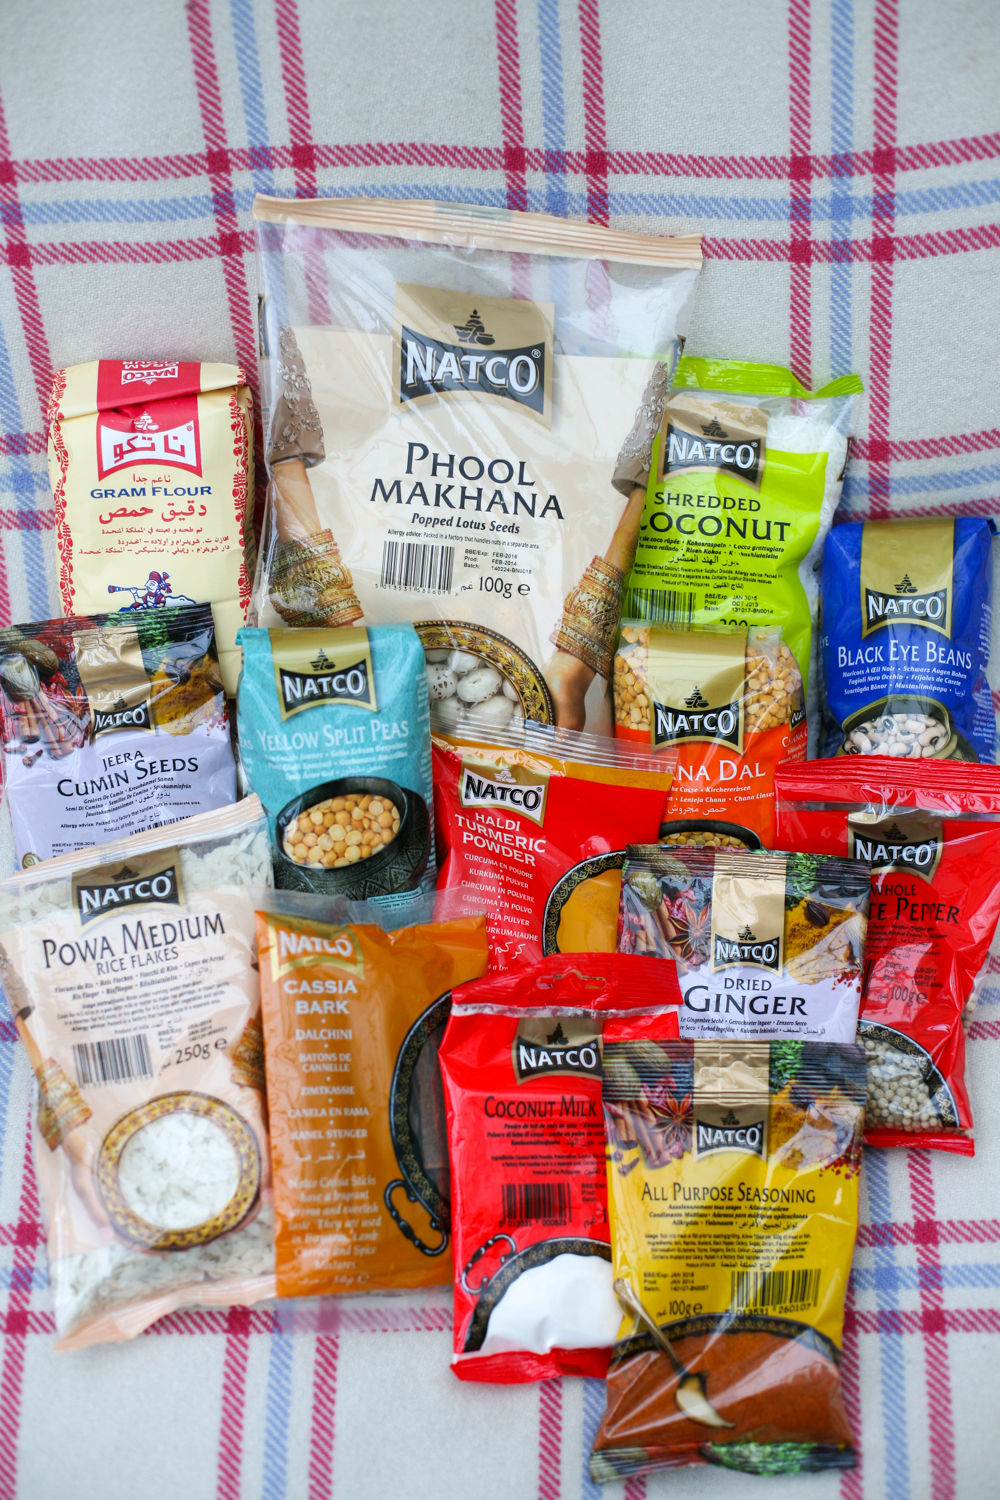
Back in London we craved spicy Indian food so rustled up one of our favourite chicken curries. We tend to cook it on the bone (seriously it tastes much better this way), but if the thought of cooking and eating off the bone doesn’t appeal simply cook the curry with breast and boneless chicken thighs instead.

Eating nourishing, homely food also really helps with jetlag ;0)

IMG_9187

Traditional Bengali Chicken Curry

Serves 4-6

3 tbsp vegetable oil

1 large onion, roughly chopped

1 chicken, cut into 10/12 pieces and skin removed

1 tsp turmeric powder

1 tsp cumin powder

1 tsp coriander powder

1 tsp Kashmiri chilli powder

4 cloves

5 cardamom pods, split open

1 pieces of cinnamon bark, split into three

2 tsp salt

8 garlic cloves, kept whole

2 tsp of fresh ginger paste

4 medium potatoes, chopped in two

2 or 3 large carrots, chopped into 1 inch pieces

1 tbsp natural yoghurt

2 tbsp of tinned chopped tomatoes

1. In a large deep pan heat up the oil. Place the onion in the oil and gently fry until the onion becomes translucent and soft. This should take around 5 minutes.

2. Add the chicken pieces to the pan and allow them to whiten completely. Turn them at intervals so that all sides of the chicken pieces are white. This will take around 10 minutes.

3. Once whitened add all the spices and salt followed by the potatoes, garlic cloves, carrots, tomatoes and yoghurt. Stir in well so that the chicken and vegetables are completely coated in the spices.

4. On a medium heat allow the curry to cook through, stirring at intervals. No extra water is needed as the chicken pieces release plenty of water during cooking.

5. After 40 minutes the curry should be completely cooked. Using a knife make sure the carrots and potatoes are soft. If they remain hard, stir into the sauce and cook for another 10 minutes.

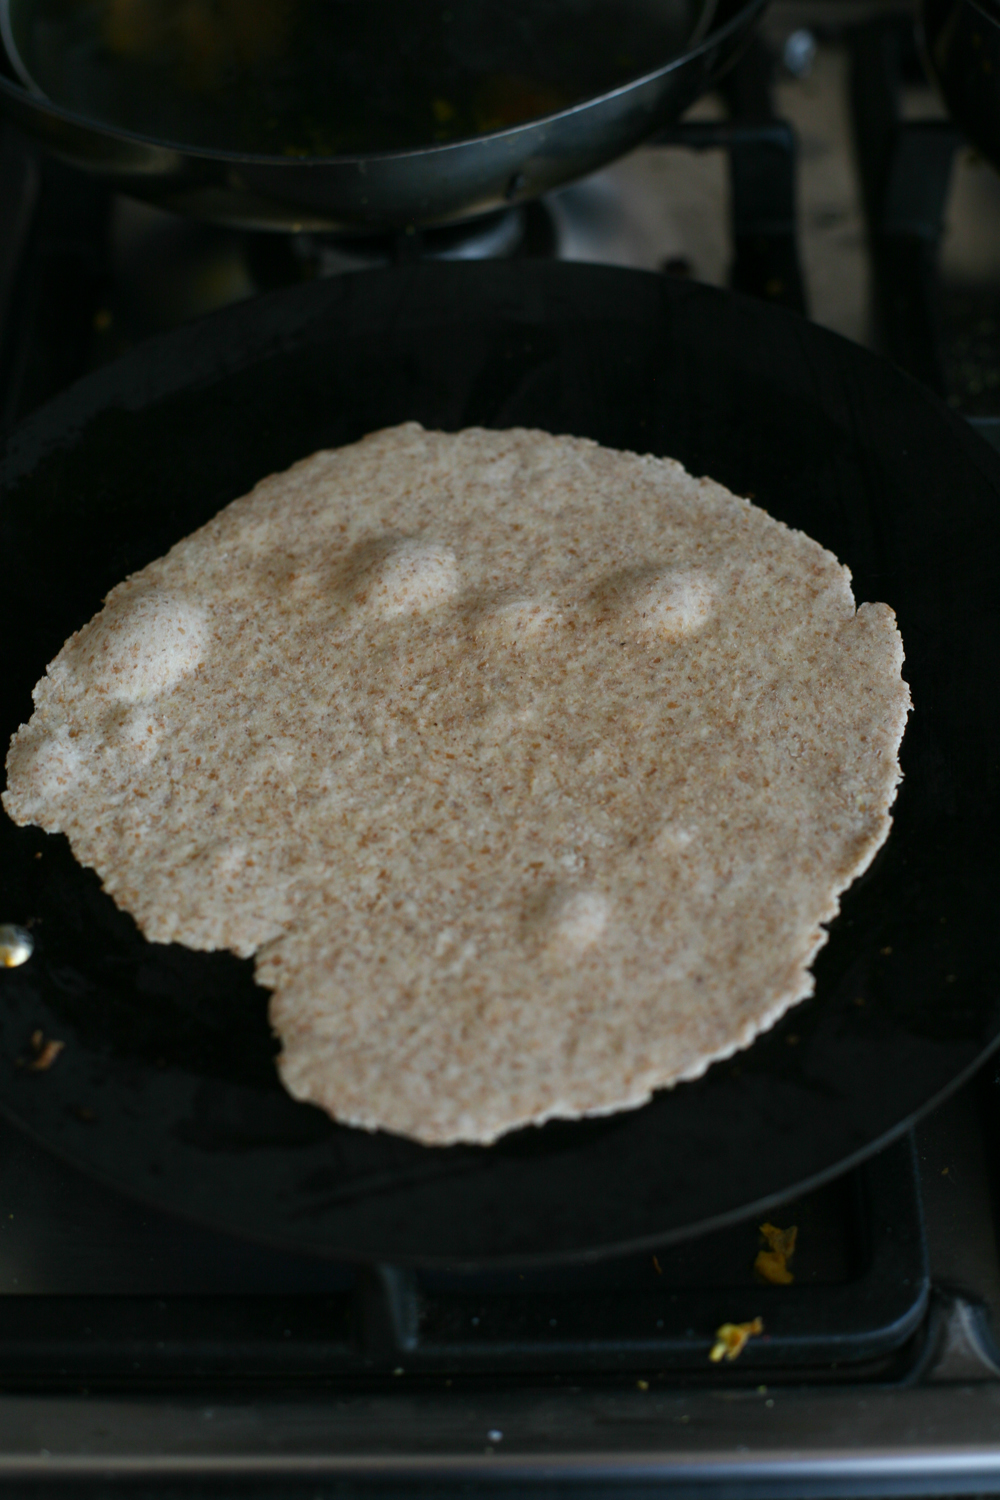
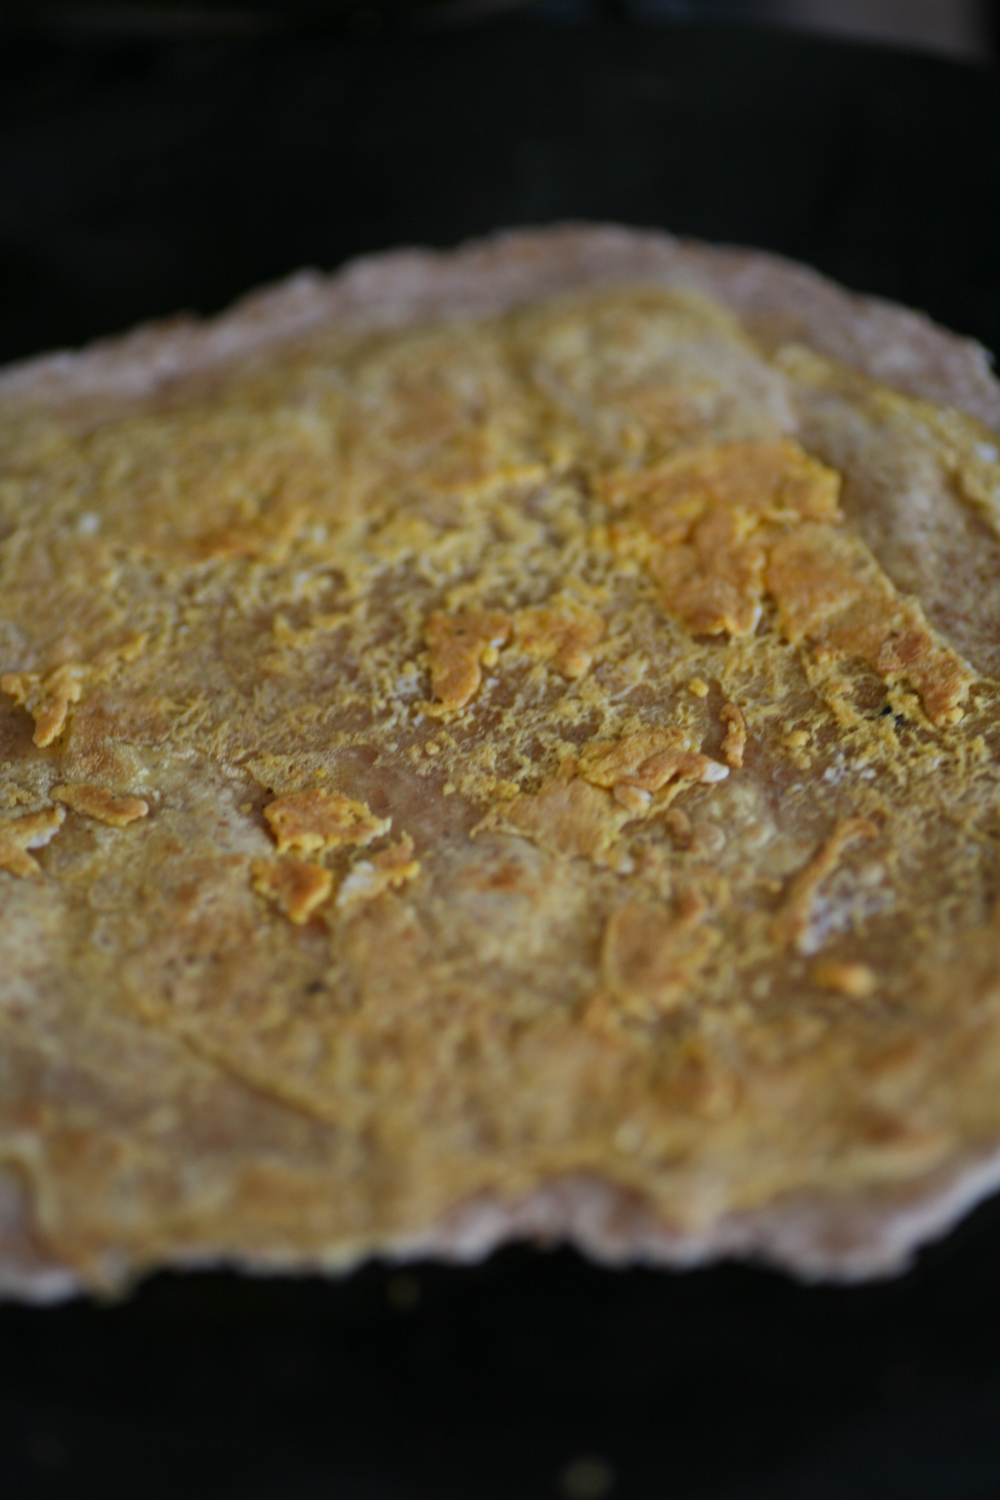
Serve with rice or Indian bread. As it is on the bone it is easier to eat the traditional Indian way – with your right hand -but I’ll leave that for you to decide.


Chicken, Ginger and Spring Onion Gyoza/Jiaozi/Pop Sticker

IMG_8706

Mention the worked ‘gyoza’ in my household and you will hear yelps of delight – and that’s not just from the children. These moreish savoury dumplings are incredibly addictive and are a great little starter or snack, although you can off course have them as a main meal along with some steamed greens with soy and garlic perhaps.

Japan and China both have their version of the dumpling, although these dumplings first originated from China and were then adopted by the Japanese. The Chinese dumplings are known as jiaozi if they are boiled or steamed and guo tie if they are fried, in Japan – gyoza and the US – pot sticker.

The Chinese variety have slightly thicker wrappers and have a far wider combination of fillings than their Japanese counterparts. They are often steamed, whereas the Japanese gyoza are fried for a few minutes and then steamed for a further few minutes. The fillings I typically use for the vegetarian are tofu and shiitake mushrooms, or the meat variety filled with pork, chicken or duck or the seafood version, which tends to be prawn. Whatever takes your fancy these little dainties will be forever cherished by those who sample them.

IMG_8670

Now the question is to lovingly prepare your own wrappers or to buy some from your local Asian grocers or online. Basically it will come down to time on your part. Making your own takes a little time, but its the perfect activity to do with a mate who comes over for coffee – just rope them in they’ll love the experience or even with the kids. Shop bought is pretty cheap, as you can see for the price sticker I left on above, and are likely to be more uniform in thickness, but I’ll leave it to you to decide which suits your lifestyle.

IMG_8662

For those who wish to make their own it is SO simple. Seriously you only need a couple of ingredients and then a bit of kneading.

IMG_8653

Homemade Gyoza Wrappers

Makes around 20

210g plain flour, seived

125ml warm water

 pinch of salt

1. Stir the salt into the warm water until it completely dissolves.

2. Place the sieved flour into a large bowl and add the warm water. Using a wooden spoon mix the flour and water together and then use your hands to create a ball.

3. Kneed the dough on a cold surface for around 10 minutes, when it will be soft and springy to touch. Sprinkle more flour onto the dough if it is getting too sticky.

4. Wrap in cling film and place in the fridge for 30 mins.

5. Take small balls of the dough – about the size of apricot – and flatten it with your hand. Gently roll the dough into a round shape, turning it after every roll. Using a round cookie cutter (or the bottom of a saucer) cut out a round circle and cover gently with flour and place in a pile.

6. Continue until the dough has been used up. You should make around 20 dough wrappers with the proportions above. Whilst you prepare the filling place a damp cloth over the wrappers so they do not dry out.

IMG_8655

So now you have the wrappers ready to go you need to prepare the filling. Whether you want to use chicken, pork mince, prawn, duck or shiitake mushrooms and tofu the rest of the ingredients remain the same.

IMG_8680

Whilst using Chinese cabbage is the most authentic, use whatever green cabbage you have in your fridge. Place two large leaves in a pan of boiling water for 1 minute and then drain and pat completely dry with kitchen paper. You then want to slice and cut them up as small as you can. You can blitz everything in a blender but I tend to often take the slightly slower version of cutting by hand. Today I used chicken and as I tend to find minced chicken hard to source so I bought boneless chicken thighs and cut up them up into small pieces. I also added spring onions, chopped garlic, finely grated ginger, soy sauce, sesame oil, salt and pepper and hey presto you have your filling. You can get creative and add any other ingredient you think might work – how about carrot, fresh chilli, five spice.

IMG_8687

Wrapping the dumplings is rather satisfying and you will begin to get into a rhyme with them. Don’t overfill the gyoza, instead putting a teaspoonful in the centre and then, using your finger tip, wet the low half rim of the circle. You then want to fold over the gyoza in half and then begin to pleat from left to right, making sure the filling is securely inside the parcel. It is definitely a case of the more you do the better you become. My 8 year old is a complete natural and can do multiple pleats across the top. You only pleat one side of the gyoza s0 do not turn over and attempt to do more on the other side.

IMG_8721

The above photo shows half of the gyoza pleated. I finished doing this row, but did not turn it over to attempt to do the other side. To pleat you simply use your thumb and forefinger to make small pleats going over the last. Make sure you press the top together so that it is firmly stuck together – you don’t want them opening up in the pan.

IMG_8693

So you can see some are neater than others above. They will still taste delicious even if you haven’t got the perfect symmetrical pleating!

IMG_8708

Dumpling Filling

to fill around 20 dumplings

2 large leaves from a green cabbage/Chinese leaf cabbage

2 garlic cloves, finely sliced

20g ginger, peeled and finely grated

3 spring onions, finely sliced into small pieces

1 tsp sesame oil

1 tsp soy sauce

1 tsp mirin rice wine

275g boneless chicken thighs/or chicken mince (or duck, pork mince, tofu and shiitake mushrooms)

100 ml water

************

Dumpling Dipping Sauce

3 tsp rice vinegar

6 tsp soy sauce

1 tsp chilli oil (optional)

1 tsp sesame seeds

**********

1. Finely chop all of the ingredients and then bind together using your hands.

2. Place a heaped teaspoon of the ingredients onto one of the wrappers in the centre.

3. Wet the rim of the lower half of the wrapper using your finger.

4. Fold the wrapper in two and then pleat from left to right across the top, making sure to firmly seal the top of the wrappers.

5. Bend the wrapper slightly so that it is in a crescent moon shape and so it can stand up unaided. Place to one side whilst you prepare the rest.

6. Using a large nonstick pan add a tablespoon of sesame oil and when hot add the dumplings so that they are standing up and not sticking to one another. Fry them for 3 minutes, by which time they will have bronzed underneath. If they have not bronzed sufficiently leave them to fry for a little longer.

7. Add 100ml of water to the pan and place a lid on the top. Leave to steam for a further 3-4 minutes so that the water has completely dissolved.

8. Mix the ingredients of the dipping sauce together and then place to one side in a little bowl.

9. Serve immediately with the dipping sauce.

IMG_8719


Boneless Southern Indian Chicken Curry

IMG_8635

I am guessing that most households will eat chicken at some point in an average week and whilst I do cook a number of chicken curries on the bone, it is always good to have some boneless chicken curries up your sleeve that you can whip together relatively quickly on a given evening. Cooking meat on the bone allows the meat to be more tender and succulent, but that said I know that having bones in a meal can really put some eaters off. So I hope this curry will be a happy compromise in that it is tasty, quick and bone free, therefore perhaps appealing to a wider audience.

IMG_8632

Whilst it does contain coconut milk the tomatoes balance out the sweetness to the extent the coconut doesn’t dominate this dish, instead giving it a subtle creaminess. I also find that adding just two chillies allows my eldest child, who is 8 yrs old, to really enjoy eating it as she does not find it too spicy. So if you find yourself wondering what to do with some chicken breasts in the fridge over the course of next week give this south Indian curry a go, you won’t be disappointed.

Boneless Southern Indian Chicken Curry

Serves 4

650g chicken breasts or thighs, cut into bite sized morsels

1 level tsp of turmeric powder

1/2 tsp of Kashmiri chilli powder

2 tbsp vegetable oil

1 tsp black mustard seeds

1 red onion, chopped

2 inches of ginger, peeled and finely grated

4 garlic cloves peeled and finely grated

************

curry paste

2 green chillies, chopped

1 red onion, chopped

3 garlic cloves, chopped

1 inch of ginger, peeled and chopped

1/2 tsp of black peppercorns

1/2 tsp ground cumin

1 tsp ground coriander

2 tbsp water

****************

5 tomatoes, peeled, skinned and chopped (put in boiling water for 3 mins then peel easily)

 2 limes, juice

250 ml coconut milk

salt to taste

fresh coriander leaves to serve

1. First marinate the chicken breasts at room temperature for up to an hour. Mix thoroughly with the turmeric and Kashmiri chilli powder and cover.

2. Prepare the chopping and grating of the onion, garlic and ginger for both the paste and the sauce and place to one side.

3. Place all the curry paste ingredients in a blender and blend into a smooth paste. Add a little more water if it needs help reaching a smooth quality. Place to one side.

3. Heat up a large pan with the oil and when it is hot add the mustard seeds. They will begin to pop within about 20 seconds  – move them around the pan to release the fragrance and then add the onion and stir into the oil and seeds. Cook the onions for 5 minutes, by which time they will begin to soften before adding the garlic and ginger. Cook for a further minute before adding the curry paste and stiring thoroughly. Let simmer away for a further couple of minutes.

4. Add the chicken and stir into the sauce so that it is coated and begins to cook. After 8-10 minutes the chicken should have turned white, with no pink bits remaining, and will begin to bronze in places.

5. Add the softened tomatoes (you can remove the pips but I tend to use it all up, bar the skin!), lime juice and coconut milk and simmer for a further 20 minutes to allow the flavours to work together and for the chicken to be thoroughly cooked through. Season to taste.

If the sauce needs to be juicier then simply add a little water. If it is too juice then cook with the lid off for a little longer.

Serve with fragrant rice or some Indian flat bread.

IMG_8629


Tlayudas – Mexican Open Pizza and Homemade Guacamole

IMG_7052

Homemade guacamole packs a punch well above the bought stuff.  I know this my trade mark line (yawn yawn!), but it really is a breeze to make and is so tasty you’ll be wishing you had bought more avocados. As well as being a moreish dip – I kid you not, if I leave the room with a bowl of guacamole and tortilla chips, when I return the contents of the bowl will be clean – it’s also the perfect filler for the Mexican pizza Tlayudas, pronounced something along the lines of (clae-yoo-das).

These pizzas can be made with Middle Eastern flat breads/pittas a supply of which I always have in my freezer. It’s simply a case of piling on all the ingredients, with the flat breads sitting directly on a frying pan and then folding them over slightly to give the appearance of an thick taco. You can fill the flat breads with whatever takes your fancy, however I find that guacamole; shredded, poached chicken; mozzarella; pecorino; spiced sun blushed tomatoes; spinach; tarragon and rocket really hits the spot.

Be warned eating this is not a tidy pastime. However, you can get seriously involved and at one with your food.

Let me know if you give them a whirl and leave a comment below.

IMG_7036

Homemade Guacamole

adapted from Thomasina Miers’s book Mexican Food Made Simple

Serves 4

1/2 a red onion, finely chopped

2 serrano green chillies (1 if you prefer it less spicy), finely chopped

3 large ripe avocados, stoned and skin removed

1-2 limes, juice

pinch of rock salt

handful  of freshly coriander, chopped

black pepper

1. After finely chopping the red onion and chillies (I tend to leave the seeds in to give it that extra kick) place them in a bowl and  mash them together a little before adding the avocado. If you don’t have a pestle and mortar I find a good sized bowl and an end of a rolling pin work really well.

2. Add the juice of one lime and stir well into the guacamole, along with the salt, pepper and the chopped coriander.

3. Taste and add the juice of a further lime if needed – down to personal choice. I love it limey so tend to add two.

4. Give a good stir and spoon into a serving bowl/dish.  Place in the fridge whilst you are preparing the ingredients for the Tlayudas. Do not prepare too far in advance as the avocado will begin to discolour.

IMG_7059

Tlayudas, Mexican Open Pizza

adapted from Thomasina Miers’s book Mexican Food Made Simple

Serves 4

2 chicken breasts, poached and shredded

1 large bag of spinach

1 tsp of butter

4 large Middle Eastern flat breads

a bowl of homemade guacamole, see above

2 large mozzarella balls, torn into smaller pieces

16 slow baked tomatoes with chilli 

2 handfuls of rocket

1 handful of fresh tarragon

rock salt and pepper

pecorino or cheddar cheese for grating

1. Poach the chicken (in boiling water for up to 20 mins) and then shred it using a fork.  Place to one side.

2. Place a saucepan on low heat and add the butter. Once it has melted add the washed spinach and cook for a minute until the spinach just wilts. Remove from the pan and strain the spinach, pressing down firmly with a spoon so that the water is removed as far as possible. Place to one side.

3. Heat up a large frying pan and when it is hot add a flat bread and press down gently. Sprinkle a drop of water and turn the flat bread over. Now you need to work quickly. Spoon on a generous helping of guacamole followed by the chicken, mozzarella, slow baked tomatoes in chilli, spinach, rocket, salt, pepper and some grated pecorino/cheddar.

4. The flat bread will begin to crisp up quickly and the mozzarella begin to melt, so carefully begin to fold the flat bread over. With a spatula lift the pizza onto a plate and serve immediately.

5. Repeat until everyone is served.

Dive in and enjoy. Don’t forget the napkins.


Vietnamese Chicken Rissoles with Shallots, Lemongrass and Garlic

IMG_6830

Vietnamese chicken rissoles, or patties if you prefer, are the perfect simple lunch/supper to prepare for all the family. Little Z, who is four, is always a bit unsure about eating chicken, however, disguising chicken as rissoles seems to really work as they are softer and therefore easier to eat than regular chicken pieces. Other than the dipping sauce, there is no chilli in the rissoles, so they really are family friendly.

IMG_6836

When preparing the rissoles you really want to make sure that the lemongrass and garlic is well chopped up. I chopped them with a knife to begin with before putting them into my spice grinder for a finer texture. The chicken and the shallots also need to be chopped up before whizzing them in a food processor.

IMG_6862

Once the all the ingredients have been combined place some oil into the palms of your hands which will allow you to easily shape your rissoles without them sticking to your hands. Roll them into a ball before flattening them slightly to give a pattie appearance. Cooking time is really short. After heating oil in a pan place five patties in your frying pan and leave them for 3 to 4 minutes before turning them over for a further 3 to 4 minutes. Make sure that the heat is consistent and they do not burn.

IMG_6876

I like to eat them with a fresh salad of tomatoes, red onions and coriander with splashes of nuoc cham sauce over the top, although my daughters prefer theirs with white rice noodles and splashes of light soy sauce. Any leftovers can be stored easily in the fridge and then enjoyed the following day in a baguette with shredded carrots, cucumber and fresh cucumber – similar to the Vietnamese sandwich – Bahn Mi. More on these glorious sandwiches another time.

Chicken Rissoles with Shallots, Lemongrass and Garlic

Makes 15 rissoles (yes myself and a little someone ate two before the photos above)

adapted from the recipe I learnt earlier this year from Van at her fabulous Green Bamboo Cooking School in Hoi An

500g boneless chicken breasts, chopped and then blended

4 lemongrass sticks, finely chopped/blended

4 garlic cloves, chopped/blended

3 banana shallots

2 eggs

1/2 tsp five spice powder

1/2 tsp cayenne powder

6 tbsp plain flour + extra for stopping the rissole sticking to your hands

1 tbsp caster sugar

salt and pepper

oil for frying

1. Finely chop the lemongrass and garlic, initially by hand and then in a spice grinder/blender./mortar and pestle. You want the lemongrass especially to be as fine as possible.

2. After roughly chopping the chicken and shallots place them in a blender until a chicken paste forms. Add the finely chopped lemongrass and garlic and pulse once again. Transfer to a large bowl.

3. Add the eggs, flour, spices and all the other ingredients. Mix well with your hands.

4. Place a little oil in the palm of your hands and then roll some of the chicken paste into your hands to create a ball and then gently press down to create the flattened rissole.

5. Heat a large frying pan with oil and when it is hot gently lower the rissoles into the pan. I usually do mine in batches of 5. Leave the rissoles to cook well on one side (3 to 4 minutes should be sufficient) before turning over and cooking for a further 3 to 4 minutes.

6. When they have browned, place the rissoles onto some kitchen paper to cool.

7. Serve with nuoc cham dipping sauce and a fresh salad

Nuoc Cham Dipping Sauce

juice of 1 lime

2 tbsp sugar

3 tbsp fish sauce

1 tbsp garlic, finely chopped

fresh chilli, finely chopped (optional/to taste)

1. Initially mix the lime juice with the sugar thoroughly before adding the rest of the ingredients. Continue to mix together. This sauce can be made ahead of time and can store easily.