Zereshk Polow – Iranian Chicken with Barberries and Rice

IMG_6663

Fairly recently I picked up a bag of dried barberries (also known as Zereshk or Pipperages) in one of my local Middle Eastern food stores. I do tend to like fruits in savoury dishes, this is customary in Middle Eastern cooking and so I had an inkling that I would probably love them. I posted a photo of my new purchase on twitter and one of my followers,  Sophia – who writes the blog ‘Real Simple Food’ – sweetly tweeted back saying how she enjoyed eating a savoury dish called ‘Zereshk Polow’ growing up, which used barberries.

IMG_6689

I did a bit of digging around on the internet and came up with a number of recipes for the dish. It immediately appealed to me as it incorporated chicken, rice, saffron, turmeric, yoghurt, milk, rice, onions – what’s not to like?

IMG_6685

Since my discovery of the dish I have cooked it a number of times, simplifying it from some of the more detailed ones on the web and those that are rich in butter and egg. The dish originates from Iran although I discovered that barberries are not as exotic as we are led to believe as they once grew in abundance all over Europe, US and Asia. Over time they were eradicated as they were responsible for creating a fungus that caused damage to wheat crops. There were a wide variety of barberries growing in sixteenth century Britain and one of the most loved was called ‘Nutmeg Barberry’, which would typically be served as a garnish for fish such as pike. English kitchens would also use the fruit to make jellies, jams and even ice cream – now there’s an idea!

The barberries themselves are bursting with a citric, tart flavour, not dissimilar to little lime explosions. Their crimson colour adds a jewel like quality to the dish, not unlike pomegranate seeds in their appearance, and this complements the turmeric and saffron in an explosion of colour. It looks inviting don’t you think? As they are dried, they store really easily. When cooking all you need to do is give them a thorough wash and then pop them in the frying pan for around 30 seconds, continuing to move them around the hot pan so that they puff up slightly.

IMG_6726

The final part of the cooking  requires some layering of ingredients before placing in the oven for 30 minutes. See photos below.

IMG_6753

Zereshk Polow (Iranian Chicken with Barberries and Rice

3 large handfuls of basmati rice

3 small red onions (totally 125g weighed), finely sliced

500g chicken breasts/thighs, cut into substantial pieces

4 tbsp butter

1 tsp turmeric

50g dried barberries

1 tsp sugar

4 tbsp milk

1 pinch of saffron

3 tbsp plain yoghurt

pinch of rock salt

1. Wash the rice thoroughly in cold water and place into a pan and pour in enough boiling water so that the water is roughly a thumb nail higher than the rice. (I tend to find this calculation works for me!) Cook on a low heat until the rice has absorbed the water and the rice has softened.  Remove from the pan and place in a bowl.

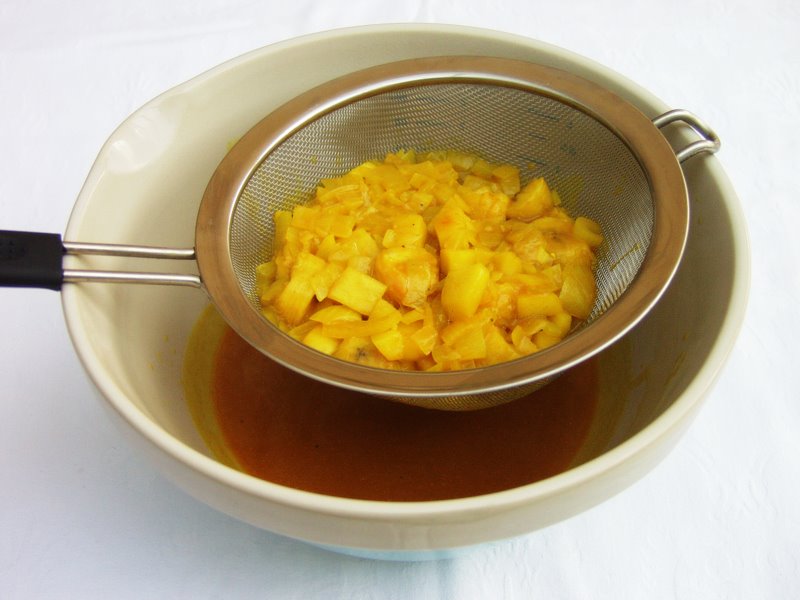
2. Soak the barberries in cold water for 10 minutes. In a pan melt a tablespoon of butter then add the strained barberries followed by the sugar. Move the barberries around the pan so that they begin to puff up. They burn really easily so keep them moving for max 30 seconds and then place to one side.

3. In a small bowl add the milk and saffron, stir and allow to rest. Once the liquid has taken on a yellow hue add the yoghurt and mix thoroughly into the milk and saffron.

4. In a large pan add two tablespoons of butter and gently fry the onions so that they bronze slightly. Gently place the onions into a bowl to rest.

5. Place the chicken in a bowl with the turmeric and mix in throughly. Add another spoonful of butter to the same pan that the onions were in and gently brown the chicken on both sides. Then add 150ml cold water to the pan and allow the chicken to gently simmer uncovered for 15 minutes.  Remove the chicken and place in a bowl to one side and place the liquid with all the extra bits from the bottom of the pan into another bowl.

6. Now for the layering:  In the same pan that you have cooked the onions and chicken – I find my Le Creuset casserole pot works superbly –  add the final tablespoonful of butter and make sure that it fully coats the bottom and the lower sides. Add a layer of rice so that it completely covers the bottom of the pot then place the chicken pieces on top. Next add another layer of rice mixed with the barberries. Then add the onions on the top followed by the yoghurt saffron milk and finally the juicy liquid that you have kept to one side.  Scatter a pinch or two of rock salt over the top.

7. Place in a preheated oven at 150 degrees centigrade  (300F) for 30 minutes with the lid on, allowing the flavours to blend together.

8. Serve straight from the pot when it is still deliciously hot.


Miso Chicken, Slow Baked Tomatoes and Fresh Spinach Salad

IMG_6527

Here in the UK we are enjoying a flashback to the summer of 1976, apparently. I was only one at the time so have no recollection of the ‘great summer’ but we are now into weeks, not days, of glorious warm sunshine with temperatures climbing up to 33 degrees in west London. When the weather is hot I love to get creative with my salads and try out different flavour and ingredient combinations. This one I created awhile ago when a friend, who has certain culinary likes and dislikes was coming over to supper. I started with the miso chicken and spinach and then built from there, digging out interesting ingredients from my fridge and pantry along the way. The overall mix of flavours works really well to the extent that I have now cooked this salad multiple times and thought you would appreciate having it too. It’s great for a picnic, lunch or supper, is hugely versatile and if you keep the chilli oil marinade to one side for guests to help themselves, then the whole family can enjoy the dish.

Miso Chicken Slow Baked Tomatoes and Fresh Spinach Salad

Serves 4-6

 For the Chicken Marinade

500g chicken breasts

3 garlic cloves, grated

1 inch ginger, peeled and grated

2 tbsp sweet white miso paste

1 tbsp sesame oil

1 tbsp light soy sauce

*******

parchment paper

3 tbsp pine nuts, toasted

250g puy lentils

1 avocado, chopped

6 slow baked tomatoes marinated with chilli

chilli oil from the slow baked tomatoes (see above)

250g fresh spinach

1. First you need to flatten the chicken breasts as they will cook under the grill more evenly and quicker if they are thinner. Place a large strip of parchment paper underneath the chicken breasts and another similar sized piece on top. Then using a rolling pin gently hit the chicken pieces which will begin to flatten. Check to see how they are looking and if they need to be a little flatter continue to hit them with the rolling pin. If you overly bash them they will begin to break apart so flatten them to the extent that they still keep in tact.

2. Place the flattened chicken breasts into a freezer bag and then add the grated ginger, garlic, sweet white miso paste, soy sauce and sesame oil. Using your hands massage the ingredients thoroughly into the chicken pieces. Place in the fridge for 30 minutes or longer if you can.

3. Heat up a small frying pan and when it is hot add the pine nuts being careful not to burn them as they toast quickly. Keep them moving around the pan and after a minute they should have toasted nicely.  Place to one side.

4. Heat your grill (you could also use a griddle pan or BBQ!) to 200 degrees centigrade and place the marinated chicken directly onto your oven rack. Place some baking parchment/foil underneath to catch all the bits than fall through the rack – these will also taste great in the salad.  The breasts will need around 6 minutes each side. If they look a little undercooked leave them for a minute or two more and vice versa.

5. In a large mixing bowl add the spinach, chopped/sliced avocado, puy lentils – for speed I often use the Merchant Gourmet brand – see here, pine nuts and slow baked tomatoes marinated in chilli. Whilst you can of course slow bake your own and marinate them in chilli oil (which I will get around to doing so at some point – will make a great blog post) I opt for the Sacla brand – see here. Chop the tomatoes up slightly and then gently mix all the above ingredients together.

6. Once the chicken has cooled slightly slice into stripes and mix gently into the salad along with the bits that had fallen through the rack. Add a little of the chilli oil from the slow baked tomatoes and place extra in a small pouring jug.

7. Transfer the salad to a serving bowl and allow guests to serve themselves. I find it is best eaten at room temperature.

It is surprisingly filling and leftovers the next day taste equally good, so just refrigerate if you have some left over.

IMG_6544


Chicken, Mango and Avocado Salad

IMG_4273

Grey days deserve brightening up and there is no better way to lift ones mood, than to indulge in a rather bright and summery looking salad….. in winter. I recently had this salad at a cheery little deli/restaurant on the Kings Road (they have two branches now at differing ends of the Kings Road) called Megan’s, where the staff are attentive and cheerful and there is a constant flow of customers coming in to have breakfast, lunch or to indulge in tea and cake, either to-go or to linger for a while in the warm haven of the restaurant. There is a positive buzz, not least because the food is fresh and inviting and made on the premises. It’s casual, unstuffy eating where you queue in line at the salad and hot bar and take your pick.

What initially attracted me to the chicken, mango and avocado salad was the colour – the bold yellow balancing beautifully with the reddish pink of the radish and the green from the salad leaves and coriander. The blend of flavours and textures complimented each other so well and I like the fact that the chicken had been delicately romancing with the dressing.

I took a mental note of what was in the salad and swore to conjure up a similar one in my home and then to share with you all when I had got it right. Of course it works brilliantly in the summer months, but I think a splash of colour and a healthy salad in the winter is fabulously refreshing. You can choose to have your grilled chicken warm or at room temperature, both work equally well so it is up to your personal preference.

What recipes do you cook when you need to brighten up your day?

IMG_4256

Chicken, Mango and Avocado Salad

serves 4

Romaine lettuce, chopped

300g chicken breasts

1 avocado

1 mango

bunch of coriander, roughly chopped

approximately 6 radishes, sliced

salt and pepper

dressing

1 tsp dijon mustard

1/2 tsp whole grain mustard

3 tbsp olive oil

1 tbsp white wine vinegar

1 clove of garlic, crushed

1. Preheat the grill to 180 degrees and cook the chicken for around 20 minutes, turning half way through.

2. Slice, cut and chop the remaining salad ingredients and place in a large bowl.

3. Mix the dressing ingredients together and place to one side.

4. When the chicken is cooked, slice the chicken breasts into strips of edible bites and place into the large bowl.

5. Add a little of the dressing and then gently toss together with all the salad ingredients.

6. Place in a serving platter for guests to serve themselves, with a small jug with the remaining dressing on the side.


Cold Rice Noodles with Peanut-Lime Chicken

The past week or so has been very memorable here in the UK. The Olympics kicked off to an outstanding opening ceremony last friday, which made me laugh and marvel in equal measure. Ok, I’m biased, but I thought that it’s quirky, eccentric nature pretty much summed up us Brits. No amount of money spent on an opening ceremony, past or future, can trump the fact that Her Majesty gamely played herself with Mr Bond as part of the ceremony itself. How cool and even the non royalists out there must have had a sneeky smile on their faces. As for Mr Bean – what a great touch to include him as part of the ceremony; he was definitely one of the highlights.  It was fun, original and gamely humorous and had all of us glued to the TV screen for over three hours, wondering what Danny Boyle was going to bring out of the hat next. I think it is safe to say he is a ‘slam dunk’ for a knighthood in the coming months.

Since the Games begun I have been glued to the TV watching the swimming in particular. Mike Phelps gaining his 19th Olympic medal making him the greatest winner the Olympics has ever seen -truly remarkable. Also the spectacular performance of China’s Ye Shiwen, who, at 16 years of age, wins gold in the women’s individual medley.  It’s addictive viewing watching the world’s best athletes compete in such a wide variety of sports.  I’m going to see the men’s beach volleyball soon, which should be fun and a little surreal to watch in central London.

We’ve had some good sunny days recently, which always inspire me to cook fragrant Asian dishes that are not too heavy. This recipe I stumbled across really recently and it caught my attention as it was served cold and could almost be classed as an Asian noodle salad, of sorts. I’ve cooked it a few times already and I have to admit it’s really good. My number one fan (Big A – who is 6) gave it a definite 10/10.  It was originally posted in the New York Times, however, I found it on the hugely popular food bloggers site ‘Smitten Kitchen‘. As with all great recipes, Deb Perelman – from Smitten Kitchen, adapted hers from the original and I changed hers a little bit further. For example,  I omitted chilli, as I was feeding it to Big A, Little Z and my father who all don’t eat chilli. That said if I were feeding it to just adults (or chilli loving adults) I would definitely add the chilli (hence it has remained on the list of ingredients), I added only one large cucumber, added baby sweetcorn, slightly more rice noodles.

For the really observant amongst you, you will have noticed that I completely forgot to scatter the crushed roasted peanuts over the dish for all the photos. When I sat down and started eating the meal I remembered but clearly too late for the shots for this blog post !

Cold Rice Noodles with Peanut-Lime Chicken

Sourced from Smitten Kitchen, original recipe from David Tanis whose recipe appeared in The New York Times

Serves 6

Dipping Sauce

6 tbsp Asian fish sauce

6 tbsp brown sugar

12 tbsp lime juice

2 garlic cloves, crushed

small thai red or green chilli,  to taste but optional

Peanut Dressing

3 tbsp Asian fish sauce

3 tbsp rice vinegar

9 tbsp lime juice

3 tbsp of light soy sauce

1 1/2 (one and a half) inch piece of ginger, peeled and sliced

6 tbsp natual unsalted peanut butter (if you can’t find this just use regular)

1 tbsp toasted sesame oil

pinch of cayenne

Chicken and Noodle Salad

3 tbsp toasted sesame oil

500g boneless skinless chicken thighs

250g dried rice noodles

1 large cucmber, cut in 1/4 inch half moons

2 carrots, cut in thin julienne

handful of baby sweetcorn, halved

handful of fresh mint and coriander (you could also add Thai basil)

4 spring onions, thinly sliced

handful of roasted peanuts, crushed

lime wedges to serve

1. Begin by making the ‘dipping sauce’. On a low heat, place all the ingredients into a pan and gently stir until the sugar has been properly dissolved – this will only take a few minutes. Place in a small serving bowl and allow to cool.

2. Next you need to make the ‘peanut dressing’. Place all the ingredients into a small food processor and puree all the ingredients so that you are left with a thick creamy sauce. Pour into a serving bowl.

3. In separate large bowl pour approximately half of the dipping sauce and a third of the peanut dressing and stir together. Add the chicken to the mixture and coat thoroughly using your hands. Leave to marinate for at least 15 minutes.

4. Once the chicken is marinated gently heat up a griddle pan and add a little toasted sesame oil and brown the chicken thoroughly on both sides, which will take a few minutes per side. I cook my in batches so that I can be sure that the chicken in properly cooked through. As an alternative you could grill the chicken for 20-25 minutes.

5. When the chicken is cooked, chop into bite sized pieces.

6. To serve there are a few alternatives that you can do –

option 1: Place everything on a large serving platter with the noodles, chicken, vegetables, dressing and marianade all separated out and then your guests/family can help themselves.

or

option 2: Divide the cooked noodles into individual bowls or plates. In a small bowl toss the vegetables with 1 tablespoon of dipping sauce. Place the vegetables and chicken onto each bowl/plate. Place a further 2 teaspoons of dipping sauce and dressing to each helping. Add the herbs, peanuts and spring onions to each bowl and serve.

Note: As an alternative to baby sweetcorn you could add fresh peppers which work equally well. 


No more cold cuts please – Turkey, Ham and Leek Pie

I hope you all had a wonderful Christmas with your family and loved ones and that it was not too stressful if you were the one in charge of feeding the masses. We always end up with loads of turkey and ham/gammon leftovers and whilst cold cuts are delicious for maybe one or two sittings, any more than that and one craves for variety. I felt a good old fashioned pie would be the perfect way to use up some of the leftovers and fill the bellies of my guests. It was polished off in one sitting so I guess you could say that it was hit.

Turkey, Ham and Leek Pie

serves 8

4 leeks, chopped

2 celery sticks, chopped

100g mushrooms, chopped

450g turkey, (or chicken) cut into small sized chunks

350g ham/gammon, cut into small sized chunks

1 heaped tbsp wholegrain mustard

1-1.5 litres of turkey stock (you could also use a tin of Campbell’s Cream of Chicken Soup or a combination of the two)

2 tsp of cornflour (if using stock add cornflour, you won’t need to if you add the chicken soup)

3tbsp cold water

pinch of salt

black pepper

400g of shortcrust pastry or ready made

1 egg, lightly beaten

1. Preheat the oven to 180 degrees fan.

2. Evenly chop the celery, leeks and mushrooms and place most of them on the bottom of the pie dish. (The dish I used was 35cm length by 24cm width). This will allow the vegetables to cook properly through when they are in the oven.

3. Cut the turkey and ham into small sized chunks and scatter over the vegetables along with the remainder of the vegetables that you put to one side. Add the wholegrain mustard and mix into the vegetables and meat.

4. If you have any turkey stock left over use that, otherwise, use chicken stock cubes, such as knorr or Campbell’s cream of chicken soup works really well. I also had some juices left from the ham so I managed to combine these into the stock as well giving it a really delicious taste. Add approximately 1.5 litres of stock to the pan and warm it through completely. Place 2 teaspoons of cornflour into a small bowl along with a couple of tablespoons of cold water. Stir until the cornflour is smooth and watery and add to the stock to thicken it.

5. Add the stock over the meat and vegetables and using your hands try and make sure all the pieces are covered to some degree in the stock. Add salt and pepper to season.

Easy Shortcrust Pastry

400g plain flour

200g butter, cubed

2-3 tbsp of cold water

6. To make your own pastry, simply place the plain flour into a large mixing bowl along with the cubed butter (room temperature is best). Using your finger tips gently mix the butter and flour together so that it begins to crumble. Using a knife stir in a little water into the dough so that it binds together. If you put in too much water just add a little extra flour. Once the dough has come together, form a ball and cover with clingfilm and place in the fridge for 15 minutes.

7. Roll the pastry out onto a cold floured surface. Once it is larger than your pie dish gently place it over the top of your filling making sure the extra pastry hangs over the sides. I find it is best to use the rolling pin to place it gently on top. Press down at the edges using your finger and thumb so that the pastry is completely secure. Using a knife cut the extra pastry that is hanging over the sides. You can then get creative on the top of your pie using the left over pastry.

8. To help give your pie the perfect brown glow, gently brush the top of the pie with your beaten egg.

9. Using a fork place a few fork marks over the top of your pastry so that it can let out the air within the body of the pie when cooking.

10. Place in the oven for 30-40 minutes, checking to see that it does not brown too much. Serve immediately with peas and new potatoes.


Childhood memories – Japanese Chicken Katsu Curry

OLYMPUS DIGITAL CAMERA


This post is dedicated to my sister who has always adored Japanese Chicken Katsu Curry. That’s not to say that I don’t, because I certainly do, but not in the same way as my sister. A few years ago when I visited her in Vancouver she ordered it in a Japanese restaurant hoping that it would bring back the same happy childhood  memories of the dish. Sadly the disappointment on her face when she tried their offering was plain to see, so I made it my mission there and then to try and find the recipe of our youth.

You may be wondering why we were eating such cosmopolitan food at such a young age in 80’s rural England. Our blessing was that my family had close links with a Japanese boarding school called the Rikkyo School. Most half term holidays we would welcome a couple of Rikkyo students, who were the same age as ourselves, into our home, as their parents lived overseas. We always looked forward to the arrival of our new guests and spending time in their company. Reserved, with gentle, quiet manners, our home and food must have seemed so alien to what they were used to.

In return for our hospitality we were invited to their annual open day. We so looked forward to this day, in fact it was definitely up there as one of our favourite days of the year, along with the village fete, Christmas, Easter, bonfire night and halloween. It transported us to another world that was completely new to us. I think that it was these childhood experiences which gave my whole family a genuine fondness and fascination with all things Japanese. To this day I visit a Japanese hairdressers whenever I need a haircut, not least because it transports me to Japan without having to get on a plane and the service is exemplary.

Anyway back to the ‘open day’.

The day consisted of watching displays of jujitsu and kendo, visiting their classrooms and seeing all the work they had done over that year, going to a Japanese tea ceremony, visiting the haunted tunnel which they had put together, going to a music concert, but most of all we enjoyed having lunch and sampling their delicious food, especially the chicken katsu curry with Japanese sticky rice.

So you can see where this fondness for the dish began.

Happy memories.

Chicken Katsu Curry 

Serves 4

4, chicken breasts

200g panko breadcrumbs

plain flour, enough for coating

5 eggs, whisked

Curry

1 onion, chopped

1 garlic clove, crushed

50g butter

2 golden delicious apples, peeled and chopped

1 tsp fresh ginger, grated

1 pint of water

2 bananas, sliced

2 tbsp honey

1/2 tsp of turmeric

1 tsp of curry powder

salt and pepper, a couple of pinches to suit tastes

100 ml cold water

4 tsp of cornflour

2 carrots, chopped into bite size chunks

1 very large  potato, chopped into bite size chunks

(optional – 1 onion, chopped into bite size quarters)

1. Place half the butter into a saucepan on a low heat and add the onion and garlic. After a couple of minutes add the apple and grated ginger. Stir regularly to prevent burning for another few minutes.

2. Now add 1 pint of water to the pan along with 2 bananas, honey, turmeric and curry powder. Bring to the boil and then simmer. To thicken the curry you need to now add the cornflour to 100 ml of cold water. Stir into the curry and then continue to simmer for a further 20 minutes. If you think it needs a little more water at this stage do not be afraid to add a little more. If you over water then just add a little more cornflour. Season with salt and pepper.

chicken katsu curry

3. Strain the contents of the pan through a sieve so that you are left with a smooth liquid. Set aside. (please note: another time I may try using my hand whisk to blend all of the mixture together so that I do not waste any ingredients – if you do this and it works then please let me know!)

                           chicken katsu curry                                

chicken katsu curry

4. In the same pan you had been using for the curry mixture, add the remaining butter and warm on a low heat. Now add the chopped carrots and potato. At this stage you could also had an onion quartered into mouth sized segments! Continue to stir for a couple of minutes, making sure the vegetables do not burn. Now add the strained curry sauce that you have put to one side and gently simmer for 30 minutes, or until the potato and carrots are soft.

OLYMPUS DIGITAL CAMERA

5. In separate bowls place the flour, whisked eggs and Japanese panko bread crumbs. By all means use ordinary breadcrumbs but you will find that panko have a coarser texture to ordinary breadcrumbs, which give a certain edge to this dish. They are also more delicate and absorb less oil than western breadcrumbs. They can be found at Asian supermarkets, although I managed to get mine on line at Amazon.

OLYMPUS DIGITAL CAMERA

chicken katsu curry

6. Flatten the chicken slightly using a rolling pin so that it is of even thickness and hence will cook evenly in the oil. Then place the chicken breast in the flour and coat both sides, then move it to the egg bowl and do the same procedure and then move on to the panko breadcrumbs. I like to have a good coating of breadcrumbs so I repeated this last procedure – egg -breadcrumbs-egg-breadcrumbs.

7. Warm a deep pan or wok with oil and so that it become very hot. Sprinkle a few panko breadcumbs into the pan and if they sizzle the oil is hot enough. Then gently place the breaded chicken into the oil moving it gently in the oil. Cook for up to three minutes and then turn over and repeat so that the chicken is thoroughly cooked through. Then take out and place on some kitchen roll. At this stage it is good to make some some incisions into the chicken to make sure it is properly cooked through. If need be you will have to place in the oil a little longer, but be careful not to over cook.

OLYMPUS DIGITAL CAMERA

8. Repeat the procedure with all four chicken breasts and place on a warm plate in a low oven whilst you are preparing the next chicken breast.

9. Evenly slice the chicken and pour the warm sauce on top with some Japanese sticky rice on the side. Red-dyed pickled daikon and shredded cabbage are also eaten with this dish, although I did not manage to source them this time.

OLYMPUS DIGITAL CAMERA


King Prawn Noodle Broth – effortless joy in a bowl

OLYMPUS DIGITAL CAMERA

Do you ever feel too exhausted to cook in the evenings but want a fresh, healthy, comforting dish that you can prepare in lightening speed with very little effort? I think all of us do from time to time, I certainly did this evening. So I put together this wonderfully flavoursome broth in less than 10 minutes. I feel it cleanses the body and heightens ones senses. It’s definitely my kind of dish.

King Prawn Noodle Broth – Serves 2

190g  Jumbo king prawns (or any prawns will do)

1 bag/ 200g of udon noodles (double the amount if you are feeling hungry)

1 tamarind broth cube (Knorr make them)

1 garlic clove, finely sliced

6 thin slices of fresh ginger

half a red chilli, finely sliced

1 lime

1 spring onion, finely sliced

1/2 tsp of lemongrass paste

2 tsp of light soy sauce

1 tbsp sesame oil

1 tbsp of coriander, chopped

1. Thinly slice the garlic, ginger, red chilli and spring onion. Heat the sesame oil in a pan, and when it is hot, add the chopped ingredients and the lemongrass paste, and cook gently for a couple of minutes.

OLYMPUS DIGITAL CAMERA

2. Meanwhile put 600ml of boiling water in a pan on a low heat and break up the tamarind broth cube into the water. Then add the prawns and watch them reduce in size slightly – this will only take a couple of minutes – be careful not to over cook them!

OLYMPUS DIGITAL CAMERA

OLYMPUS DIGITAL CAMERA

3. Place the contents of the pan with the garlic, ginger, chilli, lemongrass and spring onion into the broth along with the udon noodles. Whilst I use udon noodles any type of noodles will work equally well. Experiment and see which you prefer. Cook the noodles for 3 minutes and during this time add the soy sauce and the juice from half a lime.

4. Serve piping hot with chopped coriander on the top with a lime quarter on the side.

If you are feeling under the weather or want a general ‘pick me up’ this warming broth is sure to reinvigorate you. Instead of prawns you could use chicken or for a vegetarian option: broccoli, sugar snap peas, mange tout or pak choi.


My mother’s legendary ‘Smokey Barbeque Sauce’ and ‘Tarragon and Lemon Chicken’

OLYMPUS DIGITAL CAMERA

No barbeque is complete without my mother’s legendary smokey barbeque sauce. It’s straightforward to make and always guaranteed to please. There are certain things that you eat as a child that remain in your memory forever and this sauce is definitely one of those happy memory tastes. We were blessed with stunning weather this past weekend – for the Wimbledon finals – so having a barbeque was definitely in order. A glass of Pimms, that ubiquitous English summer tipple, a game of croquet (which is seriously addictive) all in all made for a perfect summer’s day.

OLYMPUS DIGITAL CAMERA

Smokey Barbecue Sauce

Makes approximately 1/2 pint/300ml

25g /1oz butter

1 onion, peeled and finely chopped (although my mother uses leeks as my father has an onion intolerance, which works equally well)

1 garlic clove, crushed

2 tbsp white wine vinegar

150ml/1/4 pint of water or vegetable stock

1 tbsp English mustard

2 tbsp demerara sugar

1 slice of lemon

1 bay leaf

Pinch of cayenne pepper

2 tbsp of Worcestershire sauce

5 tbsp of tomato ketchup

3 tbsp tomato puree

salt

fresh ground pepper

1. Melt the butter in a saucepan and fry the onion (or leek for those with an onion intollerance) and garlic until soft and translucent.

OLYMPUS DIGITAL CAMERA

2. Now add the vinegar, water or stock, mustard, sugar, lemon slice, bay leaf and cayenne. Bring slowly to the boil and simmer for 15 minutes, stirring occasionally.

3. Stir in the remaining ingredients with salt and pepper to taste. Simmer for a futher 10 minutes. I tend to leave the bay leaf in when I serve the sauce as I like the rustic, homemade quality to it.

OLYMPUS DIGITAL CAMERA

As an alternative to simply just barbequing chicken, which is delicious in its own right, my mother’s ‘Tarragon and Lemon Chicken’ is a good alternative. It’s best to marinade the chicken for as long as possible, ideally overnight and to pierce the skin of the chicken so that the flavours can really be absorbed by the chicken. Serve with a crisp green salad and piping hot new potatoes with a dollop of butter and some chopped up fresh parsley and my mother’s legendary smokey barbeque sauce.

Tarragon and Lemon Chicken  serves 4

3.5lb whole chicken cut into pieces

5 fl oz olive oil

6 tbsp lemon juice

1 onion (or leek), finely chopped

1 large handful of fresh tarragon

1 large handful of fresh parsley (flat leaf or curly), finely chopped

few drops of tabasco

salt and pepper

lemon wedges and fresh tarragon sprigs to garnish

1.  Season the chicken with salt and pepper and then make a few knife incisions into the chicken pieces. This is to enable the marinade to really penetrate the chicken so that it is more flavoursome when it is cooked. In a separate bowl mix together the olive oil, lemon juice, onion (or leek), the handful of tarragon and parsley and tabasco. Then add the chicken pieces and with your hands really work the marinade into the chicken pushing some of the onion and herbs into the small incisions that you have made.   Leave the chicken to marinate in the fridge overnight.
OLYMPUS DIGITAL CAMERA
2.  Take the marinated chicken out of the fridge for over an hour before cooking time and leave to stand at room temperature.
3.  When the barbeque is ready brush the grid with olive oil.  Drain the chicken pieces, reserving the marinade, and place chicken on the grid starting with the bony side down. Brush the chicken pieces with the marinade at intervals during cooking, remembering to turn the chicken so that it is cooked sufficiently.
4.  Barbequing the chicken takes 30 minutes. You know that the chicken is cooked when the juices run clear when pierced with a knife through the thickest part of the meat.
5.  Garnish with tarragon sprigs and serve with lemon wedges.
OLYMPUS DIGITAL CAMERA

In the mood for ‘Italian Salsa Verde’

OLYMPUS DIGITAL CAMERA

My family has been craving greenery. We spent the last week in the beautiful Var valley in France and whilst we had some wonderful dishes we felt that perhaps, without sounding too rude, French food is slightly stuck in a 1970’s time warp and is due a food revival. Meticulously prepared and presented, the food still remains pretty rich and creamy with lots of unpasteurized cheese not much veg and basically not ideal if you happen to be under 10, pregnant or health conscious. Before you ask, no I am not pregnant, but one of the friends we went with is, and she found it slightly restrictive on what she could actually eat. A favourite dish that one of our party devoured was scallops in a creamy curried sauce, similar to coronation chicken in taste – the sauce that is; surprisingly delicious but a little 70’s kitsch you have to agree. If only I’d taken a photo as evidence.

So back in Blighty we gathered some fresh herbs to make an Italian Salsa Verde to detox our bodies from all the cheese and cream laced food we had eaten across the waters.

Italian Salsa Verde 

Not to be mistaken with French sauce verte, German green sauce, Mexican salsa verde and Argentinian chimichurri

1 large handful of fresh mint

1 large handful of fresh basil

2 large handfuls of fresh flat leaf parsley

3 pieces of chopped garlic

6 anchovies chopped

1 large handful of chopped cornichons or gherkins

1 large handful of capers

2 tbsp of olive oil

3 tbsp of red wine vinegar

1 dsp (dessert spoon) of dijon mustard

pepper

salt

1. Finely chop the garlic, cornichons, anchoives. If you are doing it all by hand then you will also need to finely chop the fresh flat leaf parsley, mint and basil, if however you are like me and you want to save time, use a blender. Also add the capers and olive oil at this stage.

OLYMPUS DIGITAL CAMERA

2. After an initial quick blend – so that it is NOT smooth in consistency, add the red wine vinegar and dijon mustard. Season to taste although you will probably find that the saltiness of the anchovies suffice.

OLYMPUS DIGITAL CAMERA

OLYMPUS DIGITAL CAMERA

The girls loved it so much they even ended up licking out the remainder from the blender with a spoon. How sweet !


3. Salsa Verde is so versatile that it can be eaten with meat, fish, poultry or vegetables. I decided to serve mine with grilled chicken, vine tomatoes and borlotti beans on the side, and hunks of crusty bread to mop up the salsa. Delicious and not too 70’s !

OLYMPUS DIGITAL CAMERA

SaveSave