Chinese Steamed Eggs – A tasty ‘mouthfeel’ dish

How are you all surviving with the deluge of rain that we are having in the UK? It’s relentless isn’t it. It’s no wonder that us Brits are renown for talking about the weather non-stop, as it is so pertinent to our very existence. At least I have opted for a relaxation/pastime that does not depend on the weather – swimming outside – rain or shine you are always going to get wet. Followed by a sauna, and you can guarantee that your day will always seem brighter.

In a bid to be more consistent on here I wanted to kick off the weekend by sharing a super quick and tasty breakfast or lunch recipe for Chinese steamed eggs, which has a wonderful ‘mouthfeel’ to it. Fuchsia Dunlop talks about ‘mouthfeel’ in her excellent book ‘Shark’s Fin and Sichuan Pepper: A Sweet -Sour Memoir of Eating in China‘ – I highly recommend this book if you have not read it. In Chinese cuisine they have a specific word for mouthfeel – ‘kougan’ and this is often considered equal or as important to flavour. The mouthfeel for this dish comes in the form of a smooth and silky sensation – a term known as ‘hua’. The other sensations in the Chinese vocabulary are ‘cui’ – for anything that is crunchy or crispy, ‘Q’ for anything that is chewy, bouncy or rubbery in texture – noodles being a great example and ‘nuo’ for soft and gelatinous dishes – particularly braised dishes.

It takes around 15 minutes to make (including preparation) but there are a few important steps to remember.

1. After whisking the eggs it is important to strain them – this makes sure that the steamed eggs will be completely smooth.

2. The water that you add to the strain eggs need to be the same amount in weight to the eggs. It needs to be warm so I suggest half the amount is boiling water and the other half is cold. I like to add 1/4 cube of chicken or vegetable stock to the water. Give a good stir to allow the stock cube to dissolve, then strain into the whisked eggs.

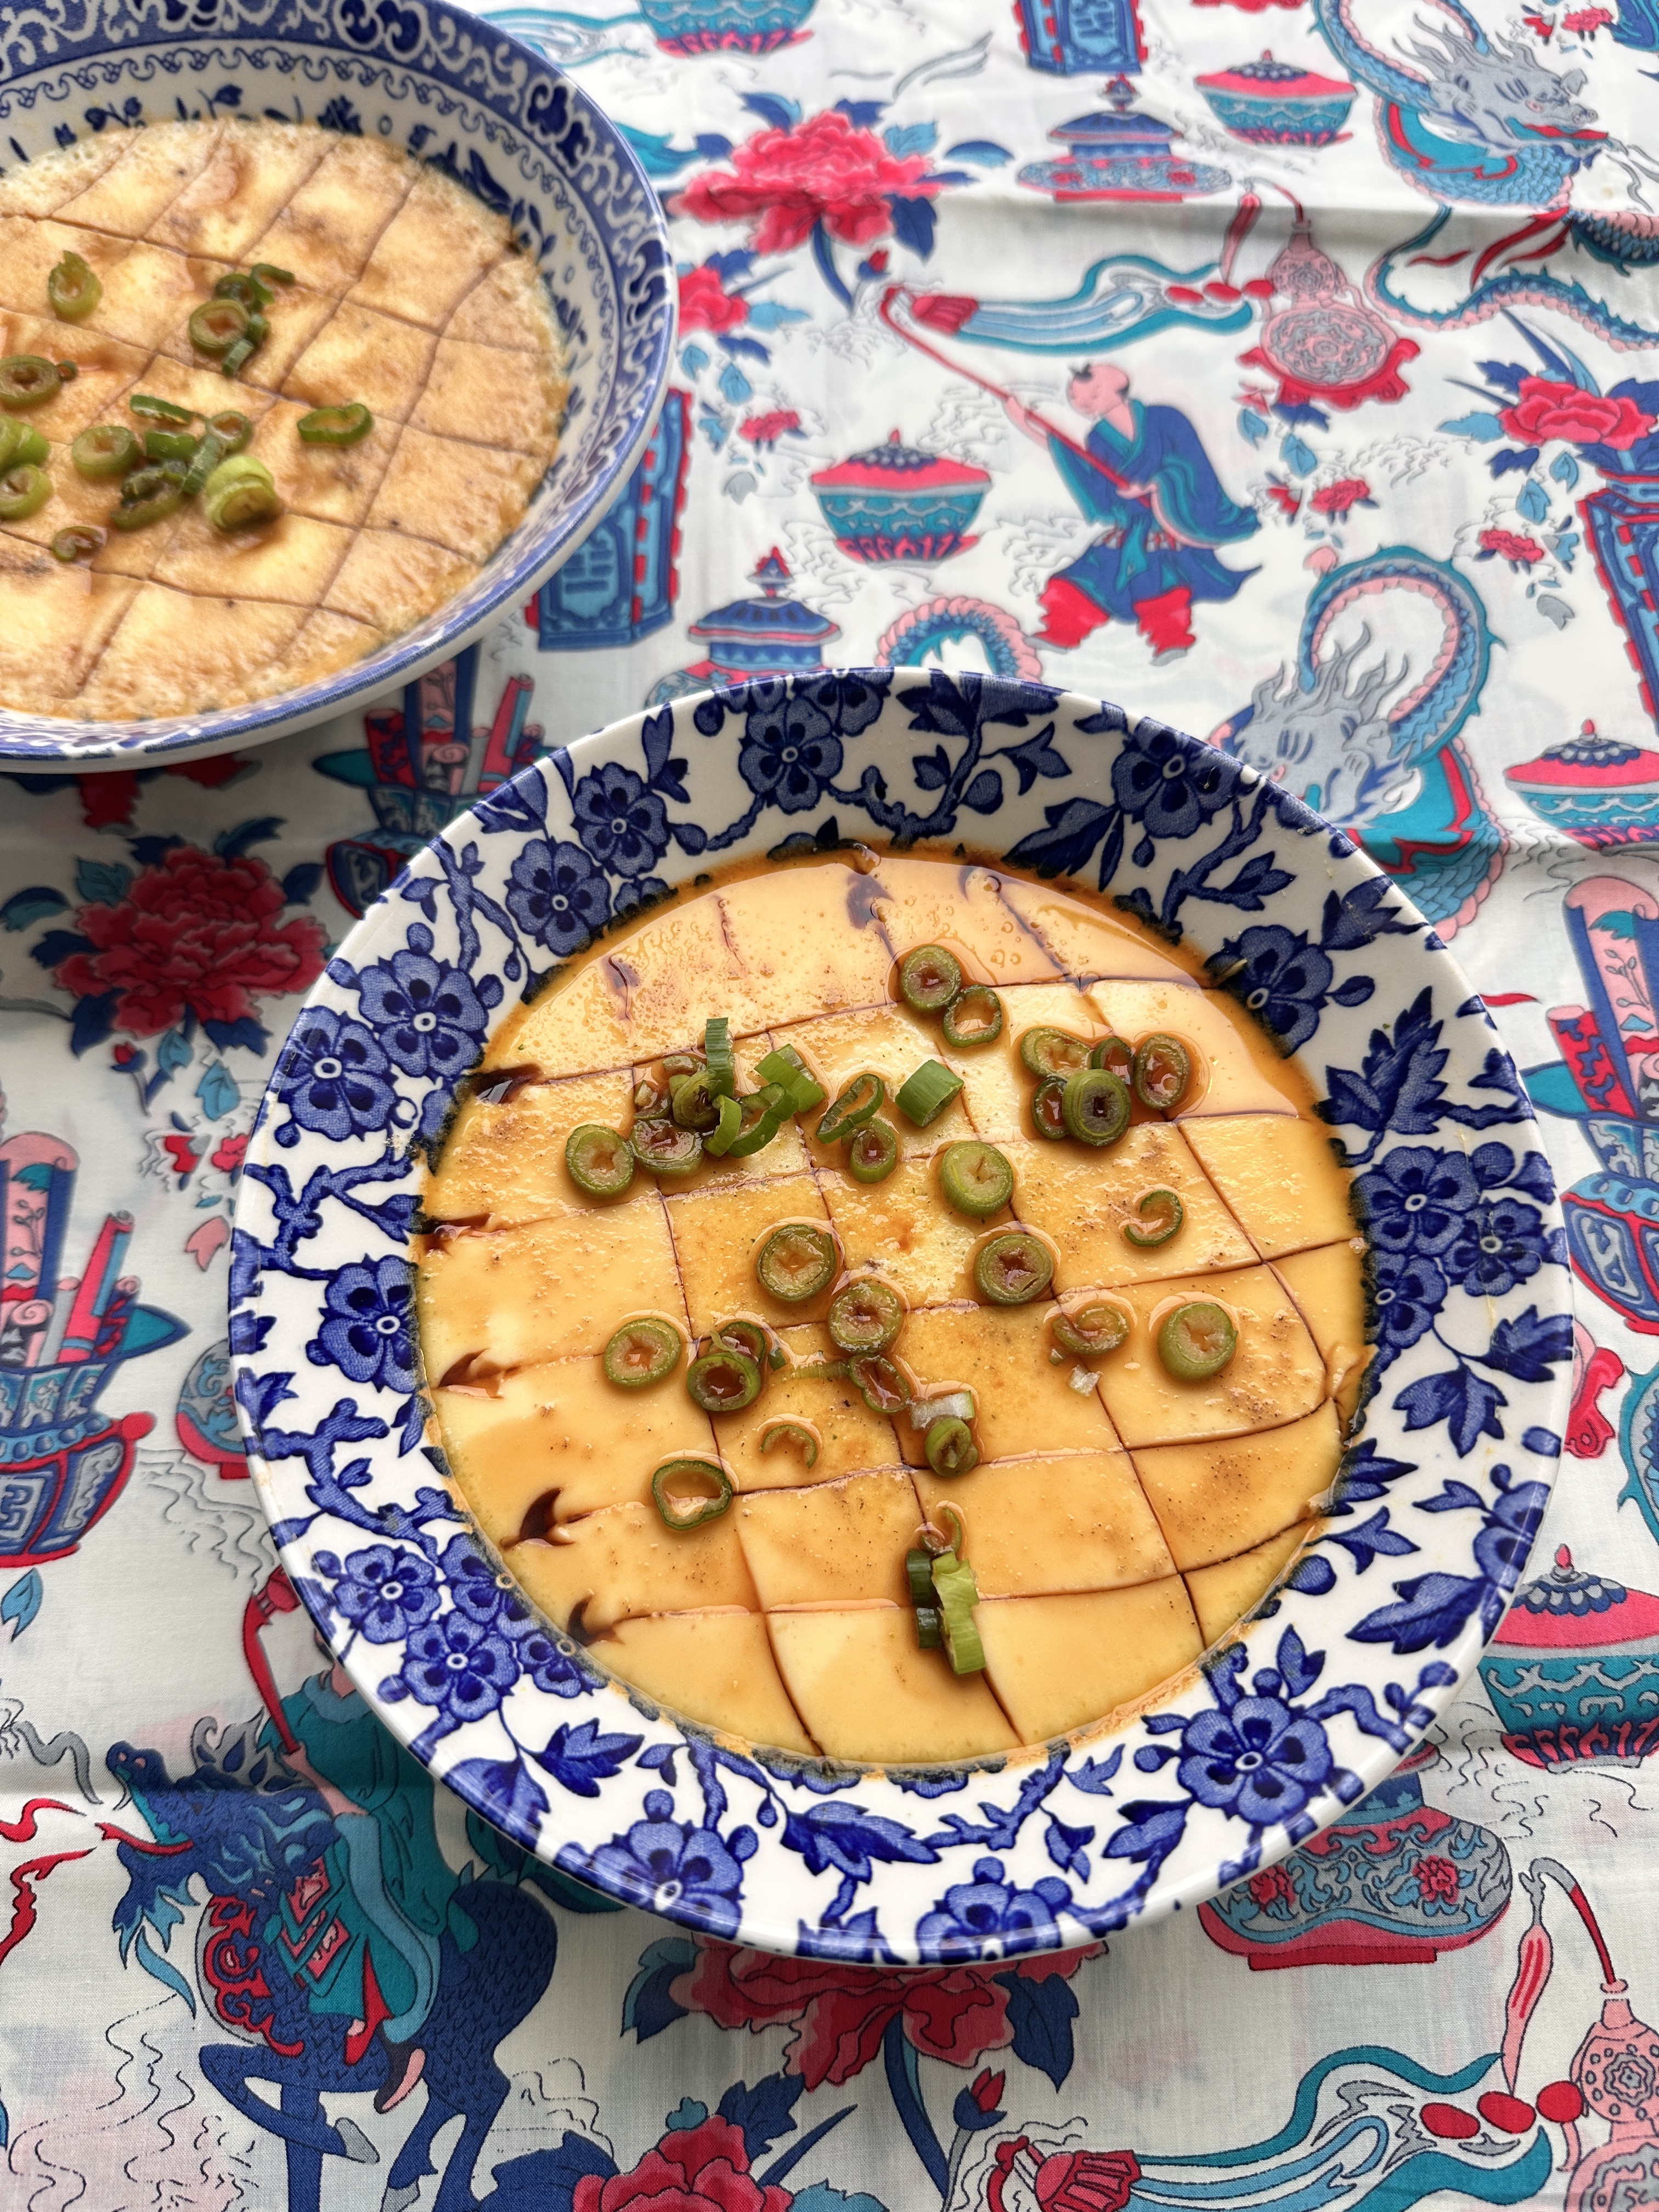
3. Cover the bowl with the egg mixture with some clingfilm with a few little holes in top – this is to prevent in water from the steam dripping into the bowl. (See the photo below which shows the bowl with steamed eggs that had clingfilm in the front of the photo and one without in the back. Without will make the eggs uneven on the surface.

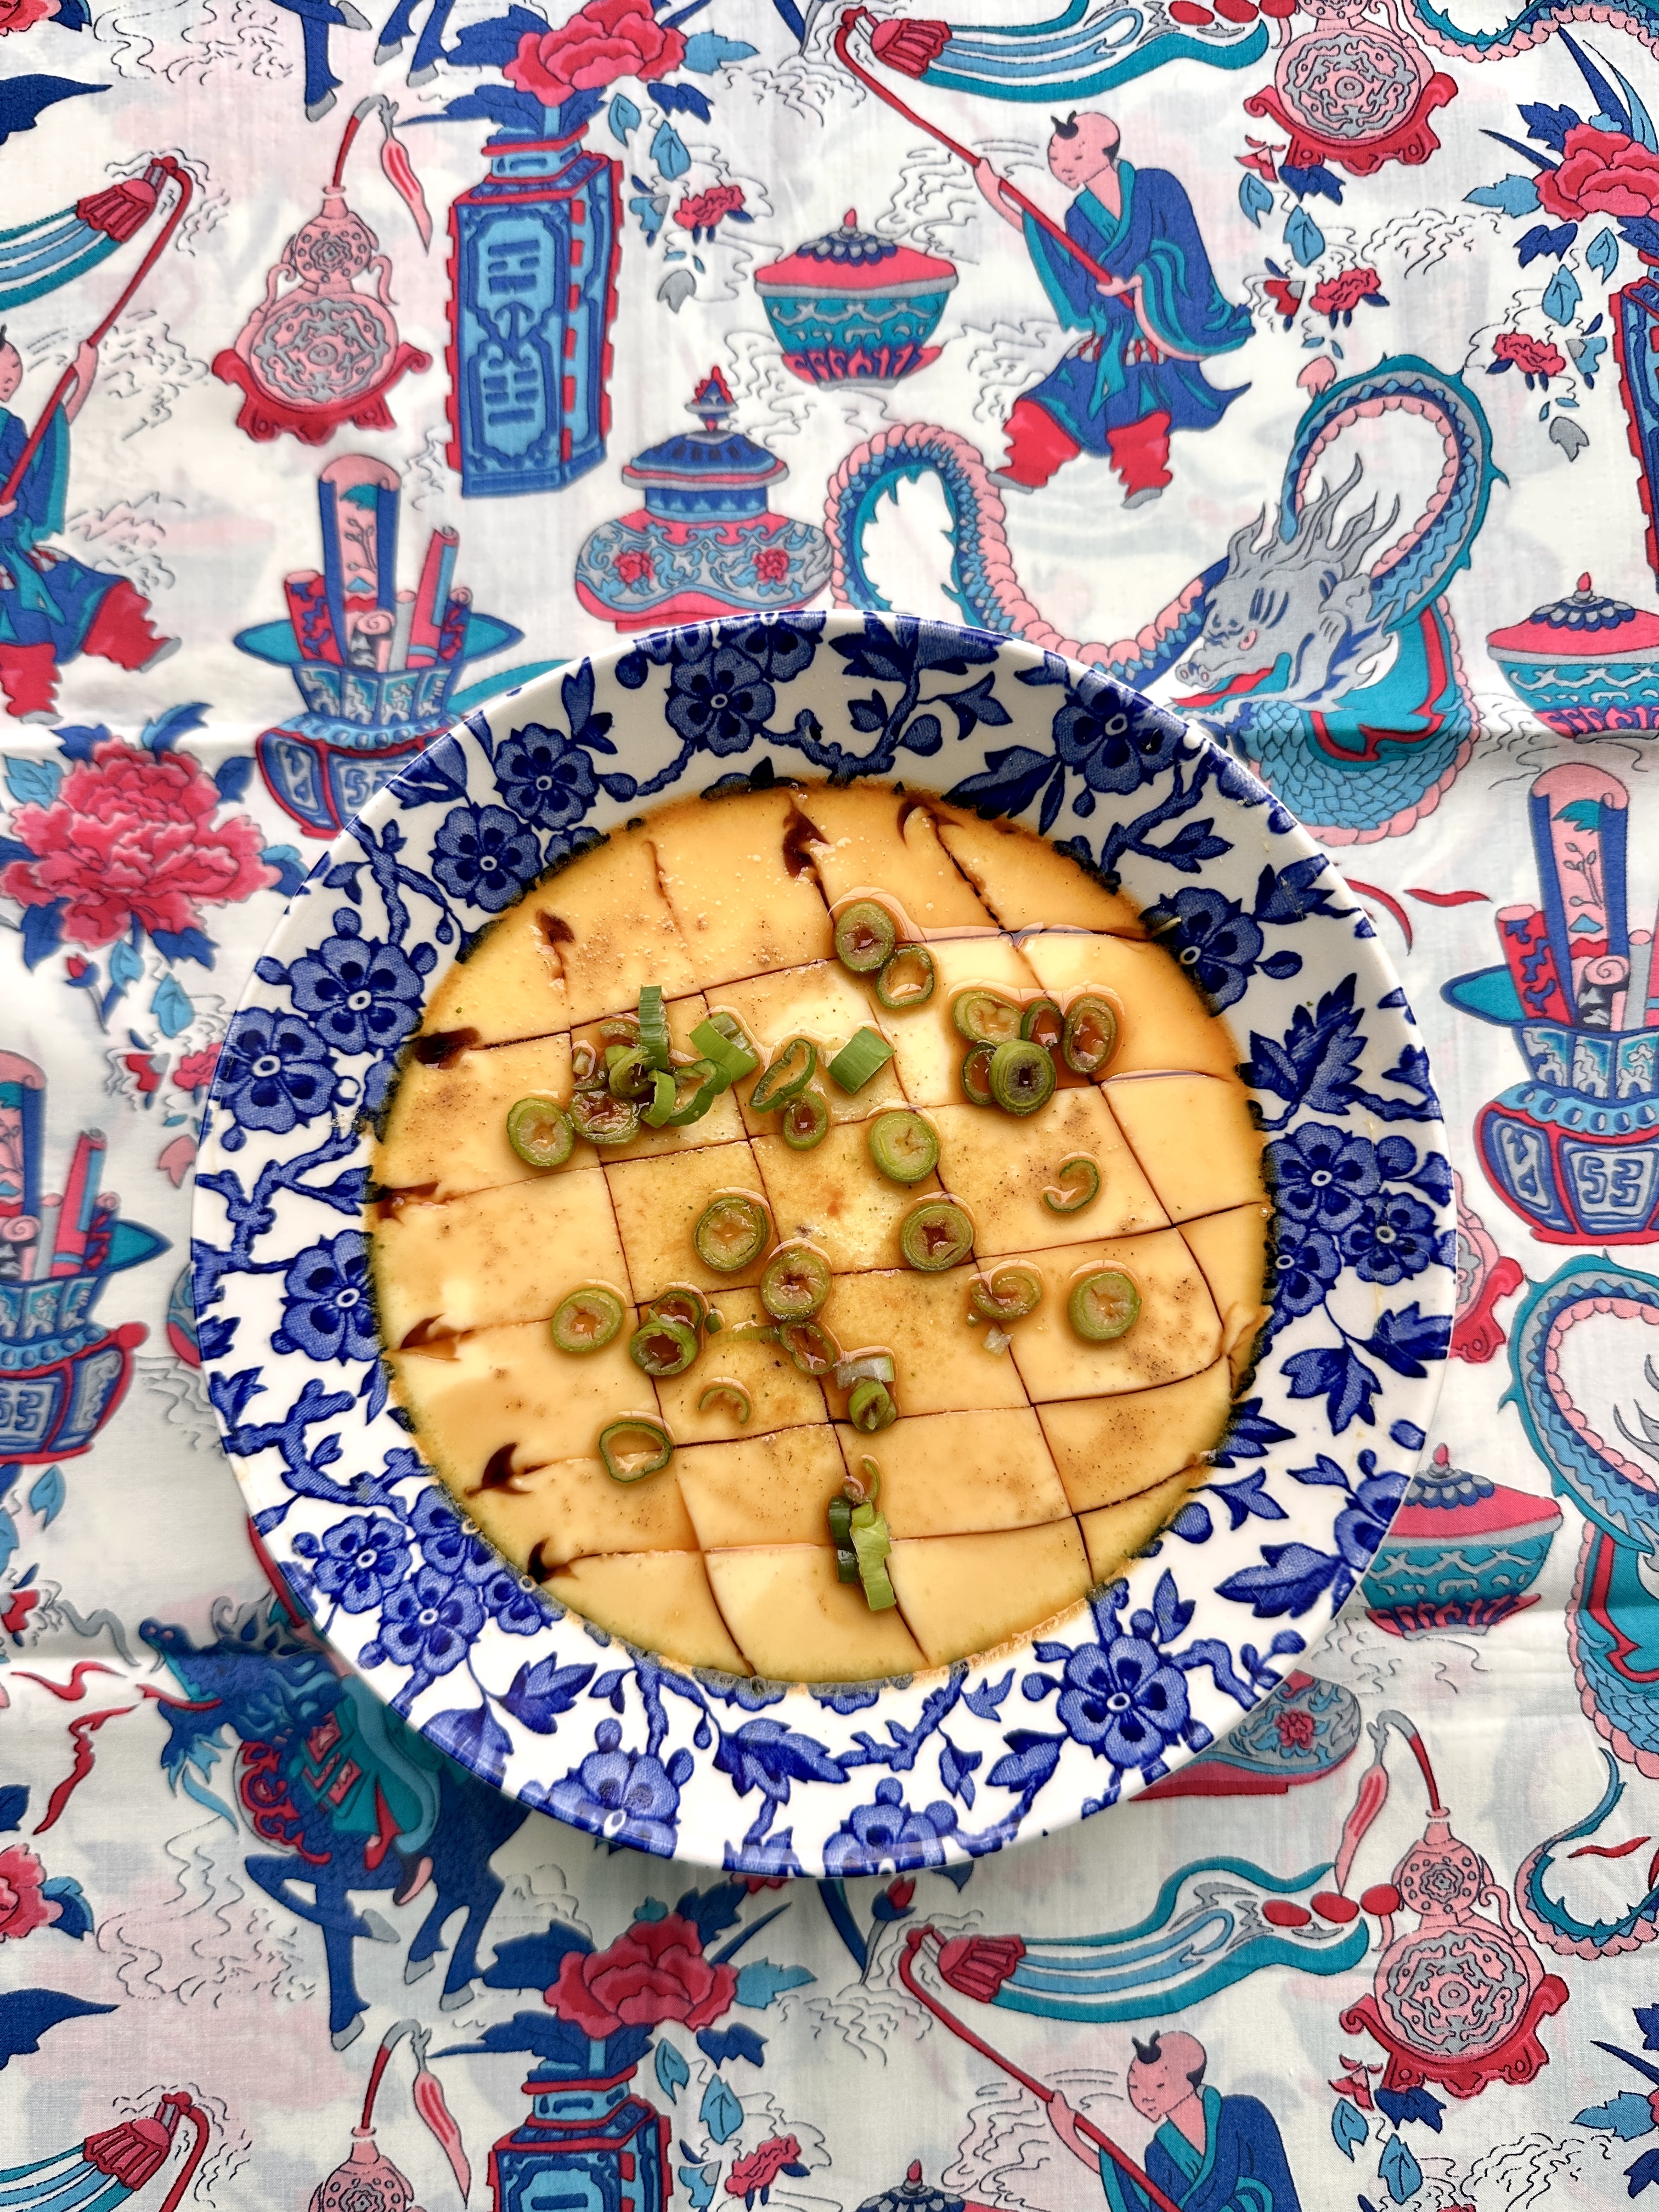
4. Use a sharp knife to make incisions evenly across the top of the steamed eggs, then turn the bowl and make more incisions so that you have a lattice effect.

So below is the recipe in detail.

Chinese Steamed Eggs

Serves 1

2 eggs, whisked

warm water (weight of the eggs + half again 1:1.5 ratio)to get the right temp water mix half boiled water/cold water

1/4 cube of chicken or vegetable stock

1 small spring onion, green part only, finely sliced OR 1-2 chives, finely sliced

1 tsp light or dark soy sauce

1/2 tsp sesame oil

small pinch of white pepper, optional

  1. Place a bowl on a weighing scales and weight the eggs. Make a note of the weight.
  2. Whisk the eggs in a bowl and leave to one side.
  3. Using a separate bowl or measuring jug add the half boiling/half cold so that it is warm and add 1/4 chicken/vegetable stock cube (you don’t want it to be too salty). You are looking for a ratio of 1.5x the weight of the eggs (example: 100ml eggs add 150ml of warm water). Stir well and then add to the bowl with the whisked eggs.
  4. Sieve the eggs and stock and place into your serving bowl. Remove any bubbles that have come to the surface.
  5. Add boiling water to the bottom of your steamer. If you don’t have one simply use a pan that is wider than your bowl. Place a cookie cutter or trivet on the bottom of the pan and cover with boiling water so that the water is up to the cutter/trivet. Bring to a rolling boil.
  6. Cover the serving bowl with cling film and prick it a couple of times with a sharp knife. Gently place in the pan and cover with a lid with a small hole in the top to allow the steam to escape.
  7. Turn the heat down to medium/low and allow to steam the eggs for 9 minutes. Turn off the heat and leave to sit for a further 3 minutes.
  8. You will be able to see that the eggs are nicely steamed and will jiggle a little if you give the pan a little tap. (see the jiggle below)
  9. Be careful removing from the steamer. Remove the clingfilm and then use a sharp knife to make a series of straight incisions along the top and then turn by 90 degrees and make more incisions so that you have a diamond lattice effect.
  10. Spoon the soy sauce and sesame oil on top, followed by a pinch of white pepper and spring onions or chives and dive in and enjoy the ‘kougan’ and comforting taste. I love it and hope you will too.

Please note:I don’t add any salt to the eggs to begin with as I find the chicken/veg stock and soy sauce adds enough salt to the dish.

Have a great weekend everyone. Wrap up warm and stay dry.

Torie


Lamb Keema an alternative to Spaghetti Bolognese

A British staple is good old spaghetti bolognese – we all grew up eating it and many regard it as the ultimate comfort food. These days I rather gravitate towards the Indian twist on the bolognese known as ‘lamb keema masala’. My girls adore it too and I personally like to eat it with some hot Indian flat bread. It has onions and garlic in it, like bolognese, but how it differs is the range of fragrant spices that go into it: cloves, cardamom, coriander, cumin, garam masala and ginger. I like to dice a large potato and throw that in too and it soaks up all the glorious flavours.

So how about this giving my keema a go next time you think of cooking a mince dish? It’s versatile, very easy to prepare and tastes really delicious. Bolognese with a twist. I hope you agree.

Lamb Keema Masala

Serves 4

800g minced lamb

2 tbs vegetable oil

1  red onions, chopped

4 garlic cloves, chopped

2 fresh green chilli, finely chopped

5cm ginger, grated

6 black peppercorns,  roughly ground

5 cloves, whole or ground

5 cardamom pods, whole or ground

1 bay

2 tsp ground coriander

1 tsp ground cumin

1/2 tsp garam masala

1 tsp ground turmeric

2 tsp ground almonds

1 heaped tsp of tomato puree

1 tsp salt

1 large potato, peeled and chopped into bite sized pieces

2 handfuls of peas, optional

handful of fresh coriander to garnish

1. Warm the oil in a pan and then add the onion and garlic. When it begins to darken after 3-5 minutes add the ginger, green chillies black peppercorns, cloves, cardamom and bay leaf and gently fry all the ingredients for another couple of minutes.

2. Add the ground mince and chopped potato and stir into the onion, garlic and spices. Allow the lamb to brown, but use the back of a wooden spoon to break up the mince and make sure it does not clump together.

3. Now add the ground coriander, cumin, turmeric and garam masala, along with the ground almonds and tomato puree. Don’t forget to add a little salt. If you are adding peas add them at this stage.  You can add a little water – around 100ml will do – to moisten it all.

3. Gently simmer, with a lid on for 20 minutes, stirring intermittently. Check that the potatoes have softened.

4.  You can cook it earlier in the day and reheat it when you are ready to eat.

Note: You may find you need to add a very little boiling water when reheating it. 

5. Garnish with fresh coriander when serving.


It’s great with boiled rice or Indian flat bread.


Smoked Salmon and Soba Noodle Bowl From Kelli Foster’s NEW book “Buddha Bowls”

I adore meals that can be eaten in a bowl, that are packed full of goodness and flavour. Going through my kitchen cupboards you will find all manner of bowls of different sizes and depths depending on what’s going in them. You can therefore imagine my delight when I came across Kelli Foster’s, new book “Buddha Bowls – 100 nourshing one-bowl meals”. Kelli is a food writer and editor for the daily food magazine on the web called ‘The Kitchn’ based in New York.  Buddha bowls are nothing new and the term has been banded around now for many years, along with “bliss bowls’, “nourish bowls” or “power bowls” but Kelli’s book is wonderfully original, with so many great sounding recipes that you actually want to cook. Turmeric-ginger cauliflower and lentil bowls, Moroccan-spiced chickpea bowl, chipotle sweet potato bowls, chicken kofta bowls, harissa chicken bowls, spinach and mushroom pesto breakfast bowl the list goes on. Making a decision on which to cook first is hard.

I opted to show you all the ‘smoked salmon and soba noodle bowls’ recipe as it is exactly the sort of thing that I make for myself and the family for lunch in the holidays or weekends. All the ingredients I already had in my pantry and fridge and it really is very straightforward to make. It’s super healthy and flavoursome so a win win.

At the beginning of the book Kelli has included a wide range of sauces to go with the various buddha bowls – for example chimichurri, creamy feta, essential pesto sauce with any herb of leafy greens, miso-ginger, tahini. The book is then split into chapters: breakfast bowls, fish and seafood bowls, chicken and turkey bowls, vegetable bowls, fruit bowls.

Photograph by Maria Siriano in the book Buddha Bowls by Kelli Foster published by The Harvard Common Press, an imprint of The Quarto Group

The recipes are all inventive, sound delicious and beautifully photographed. The ‘green goddess quinoa bowls with crispy tofu’ looked very appetising and will definitely be on the menu over the summer holidays for my family.

Photograph by Maria Siriano in the book Buddha Bowls by Kelli Foster published by The Harvard Common Press, an imprint of The Quarto Group

For those with a sweeter palate then the ‘blackberry millet breakfast bowls’ are perfect in the coming months when blackberry season is in full swing. I love overnight oats for breakfast so this will be a good one to try.

Photograph by Maria Siriano in the book Buddha Bowls by Kelli Foster published by The Harvard Common Press, an imprint of The Quarto Group

I also love the idea of the ‘quinoa and chicken taco bowls with cilantro (coriander to us Brits)- lime dressing. How divine sounding hey!

This book is bursting with ideas that the hardest thing you will find is actually deciding on which to opt for. It’s priced at £14.99 and $22.99 in the US and $29.99 in Canada but on one certain retailer you can pick up a copy for under £10 – click here.

I am running a competition until Sunday 5th August on my instagram where you can WIN a copy of the book by simply doing three simple things:

  1. follow me on instagram
  2. like my post with the salmon noodle bowl photo
  3. tag 2 friends who might be keen to win the book.

There will only be one winner and they need to be based in the UK. Good luck.

Smoked Salmon and Soba Noodle Bowls

serves 4 (gluten free)

4 tbsp (60ml) tamari (similar to soy sauce but contains little to no wheat)

1 tbsp (15ml) rice vinegar

1 tbsp (6g) freshly grated ginger

1 tsp (5mo) toasted sesame oil

1/2 (half) tsp honey

200g dry buckwheat soba noodles

1 cup (120g) shelled edamame

4 ounces (115g) thinly slices smoked salmon

1 medium seedless cucumber, peeled and julienned

1 avocado, peeled, pitted and thinly sliced

shredded nori (seaweed)

red pepper flakes

  1. First make the dressing by whisking the tamarind, rice vinegar, ginger, sesame oil and honey together in a small bowl; set aside.
  2. Bring a large pot of salted water to a boil. Cook the soba noodles according to the package instructions and then drain them and rinse thoroughly under cold water. Boil the edamame for 5-7 minutes until cooked, strain and rinse under cold water.
  3. Stir the sauce together once more and toss the noodles with 1 tablespoon (15mp) of sauce.
  4. To serve, divide the soba noodles among bowls. Top with edamame, smoked salmon, cucumber and avocado. Drizzle with the remaining sauce and sprinkle with nori and red pepper flakes. (I forgot the latter until after I had taken the photos!)

Absolutely delicious and super quick to rustle up. Enjoy.

NOTE: chilliandmint kindly received a copy of Buddha Bowls. All views and opinions are her own.

Roasted Sweet Potato, Garlic and Smoked Paprika Soup

So hands up if you are as addicted to soup as me? I could, and almost do, have a bowl most days. Indian dal is very like soup and I often make one up for lunch – my red split lentil dal is a fav – see here.

Today however I wanted to show you my roasted sweet potato, garlic and smoked paprika soup. Anything roasted has that wonderful smokey flavour that is so addictively satisfying. This soup will warm the belly and soul with one spoonful (or preferably a whole bowl). The snow provided such a good backdrop the other day that I ran outside to take this shot. When I came to eating the soup later in the day I realised it was far too thick so I added more liquid. How thick or soupy you like your soup is up to you but just add the stock a little at a time until you have reached your desired consistency.

The whole family will love it and it involves minimum fuss so win win.


Roasted Sweet Potato, Garlic and Smoked Paprika Soup

5 sweet potatoes, cleaned and chopped into cubes (skin on)

1 whole garlic bulb

1 heaped tsp smoked paprika

1 tbsp olive oil

1 red onion, roughly chopped

1 tbsp butter

2 stalks of rosemary, leaves only, stalk removed

1 tsp salt, to taste

pepper, to taste

1- 1.5 pint of vegetable stock, add more if you refer a less thick soup

  1. Preheat your oven to 180 degrees.
  2. On a baking tray place the cubed sweet potatoes and add the olive oil and smoked paprika and mix together so that the sweet potatoes are nicely covered. Add the whole garlic. Place in the oven for 40 minutes or until the sweet potato has softened.
  3. Meanwhile in a large casserole pan add the butter and a splash of olive oil and gently fry the red onion and rosemary for 7 minutes so that it has nicely softened.
  4. Remove the garlic cloves from the bulb, which will be all soft and gooey at this stage. Add them and the sweet potato to the main casserole pan and add seasoning and the vegetable stock.
  5. Using a hand whisk, blend until smooth. Add more boiling water/stock depending on how you like your soup consistency. I actually added a lot more water after this photo (above) was taken as it was too thick initially.
  6. Serve piping hot with some crunchy bread on the side. If you want to add a topping you could add a dollop of creme fraiche with a sprinkling of smoked paprika on top,  a little extra virgin olive oil or perhaps some roasted pine nuts.

If you try making this soup please post a photo on instagram and use the #soupmeuptoday so that I can see it.


SaveSave

SaveSave

SaveSave

SaveSave

SaveSave

SaveSave

SaveSave