Dreaming of Kerala – Squid Coconut Fry

IMG_2170

Kerala, often called ‘God’s own country’, is the perfect destination for the avid traveller who seeks adventure, beauty and tasty food. It encompasses so many different experiences and terrain in this sunshine state that no day is ever quite the same. Over the course of the last few weeks my family and I (and not other animals) spent time in Cochin, exploring their diverse places of worship as well admiring their famous Chinese fishing nets.

IMG_8310

The Western ghats, which provide the state, and much of the wider world, with tea, cardamom and coffee.

IMG_8541

The calming, slower pace of life in the emerald backwaters,

IMG_8731

and of course the palm fringed beaches of the coast and the gloriously warm Arabian sea.

IMG_8898

Along the way I met some wonderful people, both locals and fellow travellers, who all made our experience of Kerala very memorable. It was tough to say goodbye to the warm rays and friendly smiles and head back to a much colder London, which is now firming in the throes of winter.

During our travels I learned to cook a wealth of Keralan recipes from chefs and home cooks who welcomed us into their homes and kitchens. Meet some of them below. From left ‘Mummy’ from Philip Kutty’s Farm,  Sreeja  from Marari Beach Hotel and Moly from Cochin, who allowed me to shadow her for the day.

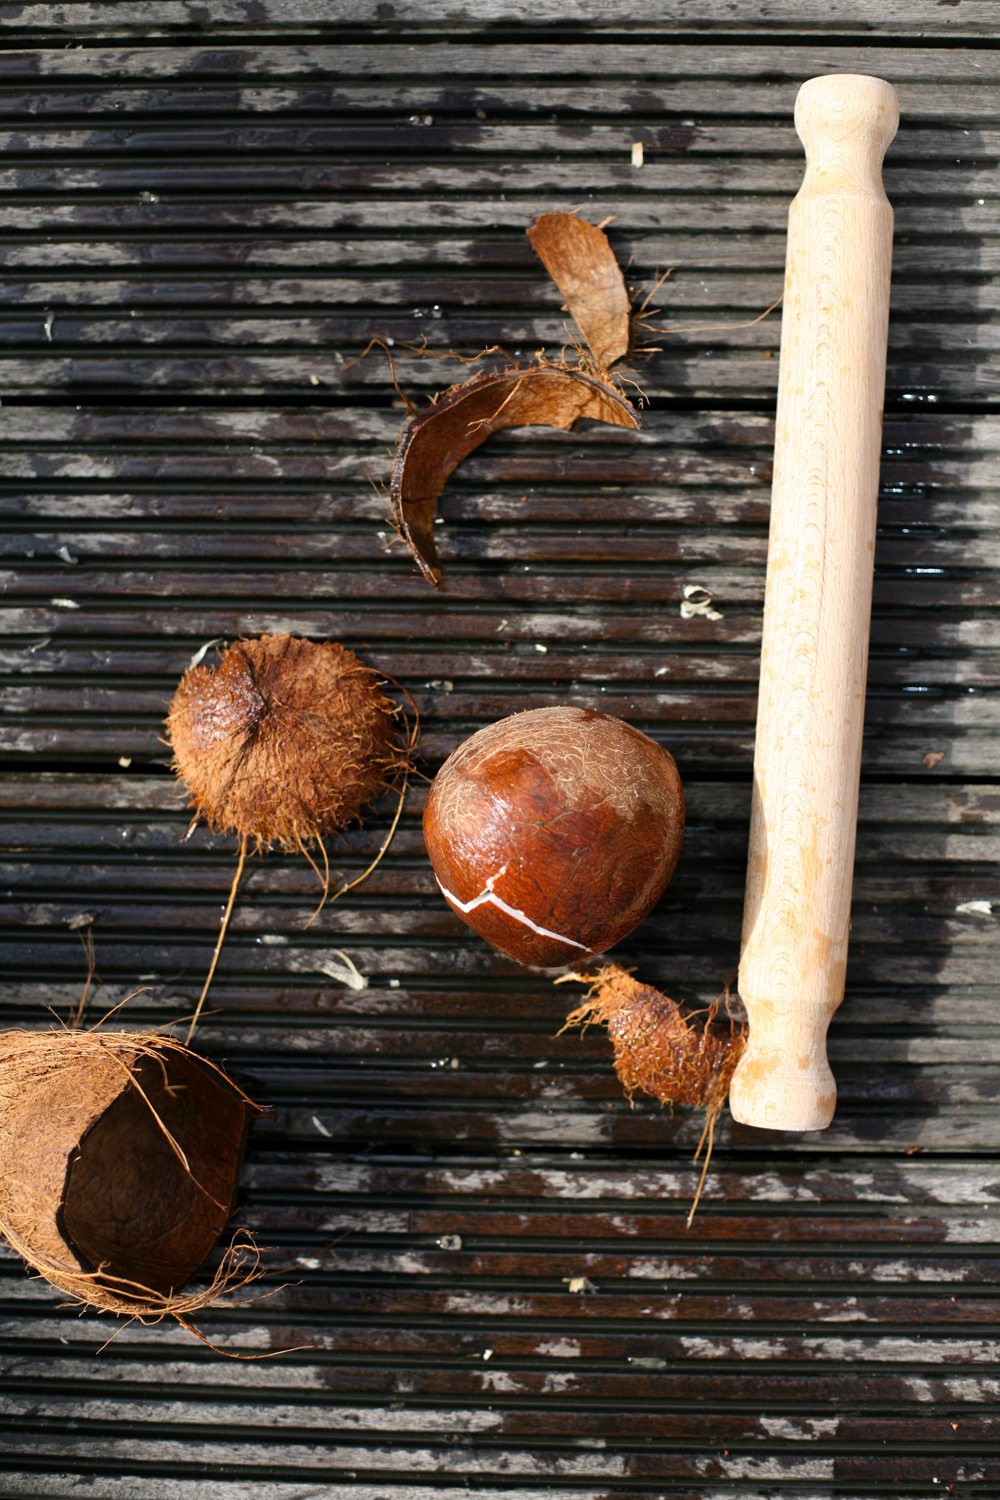
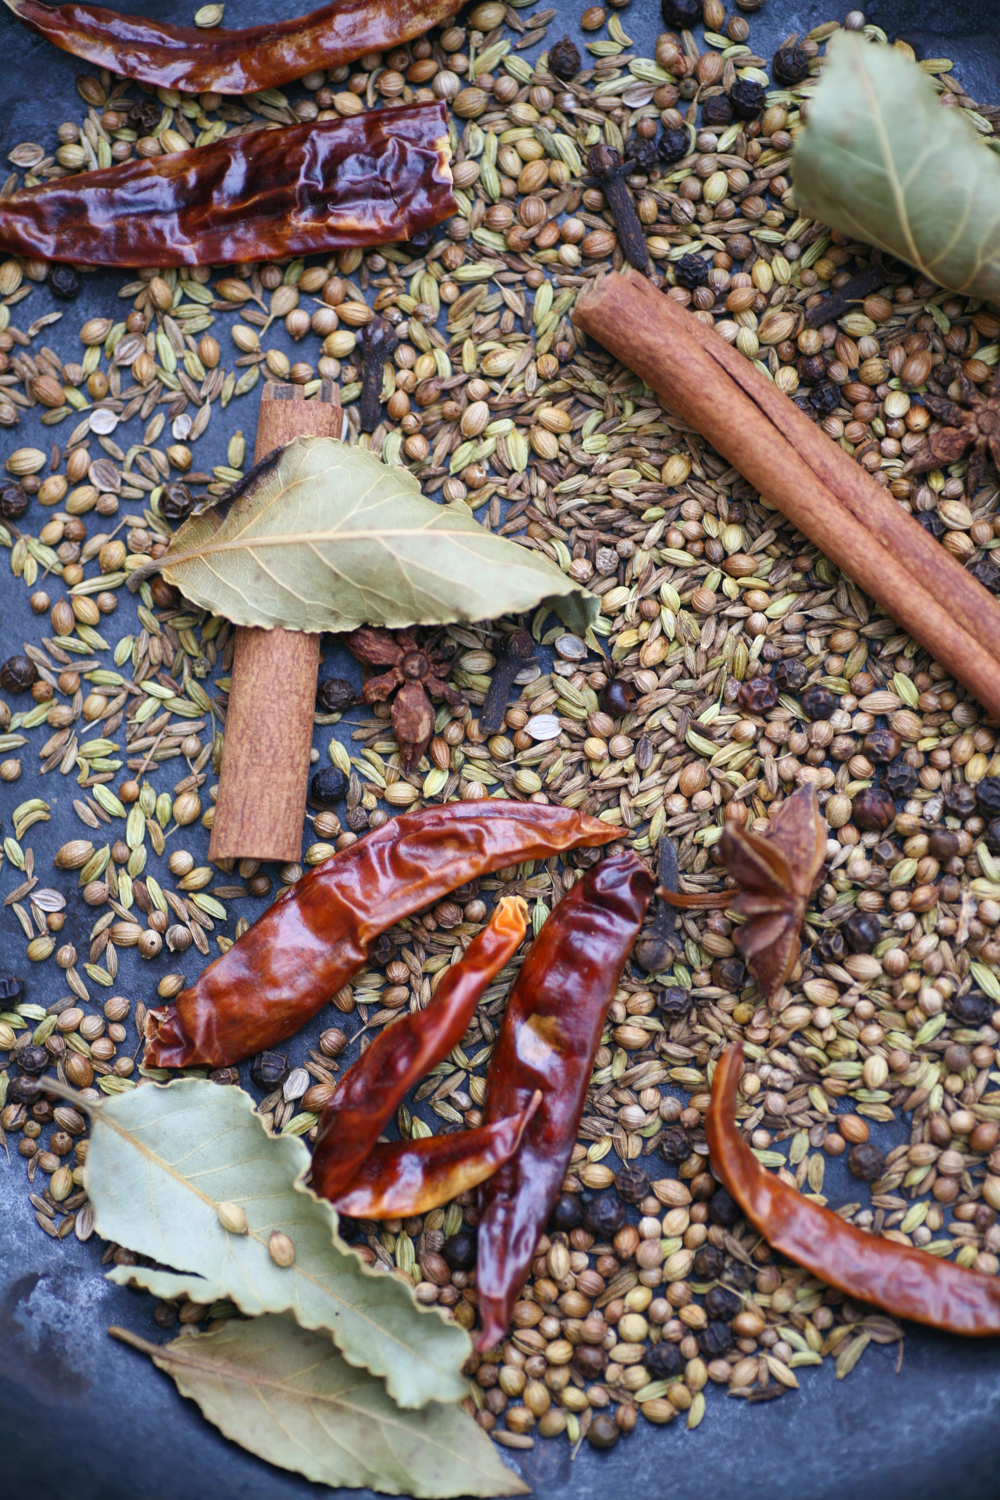
Prior to visiting the state I had a preconceived notion that a lot of the cuisine would be vegetarian, however this is not the case. In Kerala, Muslims, Hindus, Christians and Jews (there are only 6 now left in Cochin) live harmoniously and respectfully amongst one another. As such we feasted on chicken, lamb, pork and beef as well as delicious fresh and seawater fish, shellfish and a host of vegetarian dishes. Coconut oil and coconut in many forms, is the heart of many Keralan dishes along with the irresistibly sour tamarind and kokum, the latter being new to me. “Kera” in Malayalam (the language of Kerala) means coconut. As Kerala is abundant with coconut plants, it naturally got the name Kerala. Yes, many of the dishes in Kerala have heat, but with the cooling qualities of  coconut, many had their chilli bite tempered.

Over the coming months I will intersperse my blog posts with temptingly delicious Keralan dishes that will hopefully encourage you to try cooking them at home.

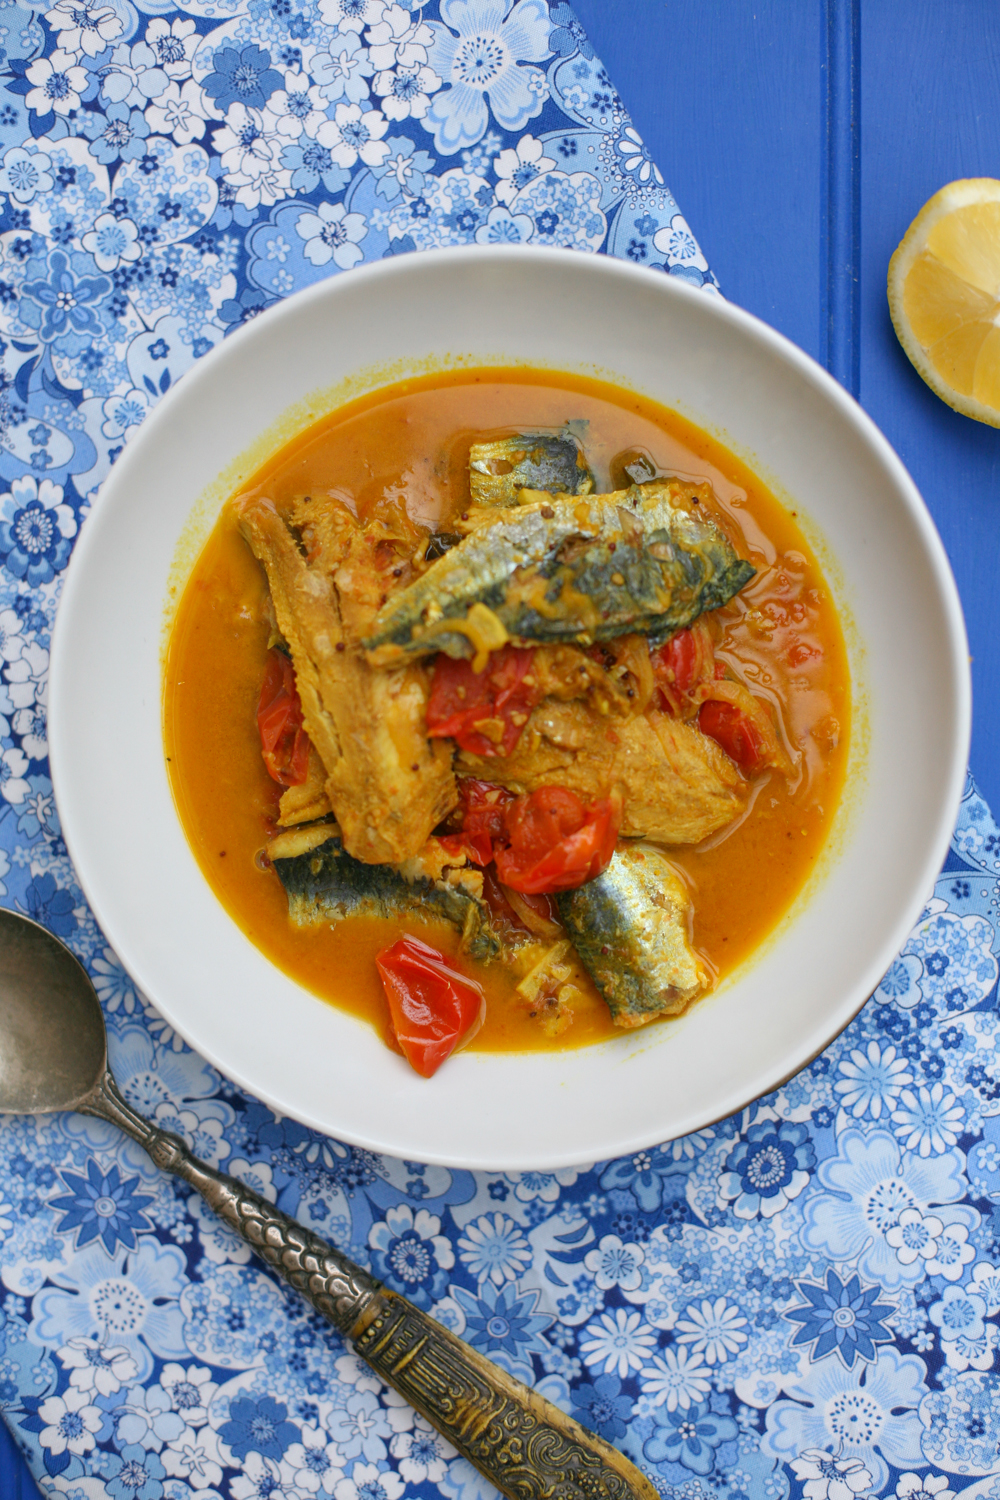
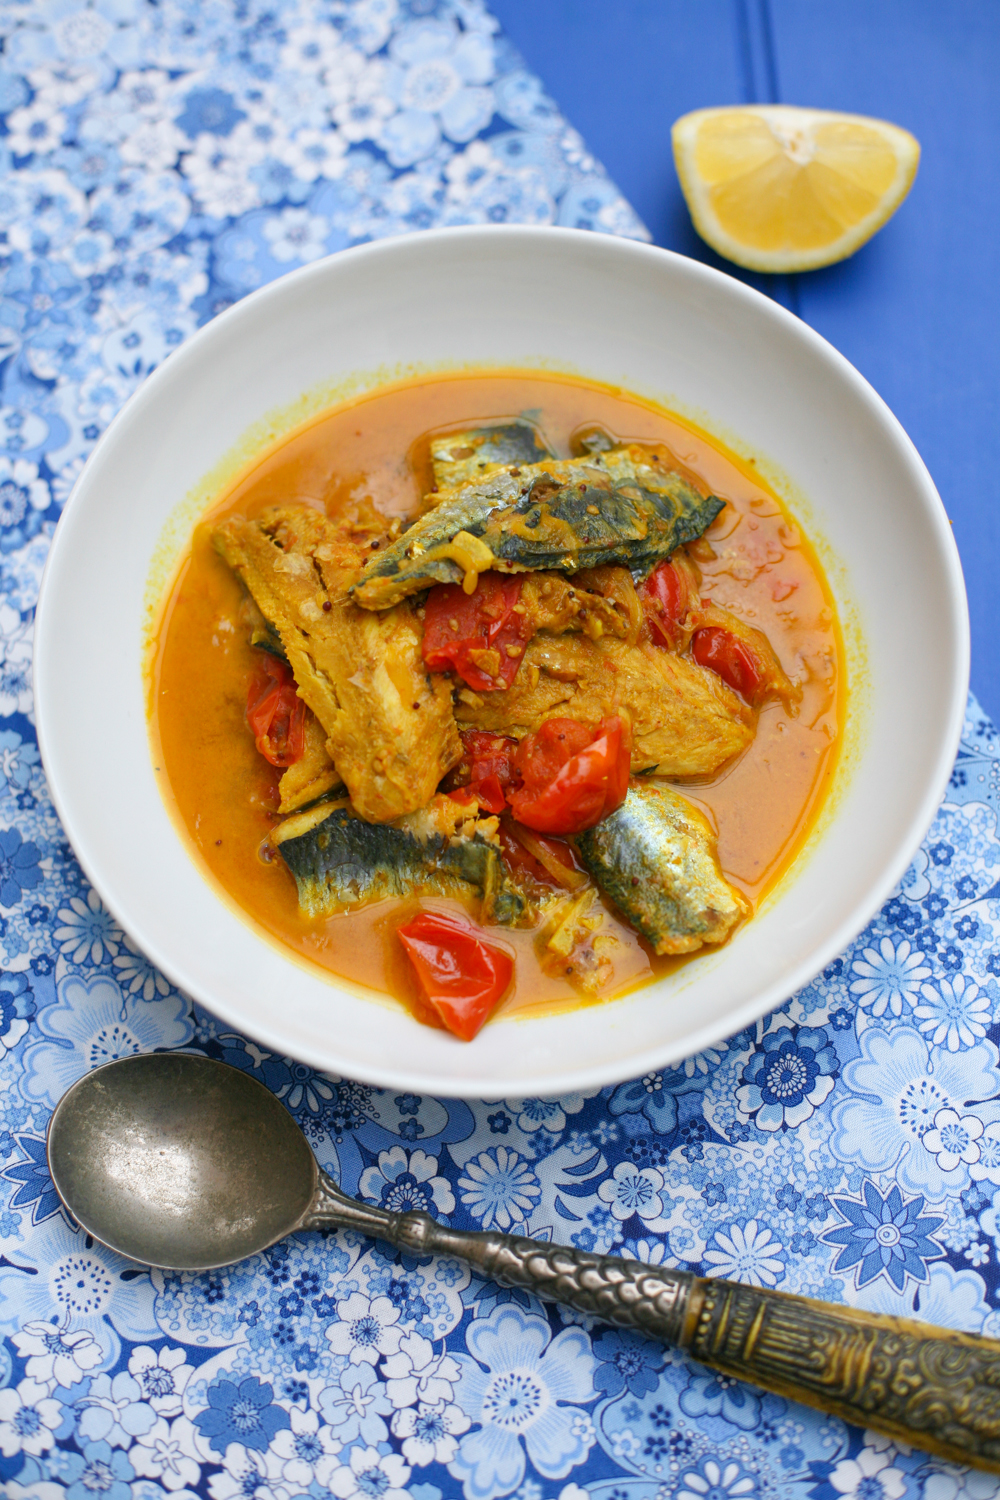
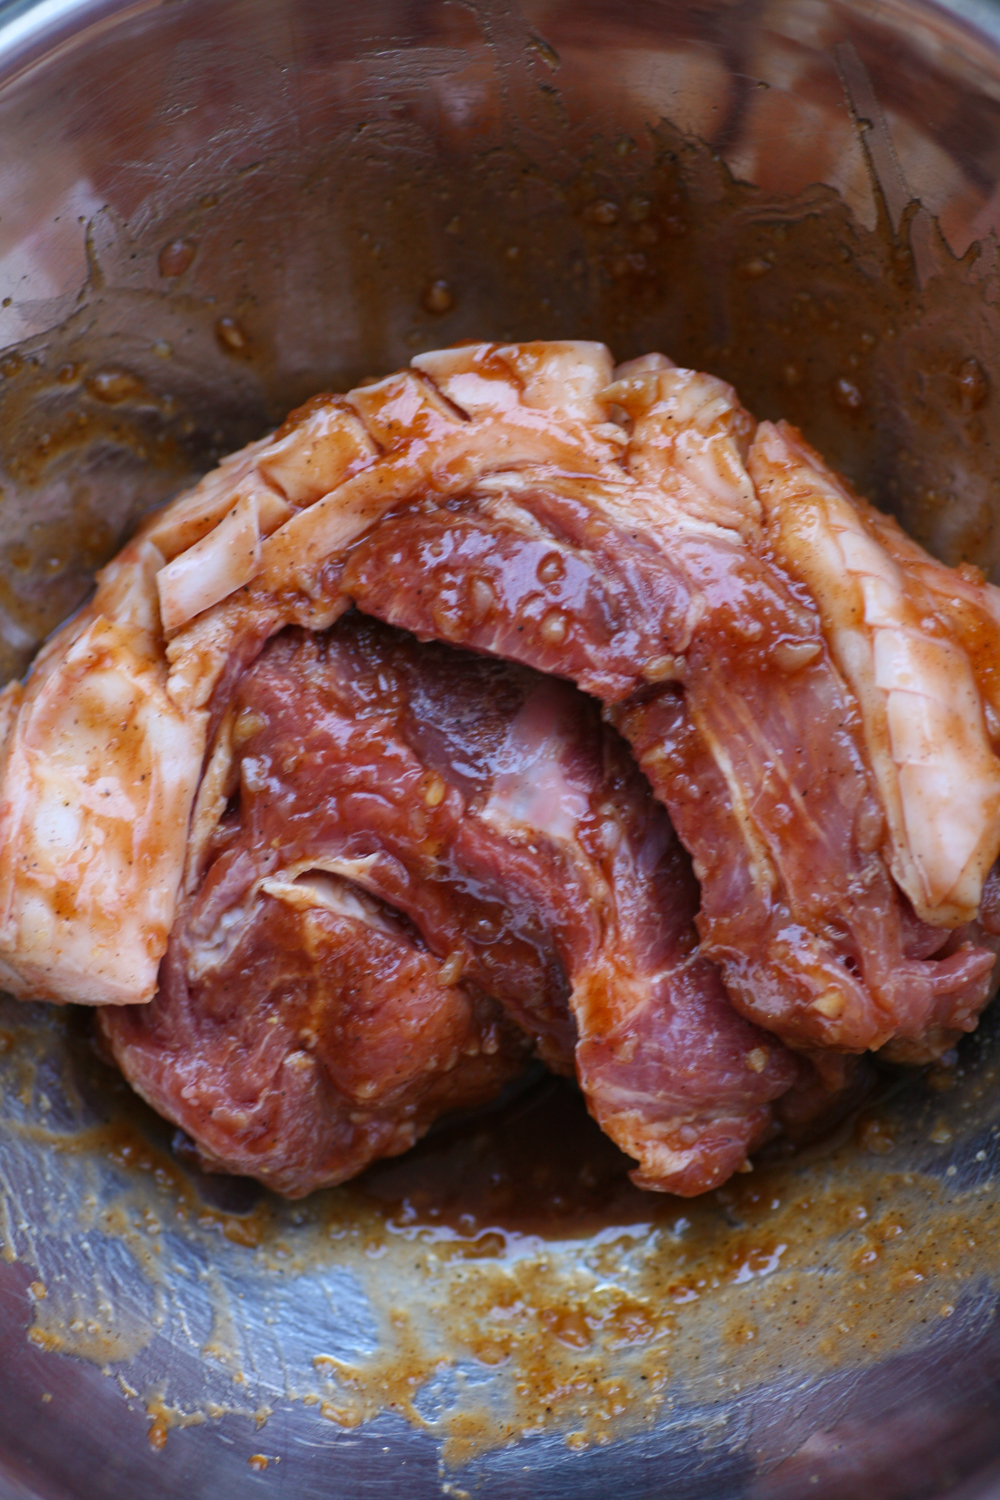
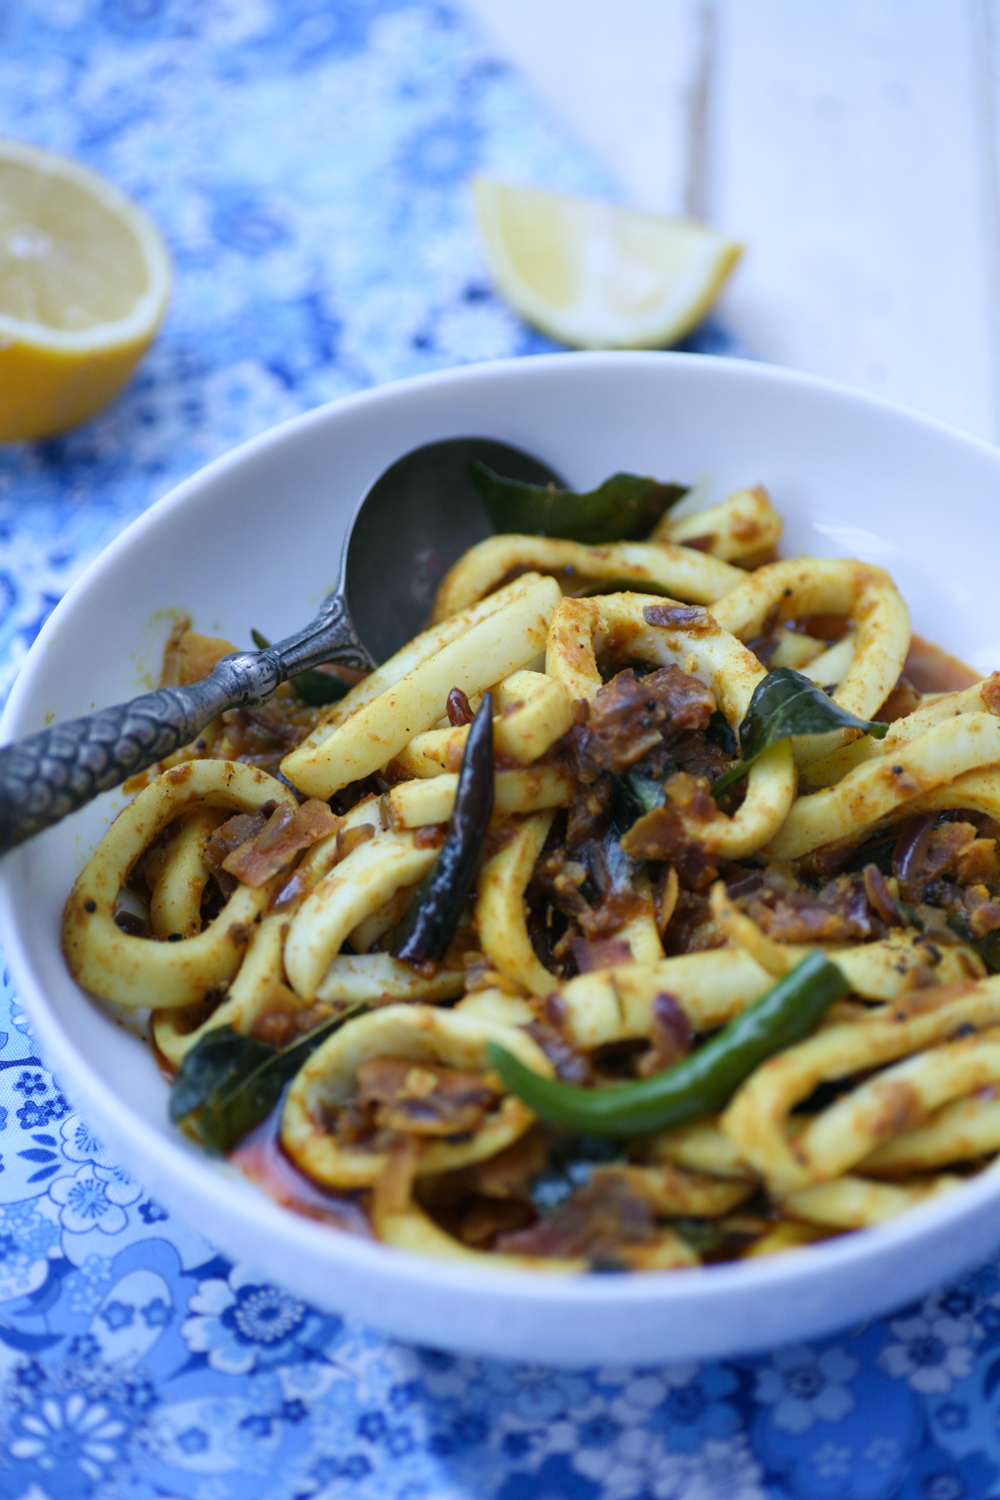
First up is ‘Squid Coconut Fry’, which in all honesty takes 10 minutes and that includes the prepping and cooking. So look no excuses not to give this a whirl. It is so good you’ll be cooking it time and time again.
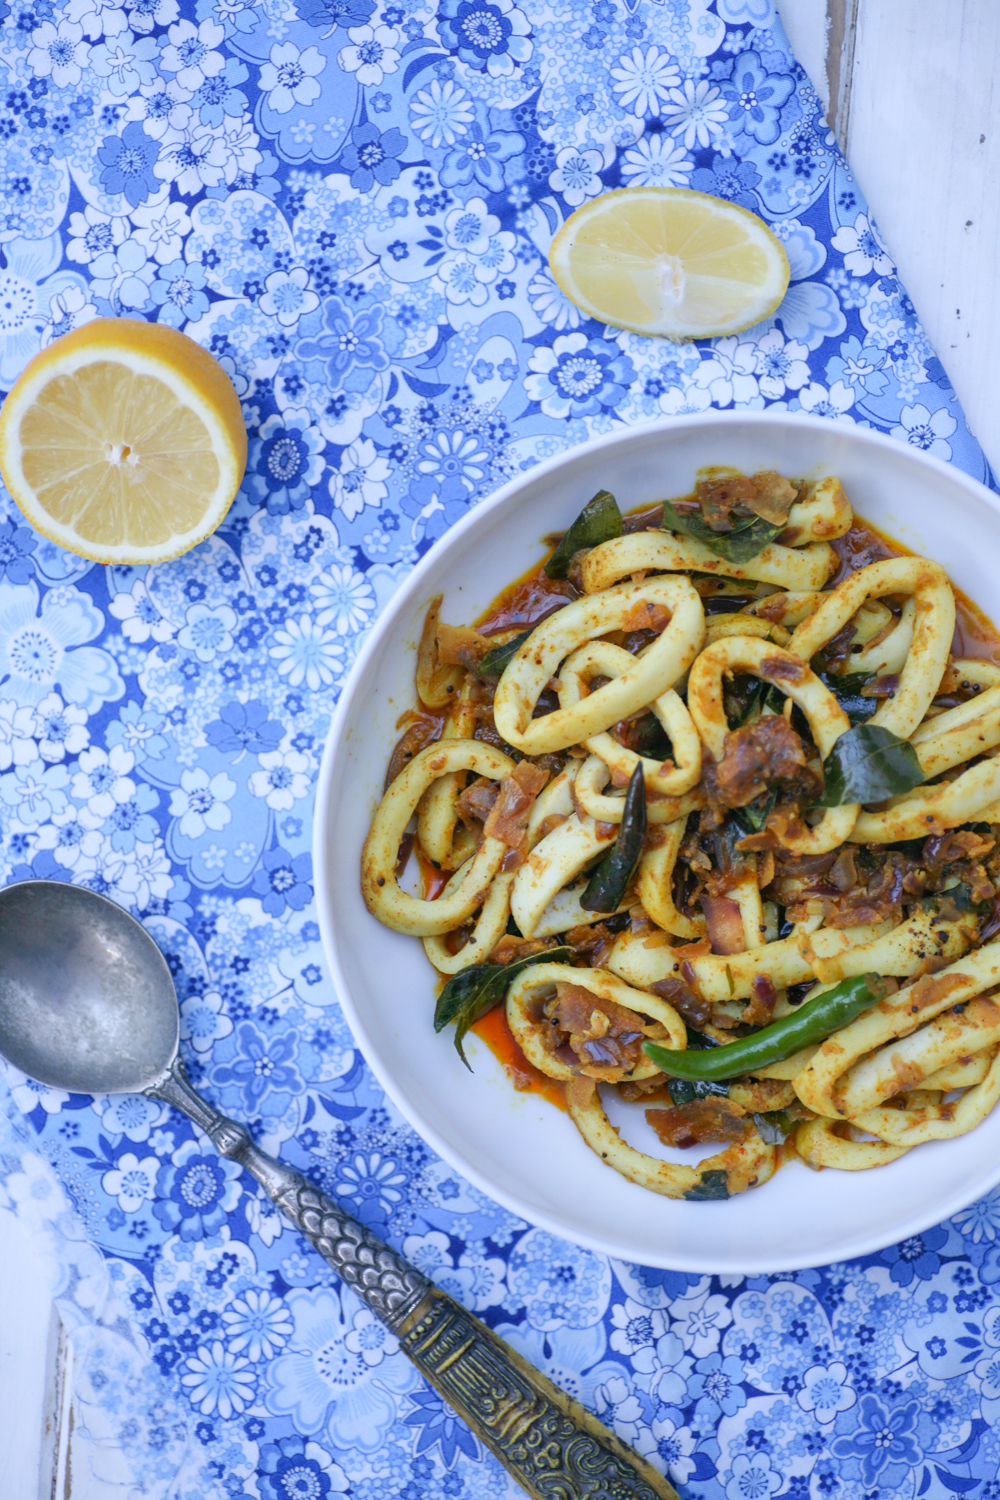
 IMG_2160

 Squid Coconut Fry

Serves 2 (or 4 if serving with other dishes)

2 tbsp coconut oil

1/2 tsp mustard seeds

2 dried red Kashmiri chillies, halved and seeds removed if you like it less hot

10 pieces of thinly sliced fresh coconut or dried coconut slices

3 garlic cloves, thinly sliced

1 tsp ginger paste

1 fresh green chilli (2 if you like it hot)

10 curry leaves

1 small red onion, finely chopped

1/2 tsp salt

1/2 tsp chilli powder

1/2 tsp coriander powder

1/2 tsp turmeric powder

300g squid tubes, chopped into thin rings

1/4 juice of a lemon

1/4 tsp ground black pepper

1/4 garam masala

  1. First get all the ingredients ready as the dish takes no time to cook and you will want to eat it immediately. This dish is not good to be reheated.
  2. Heat the coconut oil in a pan. When it is hot add the mustard seeds and red chillies followed by the thin coconut slices. Keep the heat on a medium to low heat.
  3. After 20 seconds add the garlic, ginger, fresh green chilli and curry leaves.
  4. Move around the pan for a minute before adding the red onion and salt.
  5. Now add the chilli powder, coriander powder, turmeric powder and allow the flavours to come together in the pan. Allow the onion to soften for 3-5 minutes
  6. Add the squid and move around the pan. Cook for a further 3 minutes.
  7. Add the lemon, pepper and garam masala. Move the ingredients around the pan.

Serve immediately. All the wonderful flavours will have wrapped themselves around the squid culminating in the most appetising of dishes.

Quick and easy. I would serve with rice, a vegetable curry and a dal (see my recipe library).


Coconut Chutney (and a top tip at removing a coconut shell)

IMG_1775

Have you ever had trouble getting into a coconut or rather removing the outer shell so that the sweet flesh within is easy to tuck into? If you have then you are going to love the following tip.

All you need to do is the following:

  1. Place the coconut in the freezer for 30-45 mins.
  2. Remove from the freezer and then use a rolling pin to bang down on the coconut whilst holding it in your other hand. The outer shell will break away.
  3. Easy hey!

IMG_1751

Drinking the coconut milk is a whole lot easier this way I find.

So on to the coconut chutney.

Once you have the naked coconut you then need to peel it – the outer skin comes away so easily. Then it is simply a matter of grating the coconut.

IMG_1759

Using a whole coconut does produce a lot of coconut chutney, but I find it lasts for up to a week in the fridge no problem. A dollop on the side of some spiced semolina – upma, from my previous post, works wonders or equally it would be great with any south Indian curry. In southern India they eat coconut chutney as part of breakfast, lunch or supper so if you take a similar attitude it will be used up pretty fast!

IMG_1768

Coconut Chutney

1 coconut

2 tbsp chana dal, roasted

2 fresh green chillies

*****

tempering

2 tbsp vegetable/coconut oil

1/2 tsp black mustard seeds

1/2 tsp cumin seeds

pinch of asafoetida/hing

2 dried red chillies

7 curry leaves

1 tsp salt

  1. Remove the shell from the coconut by placing it in a freezer for 30 minutes and then banging down on it carefully with a rolling pin.
  2. Remove the skin from the coconut using a potato peeler and then grate the coconut.
  3. In a frying pan dry roast the chana dal so they begin to bronze slightly. Let them cool and then use a spice grinder to grind them up.
  4. Place in a smaller blender along with the grated coconut and fresh green chillies. You will need to add a little water to loosen it up (the amount of water added depends on how thick you like your chutney! I tend to use 300ml). Blend to form a smooth paste. Add a little salt to taste.
  5. In a frying pan heat the oil and when it is hot add the mustard and cumin seeds, the dried chillies, curry leaves and hing. Move around the pan for 20 seconds before pouring over the coconut chutney.
  6. Stir into the chutney and serve.

IMG_1788


Spiced Masala Paneer Skewers, Coriander/Mint Chutney and Bejewelled Couscous

IMG_1395

I was recently approached by the the UK’s number 1 tableware provider, Denby Pottery to come up with an exciting vegetarian BBQ recipe for their blog. They kindly provided me with some of their china from the  ‘Imperial Blue’ range, to present the food. I ended up creating spiced masala paneer skewers, coriander and mint chutney and bejewelled couscous. As well as cooking the paneer skewers on the BBQ they can equally be cooked on a griddle pan or under the grill so are super versatile.

Take a look at my recipe and post here and I would love it if you can share it through your social channels.

Hope you are all having a wonderful summer (winter if you are in the southern hemisphere).

IMG_1408


Gong Bao Ji Ding – aka Chinese Chicken with Facing Heaven Bullet Chillies

IMG_1267

So the story goes that back in the Qing Dynasty the governor of Sichuan, ‘Gong Bao’, had a deep fondness for this dish so they named it after him. The ‘Ji Ding’ part translates as “chicken cut into small cubes” and to this day it is one of the most ubiquitous Chinese dishes eaten in both mainland China and in the West. It is sometimes referred to as ‘Kung Pao Chicken’ so keep a look out for this name as well.

IMG_1297

The lovely people over at World of Zing sent me some dried chillies recently with fabulous sounding names: Dragons Back, Facing Heaven Bullet and Chinese White Hunan. I pondered for some time over which one to sample first and facing heaven bullet won out. They are so called because the pepper grows with the fruit pointing upwards to the ‘heavens’ unlike most chilli peppers, which face downwards.

IMG_1290

Bullet in shape, they are often kept whole in cooking or cut in half once. Removing some or all of the seeds prior to cooking reduces the heat of the chilli, whilst still retaining a tantalising zing.  To give you some idea of heat, it is far milder than a Thai birds eye chilli.  It won’t be the case of running to the fridge for a glass of milk!

IMG_1278

This dish wins prizes on speed of delivery and flavour. Seriously even if you are shattered after a hard days slog this will raise your spirits. Give it a go and remember to come back and comment to let me know how you got on.

Gong Bao Ji Ding – Chinese Chicken with Facing Heaven Bullet Chillies

Serves 2-3

420g chicken breasts (works out as 3 breasts) skin removed, cut into strips then into 1 inch cubes

4 garlic cloves, roughly chopped

2 inches of fresh ginger, skinned and roughly chopped to the same size as the garlic

5 spring onions, white part only chopped to the size of the chicken cubes

10 facing heaven bullet chillies, halved and seeds removed

1 tsp whole Sichuan peppercorns

80g peanuts, dry roast them for 5 minutes

2 tbsp ground nut oil (or equivalent)

****

Marinade

3 tsp light soy sauce

2 tsp Shaoxing wine

2 tsp cornflour

****

Sauce

1 and a half tsp cornflour

1 tsp dark soy sauce

1 tsp light soy sauce

1 tbsp Chinkiang vinegar

1 tbsp caster sugar

1 tsp sesame oil

2 tbsp cold water

1. First prepare the chicken and then place in a bowl. Prepare the marinade in a separate bowl and then pour onto the chicken pieces and leave to rest whilst you prepare the rest of the dish.

2. Dry roast the peanuts in a frying pan for 5 minutes so that they bronze slightly.

3. Next prepare the garlic, ginger, spring onions and chilli and place to one side.

4. Prepare the sauce ingredients in a bowl and place to one side.

5. Heat a large pan or wok with the oil and when it is hot add the chillies and Sichuan peppercorns. Move them around the pan for 15 seconds before adding the cubed chicken. Keep the chicken moving around on a high heat so that it cooks through completely.

6. After a couple of minutes, and the chicken has whitened, add the spring onions, garlic and ginger continuing to move all the ingredients around the pan/wok. After 3 more minutes the chicken should be cooked completely. Cut through a large piece to check it is cooked through (if it needs a minute more continue cooking at a high heat), before adding the sauce and mixing it through completely.

7. Cook for a further minute before adding the peanuts. Coat them in the sauce and stir through a couple of times.

Serve immediately with some steamed rice.

Thanks to World of Zing for providing me with the chillies. 


Speedy Homemade Hummus

IMG_1206

 Ok ok I know, I admit I’m on a bit of a chickpea roll at the moment. Apologies to readers out there who don’t share my enthusiasm on the humble chickpea. I always have tins in my store cupboard so am constantly thinking of new ways to use them. This recipe is certainly not a new one – in fact I was convinced I had popped it up on my blog a couple of years back, but I was thinking of my baba ganoush recipe – click here, which if you haven’t tried….shame on you. Seriously give it a go. You’ll thank me for it.

IMG_1196

Going back to the more ubiquitous hummus – or the more affectionate name that we call it in our house ‘whole mouse’….it is equally straightforward to make. The only unusual ingredient that you may not have come across, but that you can easily get hold of at any major supermarket, is ‘tahini’, which put simply is sesame paste. It’s most commonly used in North Africa, the Middle East and the Levant. You’ll find it sitting next to the peanut butter in most stores. In my opinion you do need this necessary ingredient to give your hummus a more authentic taste so please don’t leave it out.

IMG_1202

The other key ingredients are olive oil, fresh lemon juice, lots of lovely garlic, cumin powder, salt and a little iced water. How easy!

Now you can jazz things up a bit, which I often like to do by adding one of the following: paprika, sumac, zataar, fried onions or shallots, fresh herbs, roasted beetroot, roasted carrots, cumin powder, black or green olives, turmeric, chilli flakes, sun dried tomatoes….the list is endless. Play around with flavours and find a new version to suit you. I’d love to hear from you if you find a new combination that’s a hit!

IMG_1213

 I’ve kept things simple for my one today by simply adding some fresh pomegranate seeds to give a ruby red jewel effect.  I like the fresh sweetness of the seeds with the hummus. It works really well and looks really pretty too. We eat with our eyes and nose as well as our stomachs after all.

IMG_1214

Homemade Hummus 

Serves – at least 6 (see bowl in photo)

2x400g tins  of chickpeas (if you want it extra smooth and silky you need to peel the chickpeas, but totally fine if you don’t)

3 tbsp/100ml tahini

2 garlic cloves, peeled and crushed

1/2 tsp cumin powder

1 lemon, juice only (if it is a small lemon you may need 2)

3 tbsp olive oil

1 tbsp extra-virgin olive oil (plus a little extra to drizzle at the end)

5 tbsp iced water

salt to taste

Serving Ideas

pine nuts, paprika, pomegranate, fresh parsley, crispy shallots

1. In a blender add the tahini, lemon juice and a couple of tablespoons of iced water. Blitz for a minute.

2. Strain the chickpeas and then add them to a blender along with all the ingredients except the olive oil.

3. Blend the ingredients adding the olive oil gradually until smooth.

4. Taste and add more salt/lemon if needed.

5. Place in a bowl and scatter the pomegranate seeds on top along with a drizzle of olive oil.

The photo above I have not peeled the chickpeas but the one below I have. You can see the difference in the smoothness.


The Tastiest Spiced Chickpea Curry Ever

IMG_1186

The humble chickpea can provide the most satisfying of meals if it is mixed with a little magic, and in this case spices. The final note of adding chaat masala raises the game of this dish into one bursting with flavour that is both salty and sour. For those who have not come across chaat masala before it’s a spice mix that is commonly used in India, Pakistan and Bangladesh and normally includes many of the following: mango powder, black salt, asafoetida, pomegranate seeds, nutmeg, mint leaf, chilli powder, black pepper, salt, cumin, coriander and dried ginger. You can pick up sachet’s or packets at your local Asian grocers or any of the large supermarkets.  If you are feeling really adventurous you could make your own. Have a look at this lovely lady showing you how to do so .


Like many of the dishes on my blog this is very straightforward, filling, nutritious, tasty and kind on the wallet. My eldest daughter loves it (she just avoids swallowing the green chillies that I simply cut in half so are easy to spot) and my youngest….well she tells me she prefers ‘English’ food. I asked her like what and she answered ‘Like udon noodles, chicken, spring onions and soy sauce’. Oh dear!

IMG_1182

If you are UK based chances are that you’ll be on half term next week – if you have children that is. This dish ticks so many boxes and is perfect for an adult, or more sophisticated child eater. Next time your are in the shopping aisles of your local supermarket – think Chaat Masala, seriously you won’t regret it. A little bit of searching will reward you royally.

You heard it here first.

IMG_1174

 Spiced Chickpea Curry

2 tbsp groundnut/rapeseed oil

10 fresh curry leaves

1/2 red onion, finely chopped

1 tsp salt

2 tsp garlic paste

1 tsp ginger paste

2 small green chillies

1 tsp cumin powder

3 medium sized tomatoes, diced

500g chickpeas (tinned is fine)

1 tbsp yoghurt

1 tbsp tomato puree

150ml juice from chickpea tin/boiling water

125g fresh spinach

1 tsp chat masala

1/2 lemon, juice only

handful of fresh coriander to serve

1. Gently heat the oil in a deep frying pan and then add the curry leaves. After 20 seconds add the onion and salt and lower the heat to allow the onions to soften and not burn. After 5 minutes add the garlic and ginger paste along with the green chillies and stir into the existing ingredients.

2. Add the cumin powder and then add the fresh tomatoes and allow them to soften slightly before adding the chickpeas.

3. Add the yoghurt and tomato puree and stir into the chickpeas.

4. Add the chickpea juice and/or boiling water and leave until the liquid has reduced. This will take around 10-15 minutes.

5. Stir in the spinach, which will wilt almost immediately.

6. Take the pan off the heat and add the chaat masala and lemon juice and stir into the curry. Add a little fresh coriander on the top of each serving.

Relax, sit back and enjoy a very satisfying bowl of chickpea curry.

SaveSave


South Indian Sardine Curry

IMG_1033

Don’t you just love those recipes that require minimal effort to achieve a very satisfying and tasty result? This south Indian sardine curry is one of those dishes.

Sardines are great fish to have in your diet as they are packed with essential nutrients, including omega 3 fats, vitamin B12 and vitamin D. They are also very reasonable to buy and therefore are within everyones budget. The bones too are so small that you can easily eat them along with the flesh, providing you with calcium.

IMG_1068

I sometimes like to keep the sardines whole and at others times have them filleted. This recipe works equally well, whichever way you like to prepare them.  If you are going to get them filleted your fishmonger can easily do this for you to save time.

You could also add tamarind paste (no more than a teaspoonful) to this dish to give it a different twist. If you do decide to do this add the tamarind at the same time that you add the tomatoes.

IMG_1056

South Indian Sardine Curry

1 tbsp coconut oil

1 tsp mustard seeds

10 fresh curry leaves

1 banana shallot, finely sliced

1 tsp salt

5 garlic cloves, finely chopped

1 heaped tsp of ginger paste

2 fresh chilli, sliced lengthways

1/2 tsp turmeric powder

1 tsp coriander powder

200g fresh tomatoes, quartered

200ml water

450g sardines, cleaned and filleted

1. Heat the coconut oil and then add the mustard seeds moving them around the pan for 15 seconds before adding the curry leaves. After a further 10 seconds add the shallots and salt.

2. Allow the shallots to soften slightly on a medium low heat for 4-5 minutes before adding the garlic, ginger and chilli, followed by the turmeric and coriander powder. Cook for a further couple of minutes.

3. Add the tomatoes and stir into the other ingredients. Place a lid on the pan and cook for around 5 minutes to allow the tomatoes to soften.

4. Add some of the water and stir into the ingredients to create a sauce and then add the sardines and cook on a low heat for around 5-7 minutes with the lid on the pan. Do add more water if you require more of a sauce.

5. Careful not to over stir as the sardines will break up.

IMG_1050


Kakrol Curry – for those who like to try new things

IMG_1156

For the next month or so if you happen to be living near or in an Asian neighboured, or passing by an Asian grocery store, you might just chance upon a wonderful Asian vegetable known in Bengal as kakrol, or you may have heard it referred to as kantola. Then again you may have never heard or seen this Asian vegetable before as it’s pretty unique and is it’s only in season for a month or two.

IMG_1105

It’s a type of Indian gourd that does not have a bitterness like it’s cousin the korola. It’s seriously delicious and actually reminds me pool, which I equally love. It’s in season NOW so seize this opportunity and seek it out. I love the bright vivid greenness of its skin. It’s so inviting it just wants to be eaten!

IMG_1109

You need to half it lengthways and then half it again and then quarter it. Similar to the ones that I have in the photo above. You do not need to peel the skin, simply cut off either end of the gourd.

IMG_1119

The brightness from the turmeric, Kashmiri chilli and the vegetable itself makes for some colourful cooking – just don’t wear a white shirt when cooking.

IMG_1143

I tend to accompany mine with some dal such as red split lentil or cholar and serve it with some freshly prepared chapatis. It’s absolute heaven and the perfect vegetarian/vegan meal. If you do manage to find them and cook this please let me know as I love to hear feedback from readers.

Have a lovely weekend.

Kakrol and Potato Curry

2 tbsp groundnut/olive oil

1 tsp cumin seeds

2 potatoes, halved lengthways and then quartered

5 kakrol/kantola, halved lengthways and then quartered (see photographs above)

1 tsp turmeric powder

1/2 tsp of Kashmiri chilli powder

1 tsp coriander powder

1 tsp cumin powder

1 tsp salt

a few tbsp of water to help soften the kakrol

1/2 tsp garam masala

1 tbsp ghee

1. Heat the oil in the pan and when it is hot add the cumin seeds and move them around the pan for 20 seconds before adding the chopped potato pieces. Turn the heat down and let the potatoes begin to bronze slightly. This will take around 4/5 minutes.

2. Add the kakrol along with the turmeric, chilli powder, salt, cumin powder and coriander powder. Use a spoon to cover the kakrol and potato in the spices.

3. You may need to add a little water to begin with to help the kakrol to soften. Place a lid on the pan to help steam and soften it. Turn gently at intervals and add a little more water if necessary. Cook on a low heat for 25-30 minutes, by which time the kakrol and potato will both be softened.

4. Before serving add the ghee and garam masala, stir into the curry and serve with hot chapatis or other Indian flat bread.

IMG_1165


Fiery Chettinad Chicken

IMG_0969

Chettinad is a region in the southern eastern state of Tamil Nadu in India. The cuisine is commonly regarded as one of the most fiery and aromatic.

IMG_0932

It is famous for its dry masalas that use a wide array of spices including, rather surprisingly, star anise, as well as more commonly used Indian spices such as cumin, cloves, black peppercorns, cinnamon, cardamom, coriander seeds, fennel seeds and whole red chillies. Similarly to the rest of southern India, coconut and tamarind are also often used in cooking.

IMG_0946

The Chettinad people have always been successful traders, travelling far afield throughout Asia. This can be seen in their cuisine as they use a wide range of spices and techniques, clearly influenced by their travelling merchant ancestors.

IMG_0971

My recipe is perfect if you crave some spice. For those at the korma end of the spectrum probably ought to give this a wide birth, but for those who like a flavoursome kick THIS is the curry for YOU. My kids definitely would not eat it, but Mr B and I are big fans and I hope that some of you out there will be also. If you prepare it in the morning ready to eat in the evening it works a treat. You could also cook it a day in advance if you are feeling super organised.

If any of you cook this please let me know what you think. It really isn’t that hot if you are used to eating spice, so be brave and give it a go. It would be great on a hot summer’s eve with a cold beer – check out my brother’s beer here or a chilled lassi such as this one.

Chettinad Chicken

Serves 4-6

800g chicken thighs, cut into bite sized pieces

1 tsp turmeric powder

1/2 lemon, juice only

****

Masala

2 tbsp coriander seeds

1 tbsp cumin seeds

1 tbsp black peppercorns

2 tsp fennel seeds

1 cinnamon stick

3 cardamom pods, seeds only

6 dried red chilli

6 cloves

4 fresh or dried bay leaves

2 star anise

60g desiccated coconut

100ml cold water

****

3 tbsp ground nut oil

14 fresh curry leaves

2 red onions, finely sliced

2 tsp salt

2 tsp garlic paste (or fresh garlic made into a paste)

2 tsp ginger paste (as above)

3 fresh tomatoes, chopped

75-100ml cold water

****

fresh ginger batons to serve

****

1. First cut the chicken thighs into bite sized pieces and cover with the turmeric and lemon juice. Mix in thoroughly and then place to one side whilst you make the masala.

2. Heat up a non stick pan and when it is hot add all the spices (but not the desiccated coconut) and move them around the pan for just over a minute so as to lightly toast them and release the flavours.

3. Place them in a spice grinder. I have this one which is excellent and Debenhams is selling it at the moment for £18. Best investment ever. (I am not on commission to say that!)

4. Whizz them around the spice grinder and then take out half the powder and then add the desiccated coconut or as much of it as you can. Whizz again and remove some more powder and put the remaining coconut in the spice grinder. Transfer to a bowl and add 100ml of cold water to create a thick paste.

5. In the same non stick pan add the ground nut oil and when it is hot add the fresh curry leaves, red onions and salt and gently fry for 8-10 minutes. Add the garlic and ginger paste and move around the pan so that it does not spit.

6. Add the tomatoes and continue to cook for a couple more minutes before adding the masala paste.

7. Add the turmeric lemon chicken and cover fully with the masala paste. Add the remaining water and leave to simmer for 45 minutes, or until the liquid has become virtually dry. Stir at intervals.

To serve place a few fresh ginger batons on top of the curry. It goes really well with rice or Indian breads. It is always good to have a bowl of fresh yoghurt on the side as this dish is renowned for being fiery.


Chinese Spiced Roast Pork – An Alternative Sunday Roast

IMG_0500

As an alternative to a typical English Sunday roast I thought I would tempt you with a Chinese spiced alternative that is sticky, sweet and balances perfectly with the saltiness from the pork and crackling. It’s a real family crowd pleaser and I can guarantee you all the plates will be completely clean after everyone has devoured their portion. This time I served mine with pak choi and some white fluffy rice, but you can equally serve with mangetout, green beans, Chinese greens, noodles – the list is endless.

IMG_0486

Take a look at these close ups and you can almost smell the five spice and the honey from looking at these glorious hunks of meat. With the juices from the meats you can quickly make a little sauce to run all over the meat and rice (the sauce was made just after these photos were taken so you are going to have to imagine the meat with a little bit of dark sauce running all over it).

IMG_0487


The meat requires as much marinading as you can manage. This time I only managed about an hour – kept at room temperature, but if you are super organised you can prepare it the night before and leave it in the fridge over night and then bring it out in the morning so that it is at room temperature when you place it in the oven.

IMG_0469

Before marinading the meat make sure your butcher, or you, has scored the meat so that there is a deep lattice effect running along the top of the fat. Once this is done you can then cover the meat in the marinade. Make sure you use your hands to massage the meat and skin.

IMG_0473

After cooking don’t worry if the crackling looks a little black (see photo below) – it’s meant to. The sauce has darkened the meat and the crackling to perfection. Let it rest for 10 minutes under foil before cutting up.

IMG_0479

 Chinese Roast Pork

Serves 4

800g boned and rolled pork shoulder

*******

pork marinade

1 heaped tsp Chinese five spice

2 tsp garlic paste

1 tbsp sesame oil

2 tbsp light soy sauce

2 tbsp tomato ketchup

*******

Sauce

all the gooeyness from the baking tray post cooking the pork

1 tsp honey

2 tbsp light soy sauce

2 tbsp boiling water

*******

for the park choi

4 garlic cloves, sliced

4 bundles park choi

1 tbsp light soy sauce

1/2 tbsp sesame oil

rice or noodles to serve

*******

1. First marinade the pork with the ingredients above either for an hour or if you are super organised, overnight. If you are marinading for an hour, leave the pork marinading at room temperature.

2. Preheat the oven to 200 degrees (180 degrees if using fan) and when the oven is hot place the pork on a roasting tray in the middle of the oven. Cook for 1 hour turning the pork over after 30 minutes of cooking time.

3. If after about 50 minutes the crackling has not crackled sufficiently increase the temperature of the oven to 200 degrees and cook for 10 minutes by which time the fat will have crackled to perfection.

4. Remove from the oven and then cover with foil for 10 minutes to rest on a warmed plate.

5. Prepare the rice or noodles so that they are ready to serve in 10 minutes.

6. Meanwhile to make the sauce, scrape all the gooeyness from the bottom of the roasting tray and add the honey, soy sauce and water. Stir so that all the ingredients mix well together. Simmer for a minute and then pour into a warmed sauce jug.

7. In a separate large pan, gently fry the garlic in the sesame oil for 2 minutes and then add the washed pak choi. The pak choi will wilt slightly within a couple of minutes, but which time it is ready to serve.