Spiced Pilau Rice

IMG_0211


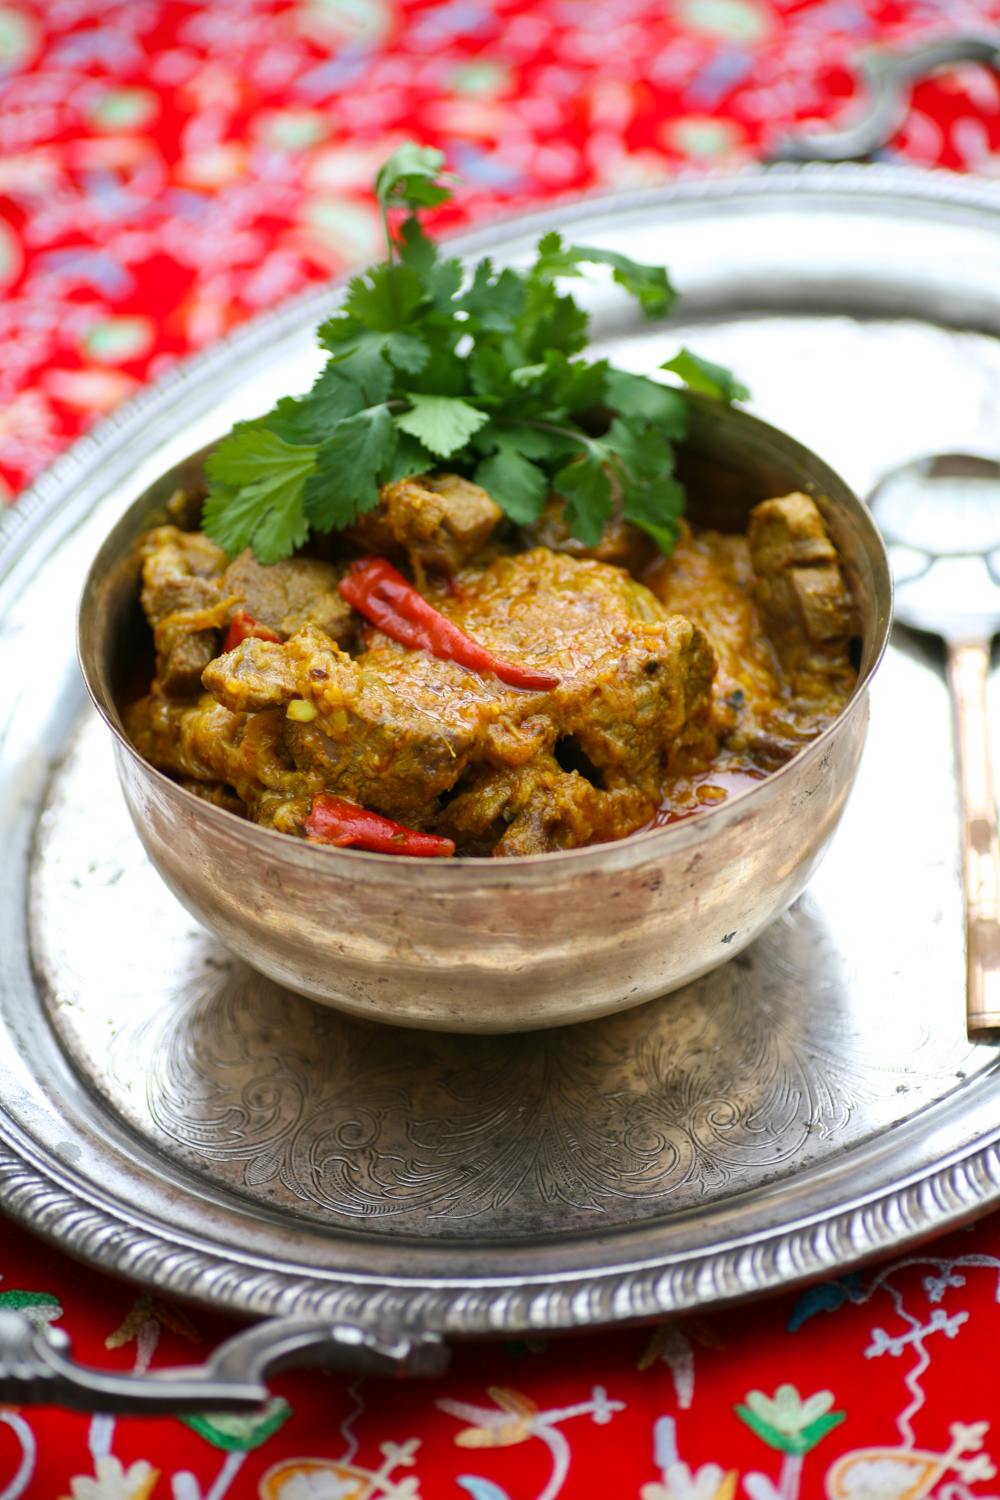
As winter is officially here and the nights are drawing in so our diet begins to crave more hearty filling food. Stew and warming curries get given centre stage during the winter months, well at least they do in my household. I realise that I have never posted a pilau rice dish, which would be a great accompaniment with a wide range of curries. Plain basmati rice is all very well but if you delicately spice it and accompany it with some nuts or fruit, it just adds a lovely new fragrant dimension to the meal and really only takes a couple of extra minutes to prepare.

I find my spiced pilau rice is really versatile as it works equally well with Middle Eastern dishes as well as Indian curries.


IMG_0150

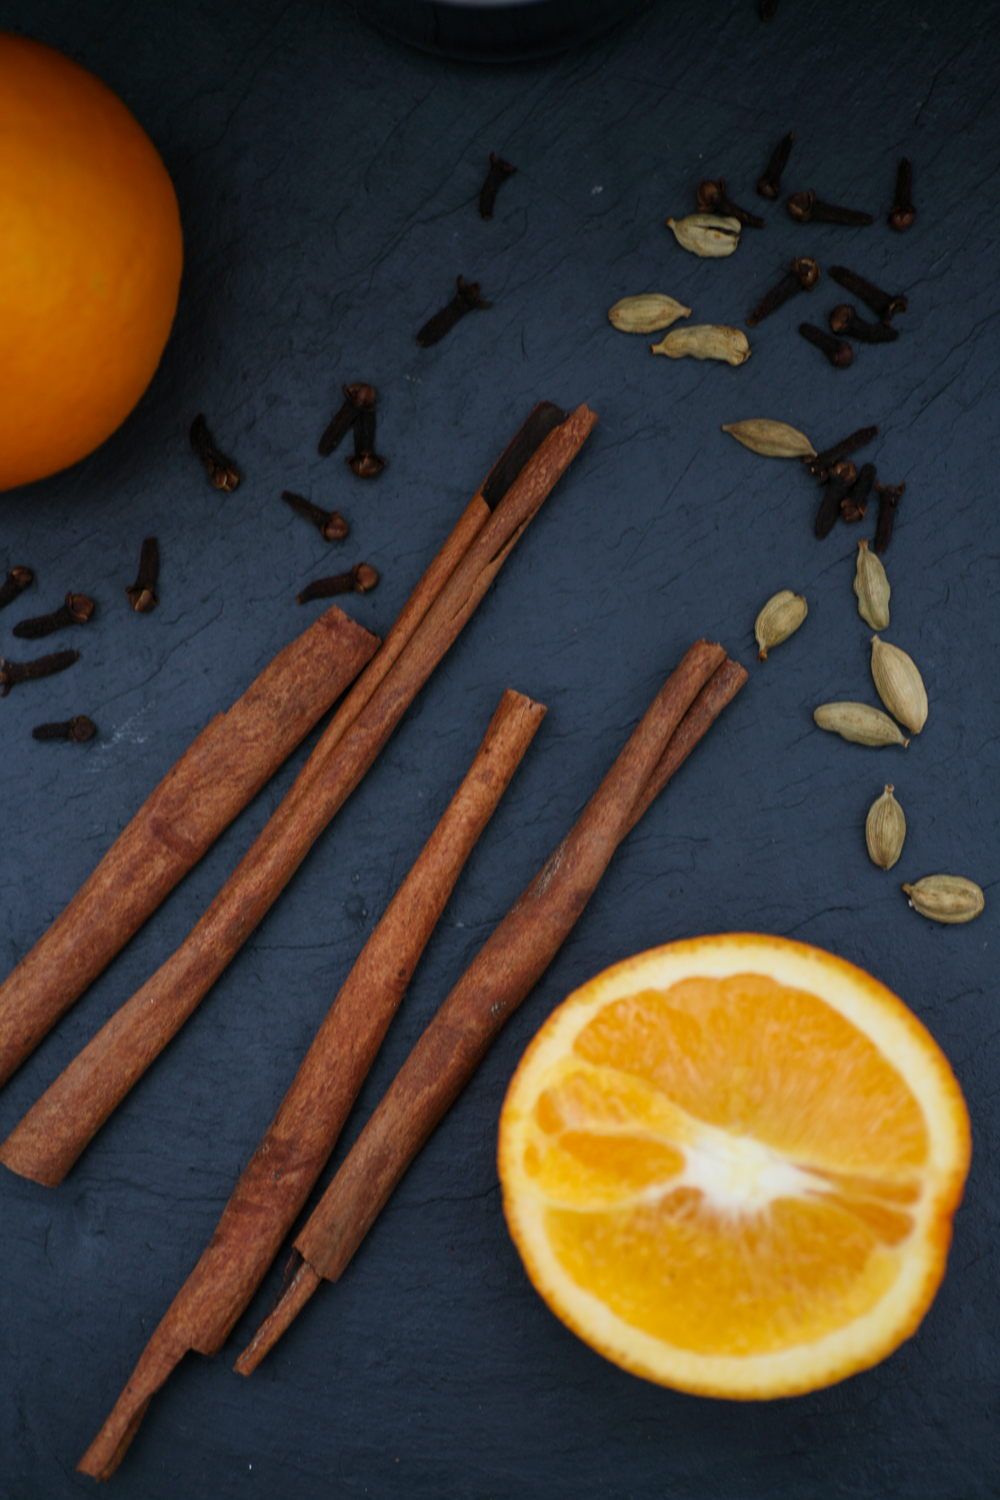
The three C’s are wonderful spices: cardamom, cloves and cinnamon stick and give a warming aroma to any dish. I also have a particular weakness for cardamom in sweet dishes, but that’s for another post. Star anise not only looks inviting but also has a delicate aniseed smell and taste and is used a lot in Vietnamese and Chinese dishes. The queen of spices is saffron – one of the most expensive so it is used sparingly, hence only a pinch used in this dish. If you do not have saffron you could use a generous pinch of ground turmeric instead, which will give a yellow hue.


IMG_0173

I used blanched almonds this time, but depending on what is in my cupboard I may use cashew nuts or even unsalted peanuts. If you are serving a more Middle Eastern dish then pistachio nuts would also work really well.

Let me know how you get on. Send me a photo of your dish and accompanying curry to my twitter account and I will retweet it to all my followers. Is there any particular pilau rice that you make at home? How does if differ to my spiced pilau?
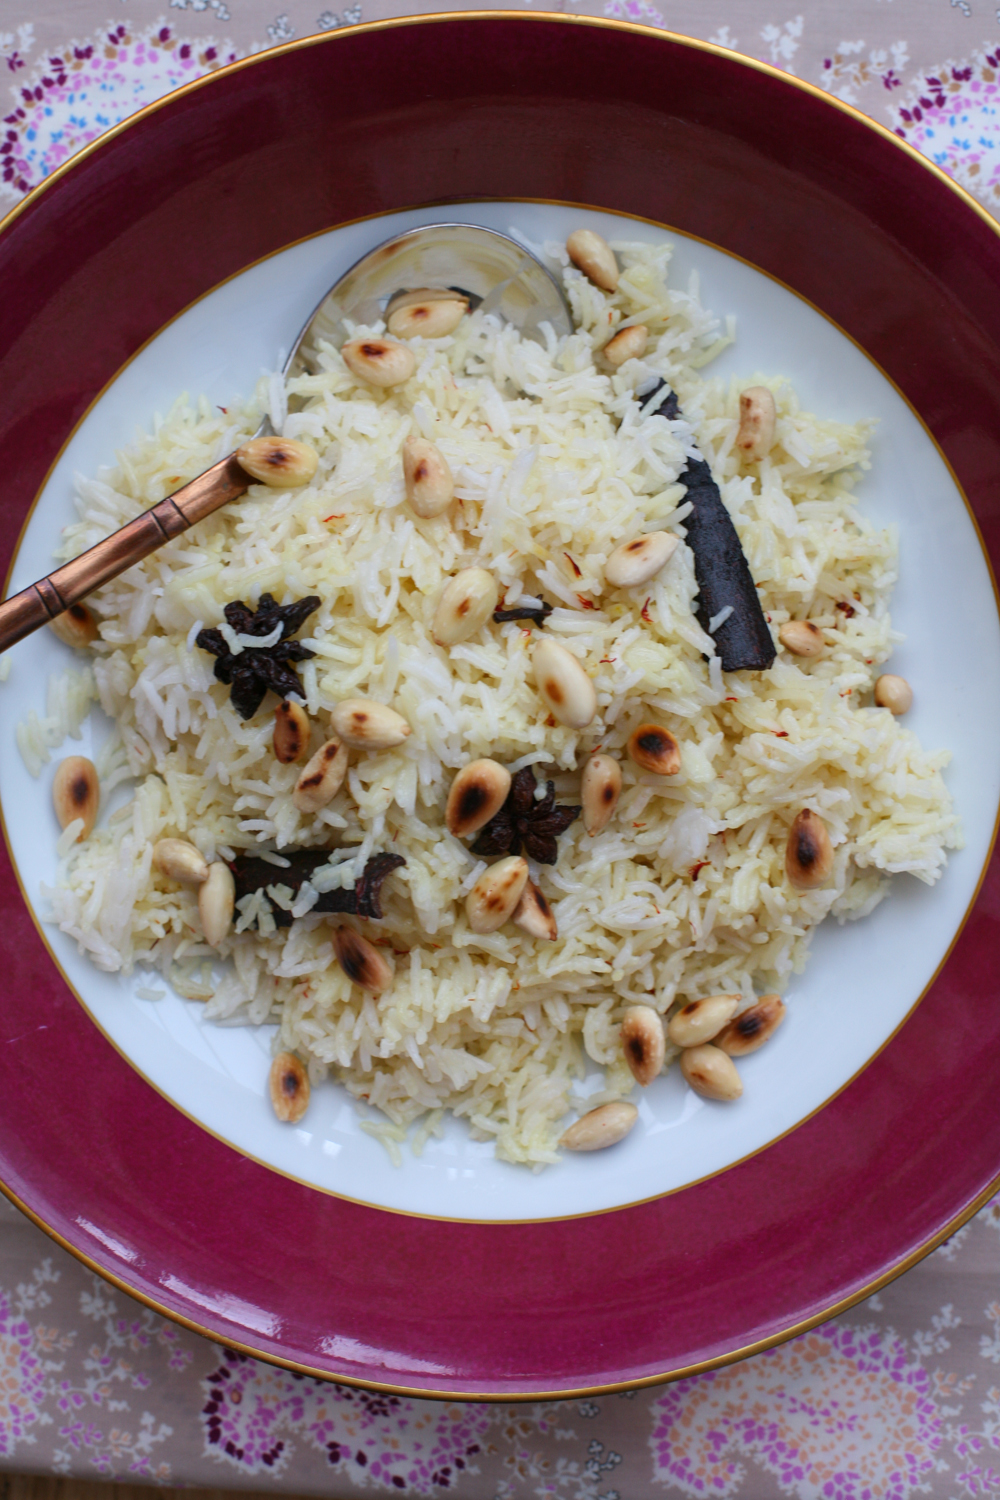


IMG_0203


Spiced Pilau Rice

serves 4

1/2 tbsp ghee/butter

7cm cinnamon stick, broken in two

2 star anise

4 cardamom pods, slightly opened

3 cloves

190g basmati rice (Approx one handful per person)

350ml cold water

1 tsp salt

2 tbsp hot milk

1 large pinch of saffron (or ground turmeric)

1 tsbp rose water

2 tbsp blanched almonds or cashew nuts

1. First rinse the rice a couple of times with cold water so that the water runs clear and not cloudy. Drain and set aside. If you have time then soak the rice in cold water for 10 minutes then drain.

2. Heat the milk and then place the saffron in the milk. Give a good stir. Leave to soak whilst you prepare the rice.

3. In a pan heat the ghee or butter and when it is melted add the star anise, cardamom, cloves and cinnamon stick. Let them sizzle away for half a minute, before adding the drained rice and salt and stirring together. Add the cold water. As a rule I always make sure that the water is about 1/3 of your smallest finger above the rice. Stir and then let the rice come to the boil which will take a couple of minutes.

4. Once it has come to the boil, turn the heat down and place the lid on the pan. Let the rice gently cook and steam away for 8 minutes. By this time small holes will have appeared in the top of the rice. Turn the heat off and leave the lid on the rice so that it can steam for a further 10 minutes.

5. In a small frying pan dry roast the blanched almonds or cashew nuts for a couple of minutes so that they begin to bronze.

6. Place the saffron milk and rose water over the rice and then gently fluff it up with a fork.

7. Scatter over a platter with the nuts over the top.

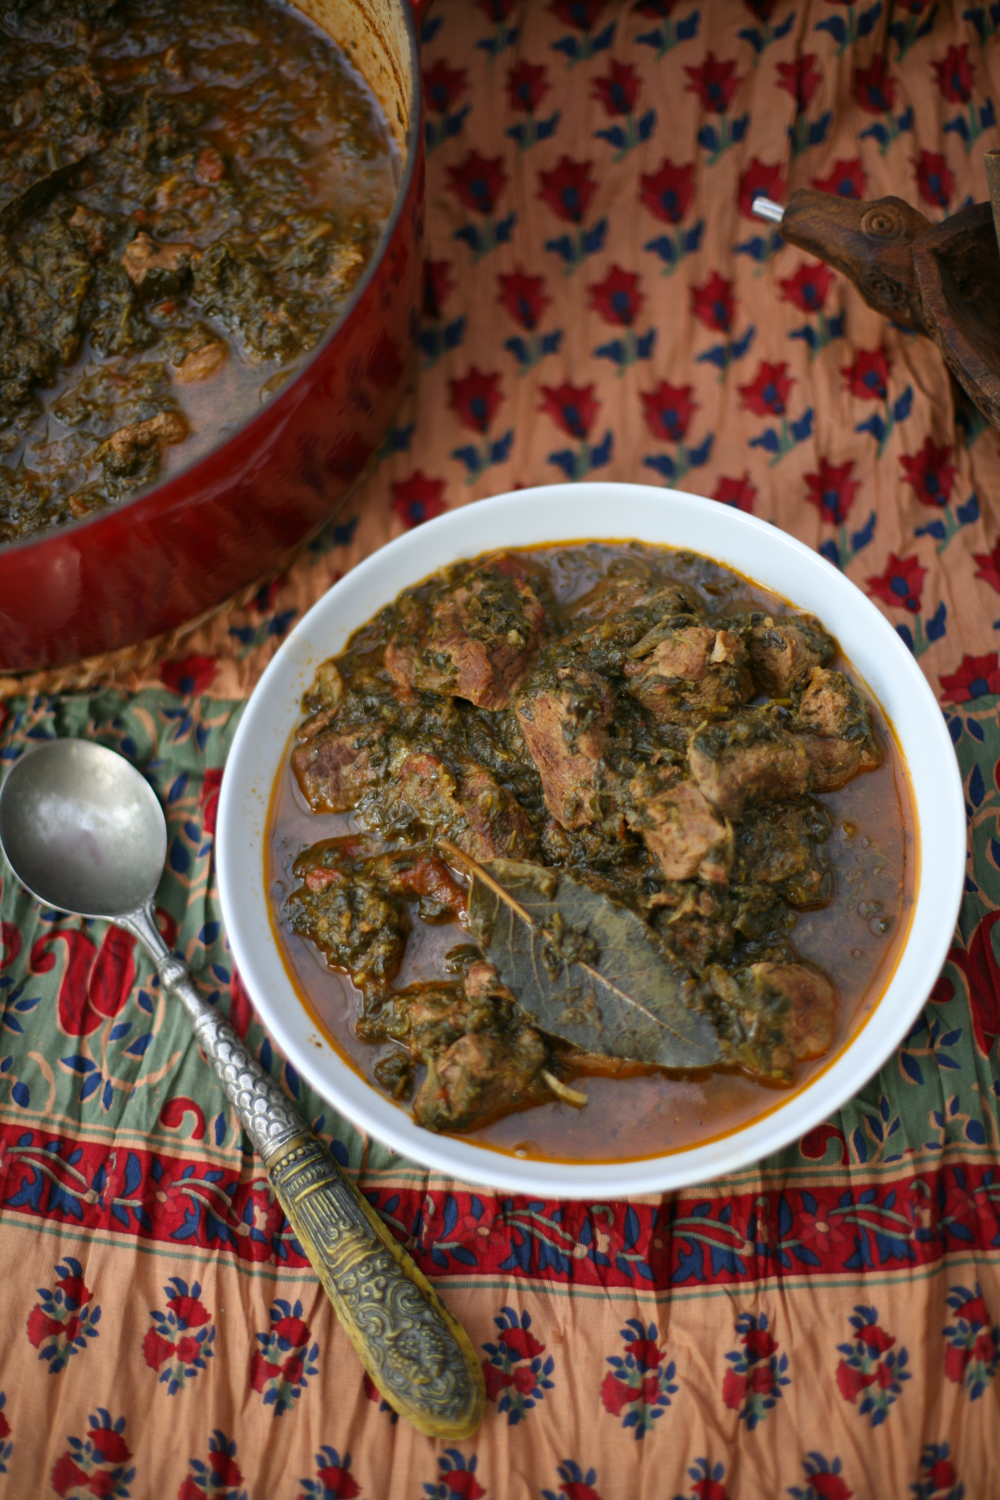
Serve with any Indian dal, vegetable, meat or fish curry. It also works really well with Middle Eastern meat or fish dishes.


IMG_0208


Indian Rasam – Spiced Tomato Soup

IMG_0021

There is nothing more sublime than a spicy hot tomato soup to warm you up and give you that inner glow. If you are feeling under the weather with a cold or fever, which invariably many of us do at this time of year, this is a great way to blast your system with goodness and help pull you through. Rasam, as it is known in South India, translates to ‘juice’ or in Sanskrit rasa means ‘taste’. I think ‘tasty juice’ is the perfect way to describe this warming, fragrant and flavoursome soup. Traditionally it is made with tomatoes or tamarind with a host of spices and fresh curry leaves giving it a comforting aroma and taste.  Being totally addicted to tomatoes I tend to make my rasam with tomatoes as the base note.

IMG_0010

Traditionally it is eaten in India at the end of a meal, but I tend to serve it the opposite way round and kick a meal off with a warming cup of this thin spiced tomato soup to whet the taste buds. It is often served in a mug or cup or can be poured over a bowl of hot steaming basmati rice. It’s also the perfect drink after a long, cold and invariably wet winter walk. With a roaring fire going and a cup of rasam you will feel a state of happiness surround you. Seriously try it and you’ll know what I mean.

IMG_0033

The only tricky (ish) ingredient to source is fresh curry leaves. If you go to your local Asian grocer they are likely to have some, or at least will be able to point you in the right direction. So what are you waiting for – give it a go and leave and comment below to let me know how you get on.

**********

Indian Rasam – Spiced Tomato Soup

Serves 4

2 tbsp sunflower oil

1 heaped tsp of garlic paste/fresh garlic grated

1 heaped tsp of ginger paste/fresh ginger grated

2 large dried red chillies (1 if you prefer it with less of a kick)

12 fresh curry leaves

1/2 tsp of crushed black pepper

1 tsp salt

1 tsp sugar

700g fresh tomatoes, roughly chopped

350ml water

a couple of sprigs of fresh coriander to garnish

black pepper to garnish

1. Warm the oil in a deep non-stick pan and when it is hot add the garlic, ginger, dried red chillies, fresh curry leaves and crushed black pepper and gently move around the pan so that the chillies darken and the ginger and garlic begin to bronze. Keep on a medium heat for a few minutes before adding the tomatoes, salt and sugar.

2. Move around the pan so that the tomatoes begin to soften and are completely covered in all of the ingredients. Then add the water and let it boil for a couple of minutes before lowering the heat and cover for 30 mins.

3. Using a hand blender blend the soup so that it is smooth and then pass through a sieve so that there are no pips or tomato skin and what remains is brilliant red, smooth thin rasam. Heat up the smooth rasam gently in the pan before serving.

4. Pour into cups and garnish with some fresh coriander and black pepper.


IMG_0027


Rajasthani Kick-Ass Lamb Curry – Laal Maas

IMG_8766

Sometimes a kick-ass curry is what one needs to enliven the senses and to feel blessed to be alive. It also does wonders if you are suffering from a cold or feeling a little run down. This curry, known as Laal Maas – which in Hindi translates as  ‘red meat’ – is a traditional Rajasthani dish that is loved, adored and eaten in every Rajasthani household. My version is not ‘blow your brains out’ chilli hot, although it does have more heat than the majority of my Indian curries on my blog.  I think if you generally like spice then this will appeal. If you are more of a korma person then I would give laal maas a wide berth.

IMG_8745

I cooked it earlier in the week when I had a bunch of friends over for supper and not one lamb morsel or spoonful of sauce was left. I served it with an ivy gourd/tindora/gentleman’s toes curry – see recipe here as I felt they would compliment and not overpower one another. I also made some pakora with some homemade coriander chutney and tamarind and date chutney – recipes for all of these I will post soon.

IMG_8728

Rajasthani cooking is traditionally a lot spicy than Bengali and this dish clearly demonstrates this. It is not a hot as you may think, largely owning to the Kashmiri chilli powder that is added which gives the curry a deep red colour but not so much heat that it is difficult to eat. The yoghurt also tones the down the heat making it enjoyably palatable. Not one of my guests requested milk to deaden the heat or were perspiring uncontrollably. So give it a go. I like to cook it earlier in the day and then gently reheat before serving. I find that leaving it to rest a while before reheating also calms the heat so don’t stress if you taste a spoonful when it is cooking in the first instance as it will calm down if it is left for a few hours.

***********

Laal Maas – Rajasthani Kick-Ass Lamb Curry

Serves 6

125ml vegetable oil

2 tsp cumin seeds

6 cloves

6 fresh red chillies, storks removed (you can also used dried – see footnote)

1/2 mace blade

6 green cardamom pods, opened

2 black cardamom pods

2 large red onions, thinly sliced

1 tbsp garlic paste

1 tbsp ginger paste

1.2kg lamb, diced

2 tsp Kashmiri chilli powder

1 tsp turmeric powder

2 tsp salt

250g plain yoghurt, whisked

coriander to serve – optional

1. Using a pestle and mortar (or a bowl and the end of a rolling pan if you do not have one), gently bash the green cardamom pods so that they open and some of the seeds come out. Place to one side. If you are making your own ginger and garlic paste I find gently grating them first is the best way to form a paste. Add a drop or two of water to make a more paste like consistency. For this recipe I used a jar of garlic paste and ginger paste for ease and speed.

2. In a large pan or casserole dish add the oil and when it is hot, but on a medium heat, add the cumin seeds and move them around the pan for 30 seconds to allow the flavours to open up.

3. Add the chilli, the green and black cardamom pods, mace blade and cloves and continue to move around the pan for a further minute.

4. Add the sliced onion and cook on a low heat for 6-8 minutes, by which time the onion will begin to brown in colour.

5. Add the garlic and ginger paste and stir in well with the other ingredients and leave to cook for a further 5 minutes.

6. Now add the diced lamb and completely coat in all the ingredients. Add the turmeric, Kashmiri chilli powder and salt and leave to cook gently so the lamb has browned – this will take up to 10 minutes.

7. Place the whisked yoghurt into the pan and fold into the lamb. Cook for a further 5 minutes, before reducing the heat and allowing the lamb to simmer in the sauce for 40 minutes. Continue to stir intermittently.

8. Ideally cook this curry at least a few hours before serving allowing the curry to rest. When you are ready to eat gently reheat and if you like scatter with coriander before serving.

Serve with Basmalti rice or Indian flat bread to mop.

The same curry can be made easily with either chicken or goat. 

You can also used dried Kashmiri chillies. Best to soak them in warm water for 10 minutes and then either keep them whole or blitz them to make a coarse paste. 

*********


Chana Masala at L’atelier des Chefs by St Paul’s Cathedral

IMG_8345

A stone’s throw away from the iconic St Paul’s Cathedral in the heart of the city of London you will find Foster Lane and nestled down it at number 10, the cookery school and cook shop, ‘L’atelier des Chefs‘. This is one of two – the other is in Wigmore Street – soon to be three locations of the cooking school, with a further 17 across the water in France.

IMG_8368

Originally set up by two French brothers, Nicolas and Francois Bergerault who wanted to bridge the gap between chefs and the day to day cook. The ethos of the company was to bring people back in the kitchen, around the table and share the love of cooking. The brothers have hired passionate and skilled chefs to teach cooking classes to budding food enthusiasts. Classes range from half an hour, whereby you cook one dish over a lunch time or after work, to a four hour ‘chefs masterclass’, therefore appealing to those of all standards and budget. Class sizes also range from small intimate groups to larger corporate events/team bonding; there is even a class for kids so everyone is included and encouraged.

IMG_8367

I headed down there earlier this week with my mother in tow. I enlisted the pair of us on the Indian cooking session. Whilst I am very comfortable around the spice rack and cooking Indian food, my mother, who is a fabulous cook, is slightly less comfortable cooking a curry. I was keen to see if the session would appeal to both of us.

IMG_8310

We were greeted by friendly staff who offered us teas and coffees before class began. There were seven of us in our class and we were introduced to chef Daniel Stevens who has just returned from an extended visit to Kochi in Kerala, India, where he has been working closely with Lily Vanilli and Atul Kochhar in their new joint venture, Bloomsburys Cafe, which focuses on celebrating Kerala flavour in Western style patisserie.

IMG_8290

Introductions over we rolled up our sleeves, washed our hands and began slicing, dicing and chopping away. Over the course of the morning we all helped to prepare a lamb rogan josh (lamb curry), chana masala (chickpea curry), vegetable pakoras (similar to an onion bhaji) with a tamarind chutney and saag aloo (potato and spinach curry). We all took turns with stirring and adding ingredients and all tasted for spiciness and saltiness along the way. I liked how Daniel allowed the class to decide if more salt, spice, sourness or sweetness was required in a particular dish. After all Indian cooking is not an exact science like baking where exact measurements are integral to the success of the cake or bread. Indian cooking allows you to be a little flexible with measurements and a more ‘go with the flow approach’ to creating a dish – something that definitely appeals to my style of cooking.

Time raced by and after two hours we had prepared all the dishes. We all sat down on a long table, admired the curries we had created and dived in before anything got cold. We all agreed that the morning had been a real success. We had all picked up new tricks and skills and unanimously agreed that we would all be able to replicate the same dishes again in the comforts of our own home kitchens. Would we return? Most definitely. In fact a couple of my class mates were already on their third return visit and if that isn’t the seal of approval on a fun and informative cooking school, I don’t know what is.

After squeezing in second helpings we were given goodie bags to take home some more. We said our goodbyes and headed out into the rain with a glow in our bellies and a spring in our step.

Chana Masala

Adapted from the L’atelier des Chefs recipe.

Serves 4-6

250g tinned chickpeas

2 tbsp vegetable oil

3 whole cloves

1 whole cinnamon stick

3 green cardamom pods, split open

2 medium sized white onion, finely sliced

1 tsp turmeric

1 tsp red chilli powder

2 tsp ground coriander

2 inch fresh ginger, peeled and finely grated

2 whole garlic, finely grated

4 tomatoes, chopped into small bits

150ml vegetable stock

1 handful of fresh coriander

2 tsp rock salt

1 lemon, juice

1. Heat a saucepan and add the vegetable oil. When it is hot add the cloves, cardamom pods and cinnamon stick and allow the aromas to be released. After a minute add the onion to the pan and cook on a medium heat for around five minutes until it begins to soften and brown.

2. Now add the turmeric, chilli powder and ground coriander and give a good stir. Add the garlic and ginger and stir to make sure they do not burn at the bottom of the pan. Adding a very little water helps to prevent burning!

3. Add the tomatoes and allow them to soften for a few minutes before adding the vegetable stock and chickpeas and allowing the curry to simmer and soften gently. Allow the juice to soak up and if it becomes too dry then just add a little more water.

4. After ten minutes add some salt to taste and then turn off the heat and scatter the fresh coriander on top. Before serving add some lemon juice

Chilli and Mint was a guest of L’atelier des Chefs. You can find more details about the course and other courses on offer here.


Prague Adventures and Spiced Mulled Wine

IMG_0903

I’ve been on a little jaunt across to Prague since my last post. As is customary around this time of year my family like to spend a few days somewhere really cold where we can wrap up warm (I wore five layers most days), visit the christmas markets, eat lardy food and soak up a bit of culture. Prague hit the spot and besides I have always wanted to return as my last visit was interrupted the whole time by work calls from London. This time I vowed to turn off my phone and all communication with the outside world.

IMG_0973

The best way to explore any city is by foot or bike, although across cobble stones the former mode of transport is by far more advisable. So for three full days we walked around the old city across the bridges, through the various squares, visiting the cathedral, churches and palace and taking in some art – both old and new. Our days of walking were interspersed with tasty pit stops. My girls loved to eat these wonderful hot pastry rolls that were dipped in cinnamon sugar.

Whilst Mr B and I enjoyed sipping some festive mulled wine/gluhwein/vin chaud/glogg. Nothing beats drinking mulled wine when the outside temperature is close to zero. It warms you up from the inside out and gives you that renewed energy to keep exploring a little longer in the cold elements.

IMG_1084

It’s brilliantly easy to make yourself and is a great winter warmer for the holiday period. Over the Christmas break you can guarantee that I for one will be drinking a glass or two after our Boxing day walk. The warming smell of the cinnamon and cloves bubbling away in the red wine on the stove evokes so many happy memories.  I recommend using the cheapest bottle of red plonk that you can get your hands on – save your Chateaux Margaux for another occasion!

IMG_7847

Spiced Mulled Wine

Serves 6 (a couple of glasses each!)

2 bottles of cheap red wine

150g (or 100g if you prefer it less sweet!) caster sugar

1/2 freshly squeezed orange juice

1 tsp cloves

4 cardamom pods

2 sticks of cinnamon split in two

100ml port (optional)

a pinch of freshly grated nutmeg

1 tsp allspice

200ml water

orange peel strips to serve

1. In a large pan add the caster sugar and half a pint of red wine and stir until completely dissolved.

2. Add the remaining ingredients aside from the orange peel strips and simmer gently for 45 minutes.

3. Strain the liquid before serving and gently pour the hot spiced mulled wine into individual glasses or mugs and add a orange peel strip to each one.

You can make in advance and then reheat when needed. You can also store in the fridge overnight to be reheated the following day.

Note: If you have some muslin cloth you could add all the spices to this cloth and then simply remove before serving, instead of straining. 

IMG_7852

IMG_7822

I bid you all a very happy Christmas and will be back with my next post in the New Year. Thank you for always stopping by and supporting me with your comments and likes over the last couple of years. Merry Christmas to you all.

Torie x

Take a sneak peek at a few of the other sights we saw in Prague below.


Lamb and Spinach Curry – a warming curry for cold winter nights

IMG_7698

Given the recent drop in temperature my cravings for comforting meat dishes grows. Lamb works so well in curries that through the winter months I am always digging into my recipe library (see above) to cook either my lamb keema, my rezala, which is heavenly if you haven’t tried it already, or my goat curry, which you can cook with lamb instead.

With a lamb and spinach curry on my mind I set out to buy the ingredients – most of which I had at home, however the lamb and spinach needed to be procured. I picked up some halal lamb from my local butcher, so much better priced than supermarkets I might add, which was mostly off the bone. Personally I rather like meat on the bone as it tastes so much better, but I know that it can put off some guests who are unaccustomed to eating meat in this way. After purchasing a few other sundries, I arrived home and realised that I had forgotten the fresh spinach.  I decided to improvise and use the frozen spinach that I always have a packet of in the freezer. It works really well so don’t stress if you too go down the route of frozen as opposed to fresh spinach.

IMG_7673

I have a propensity to always cook more food than one can eat in a single sitting so that I can stretch the meal over two days. So whilst the meat quantity looks a lot it can be eaten in one go if you have 4-6 guests or over two days if you are feeding 2-4. As is always  the case with my blog the amount of chilli you put in is up to your own individual taste. If it were just me and Mr B eating it I would spice it up a lot more than if we are sharing it amongst guests.

IMG_7694

Lamb and Spinach Curry

Serves 4-6

3 tbsp vegetable oil

2 white onions, sliced

4 bay leaves

2 inch fresh ginger, finely grated

5 garlic cloves, crushed

1.4 kg diced lamb (mainly off the bone)

5 cardamom pods, seeds taken out

1 tsp cumin seeds

1 finger sized piece of cinnamon bark, broken up

2 tsp Kashmiri red chilli powder

2 tsp ground coriander

1/2 tsp ground turmeric

salt and pepper to taste

400g tin of tomatoes

700g frozen spinach (or fresh if you remember!)

500ml water

1. Heat a large casserole dish (or any that you can use both on a hob and in an oven) and add the oil followed by the sliced onions and bay leaves. Keep on a low heat for 10 minutes so that they soften and begin to brown in colour. If they remain translucent, increase the heat for a couple of minutes, stirring to make sure they do not burn.

2. Whilst the onions are cooking prepare the spice mix of cardamom seeds, cinnamon bark and cumin seeds in either a spice grinder (one of my favourite kitchen tools) or pestle and mortar. Add the ground turmeric, coriander and red chilli powder and place to one side.

3. Add the ginger and garlic to the onions and give a good stir. Remove from the pan and place in a bowl, whilst you bronze the lamb.

4. On a medium heat add a little more oil to the pan, if needed, lightly brown the lamb in batches.  This should only take a few minutes per batch. Return the cooked onion, garlic, ginger to the pan and add the spice mix. Stir into the meat and onions before adding a little salt and pepper, tinned tomatoes, spinach and water. Heat on the stove for 10 minutes before transferring to a preheated oven set at 150 degrees ( if using a fan oven), ten degrees higher if not. Place a piece of parchment paper over the casserole dish followed by the lid and leave to cook slowly in the oven for 1hour 30mins hours, stirring a couple of times during cooking. Leave to rest for 10 minutes before serving.

5. Taste before serving to check the salt/chilli level and adjust if necessary. I find this curry is great to make ahead of time as it tends to taste even better once it has rested for a while. When you are ready to eat simply heat up gently on the hob.

Serve with rice or naan bread.

What hearty, warming curries do you like to make and eat as the winter evenings draw in? Are there any curries you would like to see me make on this blog? Leave a comment below and let me know….don’t be shy now ;o)


Panch Phoron – Bengali Five Spice and Red Split Lentil Dal

IMG_7307

From top right going clockwise: fenugreek, nigella, fennel, black mustard, cumin seeds

We’ve all heard, and no doubt use, Chinese Five Spice, but the Indian equivalent, Panch Phoron, for some reason is not given as much PR and voice in the West and yet across Bengal, it is a spice mix that is commonly used in every home and very much cherished.

When I launched my blog way back in 2011 one of the first recipes that I posted was my absolute comfort food – red split lentil dal. I cook it often as it is ridiculously easy and provides me with a quick-fix nourishing meal. You can choose whatever vegetable, if any, you need to use up, giving the dal a different twist every time you prepare it. A key seasoning to the dal, which imparts the unmistakable flavour, is panch phoron and whilst I am able to source it from a local Indian supermarket, I know that for some people getting their hands on this magic ingredient could be harder.

IMG_7292

So I wanted to show you how to make your own panch poron. Panch in Bengali is five and phoron is spices and these five spices are: nigella seeds (other wise known as black onion seeds, Kalonji or kalo jeera), fennel seeds (mouri or saunf), fenugreek seeds (methi), black (brown or yellow) mustard seeds (rai) and cumin seeds (jeera). The aromatic spices working together provide a  considerable depth of flavour to any dish and especially to dal.

IMG_7312

Unlike most spice mixes these are not ground to a powder but are cooked whole, either dry roasted in pan or placed in a little oil until they begin to pop and release their flavours – this is known as tempering. There are significant health benefits from eating the spices. In short: cumin aids digestion, fennel contains vitamin a, e and c as well as anti-oxidants, fenugreek aids metabolism, mustard seeds contains omega 3 fatty acids as well as being a good source of selenium and magnesium, nigella seeds balance the hormonal system and have healing qualities.

They store for months in an air tight container so if you make up a batch that should last you for some time as you only need a teaspoon or two every time you use it in a dish.

IMG_7321

There are a couple of lentils that do not require soaking over night and take a very short time to cook. Masoor dal or red split lentils, as they are more commonly known, are a staple in my store cupboard. From cleaning thoroughly to cooking, the dal takes no longer than 20 minutes to prepare – and that’s being generous – on average it’s a 15 minute meal to prepare and cook. Oooh Jamie Oliver would be so proud!

IMG_7322

Red split lentils are also very reasonable to buy so all in all this dish is healthy, speedy and economically friendly. A win win surely!

IMG_7358

I eat this dish all year round and like to change the consistency from a more runny, soupy dish to a thicker dal that may be eaten the Indian way, with your hands, accompanied by some rice or naan.  When the months turn colder I tend to gravitate more and more towards dals and soups to warm me up so this really is the perfect autumn meal to give me that inner glow.

Panch Phoron – Bengali Five Spice

Makes enough to last you for months

3 tbsp cumin seeds

3 tbsp fennel seeds

3 tbsp fenugreek seeds

3 tbsp mustard seeds (I tend to use black, but brown/yellow is also fine)

3 tbsp nigella seeds (black onion seeds)

1. In a bowl mix all the seeds together thoroughly and place in an air tight container.

********************************

Red Split Lentil Dal

Serves 2

200g red split lentils (masoor dal)

500ml of water, add more if you would like it a thinner consistency

1 tbsp oil (mustard,vegetable or sun flower oil)

1.5 tsp panch phoron

2 fresh chilli (red or green), chopped in half

1 tsp turmeric

1 tsp salt

5 cherry tomatoes (or carrots, courgette, marrow, peas etc)

optional

fresh coriander, to serve

lemon wedge, to serve

1. Boil the kettle and meanwhile rinse the red split lentils under the tap so as to fully clean them. Then place the boiling water in the pan with the lentils. Boil for about 10 minutes on a low heat, the lentils will become less orange in colour during the boiling.  If you are going to add a carrot you need to add it to the lentils at this stage so that they are soft in time. Please note you may need to add more water if the water is completely soaked up by the lentils.

2. In a frying pan warm the oil and when it is hot add the panch phoron, fresh chilli and turmeric. Once the panch phoron begins to pop and release the flavours – this will be around 15 seconds, give it a quick stir and then add a ladleful of the watery dal into the frying pan and mix the ingredients together.

3. Now place the contents of the frying pan back into the main pot with the red split lentil and stir.

4. Add the quartered tomatoes (or peas, courgette, marrow, spinach) at this stage and simmer gently for a few minutes.  Add salt to taste.  If you want it more soupy, add more water and if you want it thicker, let it simmer for longer.


Indian Spiced Tea – the perfect hot drink for stormy weather

Indian Spiced Tea

Oh its been mighty stormy recently in the UK. The type of storm that wakes you up in the middle of the night and your mind begins to play tricks and convinces you that the house will take off torpedo style like Dorothy from the Wizard of Oz . Since I’m living in England and not Kansas or along a typical hurricane belt, I normally manage to get back to sleep in the knowledge that the wind will pass and we won’t be reliving the 1987 hurricane.

For the last few days however, the winds and rains have been battering our doors and keeping us cooped up inside. So when they gave us a little respite and a clear sky was visible we grabbed our wellies and headed out to face the cold wind on a country walk and to stretch our legs. We are spending a few days out of London so a walk in the fields with the pheasants and sheep was overdue.

After a bracing walk we returned to the warmth of the house and drank Indian spiced tea from elegant antique bone china cups, as you do.

In Kolkata, where Mr B is originally from, they often serve it in delicate little clay mugs, like this, at the side of the road from chai wallahs. They are often made from river clay that is then baked in an open fire. After use you literally discard your clay mug and it dissolves back into the earth. Environmentally friendly and far more hygienic than having a glass washed rapidly in unsanitised water at the edge of the road.

The drink is sweet, creamy and fragrant with ginger, cardamom, cloves and cinnamon all vying for attention. It’s the perfect drink to transport us to warmer climates and exotic locations. Try it and let me know. If you prefer a stronger tea then add one more tea bag and a little less milk and more water.


Please note that I have not added the water in this photo and you will need more milk than what is shown, the jug was too irresistible not to photograph.

Indian Spiced Tea

Serves 6

600ml full fat milk

600ml cold water

1 tbsp soft brown sugar

1 tsp ground cinnamon

1tsp ground ginger

1tsp ground cardamom (this works out to be approximately 5 cardamom pods)

1/2 (half) tsp ground cloves

3 tea bags (black tea such as PG)

6 cinnamon sticks, for serving

Please note that I have used ground spices, however, if you do not have these to hand or do not have a spice grinder you can use fresh ingredients and then simply strain the liquid after the tea has infused and before serving. 

1. In a saucepan add the water, all the spices (except the cinnamon sticks which are for serving) and the tea bags. Bring to the boil and then simmer for  5 minutes before adding the milk and sugar and then simmering for a further 10 minutes.

2. Let the spices and tea continue to infuse off the heat. You can leave them in the pan to cool. All this can be prepared in advance a few hours before drinking.

3. When ready to serve reheat the tea, removing the tea bags and simmering gently for 5 minutes. Serve immediately and place a cinnamon stick in each mug/glass. This is done more for effect than a major flavour enhancer so do not worry if you do not have any to hand.