Chettinad Pepper Chicken and Being on Editors’ Picks

img_4234

There has been a wonderful flurry of activity behind the scenes on my blog in the last 48 hours. My phone began to ping – indicating a new ‘follower’ and ‘buzz’ when a new like happened. They were happening more regularly than usual to the extent I began to wonder what on earth was going on. After a little digging around I realised that my blog had been selected as one of the ‘Editors’ Picks’ – The best of WordPress, selected by Editors at Automatic. I am beyond ecstatic as I have watched in awe over the years at the fascinating, motivating and uplifting blogs that are selected across a wide selection of genres.

So welcome to all the new followers of my blog. I hope you get the chance to have a good virtual wander around. I have so many recipes in my ‘recipe library’ that I hope to appeal to a wide audience. The common thread with all of them is that they will have herbs or spices working their magic within them. I am passionate about them and adore dishes from across the globe. When I come across a new ingredient I am the first to give it a whirl and see for myself if it is something that I can incorporate in my cooking going forward. In the last year I tried (and loved) kokum, (or as one sweet reader corrected me  kodampuli)  – see here  which has a tangy, distinct flavour, as well as sea urchin which I have been meaning to try for years – it was as delicious as I had envisaged.

img_4244


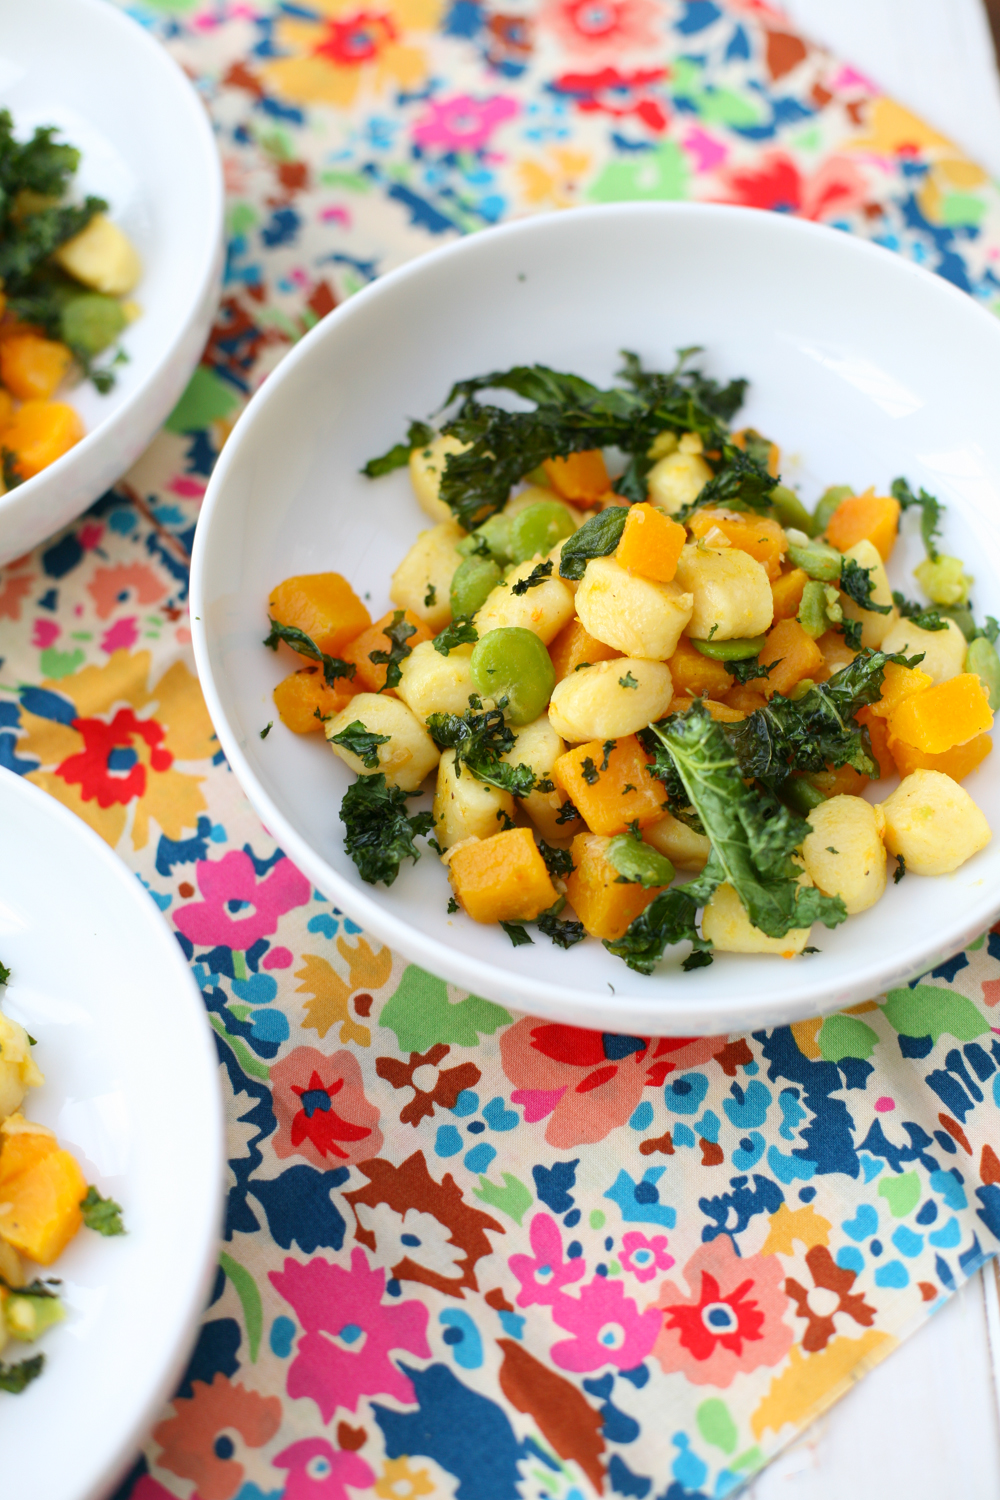
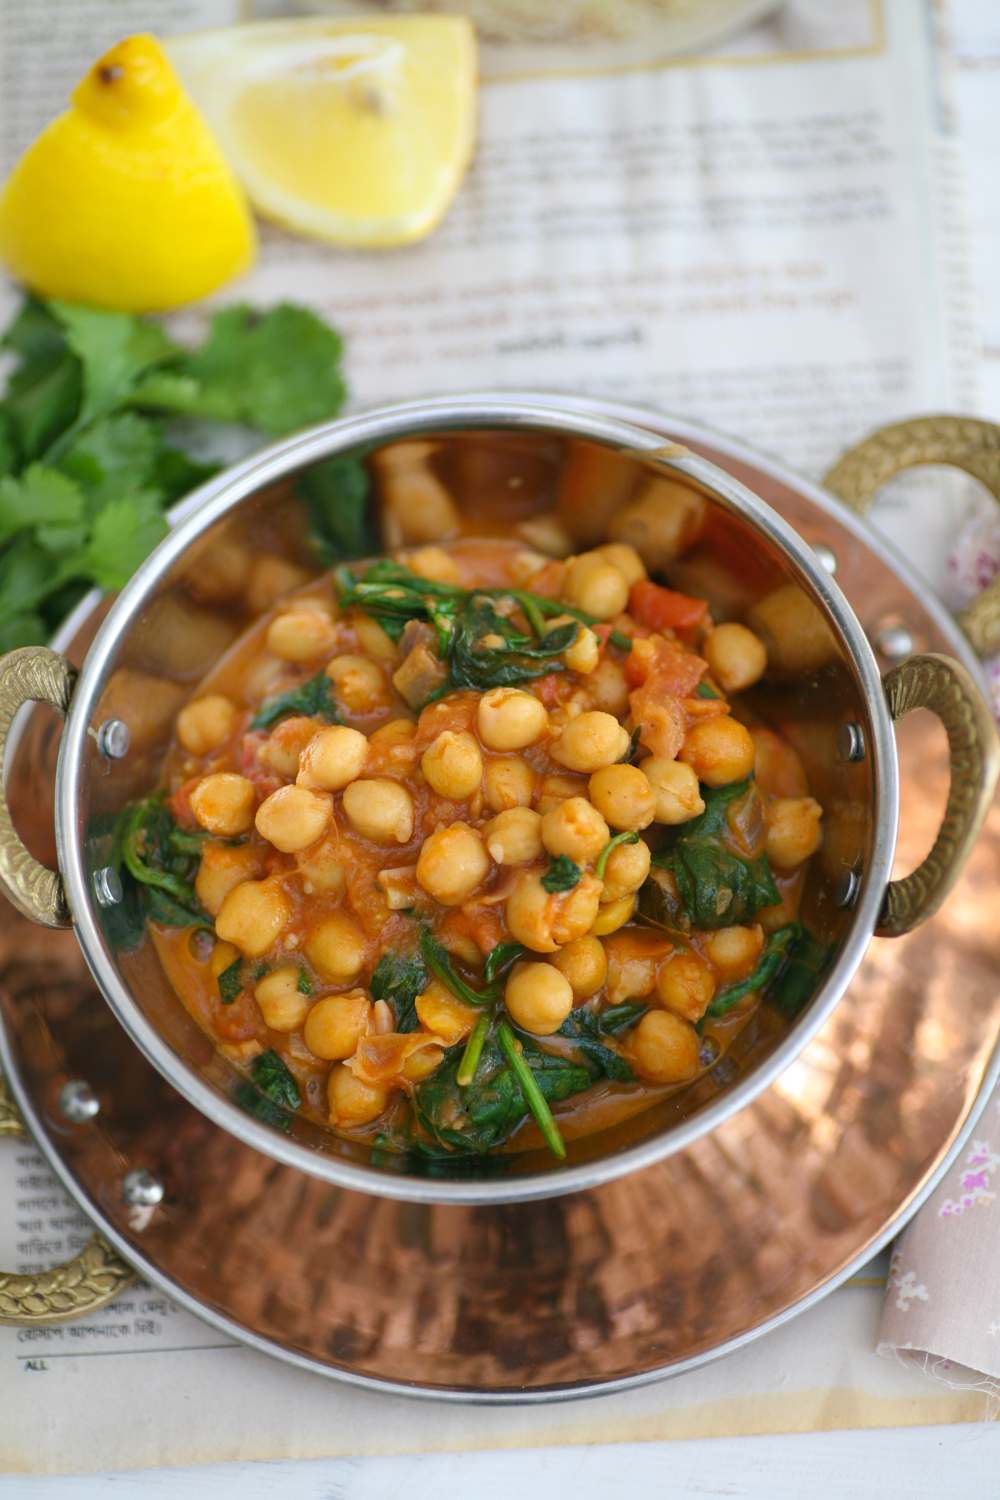
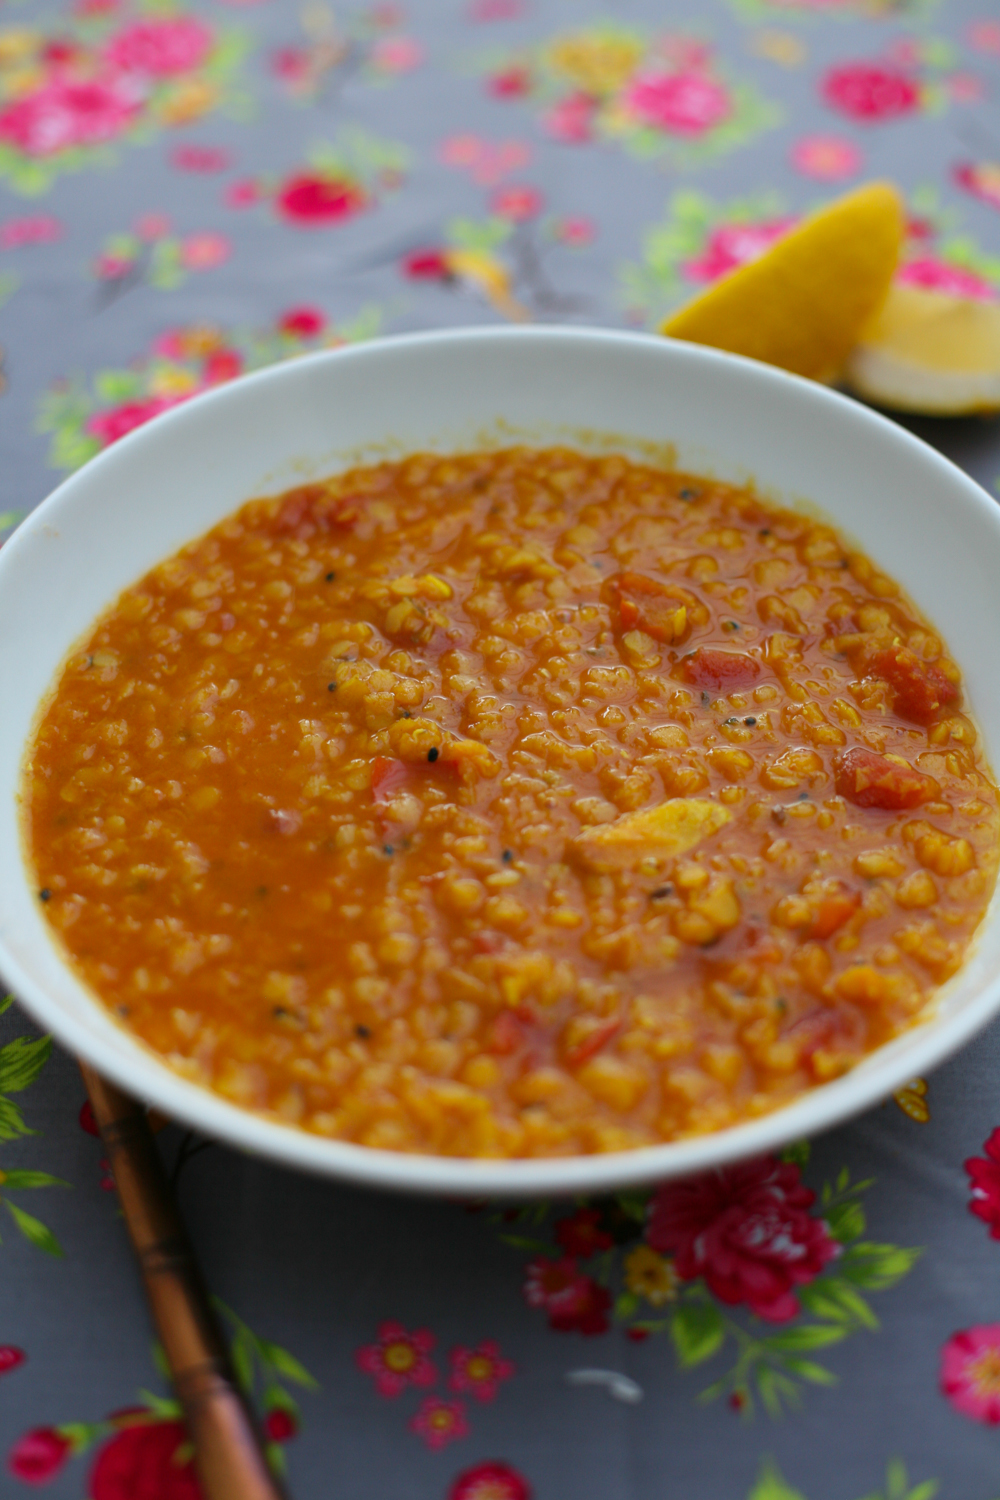
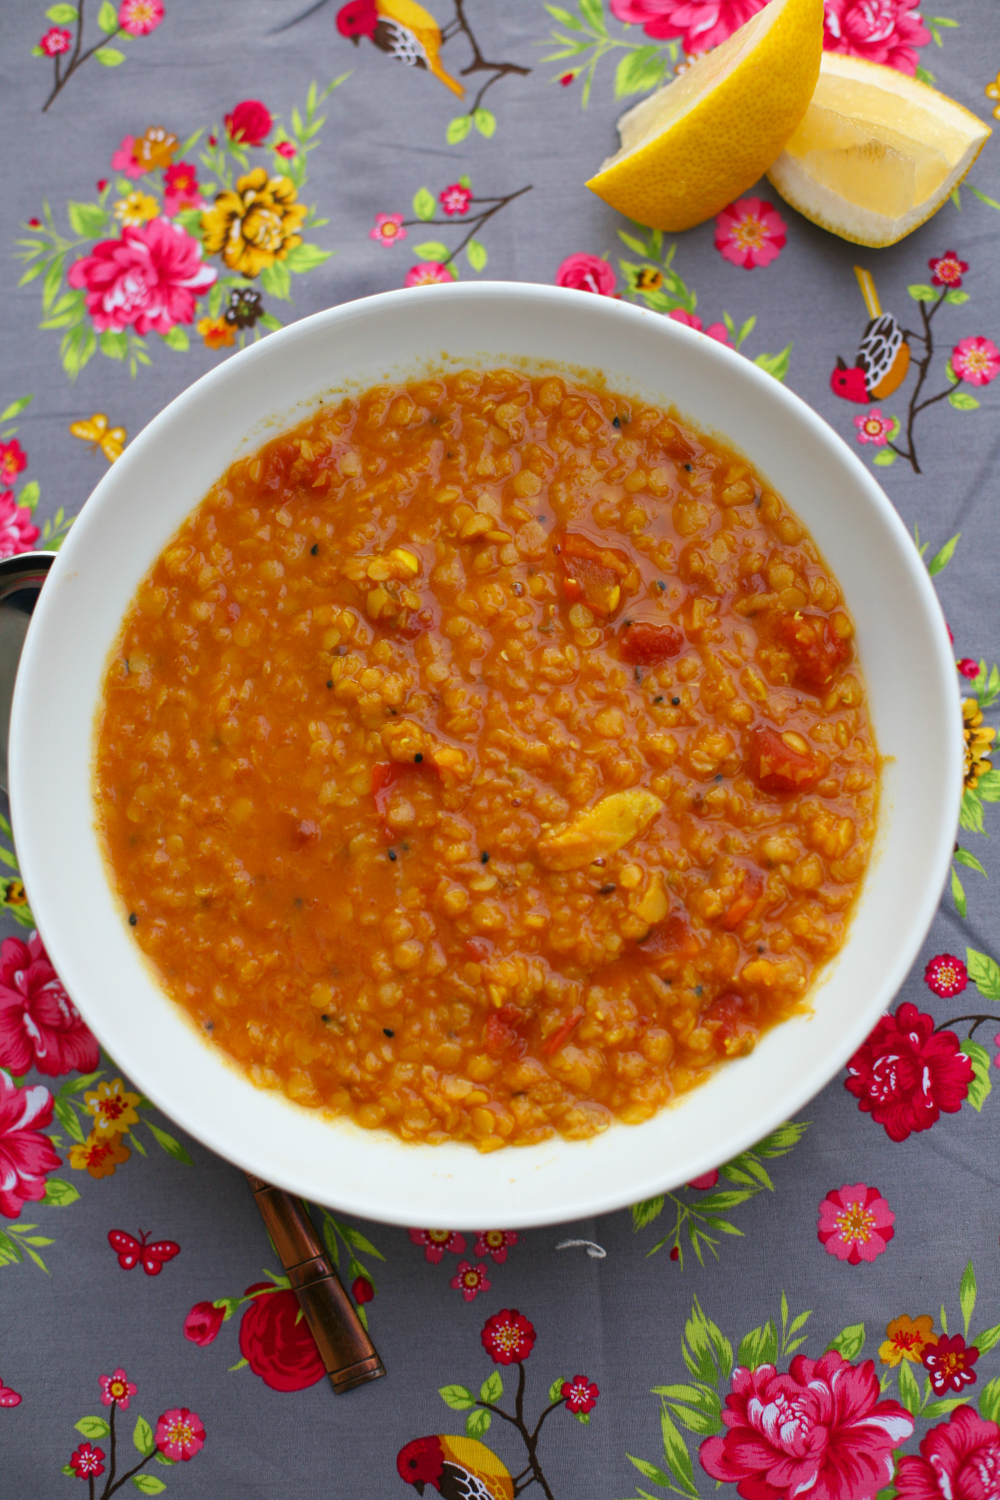
To get you started how about having a look and trying one of my Sunday go-to dishes Bengali red split lentil dal or perhaps you are more of a meat eater then try one of my fav Mexican dishes – Mexican chilli beef with butternut squash.  Keeping on the theme of butternut squash how about this vegetarian curry using the squash as the star ingredient – butternut squash, lemongrass, coconut and spinach curry . If you have more of a sweet tooth then this one is rather good and even made it’s way into the Telegraph newspaper in the UK – chocolate, chilli and cinnamon fondants with cardamom chantilly cream. If you can’t find what you are looking for just send me an email or leave a comment and I will try and point you in the right direction or will come up with a recipe for you in a future post

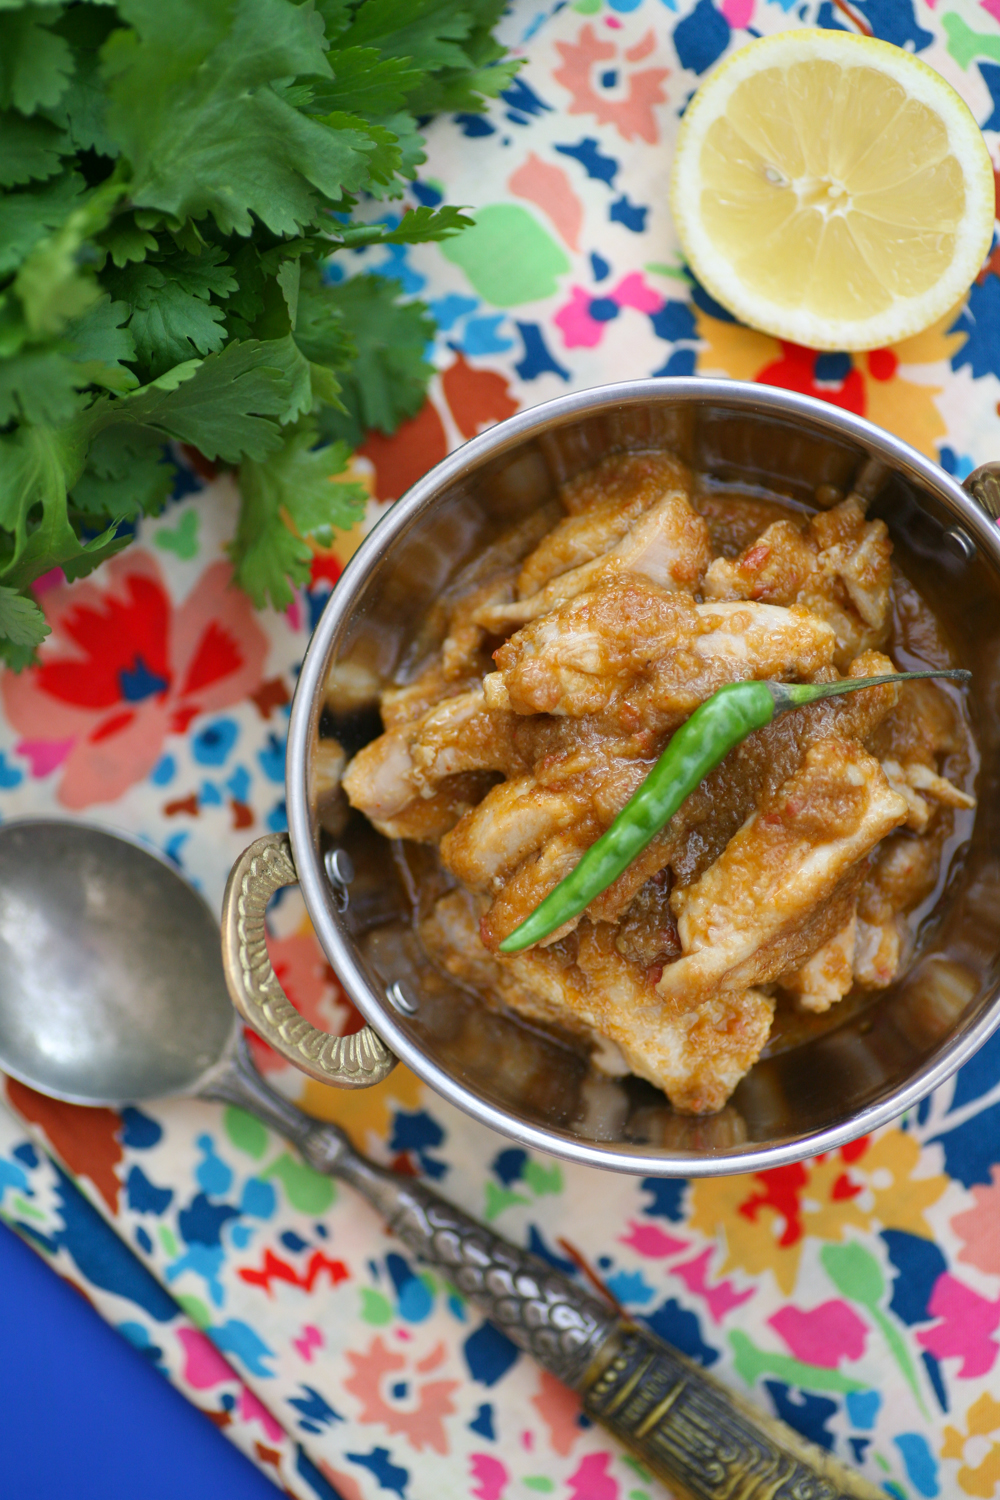
Today however I wanted to share a south Indian chicken recipe with you that actually originates from Chettinadu. As Bengal is famous for cooking with mustard, so Chettinadu is renown for using black pepper to heat their dishes. This dish is one with great heat and packs a punch. If you are feeling a bit low with a cold then I can assure you this dish will more than perk you up again. You need to make your own masala, which takes minutes, and is so worth it, and then the actually cooking of the dish is completed within 40-45 minutes max. I have another Chettinadu dish on my blog (which requires more ingredients than this dish), which you may also want to check out if this recipe turns out to be a hit for you. Let me know how you get on in the comments box below.

Chettinad Pepper Chicken

Serves 4-6 

3 tbsp olive oil

3 pods of cardamom, opened

1x 3 inch piece of cinnamon bark/dalchini

2 white onions, finely chopped

3 tomatoes, finely chopped

3 tsp ginger-garlic paste

salt

******** 

1.2 kilo of chicken thighs, on the bone (or whole chicken, skinned and cut into 10/12 pieces)

*********

Masala

4 dried chillies

4 tsp black peppercorns

3 tsp green aniseed *

3 tsp cumin seeds

3 tsp coriander seeds

*if you do not have green aniseed you can add fennel seeds instead.


  1. First warm the oil and then add the cardamom pods and the cinnamon bark. Move around the pan for 10 seconds before adding the onions and move around the pan so that they begin to bronze. Add a little salt at this stage. This will take about 10-15 minutes.
  2. Meanwhile heat a large frying pan and when the pan is hot add the masala ingredients and move around the pan for a minute. You will smell their wonderful aromas, but be careful not to let them burn. Take off the heat and then blend in your spice grinder/pestle and mortar. Place to one side
  3. Returning to the main pan, once the onions are lightly bronzing add the garlic ginger paste, tomatoes and the ground masala. You may need to add a little more oil at this stage. Allow the tomatoes to soften completely before adding the chicken.
  4. Now add the chicken and mix with all the ingredients. Add a little water so that a sauce is created and the chicken can cook easily. You will find the chicken naturally releases some water so only add a very little. Place a lid on the pan. Stir intermittently for the next 40 mins, adding a little more water if it becomes too dry. Taste test and add more salt if required.
  5. I often find it useful to let it rest for a while to allow the flavours to infuse and relax.


If you are cooking in advance, allow to cool completely before placing in the fridge. Before eating, remove from the fridge an hour before and then gently warm up. Do not add lots of water as it will naturally loosen up once it is heated up.


Prawn and Tamarind Curry

IMG_1830

Prawn curries are one of my favourite. Earlier this year another of my prawn recipes made its way into Delicious Magazine – see here – have you tried it yet? Decadent and spoiling, prawns are incredibly tasty, especially if they are of the king prawn variety. I am also a huge fan of tamarind, which has a very sweet and sour taste to it. So married together prawns and tamarind create a very satisfying meal.

IMG_1800

These beauties start off grey, but rest assured as soon as they are cooked in the oil they turn pink almost immediately. I leave the tails on, more for cosmetic reasons than for any other. The rest of the shell is removed, but not discarded (next week I will show you what to do with all those discarded shells and heads), and the black vein that runs along the prawns back is discarded completely.

IMG_1809


Other than peeling and deveining the prawns, this dish is incredibly quick to make and totally doable on a busy work week. Taking time to eat a delicious, comforting meal in the evening I think is so important. If you invest a little bit of time in preparation you really are rewarded with a memorable feast.

IMG_1838


Prawn and Tamarind Curry

serves 4

600g king prawns, peeled but keep the tails on, devein

1 tsp salt

1 tbsp tamarind paste

1 tsp ground coriander

1 tsp ground cumin

1/s tsp Kashmiri chilli powder

1/2 tsp turmeric powder

2 tbsp vegetable oil

5 garlic cloves, finely chopped

1 tsp grated fresh ginger

1 tsp salt

150 ml of boiling water

fresh coriander leaves to scatter when serving

  1. Peel, devein (make an incision down the back of the prawn to reveal a black vein, remove with a sharp knife and discard) and keep the tails on, scatter with the salt and then place to one side. Don’t forget to keep those shells and heads and I will show you how to make a magnificent prawn broth which turns into a prawn bisque next week!
  2. In a small bowl add the tamarind pulp, ground cumin and coriander, chilli powder and turmeric. Stir to form a smooth paste.
  3. Heat the oil in a pan on a medium low heat and then add the garlic and ginger. After a minute add the prawns and stir for a further minute so that they become a lovely pink colour.
  4. Add the tamarind paste and coat the prawns. Immediately add the boiling water and stir. Simmer gently for a further 5 minutes.
  5. Serve immediately with either rice, puri or other Indian flat bread.

So simple and yet utterly delicious

IMG_1829


Gnocchi with Butternut Squash, Garlic, Broad Beans and Crispy Sage and Kale

IMG_1319

The summer hols have started in my house. My daughters have weeks ahead to relax, explore, learn and grow. It’s a time to unwind and go at a more leisurely pace, no 6.30am wake up calls until September *does happy dance*. New additions to our family have arrived – two mini lop bunnies, so rabbit is firmly off the menu from henceforth.

IMG_1333

Picnics are wonderful but sometimes more of a proper meal at lunch time is required. This recipe is straightforward and although there are a couple of parts to bring together it really does not take long. I also love the bright summer colours of this meal, you can’t help but be happy when eating it. If you want to make it a morning activity though and involve your children/friends/partner then making your own gnocchi is really good fun. Here is my recipe.IMG_1335

I like to make kale crisps to add to this meal. Eleven minutes in a low oven and hey presto you have kale crisps. You can get creative as well and add cayenne pepper, soy, chaat masala, whatever takes your fancy. For this dish I have simply added a sprinkling of rock salt. By all means you can have the kale crisps in a bowl on the side, but I rather like the crisp aspect to the whole dish. It’s comfort food with a twist and they work well with the crispy sage. Broad beans are in season right now and I love to throw them in so many dishes. I prefer to shell them but I leave that to you to decide.
IMG_1324

Gnocchi with Butternut Squash, Garlic, Broad Beans and Crispy Sage and Kale

1/2 of a small butternut squash, skin removed and cubed to the size of the gnocchi

100g chopped kale

1 tbsp extra virgin olive oil

3 garlic cloves, roughly chopped

1 tbsp butter

40g shelled broad beans

350g potato gnocchi

salt and pepper to taste

handful of grated parmesan, optional

1. First cube the butternut squash into the size of the gnocchi. Boil in a pan of water along with the broad beans for around 10 minutes, or until soft but not mushy.  Rinse under cold water and leave to one side. If you need to shell the broad beans then do so at this stage.

2. Preheat an oven to 140 degrees fahrenheit. Meanwhile separate any stems from the kale and discard. Place the kale on a baking try and add the olive oil. Massage the oil into the kale and make sure that the kale is spread out evenly over the tray. Place in the oven for 11 minutes, by which time the kale will be crisp. If it is not then leave it for a minute or two longer. Keep a watchful eye over it as they can burn quickly. These kale crisps are a great snack but also rather lovely in this dish.

3. In a frying pan add the butter and when it is melted add the garlic. Move around the pan before adding the sage leaves. Allow them to cook on a low heat so that they begin to crisp.

4. Add the butternut squash and broad beans and coat them in the butter, garlic and sage.

5. Place the gnocchi in the pan and boil away for 1 minute or according to instructions. If you fancy making your own – here is my recipe.

6. Strain the gnocchi and add the pan with the other ingredients. Stir together for a minute, season to taste and plate immediately.

7. Sprinkle crispy kale over each serving with a scattering of parmesan as desired.


Simple Chicken Curry – when your spice cupboard is bare

IMG_1252

If you are starting out cooking curries or if you are running low on spices, then this is the curry for you as it only requires chilli powder – I tend to opt for the Kashmiri chilli powder for it’s deep red colour and its subtle heat. It also includes onions, ginger, garlic, tomatoes and chillies, which are pretty much fridge staples for me and I’m guessing you too! So it is ridiculously straightforward to make with minimum fuss.

IMG_1232

I like to use boneless and skinless chicken thighs for this curry, but breast meat is fine too – it’s really up to you. Like with most curries it can be cooked well in advance and then slowly reheated adding a little water if necessary. You can reduce the amount of fresh chillies if you want it less hot, but I find adding two fresh green chillies is fine for my 9 year old – I would cook a separate curry however for my 5 year old.

IMG_1246

Simple Chicken Curry

Serves 4

9 garlic cloves, roughly chopped

2 red onions, roughly chopped

2 inch piece of ginger, skin removed and roughly chopped

2 fresh chillies, roughly chopped

4 medium sized tomatoes roughly chopped

1 tsp of Kashmiri chilli powder

2tbsp water

*****

2 tsp groundnut oil

800g boneless and skinless chicken thigh, chopped into bite sized pieces

1 tsp salt

coriander to garnish (optional)

1. Using a blender add the garlic, onions, chillies, tomatoes, ginger and chilli powder. Depending on how juicy your tomatoes are you may need to add a little water to make the paste smooth.

2. Heat the groundnut oil in a pan and add the chicken. Move it around the pan for a couple of minutes so that it whitens. Remove from the pan with a slotted spoon and place to one side.

3. Using the same pan add the paste and gently fry for 45 minutes so that it thickens and allows the flavours to come through.

4. Return the chicken to the pan and add the salt. Simmer gently for a further 7 minutes, coating the chicken in the spiced tomato sauce.

5. Serve with a coriander garnish with either rice or flat bread.

IMG_1247


The Tastiest Spiced Chickpea Curry Ever

IMG_1186

The humble chickpea can provide the most satisfying of meals if it is mixed with a little magic, and in this case spices. The final note of adding chaat masala raises the game of this dish into one bursting with flavour that is both salty and sour. For those who have not come across chaat masala before it’s a spice mix that is commonly used in India, Pakistan and Bangladesh and normally includes many of the following: mango powder, black salt, asafoetida, pomegranate seeds, nutmeg, mint leaf, chilli powder, black pepper, salt, cumin, coriander and dried ginger. You can pick up sachet’s or packets at your local Asian grocers or any of the large supermarkets.  If you are feeling really adventurous you could make your own. Have a look at this lovely lady showing you how to do so .


Like many of the dishes on my blog this is very straightforward, filling, nutritious, tasty and kind on the wallet. My eldest daughter loves it (she just avoids swallowing the green chillies that I simply cut in half so are easy to spot) and my youngest….well she tells me she prefers ‘English’ food. I asked her like what and she answered ‘Like udon noodles, chicken, spring onions and soy sauce’. Oh dear!

IMG_1182

If you are UK based chances are that you’ll be on half term next week – if you have children that is. This dish ticks so many boxes and is perfect for an adult, or more sophisticated child eater. Next time your are in the shopping aisles of your local supermarket – think Chaat Masala, seriously you won’t regret it. A little bit of searching will reward you royally.

You heard it here first.

IMG_1174

 Spiced Chickpea Curry

2 tbsp groundnut/rapeseed oil

10 fresh curry leaves

1/2 red onion, finely chopped

1 tsp salt

2 tsp garlic paste

1 tsp ginger paste

2 small green chillies

1 tsp cumin powder

3 medium sized tomatoes, diced

500g chickpeas (tinned is fine)

1 tbsp yoghurt

1 tbsp tomato puree

150ml juice from chickpea tin/boiling water

125g fresh spinach

1 tsp chat masala

1/2 lemon, juice only

handful of fresh coriander to serve

1. Gently heat the oil in a deep frying pan and then add the curry leaves. After 20 seconds add the onion and salt and lower the heat to allow the onions to soften and not burn. After 5 minutes add the garlic and ginger paste along with the green chillies and stir into the existing ingredients.

2. Add the cumin powder and then add the fresh tomatoes and allow them to soften slightly before adding the chickpeas.

3. Add the yoghurt and tomato puree and stir into the chickpeas.

4. Add the chickpea juice and/or boiling water and leave until the liquid has reduced. This will take around 10-15 minutes.

5. Stir in the spinach, which will wilt almost immediately.

6. Take the pan off the heat and add the chaat masala and lemon juice and stir into the curry. Add a little fresh coriander on the top of each serving.

Relax, sit back and enjoy a very satisfying bowl of chickpea curry.

SaveSave


Vietnamese Pancakes – Bahn Xeo

IMG_0773

Savoury food for breakfast has always been my kind of thing. Other than the pain au chocolat craving I had when I was pregnant with my first, savoury food has always been my go to breakfast choice. As such Asian food in general is my idea of heaven. Curry for breakfast, a bowl of hot steaming Vietnamese pho or Vietnamese Bahn Xeo (Vietnamese pancakes), and I am in culinary nirvana. These kind of foods I could eat all day so I am not necessarily suggesting you start cooking Vietnamese pancakes before the school/office run but having the recipe in mind when you want to try something new at any time of day.

IMG_0791

Banh Xeo (pronounced Ban say-oh – see video below if you want to sound like a pro) are thin crisp pancakes made with rice flour, coconut milk (or beer in fact), turmeric, and water. Traditionally they are filled with both pork (thinly cut pork belly strips) and prawns, but for mine I have omitted the pork and used just prawns. If you are vegetarian you could equally use some fried tofu, which would taste really good. Xeo actually means ‘sizzling’ in Vietnamese and it is this sound that you want to hear when the pancakes are crisping up. They are also known as ‘happy pancakes’ and you’ll see why after you have tasted your first mouthful.

IMG_0766

I pick up my rice flour from my local Asian supermarket or you can easily buy it online, it’s also only a matter of time before the bigger supermarkets will start stocking it too. I rather love the packaging of the one that I use – it’s got happy flour written all over it!


IMG_0768

The turmeric gives the lovely bright yellow hue to the pancakes and I also put in coconut milk. Some central parts of Vietnam do not use coconut milk and instead opt for beer to give the pancakes an extra crispiness, but I personally love the coconut taste to the pancakes.

IMG_0788

Now eating the crispy pancakes can be done in a couple of ways. You can either simply use a knife and fork and eat it like that, or in Vietnam you are often provided with a spoon and large lettuce leaves along with fresh herbs such as coriander and mint. You break off a little of the pancake …..like so

IMG_0797

and then place it on the lettuce leaf, along with the herbs …..

IMG_0804

and then roll it so you are able to pick it up and dip it in your nuoc cham dipping sauce. Easy hey. I cannot stress how delicious this is, so much so that I am craving more of these writing this post. Seriously seek out rice flour and give these a shot – I promise you you won’t regret it.

IMG_0806


Vietnamese Pancakes – Bahn Xeo

Makes 7 Pancakes

Pancake batter

250g rice flour

1/2 tsp ground turmeric

pinch of salt

400ml coconut milk

250ml cold water

*******

1 tsp coconut/groundnut oil (to go into the pan for each pancake made)

 for the filling

350g king prawns, shelled and deveined

4 spring onions, finely sliced on the diagonal

125g beansprouts

a handful (per person) of mixed herbs: coriander, mint, thai sweet basil


Nuoc Cham Dipping Sauce

2 tbsp rice vinegar

5 tbsp fish sauce

2 small red chillies, finely chopped

2-3 tbsp caster sugar

2 garlic cloves, finely chopped

200ml cold water

1 lime, juice only (optional)

To Serve

3x cos lettuce, broken up into lettuce cups


1. First you want to make the batter. Mix all the ingredients together with a whisk so that the mixture is smooth and not too thick in consistency. You want to make it a similar consistency as if you were cooking regular European pancakes. Place to one side to rest ideally for at least 30 minutes.

2. To prepare the nuoc cham dipping sauce place the garlic and chilli in a bowl followed by the water, sugar, fish sauce, vinegar and lime (if using). Stir well so that the sugar dissolves. Place to one side.

3. Next prepare the filling. Place a small amount of coconut oil in a pan and cook the prawns on a medium low heat for 3 minutes, turning and stirring as you do so. Once they have become pinker in colour, transfer them to a plate.

4. Heat a large non-stick skillet or frying pan and when it is hot add 1 tsp of coconut oil (or ground nut oil) and then ladle in one spoonful of the pancake mixture. Move it around the pan immediately so that it is completely covered. Lower the heat and let it cook for 3 minutes.

5. Place some beansprouts over one half of the pancake, along with some spring onions and place a lid on the pan for a further 2 minutes.

6. Now remove the lid and place the prawns on top of the beansprouts and spring onions. Cook for one more minute checking to see that the underside of the pancake is beginning to bronze slightly and crisp up. Place some fresh coriander, mint, Thai basil on top of the prawns and then fold one half of the pancake over the other. Leave to cook for 20 more seconds and then place on a serving plate with more fresh herbs and some lettuce cups.

To Serve:

Serve immediately when it is hot. Cut a bite sized portion off the pancake and place on a lettuce leaf. Add a few more herbs and then roll so that you can pick it up and dip it into the nuoc cham dipping sauce.

The video below shows you how to eat it.


Tomato and Garlic Red Lentil Dal

IMG_0701


This recipe is for all of you lovely people out there who claim you don’t have time to cook. It is super quick, satisfying and great for cold winter nights. It literally takes no longer than 15 minutes to cook from beginning to end. To be fair it is very similar to this dal of mine although it differs in that it has a tin of tomatoes in it, loads of fresh whole garlic (great for ridding those horrible colds and coughs we pick up in winter), and a sprinkling of cumin powder.

IMG_0702

I had a bunch of friends over for lunch the other day and as well as cooking some tasty winter salads had a huge pot of this on the stove. It seemed to go down a treat as there was very little left over once they had gone, another sign that it’s worth giving it a go.

IMG_0700

I like to add a splash of lemon juice liberally at the end, but it’s up to you. Like with all dals they can be made more soupy or firmer depending on personal choice. For this dal I like to make it more soupy so that I can spoon it out of a bowl. If you are cooking it with rice and another dish then maybe you want to add less water. I never really measure the water that goes into it. I always go on how it looks, so my advice is to put in enough water so that it covers the dal by half an inch and then keep adding more boiling water once  the water has soaked up. It’s a winner and so simple. Give it a go and leave me a comment below.

IMG_0697


Tomato and Garlic Red Lentil Dal

Serves 4-6 (4 as a main 6 as a side dish)

300g red split lentil

water, enough to cover the red lentil

1 tbsp groundnut oil

5 (or more) garlic cloves, gently crushed but kept whole

1 tsp panch phoron

1 tsp turmeric powder

1/2 tsp cumin powder

1 tsp salt (to taste)

400g tin of tomatoes

1 lemon, quartered – optional to serve

1. In a deep pan place the red lentils and cover with cold water. Gently wash the lentils using your hand and pour out the murky water. Repeat three times.

2. Add boiling water to the red lentils and cover so that all the lentils are submerged by 1/2 inch. You can add more boiling water once this has soaked up if need be. Boil on a gently heat, skimming off any white residue that comes to the surface. Stir at intervals so that all the lentils cook through and turn from orange to a more yellow colour. Add more boiling water if you prefer it to have a more soupy consistency.

3. In a separate pan heat up the oil and then add the panch phoron. Once they start sizzling add the garlic and move around the pan. After a minute add the turmeric and cumin powder. Keep on a low heat, making sure the garlic and spices do not burn.

4. Add a spoonful of the now yellow lentils to the panch phoron and stir into the spices. Pour the contents of this pan into the pan with lentils and stir in thoroughly. Add a little water to the saucepan to make sure the spices pan is now clear of spices.

5. Add salt to taste and the tin of tomatoes and cook on a low heat for 5 minutes, or until the garlic has softened.

Voila. That simple. Enjoy.


Vietnamese Chicken Herb Salad

IMG_0254

When time allows I enjoy getting my weekly fruit and veg from my local market. Thankfully I live a short hop, skip and jump away from a seriously good one in West London, where the stalls are bursting with colourful produce and the stallholders have an infectious energy and enthusiasm for their produce. Bowls of fruit and veg go for £1 and when you buy herbs it’s two large bunches for a £1 – to ask for one just won’t do – so I invariably  end up with rather a huge amount of coriander, mint, parsley and dill.

IMG_0233

Dill, mint and coriander remind me of fond times in Vietnam – the food is so fragrant, largely due to mint and dill being in so many dishes, Cha Ca La Vong being a perfect example – you can see the recipe here. As I ended up with two huge bundles of cos lettuce, I decided to create a Vietnamese inspired chicken salad for our Saturday lunch. Something that could be thrown together quickly and that would appeal to the whole family.

IMG_0245

It was a success and we polished it all off in one sitting. Since then I have cooked it again (I still have lots of herbs to get through) and photographed it for you so that you too can prepare it at home. The dressing I use for the salad is the typical Vietnamese dressing of nuoc cham, which adds zing and sweetness, the perfect combo.

IMG_0237

Vietnamese Chicken Herbed Salad

Serves 4

450g chicken breasts

1 tbsp olive oil

black pepper

large cos/romaine lettuce, 6 leaves

handful of fresh coriander

handful of fresh mint leaves

handful of fresh dill

1 red chilli, finely sliced

2 spring onions, cut on the diagonal

**********

Nuoc Cham Sauce

1 tbsp fish sauce

1 tbsp rice vinegar

1 lime, juice only

1 garlic, finely chopped

3 tbsp water

1.5 tbsp white sugar

1. Cover the chicken breasts in the olive oil and season with a little black pepper. Meanwhile heat a griddle/cast iron pan and when it is hot place the breasts into the pan and bronze on each side for just under 2 minutes a side. Place on a baking tray in a preheated oven 180 degrees for 20 minutes.

2. Break off the lettuce leaves and cut into mouth size chunks and place in a large mixing bowl. Add the dill, mint and coriander leaves along with the finely sliced red onion, spring onions. If serving to children as well slice the red chilli and place in a separate side dish. Mix together gently using your hands.

3. Prepare the nuoc cham sauce by mixing all the ingredients together. If it needs to be a little sweeter add some more sugar, if you prefer it more sour add more lime.

4. Pour half the dressing over the salad and gently toss. Pour the remaining dressing in a small jug so that you can add more dressing over the individual salad portions as needed.


Tlayudas – Mexican Open Pizza and Homemade Guacamole

IMG_7052

Homemade guacamole packs a punch well above the bought stuff.  I know this my trade mark line (yawn yawn!), but it really is a breeze to make and is so tasty you’ll be wishing you had bought more avocados. As well as being a moreish dip – I kid you not, if I leave the room with a bowl of guacamole and tortilla chips, when I return the contents of the bowl will be clean – it’s also the perfect filler for the Mexican pizza Tlayudas, pronounced something along the lines of (clae-yoo-das).

These pizzas can be made with Middle Eastern flat breads/pittas a supply of which I always have in my freezer. It’s simply a case of piling on all the ingredients, with the flat breads sitting directly on a frying pan and then folding them over slightly to give the appearance of an thick taco. You can fill the flat breads with whatever takes your fancy, however I find that guacamole; shredded, poached chicken; mozzarella; pecorino; spiced sun blushed tomatoes; spinach; tarragon and rocket really hits the spot.

Be warned eating this is not a tidy pastime. However, you can get seriously involved and at one with your food.

Let me know if you give them a whirl and leave a comment below.

IMG_7036

Homemade Guacamole

adapted from Thomasina Miers’s book Mexican Food Made Simple

Serves 4

1/2 a red onion, finely chopped

2 serrano green chillies (1 if you prefer it less spicy), finely chopped

3 large ripe avocados, stoned and skin removed

1-2 limes, juice

pinch of rock salt

handful  of freshly coriander, chopped

black pepper

1. After finely chopping the red onion and chillies (I tend to leave the seeds in to give it that extra kick) place them in a bowl and  mash them together a little before adding the avocado. If you don’t have a pestle and mortar I find a good sized bowl and an end of a rolling pin work really well.

2. Add the juice of one lime and stir well into the guacamole, along with the salt, pepper and the chopped coriander.

3. Taste and add the juice of a further lime if needed – down to personal choice. I love it limey so tend to add two.

4. Give a good stir and spoon into a serving bowl/dish.  Place in the fridge whilst you are preparing the ingredients for the Tlayudas. Do not prepare too far in advance as the avocado will begin to discolour.

IMG_7059

Tlayudas, Mexican Open Pizza

adapted from Thomasina Miers’s book Mexican Food Made Simple

Serves 4

2 chicken breasts, poached and shredded

1 large bag of spinach

1 tsp of butter

4 large Middle Eastern flat breads

a bowl of homemade guacamole, see above

2 large mozzarella balls, torn into smaller pieces

16 slow baked tomatoes with chilli 

2 handfuls of rocket

1 handful of fresh tarragon

rock salt and pepper

pecorino or cheddar cheese for grating

1. Poach the chicken (in boiling water for up to 20 mins) and then shred it using a fork.  Place to one side.

2. Place a saucepan on low heat and add the butter. Once it has melted add the washed spinach and cook for a minute until the spinach just wilts. Remove from the pan and strain the spinach, pressing down firmly with a spoon so that the water is removed as far as possible. Place to one side.

3. Heat up a large frying pan and when it is hot add a flat bread and press down gently. Sprinkle a drop of water and turn the flat bread over. Now you need to work quickly. Spoon on a generous helping of guacamole followed by the chicken, mozzarella, slow baked tomatoes in chilli, spinach, rocket, salt, pepper and some grated pecorino/cheddar.

4. The flat bread will begin to crisp up quickly and the mozzarella begin to melt, so carefully begin to fold the flat bread over. With a spatula lift the pizza onto a plate and serve immediately.

5. Repeat until everyone is served.

Dive in and enjoy. Don’t forget the napkins.