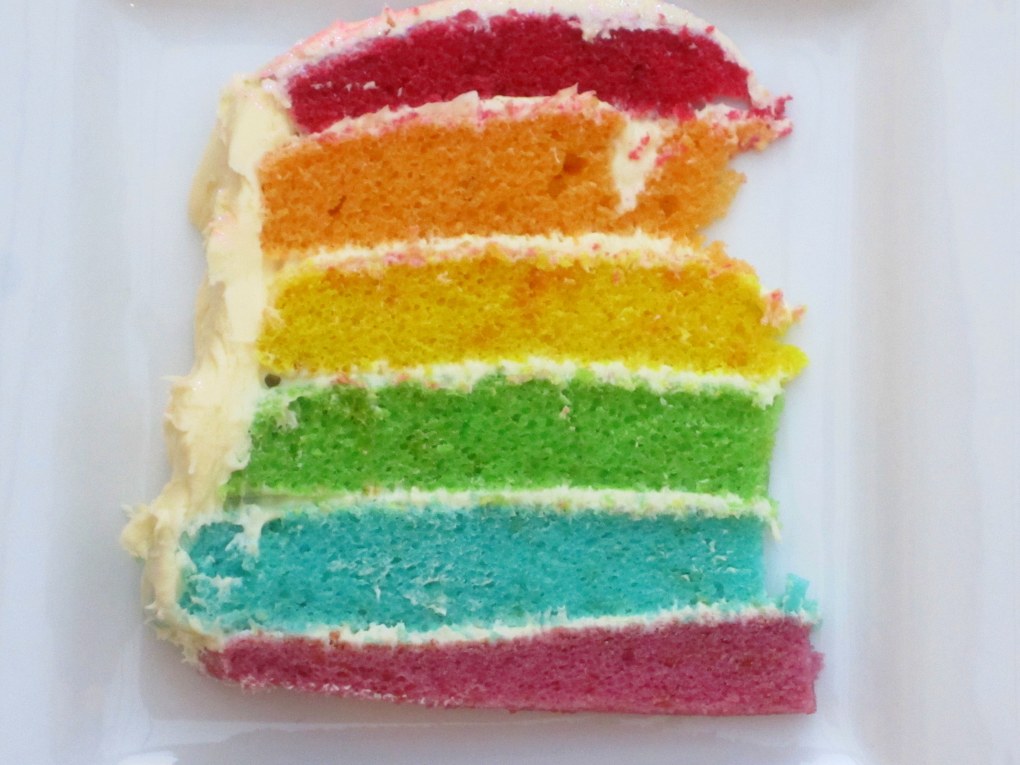
I really hadn’t planned on making a blog post out of a rainbow layer cake, hence the rather limited, and not particularly styled photos, but the outcome was somewhat unexpected in that it looked and tasted rather good and definitely had the appropriate wow factor (from a child’s perspective!). I have never really been a big cake maker, or eater of cake for that matter, largely due to the fact that I don’t have a sweet tooth and by and large I tend to cook what I like eating – mainly savoury dishes that have herbs and spices in them of course!
However, when it comes to children’s celebrations a cake is very much required and so I tend to step up (well actually perhaps that is a little lie as I sometimes pass the buck to my mother, father, or cousin who are far better cake makers than me!) and usually opt for a Victoria sponge, chocolate or banana and walnut cake or maybe even some little cupcakes.
This time however, I thought I would give myself a bit of a challenge and try making a rainbow layer cake. Hey even if the cake were to taste bad, the looks alone would make up for it – well that’s kind of what I was thinking anyway.
Thankfully the cake ticked all the boxes and was surprisingly fun to make. It really felt like creating a cake from an artists colour palate. I was also intrigued by the fact the recipe required soya milk. I don’t know why but I have never really had the need to drink soya milk, what with being a huge cows milk drinker (I need it when eating very spicy food). The taste of soya milk, however, completely surprised me as it was deliciously sweet and a genuinely lovely drink in its own right. I spotted soya milk with hazelnuts in the shops so will definitely be picking up a carton of that very soon.
So when you have a big celebration to prepare for try making this cake to wow the crowds, it won’t let you down.
This cake had been slightly ‘child’ handled by the time this photo was taken, however, I assure you it looked a lot more pristine to begin with.
So here is what you need to do.
Rainbow Layer Cake
Adapted from Kitchen Tested
(Melinda has some great step-by-step photos so check out her blog to get more of an idea)
325g plain flour
4 tsp baking powder
pinch of salt
225g margarine (I always use Stork for cake baking)
475g caster sugar
365 ml soya milk
5 egg whites
2 tsp vanilla extract
purple, blue, green, yellow, orange and red gel food colour (I use Dr Oetker’s food colours)
approx 550g cream cheese style icing (if you are not making your own and want to save time Betty Crocker’s tastes good – 2 pots should be enough, but it depends on how much icing you like in and on your cake)
vegetable spray/oil
1. Preheat your oven(s) to 180 degrees. If you have just one you will need to cook the sponges in batches but this will not take long as they are quick to cook!
2. Line six 9 inch (round) baking tins with baking parchment. Spray or rub in a little oil into each tin so that the sponge will easily come away from the parchment after cooking.
3. Ideally mix the margarine and sugar together in an electric mixer if you have one, or by hand, to form a cream.
4. Gradually add the egg whites to the cream along with the vanilla extract.
5. In a separate bowl mix the sieved flour, baking powder and salt and then slowly add the flour mixture and the soya milk to the margarine cream, alternating as you do so. (eg: flour, milk, flour, milk etc). The mixture will seem fairly runny at this stage but do not worry as it will firm up nicely when cooking.
6. Pour the mixture equally into six individual bowls and then add one food colour per bowl. I tend to use the whole gel packet per bowl so as to get a bright, vivid colour. Mix in thoroughly and pour into the six baking tins.
7. Place in the oven for 15 minutes and then leave to cool on a wire rack before gently turning out and removing the baking parchment.
8. The purple sponge needs to be at the bottom. Gently smooth the cream cheese style icing on its surface before adding the blue sponge and repeat by adding the cream cheese style icing. Then add the green, yellow, orange and red, repeating the same process as you do so. It does not have to be particularly neat as you will be covering up with the outer rim icing! Once all the sponges are in place continue to evenly spread the icing over the sides of the sponges so that no sponge is showing. You could make this outer icing any colour you fancy, but I thought white worked well and showed off the rainbow effect within perfectly.
Sprinkle with edible glitter or hundreds and thousands and serve to your guests.


5 thoughts on “Rainbow Layer Cake”