Bengali Khichuri – perfect for convalescing and detoxing

OLYMPUS DIGITAL CAMERA

If you are feeling a little under the weather, have the winter blues or just fancy some good old Indian comfort food, then read on, this post is especially for YOU>>>>>>>

Khichuri is a traditional Ayurvedic Indian dish, consisting of rice and lentils, that is given to those who are convalescing, detoxing  or fasting, it’s also really popular during puja time. Whilst it can be eaten in its pure form of rice and lentils (no onions or garlic), most khichuri that I have eaten consists of a vegetable or two thrown in as well. It’s the perfect dish to prepare if you need to use up any vegetables before they go off.  The Anglo-Indian dish of ‘kedgeree’ was inspired from khichuri and although it tastes very different the consistency is similar.

My eldest daughter (Big A) has been poorly recently and this is what I prepared for her as it is both nourishing and easy to digest.

There is no set rule on which lentil you need to use or vegetable for that matter. I tend to opt for red split lentils as they are the quickest to cook and need no soaking, although mung beans are also good to use (they do need soaking) as they are known for their ability to remove toxins from the body. My version includes carrot, courgette and and peas. Other vegetables would work equally well so if you have squash, marrow, cauliflower, pumpkin, green beans in the fridge (garden) pop one or two of them in and it will taste divine.

I have not included chilli in this dish as I was feeding it to my daughter, however, if you need a chilli buzz yourself just pop it in (whole or chopped) during  number 2 on the steps below.

OLYMPUS DIGITAL CAMERA

Bengali Khichuri

Serves 2-4

100g red split lentils

100g white rice (if using brown it will take twice as long!)

900ml boiling water

1 carrot, peeled and diced

1 large handful of fresh/frozen peas

1/2 courgette, partly peeled and diced

1 tsp of fresh ginger, finely grated

1 tsp garlic paste

4 green cardamom pods

1 tsp cumin seeds

1/2 white onion, finely chopped

1/4 tsp of garam masala powder

1/2 tsp turmeric

pinch of asafoetida/hing

1 tsp salt

freshly ground pepper

1 tbsp ghee/butter/or a splash of oil

fresh coriander to garnish

1. Rinse the rice and red spilt lentils a couple of times in cold water so as to get rid of any impurities and than place in a large saucepan with 900ml of boiling water and the chopped carrots and simmer gently for 15 minutes.

2. Meanwhile place the ghee/butter/oil in a saucepan and gently fry the onion. After 5-7 minutes add the cumin seeds, ginger and garlic and mix into the onions. Following this add the turmeric, garam masala, asafoetida and stir once again. Take a spoonful of the boiled rice and lentils and mix into the saucepan ingredients and then return it back into the main rice and lentil saucepan.

3. Stir all the ingredients together and add the courgettes and peas (or any other greens you need to finish up). Simmer for a further 5-7 minutes and add salt and freshly ground pepper to taste. You may find you need to add a little more water, but just enough to make sure that the rice and lentils do not stick to the bottom of the pan. It is not meant to be the same consistency as a soupy dal.

4. Serve into bowls with a sprinkling of fresh coriander.

OLYMPUS DIGITAL CAMERA


Wintery Warm Lentil and Goats Cheese Salad with a Fresh Basil dressing

OLYMPUS DIGITAL CAMERA

We’ve been having some glorious flurries of snow here in the UK, which has been rather exciting for us all. A blanket of snow makes London look magical and the silent, crisp air entices you outside to enjoy what nature has to offer. Whilst it is bitterly cold, returning to the warmth after some jollities in the fresh air is a welcome respite and I for one like nothing more than getting stuck into some cooking and baking. Big A and Little Z set about baking some biscuits, in fact lots of biscuits – I’ll blog this recipe once I have completely perfected it for you. Eating some warming, comforting food is totally necessary in this weather and lentils are the perfect food to tuck into.

The recipe today is great for the winter months, but can also be a fantastic dish in the spring and summer months eaten at room temperature and simply crumble the goats cheese instead of warming it. So if you are reading this in a hotter climate, fear not, you too can also cook the dish and be equally satisfied.

The trick though with this ‘salad’ is in the timing.  So if you are going to eat it warm please read the following.

1) A few hours before you intend to eat the salad place the tomatoes sliced in the oven and cover with caster sugar, salt and freshly ground black pepper. Put them on a low heat (100 degrees centigrade or less even) to gently slow roast away. You want the tomatoes to shrivel up at the sides and the slow roasting will give them an incredible depth of flavour. Seriously off the charts kind of taste. 

2) Place the sliced red onion rings on a baking tray covered in balsamic vinegar, caster sugar, olive oil, fresh thyme, salt and pepper and roast in the oven (180 degrees centigrade) for 25 minutes. If you do not have a separate oven to do this – as the tomatoes will need a lower heat – cook the onions first and then just heat them up in the low heat oven when the tomatoes are cooking to re-warm them.

3) Wash the lentils thoroughly then add cold water to cover them along with all the ingredients (listed below) and gently let them boil away for around 20 minutes. It is really important not to over cook them as they will become soft and soggy. You want to have them so that they still keep their shape.

4) Blend up the basil oil while the above is cooking away.

5) Plate up and whilst you are doing this place the goats cheese in a warm oven for a minute or two to warm it up then place on top of the lentils and drizzle with basil oil.

Whilst the ingredients length looks rather long…..please do not be put off as it really takes no time at all – bar the slow roasting of the tomatoes, which need to be cooked slowly over time. Everything, except warming the goats cheese in the oven, can be done ahead of time and then simply warmed up for a few minutes in the oven prior to serving.

Wintery Warm Lentil and Goats Cheese Salad with a Fresh Basil Dressing

adapted from Skye Gyngell’s recipe in her book ‘A Year in My Kitchen’

Serves 4-6

roasted tomatoes

6 plum tomatoes, halved

1 tbsp caster sugar

1 tbsp rock salt

liberally ground black pepper

———————————-

roasted red onions

5 red onions, sliced into circles

75g caster sugar

3 tbsp olive oil

3 tbsp balsamic vinegar

handful of fresh thyme

salt and pepper

————————————-

flavoursome lentils

400g lentils (I used a combination of green and small darkish green lentils but puy is also good!)

1 white onion, peeled and quartered

handful of fresh flat leaf parsley

2 garlic cloves, peeled

1 carrot, peeled and cut into three parts

2 inch piece of fresh ginger, peeled and cut into a few pieces

1 red chilli, kept whole

2 bay leaves

1 tbsp of fresh coriander stalks

———–

2 tbsp tamari (or soy sauce)

2 tbsp sherry vinegar

1 tbsp sesame oil

—————————————

basil oil

2 bunches of fresh basil

150ml extra virgin olive oil

1 garlic clove, peeled

salt and pepper

————————————

fresh goats cheese

6 slices of fresh goats cheese

—————

1) In the order of the above. Place the halved tomatoes into an oven proof dish and scatter with caster sugar, salt and pepper and place in the oven at a low temperature – 100 degrees centigrade works well – for up to 2 hours.

before slow roasting

OLYMPUS DIGITAL CAMERA

slow roasted to perfection!

OLYMPUS DIGITAL CAMERA

2) Slice the onions into circles and scatter in a roasting tin along with the balsamic vinegar, caster sugar,olive oil, salt, pepper and thyme and mix together well with your hands. Place in an oven at 180 degrees centigrade for 25 minutes.

before roasting

OLYMPUS DIGITAL CAMERA

3) Wash the lentils and then cover with cold water. Add the carrot, red chilli, onion, garlic, ginger, fresh parsley, bay leaves, coriander stalks and bring to the boil and then gently simmer for 20 minutes (or what is advised on the packet). Be careful not to over cook the lentils. 

lentils ready for the boil

OLYMPUS DIGITAL CAMERA

4) Place the fresh basil in a food mixer and blend. Slowly add the olive oil to the chopped basil and add salt and pepper to taste. If you prefer to have more of an oily basil then just add a little more olive oil. I rather like to have it so that you can add little dollops to the plate. (see below)

OLYMPUS DIGITAL CAMERA

5) Drain the lentils and remove the added ingredients as their job to flavour the lentils is now complete. When the lentils are still hot add the tamari, sherry vinegar and sesame oil and mix together.

6) Slice the goats cheese and place on an oven proof dish and place in the oven for a minute or two.

7) Plate up the lentils and add a generous helping of roasted onions, tomatoes and the goats cheese in the middle on the top with some dollops or drizzle of fresh basil oil and leave the rest in a separate bowl for guests to help themselves to more as they see fit.

8) Tuck in and enjoy along with some fresh bread on the side. It is absolutely heavenly. I know I often say that but seriously all the above effort is SO worth it.

Aside from the roasting of the tomatoes, this dish took me 30 mins to cook and plate up.


Vegetarian Ma Po Tofu


OLYMPUS DIGITAL CAMERA

In my first months of blogging, way back in the middle of 2011, I posted one of my absolute favourite recipes, Ma Po Tofu, which is a Sichuan classic and is seriously addictive – if you like chilli that is. It is incredibly easy to cook and after a manic day it is the perfect pick-me-up-food that takes no time to prepare. Over the years however, I have found that I am increasingly making it without the pork mince element and keeping it to a more vegetarian dish by including simply tofu and fresh (or sometimes frozen) spinach.

Recently in Hong Kong I began to judge eating establishments on how well they could cook Ma Po Tofu and Dan Dan Noodles as I had a acquired a taste for both dishes.

OLYMPUS DIGITAL CAMERA

Tofu I know divides opinion, but I am definitely in the camp of someone who loves it. It wasn’t an immediate love affair, but one that has grown over time to the extent that I always have tofu in the house, ready and waiting for me to make a last minute Ma Po Tofu dish or my other favourite tofu dishes, roasted harlequin squash with tofu, kale and coriander in a miso curry paste, black pepper tofu and soba noodles with tofu, aubergine and mango. Seriously give them all a try – I don’t think you’ll be disappointed.

OLYMPUS DIGITAL CAMERA

Tofu, or bean curd as it is also known, is hugely nutritious, versatile and a great vehicle for flavour. It’s rich in protein and low in fat, especially saturated fat. Yes, eaten on its own it is rather plain, but the point of tofu is to incorporate it with other flavours which it will help to enhance and lift. There are a myriad of different types of tofu, but the one I tend to use the most is ‘firm, silken tofu’ . I am going to be cooking some more tofu dishes over the course of this year, hoping that I may convert a few followers to the joys of tofu eating.

So here is what you need for the vegetarian version of the dish.

OLYMPUS DIGITAL CAMERA

Vegetarian Ma Po Tofu

Serves 2/3

349g silken tofu (or a similar amount)

2 large handfuls of fresh spinach

1 tbsp vegetable oil

1 clove of garlic, finely chopped

2 spring onions, chopped

2 tbsp of chilli bean sauce (Lee Kum Kee’s I find works really well)

125ml of vegetable stock (fresh or a cube)

1 tsp shaoxing wine

1 tsp of soy sauce (light or dark)

2 tsp of sugar

1/4 tsp of sea salt

a good pinch of crushed Sichuan peppercorns

1/2 tsp of sesame oil

1. Cut the tofu into small (2cm) cubes and place to one side.

2. In a shallow pan heat the vegetable oil and then add the garlic and spring onions, stirring for around 30 seconds. Then add the chilli bean paste and mix into the garlic and spring onions.

3. After a minute add the vegetable stock, shaoxing wine, soy sauce, sugar and salt and bring to the boil.

4. Add the spinach to the pan and gently fold into the hot sauce.

5. Once the spinach has begun to wither add the tofu and carefully spoon the sauce over the tofu, making sure not to break up the cubes. Leave to gently simmer for a couple of minutes.

6. Serve into a large bowl and sprinkle the Sichuan peppercorns and sesame oil and gently mix together.

Serve alongside small bowls of rice and hot cups of piping Jasmine/Chinese tea.

Perfect for this cold snowy weather.


Macha Soul tea with Janice Leung and Satay Prawns with Garlic, Lemongrass and Spring Onions

OLYMPUS DIGITAL CAMERA
This blog post has been a long time coming and for that I apologise to you all. I initially wrote the post on the plane coming back from Hong Kong and was rather chuffed with myself as I had, for once, hours to compose and fine tune it.  I was really satisfied with the end result, but then tragedy stuck as I accidently deleted it upon my return owing to the fact that I wasn’t very familiar with my new computer. So this post is very much an abridged version of the original, which in hindsight was probably far too long and rambling anyway.

During my recent visit to Hong Kong I was fortunate enough to meet up with one of Hong Kong’s most dynamic food bloggers, Janice Leung, over a delicious cup of creamy ‘matcha soul’ tea, at a charming little tea house called Sinmei in Sheung Wan. Like many of Hong Kong’s gem eateries and cafes it was hidden on the 5th floor of a commercial building away from the hustle and bustle at street level. It was an oasis of calm and serenity with its mix of vintage Chinese and European furniture giving it a somewhat boho shabby chic vibe.

IMG_7166

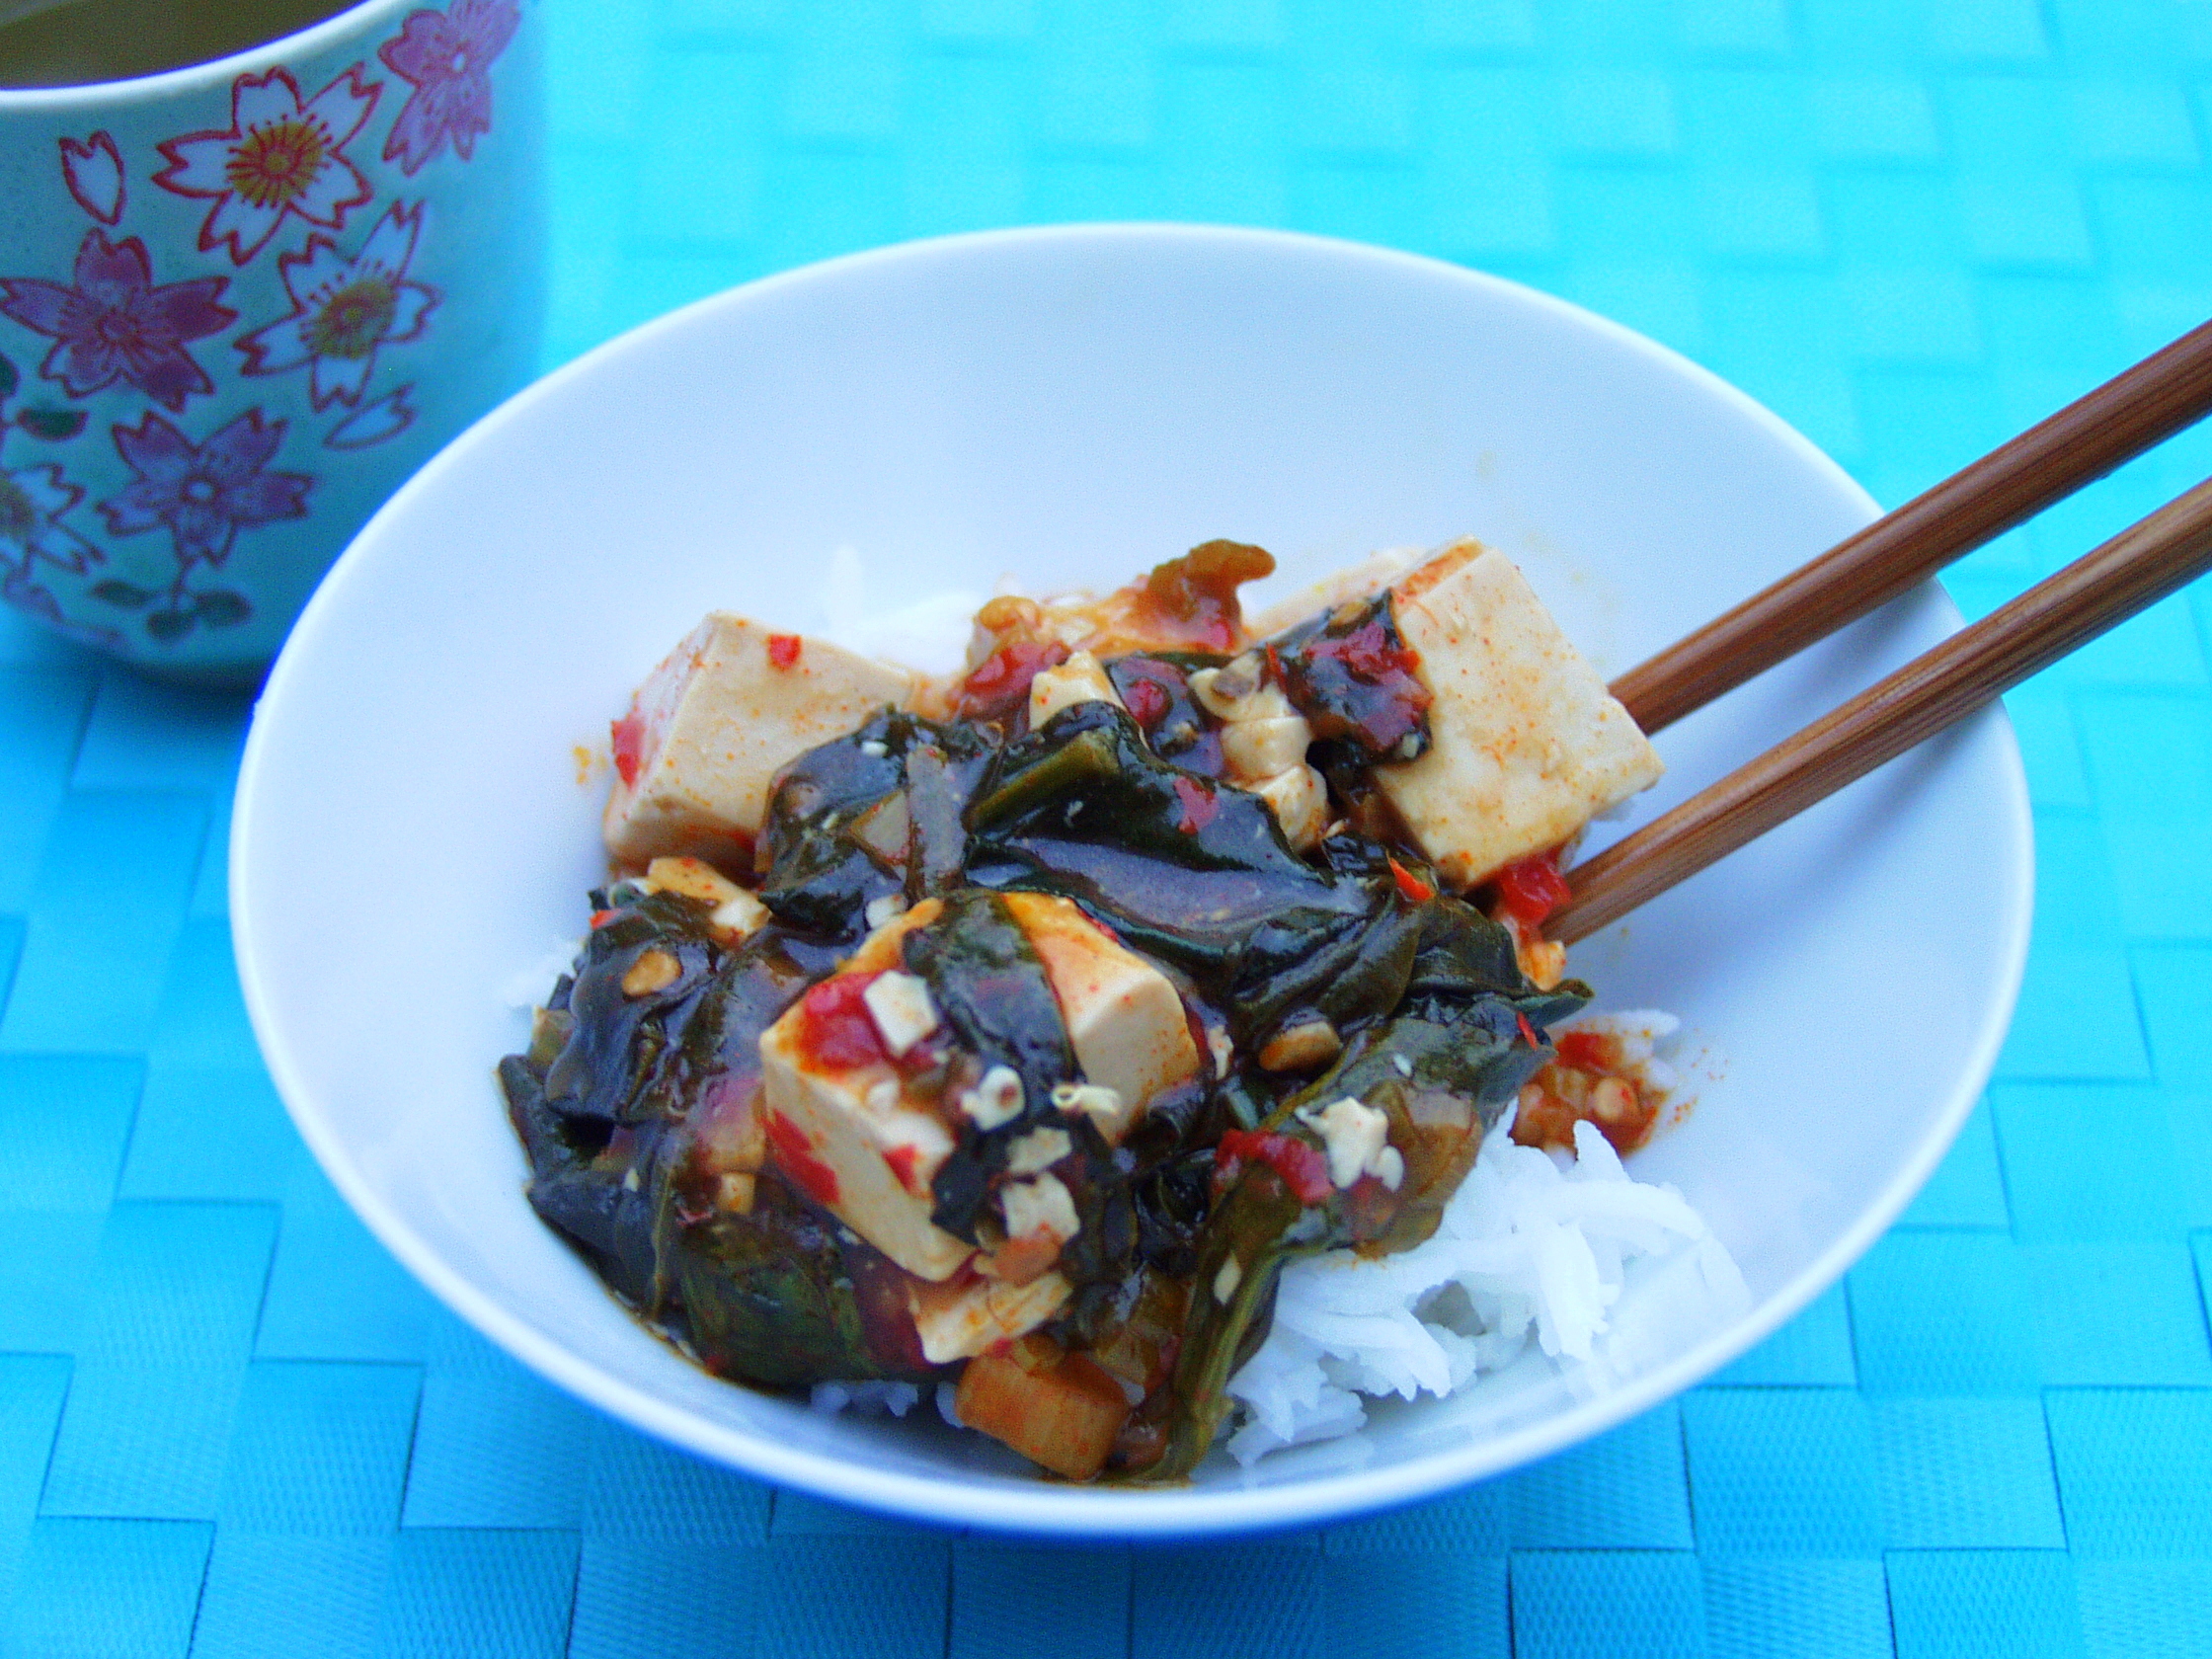
Matcha soul tea at Sinmei
Prior to setting up her blog: e-ting food, Janice worked as Assistant Editor at Luxe City Guides, so knows her way around Hong Kong (and a number of other cities in fact) better than most. Most recently however Janice, along with her business partner Vincent Poon, have set up Island East Markets which is Hong Kong’s answer to an organic farmers market.
Janice’s motivation for setting up such an enterprise was down to the fact that she found it increasingly difficult to source good organic produce in Hong Kong; the nearest place for her was in Tao Po, over an hours journey from her house, or the  few stalls on Central Pier 7. Typically the fresh fruit and vegetables you see being sold in the various street markets in Hong Kong comes from mainland China where little or no knowledge is known about where or how it was grown and whether pesticides or fertilizers were used.
IMG_6960
A typical Hong Kong fresh vegetable stall
There was definitely a gap in the market to launch such an enterprise and having spent time traveling the globe as well as living and studying in Melbourne Australia, Janice had seen the positive effect that having a local farmers market had on the community and the farmers alike. She was keen to create an environment where people would want to spend time getting to know the vendors, trying the different foods on offer and a place that families could wile away a few pleasant hours on a Sunday.  As well as edibles and fresh produce, there is handcrafted goods made by local artisans, face painting for the kids and talented local bands. I also particularly like the idea that she has organised for local chefs to come and do food demonstrations using the local food on offer at the market to create delicious dishes that people can replicate at home.
There were a couple of key factors, however, that were paramount to the markets success; firstly she needed the support from the local organic farmers in Hong Kong – namely in the New Territories and secondly she needed a site. For the former she was directed to a body of around 70 farmers who were members of the Organic Farmers Association in Hong Kong, which is similar to the Soil Association in the UK. Using this list as a starting point she introduced the idea to the farmers who responded positively. The second factor could have proved tricky had the Real Estate company Swire Properties not offered them a site in Quarry Bay every Sunday. It was an incredible stroke of good luck that allowed the market to breath life. On Sunday’s the road is closed off to traffic and stalls are set up and a relaxed vibe is allowed to resonate.
So far the market has received a positive reception by vendors and customers alike and although it was closed over the Christmas period it opens up again from Sunday 27th January so if you are living or visiting Hong Kong in the future make sure you take some time out on a Sunday to visit Island East Markets on Tong Chong Street and see for yourself Hong Kong’s answer to an Organic Farmers Market, I know for sure that I will be paying it a visit upon my return in April, in fact I can’t wait!
——————————————————
OLYMPUS DIGITAL CAMERA
The recipe for you today was inspired by a visit to a restaurant called ‘The Chairman’ on Kau U Fong in Central. Similar to Janice’s way of thinking the restaurant is also pro ‘local’ and sourcing premium produce from the New Territories, as well as placing emphasis on home-made as opposed to ready-made. Additives and MSG have no place in their kitchen and whilst the menu may not have as widest selection of dishes compared to some restaurants, the dishes that are on offer hit the mark.
The dish below was inspired by one such dish that I sampled in the restaurant. I hope that I’ve done credit to the original.  After a few false starts on the home-made satay sauce, I think I have found one that hit’s the high note. I hope you ‘ll agree.
OLYMPUS DIGITAL CAMERA
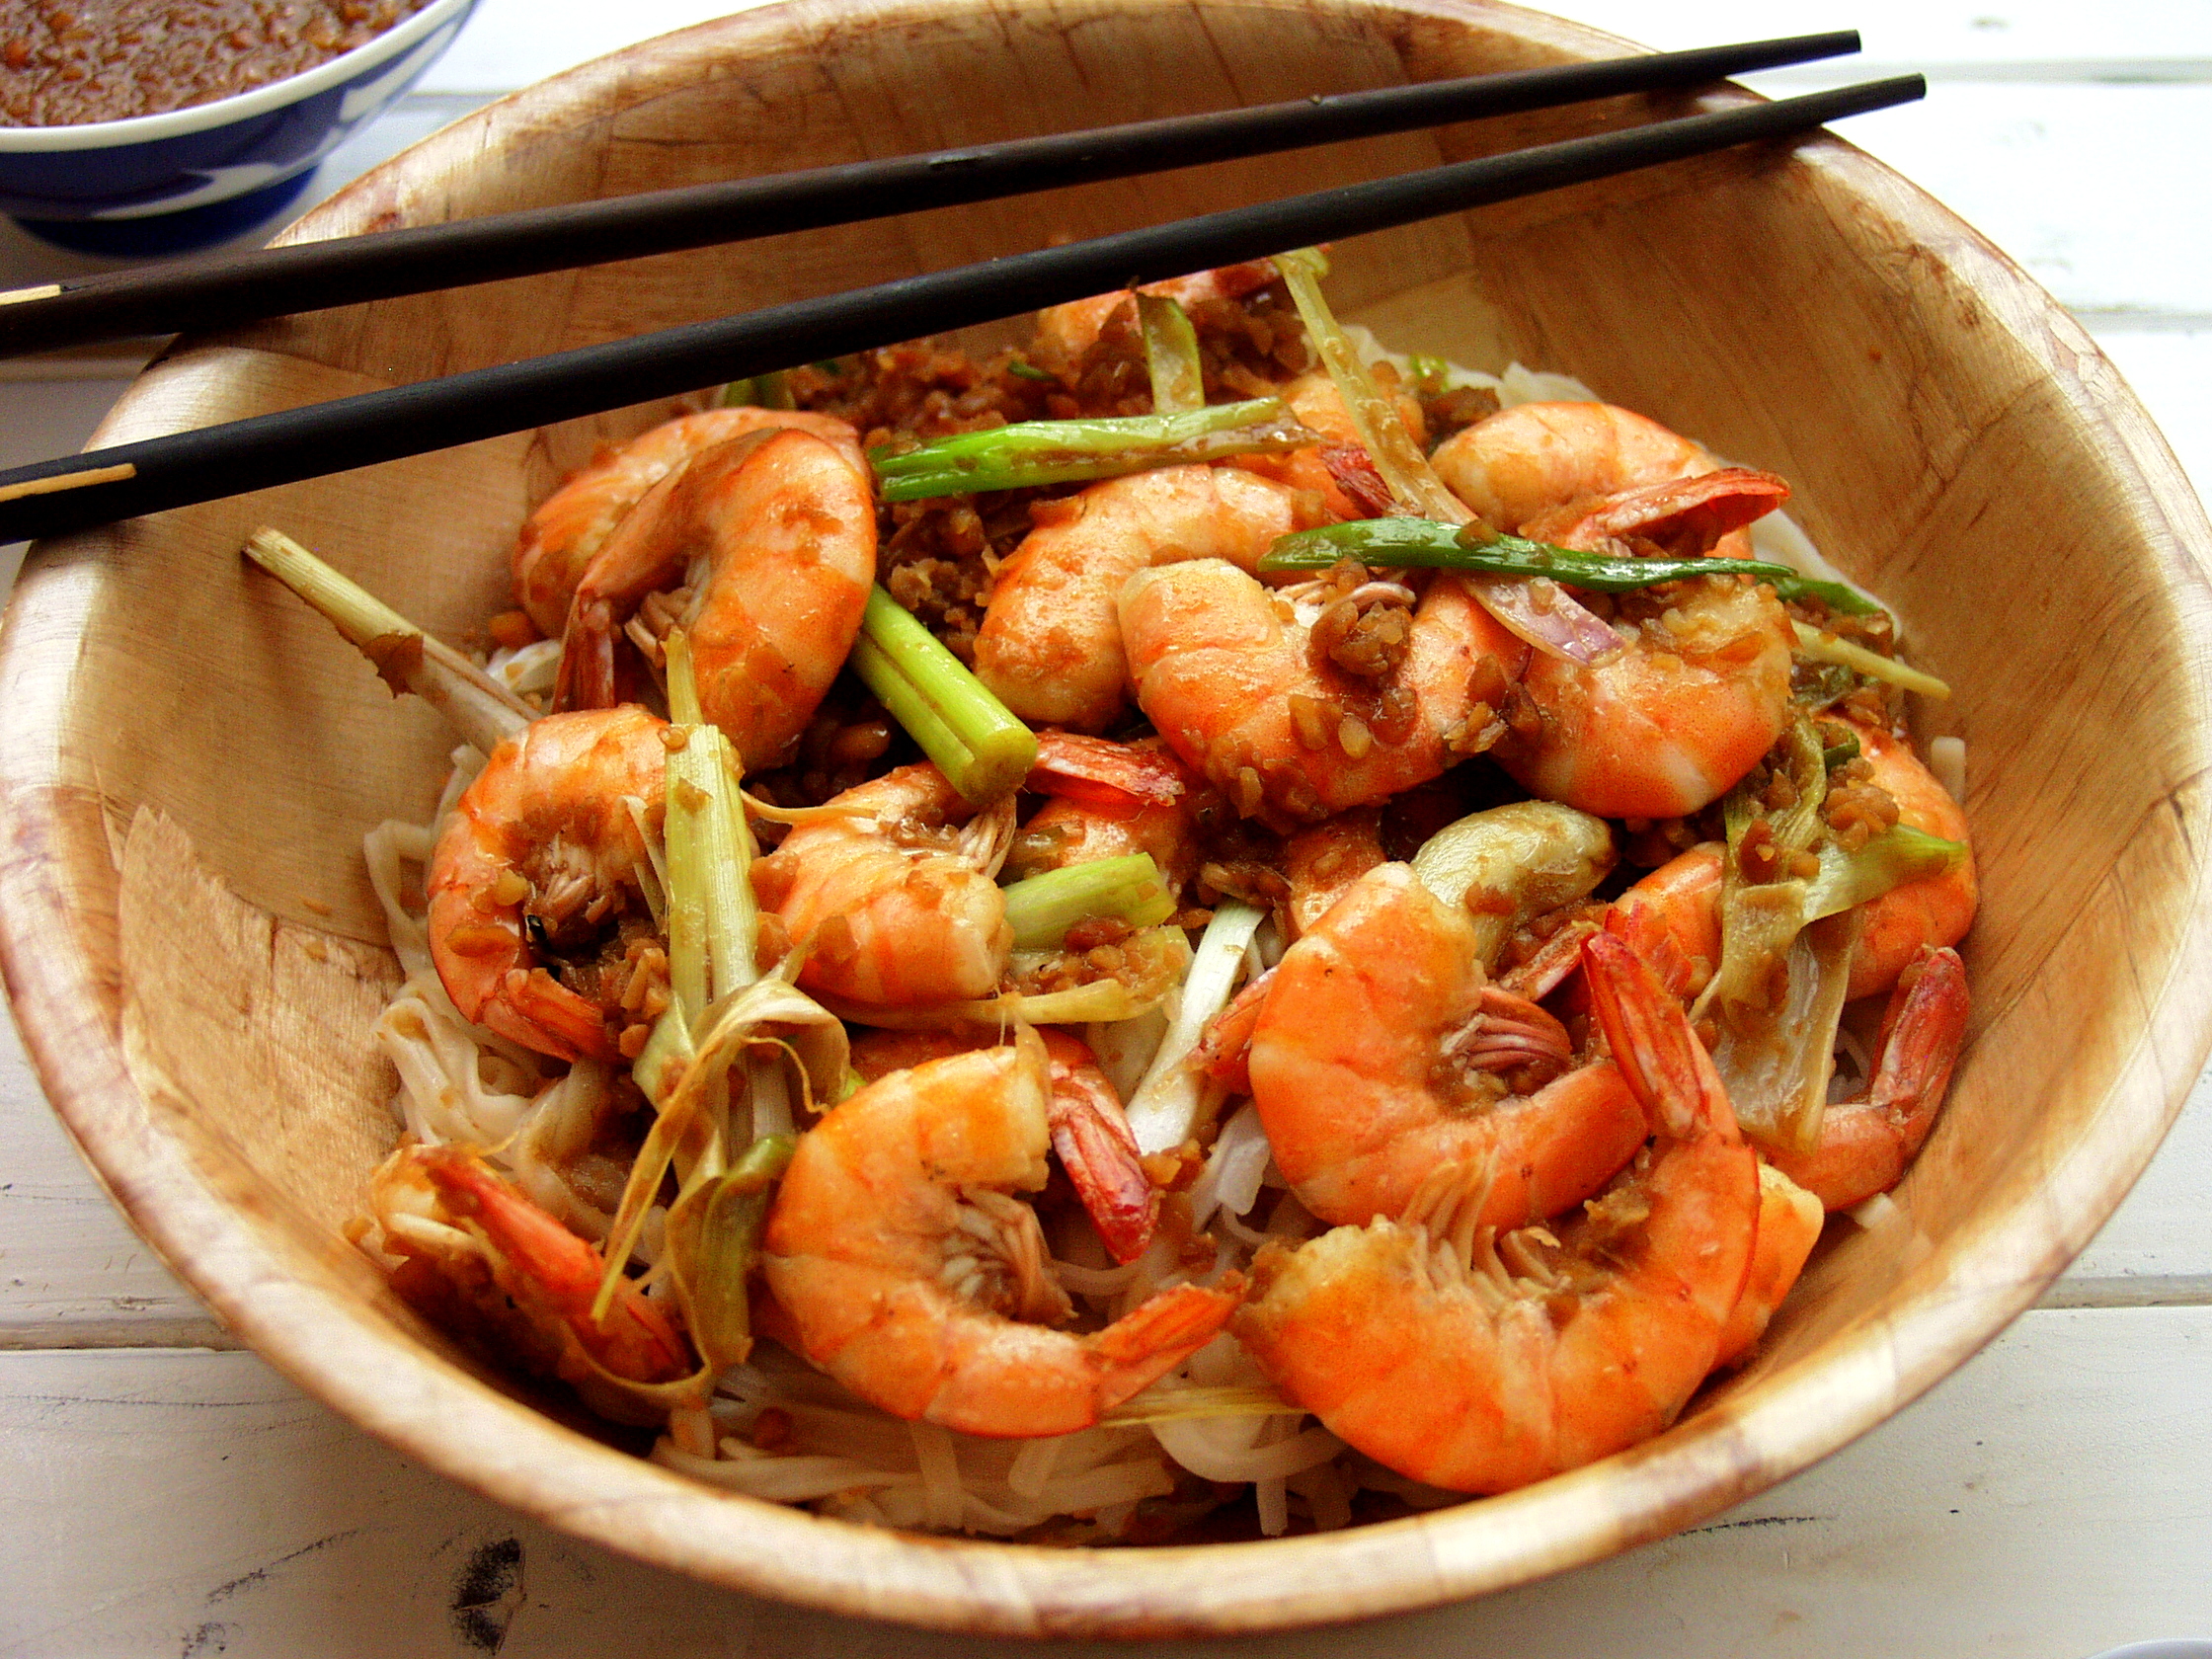
Satay Prawns with Garlic, Lemongrass and Spring Onions with Rice Noodles
Inspired by a similar claypot dish at The Chairman Restaurant in Hong Kong
Serves 4-6 (depending if you are serving other dishes as well)
320g fresh King Prawns (heads removed, shell on or just tails on – up to you)
2 tbsp of ground nut oil
7 garlic cloves, peeled (I like my garlic)
3 spring onions, chopped into 2 inch pieces
2 lemongrass, chopped into 2 inch pieces and halved (white part only)
250g rice flat noodles
Peanut Satay
250g dry roasted peanuts, unsalted
1 tbsp Kecap Manis (sweet soy sauce)
1 and a half tbsp palm sugar (or regular if you don’t have this)
1 tbsp of tamarind concentrate (or pulp soaked in 25ml of warm water – you’ll need to squeeze it through a sieve if you do it this way)
pinch of salt
50 ml ground nut oil
200 ml water
for the spice paste you will need:
4 small dried red chillies, deseeded (or more if you want more of a kick)
3 shallots
2 lemongrass (remove the green part)
3 garlic cloves
1 inch fresh galangal (or ginger if you cannot source it)
1. First make the peanut satay sauce. Coarsely grind the peanuts in a blender or food processor (or pestle and mortar) and remove and place to one side.
2. Next place the spice paste ingredients in the food processor and whizz until they are form a smooth as possible paste.
3. If you are using tamarind pulp soak in warm water for 10 minutes and then press through a sieve.
4. Place the oil in a pan and add the spice paste ingredients and let simmer gently for a couple of minutes before adding the crushed peanuts and stirring together.
5. Add half the water, tamarind concentrate (or pulp), kecap manis, palm sugar, salt. Stir in throughly.
6. Place the remaining water, and add even more if necessary, and let similar for a few minutes. Taste test to see if the salt/sugar elements have the right balance. Let cool and place to one side.
————————————————
7. Heat a pan with groundnut oil and when the oil begins to bubble add the garlic and lemongrass and let it gently sizzle for a couple of minutes, stirring occasionally.
8. Add two tablespoons of homemade satay sauce to the pan and stir into the garlic and lemongrass.
9. Place the prawns into the pan and cover throughly with the peanut satay. Add another one or two tablespoons as required. After a couple of minutes add the spring onions and after a minute take off the heat.
10. In a separate saucepan boil the rice noodles for the time specified on the packet – will not be longer than 5 minutes. Drain the noodles and add a further tablespoon of satay sauce so that the noodles are also coated in the satay.
11. Transfer the noodles to a large main dish and place the prawns, garlic, lemongrass and spring onions on top and then let guests/family serve themselves.
Please note homemade satay sauce can be stored in the fridge for a couple of weeks and in the freezer thereafter.
OLYMPUS DIGITAL CAMERA