Indian Inspired Peach Chutney

IMG_1299

Gloriously ripe and deliciously sweet juicy peaches are in season right now. They are great to eat fresh or in a salad perhaps with some mozzarella, parma ham and some fresh basil with a little olive oil and black pepper flecks sprinkled on top. I sometimes like to transform them into an Indian inspired chutney that is so versatile and delicious that you’ll be making pots of it in no time at all.

IMG_1313


As well as eating this chutney as a condiment to Indian dishes I also love it in sandwiches, with some cold or hot meats, fish, halloumi or any nice stinky and smelly cheese come to think of it. It’s perfect to take along on a summers day picnic – the sweet chilli notes adding that necessary kick to cheese baguette perhaps!

IMG_1309

If your peaches are beginning to turn, then this is another great way to use them up. If you like this recipe try making my mango and tomato one which all require the Bengali five spice known as ‘panch phoron’. You can find it in your local Asian grocers or you can easily make your own and store it in a sealed jar for months – here is my recipe.


Peach Chutney

1 tbsp groundnut oil (or equivalent)

1 tsp panch phoron – Bengali five spice

1 large dried chilli, broken into 2 or 3 pieces

1/2 tsp turmeric

5 large juicy peaches, stone removed and cut up roughly into 2 cm cubes

2 tbsp plain flour

50ml cold water

1 tsp salt

1 tbsp caster sugar

1 large storage jar

1) Heat the oil and then add the panch phoron, dried chilli pieces and turmeric. Move them around the pan for 20 seconds before adding the juicy peach pieces. Stir into the ingredients and simmer gently.

2) In a small bowl add the flour and cold water and stir until smooth. Add to the peaches in the pan.

3) Add the salt and sugar and continue to simmer until the peach chutney has thickened. This will take no longer than 6 minutes. If you require it thicker add a little more flour.

4) If eating on the same day, allow to cool completely before serving. If eating at a later date sterilise your jar by washing it thoroughly and then placing in a warm oven for 15 minutes. Add the chutney and once it has cooled it can be kept in the fridge for a couple of weeks.


Gong Bao Ji Ding – aka Chinese Chicken with Facing Heaven Bullet Chillies

IMG_1267

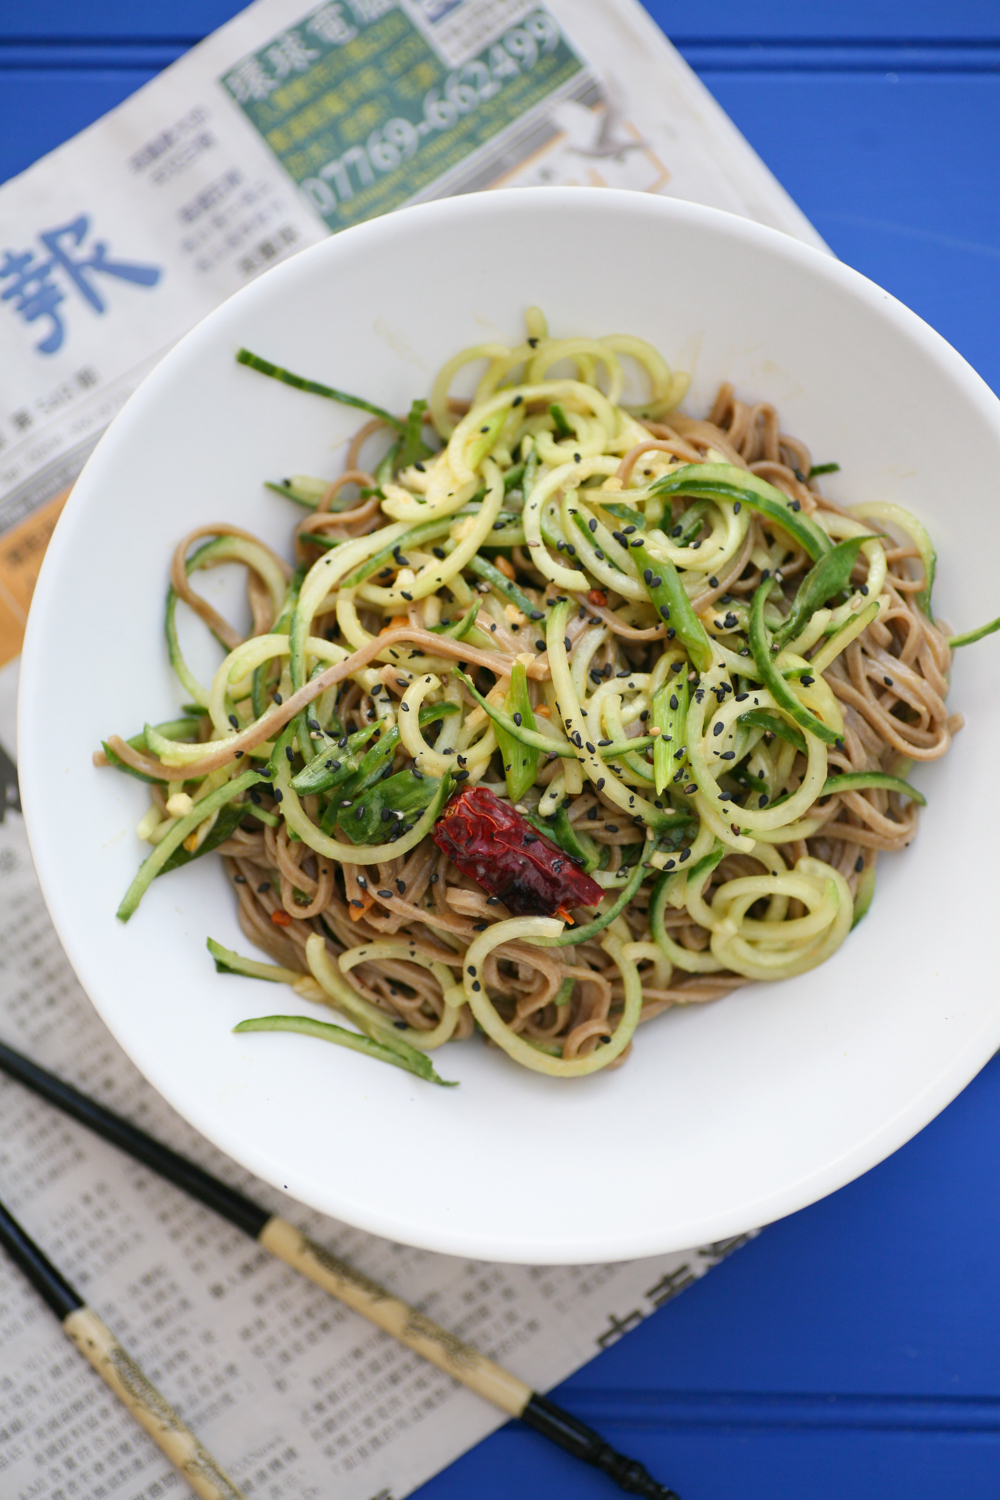
So the story goes that back in the Qing Dynasty the governor of Sichuan, ‘Gong Bao’, had a deep fondness for this dish so they named it after him. The ‘Ji Ding’ part translates as “chicken cut into small cubes” and to this day it is one of the most ubiquitous Chinese dishes eaten in both mainland China and in the West. It is sometimes referred to as ‘Kung Pao Chicken’ so keep a look out for this name as well.

IMG_1297

The lovely people over at World of Zing sent me some dried chillies recently with fabulous sounding names: Dragons Back, Facing Heaven Bullet and Chinese White Hunan. I pondered for some time over which one to sample first and facing heaven bullet won out. They are so called because the pepper grows with the fruit pointing upwards to the ‘heavens’ unlike most chilli peppers, which face downwards.

IMG_1290

Bullet in shape, they are often kept whole in cooking or cut in half once. Removing some or all of the seeds prior to cooking reduces the heat of the chilli, whilst still retaining a tantalising zing.  To give you some idea of heat, it is far milder than a Thai birds eye chilli.  It won’t be the case of running to the fridge for a glass of milk!

IMG_1278

This dish wins prizes on speed of delivery and flavour. Seriously even if you are shattered after a hard days slog this will raise your spirits. Give it a go and remember to come back and comment to let me know how you got on.

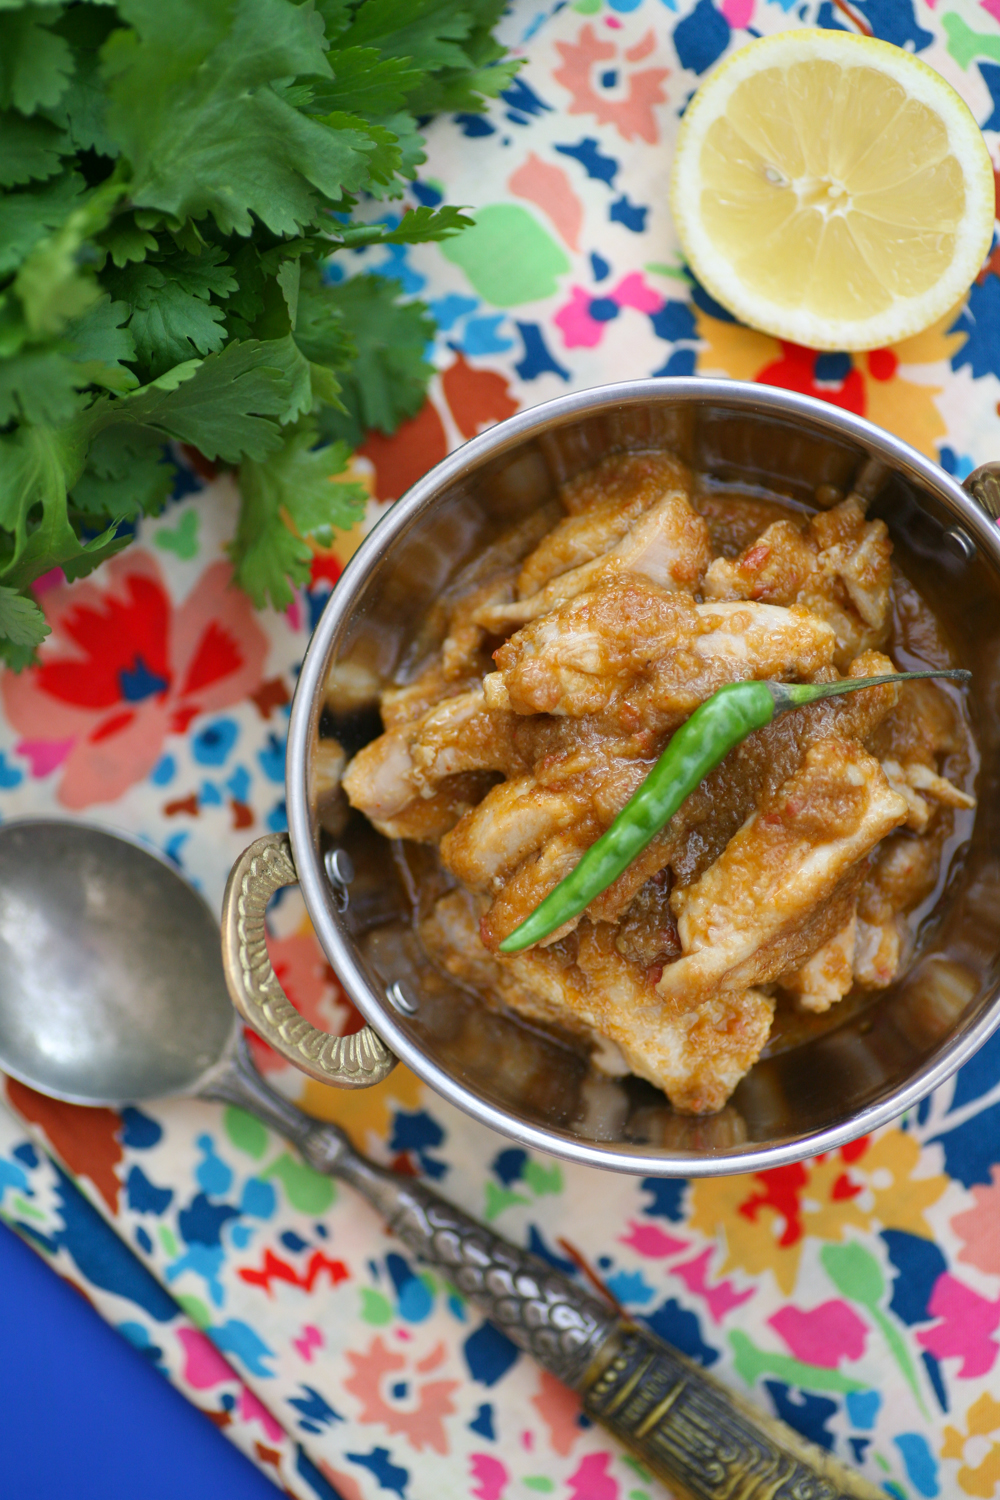
Gong Bao Ji Ding – Chinese Chicken with Facing Heaven Bullet Chillies

Serves 2-3

420g chicken breasts (works out as 3 breasts) skin removed, cut into strips then into 1 inch cubes

4 garlic cloves, roughly chopped

2 inches of fresh ginger, skinned and roughly chopped to the same size as the garlic

5 spring onions, white part only chopped to the size of the chicken cubes

10 facing heaven bullet chillies, halved and seeds removed

1 tsp whole Sichuan peppercorns

80g peanuts, dry roast them for 5 minutes

2 tbsp ground nut oil (or equivalent)

****

Marinade

3 tsp light soy sauce

2 tsp Shaoxing wine

2 tsp cornflour

****

Sauce

1 and a half tsp cornflour

1 tsp dark soy sauce

1 tsp light soy sauce

1 tbsp Chinkiang vinegar

1 tbsp caster sugar

1 tsp sesame oil

2 tbsp cold water

1. First prepare the chicken and then place in a bowl. Prepare the marinade in a separate bowl and then pour onto the chicken pieces and leave to rest whilst you prepare the rest of the dish.

2. Dry roast the peanuts in a frying pan for 5 minutes so that they bronze slightly.

3. Next prepare the garlic, ginger, spring onions and chilli and place to one side.

4. Prepare the sauce ingredients in a bowl and place to one side.

5. Heat a large pan or wok with the oil and when it is hot add the chillies and Sichuan peppercorns. Move them around the pan for 15 seconds before adding the cubed chicken. Keep the chicken moving around on a high heat so that it cooks through completely.

6. After a couple of minutes, and the chicken has whitened, add the spring onions, garlic and ginger continuing to move all the ingredients around the pan/wok. After 3 more minutes the chicken should be cooked completely. Cut through a large piece to check it is cooked through (if it needs a minute more continue cooking at a high heat), before adding the sauce and mixing it through completely.

7. Cook for a further minute before adding the peanuts. Coat them in the sauce and stir through a couple of times.

Serve immediately with some steamed rice.

Thanks to World of Zing for providing me with the chillies. 


Simple Chicken Curry – when your spice cupboard is bare

IMG_1252

If you are starting out cooking curries or if you are running low on spices, then this is the curry for you as it only requires chilli powder – I tend to opt for the Kashmiri chilli powder for it’s deep red colour and its subtle heat. It also includes onions, ginger, garlic, tomatoes and chillies, which are pretty much fridge staples for me and I’m guessing you too! So it is ridiculously straightforward to make with minimum fuss.

IMG_1232

I like to use boneless and skinless chicken thighs for this curry, but breast meat is fine too – it’s really up to you. Like with most curries it can be cooked well in advance and then slowly reheated adding a little water if necessary. You can reduce the amount of fresh chillies if you want it less hot, but I find adding two fresh green chillies is fine for my 9 year old – I would cook a separate curry however for my 5 year old.

IMG_1246

Simple Chicken Curry

Serves 4

9 garlic cloves, roughly chopped

2 red onions, roughly chopped

2 inch piece of ginger, skin removed and roughly chopped

2 fresh chillies, roughly chopped

4 medium sized tomatoes roughly chopped

1 tsp of Kashmiri chilli powder

2tbsp water

*****

2 tsp groundnut oil

800g boneless and skinless chicken thigh, chopped into bite sized pieces

1 tsp salt

coriander to garnish (optional)

1. Using a blender add the garlic, onions, chillies, tomatoes, ginger and chilli powder. Depending on how juicy your tomatoes are you may need to add a little water to make the paste smooth.

2. Heat the groundnut oil in a pan and add the chicken. Move it around the pan for a couple of minutes so that it whitens. Remove from the pan with a slotted spoon and place to one side.

3. Using the same pan add the paste and gently fry for 45 minutes so that it thickens and allows the flavours to come through.

4. Return the chicken to the pan and add the salt. Simmer gently for a further 7 minutes, coating the chicken in the spiced tomato sauce.

5. Serve with a coriander garnish with either rice or flat bread.

IMG_1247


Speedy Homemade Hummus

IMG_1206

 Ok ok I know, I admit I’m on a bit of a chickpea roll at the moment. Apologies to readers out there who don’t share my enthusiasm on the humble chickpea. I always have tins in my store cupboard so am constantly thinking of new ways to use them. This recipe is certainly not a new one – in fact I was convinced I had popped it up on my blog a couple of years back, but I was thinking of my baba ganoush recipe – click here, which if you haven’t tried….shame on you. Seriously give it a go. You’ll thank me for it.

IMG_1196

Going back to the more ubiquitous hummus – or the more affectionate name that we call it in our house ‘whole mouse’….it is equally straightforward to make. The only unusual ingredient that you may not have come across, but that you can easily get hold of at any major supermarket, is ‘tahini’, which put simply is sesame paste. It’s most commonly used in North Africa, the Middle East and the Levant. You’ll find it sitting next to the peanut butter in most stores. In my opinion you do need this necessary ingredient to give your hummus a more authentic taste so please don’t leave it out.

IMG_1202

The other key ingredients are olive oil, fresh lemon juice, lots of lovely garlic, cumin powder, salt and a little iced water. How easy!

Now you can jazz things up a bit, which I often like to do by adding one of the following: paprika, sumac, zataar, fried onions or shallots, fresh herbs, roasted beetroot, roasted carrots, cumin powder, black or green olives, turmeric, chilli flakes, sun dried tomatoes….the list is endless. Play around with flavours and find a new version to suit you. I’d love to hear from you if you find a new combination that’s a hit!

IMG_1213

 I’ve kept things simple for my one today by simply adding some fresh pomegranate seeds to give a ruby red jewel effect.  I like the fresh sweetness of the seeds with the hummus. It works really well and looks really pretty too. We eat with our eyes and nose as well as our stomachs after all.

IMG_1214

Homemade Hummus 

Serves – at least 6 (see bowl in photo)

2x400g tins  of chickpeas (if you want it extra smooth and silky you need to peel the chickpeas, but totally fine if you don’t)

3 tbsp/100ml tahini

2 garlic cloves, peeled and crushed

1/2 tsp cumin powder

1 lemon, juice only (if it is a small lemon you may need 2)

3 tbsp olive oil

1 tbsp extra-virgin olive oil (plus a little extra to drizzle at the end)

5 tbsp iced water

salt to taste

Serving Ideas

pine nuts, paprika, pomegranate, fresh parsley, crispy shallots

1. In a blender add the tahini, lemon juice and a couple of tablespoons of iced water. Blitz for a minute.

2. Strain the chickpeas and then add them to a blender along with all the ingredients except the olive oil.

3. Blend the ingredients adding the olive oil gradually until smooth.

4. Taste and add more salt/lemon if needed.

5. Place in a bowl and scatter the pomegranate seeds on top along with a drizzle of olive oil.

The photo above I have not peeled the chickpeas but the one below I have. You can see the difference in the smoothness.


The Tastiest Spiced Chickpea Curry Ever

IMG_1186

The humble chickpea can provide the most satisfying of meals if it is mixed with a little magic, and in this case spices. The final note of adding chaat masala raises the game of this dish into one bursting with flavour that is both salty and sour. For those who have not come across chaat masala before it’s a spice mix that is commonly used in India, Pakistan and Bangladesh and normally includes many of the following: mango powder, black salt, asafoetida, pomegranate seeds, nutmeg, mint leaf, chilli powder, black pepper, salt, cumin, coriander and dried ginger. You can pick up sachet’s or packets at your local Asian grocers or any of the large supermarkets.  If you are feeling really adventurous you could make your own. Have a look at this lovely lady showing you how to do so .


Like many of the dishes on my blog this is very straightforward, filling, nutritious, tasty and kind on the wallet. My eldest daughter loves it (she just avoids swallowing the green chillies that I simply cut in half so are easy to spot) and my youngest….well she tells me she prefers ‘English’ food. I asked her like what and she answered ‘Like udon noodles, chicken, spring onions and soy sauce’. Oh dear!

IMG_1182

If you are UK based chances are that you’ll be on half term next week – if you have children that is. This dish ticks so many boxes and is perfect for an adult, or more sophisticated child eater. Next time your are in the shopping aisles of your local supermarket – think Chaat Masala, seriously you won’t regret it. A little bit of searching will reward you royally.

You heard it here first.

IMG_1174

 Spiced Chickpea Curry

2 tbsp groundnut/rapeseed oil

10 fresh curry leaves

1/2 red onion, finely chopped

1 tsp salt

2 tsp garlic paste

1 tsp ginger paste

2 small green chillies

1 tsp cumin powder

3 medium sized tomatoes, diced

500g chickpeas (tinned is fine)

1 tbsp yoghurt

1 tbsp tomato puree

150ml juice from chickpea tin/boiling water

125g fresh spinach

1 tsp chat masala

1/2 lemon, juice only

handful of fresh coriander to serve

1. Gently heat the oil in a deep frying pan and then add the curry leaves. After 20 seconds add the onion and salt and lower the heat to allow the onions to soften and not burn. After 5 minutes add the garlic and ginger paste along with the green chillies and stir into the existing ingredients.

2. Add the cumin powder and then add the fresh tomatoes and allow them to soften slightly before adding the chickpeas.

3. Add the yoghurt and tomato puree and stir into the chickpeas.

4. Add the chickpea juice and/or boiling water and leave until the liquid has reduced. This will take around 10-15 minutes.

5. Stir in the spinach, which will wilt almost immediately.

6. Take the pan off the heat and add the chaat masala and lemon juice and stir into the curry. Add a little fresh coriander on the top of each serving.

Relax, sit back and enjoy a very satisfying bowl of chickpea curry.

SaveSave


South Indian Sardine Curry

IMG_1033

Don’t you just love those recipes that require minimal effort to achieve a very satisfying and tasty result? This south Indian sardine curry is one of those dishes.

Sardines are great fish to have in your diet as they are packed with essential nutrients, including omega 3 fats, vitamin B12 and vitamin D. They are also very reasonable to buy and therefore are within everyones budget. The bones too are so small that you can easily eat them along with the flesh, providing you with calcium.

IMG_1068

I sometimes like to keep the sardines whole and at others times have them filleted. This recipe works equally well, whichever way you like to prepare them.  If you are going to get them filleted your fishmonger can easily do this for you to save time.

You could also add tamarind paste (no more than a teaspoonful) to this dish to give it a different twist. If you do decide to do this add the tamarind at the same time that you add the tomatoes.

IMG_1056

South Indian Sardine Curry

1 tbsp coconut oil

1 tsp mustard seeds

10 fresh curry leaves

1 banana shallot, finely sliced

1 tsp salt

5 garlic cloves, finely chopped

1 heaped tsp of ginger paste

2 fresh chilli, sliced lengthways

1/2 tsp turmeric powder

1 tsp coriander powder

200g fresh tomatoes, quartered

200ml water

450g sardines, cleaned and filleted

1. Heat the coconut oil and then add the mustard seeds moving them around the pan for 15 seconds before adding the curry leaves. After a further 10 seconds add the shallots and salt.

2. Allow the shallots to soften slightly on a medium low heat for 4-5 minutes before adding the garlic, ginger and chilli, followed by the turmeric and coriander powder. Cook for a further couple of minutes.

3. Add the tomatoes and stir into the other ingredients. Place a lid on the pan and cook for around 5 minutes to allow the tomatoes to soften.

4. Add some of the water and stir into the ingredients to create a sauce and then add the sardines and cook on a low heat for around 5-7 minutes with the lid on the pan. Do add more water if you require more of a sauce.

5. Careful not to over stir as the sardines will break up.

IMG_1050


Kakrol Curry – for those who like to try new things

IMG_1156

For the next month or so if you happen to be living near or in an Asian neighboured, or passing by an Asian grocery store, you might just chance upon a wonderful Asian vegetable known in Bengal as kakrol, or you may have heard it referred to as kantola. Then again you may have never heard or seen this Asian vegetable before as it’s pretty unique and is it’s only in season for a month or two.

IMG_1105

It’s a type of Indian gourd that does not have a bitterness like it’s cousin the korola. It’s seriously delicious and actually reminds me pool, which I equally love. It’s in season NOW so seize this opportunity and seek it out. I love the bright vivid greenness of its skin. It’s so inviting it just wants to be eaten!

IMG_1109

You need to half it lengthways and then half it again and then quarter it. Similar to the ones that I have in the photo above. You do not need to peel the skin, simply cut off either end of the gourd.

IMG_1119

The brightness from the turmeric, Kashmiri chilli and the vegetable itself makes for some colourful cooking – just don’t wear a white shirt when cooking.

IMG_1143

I tend to accompany mine with some dal such as red split lentil or cholar and serve it with some freshly prepared chapatis. It’s absolute heaven and the perfect vegetarian/vegan meal. If you do manage to find them and cook this please let me know as I love to hear feedback from readers.

Have a lovely weekend.

Kakrol and Potato Curry

2 tbsp groundnut/olive oil

1 tsp cumin seeds

2 potatoes, halved lengthways and then quartered

5 kakrol/kantola, halved lengthways and then quartered (see photographs above)

1 tsp turmeric powder

1/2 tsp of Kashmiri chilli powder

1 tsp coriander powder

1 tsp cumin powder

1 tsp salt

a few tbsp of water to help soften the kakrol

1/2 tsp garam masala

1 tbsp ghee

1. Heat the oil in the pan and when it is hot add the cumin seeds and move them around the pan for 20 seconds before adding the chopped potato pieces. Turn the heat down and let the potatoes begin to bronze slightly. This will take around 4/5 minutes.

2. Add the kakrol along with the turmeric, chilli powder, salt, cumin powder and coriander powder. Use a spoon to cover the kakrol and potato in the spices.

3. You may need to add a little water to begin with to help the kakrol to soften. Place a lid on the pan to help steam and soften it. Turn gently at intervals and add a little more water if necessary. Cook on a low heat for 25-30 minutes, by which time the kakrol and potato will both be softened.

4. Before serving add the ghee and garam masala, stir into the curry and serve with hot chapatis or other Indian flat bread.

IMG_1165


Sardinian Fregula with Courgette, Mint, Lemon, Parmesan and Pine Nuts

IMG_1025

Surprise! I have given my blog a new lease of life by making it a little fresher, with bigger food photographs – to tempt you into making my recipes of course. How do you like it? I’ll probably tweek it here and there as it is not exactly how I want it but it will do for the mean time. It’s also probably at it’s best looked at on a computer as opposed to a mobile or iPad but any device will do. Leave a comment below once you have had a little look around.

Now back to the important stuff…. the recipe. This week I want to tempt you into making this wonderful dish that can be eaten hot or at room temperature, perhaps for a picnic. It requires a little effort in as far as locating the wonderful fregula, but once you have done that making the recipe is a doddle.

IMG_0991

So what on earth is fregula I hear you all ask? Well in a nutshell it’s a Sardinian pasta, which is similar to couscous in appearance, and comes in a variety of sizes. It’s made from rubbing semolina and water to create a crumbly texture that is then rolled into balls. It is then sun dried and toasted briefly in the oven.IMG_0990

This process allows the fregula to have that ‘al dente’ texture giving it a slightly nutty taste. I am not suggesting you make the fregula from scratch, far from it. You’ll find it most Italian delicatessen and I wouldn’t be surprised if some of the larger supermarkets may well stock it. If they don’t then I am sure they will very soon.

IMG_1002

The overall dish is healthy, takes under quarter of an hour to prep and cook and is really delicious. The flavours are fresh and cleansing, coming from the mint and lemon and this combined with nutty fregula and pine nuts, umami parmesan (check out my article on umami here) and the bright green courgette. It’s a winning recipe if you are entertaining and want no fuss with cooking as it can all be prepped before guests arrive, aside from the boiling of the fregula and courgettes.

For those who like shell fish I will be doing another fregula recipe again in the next few weeks – that leaves you more than enough time to hunt down a packet from your local Italian deli.

IMG_1010

Sardinian Fregula with Courgette, Mint, Lemon, Parmesan and Pine Nuts 

Serves 3

225g fregula (75g per person)

3 courgettes, cut into thin half moons (1 courgette per person)

1 lemon, juice and zest (to taste)

4 stems of fresh mint leaves, finely chopped

60g parmesan

1 large handful of pine nuts

salt and pepper

1. Place the fregula in boiling water so that it is completely covered for 12 minutes.

2. Prepare all the other ingredients, whilst you wait for the fregula to cook. After 12 minutes add the half moon courgettes, adding more boiling water if necessary, and cook for 2 more minutes.

3. Drain the courgettes and fregole and place in a large mixing bowl.

4. Add half the lemon juice and zest, most of the parmesan, the mint leaves, pine nuts and season with salt and pepper. Taste and add more lemon juice and zest to taste.

5. Serve in one large bowl/platter and allow everyone to serve themselves.

Sprinkle with the remaining parmesan.


Fiery Chettinad Chicken

IMG_0969

Chettinad is a region in the southern eastern state of Tamil Nadu in India. The cuisine is commonly regarded as one of the most fiery and aromatic.

IMG_0932

It is famous for its dry masalas that use a wide array of spices including, rather surprisingly, star anise, as well as more commonly used Indian spices such as cumin, cloves, black peppercorns, cinnamon, cardamom, coriander seeds, fennel seeds and whole red chillies. Similarly to the rest of southern India, coconut and tamarind are also often used in cooking.

IMG_0946

The Chettinad people have always been successful traders, travelling far afield throughout Asia. This can be seen in their cuisine as they use a wide range of spices and techniques, clearly influenced by their travelling merchant ancestors.

IMG_0971

My recipe is perfect if you crave some spice. For those at the korma end of the spectrum probably ought to give this a wide birth, but for those who like a flavoursome kick THIS is the curry for YOU. My kids definitely would not eat it, but Mr B and I are big fans and I hope that some of you out there will be also. If you prepare it in the morning ready to eat in the evening it works a treat. You could also cook it a day in advance if you are feeling super organised.

If any of you cook this please let me know what you think. It really isn’t that hot if you are used to eating spice, so be brave and give it a go. It would be great on a hot summer’s eve with a cold beer – check out my brother’s beer here or a chilled lassi such as this one.

Chettinad Chicken

Serves 4-6

800g chicken thighs, cut into bite sized pieces

1 tsp turmeric powder

1/2 lemon, juice only

****

Masala

2 tbsp coriander seeds

1 tbsp cumin seeds

1 tbsp black peppercorns

2 tsp fennel seeds

1 cinnamon stick

3 cardamom pods, seeds only

6 dried red chilli

6 cloves

4 fresh or dried bay leaves

2 star anise

60g desiccated coconut

100ml cold water

****

3 tbsp ground nut oil

14 fresh curry leaves

2 red onions, finely sliced

2 tsp salt

2 tsp garlic paste (or fresh garlic made into a paste)

2 tsp ginger paste (as above)

3 fresh tomatoes, chopped

75-100ml cold water

****

fresh ginger batons to serve

****

1. First cut the chicken thighs into bite sized pieces and cover with the turmeric and lemon juice. Mix in thoroughly and then place to one side whilst you make the masala.

2. Heat up a non stick pan and when it is hot add all the spices (but not the desiccated coconut) and move them around the pan for just over a minute so as to lightly toast them and release the flavours.

3. Place them in a spice grinder. I have this one which is excellent and Debenhams is selling it at the moment for £18. Best investment ever. (I am not on commission to say that!)

4. Whizz them around the spice grinder and then take out half the powder and then add the desiccated coconut or as much of it as you can. Whizz again and remove some more powder and put the remaining coconut in the spice grinder. Transfer to a bowl and add 100ml of cold water to create a thick paste.

5. In the same non stick pan add the ground nut oil and when it is hot add the fresh curry leaves, red onions and salt and gently fry for 8-10 minutes. Add the garlic and ginger paste and move around the pan so that it does not spit.

6. Add the tomatoes and continue to cook for a couple more minutes before adding the masala paste.

7. Add the turmeric lemon chicken and cover fully with the masala paste. Add the remaining water and leave to simmer for 45 minutes, or until the liquid has become virtually dry. Stir at intervals.

To serve place a few fresh ginger batons on top of the curry. It goes really well with rice or Indian breads. It is always good to have a bowl of fresh yoghurt on the side as this dish is renowned for being fiery.


Crispy Skin Cod with White Beans, Padron Peppers, Spinach, Dill and Aioli

IMG_0898

Not so long ago I had a really memorable lunch at Vinoteca in Farringdon. It’s a really relaxed, unstuffy little restaurant with wooden floor boards, a huge (285 if you want to get precise) selection of wines to drink there or buy to take away and a very fine menu of seasonal tasty food. I had this wonderful hake and beans dish with pardon peppers, spinach and aioli and flecks of dill. It was SO good I swore I would  replicate the dish at home and share it all with you.

IMG_0901

For the fish connoisseurs among you you will notice that I have replaced hake with cod. My preference would have been to use hake but as I had recently bought cod to make cod fritters I decided to use that up instead. If you can find hake however I would suggest using that as it holds together far better than cod, which tends to be flakier. In fact any firm white fish would work well.

IMG_0911


The hardest parts of this dish are making the aioli which can be tricky. In an ideal world I would have liked mine a little less runny but the taste and creaminess were spot on. Cooking fish can also be tricky as you want it to have crispy skin and for it not to dry out. You want to make sure the fish is completely dry before cooking so place it on kitchen paper and then add a splash of oil to the skin and season with salt and pepper. Heat a non-stick pan and when it is hot place the fish skin side down for around 4 minutes and then turn over and cook for a further 3. You then should remove from the pan and let it rest whilst you plate up the rest of the dish. If it breaks up, don’t worry it will also taste great in pieces within the beans instead of on top of them.

Padron peppers are available right now in the larger super markets. They come from Southern Spain and Morocco and complement this dish really well. They take a couple of minutes to cook so are quick and easy to prepare like the spinach.

A lot of my blog followers have told me how much they love my ‘chickpea, chorizo and cod stew with fresh parsley‘ so I hope that this one will also become one of your new go-to recipes.

Crispy Skin Cod with White Beans, Padron Peppers, Spinach, Dill and Aioli 

Serves 4

Homemade Aioli

1 garlic, finely grated

1 large egg yolk

2 tsp water

1/4 tsp salt

sprinkling of freshly ground pepper

1/2 tsp Dijon mustard

4 tbsp olive oil

4 tbsp extra virgin olive oil

1/2 lemon, juice only (or to taste)

1. In an electric blender or whisk, blend the garlic, egg yolk, salt, water and pepper together. Then add the Dijon mustard and blend again.

2. Then add the oils a teaspoon at the time, continuing to whisk as you do so. Keep doing this until the sauce has thickened and emulsified.

Taste and add more lemon or salt as you require. Place in the fridge until ready to use.

Crispy Skin Cod with White Beans, Padron Pepper, Spinach and Dill 

2 tbsp olive oil

1 shallot, finely chopped

1 tsp salt

1 carrot, finely sliced

1 garlic bulb, finely chopped

540g white beans (this will include the water that they sit in)

1 vegetable stock cube

100ml boiling water

175g fresh fish per serving (700g if feeding 4 people)

135g padron peppers

260g fresh spinach

handful of fresh dill

1 lemon, cut into 4 to serve

1. Heat a pan and add the olive oil and when it is hot add the shallots, carrots and salt on a medium heat.

2. After 5 minutes add the garlic and cook for an extra couple of minutes before adding the white beans (including the water they are in). In addition add the extra boiling water and a vegetable stock cube.

3. Simmer on a low heat for up to 10 minutes, adding more boiling water if it becomes too dry.

4. Meanwhile heat a different non stick pan. Clean each portion of fish and pat dry with kitchen paper. If it has skin place a little olive oil onto the skin along with a pinch of salt and pepper. When the pan is really hot add the fish skin side down for around 4 minutes. Do not move the pan of fish for this time as it will make the fish fall apart. After 4 minutes, gently flip the fish over and cook for a further 3 minutes. Take off the heat and leave to rest on a warm place whilst you prepare the spinach and padron peppers.

5. Using the same pan as the fish add a tablespoon of olive oil and add the pardon peppers. Move them around the pan so that they burn slightly on each side and begin to wilt and soften. This will take around 3 minutes. Place to one side on a warm plate.

6. Using the same pan as the pardon peppers add the fresh spinach and a splash of water and move around the pan for up to a minute, by which time it will have wilted.

To plate up add the beans and carrots stew then add the spinach and pardon peppers. Lay the fish on top and then pop a dollop of aioli by the fish and sprinkle some dill over the dish. Add a quartered lemon to each serving.

Serve immediately so it is nice and hot.