Fish Balls in a Sweet Smoked Paprika and Tomato Sauce

IMG_5401

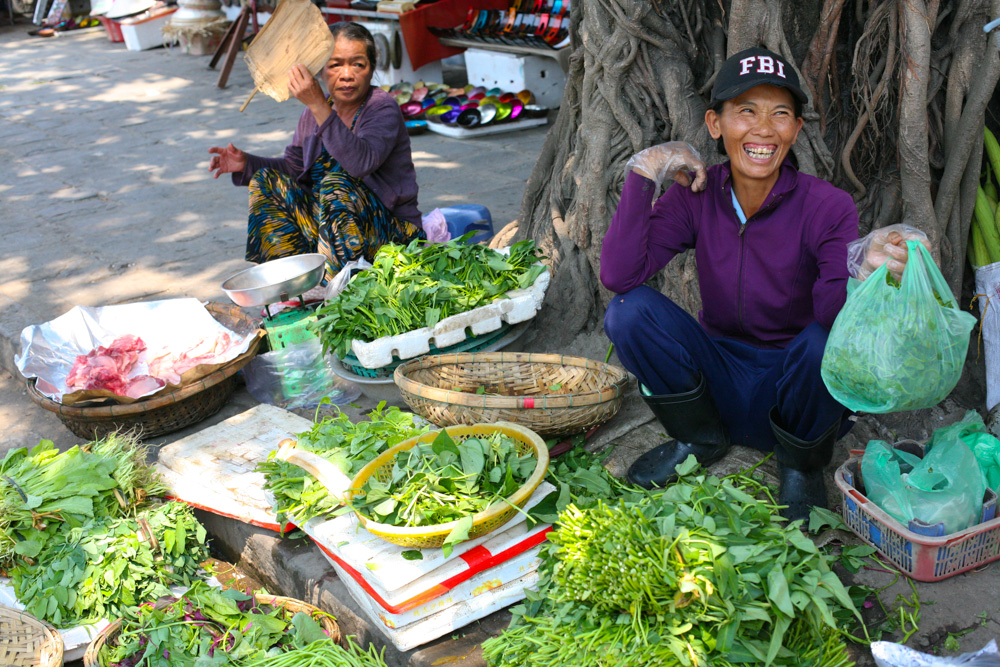
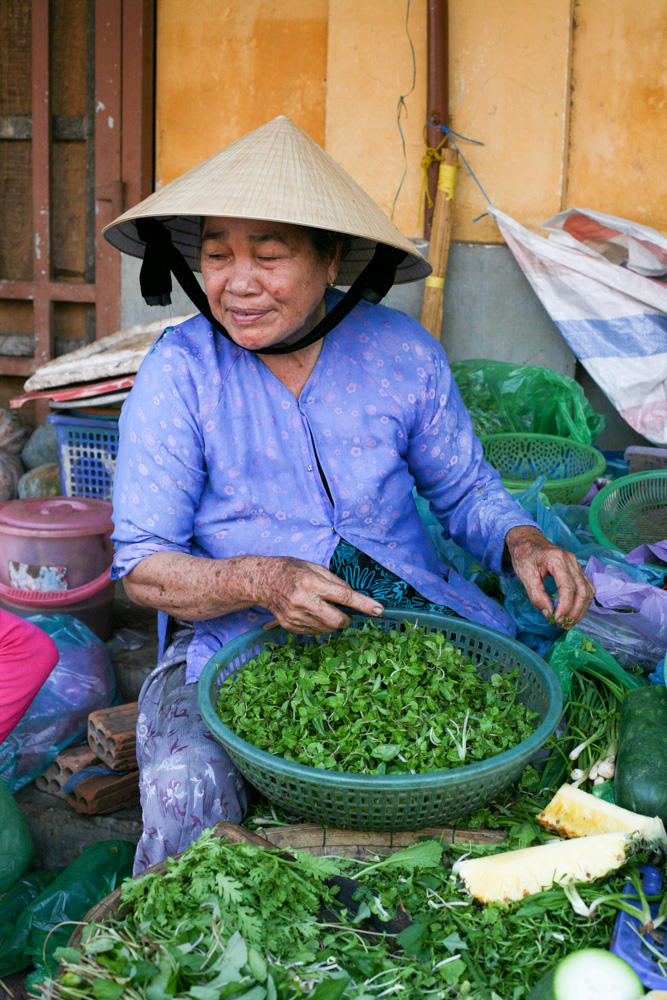
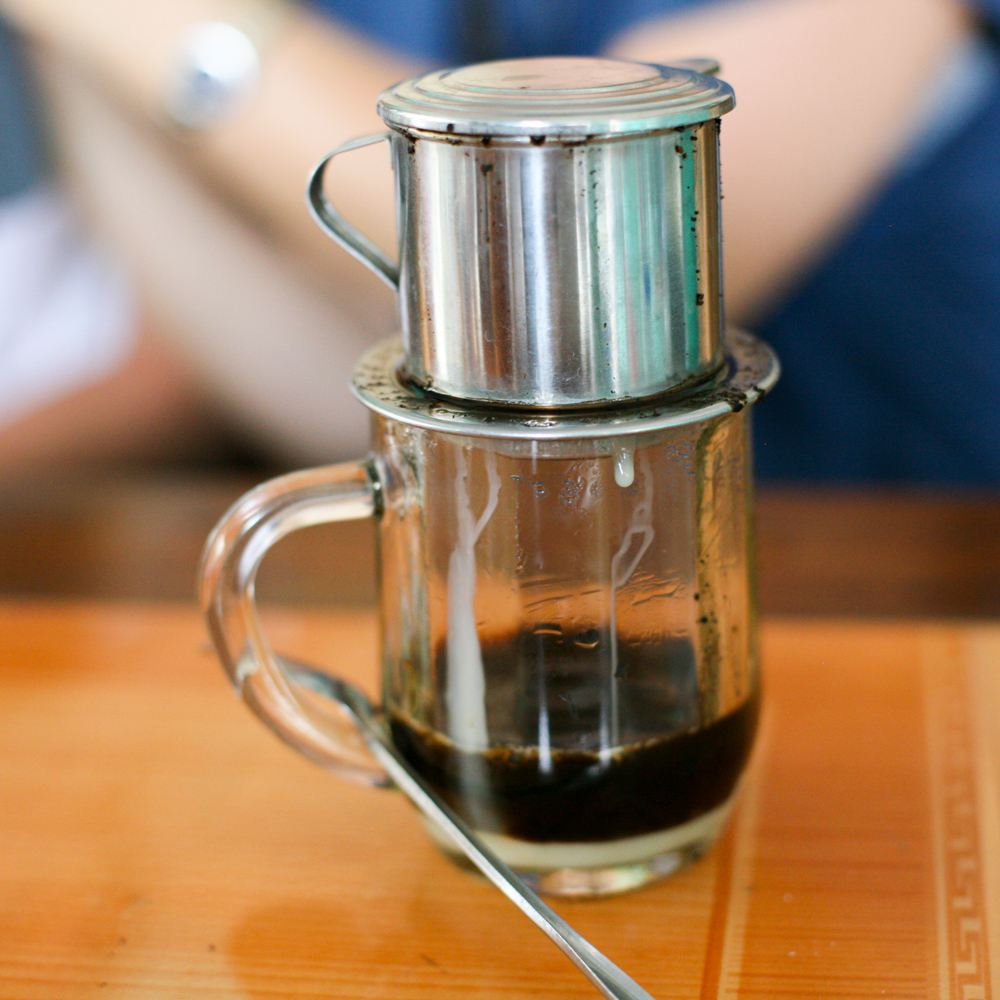
After spending the whole of the Easter holidays in Asia, both Hong Kong and Vietnam, it is great to finally come home to London;  as the saying goes: ‘absence makes the heart grow fonder’. Whilst I loved ever minute of our travels from exploring new environs, cultural sites, the beach (of course) and experiencing the amazing cuisine that both countries have to offer, there is something wonderfully homely and satisfying about preparing your own meals and sourcing your own ingredients. Mark Bittman from ‘The New York Times’ has written a fascinating article on why home cooked food is the way to go. Check it out here.  Crazy as this may sound, I kind of missed not getting stuck into some serious cooking, that said I was very lucky to get a place at ‘The Green Bamboo Cooking School’ in Hoi An, which gave me a wealth of new exciting Vietnamese recipes to cook and share with you all.

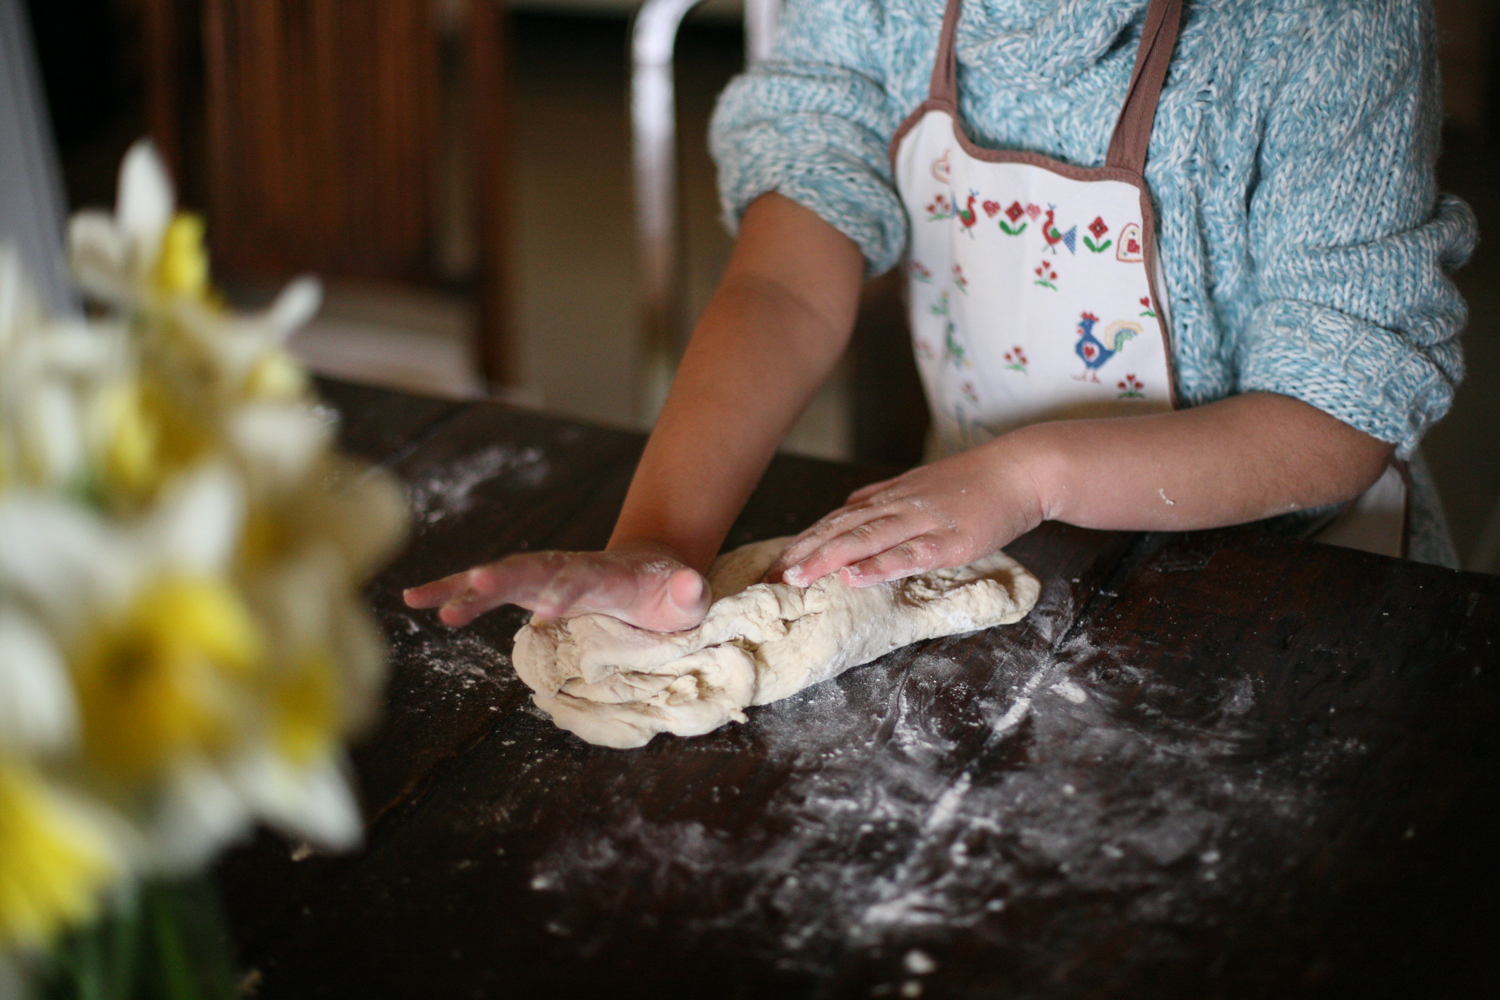
Hong Kong is pork crazy and whilst I love my pork, I decided that fish and vegetarian meals were going to be on the menu, certainly for the first week or two once I returned. The very first meal I cooked when I got back were these lovely fish balls, which are so easy to put together. Big A loved getting involved and helping me to prepare them. I made a large batch and then had the leftovers for lunch the following day.

Serve with couscous, rice or pasta and you have yourself a simple and deliciously healthy meal. I did not put any fresh chilli in either the sauce or fish balls, but you could easily pop in a finely chopped one if you are in need of that extra spicy kick!

IMG_5433

Fish Balls in a Sweet Smoked Paprika and Tomato Sauce

adapted from Yotam Ottolenghi and Sami Tamimi’s recipe ‘Cod Cakes in Tomato Sauce’ in their book Jerusalem.

Serves 4

sauce

glug of olive oil

2 small/medium sized white onions, finely chopped

1/2 (half) tsp of sweet smoked paprika – I use and totally rate this one

1 heaped tsp cumin powder

1 tsp salt

125ml white wine

1 tin of chopped tomatoes, blended

1 tsp caster sugar

4 garlic cloves, finely chopped

150ml water

fish balls

600g cod (or any white fish that has been sustainably caught), boned and skin removed

100g white breadcrumbs

2 tsp ground cumin

1 tsp salt

2 eggs

1 large handful of flat leaf parsley

1 large handful of fresh coriander

1. First you need to start making the sauce. Place a glug (a little) olive oil into a large frying pan and when it is hot add the onions. Stir and turn the heat down slightly to make sure that they do not burn. As they begin to soften after a few minutes add the sweet paprika, cumin powder and salt and then after a couple more minutes add the garlic and stir together. Leave to cook steadily for a few minutes.

2. Next add the white wine and stir into the spiced onions and let simmer for a couple of minutes before adding the blended tinned tomatoes (it is not essential to blend, but I like having the sauce slightly smoother for this recipe) and caster sugar. Stir together and simmer gently for 20 minutes on a low heat so that the flavours can mature and work together.

3. Meanwhile in a large mixing bowl use your hands to blend all the fish ball ingredients together and then roll in the palm of your hands small, bite sized, round fish balls. I made around 30 with these proportions.

4. In a large frying pan heat a glug of olive oil. When it is hot gently place the fish balls in the pan so that they are lightly bronze. I suggest doing this in stages as it takes no more than a few minutes cooking time – remember to turn them over so that they are bronzed all over.

5. After you have bronzed your first batch place them gently in the sweet smoked paprika and tomato sauce and continue to add the rest of the fish balls until they are all sitting in the sauce. Add a little water – around 150ml, or a little more if needed, so that the fish balls are just covered and then let simmer on a low heat for a further 15 minutes. Add more seasoning if necessary.

6. Serve hot with couscous, rice or pasta.

Good old comfort food. Enjoy. It’s good to be home.


Vietnamese Pho Bo – Beef Noodle Soup and finding the perfect cooking course in Hoi An

IMG_5336

Vietnamese cuisine is to put it simply, ‘heavenly’. After my first bite of a Banh Mi, from Banh Min 11, back in London, not that long ago, I knew that it was going to be a culinary love affair. Since arriving in the motherland it has not disappointed. Each meal we have eaten has been a multitude of delicate, fragrant flavours – spices that sing to you and dance on your tongue.

IMG_5119

Herbs feature heavily in most dishes and add real fragrant lift. I was sufficiently enthused that I am going to attempt to grow some of them back in London – for example Vietnamese mint (which I should have no problems growing!), Vietnamese basil, saw tooth coriander, Vietnamese lemon balm, garlic chives. There is a great explanation of Vietnamese herbs here.

IMG_5076

I was keen to attend a cooking course in the UNESCO World Heritage Site of Hoi An and so set about researching a course that best suited my needs. I was given a few recommendations, however, I decided that a course run by the very affable Van, who runs ‘Green Bamboo Cooking School’ suited my needs perfectly.

IMG_5197

The course run by Van offered a detailed tour of the fresh food markets, where we picked up our ingredients; convivial fellow pupils; personal touches by Van who runs the course in her own home; unhurried tutoring over seven hours; a generous range of recipes manifesting itself in a memorable group lunch and a souvenir goodie bag to take home. Throw in door to door service as Van kindly ferried us to and from our hotels, and it is no surprise that Trip Advisor has over 210 positive comments for this class with no dissenters.

IMG_5126

I am pleased to say that course surpassed even my high expectations. Van was charming, spoke excellent English and a was a natural teacher. She also converted me to Vietnamese coffee – the condensed milk being the key.

My fellow students were a really lovely bunch of enthusiastic foodies – three Australians, two Norwegians and two Swiss and all of us had huge grins on our faces all day, clearly revelling in the fact that we had chosen such a perfect course. Here are few photos of the day. Scroll down.

I elected to cook the unofficial national dish of Vietnam – pho bo, beef noodle soup (pronounced ‘fur’). You can find pho stalls on most streets in Vietnam, but to cook it well is the tricky part. I was keen to understand how to cook it from scratch and to make that perfect pho broth. First stop was the market to buy the beef, which was as fresh as it gets as the cow had been slaughtered that very morning. We bought the beef fillet and 1kg of beef bones. Normally Van would have bought the spine, but there had been a run on spine bones that morning from a hotel restaurant, which had bought the lot. So instead we had a range of other beef bones and some shin to add to the flavour.

IMG_5104

Back at Van’s house the first trick I learnt was to gently char the skin of some ginger, shallots and garlic over a flame as this would give the broth a deep smokey flavour.

IMG_5133

It takes no more than a couple of minutes on each side.

IMG_5145

I then removed most of the skin of the ginger, using that back of a teaspoon and also the skin from the shallots and garlic, which is very easy at this stage as they virtually pop out.

After properly cleaning the beef bones, place them in a large pan of boiling water so as to get rid of any scum from the bones before cooking. Submerge them in boiling water for under a minute and then place them into a second large saucepan, which has also has boiling water in it. Discard the water from the first saucepan. You then need to add the charred ginger, garlic and shallots

Continue to add the following ingredients to the pan: 2 chillies, stick of cinnamon, 1 large white onion, 5 star anise, 5 Chinese apples. I had not come across Chinese apples before, but they tasted delicious. As they may be difficult to source for some people, dates work equally well. Add some sugar and salt and if you fancy, some beef stock as well (I decided to omit the beef stock, to see how it would taste in its natural state).

IMG_5146

Place a lid on the top and leave to boil away gently for a further 2 to 3 hours. Add more seasoning to taste and beef stock if necessary.

IMG_5154

Meanwhile, very finely slice the beef fillet and leave in the fridge until ready to use.

IMG_5279

Before serving have individual bowls of bean sprouts and fresh pho noodles/rice noodles, (the noodles you have submerged into boiling water for 30 seconds and drained) at the ready. In a large ladle add a little of the raw beef and submerge it into the pho broth so that the broth fills the ladle. Using a fork or chop sticks, move the beef around in the boiling stock in your ladle for 30 seconds (that magic number) so that it cooks through and ladle it over one of the bowls of noodles that you have prepared.

Add a generous amount of fresh herbs, including Asian basil, coriander, spring onions along with a quarter of a lime and chilli sauce to taste. You can also have a small bowl of soy sauce on the side, should you wish to add a little, as well as some sliced green papaya and fresh sliced chilli.

IMG_5283

IMG_5284

I was delighted by the results and despite having eaten a ridiculous amount of the tastiest Vietnamese food, cooked by my fellow foodies, I managed to see off a bowl of my pho bo.

IMG_5289

Eight happy and well fed people were then deposited back to their hotels, along with a goodie bag provided by Van.

I hope that you too will try this tasty version of pho. Watch this space for more Vietnamese recipes over the coming months.

Pho Bo (Beef Noodle Soup)

Adapted from Van’s recipe, who runs Green Bamboo Cooking School

Serves at least 8

500g fresh pho noodles/rice noodles

300g beef fillet

1 kg beef bones – ideally spine bones or shin

5 litres boiling water

1 tbsp beef stock

******************

5 star anise

1 large stick of cinnamon

1 roasted fresh ginger

5 roasted shallots

1 large roasted bulb of garlic

5 dried Chinese apples/dates

1 whole white onion, peeled

2 red chillies, left whole or chopped in two

2 tsp salt and pepper

1 tbsp raw sugar

**********

50g fresh bean sprouts

50g fresh Asian basil

50g fresh coriander

50g spring onion, finely sliced

2 limes, cut into quarters

green papaya, finely sliced

chilli paste to taste

soy sauce, to taste (optional)

2 fresh chillies, sliced (optional)

1. Wash the beef bones under a tap and then place to one side. Meanwhile bring two large pans of water to the boil. In the first add the beef bones and submerge them for just under a minute and then transfer them to the second saucepan. Discard the water from the first saucepan.

2. Over a gas flame place the garlic, shallots and ginger on a metal grill directly above the flame, allowing them to char/roast. After a couple of minutes turn them over so that both sides are equally charred. Using the back of a teaspoon, peel off a little of the skin of the ginger.

3. Add them to the bones and boiling water, along with the onion, chillies, dried Chinese apples/dates, cinnamon stick and star anise. Add the salt, sugar, pepper and beef stock it you wish and place a lid on the pan and let  it boil gently for 2-3 hours.

4. Meanwhile, very finely slice the beef fillet and return it to the fridge.

5. Before serving, warm the noodles by placing them on a slotted spoon and submerging them in boling water for 30 seconds. Drain and place in individual bowls. Add the bean sprouts to each of the bowls.

6. In a large ladle add a little of the thinly sliced beef fillet and submerge into the pho broth so that the ladle is completely full and the beef is submerged. With a fork or chop sticks move the beef around in the ladle so that it ‘cooks’ through properly.  Pour over the noodles. Please note the pho broth needs to be boiling/bubbling away at this stage so that the beef fillet is cooked properly. 

7. Add the fresh herbs, lime, spring onions, green papaya and chilli paste/soy sauce/fresh chillies to taste.

8. Serve immediately and enjoy piping hot.


Bagel Mania

IMG_4461

As far as blog posts are concerned this post is definitely up there on the memorable stakes. Yes, it’s a labour of love, but I can assure you the wait and effort is more than worth it. In fact we all agreed that we had never tasted bagels so fresh and tasty, this was, of course, because they had just come out of the oven and we had toiled hard to make them ourselves.

IMG_4457

We’d headed out of London for the weekend to dog sit for my parents who live in the rolling Sussex countryside. I thought that bagel making would provide the perfect morning’s entertainment, with the results making a truly satisfying lunch.

IMG_4388

Big A and Little Z had their own bowls to make the dough and whilst a little flour, salt and yeast found itself out of the bowl, the majority made its way into the dough itself!

IMG_4389

Honey is added to the vegetable oil then poured into the dough mixture.

IMG_4400

Really getting involved in the dough-making is so rewarding, as Little Z found out.


IMG_4406

Big A had a natural ability at kneading the dough for ten whole minutes.

IMG_4414

Once the dough had been given a good work out we combined Little Z and Big A’s dough and created one large ball. Rub a little vegetable oil around a large bowl and all over the dough, and place inside the bowl. You need to cover the bowl tightly with cling film and leave it somewhere warm – but not hot for 2 hours. The airing cupboard  provided the perfect place.

IMG_4418

By the time we returned the cling film had created a huge dome like structure over the bowl and the dough had doubled in size.

IMG_4426

We decided to cover our bagels with either chilli flakes, black poppy seeds or sesame seeds, but you could also cover them in black onion seeds, grated cheese, cinnamon sugar or whatever takes your fancy.

IMG_4428

The best way to shape your bagel is to roll it into a ball and then to use the end of a wooden spoon and push through the centre. Once it has reached through the dough, keep the handle on the surface and wriggle it around until a hole is created to the size that you want the hole to be. You can also shape it further with your hands. When the desired shape is reached place to one side for ten minutes so as to let the dough relax into shape.

IMG_4434

Now this part is really unusual, but doing it will allow your bagel to have that wonderful soft sponginess in the dough, once it is baked. Don’t skip it, even if you think you’ve read the instructions wrongly…..because you haven’t, you do actually need to BOIL the bagels briefly for one and a half minutes each side by placing them in a saucepan of boiling water and black treacle, (I know sounds crazy right?) that is simmering away.

IMG_4436

After the brief dunk in boiling treacle water and a thorough drain, place the bagels on lightly oiled baking trays that are sprinkled lightly with polenta – this is to stop the bagels sticking to the tray. Brush a beaten egg gently over all the bagels and then decide on your choice of topping and sprinkle over the bagels, pressing down gently so that the toppings stay in place.

IMG_4449

Freshly baked straight out of the oven. At this point, our stomachs were rumbling and we were ready to dive into our lunch.

IMG_4464

More choices…..what filling to place in our bagels. We opted mainly for either:

* Grilled bacon, soft cows cheese or cream cheese, rocket and a spoonful of my chipotles sauce.

0r

* Smoked salmon, cream cheese, avocado and rocket with a splash of lemon juice.

IMG_4471

Other than Little Z we all had two (a little piggy I know but oooh they were soooo good!) and the remainder we ate the following day for breakfast.

After such a good feast we decided to don our country coats and wellies and head out with Tessie the dog for a good old long walk across the fields and through the woods. A perfect day to spend a Saturday.

IMG_4517

Tessie loves to dive into hollow trees!!

Homemade Bagels

makes 14

adapted from Rachel Allen:Bake!

675g strong white bread flour

3 tsp salt

10.5g fast-acting yeast

375ml warm water

3 tbsp honey

2 tbsp vegetable oil

3 tbsp black treacle/molasses

polenta, for sprinkling

1 egg, beaten

toppings of your choice (chilli flakes, sesame seeds, black poppy seeds)

1. Sift the four, salt and yeast into a large bowl and create a well in the centre.

2. Place the warm water, honey and oil into a measuring jug and pour the liquid in in stages, using your hands to begin to make the dough. This stage is rather messy and sticky so take your time not too add too much liquid at once.

3. Once all the flour has come together to form a dough, transfer to a flat surface and sprinkle a little extra flour and then knead the dough for a good ten minutes. I tend to push the dough away with one hand and then fold the dough towards me and then turn it slightly before repeating the process. You’ll be able to pick up a good pace.

4. Lightly oil a large bowl and pour a little oil in your hands and smooth it on the dough, which you have made into a ball. Place the dough in the bowl and cover tightly with cling film. Place in a warm (but not hot hot) place for around 2 hours – the airing cupboard worked perfectly – when the dough will have doubled in size.

5. Place 6 pints of water into a large deep pan and bring to the boil. Add the black treacle and stir in throughly. Once it has come to the boil, let the treacle water simmer gently on a low heat.

6. Preheat an oven to 220 degrees centigrade (425F).

7. Meanwhile, once the treacle water is heating up, take the dough out of the bowl and place on a surface sprinkled with a little flour and knead it briefly before breaking it off into small balls for you to then make into individual bagels. The best way I found to make the bagel is to place the end of a wooden spoon into the centre of the ball, which you have flattened slightly. When it pierces through the bottom of the dough, give the wooden spoon a good twist around so that a larger hole is formed. You can then reshape slightly with your hands. Place to one side until you have used up all the dough. More hands make light work at this stage!! You will need to leave the bagels to stand for 10 minutes before moving onto the next stage, however, by the time you have finished shaping your last bagel the first few you made will be ready to be boiled.

8. Place no more than 4 bagels into the boiled simmering black treacle water and turn over after 90 seconds and leave for another 90 seconds. Then drain thoroughly and place on lightly oiled baking trays that have a sprinkling of polenta on them.

9. Brush each bagel lightly with whisked egg and then cover with your choice of topping.

10. Place in the oven for 15 minutes, by which stage they will be bronzed and ready to eat. If you would like a more bronzed bagel then turn the bagel over for a few more minutes extra cooking, although I don’t think that you’ll need it.

Eat whilst still warm for the perfect bagel.

Filling ideas:

* smoked salmon and cream cheese *goats cheese and red onion *salt beef, mustard and gherkin *bacon, soft cows milk cheese, chipotle sauce and rocket * cheddar and chutney *tuna, tomatoes and capers

What’s your favourite topping and filling? Would love to hear.


Macha Soul tea with Janice Leung and Satay Prawns with Garlic, Lemongrass and Spring Onions

OLYMPUS DIGITAL CAMERA
This blog post has been a long time coming and for that I apologise to you all. I initially wrote the post on the plane coming back from Hong Kong and was rather chuffed with myself as I had, for once, hours to compose and fine tune it.  I was really satisfied with the end result, but then tragedy stuck as I accidently deleted it upon my return owing to the fact that I wasn’t very familiar with my new computer. So this post is very much an abridged version of the original, which in hindsight was probably far too long and rambling anyway.

During my recent visit to Hong Kong I was fortunate enough to meet up with one of Hong Kong’s most dynamic food bloggers, Janice Leung, over a delicious cup of creamy ‘matcha soul’ tea, at a charming little tea house called Sinmei in Sheung Wan. Like many of Hong Kong’s gem eateries and cafes it was hidden on the 5th floor of a commercial building away from the hustle and bustle at street level. It was an oasis of calm and serenity with its mix of vintage Chinese and European furniture giving it a somewhat boho shabby chic vibe.

IMG_7166

Matcha soul tea at Sinmei
Prior to setting up her blog: e-ting food, Janice worked as Assistant Editor at Luxe City Guides, so knows her way around Hong Kong (and a number of other cities in fact) better than most. Most recently however Janice, along with her business partner Vincent Poon, have set up Island East Markets which is Hong Kong’s answer to an organic farmers market.
Janice’s motivation for setting up such an enterprise was down to the fact that she found it increasingly difficult to source good organic produce in Hong Kong; the nearest place for her was in Tao Po, over an hours journey from her house, or the  few stalls on Central Pier 7. Typically the fresh fruit and vegetables you see being sold in the various street markets in Hong Kong comes from mainland China where little or no knowledge is known about where or how it was grown and whether pesticides or fertilizers were used.
IMG_6960
A typical Hong Kong fresh vegetable stall
There was definitely a gap in the market to launch such an enterprise and having spent time traveling the globe as well as living and studying in Melbourne Australia, Janice had seen the positive effect that having a local farmers market had on the community and the farmers alike. She was keen to create an environment where people would want to spend time getting to know the vendors, trying the different foods on offer and a place that families could wile away a few pleasant hours on a Sunday.  As well as edibles and fresh produce, there is handcrafted goods made by local artisans, face painting for the kids and talented local bands. I also particularly like the idea that she has organised for local chefs to come and do food demonstrations using the local food on offer at the market to create delicious dishes that people can replicate at home.
There were a couple of key factors, however, that were paramount to the markets success; firstly she needed the support from the local organic farmers in Hong Kong – namely in the New Territories and secondly she needed a site. For the former she was directed to a body of around 70 farmers who were members of the Organic Farmers Association in Hong Kong, which is similar to the Soil Association in the UK. Using this list as a starting point she introduced the idea to the farmers who responded positively. The second factor could have proved tricky had the Real Estate company Swire Properties not offered them a site in Quarry Bay every Sunday. It was an incredible stroke of good luck that allowed the market to breath life. On Sunday’s the road is closed off to traffic and stalls are set up and a relaxed vibe is allowed to resonate.
So far the market has received a positive reception by vendors and customers alike and although it was closed over the Christmas period it opens up again from Sunday 27th January so if you are living or visiting Hong Kong in the future make sure you take some time out on a Sunday to visit Island East Markets on Tong Chong Street and see for yourself Hong Kong’s answer to an Organic Farmers Market, I know for sure that I will be paying it a visit upon my return in April, in fact I can’t wait!
——————————————————
OLYMPUS DIGITAL CAMERA
The recipe for you today was inspired by a visit to a restaurant called ‘The Chairman’ on Kau U Fong in Central. Similar to Janice’s way of thinking the restaurant is also pro ‘local’ and sourcing premium produce from the New Territories, as well as placing emphasis on home-made as opposed to ready-made. Additives and MSG have no place in their kitchen and whilst the menu may not have as widest selection of dishes compared to some restaurants, the dishes that are on offer hit the mark.
The dish below was inspired by one such dish that I sampled in the restaurant. I hope that I’ve done credit to the original.  After a few false starts on the home-made satay sauce, I think I have found one that hit’s the high note. I hope you ‘ll agree.
OLYMPUS DIGITAL CAMERA
Satay Prawns with Garlic, Lemongrass and Spring Onions with Rice Noodles
Inspired by a similar claypot dish at The Chairman Restaurant in Hong Kong
Serves 4-6 (depending if you are serving other dishes as well)
320g fresh King Prawns (heads removed, shell on or just tails on – up to you)
2 tbsp of ground nut oil
7 garlic cloves, peeled (I like my garlic)
3 spring onions, chopped into 2 inch pieces
2 lemongrass, chopped into 2 inch pieces and halved (white part only)
250g rice flat noodles
Peanut Satay
250g dry roasted peanuts, unsalted
1 tbsp Kecap Manis (sweet soy sauce)
1 and a half tbsp palm sugar (or regular if you don’t have this)
1 tbsp of tamarind concentrate (or pulp soaked in 25ml of warm water – you’ll need to squeeze it through a sieve if you do it this way)
pinch of salt
50 ml ground nut oil
200 ml water
for the spice paste you will need:
4 small dried red chillies, deseeded (or more if you want more of a kick)
3 shallots
2 lemongrass (remove the green part)
3 garlic cloves
1 inch fresh galangal (or ginger if you cannot source it)
1. First make the peanut satay sauce. Coarsely grind the peanuts in a blender or food processor (or pestle and mortar) and remove and place to one side.
2. Next place the spice paste ingredients in the food processor and whizz until they are form a smooth as possible paste.
3. If you are using tamarind pulp soak in warm water for 10 minutes and then press through a sieve.
4. Place the oil in a pan and add the spice paste ingredients and let simmer gently for a couple of minutes before adding the crushed peanuts and stirring together.
5. Add half the water, tamarind concentrate (or pulp), kecap manis, palm sugar, salt. Stir in throughly.
6. Place the remaining water, and add even more if necessary, and let similar for a few minutes. Taste test to see if the salt/sugar elements have the right balance. Let cool and place to one side.
————————————————
7. Heat a pan with groundnut oil and when the oil begins to bubble add the garlic and lemongrass and let it gently sizzle for a couple of minutes, stirring occasionally.
8. Add two tablespoons of homemade satay sauce to the pan and stir into the garlic and lemongrass.
9. Place the prawns into the pan and cover throughly with the peanut satay. Add another one or two tablespoons as required. After a couple of minutes add the spring onions and after a minute take off the heat.
10. In a separate saucepan boil the rice noodles for the time specified on the packet – will not be longer than 5 minutes. Drain the noodles and add a further tablespoon of satay sauce so that the noodles are also coated in the satay.
11. Transfer the noodles to a large main dish and place the prawns, garlic, lemongrass and spring onions on top and then let guests/family serve themselves.
Please note homemade satay sauce can be stored in the fridge for a couple of weeks and in the freezer thereafter.
OLYMPUS DIGITAL CAMERA


First impressions of Hong Kong and getting over jet lag

IMG_6478

There is always something rather thrilling about going on a trip or a journey, but when you’ve never visited the destination before there is an added level of excitement and anticipation. The smells, sights, sounds and general fever of the place seize you almost immediately as soon as you step foot on to Hong Kong soil. I always knew that the place would be frenetic with activity but seeing and experiencing it in the flesh is another thing. Hong Kong is buzzing and bustling with people. An initial impression is the sheer number of people who all live here side by side, or perhaps more aptly I should say – on top of, in huge towers reaching to the stars. Vertical living is very a la mode and living in dinky dwellings is standard practice.

IMG_6397

Whilst a lot is packed into Hong Kong there are also places to be found where there is an element of calm and serenity and to watch the world go by. One of the first places that I went to visit was the Man Mo temple, which is the oldest temple in Hong Kong, having being built in 1847. I thought it was necessary to experience the old if I was to truly understand and appreciate the new and besides I always enjoy visiting temples and churches when visiting a new country as I find it helps to better understand the underlying fabric of that country.

IMG_6399

The temple did not disappoint and as I strolled around it I particularly enjoyed the heady aromas from the incense coils that hung from the ceiling. From the outside the temple stands surrounded by tall tower blocks, which makes a slightly surreal sight.

IMG_6400

IMG_6395

Near to the temple I came across this wonderfully vibrant street art that really appealed to me; I think Banksy would definitely approve.

IMG_6427

Getting to know a city I like to amble around on foot as this not only helps me get my bearings but also see what the locals are up to. Street food sellers were out in abundance selling all manners of temptingly delicious snacks to feast upon.

IMG_6456

As our body clock is a little confused at the moment, we are eating at rather random times of the day, that said little Z and big A always seem to be hungry around tea time and therefore are ready for a little cake to give them some energy before more sight seeing then supper. We have come across a number of bakeries selling all manner of wonderful tasting cakes. Egg tarts are popular here as well as buns filled with red bean paste.

IMG_6454

We visited a fish market, but it is unlike the fish markets we have in the West as the fish here were not to eat. Oh no, if you want to find fish and meat to eat as well as vegetables and fruit you need to visit a ‘wet market’ which are scattered all over Hong Kong. I hope to take some photos of these over my stay so watch this space for more on this soon.

IMG_6421

Tropical fish for sale at the Fish Market in Mong Kok

Our first evening meal out in Hong Kong was dim sum at the very popular Din Tai Fung, which is in fact a Taiwanese import. It’s famous for it’s Xiao Long Bao, which are steamed pork dumplings filled with broth and dipped into vinegar and ginger – basically little mouthfuls of joy! I liked the way that they had instructions on how to ‘eat’ the little darlings. How very thoughtful!

IMG_6381

The winner on the dim sum stakes so far though comes from Hutong where we ate delicious tasting dumplings filled with pork and fennel – ones I wouldn’t mind attempting to make when back in London. Another favourite at Hutong was the Chicken Pot with Sichuan peppers, addictively delicious and not as ‘hot’ as you would think!

IMG_6491

As I mentioned we have all been experiencing a bit of jet lag so I decided to make a southing, homely broth for our first lunch on Hong Kong soil. After gathering a few ingredients I made the following dish, which seemed to hit the spot after a long journey. I kept ours vegetarian, but it would taste equally good with a bit of salmon or trout thrown in for a couple of minutes. Here is how to make it.

IMG_6378

Jet lag Noodle Broth

Serves 3 (and enough for seconds)

splash of olive oil

3 garlic cloves, sliced

1 inch of fresh ginger, peeled and thinly sliced

3 tbsp light soy sauce

1 heaped tsp of vegan Bouillon/vegetable stock

boiling water (to cover veg and noodles)

generous handful of Chinese broccoli (Gai Lan) or regular broccoli/spinach/pat choi

6 small tomatoes, halved

3 eggs, boiled, shell removed and halved

2 packs of udon noodles (or 3 if you are serving just adults)

1. Place the eggs into a pan with cold water and when the water has boiled cook the eggs for 4 minutes, less if you like it soft boiled.

2. Meanwhile place a little oil in a medium sized deep pan and when it is hot add the garlic and ginger and stir for a minute before adding the soy sauce.

3. Next add the boiling water so that it reaches a quarter of the way up the pan – you can add more a little later. Add the Bouillon or vegetable stock that you are using and stir well.

4. Add the Chinese broccoli and after 2 minutes add the udon noodles. You may wish to add a little more boiling water at this stage. Taste to see if it requires a little more soy sauce. Add the tomatoes no more than a minute before serving so that they still hold their shape. If you prefer softer vegetables then cook the Chinese broccoli for a little longer, but I find a couple of minutes is more than enough.

5. Serve with a slice or two of boiled egg.

Warming, delicious and ever so quick, before you collapse and have another little sleep.

Other ingredients that would be great to add: fresh chilli, spring onions, fresh salmon/trout, mushrooms.

IMG_6483


Mung Bean and Cumin Dal and Durga Puja Festivities

This past weekend has been one of celebration as it was Durga Puja. For Bengali Hindus (my husband’s side of the family) Durga Puja is the biggest religious festival in the Hindu calender. In Kolkata, which is the heart of Bengal, I am told it is taken to another level altogether, when families feast, dance and pray to the goddess Durga – the conquerer of good over evil and the mother of the universe, as well as her children: Ganesh, Saraswati, Lakshmi and Kartik. Schools close and everyone takes time off work to celebrate.

The statue of goddess Durga on her lion fighting the demon Mahishasura in the Hounslow Pandal

Tooting Goddess Durga 

The making of the statues is a hugely lucrative business in India and at the end of the six day festival the statues are ceremoniously carried to the Ganges and left to drift away and be reabsorbed into the Ganges. The statutes themselves are made of straw and mud from the Ganges and then glazed with paint to give them that glossy shine; the craftsmanship and detail never ceases to impress me.

There are thousands of Durga Puja pandals, which are basically huge structures housing the goddess and her children, erected all over the different Kolkata neighbourhoods. It’s all hugely competitive and each pandal competes for attention in beauty and innovation. I visited two different ones in London – one in Tooting and the other in Hounslow and both were very spectacular in terms of colour and design, the latter I know had been shipped from Kolkata.

Ganesh – one of Durga’s offspring in the Hounslow Pandal

The banging of the drums, the blowing of the conch shell, the incense, the chanting of the prays and hustle and bustle of people coming and going really transports you to India. It’s all rather frenetic and yet very warm and inviting at the same time. In the Hounslow pandal alone thousands of visitors came and went over the course of a few days. Catering for that number must be rather daunting but I was very impressed by the taste and quality of the food and the fact that it was all hot. It was the longest queue for food I have ever witnessed, but it moved quickly and before long we were given a plate of tasty vegetarian food.

Some vegetarian cuisine given to those who attended the Hounslow puja in London

Back at home I have been cooking an endless amount of Indian dishes from: methi and pomegranate pork curry to amma’s chicken curry, red lentil dal with spinach, yellow dal with courgette, Bengali fish curry and mung bean and cumin dal.

It is the mung bean dal recipe that I wanted to share with you all today. Unlike red split lentil and some yellow dal it does require a little more forward planning as it needs to be soaked, ideally overnight.

It’s delicious, nutritious, cheap to make and other than the soaking of the mung beans, is very straightforward. My mother-in-law makes a completely different tasting mung bean dal, which I will post another time, but to get you started try this one and let me know how you get on. It’s perfect for a week night vegetarian supper.

Mung Bean and Cumin Dal

Serves 4

250g mung beans (also referred to as moong bean), soaked overnight

3 tbsp mustard oil

1 white onion, finely chopped

1 tsp cumin seeds

1 tsp turmeric

half tsp red chilli powder

half tsp garam masala powder

half tsp cumin powder

1 tsp salt

juice of half a lemon

fresh coriander to serve

1. Place the pre soaked mung beans in a pan and cover with water and gently simmer until softened. This will take around 40 minutes.

2. Meanwhile, place the oil in a pan and gently fry the cumin seeds for a minute or so until they begin to bronze. Immediately add the onion and mix together with the cumin seeds.

3. When the onions have softened and become translucent add the cumin powder, red chilli powder, turmeric and garam masala and stir together.

4. Drain the mung beans and then transfer them to the pan with the onions and fold in thoroughly. Add the salt and lemon juice and simmer together for a further 5-10 minutes. You may need to add a little more water at this stage.

Whilst it is delicious to eat on its own or with a chapati it is also great to accompany it with a fish, meat or vegetarian curry (see my recipe library) if you wish to make a more substantial Indian feast.

Mung beans soaked overnight

Step 3 above


Rhubarb and Rosewater Tart and a visit to the Jurassic Coast

Fear not, my loyal subscribers, I have not abandoned you, although I realise it might have felt like that these past few weeks. Upon returning from my adventures in Turkey we headed off to the English south west coast, or to be precise, the Jurassic coast on the border of Dorset and East Devon. The old cottage, that we made our home for the week, was fairly remote and had no Wifi so there was no chance of blogging and also if the truth be told I was far too busy rock pooling, exploring coastal and in land walks, swimming – most refreshing although a little chilly upon entry but perfect after 15 seconds, playing board games and eating Devonshire cream teas.

We stumbled across characterful villages where time seems to have stood still and the same families have holidayed at the same place for generations. The weather can be a bit unpredictable but you can guarantee there is always adventures to be had. One such intimate village was called ‘Beer’ – we had to visit it out of curiosity. I liked the fact that the village still has an active fishing community and that you can actually buy fish direct from the fisherman.

Striped deck chairs are quintessentially English and I particularly loved this little advertising board – good honest advertising. Refreshing!

Boats waiting to be hired on the beach in Beer.

Cream teas and crab sandwiches in Beer  – things can’t get much better than this.

View from one of our many coastal walks


I gave swimming a pass on this day….

…………….but these guys just couldn’t resist a good storm

On our return journey we drove cross country in our bid to explore even more quaint, hidden away, little villages.  Not far from Milton Abbas – which is seriously worth a detour when you are next in Dorset – there is a charming little farm shop at Steeptonbill Farm, where we decided to stock up on supplies. We were greeted warmly by Tess who talked us through all the produce and meats. Seeing the sign in the right of the photo for ‘freshly pulled rhubarb’ gave me my idea for my next blog post.  I loved rhubarb crumble as a child but rarely eat rhubarb as an adult. It just so happens that I had stumbled across a recipe recently in House & Garden magazine for ‘Rhubarb and Rosewater tart’ and the combination intrigued me enough to try it out.

All the recipes on this blog, unless stated, are ones that I have cooked a number of times and work well. This recipe however was my first effort and I definitely think I could perfect the results further on my next try. The most important step with this recipe, which I found out a little too late, is to not overcook the rhubarb to begin with. The House & Gardens recipe states simmering the rhubarb in the dissolved sugar, water and rosewater for 8-12 minutes. I found that I cooked mine for less than 8 minutes and it was beginning to lose its shape. So my advice is to keep checking every 2 minutes when it is simmering; by 6 minutes it should almost be done.

You can see what I mean if you look at the bottom left hand side of the tart, which is more how I wanted the whole tart to look compared to the far right side which has rhubarb that has lost its shape.

What it lacked in presentation it certainly gained in taste. I hope you will think so too.

Don’t look too close at this photo, but you can see what I mean regarding the rhubarb loosing its shape on the middle to right of the tart.

You’ll find that you will end up with excess rhubarb and rosewater syrup so take a look at Heidi’s (from 101 Cookbooks) suggestions here on what to do with the leftover syrup.

Rhubarb and Rosewater Tart

Sourced from House & Garden July 2011 issue

Serves 6-8

150g caster sugar

250ml cold water

4 teaspoons rosewater (see another recipe on my blog using rosewater – here)

850g rhubarb, trimmed cut into 3cm pieces

250g ready-made puff pastry

handful of plain flour for rolling out the pastry

1 egg, whisked

300ml whipping cream

1. Wash, cut and trim the rhubarb into 3cm pieces.

2. Gently heat a deep pan with the cold water, sugar and rosewater so that the sugar completely dissolves; this will only take a couple of minutes.

3. Place the rhubarb into the dissolved sugar and water and simmer  for 6 minutes, remembering to cover the pan. You want to make sure the rhubarb is soft BUT  still holds its shape. If after 6 minutes the rhubarb is still firm, continue to heat for another couple of minutes until it has softened.

4. While the rhubarb is simmering, roll out the puff pastry so that it measures a rectangle of 35 x 25cm. Place onto a slightly larger piece of greaseproof paper.

5. Using a slotted spoon lift the rhubarb out of the syrup and place on a flat plate. With the remaining syrup continue to heat it on a high heat so that it is reduced, but that there  is at least 6 tablespoons of rhubarb rosewater syrup.

6. Preheat the oven to 180 degrees, if using a fan oven, 20 degrees hotter if not or mark 6.

7. Arrange the rhubarb on the puff pastry leaving a boarder of 2.5cm. I find it is easiest to make a slight mark with a knife all the way around so that it is fairly uniform.

8. Before placing in the oven brush with egg mixture around the boarder.

9. Bake in the oven for 15 minutes so that the pastry is puffed and golden. Leave to cool for five minutes.

10. When the tart is baking, pour the whipping cream into a large bowl and stir in 3 tablespoons of rhubarb rosewater syrup. Whisk until the cream thickens and peaks form.  Chill until ready to serve.

11. Brush the tart with the rhubarb rosewater syrup and serve hot along with the whipped cream.


Turkish Delights and Coban Salatasi

I have just returned from two glorious weeks spent exploring Turkey’s ancient Lycian Peninsula, which is in the south west of the country, by the warm azure waters of the Mediterranean.

The area is steeped in history with numerous ruins and tombs dating back over 2000 years. I couldn’t help thinking when I was exploring  and clambering all over these ruins (no health and saftey in Turkey!) that our Stonehenge is well, how can I put this delicately, a little underwhelming, if you compare it to all the ancient Lycian ruins. In the cooler months (April and October) guided walks are on offer through Lycia taking in the ruins of lost civilizations, the flora and fauna of the mountain passes and ambling through the charming Turkish villages, many of which seemed to have stood still in time. Perhaps not an adventure to take on with small children but definitely on my to do list for the future.

Ruins of Patara 

We did however, get the chance to soak up the ruins of: Letoon, which was the main religious centre of Lycia, Xanthos – the captial city of Lycia in the late Hellenistic and Roman times, Patara – an ancient city party submerged (ready to be truly discovered) under 12km of sand dunes, Tlos with its spectacular rock tombs carved out of the rock face and Kekova – the sunken city from 2000 years ago. At Kekova you are forbidden to swim and snorkel as the treasures from the old town are there for you to see clearly from a glass bottom boat or canoe. It was quite easy to see the  pots as we sailed gently passed.


Patara’s impressive amphitheatre

Tlos amphitheatre beneath the Taurus mountains

In a bid to absorb ourselves in authentic Turkey as opposed to full on ‘tourist Turkey’, we based ourselves slightly in land, firstly in the Kaya valley and the following week high up in the Taurus mountains. Both locations where a stones thrown from the glorious beaches but far enough away so that we were able to sample another calmer, slower side to Turkey.

Cooler breezes gave us welcome respite from the coast and we enjoyed seeing how the locals pass their days.

our neighbour with her goat

On a couple of days we managed to hire a boat for the day (complete with on-board cook – result!) so that we could see the coast line from the waters and swim in sheltered bays only reachable by boat.

Pretty harbour at Ucagiz

I was amused to see a local selling ice cream from his boat, similar to the one I had seen a few weeks previously on the south coast in England. Clearly all the rage around the world!!

The absolute highlight of our time on the water was when Big A and Little Z both caught rather large fish at the same time. We were all so thrilled by this, even the Captain was impressed as I think he did not think they would catch anything using the hand held real as opposed to a rod. We took them to the local town where they gutted and grilled them for us so that we could have them for lunch. It was great for the girls to see the full cycle of catching a fish and then having it washed, cleaned and gutted before being grilled and then eaten, all within a couple of hours of being caught. Wonderfully fresh and we all agreed, very tasty. We weren’t too sure what the fish were exactly but they tasted delicious and the girls were delighted at being such able fisherwomen. Definitely a life long memory.

The morning’s catch!

When abroad I always enjoy discovering the different local foods and dishes on offer, as well as the spices and herbs that are commonplace.

At the spice market I bought: pink peppercorns, sumac, pul biber  (dried flaked pepper), dried mint tea, a marinade for fish

Turkey is bountiful with wonderful fruit trees bursting with offerings, some ready now – such as figs, grapes, peaches and cactus fruit (prickly pears) and others not quite ready for a month or two – namely pomegranate. I discovered the carob fruit that was completely new to me but I immediately took a liking to its sweet chewy undertones.

Carob fruit in centre of photo – they look like large vanilla pods.

I discovered that it has been cultivated for over 4000 years and that is also known as ‘St John’s bread’ or ‘locust bean’ as the pods were mistaking thought to be the ‘locusts’ eaten by John the Baptiste in the wilderness – although this was proved to be wrong as he ate migratory locusts. It has a honey taste to it and is in fact used as a substitute to sugar. I am certainly going to seek out the powder form and try baking with it this autumn – watch this space. Another interesting fact is that the beans are ground down to make a cocoa substitute, that although slightly different tasting, has a lot less calories and virtually fat free. It is also packed with vitamins (A, B, B2, B3, D). Check out this website which will tell you in more details about the carob fruit’s benefits. I also like John’s youtube summary of the fruit. I would love to grow a carob tree here in the UK, but I fear that our sporadic sun shine may not help it thrive like the ones in the Mediterranean and in California.

The girls discovered a new treat known as ‘gozleme’, which is basically Turkey’s answer to an Italian calzone. The dough is rolled out on a round surface and then half of it is stuffed with a contents of your choice – we liked spinach, feta and potatoes and then folded over to create a crescent. This is then put onto a hot circular surface that is heated underneath by an open fire. The whole process was mesmerizing to watch and the finished snack was polished off in no time at all.

Preparing our gozleme

As the weather was ridiculously hot, salads became a staple at meal times. The most popular salad in Lycia seemed to be ‘Coban Salasti’ otherwise known as ‘Shepherd’s Salad’. It appeared on every menu and is ridiculously easy to make and perfect in hot weather. The trick is to cut the vegetables up  really small – far smaller than I would normally when making a salad.

Coban Salatasi – Shepherd’s Salad

Serves 4

2 large tomatoes (or 3 small), finely chopped

3 Turkish green peppers (the long thin ones), finely chopped

2 small cucumbers, finely chopped

1/2 (half) a white onion

1 large handful of fresh flat leaf parsley, chopped

2 tbsp olive oil

2 tbsp lemon juice

salt and pepper to taste

1. Finely chop all the ingredients into a large bowl and gently mix together.

2. Add the olive oil and lemon juice and season to taste and serve.

So what have you been up to this summer? Any food foraging or discoveries in foreign lands? Don’t be shy and leave a message below, I’d love to hear from you.


Mountain Air and Chinese Marbled Tea Eggs

Mr B and I have just returned from one of those magical long weekends when you literally have to pinch yourself that what you are experiencing and seeing is actually real. We were attending a friend’s wedding in South Tyrol in Northern Italy, but due to logistics we decided to fly into Munich, a city we hold dear and one that we visited last December. Driving through Germany, Austria and into northern Italy may sound like a bit of an epic journey but the truth of the matter is that it only takes 3.5 hours and we thought a scenic drive through the  Brenner pass would be rather pleasant.

Our destination was the stunning eco spa hotel, Vigilius mountain resort, which was lovingly designed by architect Matteo Thun. The hotel blends into the natural environment seemlessly due to the use of materials from renewable resources. All the water used in hotel – from the pool, shower, baths and drinking comes from the Vigiljoch spring water.  To reach the hotel you need to take a cable car for about 15 minutes and upon arrival you really do feel a world away from the stresses and interruptions of day to day living. There is no Wifi or TV in the hotel, which allows you to really switch off and enjoy the natural environment that you find yourself in.

The wedding itself allowed us to explore the mountain side, not least because we had to take a single chairlift a further 15 minutes higher up the mountain and then a 15 minute walk to the church. It was one of those experiences that we will remember and cherish forever, not least because of the surreal nature of taking a chairlift dressed in wedding attire.

The smell of the pine forests and the wood burning in the chimneys conjured up happy memories of times in the mountains when the snow was thick and heavy. It was refreshing though seeing the mountains covered with grass and wild flowers and the cows with bells around their necks.

During the church service itself, the cow bells could be heard just outside the church entrance, to the extent we would not have been surprised had they ambled in to take a look at what was going on.

On Sunday, after all the wedding festivities were drawing to a close, Mr B and I returned to the top of the mountain and had a good amble around the wooded paths that are carved into the mountain. We came across characterful chocolate box houses similar to the ones that we all draw as children. I loved the green shutters and the window boxes filled with bright red flowers matching perfectly with the red gingham curtains.

We returned, one last time, to the church where we had spent some precious moments the previous day.

It was hard to drag ourselves away from such a picturesque spot, with beautiful blue skies and wonderful green mountains.

Returning to London I was convinced that the good weather must surely have arrived to our shores – I was clearly delusional after all that mountain sun and fresh air – as the rain persists and people’s moods continue to fray.

As activities with Big A and Little Z are housebound with the continuous downfall, we decided to make some Chinese marbled tea eggs. In China, the eggs are a common snack that are adored by school children and adults alike. The marbled effect, that is created through gently cracking of the hard boiled eggs, is attractive and unique, in that no two eggs will look the same. The girls love to see the different effects that are created each time we finally break open the shells.

I have loved hard boiled eggs for as long as I can remember, to the extent that no picnic is complete without them. As well as being aesthetically pleasing, Chinese marbled tea eggs also taste really delicious with the subtle flavours of tea, soy and aniseed gently resonating from the egg. So why not try making these next time you plan on having a picnic when the sun shines or, for that matter, when it rains and you decide to have it inside instead.

Chinese Marbled Tea Eggs

Sourced from Balance and Harmony Asian Food by Neil Perry – p193

6 free range or organic eggs

3 tbs Jasmine tea leaves (or black tea leaves)

2 cinnamon bark sticks

3 star anise

half tsp sea salt

100 ml dark soy sauce

1. Place the eggs in a pan of cold water so that they are completely covered and gently bring the water to the boil. Simmer gently for 6 minutes.

2. Gently transfer the eggs to a bowl full of ice and then cover with cold water. Place the pan of boiled water to one side as you will use this later.

3. Once they are cooled tap the eggs gently so that the shell cracks but does not break off. You want to have the effect of lots of small cracks.

4. Place the eggs in the pan of boiled water and add the tea, cinnamon bark, star anise, salt and soy sauce.

5. Simmer for a further hour and then remove from the heat and leave to cool completely. The longer you leave them the more flavour is drawn into the eggs and the more marbled the eggs become. Those above were left in the fridge overnight.

6. To serve remove the eggs from the stock and carefully remove the shell to reveal the unique marbled effect.


Lazy Florida days and a healthy option omelette

We have now returned from 10 blissful days in the Florida Keys and Miami. Nine hours on a plane transported us to the depths of summer where the sun shone and a gently cool breeze drifted off the Atlantic Ocean and the Gulf of Mexico, giving us a little respite from its warm rays . I’d been to Key West once before but had flown directly onto the island so had not fully grasped how spectacular the drive from the Everglades to the southern tip of Florida – Key West – actually was. There are over 1700 islands in the coral archipelago that makes up the Florida Keys, but only 43 are inhabited connected by bridges, the most spectacular being the seven mile long bridge. We stayed on the beautiful Islamorada and whiled away the days swimming, snorkeling, sea kayaking, seeing dolphins and fishing from the jetty.

A coral reef stretches to almost as far as the eye can see and this coupled by bath warm still waters provided the perfect sea for the whole family to feel safe from deep swells.

We spent a leisurely day driving up to the tip – Key West – and back to Islamorada. Key West seemed to have expanded  somewhat since I was last there 18 years ago, as you would expect, but step off the touristy Duval Street on to the side streets and you will find the the beautiful weather boarded houses covered with bougainvillaea which have remained the same since the days of Ernest Hemingway. The pace of life is slow and it doesn’t take long to feel the stresses of everyday life lift off you when you spend time in the place.

Being only 90 miles from Cuba, therefore closer to Cuba than Miami, the island definitely has more of a Caribbean than American air to it. Many Cubans moved permanently to Key West from the 1860’s  following the ‘Ten Year War’ and with the Cubans came the arrival of the rooster (due to their love of cockfighting), to the extent that today virtually every street has a rooster wandering down it. Cockfighting was outlawed in 1970 but the roosters have remained free to wander at their will around the streets.

Mr B and I ate one of the most delicious lunches whilst in the US at a place called Mangoes, a ‘Tuna, Crab and Avocado Tower’. It was absolutely divine, seriously off the charts. It consisted of  tuna tartar, blue crab, layered avocado, plum tomato, cucumber, field greens and arugula (or rocket for us Brits!) and finished with a tomato vinaigrette and scallion infused oil.  I am going to have to replicate a similar dish and put it here on my blog in the future. Fresh, healthy and delicious what more could I ask for !

Half way through our holiday we said our goodbyes to the Keys and headed to Miami, a city that none of us had visited before. I had high hopes for the place and was looking forward to seeing its art deco district, sample fresh healthy food and soak up the atmosphere on South Beach. I can honestly say that Miami totally lived up to our high expectations. OK, it’s not going to compare to the likes of Rome or Florence for history and culture, but for flamboyance, flair and basically great fun, it definitely rocks.


The pulse of the place is electric and it’s definitely a place that promotes healthy living. South beach is stunning and stretches for miles and all day there are joggers, cyclists, skate boarders, roller bladders and walkers using the board walk that runs parallel to the beach. The beach is exceptionally wide owing to the fact that the part nearest the board walk has concrete underneath with sand on top, which gives it an easier surface to jog for those who want to run on the beach. It’s appearance however, completely blends in naturally with the rest of the beach. I was rather taken by the stunningly painted (mostly pastel shades) life guard huts that are scattered down the beach. There are 125 life guards covering 8 miles of beach and every couple of hundred meters sits another beautiful hut for them to survey the waters and swimmers within their view.

Up until the 1980’s Miami was a no-go zone for tourists, in fact it supposedly had the highest murder rate in the whole of the US. The hit TV series ‘Miami Vice’ played it’s own part at bringing around the change from least desirable city to visit to the happening, tourist magnet it is today. The series put Miami on the map and with the help of the real life cops it cleaned up it’s act. I can honestly say that I was surprised by how safe Miami – well South Beach – actually felt. There was a police presence, but not a threatening in your face kind of presence.

Food wise we ate some delicious meals but there are a few observations I thought it might be interesting to raise here.

1. Portions in the US are SOOOOO BIG. Way bigger than here in the UK. On average I would say they are twice the size. I have a good appetite but even I found the portions to be far too large to be considered healthy for a grown adult. I realise that ‘doggy bags’ are common place in the US, less so here in the UK, and that most people like to take home the food they cannot eat. Just an idea, but why don’t restaurants serve smaller portions, charge less, and then the diners can finish all their plate without having to take home a ‘doggy bag’. Does everyone really like leftover brunch? As far as I could see there must be so much wasted food in the US. Also as the population is growing in girth it might be advisable for restaurants all over the US to join together and serve smaller portions so that the next generation do not have to deal with such first world problems as obesity.

2. Oranges come from Florida right? They even have them on their number plates, so you would expect that a fresh orange juice in a restaurant/diner would be pretty cheap. Oh no think again. Fresh orange and apple juice were so much more expensive than all the fizzy sodas that it is no wonder that people chose the unhealthy option if they are strapped for cash. We went to a few diners and they always seemed to have free refill for coke, lemonade etc, but never the healthy options such as fresh orange or apple juice. I found it rather off putting seeing grown adults drinking pint sized glasses of coke with their breakfast.  Also ordering a fruit salad for breakfast was always so much more expensive than ordering the unhealthy options.

3. Seeing Cops eating in diners was new for us. In the UK you would never see this. It’s not that they don’t eat when on duty – I am sure they do – but you never see a bunch of them chilling out for an hour or so eating a large fry up. I’m not saying this is a good or bad thing, just an observation we made.

4. Average steak size in the UK is 12/14oz. In the US it’s 22 oz. This tells you something right?

5. We had a fun brunch at ‘The Big Pink’ in South Beach, but a 5 egg omelette is just a little too much for one individual. A healthier option and one that was prepared for me when I was staying in Islamorada is the following and is without out doubt the tastiest and healthiest omelette ever. Seriously try it out and let me know what you think.

 Egg White Omelette with Fresh Spinach, Goats Cheese, Red Onion and Tomato

serves 1

3 egg whites, whisked

half a small red onion, chopped

half a medium sized tomato, chopped

small handful of fresh spinach

1 tbsp crumbled goats cheese/feta

olive oil

pinch of salt (optional)

1. Warm a pan/skillet and then add a little oil and the chopped red onion. Fry for 2-3 minutes before adding any other ingredients.

2. Add the tomatoes and spinach and after 10 seconds add the whisked egg whites, goat cheese and pinch of salt (optional).

3. Continue to whisk gently for up to a minute or just before the eggs set so as to make the omelette fluffy. Using a spatula press down lightly so as to bind the omelette together.

4. Gently fold over half the omelette using a spatula to create a half moon shape and again press down lightly for 20 seconds.

5. Tilt the pan/skillet and transfer omelette on to a plate.

6. Eat immediately, with a scattering of fresh spinach leaves on the side.