Tlayudas – Mexican Open Pizza and Homemade Guacamole

IMG_7052

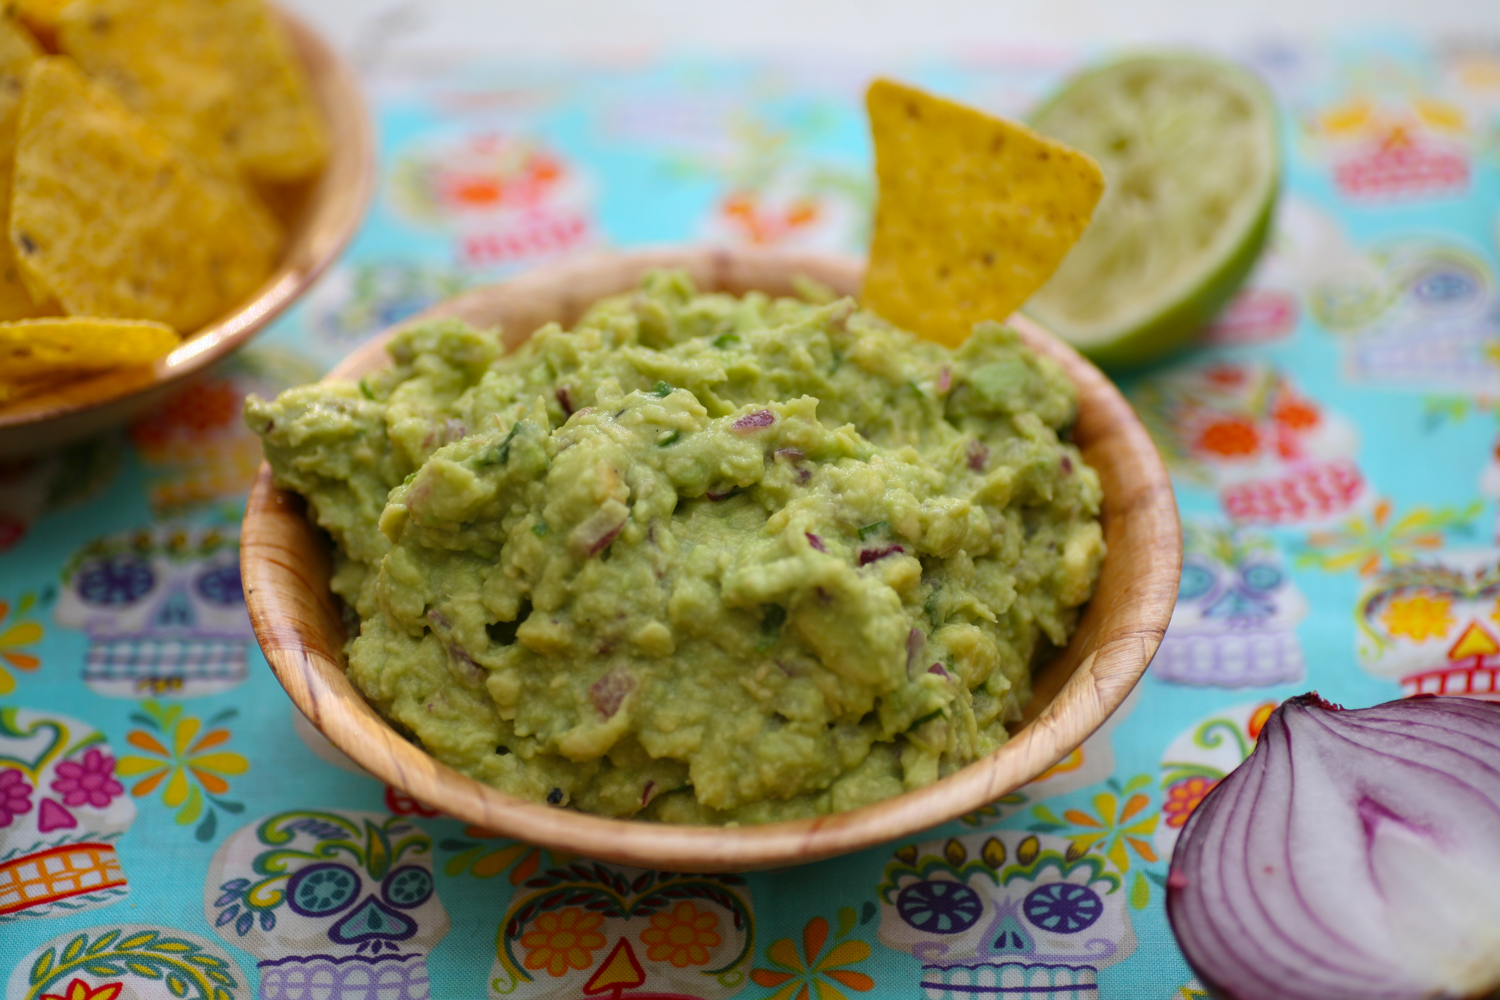
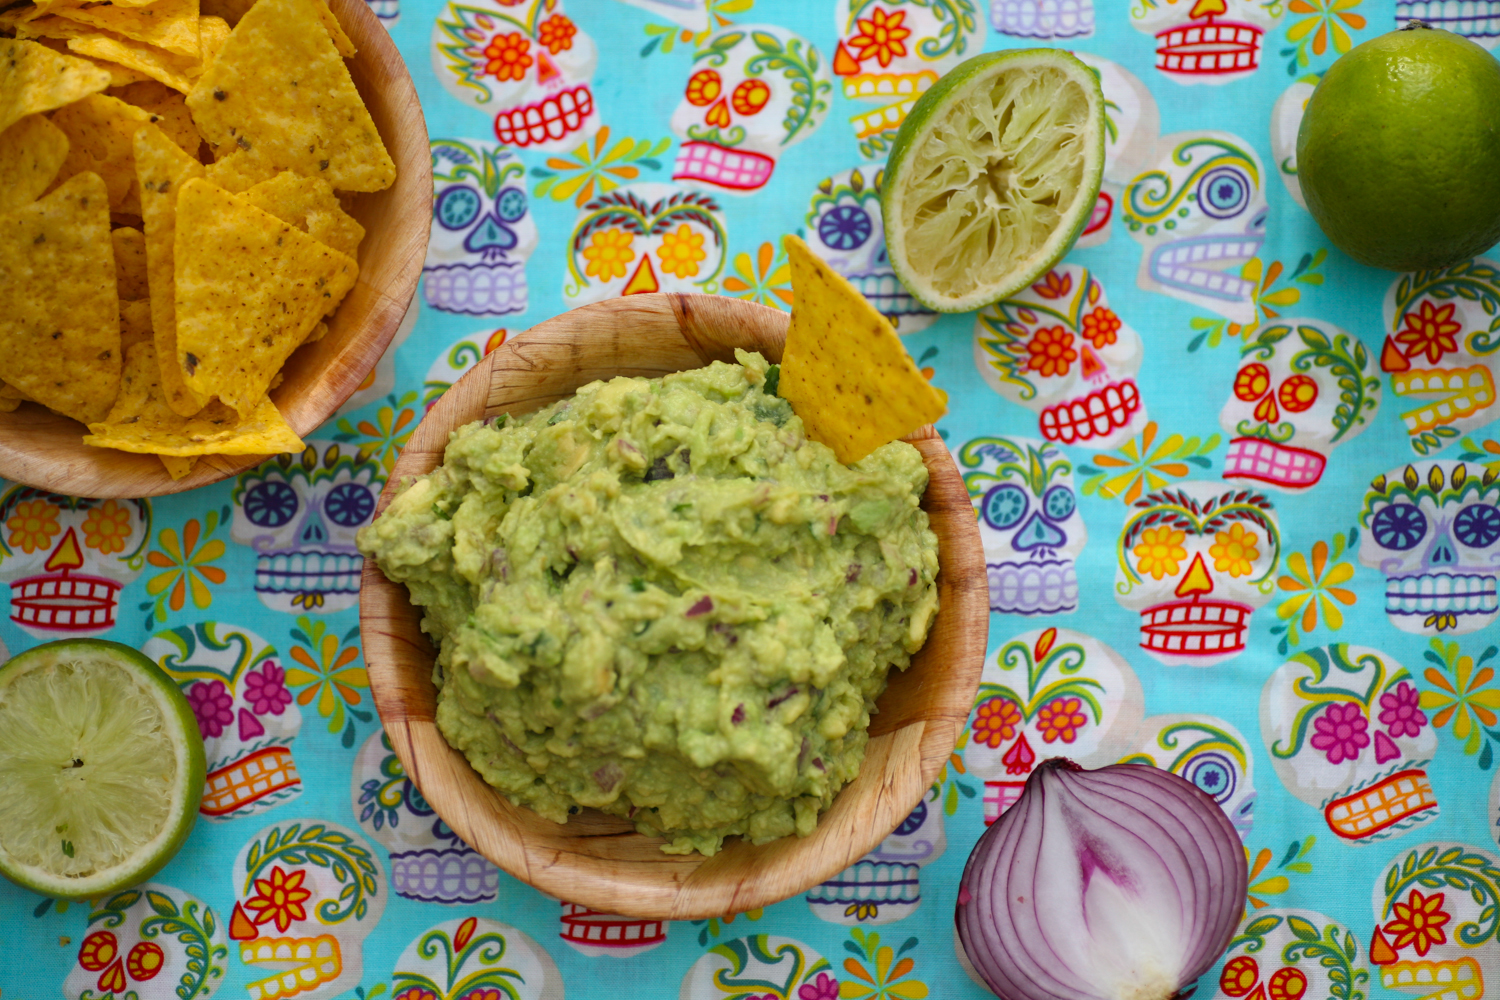
Homemade guacamole packs a punch well above the bought stuff.  I know this my trade mark line (yawn yawn!), but it really is a breeze to make and is so tasty you’ll be wishing you had bought more avocados. As well as being a moreish dip – I kid you not, if I leave the room with a bowl of guacamole and tortilla chips, when I return the contents of the bowl will be clean – it’s also the perfect filler for the Mexican pizza Tlayudas, pronounced something along the lines of (clae-yoo-das).

These pizzas can be made with Middle Eastern flat breads/pittas a supply of which I always have in my freezer. It’s simply a case of piling on all the ingredients, with the flat breads sitting directly on a frying pan and then folding them over slightly to give the appearance of an thick taco. You can fill the flat breads with whatever takes your fancy, however I find that guacamole; shredded, poached chicken; mozzarella; pecorino; spiced sun blushed tomatoes; spinach; tarragon and rocket really hits the spot.

Be warned eating this is not a tidy pastime. However, you can get seriously involved and at one with your food.

Let me know if you give them a whirl and leave a comment below.

IMG_7036

Homemade Guacamole

adapted from Thomasina Miers’s book Mexican Food Made Simple

Serves 4

1/2 a red onion, finely chopped

2 serrano green chillies (1 if you prefer it less spicy), finely chopped

3 large ripe avocados, stoned and skin removed

1-2 limes, juice

pinch of rock salt

handful  of freshly coriander, chopped

black pepper

1. After finely chopping the red onion and chillies (I tend to leave the seeds in to give it that extra kick) place them in a bowl and  mash them together a little before adding the avocado. If you don’t have a pestle and mortar I find a good sized bowl and an end of a rolling pin work really well.

2. Add the juice of one lime and stir well into the guacamole, along with the salt, pepper and the chopped coriander.

3. Taste and add the juice of a further lime if needed – down to personal choice. I love it limey so tend to add two.

4. Give a good stir and spoon into a serving bowl/dish.  Place in the fridge whilst you are preparing the ingredients for the Tlayudas. Do not prepare too far in advance as the avocado will begin to discolour.

IMG_7059

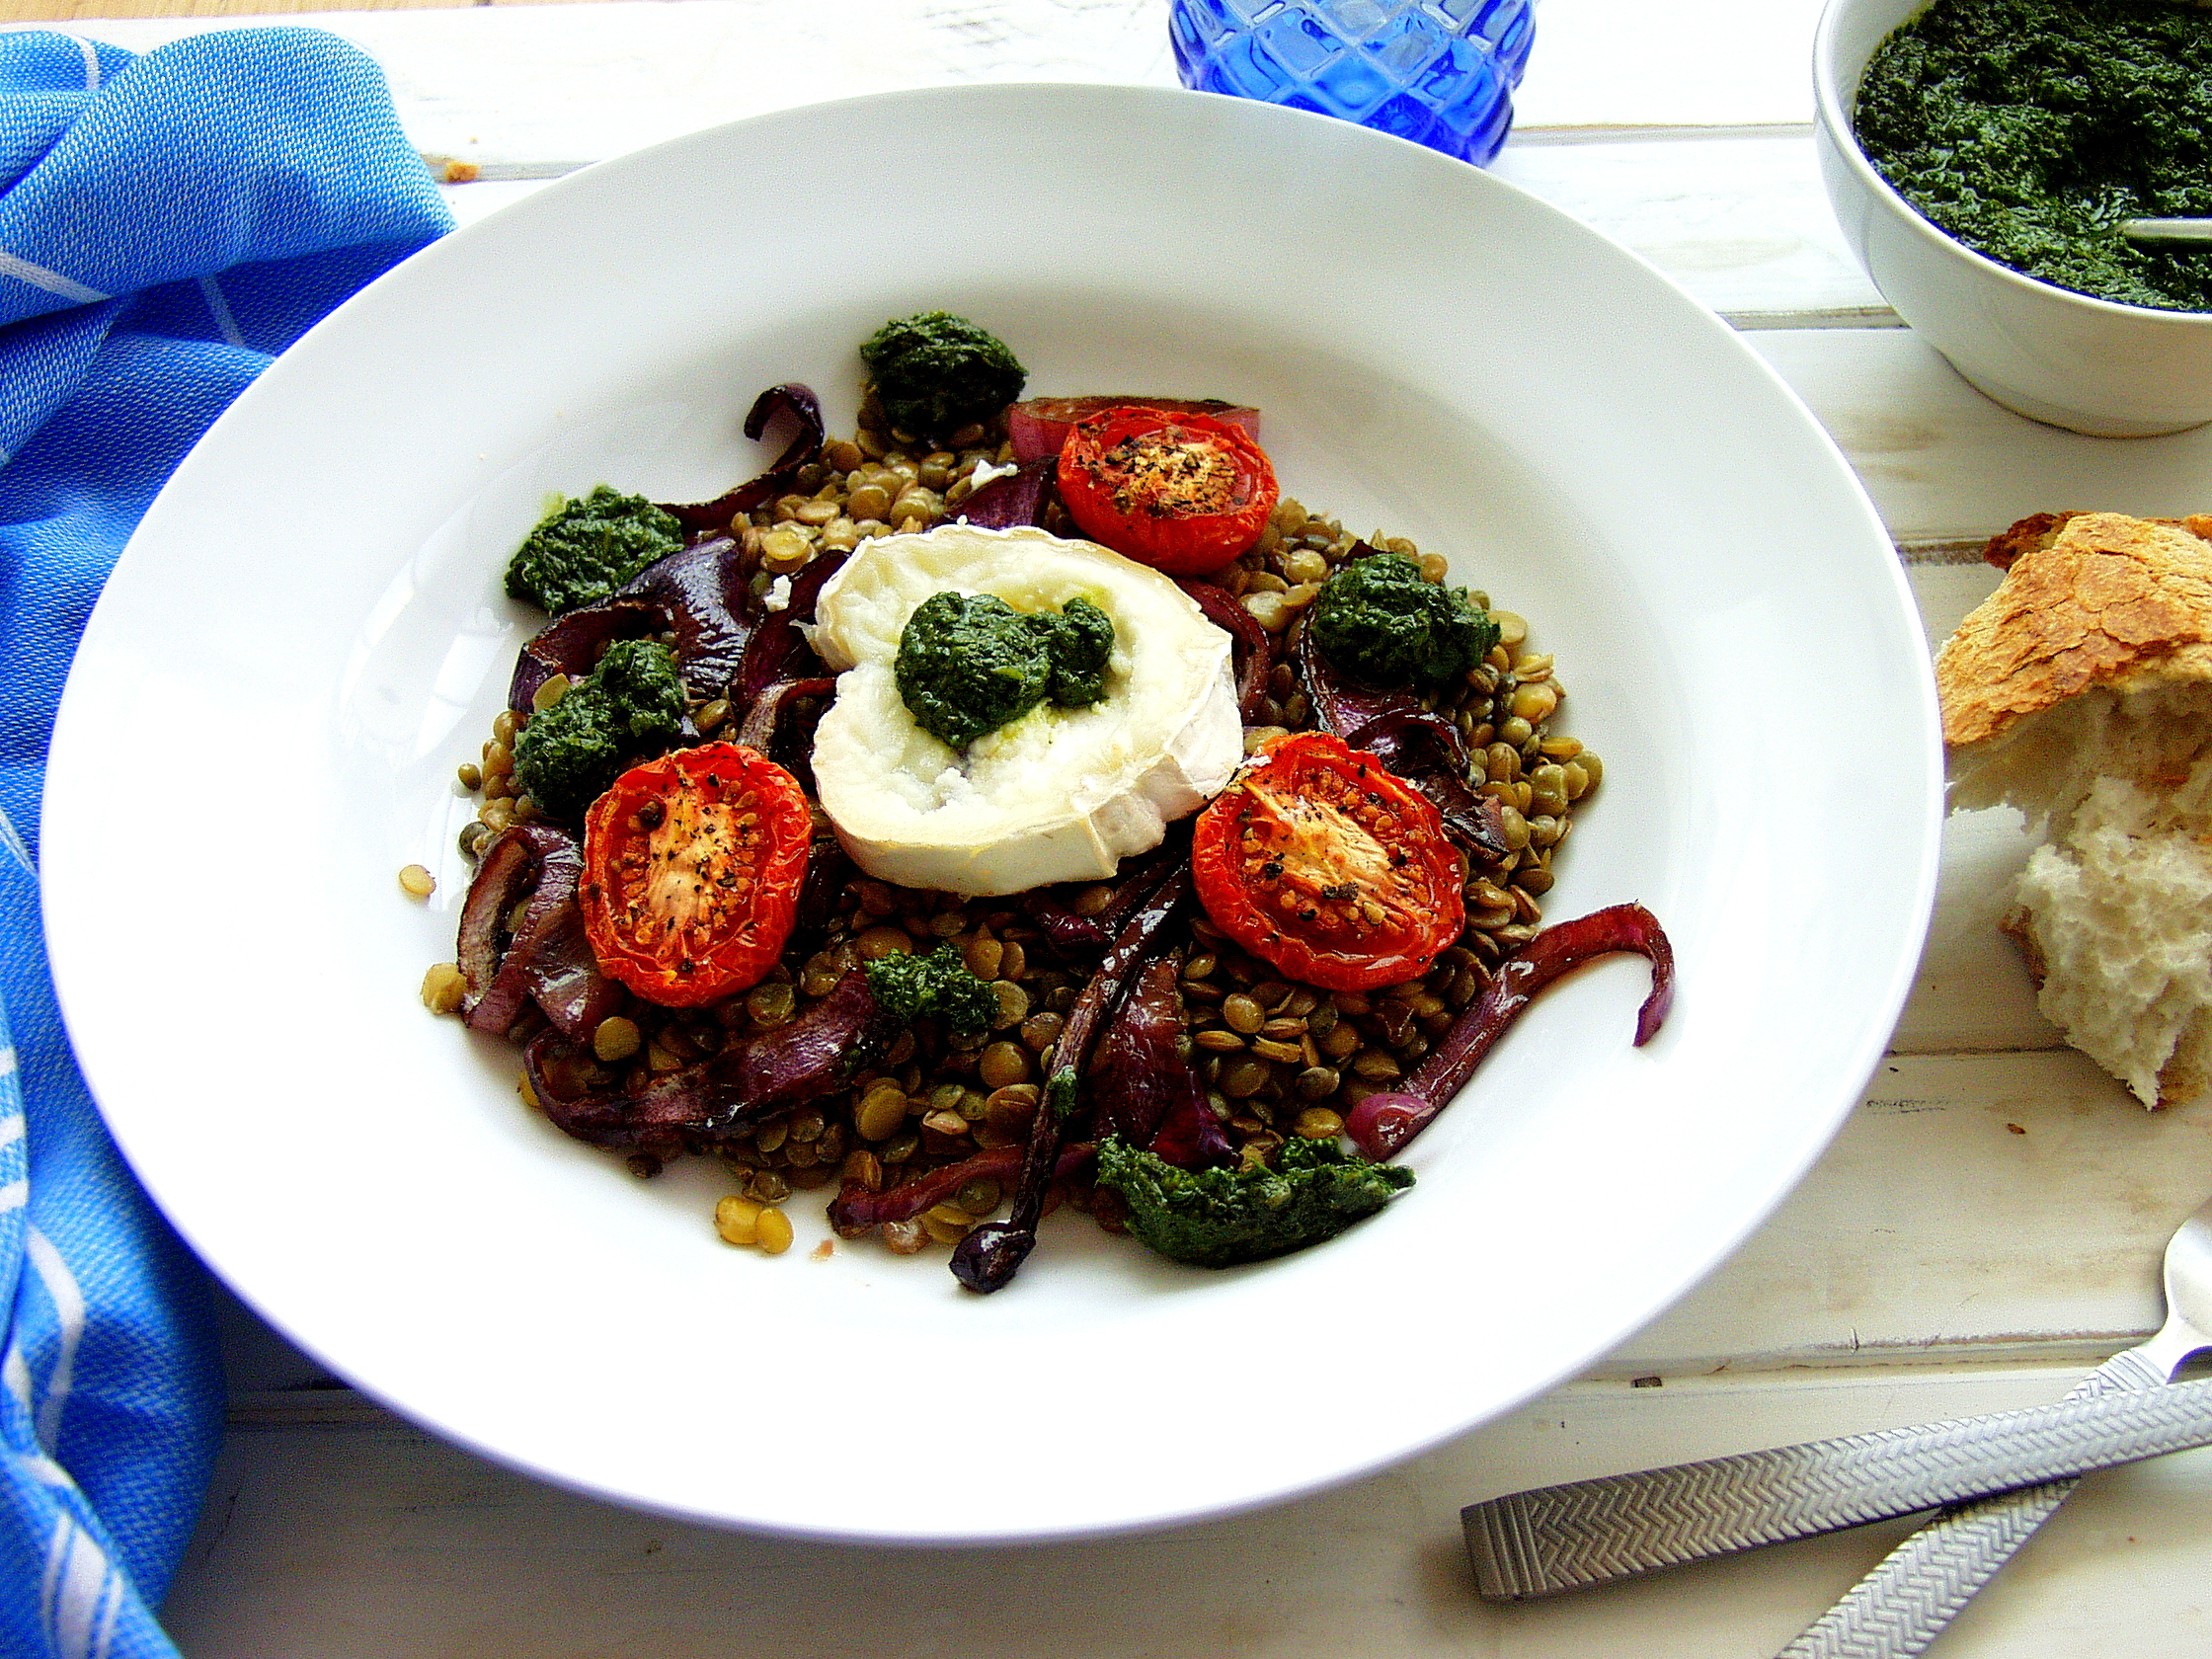
Tlayudas, Mexican Open Pizza

adapted from Thomasina Miers’s book Mexican Food Made Simple

Serves 4

2 chicken breasts, poached and shredded

1 large bag of spinach

1 tsp of butter

4 large Middle Eastern flat breads

a bowl of homemade guacamole, see above

2 large mozzarella balls, torn into smaller pieces

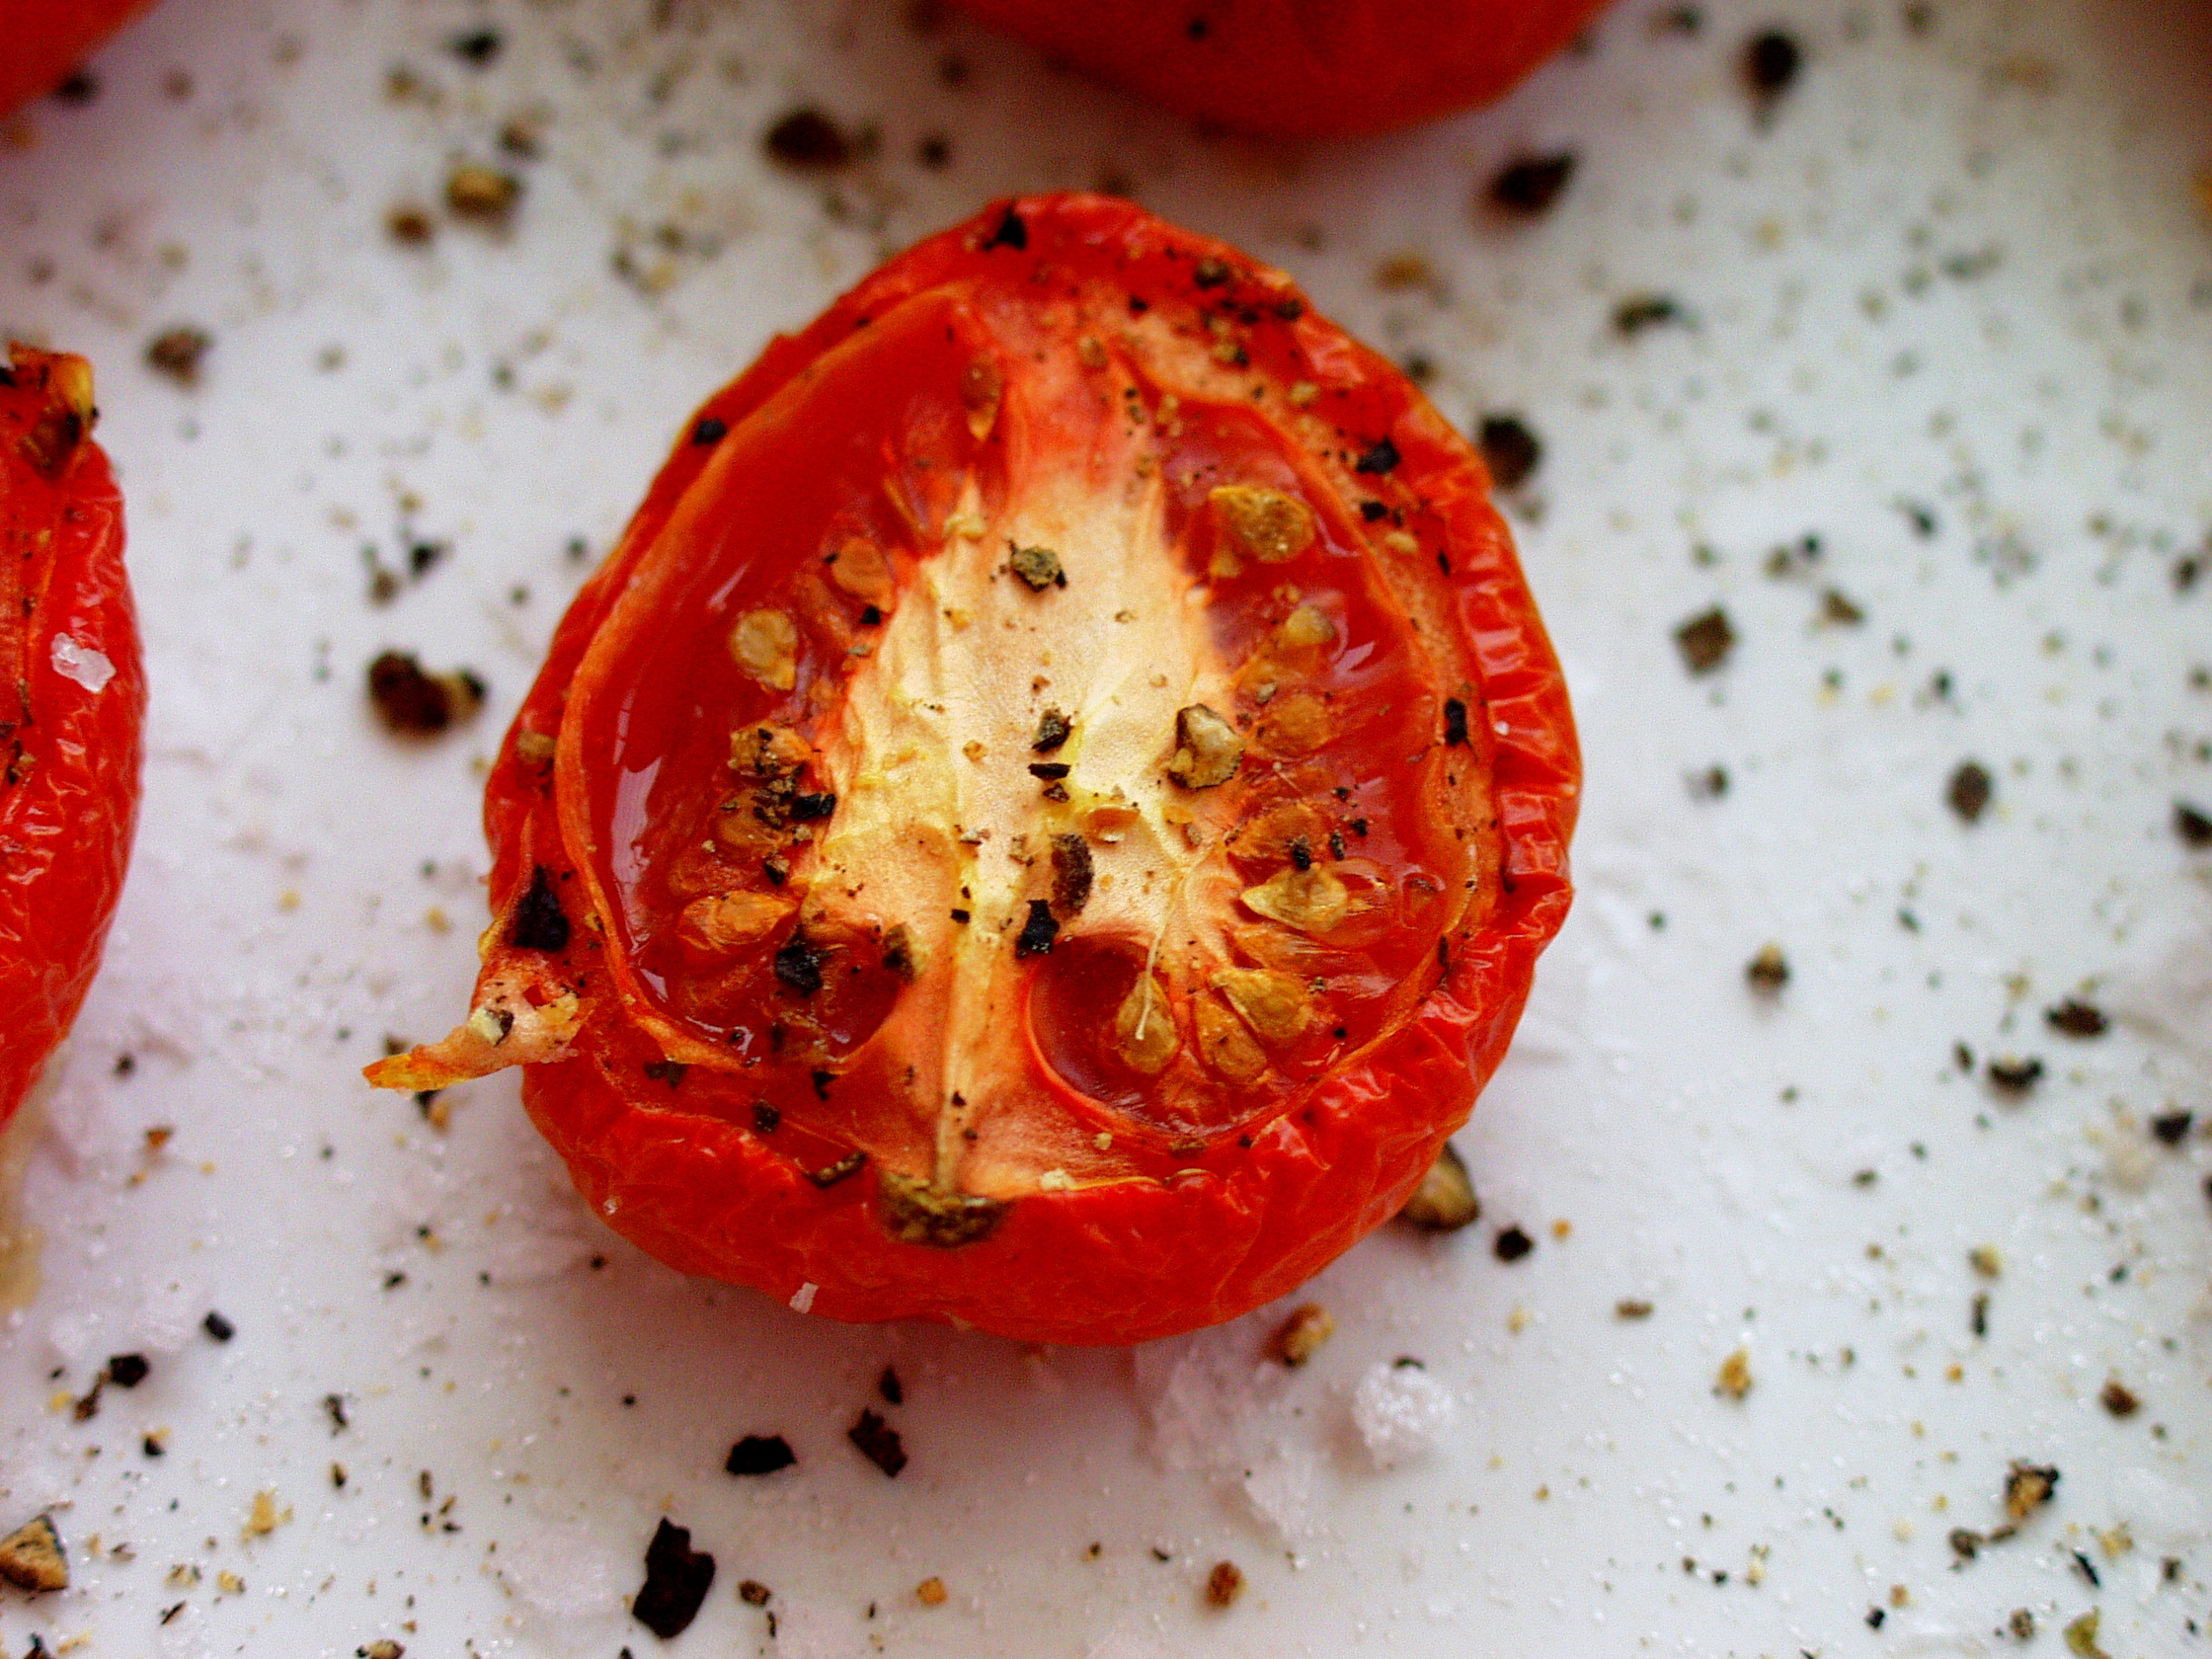
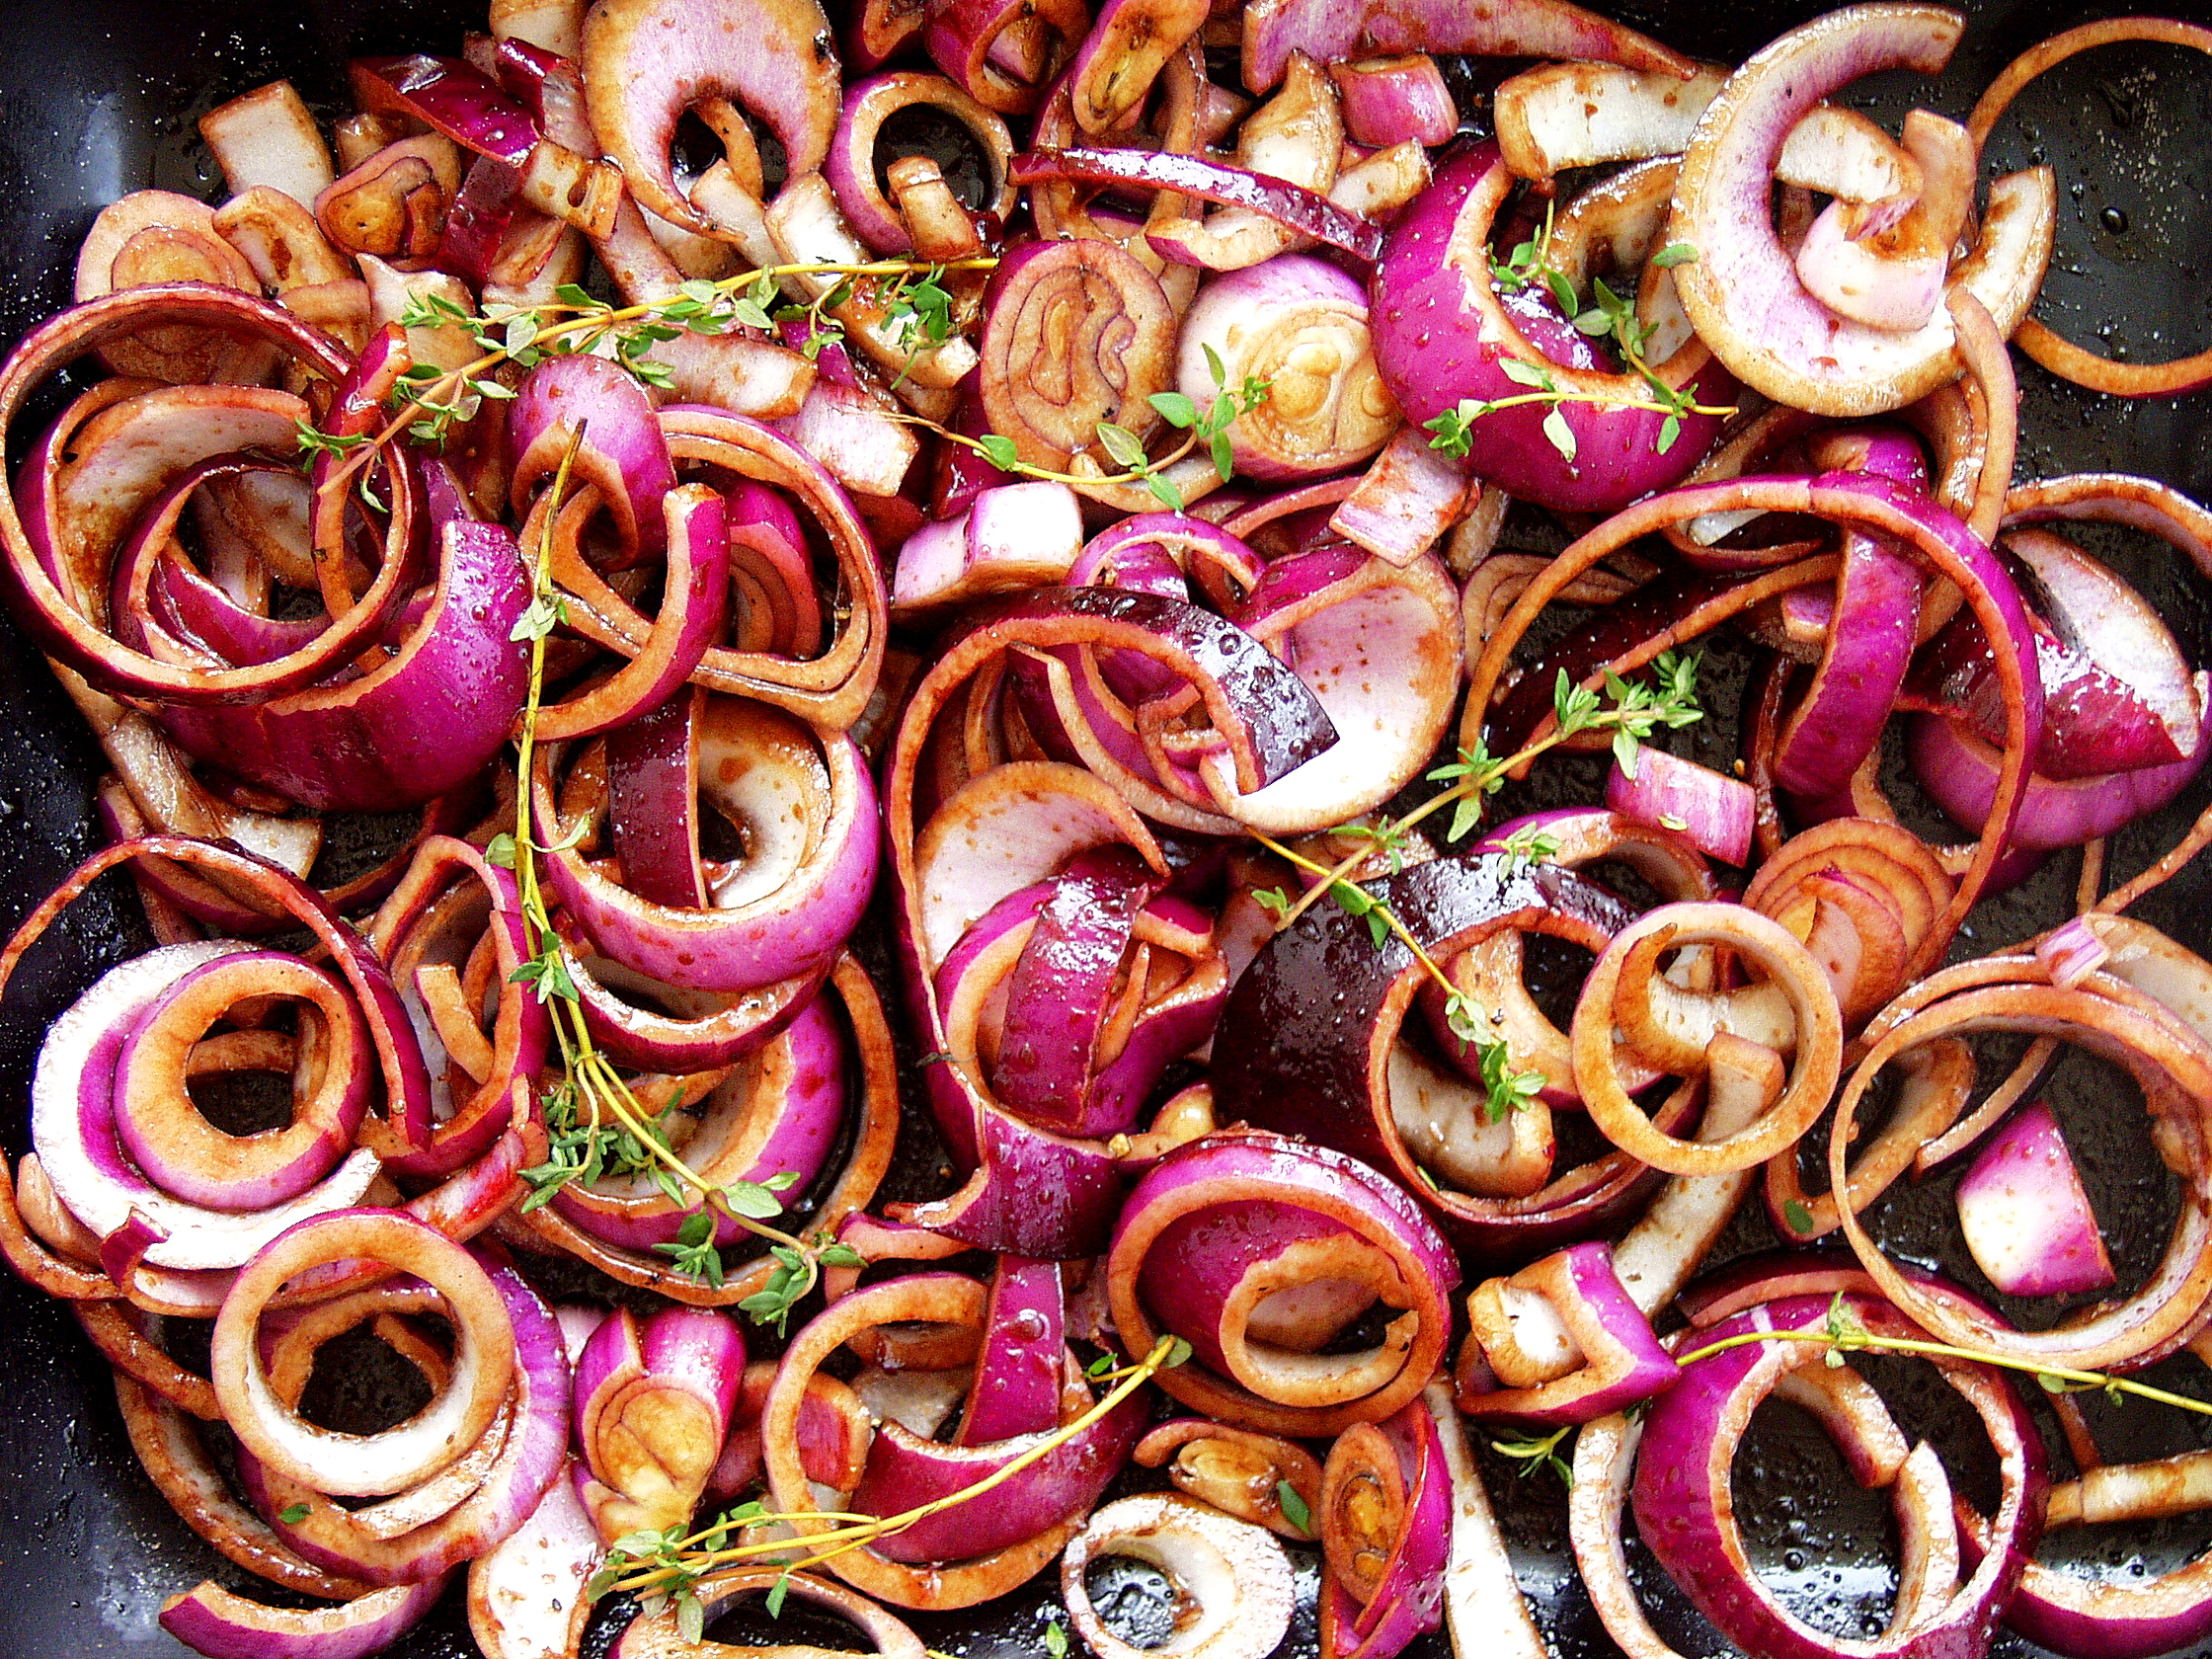
16 slow baked tomatoes with chilli 

2 handfuls of rocket

1 handful of fresh tarragon

rock salt and pepper

pecorino or cheddar cheese for grating

1. Poach the chicken (in boiling water for up to 20 mins) and then shred it using a fork.  Place to one side.

2. Place a saucepan on low heat and add the butter. Once it has melted add the washed spinach and cook for a minute until the spinach just wilts. Remove from the pan and strain the spinach, pressing down firmly with a spoon so that the water is removed as far as possible. Place to one side.

3. Heat up a large frying pan and when it is hot add a flat bread and press down gently. Sprinkle a drop of water and turn the flat bread over. Now you need to work quickly. Spoon on a generous helping of guacamole followed by the chicken, mozzarella, slow baked tomatoes in chilli, spinach, rocket, salt, pepper and some grated pecorino/cheddar.

4. The flat bread will begin to crisp up quickly and the mozzarella begin to melt, so carefully begin to fold the flat bread over. With a spatula lift the pizza onto a plate and serve immediately.

5. Repeat until everyone is served.

Dive in and enjoy. Don’t forget the napkins.


Marrow Dal and Fried Marrow Skin (Khosha Bhaja)

IMG_6968

My husband once asked a fellow foodie friend, who used to write for the food section of one of the large weekend newspapers here in the UK, for suggestions of ways to cook with marrow, to which her response was ‘you can start by throwing it in the bin’.  Ever so harsh but she is not alone! Many people often overlook the humble marrow and regard it as tasteless. I can tell you however, that marrow completely comes into its own cooked in Indian dal and even the skin need not be discarded as you can cook a completely separate delicious dish using it.

IMG_6961

In the hot sweltering heat of an Indian summer, eating marrow is the perfect way to cool down as it’s made pretty much made of water. So by combining it with red split lentils to form a dal is a wonderfully satisfying way to eat marrow in all it’s glory. Gardens here in England are bursting with marrows at the moment and although I have none growing in my postage stamp garden both my mother and mother-in-law are supplying me with endless amounts of marrow.

So dive in and give this glorious dal a go. I bet you’ll even surprise yourself as to how good it tastes.

IMG_7031

Marrow Dal

Serves 2-3

125g red split lentils

500g marrow, skinned and cubed (remember to keep the skin)

600g boiling water

1 tsp salt

half tsp turmeric

1 tbsp vegetable/mustard oil

1tsp Panch Phoran (Bengali five spice – see below)

2 green chillies, chopped in two

Panch Phoran is a uniquely Bengali (East India and Bangladesh) five (panch) spice mix. It has a magnificent aroma so I often use it in my red split lentil dals. If you cannot find a packet in your local Asian grocers you can make it yourself by mixing the following seeds together in equal parts: fennel, cumin, nigella, fenugreek and mustard. Store in an airtight container and it will last months. 

1. Rinse the red split lentils under cold water so as to clean them thoroughly. Repeat the process a couple of times.

2. In a saucepan add the cleaned red split lentils and 500g of boiling water. Add the turmeric and leave to simmer for 7-10 minutes. If the lentils begin to dry out add a little more boiling water.

3. Add the marrow and stir into the dal. Add a further 100ml of boiling water and continue to simmer for another 5 minutes.

4. In a separate pan heat the oil and when it is hot gently add the panch phoran. They will begin to pop immediately so keep them moving around the pan. Add the chillies and mix in together. Now pour the marrow dal on top of the panch phoran and chillies and stir in together. Add the salt and then simmer for couple of minutes. Let it cool slightly before serving. You may need to add more salt if required.

In India many people often add a little ghee (clarified butter) on top just before serving to give it that extra delicious taste. If you are watching your waste line simply ignore this step!

***********************************************************

Fried Marrow Skin – Khosa Bhaja

Skin of a marrow

1 tbsp vegetable/mustard oil

1 tsp nigella seeds

1/2 tsp turmeric powder

pinch of chilli powder (optional)

1 green chilli, finely sliced

1 tsp salt

1. Peel the skin of a marrow and slice into fine, small strips. Place in a pan of boiling water and gently simmer for a couple of minutes.

2. Strain and place to one side. Heat a pan with oil and when it is hot add the nigella seeds. After a few seconds add the marrow skin followed by the turmeric, chilli powder, green chilli and salt. Cook on a low heat until the marrow skin begins to bronze.

Serve with the marrow dal above.


Foraging for Samphire on the British Coast

IMG_6645

June, July and August are the months to forage for marsh samphire, not to be mistaken for rock samphire, which grows on rocks on land and tastes completely different, I am told. Marsh samphire can be found in abundance in salt marshes and tidal mud flats on the British coast. You may have also come across it by one of it’s other names:  glasswort (its name of old alluding to a time when it was used in making glass and soap); sea asparagus; Saint Peter’s herb (the Patron Saint of Fisherman) or it’s rather grand sounding Latin name ‘salicornia europaea’. I particularly like its less well known name of ‘Mermaid’s kiss’.

IMG_0176

A few years back marsh samphire was not so easy to source in the shops, other than the fishmonger who would grace their fish displays with the vegetable from time to time. Recently I have seen it in the larger supermarkets in the UK being sold in packets on their fish counters. It’s relatively expensive for the amount you get, so if you happen to be on the British coast in the summer, it is well worth having a forage for the vegetable.

IMG_0174

I’ve been spending the last week or so on the borders of Suffolk and Essex, which is perfect hunting ground. I initially came across some growing on the mudflats on Mersea Island and immediately gathered a small amount to prepare for when I returned home. The following day we were passing by the picturesque and historical village of Orford in Suffolk – well worth a detour on many levels – Richardson’s smokehouse, the great Pump Street Bakery, some fine pubs, a small castle, a grade I listed church with Norman remains and a sailing club – all civilised places have a sailing club don’t you find? I had read that Orford was the perfect place to forage for marsh samphire, so bucket and scissors in hand Big A, Mr B and I went a foraging.

IMG_0178

It was not long before we spotted the easily identifiable marsh samphire sprouting up through the tidal mudflats. They almost look like miniature cacti, without any spines or sharp bits. When foraging though you need to be very careful not to pull out the whole plant as it will prevent it from growing further. Simply pinch off the top parts or use a pair of scissors, so that the fibrous stems and roots remain intact. You will find that the the samphire needs to be thoroughly washed a couple of times so that the mud, grit and general nasties are disposed of.

IMG_0179

Whilst it can be eaten raw, I like to cook samphire – boil or steam for a couple of minutes, and then eat with a dollop of melting butter and a squeeze of fresh lemon juice. Absolutely no salt is needed as they taste of the sea so are more than sufficiently salty. They are rich in Vitamins A, C and D and taste  similar to asparagus, albeit more salty!

IMG_6590

They are also a perfect accompaniment for fresh fish and also lamb, although I rather like the way that this blogger has prepared their samphire – see here – Poached Eggs with Samphire and Honey Harissa. How good does that sound?

Are you able to forage samphire near you? Does it grown in your country? How do you eat it? I would love to know so write a comment below for us all to see.

IMG_0185

Fresh Marsh Samphire with Butter and Lemon

A handful of fresh marsh samphire per person

 knob of butter

lemon wedges

1. Trim and wash the marsh samphire a couple of times so that all the mud, grit and stray seaweed is discarded.

2. Boil a large pan of water and place the samphire directly in the water (if steaming put into the steamer). Boil gently for 3 minutes and drain immediately.

3. Plate up and add a knob of butter to each serving and a lemon wedge on the side. Equally you can pre-melt the butter and pour it over the samphire. Both ways work equally well.

Eat immediately when it is hot and enjoy.

Remember no salt is needed. 


Mexican Tortilla Soup

IMG_5849

It’s been half term this week so until now I ‘ve not had a second to sit down and actually write a blog post. I had wanted to put up one of my ‘en papillote’ recipes, but although I ended up eating three fish meals ‘en papillote’  this week each time it was in the evening and by the time the little parcels of deliciousness came out of the oven the lighting was frankly too dark to get a good shot. Lightening or rather natural lightening is key to good food photography and whilst I am still learning I feel it is important to heed this one basic rule. When I started food blogging two years ago, virtually to the day, my food photography was pretty appalling and whilst I have not got to where I want to be quite yet, it has at least improved. This shot was taken at night and I look back at it now and cringe – in fact I think I may even re blog the recipe – Chilli Crab Linguini – with more appealing photographs as the recipe is a keeper and perfect for a midweek supper.

Anyway I digress, the recipe for today’s blog is straightforward and perfect for a light lunch. It uses a spoonful of the chipotle sauce that I blogged about a couple of months ago – hands up whose attempted to make it? I made another batch of 7 pots the other day as all the others had finished. By all means buy a ready made chipotle sauce but if you have a little bit of time (it really does not take long) I really urge you to try making your own chipotle sauce – recipe here.  The chipotle gives the soup an earthy, delicately spiced flavour – for those who have not tried chipotle chillies before they are NOT ‘blow your mind’ type of chillies but more of a smokey, gently spiced chilli that keeps you coming back for more. My seven year old loves the soup and does not find it too spicy for her palate.

Mexican Tortilla Soup

adapted from Thomasina Miers – Mexican Food Made Simple

Serves 6

4 tbsp olive oil

2 onions, sliced

3 garlic cloves, chopped

1 corn tortilla, broken up

1 tbsp of chipotle sauce

2 (400g) tins of tomatoes

1 tbsp brown sugar

1 tsp fresh oregano (or dried)

1.5 litres chicken/vegetable stock

salt and pepper to taste

Garnish

2 corn tortillas, chopped into 1 inch strips

vegetable oil, for frying

4 pasilla dried chillies, deseeded and stems removed (or you could use ancho)

100g feta cheese, crumbled

handful of fresh coriander, chopped

half a lime per serving

(You can also add avocado and sour cream although I omitted them for this shoot)

1. In a large pan – I find my large casserole Le Creuset pot is perfect for this – add the olive oil and when it is hot add the onion and gently cook for around 10 minutes before adding the garlic and the broken up corn tortilla. Leave these three ingredients to cook for another five minutes.

2. Now add the chipotle sauce, brown sugar, tinned tomatoes, oregano and a sprinkling of salt and pepper. Leave to cook for another 10 minutes before adding the stock and simmering for a further 10 minutes.

 3. Using a hand blender, blend the soup until smooth and then let to simmer gently for a few more minutes.

4. While the soup is simmering, place the pasilla chilles in a bowl of warm water for 10 minutes and then remove the stems and deseed. Pat dry with kitchen paper.

5. Heat up some vegetable oil in a small pan. You want to make sure that there is enough vegetable oil so that the tortilla will float on the top. I find that 200ml is more than enough – (you can reuse this oil fyi!). When it is hot and small bubbles are rising to the surface, gently add the strips of corn tortilla. They will sizzle immediately and begin to bronze quickly so move them around the pan for a few seconds so that they are bronzed all over. Remove with a slotted spoon and place on kitchen paper before transferring to a bowl.

6. Delicately place the chillies in the remaining oil. If they are still wet at all they will spit so be vigilant when placing them in the oil. Move them around in the oil for a few seconds then also place on kitchen paper. Chop up into bite sized portions and place into a bowl.

7. Crumble the feta, roughly chop the coriander and half the limes. (if you are using avocado – chop this is up into small cubes). Place in bowls on the table so that the hungry masses can add whichever garnish they wish to their Mexican tortilla soup.

Also if you are using sour cream, place in a bowl so those who wish can an add a dollop to their soup. I had this all ready and then forgot to photograph the sour cream on the soup as well. A case of being hungry so quickly wanting to photograph the soup and then eat with the rest of the family!


Broad beans, lemon zest ricotta, fresh mint oil, parma ham with pink peppercorns

IMG_5822

I have been meaning to a write blog post on this recipe for sometime now as I seem to be averaging eating it once a week in the last month or so. It’s one of those recipes that once you’ve prepared it you want to dive in and eat it so I needed to be speedy with the camera work, hence the lack of lots of photos.  It is absolutely perfect for a lunch either by yourself or if you have a few friends coming over. The bright greens and the complimenting flavours of lemon, broad beans, mint, olive oil, garlic, ricotta, parmesan, parma ham and pink peppercorns really appeal to me. The pink peppercorns I managed to source in Turkey last year and they have the most wonderful flavour. Whilst I imagine a quick trip to Turkey may not be realistic you’ll be glad to hear that you can find them at most supermarkets – they are definitely worth seeking out as they have a very distinct flavour – very different from the black variety.

I stumbled across this recipe years ago in Skye Gyngells book ‘A Year in My Kitchen’ and as far as I’m concerned it’s a winning recipe. The only slightly time consuming part is taking the skins off the broad beans – which to be fair does not really take that long, especially if you have a friend to chat to whilst you are sharing the podding together.

IMG_5769

Other than this time, I always prepare the dish with fresh broad beans but for some reason the two places that normally stock them this morning had run out, so I had to suffice with frozen. They tasted equally good, although they were a slightly smaller in size, which made peeling them take a little longer. I reckon if you have a glorious sunny day with friends coming over for lunch this is the perfect dish. To accompany it, a glass of Riesling or ginger cordial would always go down a treat. A great wine merchant called Symposium, based in the picturesque town of Lewes in East Sussex, I always find comes up trumps with recommending great drinkable wines. I’m based in London and they always seem happy to deliver a case or two to me when I am needing to stock up. If you are interested send Henry an email henry@symposium-finewine.co.uk and he’ll send you their wine list.

Broad beans, lemon zest ricotta, fresh mint oil, parma ham with pink peppercorns

Adapted from Skye Gyngell’s book ‘A year in my kitchen’

Serves 4

1kg of fresh broad beans in their pods (or 500g podded/frozen)

250g fresh ricotta

50g parmesan, finely grated

1 lemon, zest and juice

8 slices of parma ham

1 garlic clove

handful of fresh mint

75ml olive oil

pinch of pink peppercorns per serving

sour dough bread (or ciabatta)

1. If using fresh broad beans, take them out of their pods and place into a pan of boiling water for under 1 minute. If you are using frozen broad beans you need to leave them in the boiling water for 3 minutes. Strain and run under cold water immediately and then peel off  the outer shell of the broad beans and discard.

2. Take a large handful of fresh mint and finely chop up all of it bar a few leafs that you will sprinkle over the top at the end. Place the finely chopped mint leaves in a bowl with 75ml of olive oil and leave to infuse for 15 minutes or longer.

3. Place the ricotta into a bowl and add the finely grated parmesan. Stir together and then add most of the zest from one lemon – the remaining zest you will sprinkle on the dish at the end. Add the juice from half a lemon.  Stir in all together and leave to one side.

4. In a preheated oven – 180 degrees – place the parma ham on baking parchment with a drizzle of olive oil and black pepper. Leave to crisp up in the oven for 10 minutes.

5. Slice some sourdough bread and place in the toaster or under a grill for it to become golden. Once toasted cover with a little olive oil and fresh garlic.  Place on a serving plate.

6. Add a spoonful or two of the  lemony ricotta/parmesan to the toast. Add a scattering of broad beans followed by some mint drizzle and then lay two slices of parma ham over the creation followed by some of the remaining lemon zest, fresh mint leaves and a good pinch or two of pink peppercorns. I find that no salt is necessary as the parma ham and parmesan more than make up for the lack of salt.

Eat at room temperature.

IMG_5820


Bengali Khichuri – perfect for convalescing and detoxing

OLYMPUS DIGITAL CAMERA

If you are feeling a little under the weather, have the winter blues or just fancy some good old Indian comfort food, then read on, this post is especially for YOU>>>>>>>

Khichuri is a traditional Ayurvedic Indian dish, consisting of rice and lentils, that is given to those who are convalescing, detoxing  or fasting, it’s also really popular during puja time. Whilst it can be eaten in its pure form of rice and lentils (no onions or garlic), most khichuri that I have eaten consists of a vegetable or two thrown in as well. It’s the perfect dish to prepare if you need to use up any vegetables before they go off.  The Anglo-Indian dish of ‘kedgeree’ was inspired from khichuri and although it tastes very different the consistency is similar.

My eldest daughter (Big A) has been poorly recently and this is what I prepared for her as it is both nourishing and easy to digest.

There is no set rule on which lentil you need to use or vegetable for that matter. I tend to opt for red split lentils as they are the quickest to cook and need no soaking, although mung beans are also good to use (they do need soaking) as they are known for their ability to remove toxins from the body. My version includes carrot, courgette and and peas. Other vegetables would work equally well so if you have squash, marrow, cauliflower, pumpkin, green beans in the fridge (garden) pop one or two of them in and it will taste divine.

I have not included chilli in this dish as I was feeding it to my daughter, however, if you need a chilli buzz yourself just pop it in (whole or chopped) during  number 2 on the steps below.

OLYMPUS DIGITAL CAMERA

Bengali Khichuri

Serves 2-4

100g red split lentils

100g white rice (if using brown it will take twice as long!)

900ml boiling water

1 carrot, peeled and diced

1 large handful of fresh/frozen peas

1/2 courgette, partly peeled and diced

1 tsp of fresh ginger, finely grated

1 tsp garlic paste

4 green cardamom pods

1 tsp cumin seeds

1/2 white onion, finely chopped

1/4 tsp of garam masala powder

1/2 tsp turmeric

pinch of asafoetida/hing

1 tsp salt

freshly ground pepper

1 tbsp ghee/butter/or a splash of oil

fresh coriander to garnish

1. Rinse the rice and red spilt lentils a couple of times in cold water so as to get rid of any impurities and than place in a large saucepan with 900ml of boiling water and the chopped carrots and simmer gently for 15 minutes.

2. Meanwhile place the ghee/butter/oil in a saucepan and gently fry the onion. After 5-7 minutes add the cumin seeds, ginger and garlic and mix into the onions. Following this add the turmeric, garam masala, asafoetida and stir once again. Take a spoonful of the boiled rice and lentils and mix into the saucepan ingredients and then return it back into the main rice and lentil saucepan.

3. Stir all the ingredients together and add the courgettes and peas (or any other greens you need to finish up). Simmer for a further 5-7 minutes and add salt and freshly ground pepper to taste. You may find you need to add a little more water, but just enough to make sure that the rice and lentils do not stick to the bottom of the pan. It is not meant to be the same consistency as a soupy dal.

4. Serve into bowls with a sprinkling of fresh coriander.

OLYMPUS DIGITAL CAMERA


Wintery Warm Lentil and Goats Cheese Salad with a Fresh Basil dressing

OLYMPUS DIGITAL CAMERA

We’ve been having some glorious flurries of snow here in the UK, which has been rather exciting for us all. A blanket of snow makes London look magical and the silent, crisp air entices you outside to enjoy what nature has to offer. Whilst it is bitterly cold, returning to the warmth after some jollities in the fresh air is a welcome respite and I for one like nothing more than getting stuck into some cooking and baking. Big A and Little Z set about baking some biscuits, in fact lots of biscuits – I’ll blog this recipe once I have completely perfected it for you. Eating some warming, comforting food is totally necessary in this weather and lentils are the perfect food to tuck into.

The recipe today is great for the winter months, but can also be a fantastic dish in the spring and summer months eaten at room temperature and simply crumble the goats cheese instead of warming it. So if you are reading this in a hotter climate, fear not, you too can also cook the dish and be equally satisfied.

The trick though with this ‘salad’ is in the timing.  So if you are going to eat it warm please read the following.

1) A few hours before you intend to eat the salad place the tomatoes sliced in the oven and cover with caster sugar, salt and freshly ground black pepper. Put them on a low heat (100 degrees centigrade or less even) to gently slow roast away. You want the tomatoes to shrivel up at the sides and the slow roasting will give them an incredible depth of flavour. Seriously off the charts kind of taste. 

2) Place the sliced red onion rings on a baking tray covered in balsamic vinegar, caster sugar, olive oil, fresh thyme, salt and pepper and roast in the oven (180 degrees centigrade) for 25 minutes. If you do not have a separate oven to do this – as the tomatoes will need a lower heat – cook the onions first and then just heat them up in the low heat oven when the tomatoes are cooking to re-warm them.

3) Wash the lentils thoroughly then add cold water to cover them along with all the ingredients (listed below) and gently let them boil away for around 20 minutes. It is really important not to over cook them as they will become soft and soggy. You want to have them so that they still keep their shape.

4) Blend up the basil oil while the above is cooking away.

5) Plate up and whilst you are doing this place the goats cheese in a warm oven for a minute or two to warm it up then place on top of the lentils and drizzle with basil oil.

Whilst the ingredients length looks rather long…..please do not be put off as it really takes no time at all – bar the slow roasting of the tomatoes, which need to be cooked slowly over time. Everything, except warming the goats cheese in the oven, can be done ahead of time and then simply warmed up for a few minutes in the oven prior to serving.

Wintery Warm Lentil and Goats Cheese Salad with a Fresh Basil Dressing

adapted from Skye Gyngell’s recipe in her book ‘A Year in My Kitchen’

Serves 4-6

roasted tomatoes

6 plum tomatoes, halved

1 tbsp caster sugar

1 tbsp rock salt

liberally ground black pepper

———————————-

roasted red onions

5 red onions, sliced into circles

75g caster sugar

3 tbsp olive oil

3 tbsp balsamic vinegar

handful of fresh thyme

salt and pepper

————————————-

flavoursome lentils

400g lentils (I used a combination of green and small darkish green lentils but puy is also good!)

1 white onion, peeled and quartered

handful of fresh flat leaf parsley

2 garlic cloves, peeled

1 carrot, peeled and cut into three parts

2 inch piece of fresh ginger, peeled and cut into a few pieces

1 red chilli, kept whole

2 bay leaves

1 tbsp of fresh coriander stalks

———–

2 tbsp tamari (or soy sauce)

2 tbsp sherry vinegar

1 tbsp sesame oil

—————————————

basil oil

2 bunches of fresh basil

150ml extra virgin olive oil

1 garlic clove, peeled

salt and pepper

————————————

fresh goats cheese

6 slices of fresh goats cheese

—————

1) In the order of the above. Place the halved tomatoes into an oven proof dish and scatter with caster sugar, salt and pepper and place in the oven at a low temperature – 100 degrees centigrade works well – for up to 2 hours.

before slow roasting

OLYMPUS DIGITAL CAMERA

slow roasted to perfection!

OLYMPUS DIGITAL CAMERA

2) Slice the onions into circles and scatter in a roasting tin along with the balsamic vinegar, caster sugar,olive oil, salt, pepper and thyme and mix together well with your hands. Place in an oven at 180 degrees centigrade for 25 minutes.

before roasting

OLYMPUS DIGITAL CAMERA

3) Wash the lentils and then cover with cold water. Add the carrot, red chilli, onion, garlic, ginger, fresh parsley, bay leaves, coriander stalks and bring to the boil and then gently simmer for 20 minutes (or what is advised on the packet). Be careful not to over cook the lentils. 

lentils ready for the boil

OLYMPUS DIGITAL CAMERA

4) Place the fresh basil in a food mixer and blend. Slowly add the olive oil to the chopped basil and add salt and pepper to taste. If you prefer to have more of an oily basil then just add a little more olive oil. I rather like to have it so that you can add little dollops to the plate. (see below)

OLYMPUS DIGITAL CAMERA

5) Drain the lentils and remove the added ingredients as their job to flavour the lentils is now complete. When the lentils are still hot add the tamari, sherry vinegar and sesame oil and mix together.

6) Slice the goats cheese and place on an oven proof dish and place in the oven for a minute or two.

7) Plate up the lentils and add a generous helping of roasted onions, tomatoes and the goats cheese in the middle on the top with some dollops or drizzle of fresh basil oil and leave the rest in a separate bowl for guests to help themselves to more as they see fit.

8) Tuck in and enjoy along with some fresh bread on the side. It is absolutely heavenly. I know I often say that but seriously all the above effort is SO worth it.

Aside from the roasting of the tomatoes, this dish took me 30 mins to cook and plate up.


Vegetarian Ma Po Tofu


OLYMPUS DIGITAL CAMERA

In my first months of blogging, way back in the middle of 2011, I posted one of my absolute favourite recipes, Ma Po Tofu, which is a Sichuan classic and is seriously addictive – if you like chilli that is. It is incredibly easy to cook and after a manic day it is the perfect pick-me-up-food that takes no time to prepare. Over the years however, I have found that I am increasingly making it without the pork mince element and keeping it to a more vegetarian dish by including simply tofu and fresh (or sometimes frozen) spinach.

Recently in Hong Kong I began to judge eating establishments on how well they could cook Ma Po Tofu and Dan Dan Noodles as I had a acquired a taste for both dishes.

OLYMPUS DIGITAL CAMERA

Tofu I know divides opinion, but I am definitely in the camp of someone who loves it. It wasn’t an immediate love affair, but one that has grown over time to the extent that I always have tofu in the house, ready and waiting for me to make a last minute Ma Po Tofu dish or my other favourite tofu dishes, roasted harlequin squash with tofu, kale and coriander in a miso curry paste, black pepper tofu and soba noodles with tofu, aubergine and mango. Seriously give them all a try – I don’t think you’ll be disappointed.

OLYMPUS DIGITAL CAMERA

Tofu, or bean curd as it is also known, is hugely nutritious, versatile and a great vehicle for flavour. It’s rich in protein and low in fat, especially saturated fat. Yes, eaten on its own it is rather plain, but the point of tofu is to incorporate it with other flavours which it will help to enhance and lift. There are a myriad of different types of tofu, but the one I tend to use the most is ‘firm, silken tofu’ . I am going to be cooking some more tofu dishes over the course of this year, hoping that I may convert a few followers to the joys of tofu eating.

So here is what you need for the vegetarian version of the dish.

OLYMPUS DIGITAL CAMERA

Vegetarian Ma Po Tofu

Serves 2/3

349g silken tofu (or a similar amount)

2 large handfuls of fresh spinach

1 tbsp vegetable oil

1 clove of garlic, finely chopped

2 spring onions, chopped

2 tbsp of chilli bean sauce (Lee Kum Kee’s I find works really well)

125ml of vegetable stock (fresh or a cube)

1 tsp shaoxing wine

1 tsp of soy sauce (light or dark)

2 tsp of sugar

1/4 tsp of sea salt

a good pinch of crushed Sichuan peppercorns

1/2 tsp of sesame oil

1. Cut the tofu into small (2cm) cubes and place to one side.

2. In a shallow pan heat the vegetable oil and then add the garlic and spring onions, stirring for around 30 seconds. Then add the chilli bean paste and mix into the garlic and spring onions.

3. After a minute add the vegetable stock, shaoxing wine, soy sauce, sugar and salt and bring to the boil.

4. Add the spinach to the pan and gently fold into the hot sauce.

5. Once the spinach has begun to wither add the tofu and carefully spoon the sauce over the tofu, making sure not to break up the cubes. Leave to gently simmer for a couple of minutes.

6. Serve into a large bowl and sprinkle the Sichuan peppercorns and sesame oil and gently mix together.

Serve alongside small bowls of rice and hot cups of piping Jasmine/Chinese tea.

Perfect for this cold snowy weather.


First impressions of Hong Kong and getting over jet lag

IMG_6478

There is always something rather thrilling about going on a trip or a journey, but when you’ve never visited the destination before there is an added level of excitement and anticipation. The smells, sights, sounds and general fever of the place seize you almost immediately as soon as you step foot on to Hong Kong soil. I always knew that the place would be frenetic with activity but seeing and experiencing it in the flesh is another thing. Hong Kong is buzzing and bustling with people. An initial impression is the sheer number of people who all live here side by side, or perhaps more aptly I should say – on top of, in huge towers reaching to the stars. Vertical living is very a la mode and living in dinky dwellings is standard practice.

IMG_6397

Whilst a lot is packed into Hong Kong there are also places to be found where there is an element of calm and serenity and to watch the world go by. One of the first places that I went to visit was the Man Mo temple, which is the oldest temple in Hong Kong, having being built in 1847. I thought it was necessary to experience the old if I was to truly understand and appreciate the new and besides I always enjoy visiting temples and churches when visiting a new country as I find it helps to better understand the underlying fabric of that country.

IMG_6399

The temple did not disappoint and as I strolled around it I particularly enjoyed the heady aromas from the incense coils that hung from the ceiling. From the outside the temple stands surrounded by tall tower blocks, which makes a slightly surreal sight.

IMG_6400

IMG_6395

Near to the temple I came across this wonderfully vibrant street art that really appealed to me; I think Banksy would definitely approve.

IMG_6427

Getting to know a city I like to amble around on foot as this not only helps me get my bearings but also see what the locals are up to. Street food sellers were out in abundance selling all manners of temptingly delicious snacks to feast upon.

IMG_6456

As our body clock is a little confused at the moment, we are eating at rather random times of the day, that said little Z and big A always seem to be hungry around tea time and therefore are ready for a little cake to give them some energy before more sight seeing then supper. We have come across a number of bakeries selling all manner of wonderful tasting cakes. Egg tarts are popular here as well as buns filled with red bean paste.

IMG_6454

We visited a fish market, but it is unlike the fish markets we have in the West as the fish here were not to eat. Oh no, if you want to find fish and meat to eat as well as vegetables and fruit you need to visit a ‘wet market’ which are scattered all over Hong Kong. I hope to take some photos of these over my stay so watch this space for more on this soon.

IMG_6421

Tropical fish for sale at the Fish Market in Mong Kok

Our first evening meal out in Hong Kong was dim sum at the very popular Din Tai Fung, which is in fact a Taiwanese import. It’s famous for it’s Xiao Long Bao, which are steamed pork dumplings filled with broth and dipped into vinegar and ginger – basically little mouthfuls of joy! I liked the way that they had instructions on how to ‘eat’ the little darlings. How very thoughtful!

IMG_6381

The winner on the dim sum stakes so far though comes from Hutong where we ate delicious tasting dumplings filled with pork and fennel – ones I wouldn’t mind attempting to make when back in London. Another favourite at Hutong was the Chicken Pot with Sichuan peppers, addictively delicious and not as ‘hot’ as you would think!

IMG_6491

As I mentioned we have all been experiencing a bit of jet lag so I decided to make a southing, homely broth for our first lunch on Hong Kong soil. After gathering a few ingredients I made the following dish, which seemed to hit the spot after a long journey. I kept ours vegetarian, but it would taste equally good with a bit of salmon or trout thrown in for a couple of minutes. Here is how to make it.

IMG_6378

Jet lag Noodle Broth

Serves 3 (and enough for seconds)

splash of olive oil

3 garlic cloves, sliced

1 inch of fresh ginger, peeled and thinly sliced

3 tbsp light soy sauce

1 heaped tsp of vegan Bouillon/vegetable stock

boiling water (to cover veg and noodles)

generous handful of Chinese broccoli (Gai Lan) or regular broccoli/spinach/pat choi

6 small tomatoes, halved

3 eggs, boiled, shell removed and halved

2 packs of udon noodles (or 3 if you are serving just adults)

1. Place the eggs into a pan with cold water and when the water has boiled cook the eggs for 4 minutes, less if you like it soft boiled.

2. Meanwhile place a little oil in a medium sized deep pan and when it is hot add the garlic and ginger and stir for a minute before adding the soy sauce.

3. Next add the boiling water so that it reaches a quarter of the way up the pan – you can add more a little later. Add the Bouillon or vegetable stock that you are using and stir well.

4. Add the Chinese broccoli and after 2 minutes add the udon noodles. You may wish to add a little more boiling water at this stage. Taste to see if it requires a little more soy sauce. Add the tomatoes no more than a minute before serving so that they still hold their shape. If you prefer softer vegetables then cook the Chinese broccoli for a little longer, but I find a couple of minutes is more than enough.

5. Serve with a slice or two of boiled egg.

Warming, delicious and ever so quick, before you collapse and have another little sleep.

Other ingredients that would be great to add: fresh chilli, spring onions, fresh salmon/trout, mushrooms.

IMG_6483


Curried Potatoes and an Award

There has been a whirlwind of activity in my household this week, getting ready for our departure to Hong Kong for the Christmas holidays. Big A and little Z breaking up from school and I have been doing last minute Christmas shopping – all done now, big sigh of relief – on top of that the ‘outlaws’ are spending this week with us, which means there is a lot of feasting and fragrant Indian cooking smells coming from the kitchen. A sprinkling of Christmas drinks with the traditional mulled wine (blog post for christmas 2013 I think) and carol concerts have added to the Christmas spirit and excitement.

Out of the blue this morning I received a ‘Blog of the Year Award’ from the lovely Charu who writes Soul of Spice, and whose blog I enjoy following immensely.

As part of the honour I must bestow the award on others that stand out for me. It’s a tough call as there are many strong contenders out there, but there are two obvious ones for me:

1) The Garum Factory. Written by husband and wife, Ken and Jody who are based on the east coast of the US.  Importantly the recipes are temptingly delicious and ones that I actually want to cook (mainly savouries, which suits my palette) The photographs always inspire me to try and improve mine ;o) and the narrative is always very amusing. I also mentioned The Garum Factory in a past post here

2) The other one I always enjoy reading and perusing over is The Hungry Australian written by Christina. She always seems to have a million things going on at once (running Eat Drink Blog conferences, the food blogger hop, writing articles for magazines, being a good mother, wife etc)  but is consistent at posting interesting blog posts with bright, impressive photos and interesting recipes, many with an Asian twist – which is  a winner in my book.

So I pass on the honour to both of you. Congratulations.

Blog of the Year Award 1 star thumbnail

The rules to accept this award:

1. Select the blog(s) you think deserve the ‘Blog of the Year 2012’ Award
2. Write a blog post and tell us about the blog(s) you have chosen – there’s no minimum or maximum number of blogs required – and ‘present’ them with their award.
3. Please include a link back to this page ‘Blog of the Year 2012’ Award – and include these ‘rules’ in your post (please don’t alter the rules or the badges!)
4. Let the blog(s) you have chosen know that you have given them this award and share the ‘rules’ with them
5. You can now also join our Facebook page – click the link here ‘Blog of the Year 2012’ Award and then you can share your blog with an even wider audience
6. As a winner of the award – please add a link back to the blog that presented you with the award – and then proudly display the award on your blog and sidebar … and start collecting stars…

6-stars-image

Yes – that’s right – there are stars to collect! Unlike other awards which you can only add to your blog once – this award is different! When you begin you will receive the ‘1 star’ award – and every time you are given the award by another blog – you can add another star! There are a total of 6 stars to collect. Which means that you can check out your favourite blogs – and even if they have already been given the award by someone else – you can still bestow it on them again and help them to reach the maximum 6 stars!

We all love potatoes right? So I thought that a new way to cook them might appeal to you all, hence the curried potatoes recipe below. I am sure I am not alone in saying that potatoes and rice are the two staples that you will always find in households, so if you want to cook an easy, cheap and quick supper making this dish, along side a dal for example, makes a really filling and tasty supper/lunch.

Curried Potatoes

Serves 4

2 tbsp mustard oil (or vegetable oil if you don’t have mustard oil)

500g small potatoes (I use Charlotte, but new would be good too)

1 tsp mustard seeds

1 onion, finely chopped

1 green chilli, chopped in half

4 inch piece cinnamon bark, broken into pieces

3 curry leaves

2 cloves

1 tsp turmeric

150 ml water

1 tbsp yoghurt

1/2 tsp sugar

1 tsp salt (to taste)

1. Boil the potatoes until they are softened – this will take around 10 minutes. Drain and place to one side.

2. In a pan gently heat up the mustard oil and when it is hot add the mustard seeds and stir for 10 seconds, then add the chilli, cloves, salt, sugar, cinnamon bark and curry leaves and stir once again.

3. Add the onion to the pan and stir into the spices. When they have softened and begin to bronze add the turmeric followed by the potatoes and stir in together so that they are properly coated in the spices.

4. Place the water and yoghurt in the pan and gently simmer  with the lid on until the water has almost completely been absorbed.

Serve immediately with some Indian bread, such as luchi or paratha. It would also go very well with a cinnamon and ginger dal