Daler Bora – Bengali Lentil Fritters

Close to where we were staying in Kolkata there was a guy who set up a food stall in the late afternoon to make daler bora – Bengali lentil fritters. He would fry them upon request and serve them piping hot in little paper bags. They were so addictively good that one bag was never enough. We would munch them as we strolled back to our hotel, pausing often at the tea wallah for our last masala chai of the day.

It became a habit and one that the whole family enjoyed. Upon arriving back in London I decided that life without daler bora was incomplete, so after a bit of tweaking I came up with the perfect recipe to cook them in the home. They are light, crisp and not at all oily. They must be eaten hot and freshly made. Try them and let me know how you get on.


Daler Bora – Bengali Lentil Fritters

350g red spit lentils (masoor), soaked for 2 hours

Handful of fresh coriander

1 medium sized onion, chopped

1 inch of fresh ginger, skin removed and finely grated, optional

2 green chillies, finely chopped

1 tsp salt

1tsp turmeric powder

Sunflower or Vegetable oil for frying

sprinkling of chaat masala

  1. Once the red split lentils have soaked, drain them and then place in a blender along with the rest of the ingredients.
  2. Use a small deep pan and place enough oil in the pan so that the daler bora will float.
  3. Wait for the oil to be at the right heat – drop a little of the batter in the pan and if it fizzles and rises to the top then the oil is ready.
  4. Use two teaspoons and heap one teaspoon with the blended dal and use the other to gently push the blended dal into the oil. I usually fry one first and then try it to check for the right chilli and salt levels. If it needs any more of either of these then this is the time to add a little more.
  5. Place around 10 in the pan and then allow them to bronze. If the oil is at the right heat they should be done in 1-2 minutes. Turn them over half way with a slotted spoon.
  6. Once bronzed remove with the slotted spoon and place on kitchen roll and sprinkle a little chaat masala on top. This will give the lentil fritters a pleasing tang.
  7. Eat whilst still hot.

They are great dipped into an Indian chutney. My tamarind and date chutney works a treat.


Speedy Indian Salmon Curry

Exhausted after a long day, with little energy or inclination to cook a complex dish that involves lots of marinating and blending? We’ve all been there right? Well this curry works a treat and literally takes 15 minutes to prepare and cook.  It’s a staple dish in my household and is always guaranteed to raise spirits and a smile. I’ve been cooking it for 20 years so felt it would be a good one to share with you all. I have used salmon but you can equally use trout or any firm fish in fact.

I find I use all the spices quite regularly so am guaranteed to have them in the house. My fridge also always has fresh ginger and curry leaves, which are either kept in my fridge of freezer (so I don’t get caught out). Same goes for fresh chillies.

I think you’ll be pleasantly surprised at how quick and easy this dish is and yet tastes really moreish. I often get asked do I eat the curry leaves and the answer is ‘yes’. I love the taste of them, but you can leave them to one side if you don’t fancy it. They will have already worked their magic flavouring the dish.

I often accompany it with some of my Bengali dal, which is my ultimate comfort food. A plain white or brown rice works well with this dish.

I would love to see how you get on so don’t forget to tag and link me on instagram if you make it @chilliandmint #chilliandmint.


Speedy Indian Salmon Curry

Serves 4

700g filleted salmon, cut into manageable portions (skin on or off as you prefer)

2 tbsp vegetable oil

1 medium onion, chopped

1 tsp nigella seeds

1 small tsp turmeric powder

1 tsp coriander powder

1 tsp cumin powder

2 fresh chilli, chopped in half (more if you like it hot)

half tsp chilli powder (optional)

2 inches  fresh ginger, peeled and grated

approx 10 fresh curry leaves

2 large tomatoes, finely diced

150ml water

1 tsp salt

handful of fresh coriander

1. Cut the salmon pieces into manageable sized portions and put to one side.

2. Warm the oil and when it is hot add the onions and fry on a medium heat for 6 minutes or until they begin to brown. At this point add the nigella seeds, fresh chilli, turmeric, chilli powder, cumin powder, coriander powder, grated ginger, curry leaves and salt and stir for 20 seconds.

3. Add the tomatoes and 100ml of water and mix all the ingredients together.

4. Gently place the salmon pieces, with the skin facing upwards (if skin is still on), into the sauce and let it simmer on a medium/low heat for 5 minutes. Place a lid on the pan.

5. Then using a spoon turn the salmon pieces over and add a further 50ml of water if necessary. It will only need a couple of minutes. If you prefer a thicker sauce add less water and vice versa. Its really not an exact science and more down to personal taste.

Serve with roughly chopped fresh coriander.


Baingan Bharta – Spiced Smokey Aubergine/Eggplant 

How’s everyone getting on? Not having the January blues I hope. It’s a bit cold and dreary back here in London and snow is  forecast, but I hope that this post will lift your heart and spirits and that you’ll see the world in colour once again. I thought you would be intrigued to see beautiful Jodhpur below. We recently spent a few days in this magnificent city, wandering the streets and soaking up the electric atmosphere.

I’ve been trying out some of the lovely recipes that I sampled in India in the comfort of my warm cosy kitchen this week. I’ll be sharing lots of them with you here on the blog over the coming weeks. Today I wanted to show you a wonderful aubergine dish – or eggplant as it is known to my US followers. It is similar to my baba ganoush, but with an Indian twist due to the spices.

Before I show you the recipe however, I wanted a moment to talk about chillies. I often get asked which chillies I use in my Indian cooking. When it comes to fresh green chillies I opt for the ones that are small and thin – but not the Thai birds eye, which are far hotter. The chillies I buy are slightly largely and longer, but still thin compared to the more bulbous ones.

In Kolkata I visited so many wonderful markets but the one above – Bow Bazaar – which is more of a wholesale fresh produce market, had a magnificent array of fresh produce. These chillies are similar to the ones I buy here in the UK.

So back to the recipe for this week. Please do give it a go and share the results on your social media outlets with the #chilliandmint and link me @chilliandmint.

Have a lovely weekend everyone.


Baingan Bharta – Spiced Smokey Aubergine/Eggplant 

serves 4-6 (served with some other dishes)

2 large aubergines

2 tbsp oil

1 tsp cumin seeds

1 small red onion, finely chopped

1 inch fresh ginger, finely grated

4 garlic cloves, finely sliced or chopped

1-2 fresh green chilli, finely sliced

1 tsp salt, to taste

1/2 tsp turmeric powder

1/2 tsp chilli powder

1 tsp coriander powder

4 medium sized tomatoes, cubed


  1. First you need to place the aubergines over a flame. If you have a gas hob then this works really well. If you do not you can place in the oven for 20-30 minutes, or until the flesh softens, although it won’t have the same smokiness as over an open flame. If you are smoking it over a flame/gas hob it will take around 8 minutes, but you need to use tongs to turn it over so that it is ‘burnt’. Once it is soft and the sides have shrivelled remove from the plan and place on a plate to cool.
  2. Remove the charred skin from the aubergine and run under water to remove any excess skin. Place in a bowl and mash using a fork or potato masher.
  3. In a non-stick pan add the oil on a medium/low heat and add the cumin seeds. Allow them to fizzle in the pan for 15 seconds or so before adding the red onion, fresh chilli, garlic and ginger. Move around the pan to soften for 5 minutes.
  4. Add the spice powders and salt and move around the pan.
  5. Add the tomatoes and aubergine and move around the pan for a further 3-5 minutes.
  6. Serve warm – you can add some fresh coriander on top or eat it as is.

You can serve this at room temperature, but personally I love it hot with a paratha or chapati.


Snap Shot of India and a delicious Indian breakfast recipe – Pongal

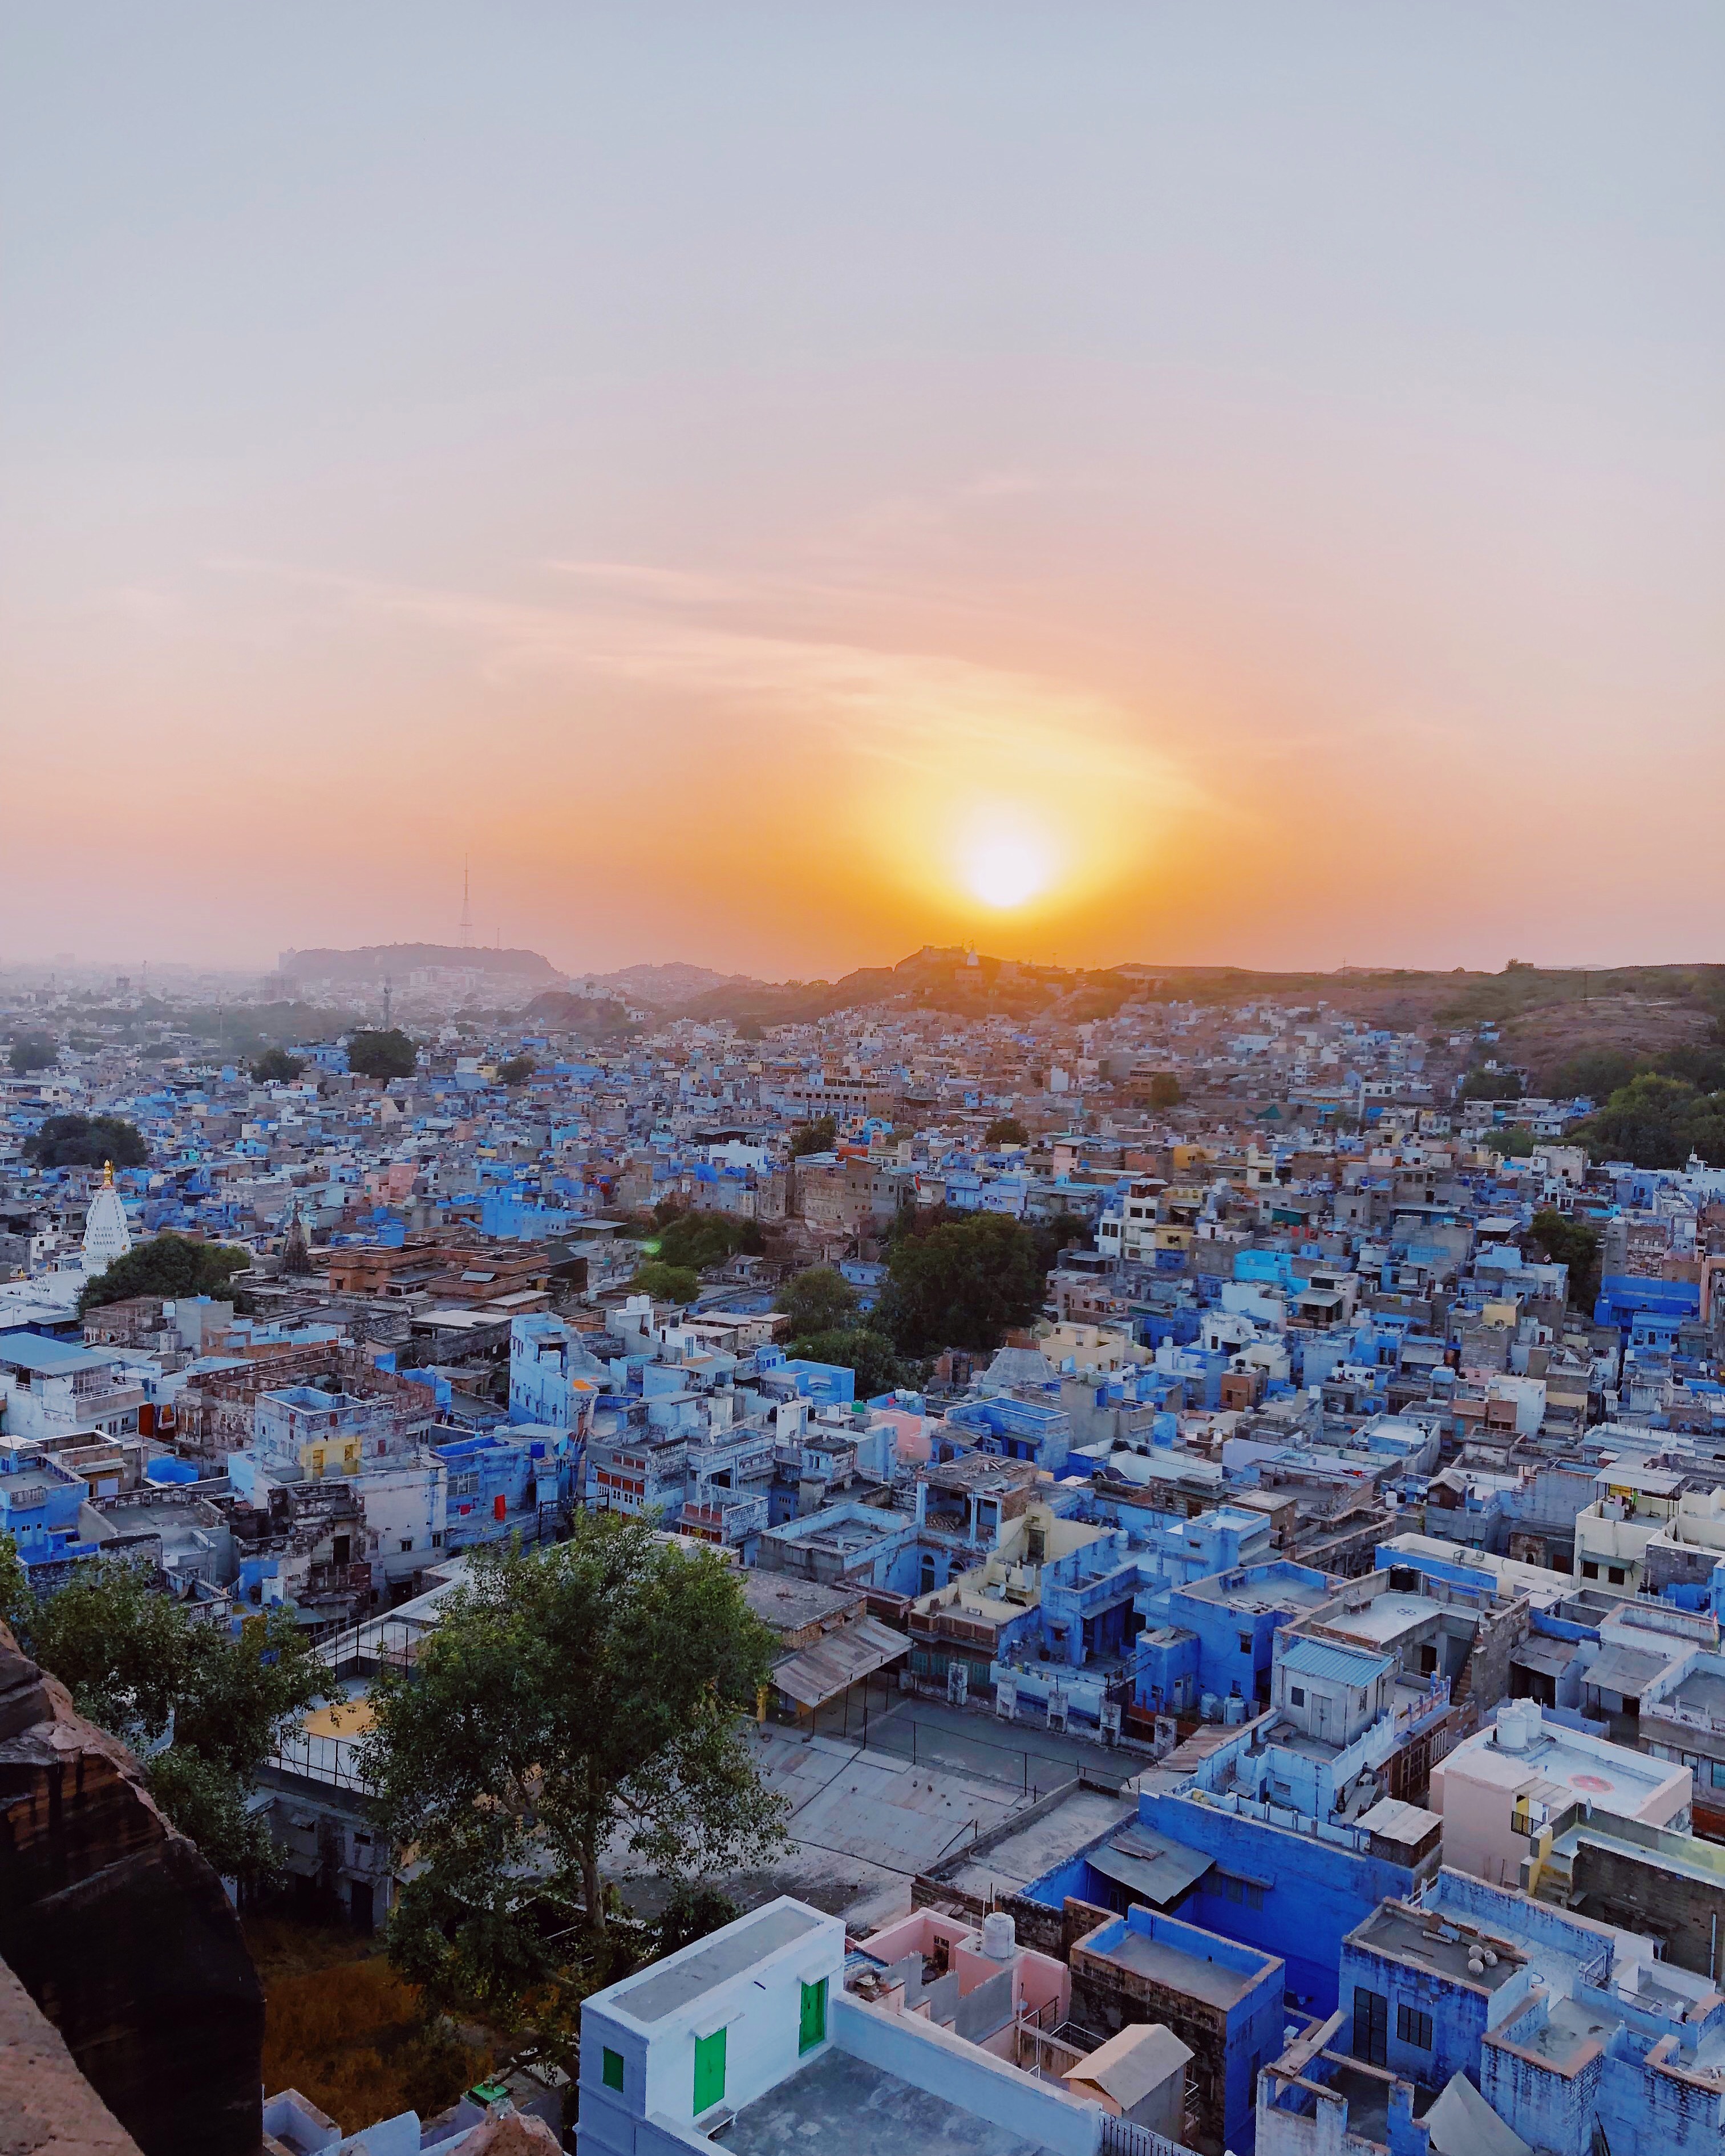
Happy New Year to you all. I have just returned from three glorious weeks in colourful, warm-spirited India (hence my lack of blog posts). I have seen and experienced so much that it feels that I have been away for far longer. I feel uplifted and invigorated and have returned to cold chilly London with a positive outlook and excitement for the year ahead.

If you’ve never been to India then I urge you to go. It’s incredible and, like Africa, seeps into your soul and never leaves you. It’s frenetic, chaotic and providing you leave your Western ways and customs at home, you can acclimatise to the way of life there pretty quickly. It’s crowded, intoxicating and full on, but remember to breath and relax and you will begin to enjoy everything about this magical country. I was pretty active on Instagram so if you are keen to see some of the Indian street life, food and people, then please follow me over there as well. Here are few snaps to whet your appetite.

We spent 9 days in beautiful Kolkata, visiting family and generally relaxing and seeing more of the city. Followed by a two week tour of Rajasthan. I have lots of tips and suggestions on the food front, but I am presently writing an article that I hope to get into one of the magazines or newspapers – so watch this space. The photo of ‘papri chat’ below gives you an idea of how epic the street food is in Kolkata. It is commonly thought of as the street food capital of India.

The best way to get under the skin of any city is to pound the pavements on foot and see everything up close. It’s an overload of the senses and truly engaging. In Kolkata one day, we walked 10km along the Hooghly River – a distributary of the Ganges River – and saw everything from the Mullick Ghat Flower Market, people bathing in the river, a wedding couple, the cremation ghats (I particularly wanted to show my children this, as death is dealt with in very different way in India and it is nothing to be afraid of), the district of Kumortuli Pally – Kolkata’s Potter’s community, to the Marble Palace.

Rajasthan was the second part of our trip and whilst, on paper, the trip sounded rather exhausting, it was in fact not the case. We combined culture and sights with relaxing in beautiful surroundings and meeting the local people. Staying in the Aravalli Hills, in a stunning heritage hotel in a small rural village, was a highlight. It you are planning a trip to Rajasthan, make sure you book a night or two at Rawla Narlai – where you will get to meet this fine gentleman, who I think without doubt has the best attire of any hotel staff I have ever met.

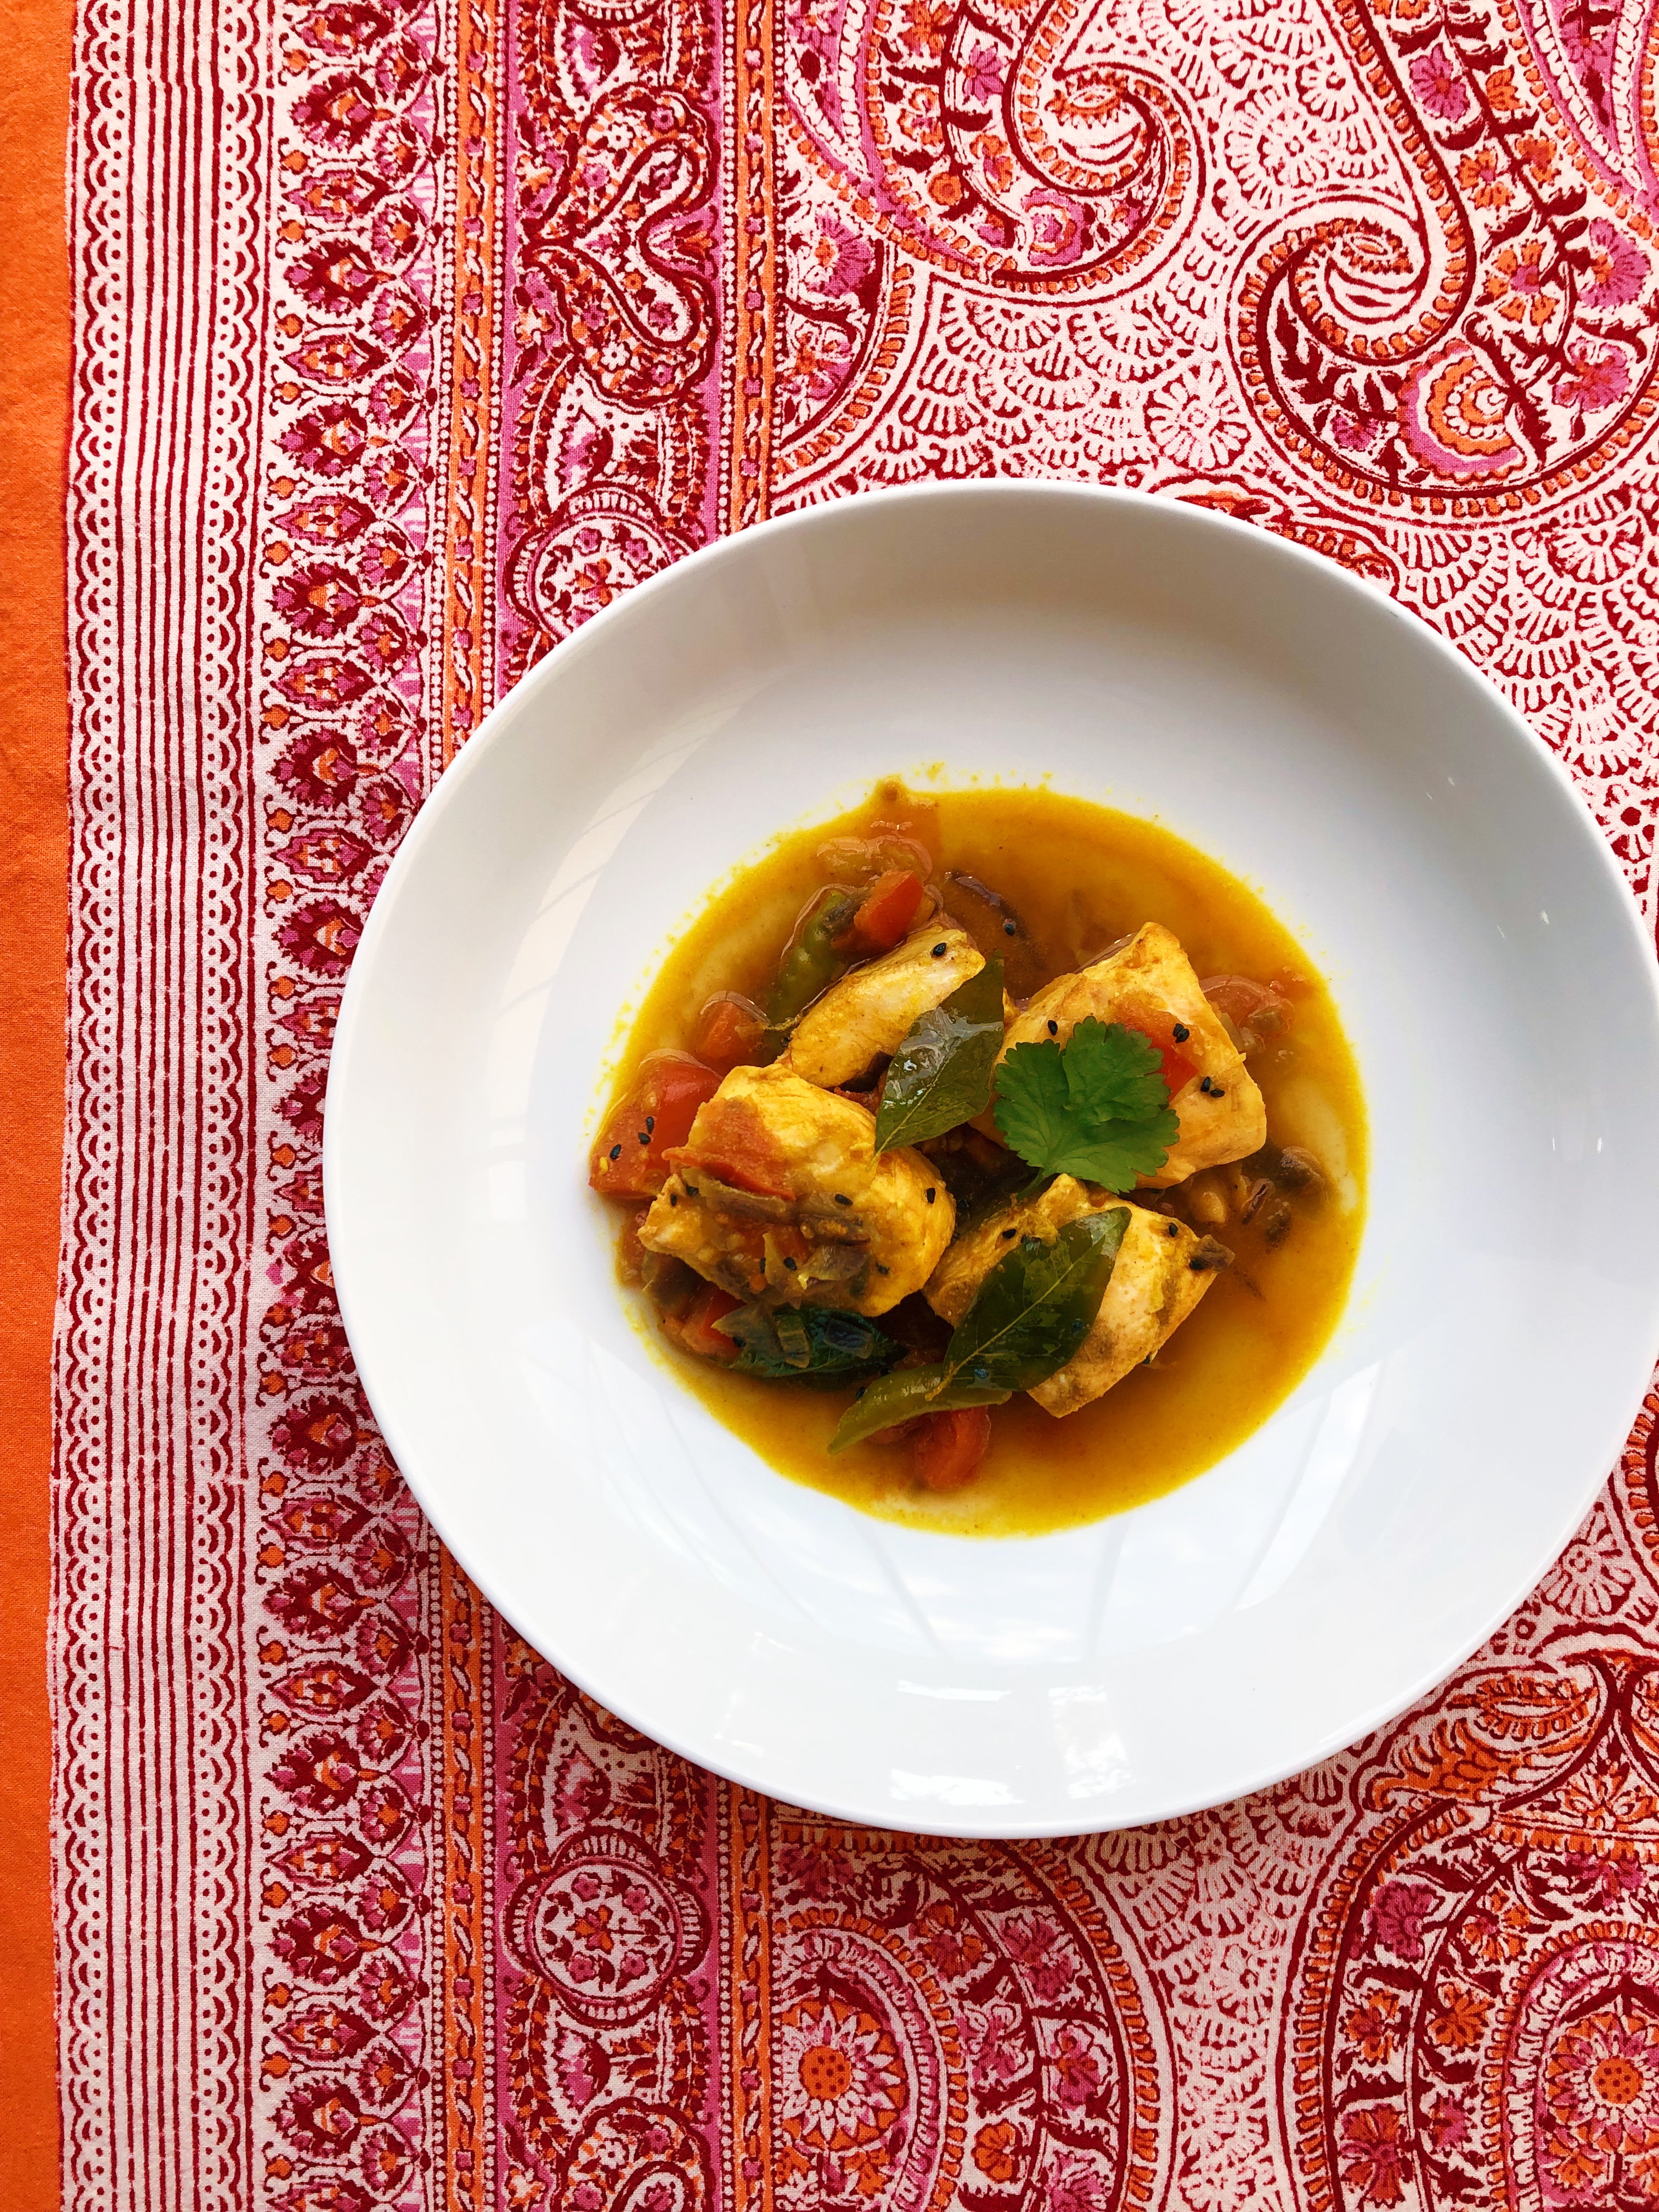
Without overloading you on my first blog post back, let me introduce the recipe that I wanted to show you today. To give you a brief back story, I was poorly for a few days with Delhi belly (not from street food but from a ‘smart’ hotel dinner). After eating next to nothing for a few days I wanted to eat comforting food that would ease me back. At our hotel in Delhi ‘pongal’ was on the breakfast menu. It’s actually a south Indian breakfast originating, I believe from Tamil Nadu. It is often referred to as ven/ghee/kara or milagu pongal but the one in the hotel simple said pongal, so I will go with that. It is made with rice and a small yellow lentil called moong dal – which you can order online from Asian Dukan in the UK. It didn’t look dreadfully appetising, but my goodness it tasted wonderful. A cross between a savoury porridge and dal – not dissimilar to Chinese congee, but in my mind – better.

I have a couple of other tasty Indian breakfast recipes on this blog – Upma  and Hoppers or Appam so thought this might be a good one to add to the list. You can make it the night before then leave it in the fridge until morning. Simply add a little boiling water to bring it back to life, and hey presto you have a deliciously subtle and tasty Indian breakfast. It’s also perfectly tasty to eat for lunch too so you can make a batch and eat it as you want over a couple of days.


Pongal

serves 4-6

120g basmati rice

120g yellow moong dal

900ml cold water

1 tbsp ghee (clarified butter)

10 approx cashew nuts

1/2 tsp cumin seeds

1/2 tsp mustard seeds

1/2 tsp roughly broken up black peppercorns

1 tsp grated/chopped fresh ginger

1 stem of fresh curry leaves (Sainsburys now sell them)

1 fresh green chilli, finely chopped, optional

pinch of asafoetida/hing

pinch of turmeric powder, optional

1tsp salt, to taste

handful of freshly chopped coriander, leaves and stems

  1. This first part is optional, but it gives the dish a slightly more smokey flavour. Dry roast the dal until it begins to bronze slightly. It will take a couple of minutes, but use a wooden spoon to move it around the pan so that it does not burn. You can omit this part and simply go to 2. should you wish.
  2. Add the rice to the same pan as the dal and place some water in the pan. Move the spoon around the pan then discard the water by gently pouring it out – you don’t need to use a sieve. Repeat twice and then add 900ml cold water.
  3. Leave to simmer for around 20-25 minutes, by which time the rice and dal will be soft and the water soaked up. If it becomes too dry simply add in a little more water.
  4. Using a potato masher, mash the rice and dal so that it gets broken up and more ‘mash’ like in appearance. Place to one side whilst you do the next steps.
  5. Using a frying pan, add the ghee. Once it has melted add the cashew nuts and gently move around the pan for 30 seconds before adding the cumin and mustard seeds, black pepper. They will begin to pop, so make sure that your heat is on low.
  6. Now add the fresh ginger, turmeric (optional), asafoetida, curry leaves and green chilli (optional). Move around the pan for 20 seconds or so and then add the contents of the pan into the rice and dal mixture.
  7. Move around the pan and add salt to taste. Add more water if necessary. Check to taste and heat up again if necessary. Add some freshly chopped coriander and serve.

With these cold, dark mornings we are having in the UK, what better way to start the day than with some delicate spices in a comforting bowl of Indian pongal.

More exciting Indian recipes and photos next week. Have a good weekend in the meantime.


Indian Chana Dal – Sweet and Salty

As some of you may know I am a BIG dal fan. Huge in fact, I love the stuff, and I am always trying to convert the uninitiated. Dal is an Indian lentil soup, or porridge of sorts, that can vary in consistency depending on personal preference. There are so many varieties, using a wide range of lentils, that there is at least one to appeal to every palate. For the most part (some need soaking) they are quick and very easy to make. Once you have bought a few staple ingredients for your pantry, you will find that cooking dal is a very economical meal to cook and, for many in the Indian subcontinent, an essential source of inexpensive protein.

Chana dal, also known as cholar or yellow split lentil, is one of my personal favourites. It is absolutely delicious with delicate sweet undertones coming from the coconut and sultanas. I use desiccated coconut, however in India as coconuts are more readily available, they often use shavings of freshly fried coconut. I eat it for lunch or dinner, although out in India it is even served up for breakfast!

Unlike the red split lentil dal, which I spoke about in an earlier blog, you need to think a little ahead for this dal as the yellow split lentils need to soak for a number of hours. I always soak them over night, but if you check on the packet you will probably find that you can soak them in the morning and they will be ready to cook by the afternoon/evening.

Chana Dal

Serves 4-6

300g of chana dal, soak overnight

1 tbsp of oil

1 tsp panch phoron

3 bay leaves

1/2 tsp turmeric

1/2 tsp chilli powder (more if you prefer it hot)

sultanas, handful

1 tsp of ghee/butter (optional)

1 tsp of sugar

1 tsp salt

2 tsp of desiccated coconut

  1. Before cooking soak the lentils overnight ideally or at least for a few hours.
  2. After soaking, remove the water and refresh with more water. Boil on a low heat, until soft, approx. 20 mins (45mins + if not soaked). You will know they are soft when you are able to squeeze them easily between your fore finger and thumb. If they are still a little hard, leave them to boil for longer.
  3. In a new pan heat a tablespoon of oil on a low heat. Add the panch phoron, bay leaves, turmeric, chilli powder, sultanas, salt and sugar.
  4. Move around the pan for 20 seconds max, so that it does not burn, and add a couple of spoonfuls of chana dal and stir into the pan. Then transfer all of the contents of the pan into the original pan. Add more salt if necessary.
  5. Add the ghee/butter if using. Sprinkle the desiccated coconut over the top of the dal and let it simmer for a few minutes.

Other additions to this dal is to add fresh green or dried red chillies instead of chilli powder. If you have fresh coconut to hand then thinly slice it into pieces (no more than a handful) and bronze initially in a little ghee, remove and place to one side. Scatter on top at the end instead of the desiccated coconut.

SaveSave

SaveSave

SaveSave

SaveSave

SaveSave

SaveSave

SaveSave


Indian Stuffed Paratha – easier than you think

The are sooooo many varieties of Indian flat breads to choose from that making the decision on which one to prepare, and eat, can be a tricky business. Paratha are easier to make than you would think. A dough like pancake all warm and pillowy, filled with whatever savoury filling you choose. If you are familiar with the ubiquitous chapati then paratha are considered a close relative. My recipe shows you how to make them with a spiced potato and spring onion filling but you can be as adventurous as you fancy. They are ever so delicious and work really well with just a simple dal. Often the most humblest of foods can be fit for a king or queen. The preparation is pretty minimal and if you are cooking for a few you can prepare the filling earlier on in the day.

So follow these simple steps to create your very own paratha at home.

I suggest making the filling first and then let it cool whilst you make the dough.

Roll out the dough so that it is thin, but not so thin that it splits. Place a round ball of the filling in your hand and then gently place it in the centre of the dough circle. Flatten slightly.

Pull up the edges so that the filling is completely covered.

Turn it over and place some sesame seeds or nigella seeds on top. Flatten it with your hand.

Then gently roll out the dough so that it flattens further. Be careful not to roll too thinly or the contents will escape.

Heat a tawa, or large frying pan, and when it is hot brush a little melted ghee (or butter/oil) on one side of the paratha and place that side into the pan. While this side is toasting, place melted ghee on the other side and then after a minute turn over. Leave for a further 30-60 seconds so that it is nicely bronzing but not burning and then remove from the pan and eat whilst still hot. If you are preparing a few then place in a warm oven while you prepare the next.


Stuffed Paratha

Serves 6

125g plain flour

125g chapati flour/wholemeal flour (you can just use plain flour in which case double up on plain)

1/2 tsp baking powder

2 tbsp yoghurt

1 tbsp oil

1 tsp sugar

1 tsp salt

60 ml water

filling

350g potatoes, approx 3 medium ones (equally you can use sweet potato)

1 spring onion, finely chopped

2 tbsp fresh coriander, finely chopped

1/2 tsp kashmiri chilli powder

1/2 tsp dry mango powder

1/2 tsp ground garam masala

1 green chilli, finely sliced (optional)

sesame/nigella seeds, to garnish

2 tbsp melted ghee/butter/oil

  1. In a large bowl add all of the dry ingredients and mix well, then add the yoghurt and oil.
  2. Slowly add in the water so that a dough forms. Use your hands to form a ball, knead for around 7 minutes so that the dough is pliable and soft. Cover with cling film whilst you make the filling.
  3. To make the filling, boil the potatoes and when soft, drain and mash them.
  4. Add the rest of the ingredients and mix thoroughly.
  5. Returning to the dough, break them into 6 even balls. Using your hands initially flatten a ball, sprinkle with a little flour and using a rolling pin roll into 6-7inch diameter circles.
  6. Using your hands scoop up some of the mashed spiced potato and create a small ball and flatten this is the middle of the dough.
  7. Move the sides of the dough up to the centre so that the spiced potato is securely covered up.
  8. Turn over the round parcel and spoon some sesame seeds on the top and then gently roll out the dough with the spiced potato filling into a round circle once again.
  9. Heat up a frying pan or tawa. When it is getting hot, melt the ghee and then brush some onto the surface of the paratha and place ghee side down onto the pan.
  10. Leave for up to a minute and brush the paratha again with ghee before turning over for a further minute. When the paratha is sufficiently bronzed place onto a warm plate and cover whilst you do the rest or pop in a warm oven.

Paratha are wonderful to have with dal or a curry or if you are really organised, for breakfast, now isn’t that worth getting up for.


How to Make Sri Lankan/ Southern Indian Sambar

So how have you been getting on with making ‘hoppers/appam’ at home? Has anyone been brave enough to give them a whirl? I would love to hear how you got on. You do need a special pan mind you, but they are easy to source on the web – I think this is the one that I bought. Perfect christmas gift for anyone with a keen interest in cooking? If you do give them a go PLEASE can you post it up on Instagram and tag me @chilliandmint and #chilliandminthoppers. Thank you.

As promised todays post is all about the sambar. Sambar is very similar to a dal, the main difference is that it is more of a lentil based vegetable stew, whereas dals tend to be more of a lentil soup with maybe one of two vegetables incorporated within it. Sambar often has a tamarind broth as its base note, which can also be found in dal – for example toor dal – but not exclusively. It is eaten in both Southern Indian and Sri Lanka and once you have made the spice blend you can keep making it in a relatively short space of time. I hosted a Sri Lankan lunch recently where I basically fed my pals a typical Sri Lankan breakfast…but I gave it to them for lunch (they weren’t to know). Egg hoppers, sambar, pol sambol (similar to a dry coconut chutney) and an onion relish. I think it was a hit.

When you make sambar you can use any vegetable that needs using up. Unless you live near an Asian grocers you are unlikely to come across ‘drumstick’ which is fairly typical to see in a sambar. Don’t worry, just pop in marrow, courgette, pumpkin, squash, green beans – anything that needs using up will work a treat.

Sambar Powder

50g chana dal (split husked Bengal gram)

50g urid dal (split husked black gram)

30g coriander seeds

2 tbsp cumin seeds

1 tsp fenugreek seeds

1 tsp black peppercorns

10 dry red chillies

12 fresh curry leaves

1/2 tsp turmeric powder

1/2 tsp asafoetida/hing powder

1 tbsp desiccated coconut (or fresh of course!)

  1. Heat a dry frying pan over a low heat and dry roast both dals until they turn bronze slightly – a couple of minutes max. Place in a bowl to one side.
  2. Using the same pan add the coriander, cumin, fenugreek, black peppercorns and dried chillies and move them around the pan for 30 seconds. A wonderful aroma will be released.
  3. Add the fresh curry leaves, asafoetida, turmeric and desiccated coconut and mix it all around the pan for another 20 seconds and then place in the bowl with the dals.
  4. Let it all cool and then whizz it up in a spice grinder. I have this one and it works a treat.
  5. Store in an airtight container and use as and when you need it.


Sambar

You can make it with a range of different lentils but I find that red lentils work really well as they take the least amount of time to cook.

200g red split lentils, washed under cold water for a couple of rinses

water to cover the lentils about an inch above (you can always add more if it dries out)

2 green chillies, sliced lengthways and seeds kept in

1/2 tsp turmeric powder

******

250ml tamarind water (use a walnut size piece of tamarind – see notes below)

2 tbsp oil (rapeseed/vegetable)

1 tsp mustard seeds

1 tsp cumin seeds

7 fresh curry leaves

2 dried chillies (split in two)

1 medium onion, finely chopped

4 garlic cloves, finely chopped

80g of pumpkin/squash, cut into 1 cm pieces

80g carrots, cut into 1 cm pieces

80g aubergine/green/runner beans, cut into 1 cm pieces

1 large drum stick, washed and part of the outer green skin removed, chopped into 1 inch pieces, optional

250ml tamarind water (use a walnut size piece of tamarind – see notes below)

1 tbsp sambar powder

salt to taste

  1. In a deep pan add the lentils, chillies and turmeric powder and cover with water. Simmer gently, removing any scum that may form, for 10-15 minutes, by which time the lentils will have completely softened. Do not drain, instead leave to one side whilst you work through the following steps.
  2. Take a generous walnut size piece of tamarind and place in a bowl and add boiling water to cover it. Leave to rest for 20-30 minutes then strain. Using the back of a spoon push through any of the tamarind pulp. Discard the stones. Place the liquid in a measuring jug and leave to one side.
  3. In a large frying pan/skillet heat the oil and then add the mustard seeds and allow them to gently pop before adding the cumin seeds, curry leaves and dried chillies. Move around the pan for 10 seconds and then add the onion and garlic. Leave to soften, stirring occasionally for around 7 minutes.
  4. Add all the vegetable pieces (they should all be around the same size, other than the drumstick) and mix in with the spices and onions.
  5. Add the sambar powder, salt and tamarind water and bring to the boil.
  6. Lower the heat and place a lid on the pan and allow the vegetables to soften completely – this will take  around 12 minutes. Check that they have softened completely before adding the lentils.
  7. Add the lentils and stir in well to the spices and vegetables. Add more salt if necessary and allow to simmer further for another 5 minutes.

It makes a wonderful ‘soup/stew’ as the days get shorter and the weather colder. If you are living in a warmer climate then sambar is equally good for you all year around.

Have a good week folks.


SaveSave

SaveSave

SaveSave

SaveSave


How to make Egg Hoppers/Appam

How do you breakfast? On the go, sitting down at your kitchen table or perhaps at your office? With good intentions we try at least to have a ‘proper’ breakfast as a family before we  go our separate ways. My eldest daughter catches a coach to school and is out the house like a whirlwind by 7.20am and my youngest needs to at school by 8am and invariably I drive/scoot with her. As we approach Autumn and the darkness intrudes further into our mornings, I think it is important to fill your belly with some satisfying food before embarking on the challenges of the day ahead.

I always try to think of something new and exciting to feed my crew for breakfast and we often talk about it the night before. I thought it might be interesting and helpful if I create a ‘breakfast’ section under my recipe library and over the coming months I will put new ideas up here on my blog. I would love to hear what you think.

First up are my hoppers (Sri Lankan term) or appam (Keralan term). They are a typical breakfast in Sri Lankan and south India and are often eaten with a sambar or dal and a chutney. They have a coconut flavour and are made of rice flour. You do need to invest in a hoppers pan – something like this would be perfect, but my family are such fans of them that the investment made sense. I went and stayed with pals in the Cotswolds this summer and made a batch (15) for lunch one day for everyone to have with meat and vegetable curries and dal. All the kids – ranging from 4 to 14 gave them a thumbs up and for most it was the first time they had tried them.  I’m sure if you give them a try you (and your kids) will be pleasantly surprised. If you are going to make them for breakfast before school/work I would advise activating the yeast (the first part in the instructions below) before you jump in the shower. Then when you are out you can then add it to the rice flour and coconut milk, whisk and then leave to rest whilst you get changed. It’s a multi-tasking kind of breakfast. Equally it is great to have at lunch or supper, so don’t feel limited to cooking these at breakfast time.

Next week I am going to post a sambar recipe for you (which you will be able to prepare in advance) but today I simply ate them with a bowl of my marrow dal (see below) – but any of my dals would work equally well accompanying the hopper/appam.


Hoppers/Appam

Makes around 6

4g/1 tsp dried yeast

1 tsp white sugar

35ml lukewarm water (warm to the touch but not hot!)

200g rice flour

1x400ml tin of coconut milk

pinch of salt

  1. First you need to place the yeast, sugar and water into a bowl and give a good stir. Leave the mixture for 15-20 minutes to allow the yeast to activate.
  2. Meanwhile, in a large bowl add the rice flour, coconut milk and salt and once the yeast mixture has frothed, and therefore activated, add it to the mixture and whisk so that the batter is smooth and thick.
  3. Leave to rest at room temperature for at least 1/2 an hour.
  4. Warm your pan and put one ladle full of the mixture into the pan. Slowly swirl the mixture around the edge of the pan so that the mixture has reached almost up to the top of the pan. I usually swirl it around a couple of times so that all the sides are coated. Place the pan on a low heat (the reason my edges look a little bronzed is that I had the heat too high ;o) and place the lid on top of the pan.
  5. If you are going to make an egg hopper crack an egg into the centre of the pan and place the lid on top. Leave for around 3-4 minutes so that the sides are a little crispy and the egg is cooked sufficiently but is still soft in the centre. If you would rather not have an egg simply place the lid on the pan and leave for 3-3.5 mins
  6. If you are using a non-stick pan the hopper will easily slide onto a plate and serve immediately with sambar/dal and some chutney.

Dal ideas to accompany the hoppers

Bengali Dal recipe

Sri Lankan Dal recipe

Red Onion Dal recipe

Toor Dal recipe  

Marrow Dal recipe


Gobi Aloo Kasoori Methi – Cauliflower with Potato and Dried Fenugreek Leaves

Cauliflower, in my view, is massively underrated. In the past it was perhaps thought of as a little bland, but when you boil anything I guess it could be described as bland. Growing up we had cauliflower cheese – which don’t get me wrong, is delicious – but beyond that people really didn’t tend to do much with it.  That has all changed though in the last couple of years, with dishes such as cauliflower rice, cauliflower base for pizza, roasted cauliflower, burnt cauliflower – you name it, people are getting creative with this humble ingredient. In Indian cuisine  it is hugely versatile and used in all manner of dishes.

Throw a little spice into the mix and you have yourself a very tasty little number. I thought I would show you one of my favourite cauliflower recipes that works well either on its own or as part of a larger Indian feast. Dried methi, or fenugreek as it is also known, is fairly easy to come by these days. Certainly the large supermarkets stock it, but I like to get it from one of my local Asian grocers. You can order online  – herfrom Asian Dukan. Easy.

Methi has a wonderful aroma, that works so well with the cauliflower. Only scatter the dried leaves over the cauliflower at the very end of cooking and gently fold the leaves into the dish. I cook this dish with the trinity of Indian spices: turmeric, cumin and coriander, but my mother-in-law likes to keep it super simple and literally just add, oil, dried chilli, salt and dried methi. It is also delicious this way, but try my slightly more elaborate way first.

Gobi Aloo Kasoori Methi – Cauliflower with Potato and Dried Fenugreek Leaves

serves 4-6 along with another dish or two.

2 medium potatoes, cubed into 2-2.5cm

3-4 tbsp rapeseed/vegetable oil

1 tsp cumin seeds

2 small dried red chillies

1 cauliflower, outer leaves removed and cut into small florets

1 tsp turmeric

1 tsp cumin powder

1 tsp coriander powder

1 tsp salt, to taste

sprinkling of water

2 tbsp of Kasoori Methi


  1. Peel the potatoes and then once diced place them in a pan of boiling water and boil for around 8 minutes or until softened but not mushy. Strain and place to one side.
  2. In a large wide pan (ideally with a lid), add 1 tablespoon of oil and when it is hot add the cumin seeds move around the pan for 10 seconds before adding the dried chillies.
  3. Add the boiled cubed potatoes and cover with the cumin seeds.
  4. Place the cauliflower florets into the pan and move around so that they are also beginning to coat themselves in the cumin seeds. You will need to add a little more oil at this stage to help the cauliflower cook and soften. Add the oil in stages instead of all at once.
  5. Add the turmeric, cumin and coriander powders along with the salt and fold into the cauliflower.
  6. Keep the cauliflower gently moving around the pan at intervals. Sprinkle a little water to help soften the cauliflower and place a lid on the pan.
  7. Every few minutes move the contents of the pan around.
  8. Continue to cook gently, on a low heat for a further 10-15 minutes so that the cauliflower has softened.
  9. Finally add the fenugreek leaves – kasoori methi and gently fold into the cauliflower. Take off the heat and serve.

An alternative and even simpler way to cook this dish is to replace cumin seeds with methi (fenugreek) seeds, do not add any spice and then the kasoori methi. Obviously the dish is not as yellow in colour but still tastes really delicious. You can also omit the potatoes if you wish. 


Methi (Fenugreek) Paratha for Durga Puja

img_3013

This coming weekend is the beginning of the Bengali Hindu festival of Durga Puja, which lasts for five days. I have written a few posts on the celebration here and here over the last couple of years. In short, the weekend is spent visiting temples in all corners of London, catching up with family and friends and eating vegetarian feasts at the temples. I am not Hindu but I enjoy being part of the occasion, which is always very lively and colourful, and of course the food is always so good.

img_3005

I was pottering around in my local Asian supermarkets this morning when I came across some methi – fresh fenugreek. Fenugreek is jam packed with health benefits. We all need it in our diet – either the seeds or fresh leaves or both. It lowers blood cholesterol, reduces the risk of heart disease, controls blood sugar levels – therefore diabetics are advised to eat it daily. It aids digestion, weight loss, prevents colon cancer – the list goes on. Seriously if you have not had it before please try it and then try and incorporate it into your diet. One way you can do this is by making fenugreek/methi paratha. The hard part will be locating the fresh methi.

img_3006

If you live in London then you will have no problem as you will find it at any Indian/Asian supermarket. Apparently it is really easy to grow so maybe it is something to look into growing if you are living outside a major city. I would love to hear how you get on if you go down this path.

img_3007

Anyway back to the making of the paratha. It is important to carefully take the leaves of the fenugreek plant away from the stem, as the stem is very bitter and you don’t want to be eating that. I leave the leaves to soak in a bowl for 15 minutes so that the grit and dirt sinks to the bottom. Then you can easily remove the leaves and place them in a new dry bowl along with the spices and flour.

img_3008

If you don’t have a tawa then simply use a frying pan. Once the leaves have soaked and you have made the dough it takes very little time to make the paratha.

img_3009

They are great eaten with dal such as this one or this one or simply with chutney and perhaps a little yoghurt and lemon. In India they are sometimes eaten at breakfast, but I tend to eat them for lunch or dinner.

img_3010

img_3011

Methi Paratha

Makes round 5

150g wholemeal chapati flour/atta 

50g gram/chickpea flour

50g fresh methi/fenugreek (leaves only), washed and finely chopped

1 small fresh green chilli, finely chopped (optional)

1/4 tsp Kashmiri chilli powder

1/4 tsp turmeric powder

1/2 tsp salt, optional

2 tbsp melted ghee/butter/oil

  1. First remove the methi leaves and discard the rest of the methi stem. Place in a bowl of fresh cold water and leave to soak for 15 minutes.
  2. Gently remove the methi leaves so that the grit and dirt is at the bottom of the water bowl. Discard this water. Place in a clean dry bowl.
  3. Measure out the flours, chilli powder, turmeric powder, salt and fresh chilli (if using).
  4. Use your hand to begin to bind the ingredients together. Gradually add a little warm water so that a dough forms.  Be careful not to make it too wet.
  5. Place a drop of oil in the bottom of the bowl and cover the dough, which you have now made into a ball shape. Cover the bowl and leave for 10 minutes.
  6. Knead the dough for a minute further and then break off a small part – about the size of a lime.
  7. Place the dough in some fresh flour and then roll it out on a dry, clean surface. If you want to make triangular paratha roll the dough into a circle and then fold it in half and then half again. I kept mine round today.
  8. Heat a tawa/frying pan and place a drop of ghee onto the pan. Then place the paratha on the pan and leave for a couple of minutes.
  9. Whilst it is cooking begin making your next paratha.
  10. Before turning over the paratha on the pan, brush a little ghee on the top and then turn over. You want the paratha to begin to have little bubbles that begin to bronze. Leave to cook on this side for a further couple of minutes. If need be turn over again and then place to one side.
  11. Repeat until all the dough has been used up.

Eat warm with dal, chutney or yogurt with a splash of fresh lemon.

Notes: You can also add finely chopped onion, 1 tsp garlic paste and/or ginger paste, 1 tsp cumin seeds, 1 tsp ajwain/carom seeds, 1/2 tsp coriander powder. There are so many options so try a variation and see what works for you.img_3015