
Hello everyone. How are you all? It’s been a while. My blog has taken a bit of a backseat since my cookbook was launched back in 2021 as all my attention has been focused on PR related to that and book tours across the UK. An invite to the Sharjah Book Fair last November for 5 days was a highlight as I was able to demo my recipes each day to a Middle East audience, as well as do some live radio and TV related slots.

Getting ready to go LIVE with 95 Pulse (96.1fm) in Sharjah in the Middle East
An incredible opportunity that I am forever grateful for and some lasting friendships with other book authors from around the world who were also invited.

With the fantastic team which made my demonstrations possible
Sales have been going well so a BIG THANK YOU to those kind folks who have been buying it, gifting it to friends, reviewing it and of course cooking from it. It gives me the greatest joy to hear you are loving the recipes and that they are easy to follow. After the first year the first print run sold out so it is already on its second. It is available at all good bookshops – if you local bookshop does not have a copy stocked, they can order it in from the wholesaler within a couple of days. It continues to be in Waterstones, Hatchards, Foyles, Harrods, Selfridges in the UK as well as many place across Europe, US, Australia and online in New Zealand. You can also order direct from me here too if you want it signed to a particular person.

With my lovely translator Hend Saeed
Since July, I have been taking time off from my Indian cooking classes and spice tours – they resume in September – and then it is full steam ahead with some exciting collaborations and events in the run up to Christmas. I’m also researching book 2, which I am excited about. It will continue to be on Indian food – but from a totally different perspective from book 1. I am excited to share more about this with you next year.

Morning prayers in Koyasan
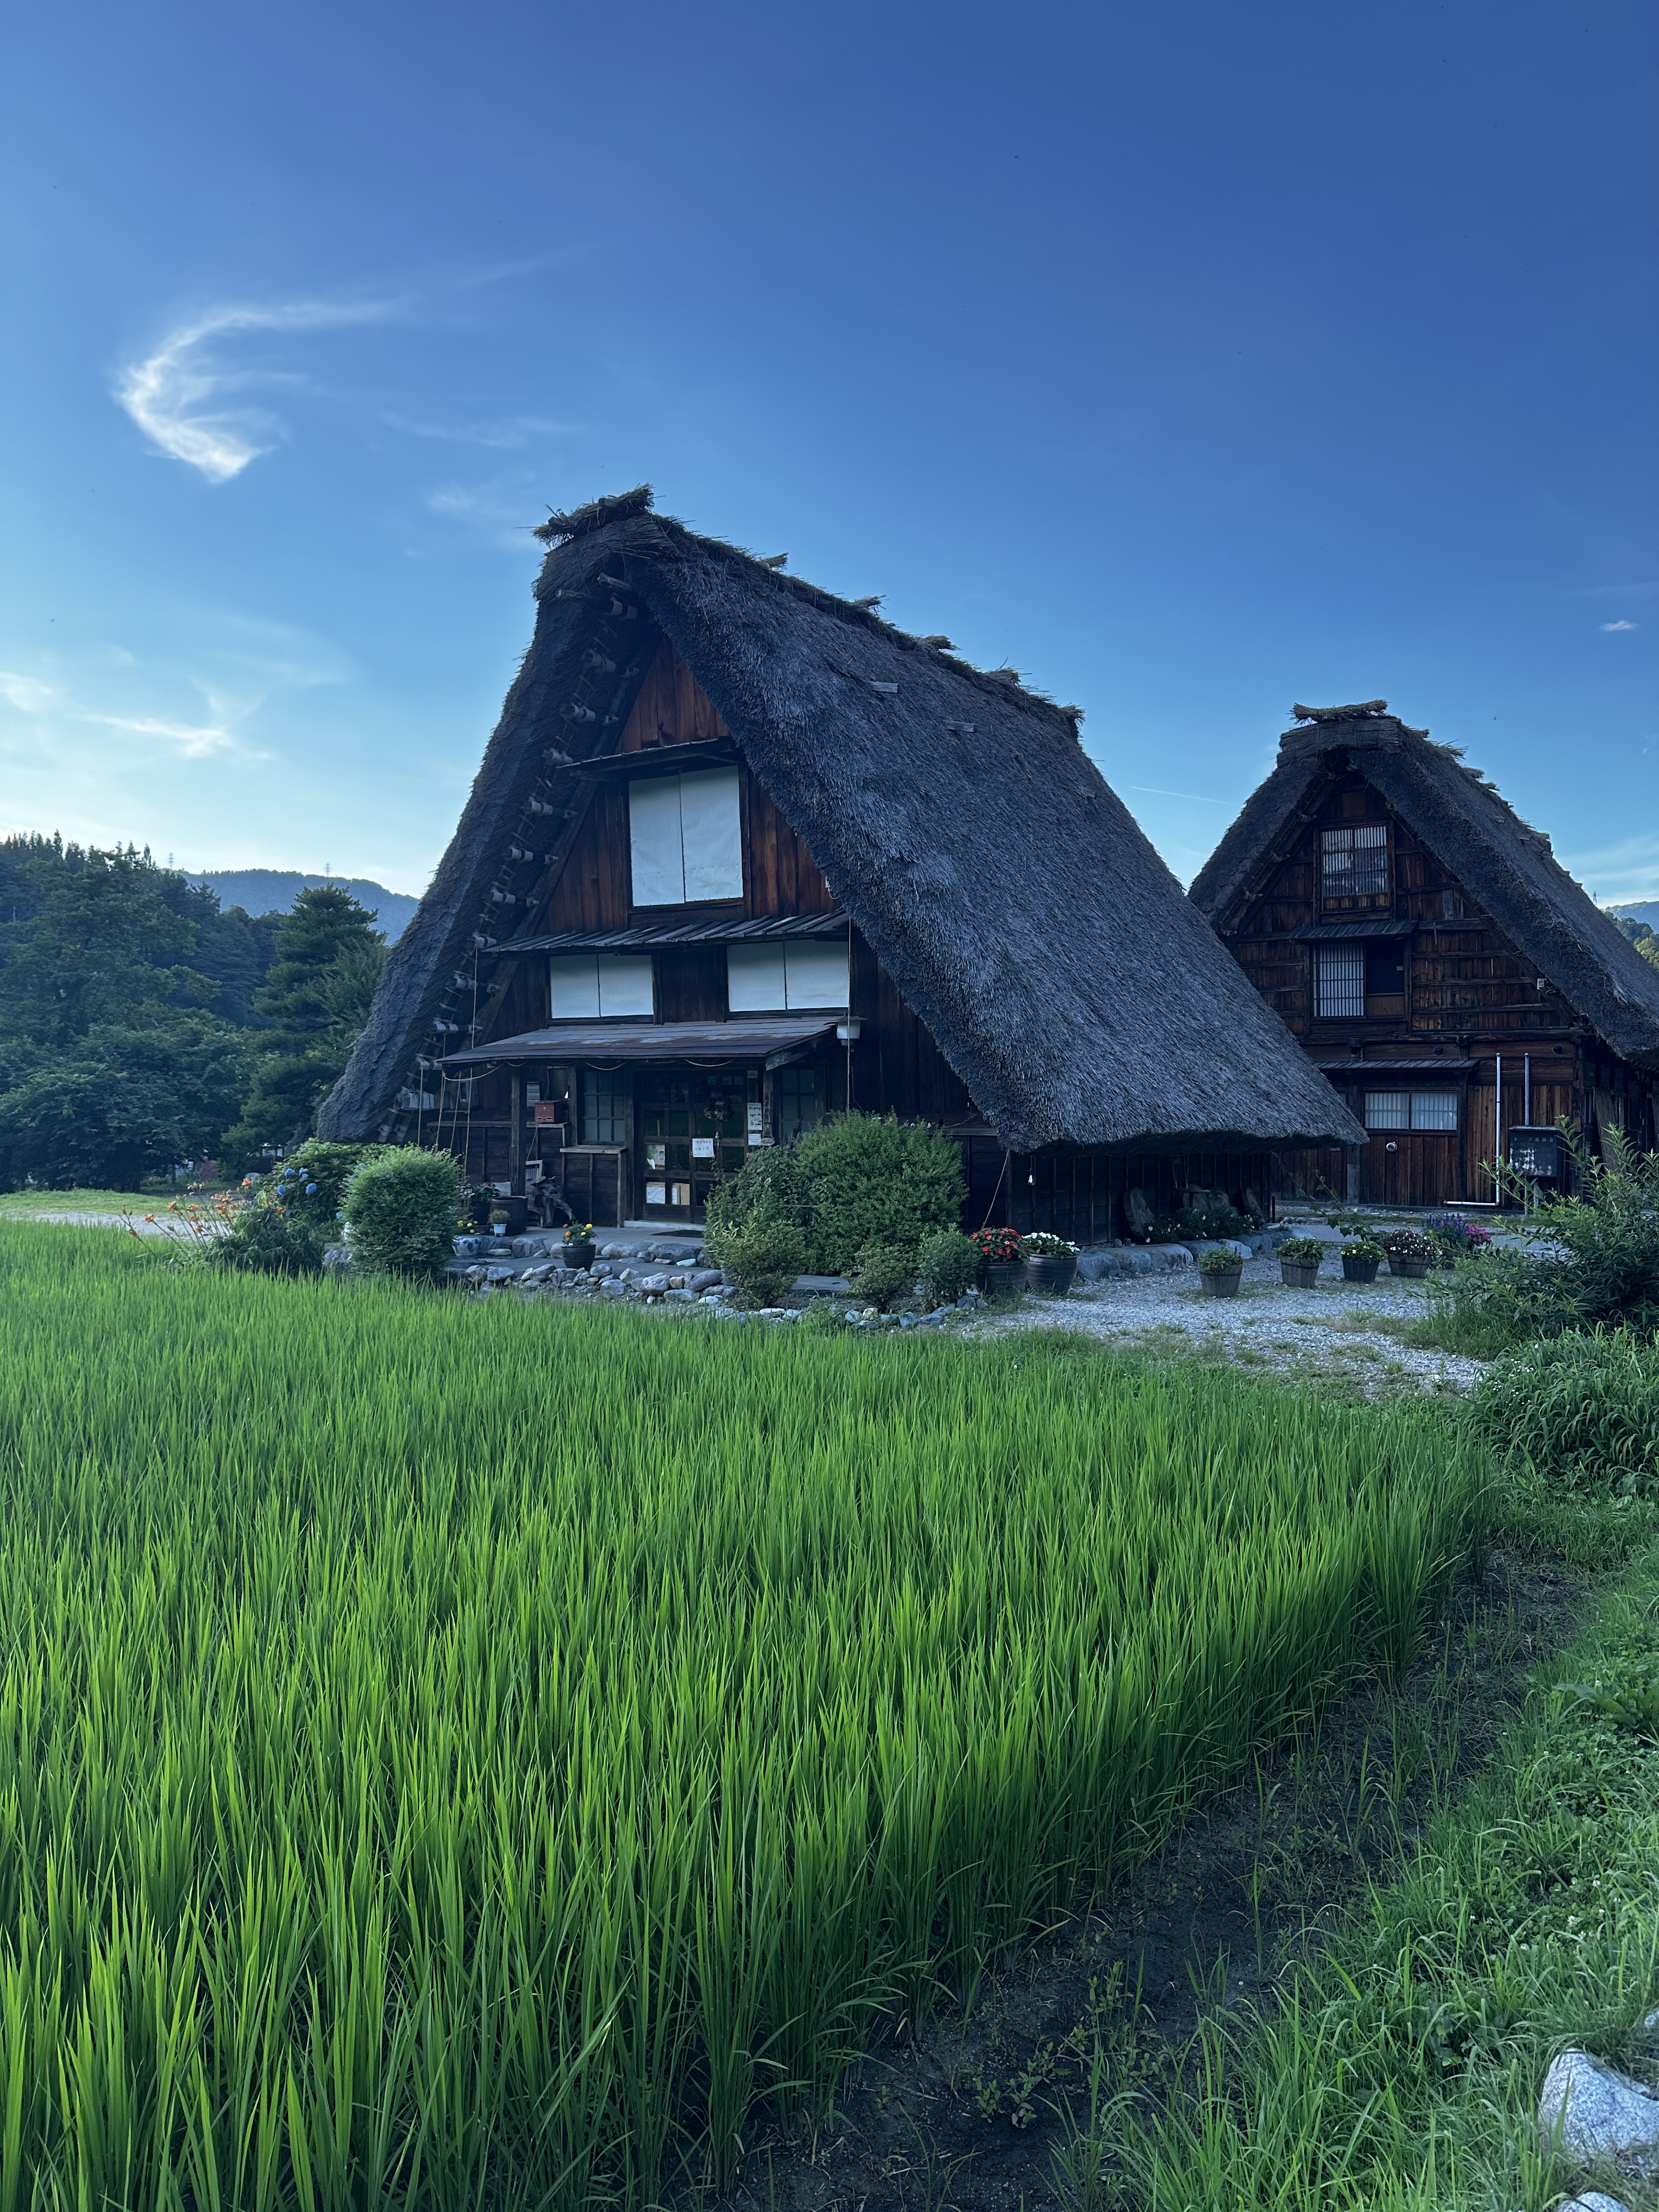
As daughter number 2 and I adored Japan so much last summer we decided to return with the rest of the family this summer. So for much of July I was in Japan. We returned to Tokyo, Kyoto, Koyasan (the temple mountain which I loved so much last year) and Osaka for a night. In addition, we also visited Kanazawa, Takayama and Shirakawa-go in the Japanese Alps, which were really interesting and less crowded (other than Shirakawa-go which has a lot of day trippers – we stayed overnight and it was deserted) than well known cities such as Kyoto, which is overrun with tourists – maybe to its detriment.

The beautiful village of Shirakawago in the Japanese Alps
I thought it might be helpful to outline 14 observations from my two trips to Japan.
- Eating out in Japan is reasonable and totally affordable. I know crazy right!!! I was always led to believe the opposite. For example: a ‘kitsune udon’ – a Japanese noodle soup in a umami-rich dashi broth topped with seasoned fried tofu in Koyasan came to £3.50.

A bowl of udon kitsune for £3.50 in Koyasan
Typically though you don’t need to spend more than £10 per person max on a meal – unless of course you want to eat fine dining, which is obviously completely different. One of the most flavoursome bowls of ramen I have ever eaten was Kanazawa and was a mere 980 yen, which is just over £5.

BEST RAMEN EVER at Menya Taiga in Kanazawa. The fresh ginger and lemon rind lifted it to new heights of deliciousness
2. Getting around Japan is SO DARN EASY. The train and bus system both within the cities and across the country is amazing. The subway is also relatively easy to navigate too, with the help of ‘google maps’. It literally feels they are a few decades ahead of us. We crossed the width of the country on the Shinkansen aka the bullet train in around 3 hours.

The famous bullet train (Shinkansen)
3. The bento boxes at the train stations are incredible. Normally no more than £10 a box they include a substantial meal that it really fresh and tasty. They offer everything from hot and cold food, salads, dumplings and sushi – deciding which to opt for takes time, so get to the station early to browse the possibilities.
-

- Bento box options

4. The large train stations have a myriad of restaurant opportunities that the locals eat in and the quality of the food is really good. Under cities like Osaka and Tokyo there are are huge walkways to keep cool from the humidity above ground and along these passages are numerous eateries, cafes and shops.
5. We found the Japanese so helpful and friendly.

The oldest sushi chef in Ishikawa Prefecture. Restaurant is called Sushi Tora and the experience is definitely memorable
Whilst perhaps a little guarded initially, when I asked locals if I was going the right way to X they invariable opened up, smiled and communicated with sign language or google translate. Speaking English is not a given.

I was overcome by how friendly and kind they were when I sat next to a lovely Japanese lady on the subway in Tokyo. She did speak a little English and told me she lived in Singapore with her family so was visiting. We chatted for a few minutes and I gave her a rough itinerary about our trip. Our next destination was Kanazawa, which was coincidentally her home town and where she was heading. I mentioned the little inn we were heading to in passing. We said our goodbyes after a couple of minutes and that was that. Fast forward a few days we arrive in Kanazawa in the evening at the Inn and the receptionist mentioned that I had a message from a friend. When she gave me the person’s name I remembered it must have been the lady from the train in Tokyo. Next thing I know this lovely lady is coming over to see me at the hotel (in the pouring rain) – I was wondering where this was going but was intrigued. Anyway she turns up and presents me with this beautiful box of cakes that she has had specially made for me from a patisserie in Kanazawa.
-

- The beautiful cakes stuffed with red bean paste


They take a while to make so she had put in the order the day before. I was so taken back by her kindness and sweet gesture. After chatting with her we exchanged numbers and she wished our family a happy stay in her hometown. The kindness of strangers. I don’t think I could ever imagine anything like this happening in the UK, after having spoken to someone for simply a few minutes. I will remember this kindness for the rest of my life.
-

- Machi no Odoriba in Kanazawa
-

- Entrance to the Inn
6. I booked all our accomodation either through Airbnb or Bookings.com – both were excellent and very straightforward.
-

- Our Airbnb in Kyoto
-

- Light and airy inside
I opted for old inns and traditional houses and then we stayed in temple accomodation in Koyasan – a different temple this time – Sojiin – which was equally wonderful, but different, to last year’s temple.
-

- Entrance to Sojinn

7. Getting to Japan is costly and long. We travelled on BA direct. The flight back took around 14 hours as they can no longer fly over Russia, so instead go over Greenland and the Arctic.
8. To really appreciate Japan I would not travel with children under teenage years. July was a good month in that it is less busy than August but it is incredibly hot and humid. We walked around 20k steps per day and must have sweated a huge amount. Take an umbrella to shade yourself from the sun. Everyone carries one at all times – rain or shine.
9. Japan is really trying to encourage tourists to visit less well known places and I really think this is the way to go due to the deluge of tourists in some places really putting a strain on the local community and spirit. Kanazawa for example is only visited by 2% or all tourists and because of this it was really lovely to wander around and visit the temples and the geisha districts. I would have liked to have stayed for another day or so – we stayed 2 nights – 3 would have been perfect.

Kanazawa Castle Park
10. Don’t bother with a JR rail pass. The first time we got one of these for the period we were travelling around. This time we didn’t as they have gone up in price so exponentially it doesn’t make sense. Also some of the trains you will want to go on are not covered by JR Rail. It is easy to purchase whilst you go. When you are arrive in Tokyo buy a SUICA and PASMO card. They are prepaid IC (stored-value) cards. They can be used for travel on JR, subways, buses and private railways in Tokyo as well as neighbouring areas. SUICA is issued by JR East and PASMO by private transport companies however they can be used interchangeably. They are available on Apple Wallet on your iPhone or Apple Watch so that may even be the easiest.

Mount Fuji as we whizz past on the bullet train
11. If you travel in the summer months, I would recommend only taking hand-luggage. We all carried one carry-on each for the trip. Most places we stayed had washing machines and tumble dryers, so we washed our clothes as we went along. Also when you stay at inns they give you yukatas and pyjamas to wear.
-

- our yakata and pyjamas
-

- indoor shoes at the inn
You can easily pick up another suitcase if you end up buying gifts along the way. Equally there is a ‘luggage forwarding’ option in Japan that is highly convenient, reliable, secure, and very economical. Companies that offer the service, including Kuroneko Yamato, but normally your hotel or inn can sort this out for you.

a relatively short queue by Japanese standards
12. Invariably when you go to a restaurant there is a queue. This is totally normally so don’t be put off as they do go down pretty fast. People don’t loiter at restaurants – they eat their meal and leave. Obviously there are ones that you can go slower but a lot of the ramen joints operate in this way.

Watermelon cubes and pyramids
13. Fruit is expensive. As they rarely import it is down to what they are able to grow. Individual fruit are wrapped with care and prices for fruit that is reasonable in the UK is relatively expensive in Japan. One of the most interesting observations were the watermelon cubes and pyramids. They are more for decorative purposes than to eat I hear – costing around £100+. The regular round watermelons that we are all familiar with are expensive to what we have in the UK.
14. I adored all the food we ate in Japan but for me the vegan food given at the temples in Koyasan is standout. The flavours, textures and appearance are exceptional and it was a joy to have half board for the 2 nights when we were there.
-

- Just a few of the dishes given to us for supper at the temple


Have you been to Japan or plan to go? What observations would you add?
Comments below please for all subscribers and readers to see.
I’ll be back soon with a recipe.


