Bengali Vegetable Curry with Lentil Kisses

IMG_2531

Lentil kisses, known as bori, are little sun dried lentil nuggets that have often been handmade and left to dry in the hot, warming Indian sun. My mother-in-law often brings me back a jar upon visiting her beloved  home city of Kolkata. They remind me of a lentil version of Hershey’s chocolate kisses – the type that visitors from the US often used to bring me and my siblings when we were young. Making bori yourself is not too tricky – there is a lovely recipe here if you are keen – if you live in a country where you can rely on warm, glowing hot sun, but as the weather in the UK is at best erratic when it comes to sunshine, it would probably be rather tricky.

IMG_2509


Whilst I realise not everyone has a Benglai mother-law-in who can magic up bori at a whim, you can get hold of bori in London at any good Asian grocers. In Kolkata, bori is also cooked with fish dishes or with greens, but today I wanted to show you a simple recipe that uses up vegetables that you are likely to have in your fridge. It makes for a very satisfying and enjoyable vegetable meal that is perfect eaten on it’s own or accompanied with some dal, rice or flat breads.

IMG_2512

Good luck in your quest for lentil kisses. They are seriously not that hard to seek out. Let me know how you get on.

IMG_2530

Vegetable Curry with Lentil Kisses

1 large handful of bori (lentil kisses)

2 tbsp groundnut oil

2 small dried red chillies

1 tsp panch phoron

1/2 tsp turmeric

1/2 tsp chilli powder, optional

2 carrots, cut into bite sized chunks

3 medium sized potatoes, quartered

1/4 of an aubergine, cut into bite sized chunks

2 tomatoes, finely diced

1 tsp salt

to serve

1 handful of fresh coriander

  1. Heat a tablespoon of oil (or thereabouts) in a pan and when it is hot add the dried chillies and allow them to blacken a little, this will take no longer than a minute, but may make you cough a little so beware!
  2. Add the panch phoron which will begin to fizzle almost instantly. Then add the turmeric and chilli powder (if using the latter) and add the chopped carrots and potatoes. Move around the pan, lower the heat add a couple of tablespoons of water and place a lid on the pan and leave for 15 minutes, stirring at intervals.
  3. Meanwhile in a separate pan add another tablespoon of oil and when it is hot add the bori/lentil kisses so that they bronze slightly in colour. This will only take a few minutes, if you keep moving them around the pan. Remove them from the pan with a slotted spoon and place on a plate with kitchen roll.
  4. In the main pan now add the aubergine, salt and fresh tomatoes and stir into the other ingredients. Add a little more water to help soften the ingredients, but not too much as you do not want the sauce to become too runny. Place a lid on the pan and leave for another 10 minutes.
  5. After 5 minutes check to see if the potatoes and carrots are softening. Add the bronzed bori and gently stir into the vegetables. Place the lid on the pan and leave for a further 5 minutes or until the potatoes and carrots have softened sufficiently.
  6. To serve add freshly chopped coriander.

It is wonderful to accompany with some dal and rice or Indian flat breads.

IMG_2517


Miso Aubergines and Harissa Asparagus – Vegan Feasting

IMG_0505


I really hadn’t planned for this to be a blog post. There is only this one photo that was taken in a hurry, with my iPhone and not my usual food photography camera.  I hadn’t given much thought as to food presentation or back boards or table cloths. It was very much in the moment, what my family were eating one evening. The feedback I had from this photo on Instagram however convinced me that I ought to share the recipes.

Whilst I added my own twist to the recipes both are from two wonderful cookbooks that are worth investing in, if you haven’t already got them. The plate on the left with the aubergines comes from a similar recipe by Anna Jones’s book ‘ A Modern Way to Cook‘. It is one of my favourite vegetarian cookbooks and  one which I regularly dip into it. The asparagus on the right is from Sabrina Ghayour’s ‘Persiana’ cookbook, which is equally fabulous and worth purchasing.

Dark Miso and Honey Aubergines

Adapted from ‘A Modern Way to Cook’ by Anna Jones

Serves 4 (if served with other dishes)

1 large aubergine (or 2 smaller aubergines), halved and then cut into 1 inch slices

1 tbsp coconut oil

1 tbsp dark miso (I get mine from Korea Foods)

2 tbsp runny honey

2 tbsp mirin/rice wine

pinch of Kashmiri chilli powder

1 tbsp white sesame seeds

  1. First wash and then half the aubergine and cut into slices lengthways – approx 1 inch thickness and cut slice marks across the flesh (not the purple skin).
  2. Place on a lined baking tray.
  3. Meanwhile mix the dark miso, runny honey, mirin (you can get this from all large supermarkets, as well as Asian specialist shops) and a pinch of Kashmiri chilli powder.
  4. Heat the coconut oil in a pan if it is solidified and then gently brush the flesh of the aubergines.
  5. Place in a grill for 5 minutes before turning over for another 5 minutes.
  6. Using a spoon spread the miso honey paste over the aubergines equally and place into an oven at 180 degrees for 15 minutes.
  7. Scatter with white sesame seeds and serve.

Harissa, Lemon and Honeyed Asparagus

Serves 4 (if served with other dishes)

Adapted from ‘Persiana’ by Sabrina Ghayour

1 large handful of fresh asparagus, trim the ends

2 tsp harissa

2 tbsp runny honey

1 lemon, rind and juice

pinch of salt

  1. Trim the ends of the asparagus so that the rough ends are removed.
  2. In a bowl add the harissa, lemon rind and juice, honey and salt. Mix together then add the asparagus so that all the stalks are coated.
  3. Heat a heavy based griddle pan and when it is hot add the asparagus and allow to soften and form black ridges from the griddle pan. Turn over at intervals. The asparagus will be cooked within 10 minutes.
  4. Place on a serving plate and pour over any remaining juice from the marinade.


With these dishes I also served steam basmati rice and pak choi. To cook the pak choi I added a little coconut oil to a pan and then added the pak choi leaves. After a minute the leaves will soften so add a splash of soy sauce or tamari and a tablespoon of yuzu or lime juice and allow to wilt a little further for a couple of minutes.

Let me know how you get on. There is so much flavour coming from all the citric, spicy and cleansing notes and I like the way how the rice balances it all out nicely.


Indian Inspired Cucumber, Apple and Red Onion Salad

IMG_0217

I’ve just returned from 10 glorious days in the Schwarzwald – or German Black Forest to you and me.

IMG_9957

Days were spent hiking through dense forests where gentle streams turned into ferocious waterfalls.

IMG_0097

 We climbed many a hill and marvelled at all the spruce and pine trees peppering the landscape. Dramatic scenery at every turn.

IMG_0022

Picnic lunch stops afforded us spectacular vistas, stretching for miles and the best thing was that we were completely alone – over the time we were there we passed only a couple of other walkers, one of which was a nun from the local nunnery. We live in such a frenetic, fast paced world that taking time out and spending time with nature away from the crowds is wonderfully cleansing for the mind and soul.

IMG_9971

Upon returning to our gasthof we would often treat ourselves to the local speciality…….Black Forest Gateaux,  because when in Rome…..

IMG_0113

After resting our weary limbs we prepared for serious dining in the evening. The food was exquisite, refined and yet hearty – the lemongrass creme brule and the wild garlic soup being highlights.

IMG_9946

Upon returning back in the UK however, I was ready to have a vegetarian spell. I began to crave green vegetables (I eat a lot of spinach) and fruit with a spice injection and simple Asian food. In fact the first thing I cooked for myself when we returned to Blighty was this.

With the bambinos having just returned to school and the sun giving us a lovely, welcome dose of vitamin c – check out the blossom and blue skies

IMG_0208

I wanted to eat a lovely salad that I was given recently when I was in Kerala. It’s lovely on it’s own or eaten to accompany all manner of Indian, meat, fish or veg curries – see my recipe library. The crunch from all the different textures and the flavours sing sweet notes as you dive into this salad. Give it a whirl and let me know if you agree.

IMG_0218

Indian Inspired Cucumber, Apple and Red Onion Salad

Serves 4 with another dish or 2 on it’s own

2 crunchy green apples, cored, skin removed, quartered and chopped into 3

1 cucumber, skin removed, halved and chopped into half moons

1 red onion, finely sliced

1 handful of fresh coriander, roughly chopped

1/2 tsp salt

1 tbsp agave nectar/honey

  1. Skin, slice and cut the ingredients as specified above and mix altogether along with the honey and salt. Simple and utterly delicious.

This salad would also be perfect with meat, fish or vegetables off the BBQ.

IMG_0219


A tasty breakfast treat – spiced semolina (Upma)

IMG_1731

Semolina and I did not start out on a good footing.

For a few years when I was young I attended a convent – not as a nun, but as a pupil, and the nuns had a habit of being very strict. You had to eat every morsel on your plate and were not allowed to leave the table until your plate was clean.

IMG_1724

The food in the early 80’s was not something you would particularly blog about and the puddings that were dished up to us were well, how can I put this politely, not that appetising. The gruel that I particularly disliked was sloppy semolina with a dollop of sweet jam. I found it so hard to eat that on one occasion after the dining hall had emptied and I was sitting all alone and the minutes were ticking by I decided that when Sister was not looking I would deposit the contents of my bowl into my pocket. I did it like a stealth ninja and no one found out, other than my mother, who is such a sweetie she didn’t seem to make much of a fuss.

IMG_1714

Fast forward 34 years and I now love semolina – but only if I eat it the savoury way. In India a hugely popular breakfast snack is spiced semolina known as ‘Upma’. It is so quick and easy to put together it takes minutes to create a really warming bowl of goodness. I eat it at any time of day in all honesty – breakfast, snack, lunch, supper – you name it, it is super versatile. You can also add whatever vegetables need to be used up in the fridge, so it’s a win win in my book.

IMG_1742

Spiced Savoury Semolina – Upma

Serves 2-3 (or for 4 if eating as a snack)

2 tbsp vegetable oil

1 tsp black mustard seeds

12 fresh curry leaves

1 fresh green chilli finely chopped

1 banana shallot or small onion, finely chopped

1 tsp salt

20g fresh ginger, finely grated

1/4 tsp turmeric powder

1 carrot, finely cubed

60g green beans chopped in half

40g red peanuts

150g course semolina (sooji)

275ml water

  1. Heat a pan with the oil and when it is hot add the mustard seeds, curry leaves and fresh chilli. The mustard seeds will begin to splutter after 20-30 seconds so then add the shallot/onion and salt and lower the heat. Allow the shallot to soften for around 5 minutes.
  2. Add the fresh ginger and turmeric and stir gently.
  3. Now add the carrot and beans or another vegetable that needs using up along with the red peanuts.  After 1 minute add the water and leave to simmer for up to 5 minutes or when the vegetables have softened.
  4. Add the semolina gradually and stir constantly so that it does not clump together too much. Once it has soaked up the water – you can add a little more water if needed at this stage – place a lid on the pan and switch off the heat so that it can steam for a few minutes before serving.

Speedy Homemade Hummus

IMG_1206

 Ok ok I know, I admit I’m on a bit of a chickpea roll at the moment. Apologies to readers out there who don’t share my enthusiasm on the humble chickpea. I always have tins in my store cupboard so am constantly thinking of new ways to use them. This recipe is certainly not a new one – in fact I was convinced I had popped it up on my blog a couple of years back, but I was thinking of my baba ganoush recipe – click here, which if you haven’t tried….shame on you. Seriously give it a go. You’ll thank me for it.

IMG_1196

Going back to the more ubiquitous hummus – or the more affectionate name that we call it in our house ‘whole mouse’….it is equally straightforward to make. The only unusual ingredient that you may not have come across, but that you can easily get hold of at any major supermarket, is ‘tahini’, which put simply is sesame paste. It’s most commonly used in North Africa, the Middle East and the Levant. You’ll find it sitting next to the peanut butter in most stores. In my opinion you do need this necessary ingredient to give your hummus a more authentic taste so please don’t leave it out.

IMG_1202

The other key ingredients are olive oil, fresh lemon juice, lots of lovely garlic, cumin powder, salt and a little iced water. How easy!

Now you can jazz things up a bit, which I often like to do by adding one of the following: paprika, sumac, zataar, fried onions or shallots, fresh herbs, roasted beetroot, roasted carrots, cumin powder, black or green olives, turmeric, chilli flakes, sun dried tomatoes….the list is endless. Play around with flavours and find a new version to suit you. I’d love to hear from you if you find a new combination that’s a hit!

IMG_1213

 I’ve kept things simple for my one today by simply adding some fresh pomegranate seeds to give a ruby red jewel effect.  I like the fresh sweetness of the seeds with the hummus. It works really well and looks really pretty too. We eat with our eyes and nose as well as our stomachs after all.

IMG_1214

Homemade Hummus 

Serves – at least 6 (see bowl in photo)

2x400g tins  of chickpeas (if you want it extra smooth and silky you need to peel the chickpeas, but totally fine if you don’t)

3 tbsp/100ml tahini

2 garlic cloves, peeled and crushed

1/2 tsp cumin powder

1 lemon, juice only (if it is a small lemon you may need 2)

3 tbsp olive oil

1 tbsp extra-virgin olive oil (plus a little extra to drizzle at the end)

5 tbsp iced water

salt to taste

Serving Ideas

pine nuts, paprika, pomegranate, fresh parsley, crispy shallots

1. In a blender add the tahini, lemon juice and a couple of tablespoons of iced water. Blitz for a minute.

2. Strain the chickpeas and then add them to a blender along with all the ingredients except the olive oil.

3. Blend the ingredients adding the olive oil gradually until smooth.

4. Taste and add more salt/lemon if needed.

5. Place in a bowl and scatter the pomegranate seeds on top along with a drizzle of olive oil.

The photo above I have not peeled the chickpeas but the one below I have. You can see the difference in the smoothness.


Kakrol Curry – for those who like to try new things

IMG_1156

For the next month or so if you happen to be living near or in an Asian neighboured, or passing by an Asian grocery store, you might just chance upon a wonderful Asian vegetable known in Bengal as kakrol, or you may have heard it referred to as kantola. Then again you may have never heard or seen this Asian vegetable before as it’s pretty unique and is it’s only in season for a month or two.

IMG_1105

It’s a type of Indian gourd that does not have a bitterness like it’s cousin the korola. It’s seriously delicious and actually reminds me pool, which I equally love. It’s in season NOW so seize this opportunity and seek it out. I love the bright vivid greenness of its skin. It’s so inviting it just wants to be eaten!

IMG_1109

You need to half it lengthways and then half it again and then quarter it. Similar to the ones that I have in the photo above. You do not need to peel the skin, simply cut off either end of the gourd.

IMG_1119

The brightness from the turmeric, Kashmiri chilli and the vegetable itself makes for some colourful cooking – just don’t wear a white shirt when cooking.

IMG_1143

I tend to accompany mine with some dal such as red split lentil or cholar and serve it with some freshly prepared chapatis. It’s absolute heaven and the perfect vegetarian/vegan meal. If you do manage to find them and cook this please let me know as I love to hear feedback from readers.

Have a lovely weekend.

Kakrol and Potato Curry

2 tbsp groundnut/olive oil

1 tsp cumin seeds

2 potatoes, halved lengthways and then quartered

5 kakrol/kantola, halved lengthways and then quartered (see photographs above)

1 tsp turmeric powder

1/2 tsp of Kashmiri chilli powder

1 tsp coriander powder

1 tsp cumin powder

1 tsp salt

a few tbsp of water to help soften the kakrol

1/2 tsp garam masala

1 tbsp ghee

1. Heat the oil in the pan and when it is hot add the cumin seeds and move them around the pan for 20 seconds before adding the chopped potato pieces. Turn the heat down and let the potatoes begin to bronze slightly. This will take around 4/5 minutes.

2. Add the kakrol along with the turmeric, chilli powder, salt, cumin powder and coriander powder. Use a spoon to cover the kakrol and potato in the spices.

3. You may need to add a little water to begin with to help the kakrol to soften. Place a lid on the pan to help steam and soften it. Turn gently at intervals and add a little more water if necessary. Cook on a low heat for 25-30 minutes, by which time the kakrol and potato will both be softened.

4. Before serving add the ghee and garam masala, stir into the curry and serve with hot chapatis or other Indian flat bread.

IMG_1165


Sardinian Fregula with Courgette, Mint, Lemon, Parmesan and Pine Nuts

IMG_1025

Surprise! I have given my blog a new lease of life by making it a little fresher, with bigger food photographs – to tempt you into making my recipes of course. How do you like it? I’ll probably tweek it here and there as it is not exactly how I want it but it will do for the mean time. It’s also probably at it’s best looked at on a computer as opposed to a mobile or iPad but any device will do. Leave a comment below once you have had a little look around.

Now back to the important stuff…. the recipe. This week I want to tempt you into making this wonderful dish that can be eaten hot or at room temperature, perhaps for a picnic. It requires a little effort in as far as locating the wonderful fregula, but once you have done that making the recipe is a doddle.

IMG_0991

So what on earth is fregula I hear you all ask? Well in a nutshell it’s a Sardinian pasta, which is similar to couscous in appearance, and comes in a variety of sizes. It’s made from rubbing semolina and water to create a crumbly texture that is then rolled into balls. It is then sun dried and toasted briefly in the oven.IMG_0990

This process allows the fregula to have that ‘al dente’ texture giving it a slightly nutty taste. I am not suggesting you make the fregula from scratch, far from it. You’ll find it most Italian delicatessen and I wouldn’t be surprised if some of the larger supermarkets may well stock it. If they don’t then I am sure they will very soon.

IMG_1002

The overall dish is healthy, takes under quarter of an hour to prep and cook and is really delicious. The flavours are fresh and cleansing, coming from the mint and lemon and this combined with nutty fregula and pine nuts, umami parmesan (check out my article on umami here) and the bright green courgette. It’s a winning recipe if you are entertaining and want no fuss with cooking as it can all be prepped before guests arrive, aside from the boiling of the fregula and courgettes.

For those who like shell fish I will be doing another fregula recipe again in the next few weeks – that leaves you more than enough time to hunt down a packet from your local Italian deli.

IMG_1010

Sardinian Fregula with Courgette, Mint, Lemon, Parmesan and Pine Nuts 

Serves 3

225g fregula (75g per person)

3 courgettes, cut into thin half moons (1 courgette per person)

1 lemon, juice and zest (to taste)

4 stems of fresh mint leaves, finely chopped

60g parmesan

1 large handful of pine nuts

salt and pepper

1. Place the fregula in boiling water so that it is completely covered for 12 minutes.

2. Prepare all the other ingredients, whilst you wait for the fregula to cook. After 12 minutes add the half moon courgettes, adding more boiling water if necessary, and cook for 2 more minutes.

3. Drain the courgettes and fregole and place in a large mixing bowl.

4. Add half the lemon juice and zest, most of the parmesan, the mint leaves, pine nuts and season with salt and pepper. Taste and add more lemon juice and zest to taste.

5. Serve in one large bowl/platter and allow everyone to serve themselves.

Sprinkle with the remaining parmesan.


Umami Rich Portabella Mushrooms, Sun Dried Tomato and Black Garlic Pesto

IMG_0891

Recently I was asked to create my own version of one of the vegan dishes offered on the menus of ‘The Wynn Resort‘ in Las Vegas. The hotel has recently teamed up with famous vegan chef Tal Ronnen so I was eager to bring my own twist to the menu.

IMG_0888

I decided to alter his version of ‘royal trumpet mushrooms with a soy reduction’ at the Lakeside Restaurant and create my own umami rich mushroom dish. Mushrooms, tomatoes and black garlic are all ingredients that are bursting with umami. I wrote an article for Country & Townhouse Magazine on umami which you can read here. My ingredient that brings depth of flavour and an interesting twist though is black garlic – see another article here. It is now becoming increasingly easy to get hold of and can be sourced at some of the large supermarkets here in the UK. I can only imagine the same can be said for the US. If not there is a business opportunity out there for someone as this is a seriously magic ingredient.

IMG_0874

It is so straight forward and quick to prepare and bake that these can be easily rustled up in no time at all. I find them hugely satisfying and perfect if you want a vegetarian flavoursome meal.

IMG_0880

I like to sit the mushrooms on a bed of steamed spinach with a sprinkling of dried chilli flakes and a splash of lemon juice. So Tal if you are reading this how about adding this to the menu? Do let me know if you do.

IMG_0895

Portabella Mushrooms, Sun Dried Tomato and Black Garlic Pesto and Steamed Spinach

Serves 2

2-4 large portabella mushrooms (depending how hungry you are)

70g sun dried tomatoes

3 black garlic bulbs

20ml sun dried tomato oil

200g fresh spinach

1 tsp dried chilli flakes

fresh lemon, quartered to serve

1. Preheat the oven to 180 degrees.

2. Cut the stork of the mushroom if it is protruding and place in a hand blender. Add the sun dried tomatoes, black garlic bulbs and sun dried tomato oil. Blitz so that it forms a pesto like consistency.

3. Spoon the tomato pesto onto the mushrooms evenly and place in an oven proof dish. Bake in the oven for 12 minutes.

4. Steam the spinach or simply place the spinach in a pan with 1 tsp of cold water which will make it wilt. Move it around the pan for a minute so that it is all wilted. Add the chilli flakes and serve on to a plate.

5. Place the hot stuffed mushrooms onto the spinach and serve with fresh lemon on the side.

Please note you will not need to add any salt to this dish as the umami flavours more than make up for flavour and depth. 


Butternut Squash, Lemongrass, Coconut and Spinach Curry

IMG_0868

Increasingly more and more people are balancing their diet with vegetarian food and cutting out meat completely on some days of the week #meatfreemondays. Whilst I do eat meat and fish I am consciously eating less meat and more fish and vegetables. A balanced diet is important and I do enjoy eating meat but I am in the camp that it is unnecessary to eat it everyday.

IMG_0856

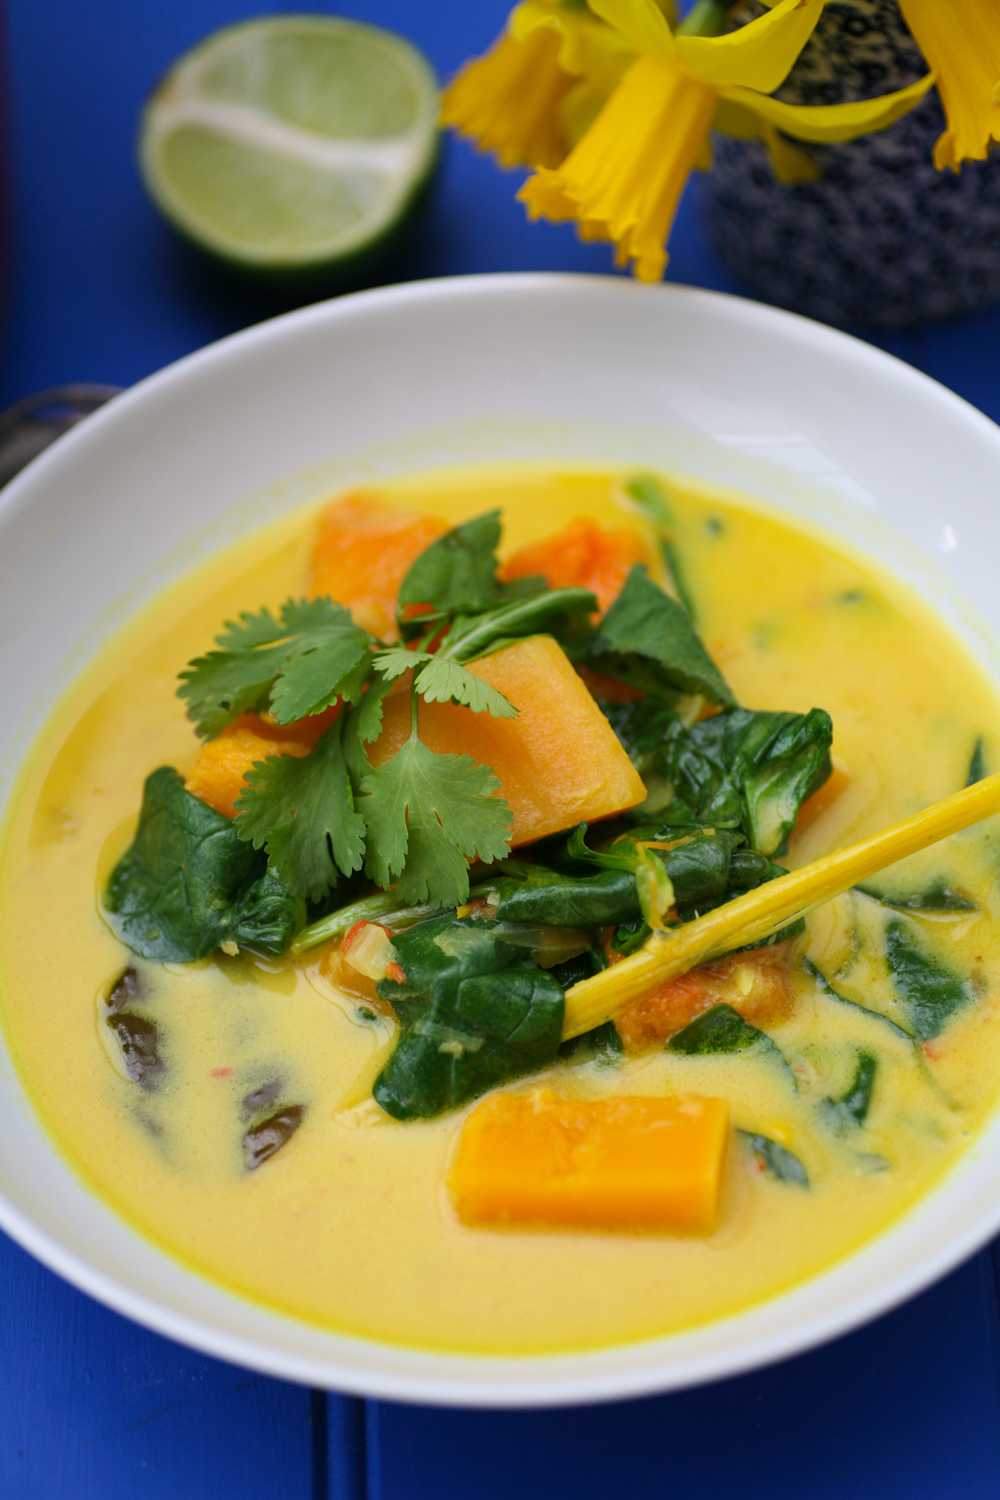
My recipe here ‘Butternut Squash, Lemongrass, Coconut and Spinach Curry’ will hopefully convert even the meat lovers amongst you. It is packed with so much goodness and tastes really good, with a lovely chilli kick reverberating through the dish. For those who claim they can’t cook, seriously try this one. It is very easy to make and you can cook it in under 30 minutes. The hardest part is peeling the butternut squash. *Inventors* out there I would love you to come up with a device that makes it quick and easy to peel any type of squash or pumpkin. I use my regular peeler and knife and whilst it does not take long I know it can be done faster.

IMG_0824

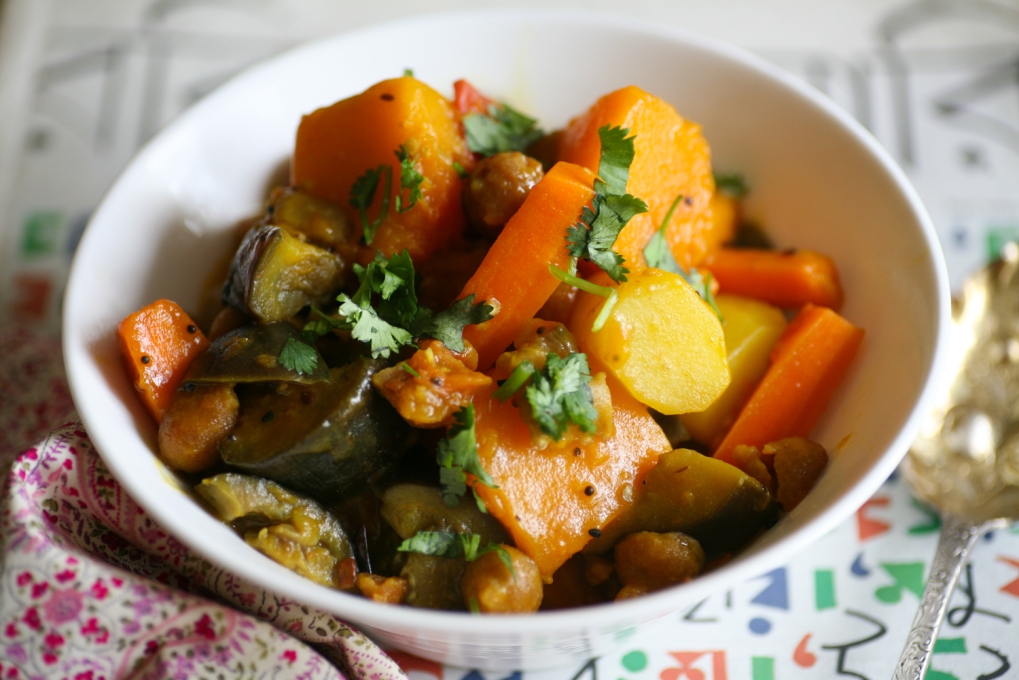
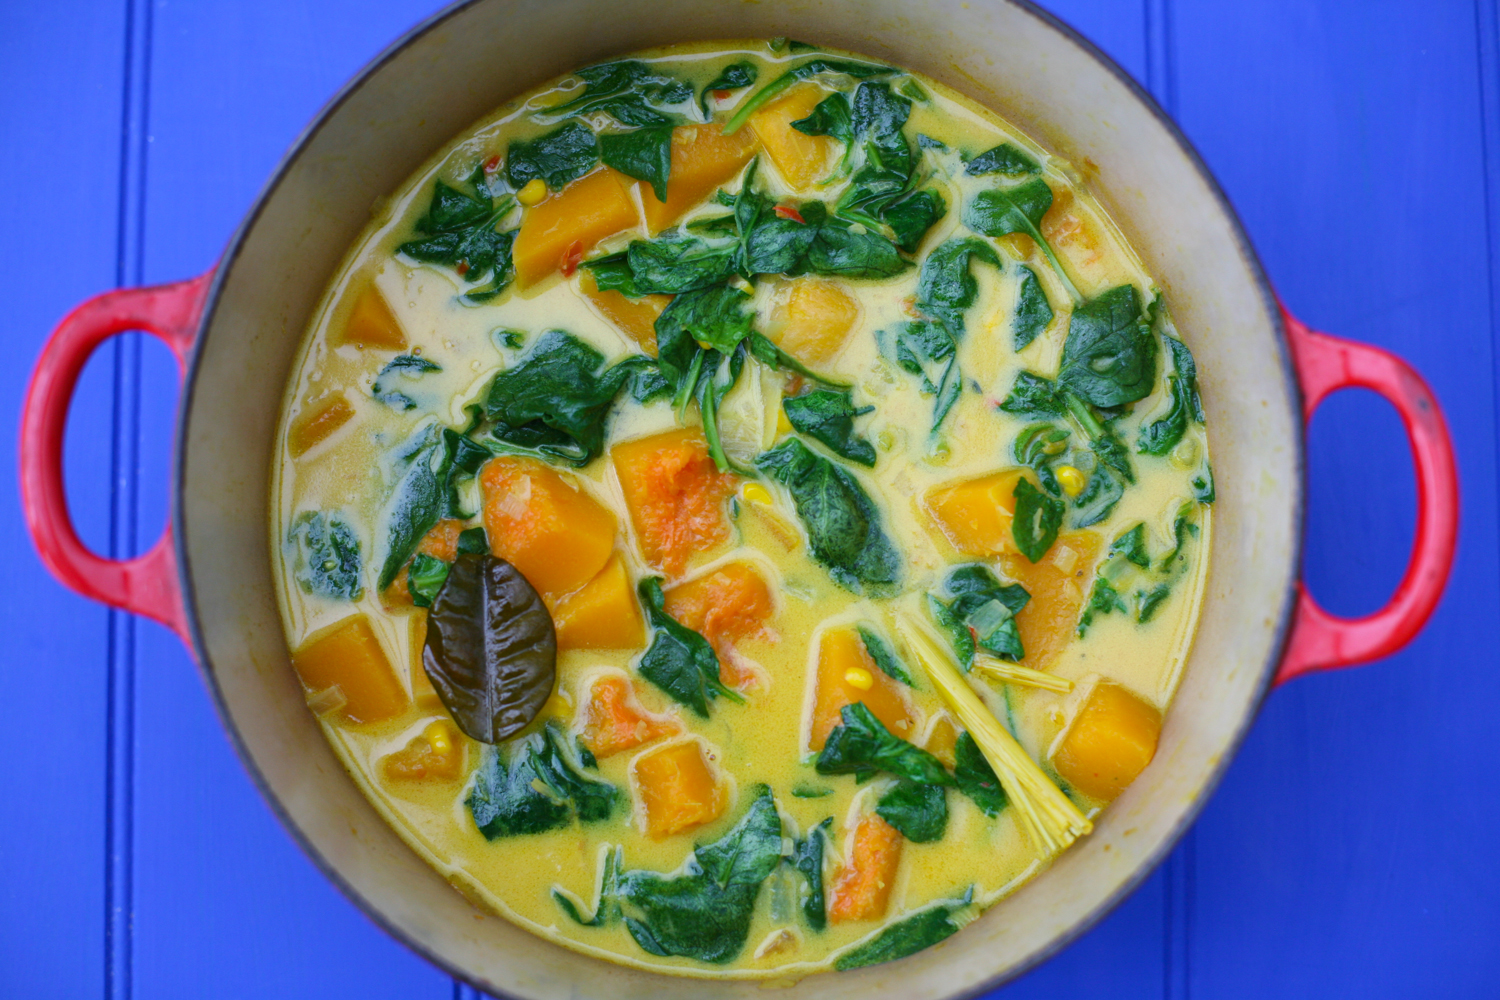
This recipe shouts SPRING to me, although that maybe because I put daffodils in the photo shoot. The bright yellow orange hue coming from the butternut squash and turmeric sings to me and makes it wonderfully appetising to look at and eat. I also love the burst of green from the spinach, fresh herbs and lime.

IMG_0830

I have used fresh ginger paste and garlic paste, as I always have pots to hand in the fridge and for speed they are wonderfully helpful, but by all means use fresh ginger and garlic and then simply finely grate them so they become more paste like.

IMG_0836

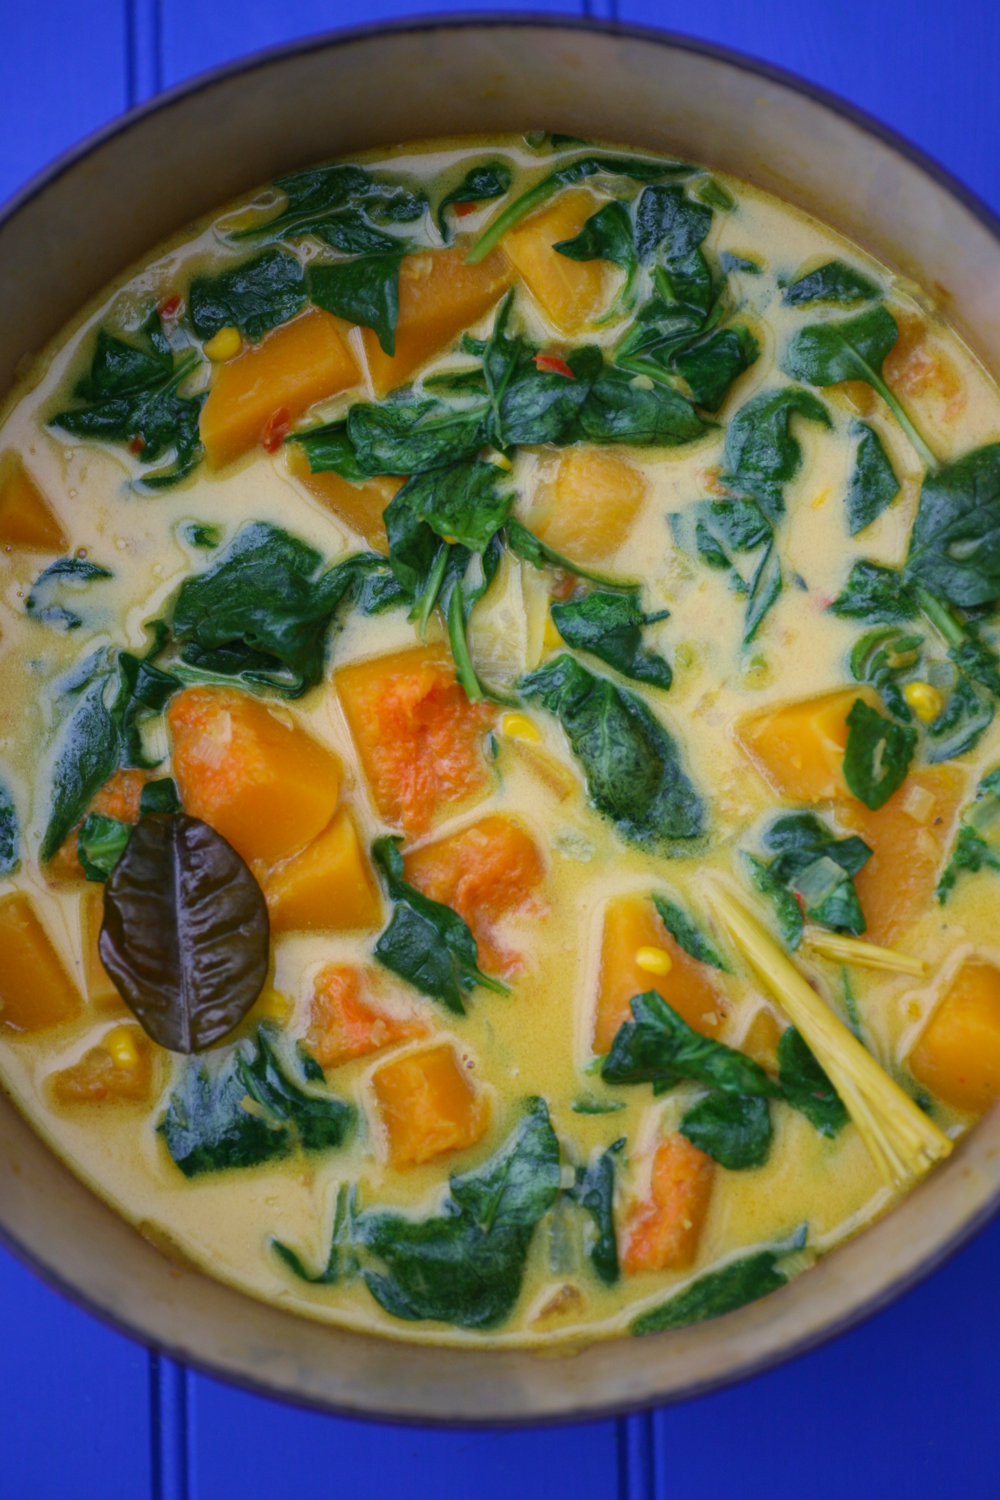
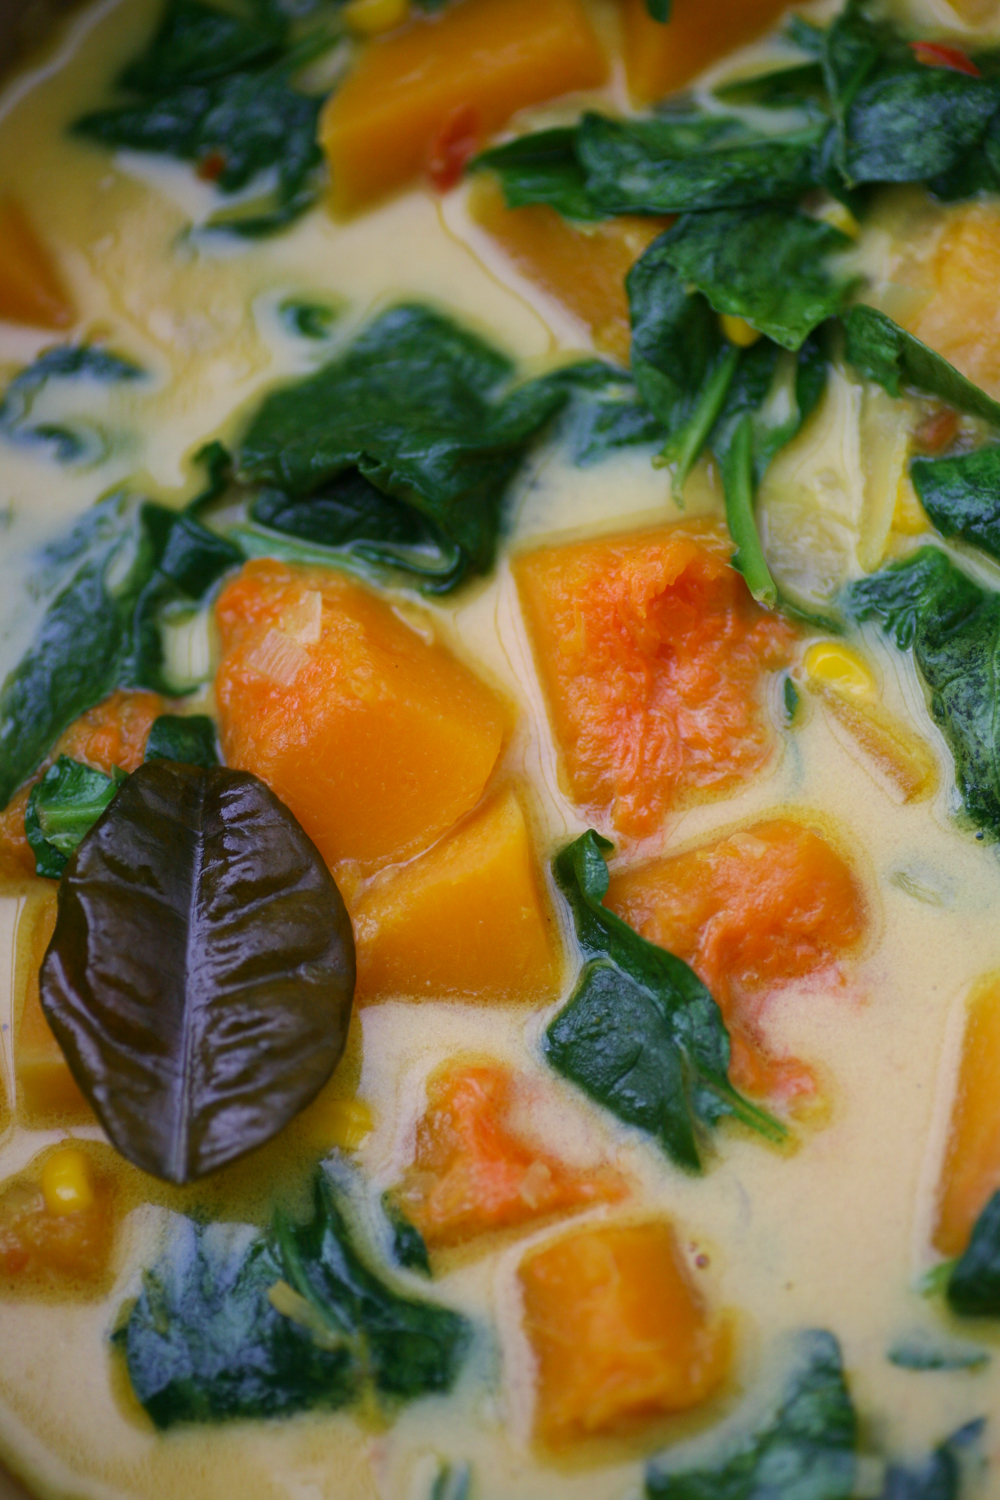
The sweetcorn adds a lovely crunch and texture to the dish alongside the soft butternut squash and spinach. I have added kaffir lime leaves as I often have some in my fridge/freezer. They freeze well and you can pick them up at the big supermarkets.

IMG_0842

I don’t bother to take out the kaffir lime leaves or lemongrass when serving. I quite like the rustic, throw it together look. I also find the dish is a great pick me up if you are feeling a little under the weather. The ginger, turmeric, garlic, spinach and chilli really flood the body with so much goodness that a sense of wellbeing hits you almost immediately.

IMG_0856

I would love you to give it a try and please let me know how you get on. Butternut squash (uncooked) last for weeks so I always have one ready to use.

IMG_0846

Butternut Squash, Lemongrass, Coconut and Spinach Curry

Serves 4-6

3 tbsp ground nut oil

3 banana shallots (or 2 medium onions), finely sliced

1 tsp salt

2 lemongrass, outer leaves taken off and both ends and then bashed gently with a rolling pin

1 heaped tsp of ginger paste

1 heaped tsp of garlic paste

2 small red chillies, thinly sliced

3 kaffir lime leaves (optional)

1 tsp ground turmeric

200g chopped fresh tomatoes

1 butternut squash, peeled and cut into 3cm cubes

500 ml of vegetable stock

1x 400ml can of coconut milk (I find Pride is nice and creamy)

1 tbsp Thai fish sauce

1 fresh corn on the cob, corn sliced off the cob

200g fresh spinach

handful of fresh coriander, to serve (optional)

handful of fresh mint, to serve (optional)

1/4 fresh lime per portion

1.  Finely slice the banana shallots and then heat the oil in a large deep pan. When it is hot add the shallots and turn the heat down. Add the salt and stir into the shallots. Allow the shallots to soften, which will take a few minutes.

2. Add the garlic and ginger paste and stir into the shallots. Then add the chillies, lemongrass, ground turmeric and kaffir lime leaves. After a further minute add the fresh tomato and stir once again. Add the butternut squash and stir into all the other ingredients.

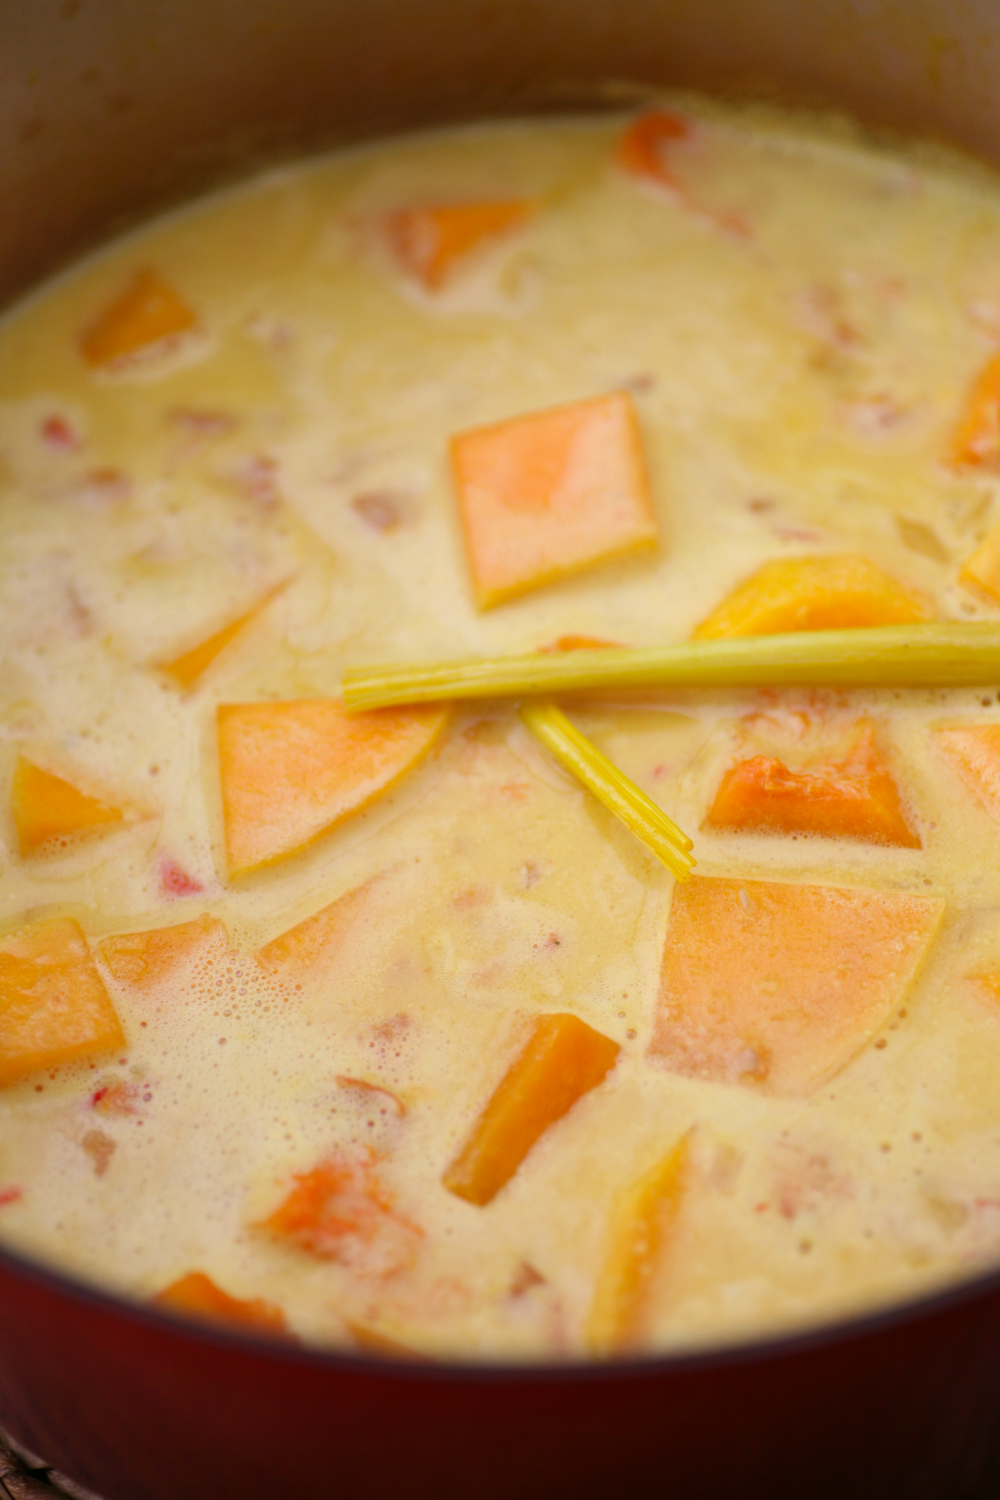
3. Add the stock, Thai fish sauce and the coconut milk and simmer gently for around 20 minutes, by which time the butternut squash will have nicely softened. If it needs a couple more minutes to soften adequately, carefully monitor as you do not want to over cook as mushy butternut squash is not so appealing. Add the sweetcorn 5 minutes before you wish to serve as it will take no time to cook.

4. Turn off the heat and add the fresh spinach and gently submerge in the sauce, which will wilt it perfectly.

5. Serve hot in bowls either with some jasmine rice or noodles. Add fresh coriander, mint and lime to suit individual tastes.

IMG_0840

If you click on the comments button below you will also see the option to like. I know it’s a little hidden away but have a look and don’t forget to click the *LIKE* button and if you are feeling extra brave do leave a comment as I love to hear from readers.


Decadent Dal Makhani

IMG_9781

This gloriously decadent dal originates from the Punjab region of North India where black urid beans, also known as black gram, are eaten in abundance. It happens to be my husband’s absolute favourite king of dals. Creamy and rich from the butter, ghee (or oil) and double cream (oh don’t let that put you off!) and yet zings of ginger, garlic and tomato accompanied with a delicious spicy masala.

IMG_9792

Whilst we are lucky to still have some warm days, soon the weather will be turning and this dal is definitely one to bookmark for when there is a chill in the air.

IMG_9785

In the Punjab this dal is eaten on special occasions, such as weddings and religious ceremonies. When all the pomp and glory happens you can guarantee that dal makhani will be offered to guests. Do try it and let me know how you get on.

IMG_9808

Hope you all have a lovely weekend.


Dal Makhani

Serves 4-6

250g black urid beans (also known as black gram)

20g fresh ginger, peeled and grated

3 garlic cloves, grated

2 green chillies, finely sliced

241g tin of red kidney beans (this was the amount once drained)

1 tsp salt

*********************

tadka 

2 tbsp sunflower oil or ghee

1 tsp cumin seeds

1/2 tsp fenugreek seeds

pinch of asafoetida/hing

2 garlic cloves, grated

2 tbsp tomato puree

*********************

Just before serving

1 tbsp butter

40ml double cream

1/2 tsp Kashmiri chilli powder

1/2 tsp garam masala

salt to taste

1. Ideally soak the urid beans overnight submerged in a bowl of water. Equally if you plan on eating them in the evening you can soak them in the morning for around 6 hours.

2. Once the lentils have soaked (see above) drain them and then wash them with clean water and drain 3 times so as to get rid of any impurities.

3. Place them in a large deep pan and completely cover so that the water is just above the beans. You can always add more water during the cooking process if it all gets soaked up. Add the finely grated ginger and garlic as well as the green chilli and salt. Bring to the boil and then simmer for 20 minutes. The scum that comes to the top when cooking can be removed with a spoon and discarded.

4. After about 20 minutes the dal should have softened and much of the water reduced. Press a bean between your thumb and forefinger and it should easily be squashed. If it needs to soften a bit more leave it simmering for a further 5 minutes.

5. Strain the lentils and then place them back in the pan along with the drained tinned red kidney beans. Add 100ml of water and simmer for a couple of minutes.

6. In a separate small frying pan add the oil (or ghee if you are feeling a little bit naughty) and when it is hot gently add the cumin and fenugreek seeds. They will begin to pop after about 30 seconds so proceed to add the garlic, asafoetida and then after a minute add the tomato puree and stir in together. Simmer on a low heat for a further minute.

7. Place the contents of the frying pan into the large pan with the urid and red kidney beans and give a good stir. If it is too thick add a little more water. It is very much down to personal taste on how thick or soupy you wish your dal to be. Simmer together for 10 minutes.

8. A few minutes before serving add the butter, double cream, Kashmiri chilli powder and garam masala. Give a good stir and add more salt as required.

Oh so delicious. I hope you agree.

Do leave a comment below. I love to hear from my readers.