San Bei Ji – Three Cup Chicken

If you are looking for a crowd pleaser then look no further as I can guarantee you that plates will be licked clean if you serve up this dish. As well as cooking a pot for grown-ups, I made up a batch for Big A and Little Z (minus the dried chillies) and they absolutely adored it.

The dish originates from the Southern Chinese province of Jiangxi and is a speciality of Ningdu. In addition, it has also become a popular dish in Taiwan. I can also guarantee it will become a firm favourite in your repertoire once you’ve tried cooking it once.

San Bei Ji literally translates as three cup chicken – the three cups being sesame oil, rice wine and soy sauce. This recipe uses the trio but less liberally and the result is outstanding and quite frankly addictive.

San Bei Ji – Three Cup Chicken

Adapted from Leemi Tan’s book Lemongrass and Ginger

Serves 4 (with no leftovers!)

1.2kg boneless chicken thighs, diced into bite sized pieces

1 tsp sunflower oil

2 inch piece of fresh root ginger, peeled and cut into fine matchsticks

8 garlic cloves, roughly chopped

5 spring onions, cut into 5 cm pieces and thinly sliced lengthways

4 small dried chillies, chopped and seeds discarded (if you prefer it less chilli)

250ml Shaoxing rice wine

6 tbsp light soy sauce

3 tbsp sugar (whatever you have to hand)

4 tbsp sesame oil

1 handful of fresh coriander leaves

1 handful of thai basil leaves


1. In a large pan add the sunflower oil and when it is hot add the ginger and stir fry for one minute before adding the garlic and continuing to cook for a further minute.

2. Add the dried chillies and spring onions and continue to fry for another minute, stirring frequently. Add the chicken and move around the pan for 5 minutes before adding the rice wine, soy sauce and sugar and cover the pan and cook until most of the liquid has dissolved, around 30 minutes. Continue to stir occasionally intermittently during this process.

3. Once the liquid has almost dissolved add the sesame oil and coat the chicken pieces. Add fresh Thai basil and coriander leaves and stir together for a few seconds.

4. Serve immediately so that it is sizzling hot.

Serve with Jasmine rice and steamed greens.


Cold Rice Noodles with Peanut-Lime Chicken

The past week or so has been very memorable here in the UK. The Olympics kicked off to an outstanding opening ceremony last friday, which made me laugh and marvel in equal measure. Ok, I’m biased, but I thought that it’s quirky, eccentric nature pretty much summed up us Brits. No amount of money spent on an opening ceremony, past or future, can trump the fact that Her Majesty gamely played herself with Mr Bond as part of the ceremony itself. How cool and even the non royalists out there must have had a sneeky smile on their faces. As for Mr Bean – what a great touch to include him as part of the ceremony; he was definitely one of the highlights.  It was fun, original and gamely humorous and had all of us glued to the TV screen for over three hours, wondering what Danny Boyle was going to bring out of the hat next. I think it is safe to say he is a ‘slam dunk’ for a knighthood in the coming months.

Since the Games begun I have been glued to the TV watching the swimming in particular. Mike Phelps gaining his 19th Olympic medal making him the greatest winner the Olympics has ever seen -truly remarkable. Also the spectacular performance of China’s Ye Shiwen, who, at 16 years of age, wins gold in the women’s individual medley.  It’s addictive viewing watching the world’s best athletes compete in such a wide variety of sports.  I’m going to see the men’s beach volleyball soon, which should be fun and a little surreal to watch in central London.

We’ve had some good sunny days recently, which always inspire me to cook fragrant Asian dishes that are not too heavy. This recipe I stumbled across really recently and it caught my attention as it was served cold and could almost be classed as an Asian noodle salad, of sorts. I’ve cooked it a few times already and I have to admit it’s really good. My number one fan (Big A – who is 6) gave it a definite 10/10.  It was originally posted in the New York Times, however, I found it on the hugely popular food bloggers site ‘Smitten Kitchen‘. As with all great recipes, Deb Perelman – from Smitten Kitchen, adapted hers from the original and I changed hers a little bit further. For example,  I omitted chilli, as I was feeding it to Big A, Little Z and my father who all don’t eat chilli. That said if I were feeding it to just adults (or chilli loving adults) I would definitely add the chilli (hence it has remained on the list of ingredients), I added only one large cucumber, added baby sweetcorn, slightly more rice noodles.

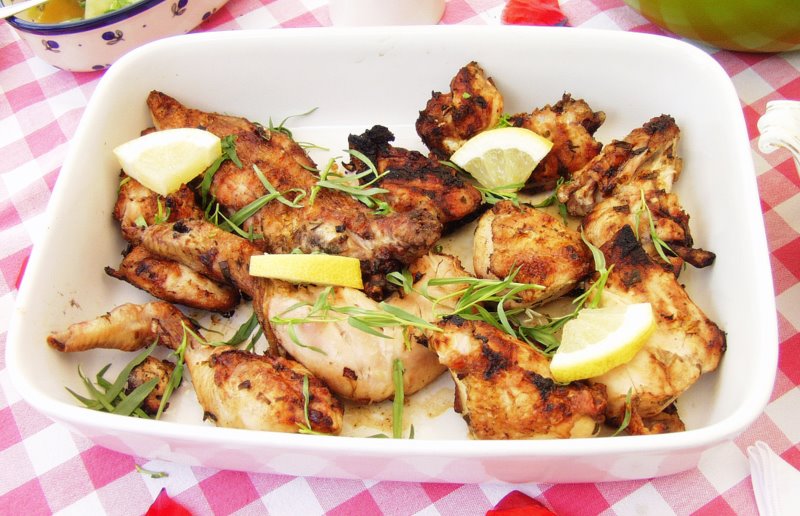
For the really observant amongst you, you will have noticed that I completely forgot to scatter the crushed roasted peanuts over the dish for all the photos. When I sat down and started eating the meal I remembered but clearly too late for the shots for this blog post !

Cold Rice Noodles with Peanut-Lime Chicken

Sourced from Smitten Kitchen, original recipe from David Tanis whose recipe appeared in The New York Times

Serves 6

Dipping Sauce

6 tbsp Asian fish sauce

6 tbsp brown sugar

12 tbsp lime juice

2 garlic cloves, crushed

small thai red or green chilli,  to taste but optional

Peanut Dressing

3 tbsp Asian fish sauce

3 tbsp rice vinegar

9 tbsp lime juice

3 tbsp of light soy sauce

1 1/2 (one and a half) inch piece of ginger, peeled and sliced

6 tbsp natual unsalted peanut butter (if you can’t find this just use regular)

1 tbsp toasted sesame oil

pinch of cayenne

Chicken and Noodle Salad

3 tbsp toasted sesame oil

500g boneless skinless chicken thighs

250g dried rice noodles

1 large cucmber, cut in 1/4 inch half moons

2 carrots, cut in thin julienne

handful of baby sweetcorn, halved

handful of fresh mint and coriander (you could also add Thai basil)

4 spring onions, thinly sliced

handful of roasted peanuts, crushed

lime wedges to serve

1. Begin by making the ‘dipping sauce’. On a low heat, place all the ingredients into a pan and gently stir until the sugar has been properly dissolved – this will only take a few minutes. Place in a small serving bowl and allow to cool.

2. Next you need to make the ‘peanut dressing’. Place all the ingredients into a small food processor and puree all the ingredients so that you are left with a thick creamy sauce. Pour into a serving bowl.

3. In separate large bowl pour approximately half of the dipping sauce and a third of the peanut dressing and stir together. Add the chicken to the mixture and coat thoroughly using your hands. Leave to marinate for at least 15 minutes.

4. Once the chicken is marinated gently heat up a griddle pan and add a little toasted sesame oil and brown the chicken thoroughly on both sides, which will take a few minutes per side. I cook my in batches so that I can be sure that the chicken in properly cooked through. As an alternative you could grill the chicken for 20-25 minutes.

5. When the chicken is cooked, chop into bite sized pieces.

6. To serve there are a few alternatives that you can do –

option 1: Place everything on a large serving platter with the noodles, chicken, vegetables, dressing and marianade all separated out and then your guests/family can help themselves.

or

option 2: Divide the cooked noodles into individual bowls or plates. In a small bowl toss the vegetables with 1 tablespoon of dipping sauce. Place the vegetables and chicken onto each bowl/plate. Place a further 2 teaspoons of dipping sauce and dressing to each helping. Add the herbs, peanuts and spring onions to each bowl and serve.

Note: As an alternative to baby sweetcorn you could add fresh peppers which work equally well. 


The Perfect Steamed Lemon Chicken

I have always been massively underwhelmed when ordering lemon chicken at Chinese restaurants to the extent that I never order it anymore as I don’t want to have further disappointments. It’s always far too sweet and the chicken looks too white and unappealing. So you can guess how delighted I was when I recently tried Neil Perry’s ‘Steamed Lemon Chicken’ recipe that actually tasted really good. I am a HUGE fan of the Australian chef  and his beautifully presented book ‘Balance and Harmony’. It was in his book that I found this recipe that is now one of my absolute favourites.

The beauty of Perry’s ‘Steamed Lemon Chicken’ is that it is really really easy. Seriously it is definitely going to become one of my ‘go to’ recipes that I can rustle up really quickly and yet can also be perfect to offer guests coming around for dinner.  Steaming the chicken really retains the flavour and tenderness through the use of steam and is one of the most healthy forms of cooking. It’s a win win.

The key with a good lemon chicken is to buy thighs and not breast meat folks as it is so much more tasty and tender. Seriously, do not think about buying breast meat for this recipe as it really won’t taste half as good. Trust me on this one.

The only alterations I have made to Perry’s recipe are:

1) As I did not have peanut oil to hand I used ground nut oil as an alternative.

2) Neil Perry’s recipe uses 350g of chicken and I have used 550g so my chicken needed more steaming time. He suggested 25 minutes but mine needed closer to 40 minutes.

Steamed Lemon Chicken

Serves 2-3

550g free-range or organic chicken thigh fillets, skin on (if possible), each cut into 3 pieces

1 1/2 (one and a half) lemons, quartered lengthways

a pinch of freshly ground white pepper

2 spring onions (scallions), cut into julienne

Marinade

1 tbsp shaoxing

1 1/2 tbsp light soy sauce

1 1/2 tbsp oyster sauce

2 tsp sesame oil

1 tbsp peanut/ground nut oil

2 tsp sea salt

1 tbsp sugar

 1. Place the chicken thighs in a shallow heatproof bowl and squeeze the lemon juice over the chicken and add the lemon skins to the bowl.

2. Prepare the marinade and add to the bowl of chicken and mix thoroughly using your hands and leave for at least 30 minutes so that the marinade can infuse the chicken with it’s wonderful flavours.

3. Firmly cover the bowl with foil and place into a large bamboo steamer (you can also use a steam oven if you do not have a bamboo steamer – both work equally well).

4. Place the bamboo steamer on a rack over a pot/wok of rapidly boiling water – you will need to place a couple of  inches of water into the pot. Put the lid on and steam the chicken for 40 minutes.  You will need to turn the chicken once during cooking so be careful when removing the lid and foil as the steam will be very hot. To check the chicken is cooked sufficiently make a small incision into the flesh to see that it is fully cooked and not pink! If it is not quite done, continue to steam for a further few minutes. If you cook with a smaller amount of meat – 350g – steam for 25 minutes.

5. Carefully remove the bowl from the steamer and place the chicken onto plates, or a warmed central plate and sprinkle with ground white pepper and spring onions.  Serve with rice.


Ottolenghi’s Roast Chicken with Saffron, Hazelnuts and Honey

Foodies in London will be very familiar with the names Yotam Ottolenghi and Sami Tamimi who first set up the successful deli/bakery/patisserie cum restaurant  called ‘Ottolenghi’ back in 2002 in Notting Hill.  Their passion and flair for cooking was evident from the start and their venture soon became a food lovers magnet, in particular I remember the mounds of mouth watering salads piled high on large dishes for you to help yourself to. We are not talking about a few lettuce leaves with tomatoes and cucumbers thrown in. Oooooooooh no, their salads were, and in fact still are, on a whole different playing field. They are the most imaginative and more-ish that you will come across, to the extent that it is actually hard to decide which to tuck into. Decisions, decisions!

In 2010 Yotam published a book dedicated to vegetarian food called ‘Plenty’ and a number of his salads were put into the book. It’s beautifully put together and I am convinced it would persuade even the most carnivorous amongst you to try some of the recipes. He has in many respects made vegetarian food, and indeed salads, look sexy.

Today they now have four delis as well as launching a very successful restaurant called, Nopi.  Basically they are on a roll and London cannot get enough of their talents. That is not to say that Yotam and Sami only cook vegetarian food, far from it. Their cooking is heavily influenced from their childhoods in Israel and their style of cooking definitely has a Mediterranean edge to it, with wonderful meat and fish dishes to whet the appetite.  They cook all the kind of dishes that I am attracted to – basically ones that are full of bold flavours, which they describe rather endearingly as the ‘noisy’ flavours: ‘lemon, pomegranate, garlic and chilli’. The other cookbook, which is a definite must for those who like their style of honest cooking, is ‘Ottolenghi, The Cookbook‘. They also have a new book,  ‘Jerusalem’, in the wings, launching later this year, which I am looking forward to buying.

It was from Ottolenghi, The Cookbook that I discovered ‘Roast chicken with saffron, hazelnuts and honey’. I was immediately attracted to the recipe as it had a wonderful range of interesting ingredients – in particular I like the fact that it had ginger, cinnamon, saffron, lemon, hazelnuts, honey and rosewater. I had never cooked with rosewater until I started cooking this recipe; I love the fragrance  and subtleness that it brings to the dish.  The  exotic smells coming from the oven takes me back to happy times exploring Morocco and the Atlas mountains.

 Roast Chicken with saffron, hazelnuts and honey

Sourced from Ottolenghi, The Cookbook

Serves 4

10 chicken thighs (or a combination of wing, leg and thighs)

2 onions, roughly chopped,

4 tbsp olive oil

1 tsp ground ginger

1 tsp ground cinnamon

1 large pinch of saffron strands

juice of 1 lemon

4 tbsp cold water

2 tsp coarse sea salt

1 tsp black pepper

100g unskinned hazelnuts

75g honey

2 tbsp rosewater

2 spring onions, roughly chopped

1. Trim the fat of the chicken thighs and then mix in a bowl with the chopped onions, olive oil, ginger, cinnamon, saffron, lemon juice, water, pepper and salt. Leave to marinate in the fridge for over an hour –  or overnight if you are really well organised. I wasn’t so left it in the fridge for a couple of hours!

2. In a preheated over – 180 degrees if using a fan oven (10 degree hotter if not), place the hazelnuts on a tray to roast for 10 minutes.

3. Roughly chop the roasted hazelnuts – I give them a quick wizz with my hand blender and set aside.

4. Place the chicken, skin side up, in an ovenproof dish/roasting tray in the oven with the onions and juice surrounding it and leave to cook for 35 minutes.

5. In a new bowl mix the honey, rosewater and nuts to create a rough paste. When the 35 minutes cooking time for the chicken is up, spread the paste over the chicken and place back in the oven for another 10 minutes, until the chicken is golden brown.

6. Whilst the chicken is cooking for the final 10 minutes, put on the rice/or prepare the cous cous.

7. Serve the chicken with either rice or cous cous and garnish with spring onions – I preferred to do this over the cous cous. There will be plenty of sauce full of deliciousness to serve over the chicken.


No more cold cuts please – Turkey, Ham and Leek Pie

I hope you all had a wonderful Christmas with your family and loved ones and that it was not too stressful if you were the one in charge of feeding the masses. We always end up with loads of turkey and ham/gammon leftovers and whilst cold cuts are delicious for maybe one or two sittings, any more than that and one craves for variety. I felt a good old fashioned pie would be the perfect way to use up some of the leftovers and fill the bellies of my guests. It was polished off in one sitting so I guess you could say that it was hit.

Turkey, Ham and Leek Pie

serves 8

4 leeks, chopped

2 celery sticks, chopped

100g mushrooms, chopped

450g turkey, (or chicken) cut into small sized chunks

350g ham/gammon, cut into small sized chunks

1 heaped tbsp wholegrain mustard

1-1.5 litres of turkey stock (you could also use a tin of Campbell’s Cream of Chicken Soup or a combination of the two)

2 tsp of cornflour (if using stock add cornflour, you won’t need to if you add the chicken soup)

3tbsp cold water

pinch of salt

black pepper

400g of shortcrust pastry or ready made

1 egg, lightly beaten

1. Preheat the oven to 180 degrees fan.

2. Evenly chop the celery, leeks and mushrooms and place most of them on the bottom of the pie dish. (The dish I used was 35cm length by 24cm width). This will allow the vegetables to cook properly through when they are in the oven.

3. Cut the turkey and ham into small sized chunks and scatter over the vegetables along with the remainder of the vegetables that you put to one side. Add the wholegrain mustard and mix into the vegetables and meat.

4. If you have any turkey stock left over use that, otherwise, use chicken stock cubes, such as knorr or Campbell’s cream of chicken soup works really well. I also had some juices left from the ham so I managed to combine these into the stock as well giving it a really delicious taste. Add approximately 1.5 litres of stock to the pan and warm it through completely. Place 2 teaspoons of cornflour into a small bowl along with a couple of tablespoons of cold water. Stir until the cornflour is smooth and watery and add to the stock to thicken it.

5. Add the stock over the meat and vegetables and using your hands try and make sure all the pieces are covered to some degree in the stock. Add salt and pepper to season.

Easy Shortcrust Pastry

400g plain flour

200g butter, cubed

2-3 tbsp of cold water

6. To make your own pastry, simply place the plain flour into a large mixing bowl along with the cubed butter (room temperature is best). Using your finger tips gently mix the butter and flour together so that it begins to crumble. Using a knife stir in a little water into the dough so that it binds together. If you put in too much water just add a little extra flour. Once the dough has come together, form a ball and cover with clingfilm and place in the fridge for 15 minutes.

7. Roll the pastry out onto a cold floured surface. Once it is larger than your pie dish gently place it over the top of your filling making sure the extra pastry hangs over the sides. I find it is best to use the rolling pin to place it gently on top. Press down at the edges using your finger and thumb so that the pastry is completely secure. Using a knife cut the extra pastry that is hanging over the sides. You can then get creative on the top of your pie using the left over pastry.

8. To help give your pie the perfect brown glow, gently brush the top of the pie with your beaten egg.

9. Using a fork place a few fork marks over the top of your pastry so that it can let out the air within the body of the pie when cooking.

10. Place in the oven for 30-40 minutes, checking to see that it does not brown too much. Serve immediately with peas and new potatoes.


A special curry for REAL foodies

I’ve been procrastinating about sharing this blog recipe with you all for some time now as I know that if I mention three certain words I would guess that possibly 80% of you will just reach for your mouse or control pad and head straight out of this blog entry, quicker than you can say…….

CHICKEN

LIVER

CURRY

Ahhhhhh I said it. Is anyone still there?

Anyone?

Anyone?

Phew at least there are still a few of you still curious to find out more.

I think our fear and loathing of liver stems largely from our school days where it was rather unceremoniously dumped on our plates with some watery greens and some white looking mush that vaguely resembled mashed potato. It wasn’t great, I admit – and thats coming from someone who actually liked her school food.

My opinion of liver changed completely when my mother-in-law started cooking chicken liver curry for me. It completely took me by surprise, so much so that I thought that I would try and convert a few of you. A real bonus as well is that chicken livers are so cheap to buy that even if you give this a shot once and you absolutely loathe it (which you won’t) then you are not wasting loads of money. It’s not as if I am asking you to try making lobster thermidor!

Chicken Liver Curry

Serves 4

Preparation time: 10 minutes

Cooking time: 35 minutes

1 large potato, diced

500g chicken livers

1 large onion, chopped

2 inch ginger, grated

2 small fresh red or green chilli (optional), chopped in two

1 large tsp of ground turmeric

1 tsp of ground coriander

1 tsp of ground cumin

1 tsp of salt

5 garlic cloves, kept whole

1 cinnamon stick, broken up

3 cardamom, opened up slightly

1 small tsp of vindaloo curry paste

100 ml water

a few glugs of olive oil

1. Peel and dice a large potato and then fry it gently in some olive oil for 5 minutes, stirring occasionally so that the cubes don’t get stuck at the bottom of your saucepan. Make sure that you are using a pan that is deep enough to hold all the ingredients and some water. After 5 minutes spoon out the potatoes and put to one side.

2. Fry the onions in the pan that the potatoes were in. You may need to add a little more oil at this stage.  After 6 minutes the onions should begin to be turning brown. At this stage add the grated ginger (and fresh chillies if you are using them – I tend not to for this curry) and stir into the onions.

3. Add the chicken livers and let them turn a whiter colour. Do not add any further ingredients until they have become paler in appearance, this should not take longer than 10 minutes. If you are cooking with rice, this is the perfect time to start boiling your rice so that the curry and rice are ready around the same time.

4. Now add the ground turmeric, ground cumin, ground coriander, salt, garlic and the potato to the chicken livers. Stir well, but gently, so that all the spices are mixed up evenly.

5. Add the broken up cinnamon stick, cardamom and vindaloo curry paste. Gently add a little boiling water – I tend to add the water in two stages of 50ml each. You may find that you do not need this much so add a little at a time. It will help soften the potatoes and garlic.

Serve with rice and dal.  I really think you will be pleasantly surprised. Let me know how you get on.


Chicken Noodle Soup – fuel for the festive season


I don’t know about you, but if your household is anything like mine, we ALWAYS end up with a little bit of chicken leftover after a sunday roast. The amount though is not enough to have a full on meal again, but there is enough to make a meal from it………………if you get my drift.

One dish which is great for leftover chicken (or by all means buy a couple of chicken breasts and create if from scratch) is ‘chicken noodle soup’, which accompanied with a fresh baguette to dunk in the juice, certainly hits the spot. Its a great Monday night supper and takes no time to prepare and is a feast for all the family to enjoy and share.

As November fades away and Advent waits eagerly in the wings, I am sure that some good old fashioned comfort food like chicken noodle soup will help us all get through those Christmas engagements that we eagerly accepted. It’s only when we have our diaries in front of us that it begins to dawn on us that perhaps we should have accepted less and had a night in. So, one and all, let us prepare our bodies, minds and spirits for the great social quest that lies before us: the month of December.

Do you have a favourite comfort recipe that warms your cockles and boosts your immune system?

Let the good times roll.

Chicken Noodle Soup

Serves 4-6

100g carrots, peeled and cut into small cubes

1 large onion, chopped finely

1 tsp of crushed garlic

2 celery stalks, chopped finely

glug of olive oil

1 tsp of rock salt

fresh black pepper

fresh sage

fresh parsley

2 tsp dried herbes de Provence

2 bay leaves

half a lemon

1 tsp of vegetable bouillon

1 left-over chicken/2 chicken breasts, chopped into bite sized portions/strips

handful of dried spaghetti or linguine

fresh baguette for dunking

1. Remove all the leftover meat from the chicken and cut into small bite sized mouthfuls and place to one side. Put the remaining carcass in a casserole pot and add the herbes de provence and bay leaves and cover with boiling water.  Simmer gently for 30 minutes and then strain off the liquid. This will become the basis for your soup. Discard the remains of the chicken. If you do not have a leftover chicken to make stock I find bouillon vegetable stock works wonders.

2. Using the same casserole pan, add a glug of olive oil – basically enough so that it pretty much covers the bottom of your pan. Add the onion and let them sweat on a low heat, stirring occasionally. After 5 minutes, add the garlic, carrots and celery stalks and continue to stir. ONLY if you are using fresh boneless chicken breasts – add them at this stage. Place the lid on the casserole pot so that the vegetables really get to sweat. After 3-4 minutes, add a couple of torn sage leaves, rock salt and a good amount of fresh black pepper.

3. Add the chicken stock, which should be between 3-4 pints. Put in a small amount at a time and continue to add until you have the consistency that you like for your soup. Please note, however, that when you add the dried pasta it will soak up a fair amount of the stock, so you need to put in a little more than you think. You will not need more than 4 pints though altogether. Even though I made fresh stock I often like to add a little vegetable bouillon (stock cube), to give it an extra boost. Apologies to you purists out there!

4. Break a handful of dried spaghetti/linguine into the pot. Keep the lengths around 3cm in length. Add half a lemon, squeeze it as you add it to the soup. Stir the soup and gently simmer for 10 minutes or until the pasta is cooked. In the final few minutes add the chicken to the soup and mix all the ingredients together.

5. Serve piping hot in bowls with a scattering of freshly chopped parsley and a baguette for dunking.


Childhood memories – Japanese Chicken Katsu Curry

OLYMPUS DIGITAL CAMERA


This post is dedicated to my sister who has always adored Japanese Chicken Katsu Curry. That’s not to say that I don’t, because I certainly do, but not in the same way as my sister. A few years ago when I visited her in Vancouver she ordered it in a Japanese restaurant hoping that it would bring back the same happy childhood  memories of the dish. Sadly the disappointment on her face when she tried their offering was plain to see, so I made it my mission there and then to try and find the recipe of our youth.

You may be wondering why we were eating such cosmopolitan food at such a young age in 80’s rural England. Our blessing was that my family had close links with a Japanese boarding school called the Rikkyo School. Most half term holidays we would welcome a couple of Rikkyo students, who were the same age as ourselves, into our home, as their parents lived overseas. We always looked forward to the arrival of our new guests and spending time in their company. Reserved, with gentle, quiet manners, our home and food must have seemed so alien to what they were used to.

In return for our hospitality we were invited to their annual open day. We so looked forward to this day, in fact it was definitely up there as one of our favourite days of the year, along with the village fete, Christmas, Easter, bonfire night and halloween. It transported us to another world that was completely new to us. I think that it was these childhood experiences which gave my whole family a genuine fondness and fascination with all things Japanese. To this day I visit a Japanese hairdressers whenever I need a haircut, not least because it transports me to Japan without having to get on a plane and the service is exemplary.

Anyway back to the ‘open day’.

The day consisted of watching displays of jujitsu and kendo, visiting their classrooms and seeing all the work they had done over that year, going to a Japanese tea ceremony, visiting the haunted tunnel which they had put together, going to a music concert, but most of all we enjoyed having lunch and sampling their delicious food, especially the chicken katsu curry with Japanese sticky rice.

So you can see where this fondness for the dish began.

Happy memories.

Chicken Katsu Curry 

Serves 4

4, chicken breasts

200g panko breadcrumbs

plain flour, enough for coating

5 eggs, whisked

Curry

1 onion, chopped

1 garlic clove, crushed

50g butter

2 golden delicious apples, peeled and chopped

1 tsp fresh ginger, grated

1 pint of water

2 bananas, sliced

2 tbsp honey

1/2 tsp of turmeric

1 tsp of curry powder

salt and pepper, a couple of pinches to suit tastes

100 ml cold water

4 tsp of cornflour

2 carrots, chopped into bite size chunks

1 very large  potato, chopped into bite size chunks

(optional – 1 onion, chopped into bite size quarters)

1. Place half the butter into a saucepan on a low heat and add the onion and garlic. After a couple of minutes add the apple and grated ginger. Stir regularly to prevent burning for another few minutes.

2. Now add 1 pint of water to the pan along with 2 bananas, honey, turmeric and curry powder. Bring to the boil and then simmer. To thicken the curry you need to now add the cornflour to 100 ml of cold water. Stir into the curry and then continue to simmer for a further 20 minutes. If you think it needs a little more water at this stage do not be afraid to add a little more. If you over water then just add a little more cornflour. Season with salt and pepper.

chicken katsu curry

3. Strain the contents of the pan through a sieve so that you are left with a smooth liquid. Set aside. (please note: another time I may try using my hand whisk to blend all of the mixture together so that I do not waste any ingredients – if you do this and it works then please let me know!)

                           chicken katsu curry                                

chicken katsu curry

4. In the same pan you had been using for the curry mixture, add the remaining butter and warm on a low heat. Now add the chopped carrots and potato. At this stage you could also had an onion quartered into mouth sized segments! Continue to stir for a couple of minutes, making sure the vegetables do not burn. Now add the strained curry sauce that you have put to one side and gently simmer for 30 minutes, or until the potato and carrots are soft.

OLYMPUS DIGITAL CAMERA

5. In separate bowls place the flour, whisked eggs and Japanese panko bread crumbs. By all means use ordinary breadcrumbs but you will find that panko have a coarser texture to ordinary breadcrumbs, which give a certain edge to this dish. They are also more delicate and absorb less oil than western breadcrumbs. They can be found at Asian supermarkets, although I managed to get mine on line at Amazon.

OLYMPUS DIGITAL CAMERA

chicken katsu curry

6. Flatten the chicken slightly using a rolling pin so that it is of even thickness and hence will cook evenly in the oil. Then place the chicken breast in the flour and coat both sides, then move it to the egg bowl and do the same procedure and then move on to the panko breadcrumbs. I like to have a good coating of breadcrumbs so I repeated this last procedure – egg -breadcrumbs-egg-breadcrumbs.

7. Warm a deep pan or wok with oil and so that it become very hot. Sprinkle a few panko breadcumbs into the pan and if they sizzle the oil is hot enough. Then gently place the breaded chicken into the oil moving it gently in the oil. Cook for up to three minutes and then turn over and repeat so that the chicken is thoroughly cooked through. Then take out and place on some kitchen roll. At this stage it is good to make some some incisions into the chicken to make sure it is properly cooked through. If need be you will have to place in the oil a little longer, but be careful not to over cook.

OLYMPUS DIGITAL CAMERA

8. Repeat the procedure with all four chicken breasts and place on a warm plate in a low oven whilst you are preparing the next chicken breast.

9. Evenly slice the chicken and pour the warm sauce on top with some Japanese sticky rice on the side. Red-dyed pickled daikon and shredded cabbage are also eaten with this dish, although I did not manage to source them this time.

OLYMPUS DIGITAL CAMERA


My mother’s legendary ‘Smokey Barbeque Sauce’ and ‘Tarragon and Lemon Chicken’

OLYMPUS DIGITAL CAMERA

No barbeque is complete without my mother’s legendary smokey barbeque sauce. It’s straightforward to make and always guaranteed to please. There are certain things that you eat as a child that remain in your memory forever and this sauce is definitely one of those happy memory tastes. We were blessed with stunning weather this past weekend – for the Wimbledon finals – so having a barbeque was definitely in order. A glass of Pimms, that ubiquitous English summer tipple, a game of croquet (which is seriously addictive) all in all made for a perfect summer’s day.

OLYMPUS DIGITAL CAMERA

Smokey Barbecue Sauce

Makes approximately 1/2 pint/300ml

25g /1oz butter

1 onion, peeled and finely chopped (although my mother uses leeks as my father has an onion intolerance, which works equally well)

1 garlic clove, crushed

2 tbsp white wine vinegar

150ml/1/4 pint of water or vegetable stock

1 tbsp English mustard

2 tbsp demerara sugar

1 slice of lemon

1 bay leaf

Pinch of cayenne pepper

2 tbsp of Worcestershire sauce

5 tbsp of tomato ketchup

3 tbsp tomato puree

salt

fresh ground pepper

1. Melt the butter in a saucepan and fry the onion (or leek for those with an onion intollerance) and garlic until soft and translucent.

OLYMPUS DIGITAL CAMERA

2. Now add the vinegar, water or stock, mustard, sugar, lemon slice, bay leaf and cayenne. Bring slowly to the boil and simmer for 15 minutes, stirring occasionally.

3. Stir in the remaining ingredients with salt and pepper to taste. Simmer for a futher 10 minutes. I tend to leave the bay leaf in when I serve the sauce as I like the rustic, homemade quality to it.

OLYMPUS DIGITAL CAMERA

As an alternative to simply just barbequing chicken, which is delicious in its own right, my mother’s ‘Tarragon and Lemon Chicken’ is a good alternative. It’s best to marinade the chicken for as long as possible, ideally overnight and to pierce the skin of the chicken so that the flavours can really be absorbed by the chicken. Serve with a crisp green salad and piping hot new potatoes with a dollop of butter and some chopped up fresh parsley and my mother’s legendary smokey barbeque sauce.

Tarragon and Lemon Chicken  serves 4

3.5lb whole chicken cut into pieces

5 fl oz olive oil

6 tbsp lemon juice

1 onion (or leek), finely chopped

1 large handful of fresh tarragon

1 large handful of fresh parsley (flat leaf or curly), finely chopped

few drops of tabasco

salt and pepper

lemon wedges and fresh tarragon sprigs to garnish

1.  Season the chicken with salt and pepper and then make a few knife incisions into the chicken pieces. This is to enable the marinade to really penetrate the chicken so that it is more flavoursome when it is cooked. In a separate bowl mix together the olive oil, lemon juice, onion (or leek), the handful of tarragon and parsley and tabasco. Then add the chicken pieces and with your hands really work the marinade into the chicken pushing some of the onion and herbs into the small incisions that you have made.   Leave the chicken to marinate in the fridge overnight.
OLYMPUS DIGITAL CAMERA
2.  Take the marinated chicken out of the fridge for over an hour before cooking time and leave to stand at room temperature.
3.  When the barbeque is ready brush the grid with olive oil.  Drain the chicken pieces, reserving the marinade, and place chicken on the grid starting with the bony side down. Brush the chicken pieces with the marinade at intervals during cooking, remembering to turn the chicken so that it is cooked sufficiently.
4.  Barbequing the chicken takes 30 minutes. You know that the chicken is cooked when the juices run clear when pierced with a knife through the thickest part of the meat.
5.  Garnish with tarragon sprigs and serve with lemon wedges.
OLYMPUS DIGITAL CAMERA