Daler Bora – Bengali Lentil Fritters

Close to where we were staying in Kolkata there was a guy who set up a food stall in the late afternoon to make daler bora – Bengali lentil fritters. He would fry them upon request and serve them piping hot in little paper bags. They were so addictively good that one bag was never enough. We would munch them as we strolled back to our hotel, pausing often at the tea wallah for our last masala chai of the day.

It became a habit and one that the whole family enjoyed. Upon arriving back in London I decided that life without daler bora was incomplete, so after a bit of tweaking I came up with the perfect recipe to cook them in the home. They are light, crisp and not at all oily. They must be eaten hot and freshly made. Try them and let me know how you get on.


Daler Bora – Bengali Lentil Fritters

350g red spit lentils (masoor), soaked for 2 hours

Handful of fresh coriander

1 medium sized onion, chopped

1 inch of fresh ginger, skin removed and finely grated, optional

2 green chillies, finely chopped

1 tsp salt

1tsp turmeric powder

Sunflower or Vegetable oil for frying

sprinkling of chaat masala

  1. Once the red split lentils have soaked, drain them and then place in a blender along with the rest of the ingredients.
  2. Use a small deep pan and place enough oil in the pan so that the daler bora will float.
  3. Wait for the oil to be at the right heat – drop a little of the batter in the pan and if it fizzles and rises to the top then the oil is ready.
  4. Use two teaspoons and heap one teaspoon with the blended dal and use the other to gently push the blended dal into the oil. I usually fry one first and then try it to check for the right chilli and salt levels. If it needs any more of either of these then this is the time to add a little more.
  5. Place around 10 in the pan and then allow them to bronze. If the oil is at the right heat they should be done in 1-2 minutes. Turn them over half way with a slotted spoon.
  6. Once bronzed remove with the slotted spoon and place on kitchen roll and sprinkle a little chaat masala on top. This will give the lentil fritters a pleasing tang.
  7. Eat whilst still hot.

They are great dipped into an Indian chutney. My tamarind and date chutney works a treat.


Green Jackfruit Curry


Back in December, when I was in Kolkata, I was at a family gathering and was given a curry that tasted absolutely delicious. Deep in conversation I ate the curry, pausing after a few mouthfuls to ask what ‘meat’ it was as I couldn’t quite work it out and thought perhaps it was pork. The answer was ‘green jack fruit’. Somewhat surprised but delighted that such a fruit could taste so ‘meat-like’ in structure. It was substantial, filling and utterly delicious. In the photo below it is the curry bottom right.

Fast forward a few months and I’m down in Tooting taking some clients on a spice tour before heading back to my house to teach some Indian recipes. One of my shopkeeper friends – Rohit – delighted us all by giving us a plate of his delicious jackfruit curry that he had just made – it tasted divine and prompted one of my clients to immediately buy a fresh green jackfruit to take home to replicate the curry. I love enthusiastic foodies.

I returned a few days later to continue the conversation of his curry and how he made it exactly and to buy one myself so I can share it here with you. This is Rohit’s recipe and it works a treat. They are in season now (in India and Africa) so if you see one when you are next in your local Asian grocers be brave and pick one up and try making this recipe. Please note the yellow jackfruit is sweet and not used in savoury curries – you want to buy the green jackfruit.

An important point to note:

  1. Once you cut into the jackfruit – cut into rounds and then use a serrated knife to cut away the tough outer skin – it is VERY sticky. Place a little oil on your hand that will touch the jackfruit to prevent the stickiness from covering your hand.


If you are keen to join me on a spice tour of Tooting followed by an Indian cooking class at my house- send me an email chilliandmint@gmail.com for details.


**********

Jack Fruit Curry

kindly given to me by Rohit – my friendly Asian grocer in Tooting

2 tbsp vegetable oil (you can use mustard too)

1 tsp black mustard seeds

1 tsp cumin seeds

1 dried red chilli, broken in two

5 fresh garlic, roughly chopped

2 inches of fresh ginger, skin removed and finely grated, chopped also fine

1/4 tsp asafoetida/hing

2 fresh green chillies, finely sliced

2 or 3 large white onions, finely chopped

salt, to taste

1tsp coriander powder

1 tsp turmeric powder

1 tsp cumin powder

1x 400g tin of tomatoes OR 3 or 4 large tomatoes diced

200ml water

1 small green jackfruit, cut into rounds and then skin removed and then cut into 2 inch pieces

1 tsp garam masala


  1. First cut and peel the jackfruit and then cut into 2 inch pieces and place in a pan of boiling water so that it covers the jackfruit completely. Allow to boil for 20 minutes so that the jackfruit softens. It will never be soft, like potato for example, but when you place a sharp knife into one piece it will go in easily. Drain and keep to one side.
  2. In a different pan, heat the oil and when it is hot add the black mustard seeds, cumin seeds and dried red chilli. Move around the pan for 20 seconds and then add the chopped garlic and ginger and move around the pan for a minute.
  3. Now add the asafoetida/hing and fresh green chillies. Stir.
  4. Add the chopped white onion and some salt (to speed up the cooking time for the onion)and move around the pan, mixing all the ingredients together. Allow the onions to pick up some colour – lightly bronzed. This will take 10-12 minutes.
  5. Add the coriander, cumin and turmeric powders and stir once again.
  6. Add the tomatoes and mix together before adding the cooked green jackfruit. Stir gently into the sauce and add the water. Add the garam masala and cook for a further 5-10 minutes. Checking the salt and add more if necessary.

Serve with spiced rice or Indian naan or flat breads.

Do YOU have any spectacular green jack fruit curries that you would like to share? Please do so in the comments box below.


Aloo Matar – Potato and Pea Curry

Increasingly I am eating more and more vegetarian dishes (and fish) throughout the week. Has anyone else found that their meat/veg ratio has changed quite a lot in the last couple of years? I do still eat meat, but certainly not every day. I find it immensely helpful to have a number of go-to vegetarian recipes up my sleeve, so thought I would share this one with you. It’s a good one for the whole family as it is spiced but not spicy. Invariably I always have potatoes, tomatoes and frozen peas in my house, so this recipes is an easy one to whip together at a moments notice. It’s very similar to a dish that I started cooking way back at university, and in many respects laid the foundation stones for my future Indian cooking exploits.

I know that potatoes seem not to be so in vogue as they once were, like bread, but I still love to eat both potatoes and bread – especially sourdough – in many different guises. Do you have a potato recipe they you always fall back on time and time again? Do let me and my readers know in the comments section below.


Also if you cook this dish please share it on instagram and tag me @chilliandmint so that I can see.


Aloo Matar (Potato and Pea curry)

serves 4 

3 tomatoes, roughly chopped

2 inch piece of fresh ginger, finely grated

2 tbsp vegetable oil

1 red onion, finely chopped

1 tsp cumin seeds

1 tsp coriander powder

½ tsp turmeric powder

½ chilli powder

1 tsp salt

400ml water

3 medium/large potatoes, chopped into 1.5inch pieces (approx)

100g peas

½ tsp garam masala

2 tbsp kasoori methi (dried fenugreek)

1 tbsp fresh coriander

  1. Place the tomatoes and ginger in a hand blender and blend to a smooth puree. Place to one side.
  2. Heat some oil in a pan and add the cumin seeds, they will begin to sizzle almost immediately. After 15 seconds add the red onion.
  3. Gently saute for 5 minutes before adding the coriander, turmeric and chilli powders.
  4. After a minute, add the tomato and ginger puree followed by the potatoes and cover with the water.
  5. Place a lid on the pan and simmer for 15 minutes or until the potato has softened.
  6. Add the peas after 8 minutes.
  7. Just before serving scatter the kasoori methi and garam masala and fold into the potatoes.
  8. Serve with a sprinkling of fresh coriander.


Indian Spiced Okra

Have you tried okra before? As am sure you know, they are also called ‘ladies fingers’. Less well known is the vegetable called ‘gentleman’s toes’ – I kid you not! They are also known as ‘tindora’ or ‘ivy gourds’ – check out my recipe here if you interested – it’s actually super tasty. Anyway back to okra. I’ve been eating them a fair amount on my recent travels so thought I would continue to include them in our diet now that we are back home in London.

Thankfully I live near loads of Asian grocers so sourcing them is very easy. I had a lot of positive feedback on instagram about sharing the recipe with you when I put it onto my instastories.


My friend, Harriet aka @thenutritionalbean who is a Registered Nutritional Therapist, Nutritionist and Health Coach, based in Bruton, kindly shared some nutritional facts on okra with me that I thought you would benefit from reading too.

“Overall, okra appears to be a nutritional powerhouse and particularly useful for diabetics and those with digestive complaints. It delivers carotene (vitamin A), folate, vitamins B1, B3, B5, B6, C, E and K needed for our immune system, energy production and cardiovascular health, plus amino acids for growth and repair. Okra is packed with minerals and antioxidant-rich phytochemicals (the plant’s natural defence system that also help keep our cells protected from damage). Not only nutritionally replete, okra is used for its wide-ranging medicinal qualities. As you may know, once cooked, these ladies’ fingers become mucilaginous and for this reason are used, like marshmallow, for soothing an inflamed and irritated digestive tract. Okra may also stop Helicobacter Pylori, a wide-ranging and often nasty bacteria that can lead to ulcers, from adhering to the stomach lining. The specific fibre content is shown to help keep our blood sugar levels stable, keep inflammation in check and improve triglyceride and lipid profiles. Studies on Type 2 Diabetic rats are finding that their condition improves after eating okra.”

Makes you want to start including it in your diet fairly regularly right?

Some people are put off with the texture, but I find if you dry the okra properly after washing then the gooeyness is minimal. I have another similar recipe for okra here which uses less ingredients and has a slightly different taste. If you want to make the dish more Middle Eastern then try this one, which includes tomatoes and butterbeans.


Indian Spiced Okra

500g okra

2 tbsp vegetable oil

10 fresh curry leaves

1 tsp black mustard seeds

1 red onion, finely chopped

1 tsp garam masala

1 tsp coriander powder

1 tsp cumin powder

1/2 tsp turmeric powder

1/2 tsp Kashmiri chilli powder (optional)

2 small green chillies, sliced lengthways

5 garlic cloves, thinly sliced

1 tsp salt

  1. First wash the okra and then lay them out on a tea towel and cover with kitchen roll so that they become dry completely.
  2. Slice off the end of the okra and discard and then slice them, width ways, to one inch pieces, or you can slice on the diagonal, about three times per okra.
  3. In a deep frying pan or wok, add the oil and when it is hot add the mustard seeds and curry leaves for 20 seconds before adding the onion. Keep on a medium heat and move the onion around the pan for about 5 minutes, so that the onion begins to colour.
  4. Stir in the spices and then add the garlic, chilli, followed by the okra.
  5. Add the salt and gently fry for 10-15 minutes, moving the okra around the pan until it softens.
  6. This is a dry dish so do not expect there to be much of a sauce. The spices will coat the okra.


Baingan Bharta – Spiced Smokey Aubergine/Eggplant 

How’s everyone getting on? Not having the January blues I hope. It’s a bit cold and dreary back here in London and snow is  forecast, but I hope that this post will lift your heart and spirits and that you’ll see the world in colour once again. I thought you would be intrigued to see beautiful Jodhpur below. We recently spent a few days in this magnificent city, wandering the streets and soaking up the electric atmosphere.

I’ve been trying out some of the lovely recipes that I sampled in India in the comfort of my warm cosy kitchen this week. I’ll be sharing lots of them with you here on the blog over the coming weeks. Today I wanted to show you a wonderful aubergine dish – or eggplant as it is known to my US followers. It is similar to my baba ganoush, but with an Indian twist due to the spices.

Before I show you the recipe however, I wanted a moment to talk about chillies. I often get asked which chillies I use in my Indian cooking. When it comes to fresh green chillies I opt for the ones that are small and thin – but not the Thai birds eye, which are far hotter. The chillies I buy are slightly largely and longer, but still thin compared to the more bulbous ones.

In Kolkata I visited so many wonderful markets but the one above – Bow Bazaar – which is more of a wholesale fresh produce market, had a magnificent array of fresh produce. These chillies are similar to the ones I buy here in the UK.

So back to the recipe for this week. Please do give it a go and share the results on your social media outlets with the #chilliandmint and link me @chilliandmint.

Have a lovely weekend everyone.


Baingan Bharta – Spiced Smokey Aubergine/Eggplant 

serves 4-6 (served with some other dishes)

2 large aubergines

2 tbsp oil

1 tsp cumin seeds

1 small red onion, finely chopped

1 inch fresh ginger, finely grated

4 garlic cloves, finely sliced or chopped

1-2 fresh green chilli, finely sliced

1 tsp salt, to taste

1/2 tsp turmeric powder

1/2 tsp chilli powder

1 tsp coriander powder

4 medium sized tomatoes, cubed


  1. First you need to place the aubergines over a flame. If you have a gas hob then this works really well. If you do not you can place in the oven for 20-30 minutes, or until the flesh softens, although it won’t have the same smokiness as over an open flame. If you are smoking it over a flame/gas hob it will take around 8 minutes, but you need to use tongs to turn it over so that it is ‘burnt’. Once it is soft and the sides have shrivelled remove from the plan and place on a plate to cool.
  2. Remove the charred skin from the aubergine and run under water to remove any excess skin. Place in a bowl and mash using a fork or potato masher.
  3. In a non-stick pan add the oil on a medium/low heat and add the cumin seeds. Allow them to fizzle in the pan for 15 seconds or so before adding the red onion, fresh chilli, garlic and ginger. Move around the pan to soften for 5 minutes.
  4. Add the spice powders and salt and move around the pan.
  5. Add the tomatoes and aubergine and move around the pan for a further 3-5 minutes.
  6. Serve warm – you can add some fresh coriander on top or eat it as is.

You can serve this at room temperature, but personally I love it hot with a paratha or chapati.


‘Masala Mamas’ Dill Stew

I feel it’s been a while since I posted any Indian recipes. That is not to say I’ve not been cooking any Indian food at home. For those who have been following me for a while, or have read my bio, will know my husband is Indian so cooking Indian food is part of our regular diet – but some of the recipes I’ve been cooking are already on my blog. These are always family favourites that I have been cooking:

DalsBengali red split lentil dal, channa dal, toor dal

CurriesBengali chicken, speedy salmon, Bengali prawn, Laal Maas (when I want a seriously hot one!) or Chettinad Chicken, 

Sri Lankan tuna curry, mild cod curry

Vegetarian curries  – cauliflower with fenugreek, ginger and turmeric okra, chickpea curry, butternut squash and lemongrass (more Asian influenced than Indian, but a great recipe)

Not so long I was contacted by a Elana Sztokman, an anthropologist and award-winning writer specialising in women from traditional societies. She has written an Indian cookbook, which tells the inspiring story of a group of sixteen Indian women from the Kalwa slum in Mumbai, changing their communities through food and love. The slum is home to over 200,000 people where clean water and electricity are hard to find. These harsh conditions often prevent children going to school, with many being sent out to work to make a few rupees so that they will have something to eat.

These women are changing all this by making sure the children eat and learn, and consequently changing their otherwise inevitable destiny. Each morning the women rise early to prepare a host of delicious, nutritious vegetarian food for the children. In one year alone they cook 257,400 meals. They deliver the food to the Love2Learn school, run by the the NGO Gabriel Project Mumbai, where the children know that if they show up to learn, they will eat. It’s a win win. The children learn, have nutritious food and thus begin to end the cycle of poverty they are trapped in. The women feel inspired and thrive and thus the children and communities thrive around them.

The book that Elana has sent to me – ‘Masala Mamas’ incorporates recipes and stories from all these Indian women. It’s a joy to read, hearing about the rural villages the women have originally come from and how they came to the sprawling metropolis of Mumbai in the hope of giving their children an education, which most of them lacked. The group has provided kinship, connections and a purpose, which is motivating them every day. All the proceeds from the sale of the cookbook go directly to the women of the Masala Mamas cooperative. You can order a copy for yourself here.

I thought it would be interesting for you to see a typical menu for the children:

On Mondays the children eat poha – rice flakes with vegetables.
On Tuesdays –  dal khichdi – lentil and rice stew.
On Wednesdays – chana dal – black bean curry.
On Thursdays – veg pulav – a pilaf made with mixed vegetables.
On Fridays – soya pulav – a stew made from soya chunks, an affordable and simple source of protein.

And on Saturdays, as a special treat, the children eat sheet – a kind of sweet semolina pudding that they particularly love.
And for special occasions and holidays, the women prepare special holiday fare like shankarpali and modaks.

After a lot of pondering on which recipe to show you  I ended up gravitating towards the ‘Dill Stew’ or ‘Shepu Bhaju’ by Jayshree Chavdry. It’s basically a dal, and you know how much I adore dals and could quite happily eat a different one every day. I also liked the fact that it contained dill, a herb that I do not usually associate with Indian food. It’s also super straightforward, requires no unfamiliar ingredients and is perfect for a light meal on a summers day. The result – it tasted really really good and I will now be including it in my Indian culinary arsenal for sure. Give it a go and if you are on instagram, don’t forget to tag me #chilliandmint so that I can see how you got on.


Dill Stew

1 cup/240ml yellow moong dahl (lentils)

1 tbsp/15ml oil

1 tsp/5ml mustard seeds

1/2 (half) tsp/2.5ml cumin seeds

1 medium onion, finely chopped

3 small green chillies, finely chopped

1 tsp/5ml turmeric powder

2 cups/1/2 litre water

1 cup/240ml finely chopped dill

3 cloves garlic, crushed

salt to taste

  1. Soak the dahl in water for 20-30 minutes. Then rinse well.
  2. Heat the oil in a pan on a medium heat and add the mustard seeds. They will begin to crackle almost immediately. Add the cumin seeds followed by the onions. Mix well and let them cook for 2 minutes before adding the chillies and cooking for a further 2 minutes.
  3. Drain and rinse the presoaked moong dal and add to the pan along with the turmeric powder. Add the water and mix well together. Cover and allow the dal to cook for 10-15 minutes or until it is fully cooked and softened. Be careful not to burn the dal and add more water if necessary.
  4. Add the dill, garlic and salt to taste. Cook covered for another 5-10 minutes
  5. Serve hot with rice or puris/lunchi or simple in a bowl on its own. Divine.

If you are making it earlier in the day to eat later you may find you need to add a little water when reheating it. 


SaveSave

SaveSave

SaveSave

SaveSave

SaveSave

SaveSave

SaveSave

SaveSave

SaveSave

SaveSave


Home cooked Chinese Food and Hot Pot Dining on Cold Blustery Days


January is a month for nesting. The weather tends to be so cold and blustery, with the odd rain or snow shower, that I like to hibernate, wear thick wooly jumpers and keep warm. It’s the perfect time to cook hearty food, bake and make those chutneys, marmalades and pickles (I made a batch of my carrot and daikon pickle) that you’ve been meaning to do. I did venture out earlier this week however to try my first hot pot at a restaurant that opened last year by the same name. They have over 150 restaurants in Asia but this is their first foray on British shores. It’s at the gate of China town, near Soho, so is very easy to find. Hot pots are in many respects the Chinese version of fondu, although with fondu of course there is no broth to eat with your meat or cheese. They are a great social way to dine with family and friends as a great big pot of steaming broth is the centrepiece of the whole table. I guess they would also be a great date idea, as it’s a fun way to eat and there would always be something to talk about! From a health perspective, broths are a perfect way to strengthen your immune system, which often tends to be quite low at this time of year.

We were welcomed by friendly staff who were on hand to talk us through the menu. Now the menu can be a little daunting at first glance folks, but do not be phased by this hurdle. First you need to decide on which broth you want to go for. You can chose one or  two, the latter coming in one giant bowl with a clever partition in the middle (see photo below). We obviously went for the two option. There are 8 choices and they all sounded delicious.

They ranged from the non-spicy to the kickass spicy. We decided to opt for two non-spicy ones – the vegan “longevity mushroom broth” – made up of a host of mushrooms and cordyceps flowers. It has a high content of antioxidants, minerals and vitamin D. Our other choice was the “herbal drunken chicken”. With a name like that how could we resist? It’s made from British free-range chicken that has been cooked in a broth for 4.5 hours with a range of herbs and tonics.

Next you need to choose what to put into the broth. There are a number of platter options, as well as individual plate options, which come in half plate or full plate sizes. We chose everything in half plate, which was more than enough for two people. We went for the sea bass fillets, the spicy marinaded pork, some king prawns, winter melon, Chinese cabbage, emerald spinach noodles and some fried tofu puffs. Whilst our order was being prepared we went over the self serving sauce station (now say that quickly 4 times ;o) where you can get as creative as you wish. The floors over in this section of the restaurant where rather instragramable don’t you think?

There were so many choices that we took a couple of little plates back to the table: soy sauce, chilli sauce, peanut sauce, garlic, spring onions, chillies, sesame seeds to name a few.

This was my favourite that I ‘created’ (see photo above). The waiting staff will turn on your hob on the table and then let the stock bubble away gently for a few minutes. You then start by adding your vegetables and some of your noodles and leaving them for a very short while before fishing them out and placing them in a small bowl to then dunk in your sauce and eat. Delicious. If you order the winter melon, don’t leave them in there for too long or they will begin to disintegrate, a mistake we made.  You can take a little broth as you go to slurp away, it really does warm you to your inner core. The longer the broth cooked, the more the flavours intensified. We then added the sea bass and prawns for a couple of minutes max before dunking in the pork  (which in fact didn’t taste spicy) for around 4-5 minutes cooking.

Both broths tasted really good and distinct from one another. I would happily choose both again. If I had to choose one over the other I think the herbal drunken chicken had the edge, but it really was a hard call. We ordered the right amount and couldn’t quite finish all of the broth. My dining companion lived in Hong Kong for many years and is in fact half Chinese and she was pleasantly surprised by how delicious both broths were. A real accolade if ever there was one.  The restaurant is over two floors (and sits up to 150 apparently), although only the downstairs tends to be open in the day time, largely owing the the footfall. The clientele ranged from families, couples, friends and Chinese business man, so I think it would appeal to anyone of any age. There is also a number of Thai food options as well as the hotpots, if someone in your party would rather eat Thai. I think my children would love it and perhaps it would make an ideal lunch spot after a morning at the British Museum.

Hot Pot Restaurant, 17 Wardour Street, London W1D 6PJ 

Tel: 020 7287 8881 (open facility from noon-12.30am)

http://www.hotpotrestaurants.co.uk / @hotpotlondon_

Thank you to Hot Pot Restaurant for my complimentary lunch. All opinions are my own and I would happily return again.

Back at home I have been working on my Chinese braised oxtails, which I cooked over Christmas for the whole family and wanted to improve upon. Now don’t get put off by the word “oxtails” folks. Ok, perhaps if you are vegan or vegetarian you can stop reading from now on, but for everyone else, they taste really good but there are a few tricks you need to know about when cooking them. The secret is to cook/braise them for a long time in a low oven – 5h30 mins at 150 degrees centigrade. You need to have it so that the meat is literally falling off the bone.


I served it with some brown rice, cavolo nero/pea/garlic medley and some roasted butternut squash, which I had coated with some freshly ground Sichuan peppercorns. It’s a complete crowd pleaser with all the family really enjoying it. I am sure it would work equally well in a slow cooker, but I don’t have one so cooked it in the oven in my trusted Le Creuset pot.

It literally cooks itself so you can get on with other things whilst it slowly cooks away. Easy cooking, albeit one that takes time.


Chinese Braised Oxtails

Serves 6

2 tbsp of oil

2.6 kilos oxtails, cleaned and dried

45g ginger, chopped into thin batons

12 garlic cloves, roughly chopped

10 cloves

5 star anise

4 bay leaves

240ml Shaohsing rice wine (you can pick this up in large supermarkets and small Asian grocers)

6 tbsp light soy sauce

4 tbsp dark soy sauce

2 tbsp jaggery or brown sugar

700ml water


  1. Preheat the oven to 150 degrees centigrade.
  2. On your hob, add oil to a large ovenproof pot and then add some of the oxtails and brown all sides before removing and placing on a plate whilst you do the next batch.
  3. In the same pan, keeping the heat low, add the ginger, garlic, cloves, bay leaves and star anise and move around the pan for about a minute before adding the soy sauce, Shaohsing, sugar and water. I do not add any salt as I feel that enough comes from the soy sauces.
  4. Add the oxtails to the pan and coat in the sauce. Add a little more water if necessary and transfer to the oven.
  5. Cook for 5hours 30 minutes, by which time the meat will be falling off the bone. Over the course of the five hours move the oxtails around a few times. If it is looking dry simply add a little more water.
  6. Once it has cooked. Allow to cool before removing the oxtails – keep all the juice – and then using your hands allow the meat to fall off the bones. When all the meat has been removed return it to the pan and then rewarm before cooking and serve with brown rice, roasted butternut squash with some ground Sichuan peppercorns and some greens. Warming food for this cold weather.


SaveSave

SaveSaveSaveSave

SaveSave

SaveSave

SaveSave

SaveSave

SaveSave

SaveSave

SaveSave

SaveSave

SaveSave

SaveSave

SaveSave

SaveSave

SaveSave

SaveSave

SaveSave

SaveSave

SaveSave

SaveSave

SaveSave

SaveSave

SaveSave

SaveSave

SaveSave

SaveSave

SaveSaveSaveSaveSaveSaveSaveSave

SaveSave

SaveSave


Cambodia, VB6 and a review of “My Vegan Travels” by Jackie Kearney

Sunset in Kep, Cambodia

Happy New Year everyone. As you’ve probably gathered from my lack of posts I have been off the grid for a few weeks, which has been bliss – although I was still posting on instagram so do check out my feed if you are interested. My family decided to cheat winter for a few weeks and headed off to Cambodia to see the ancient ruins, visit the capital and then head south to laidback Kep – which was once where the Cambodian royals and wealthy would head to relax and enjoy themselves; before the Khmer Rouge destroyed much of the town.

Angkor Wat Temple complex

Back in London and it has all been a bit of a shock with the cold, blistery weather and getting dark so early in the day. I reluctantly packed away my flip flops and got out my winter boots. January is a funny old month. We all start with such good intentions.

Most friends seem to be attempting a “dry January” and “veganuary” has now been thrown into the mix. Read more about it here if the term is new to you.

Sacred prays in Angkor Wat complex

I can get my head around being more vegetarian, or at least a diet which has a heavy vegetable focus, but vegan……now that involves a lot of thought and planning. Whilst I was pondering veganuary, I read about a rather interesting “diet” or let’s just say “way of life” which, in my view, seemed more attainable and realistic. There is a lot of chat about it in the media at the moment. It is called the VB6 diet. Now don’t get me wrong I do not follow diets and have never been on one, but this VB6 caught my attention.

Lotus flower arrangement in Siem Reap

The diet was given life by New York Times’ lead food writer Mark Bittman and literally means “Vegan Before 6pm”. I am increasingly convinced we all need to eat more vegetables and fruit and less meat and fish. Like Mark however, I am not going to become vegan anytime soon, but a swing of the pendulum towards more of a plant based diet is definitely attractive on many levels. I would prefer to eat meat and fish less often but the quality of what I eat to be high and ultimately know exactly where the produce has come from. By eating it less frequently does allow us to buy better quality meat and fish when we do actually buy it.

Drying out fish on the shores of Tonle Sap – the 4th largest freshwater source of fish in the world

The VB6 diet came about when Mark was told by his doctor that he was overweight, his cholesterol and blood sugar were too high and that intervention by surgery was one possible option. He discussed these findings with another doctor who suggested that becoming vegan was another way that could help him. Knowing that becoming a true vegan was out of the question he decided to adapt and become vegan throughout the day but in the evening from 6pm he could eat what he wanted. It made a lot of sense as he could be sociable in the evening with friends and eat how he always has done. He is also really realistic that sometimes he may deviates from the plan and he readily admits he has milk in his coffee in the morning, but for the most part he continues to be vegan in the day time.

A shrine in Phnom Penh

So has it worked?

Absolutely. He has lost a good amount of weight – 36 pounds then gained a little to plateau to around losing 26 pounds. The diet seems sensible and also not really very restrictive in the grand scheme of things. He talks to the Huffington Post here about the diet. Have a read, it’s really interesting. I definitely plan to pick up a copy of his book and see what he has to say in more detail. You can order it here if you are interested.

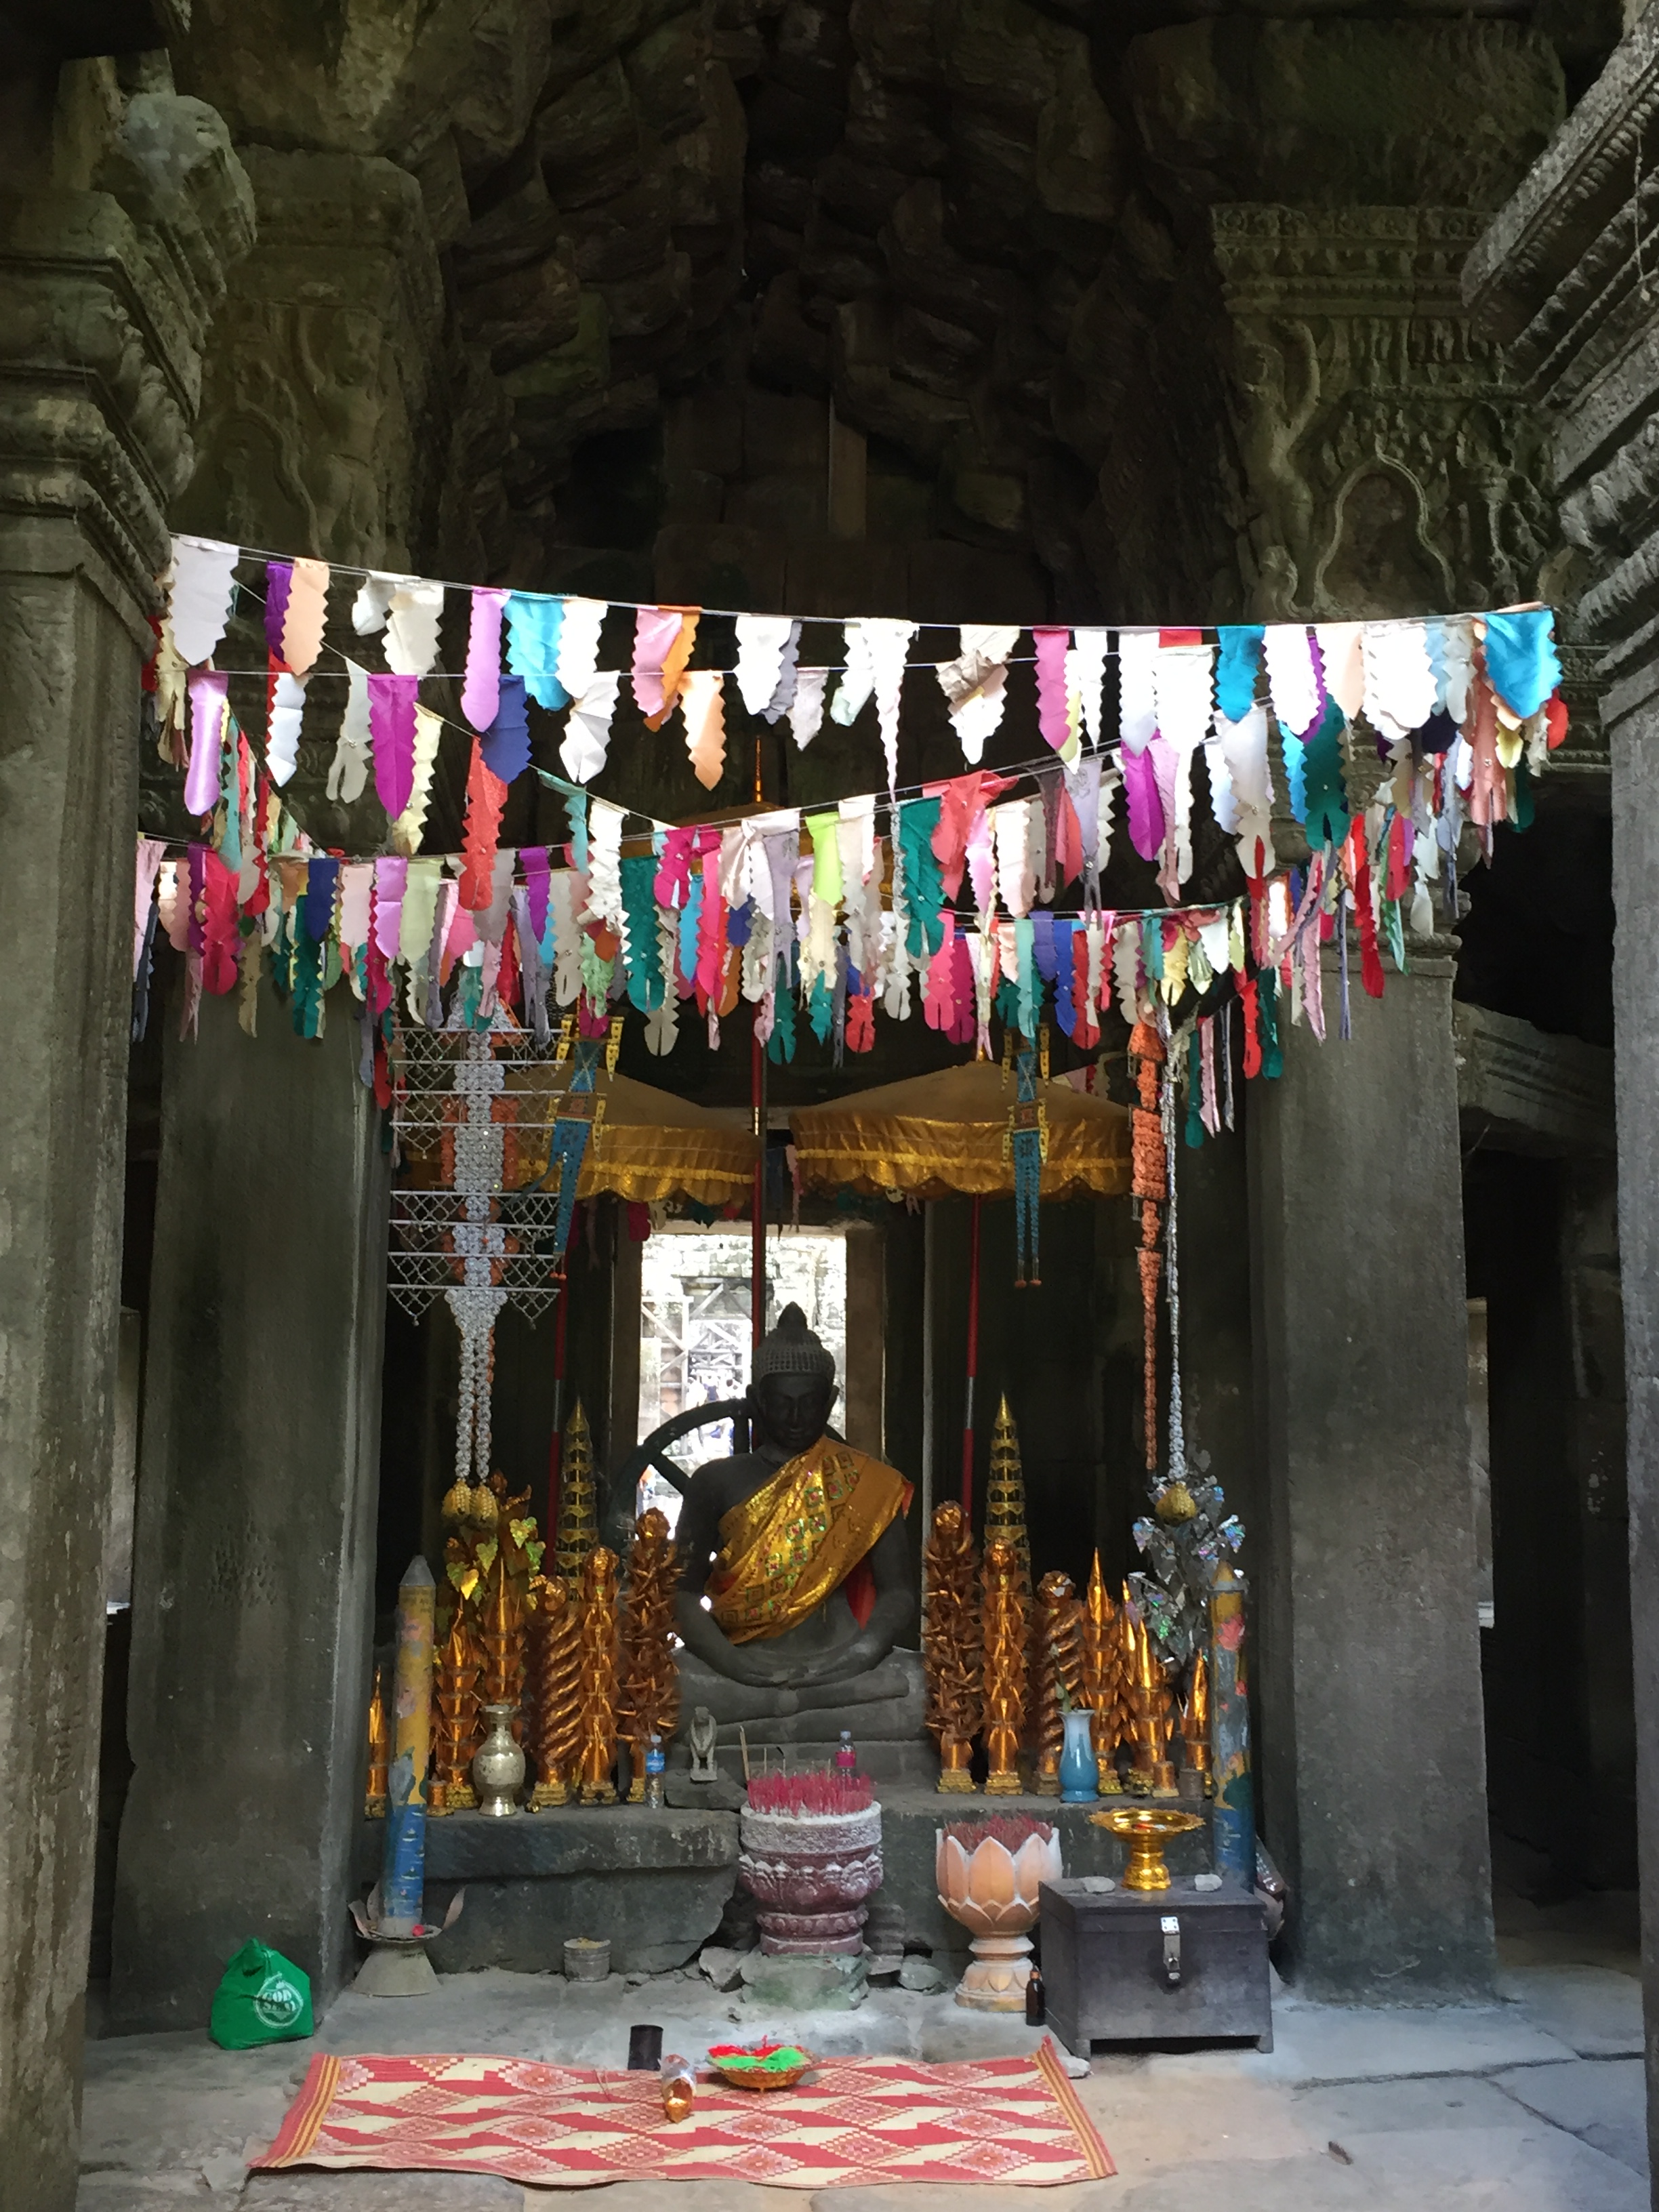
Buddhist shrine in Angkor Wat

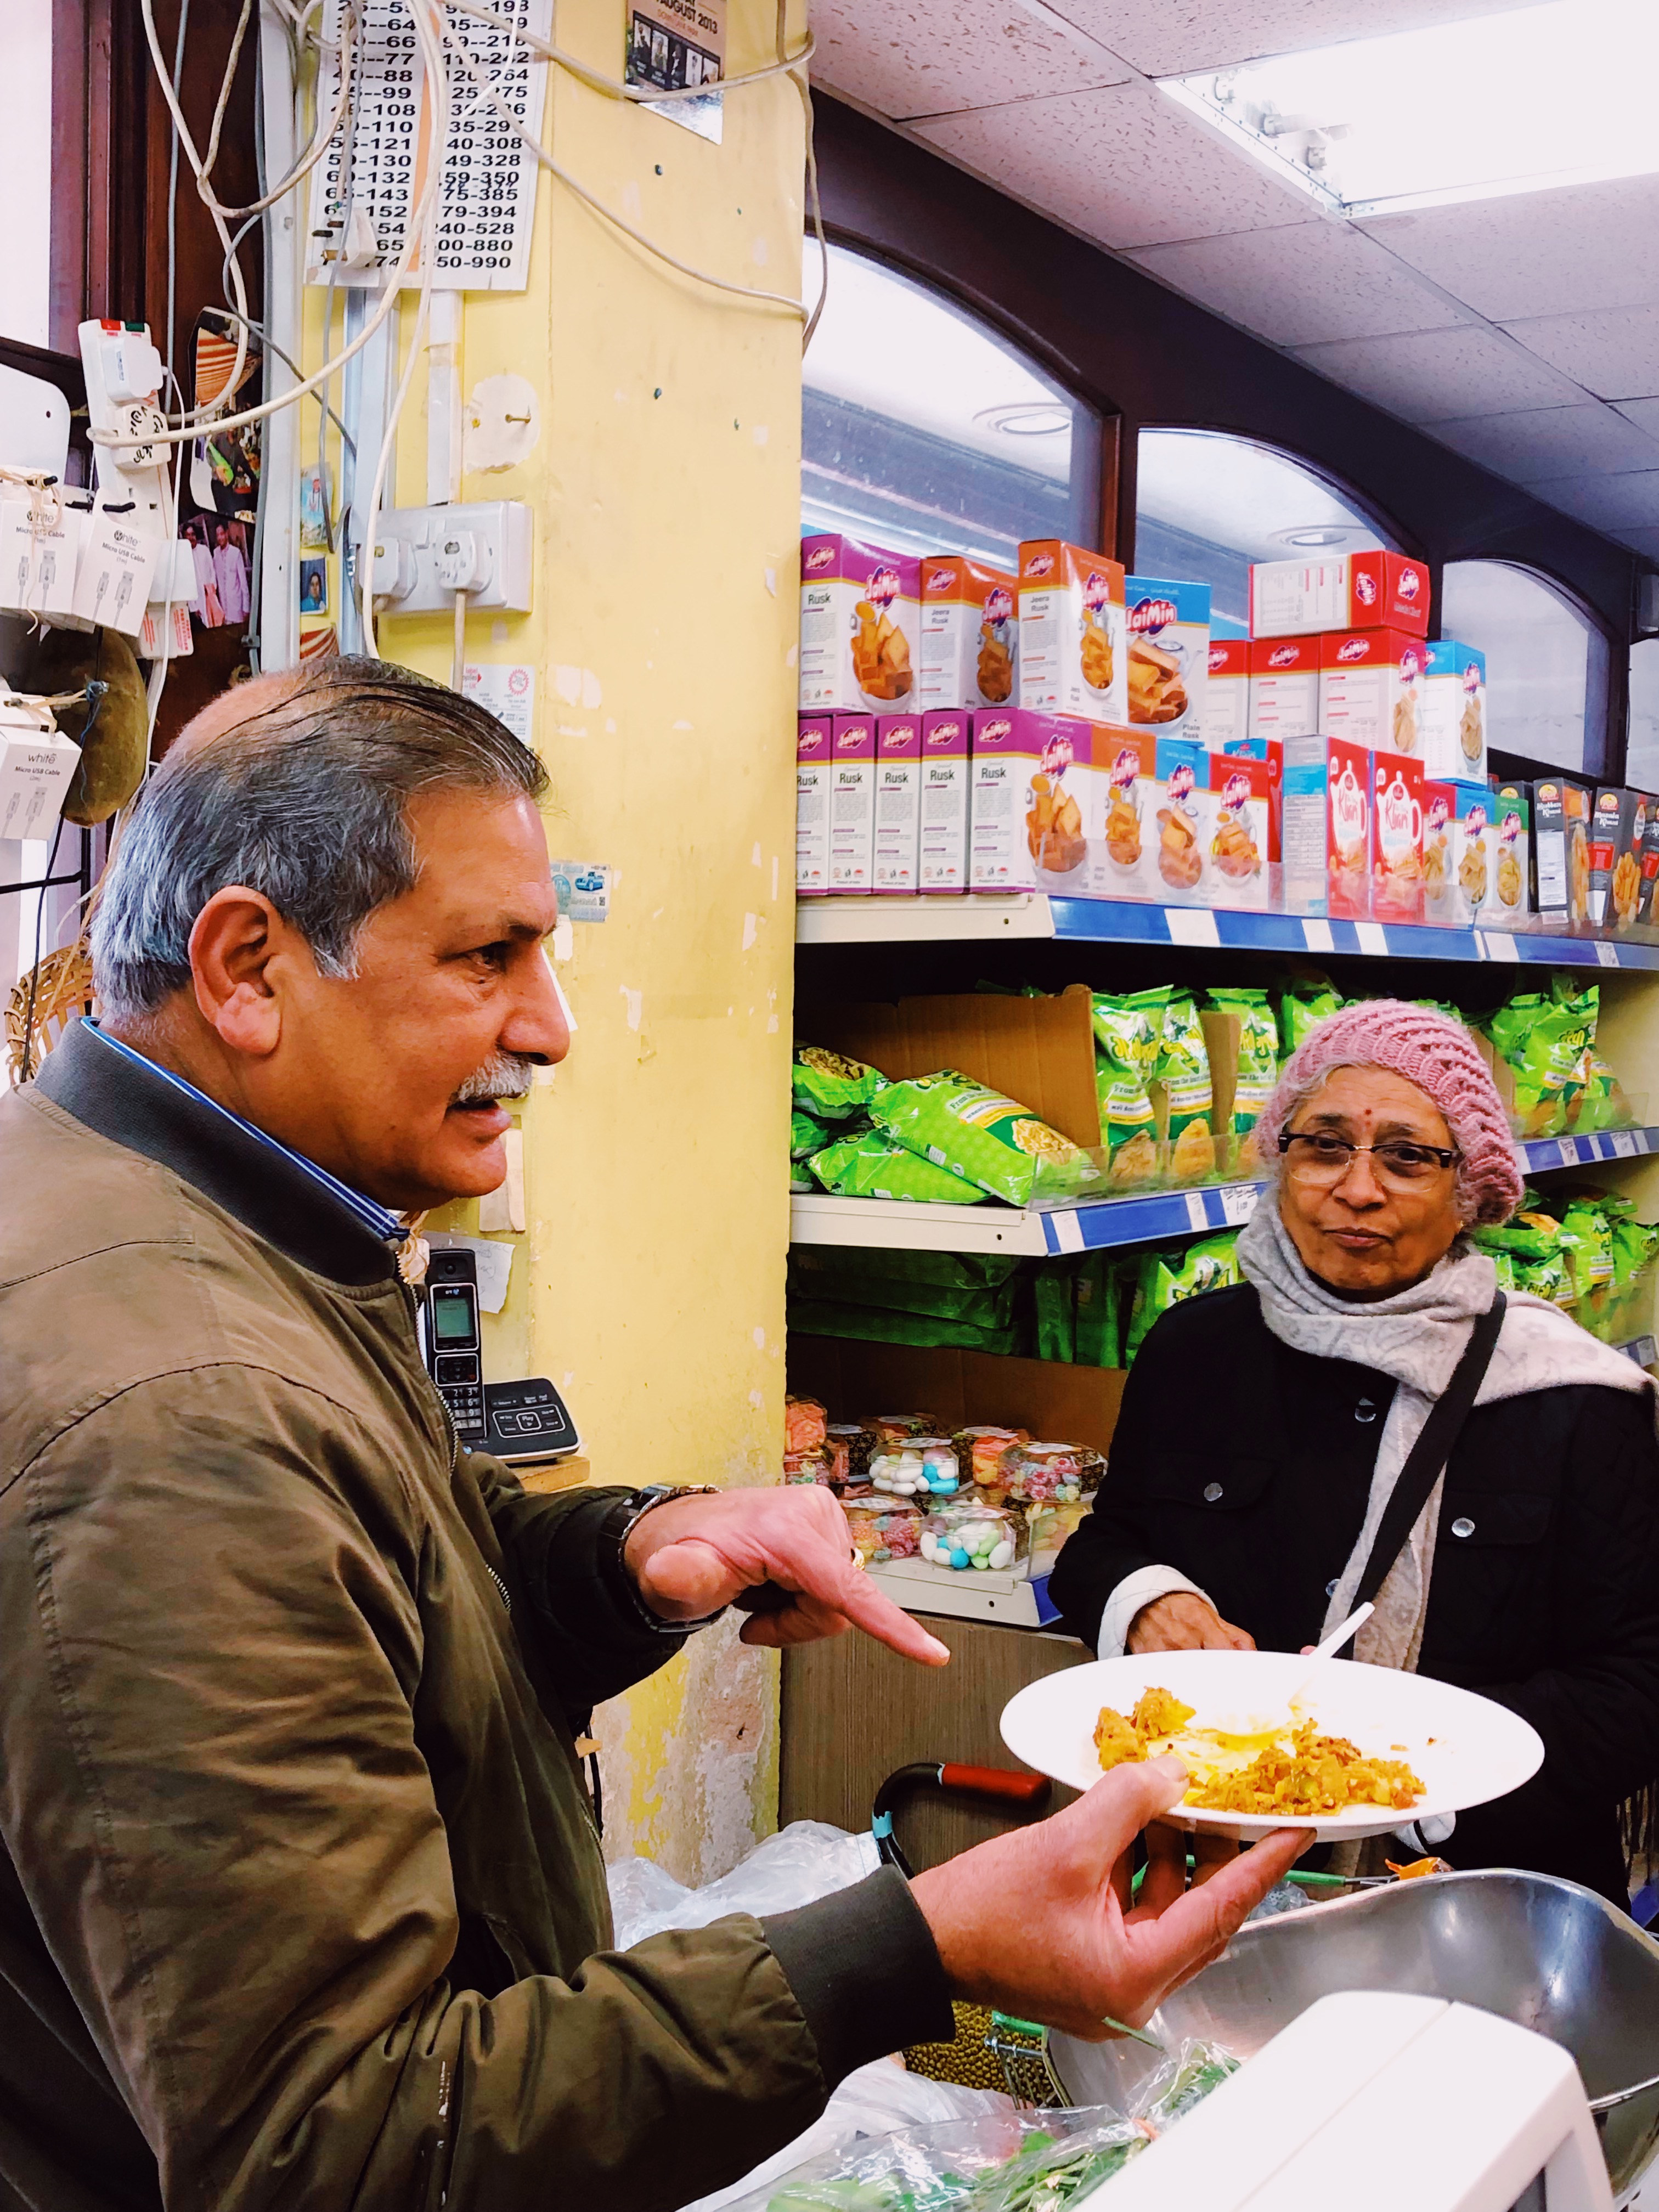
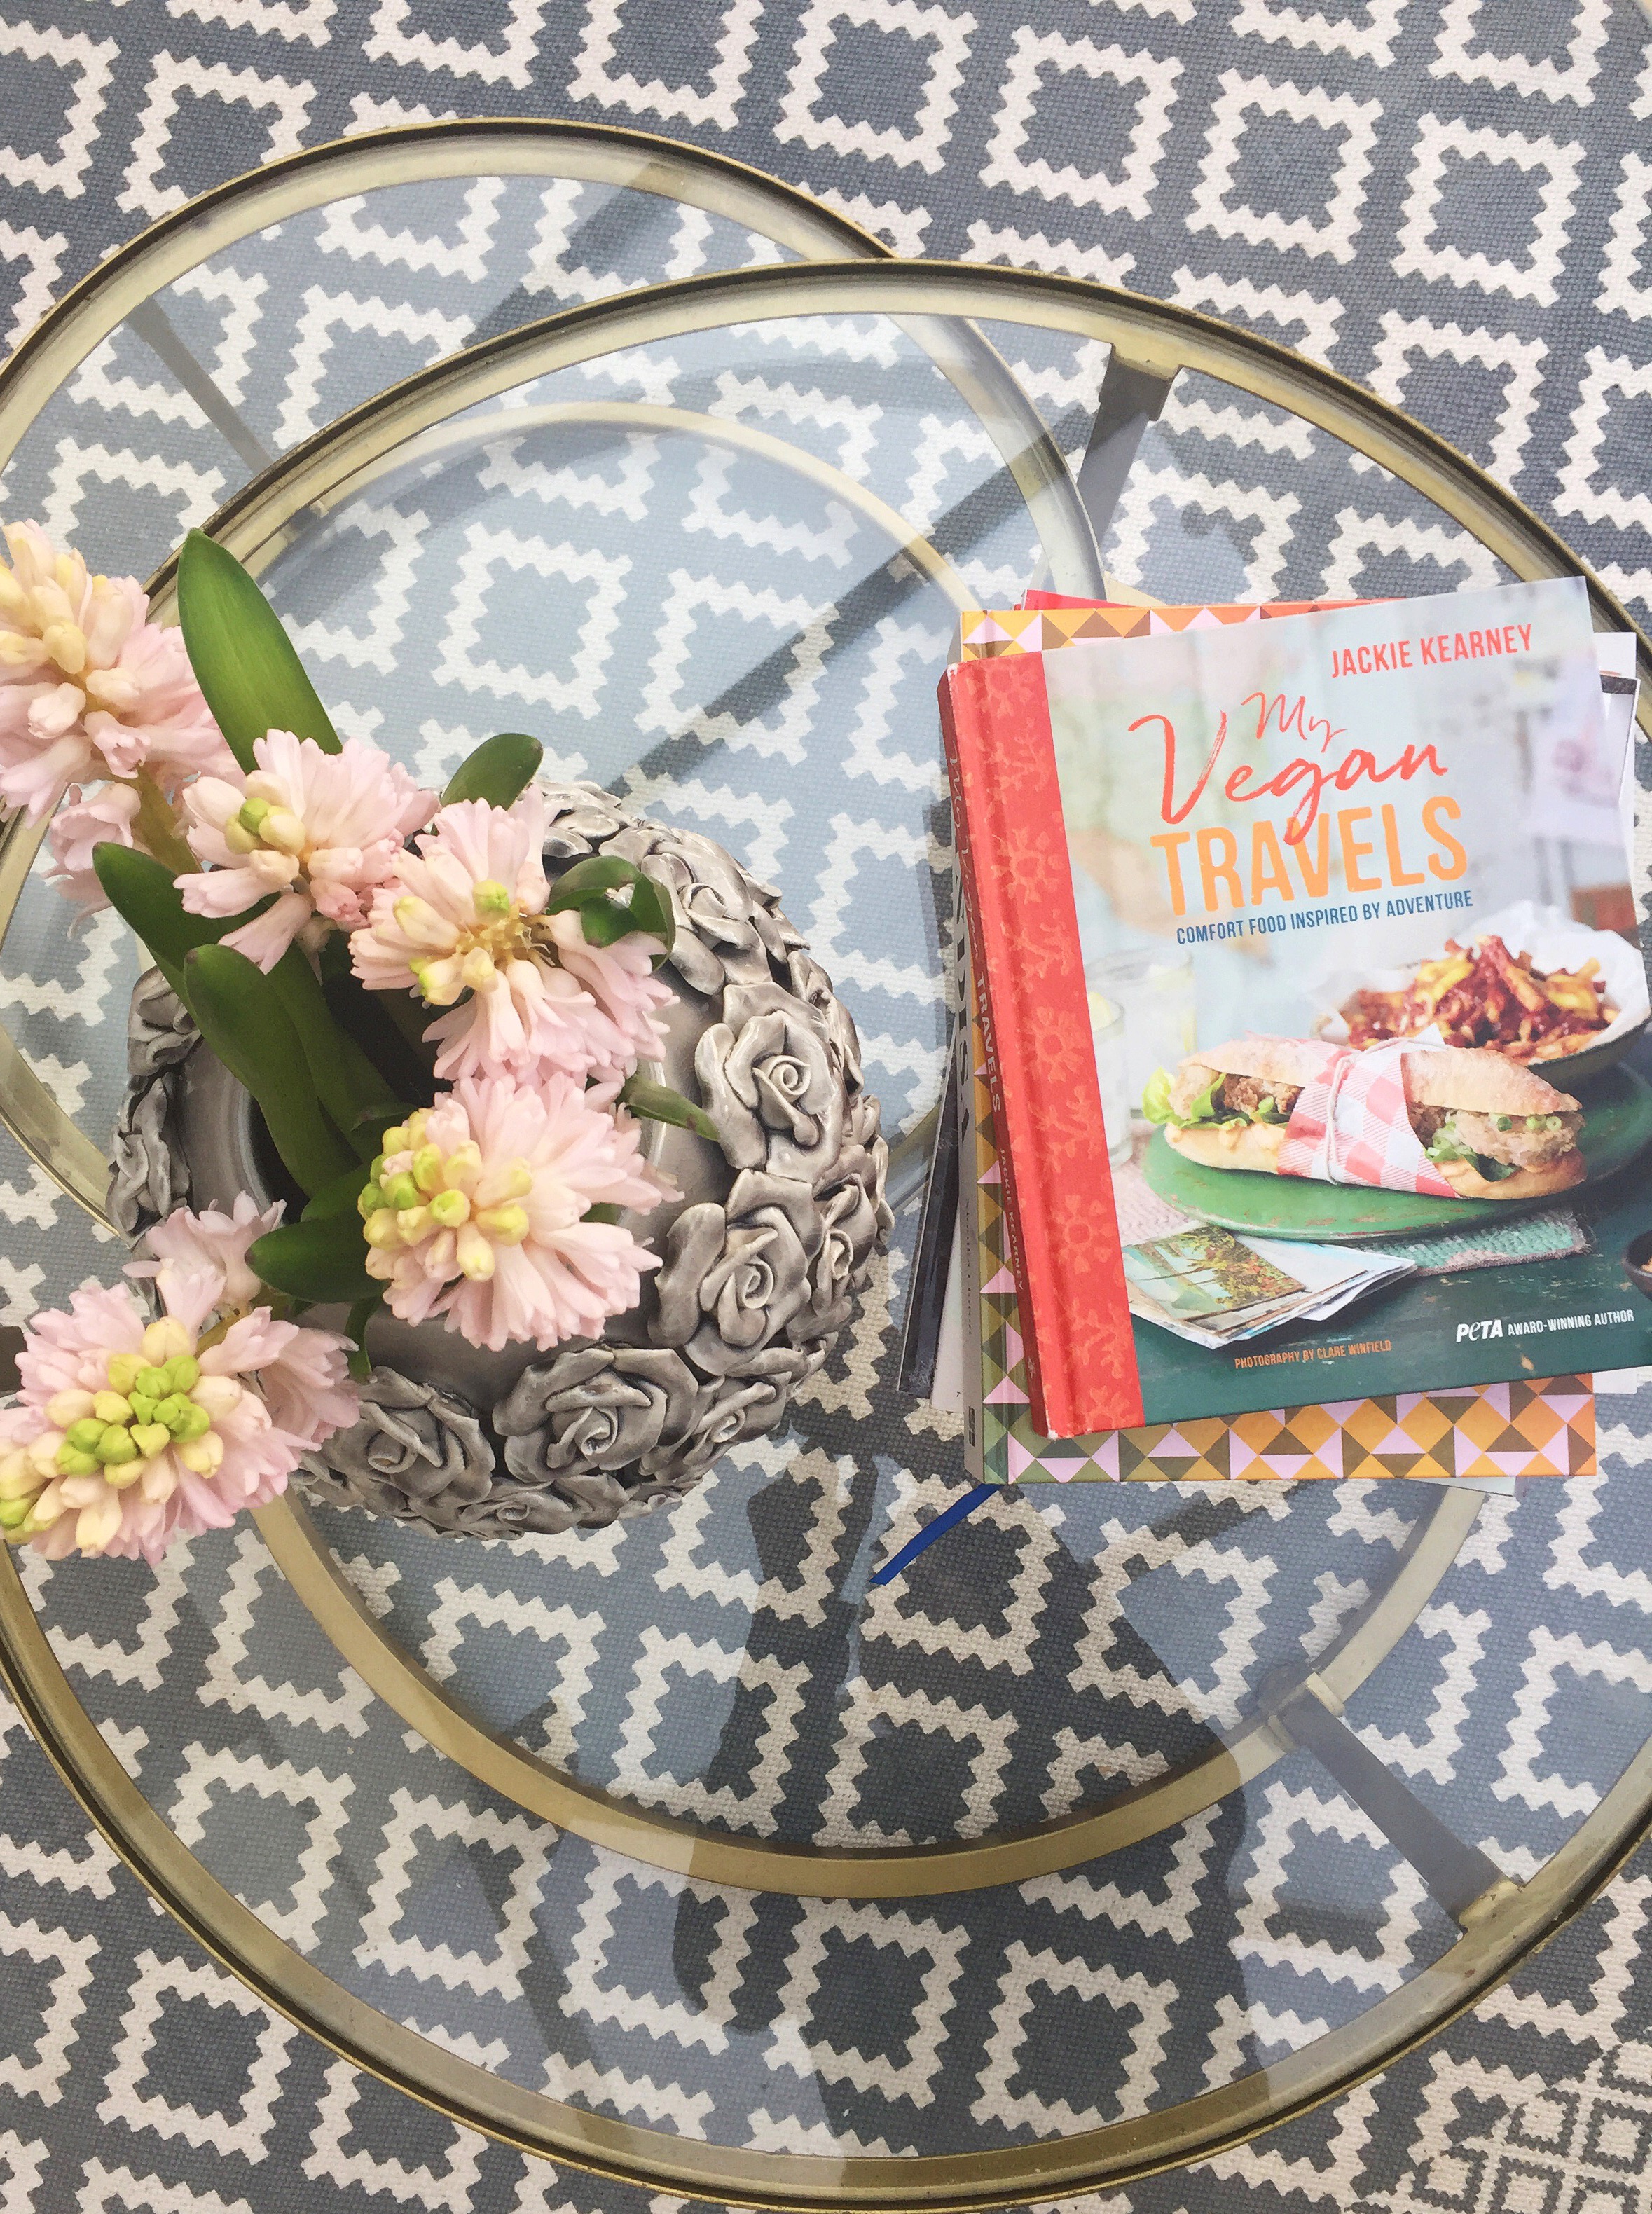
Which brings me to a rather lovely book that was recently sent to me, called “My Vegan Travels – Comfort Food Inspired by Adventure” by Jackie Kearney. I don’t own a vegan cookery book so was not too sure on what to expect. What I discovered is a hugely informative book with recipes that actually sound and look (if the five photos below are anything to go by) delicious.

Photography credit above: Clare Winfield, published by Ryland Peters & Small

At first glance there did seem to be quite a number of ingredients in each recipe but that has never phased me. If you are someone who likes 5 ingredients, then this book is probably not for you. For anyone who has a keen interest in cooking and a willingness to try something new then you will love it. The chapters are slit into “No Place Like Home”, “European Summers”, “Asian Comfort” and “Americana”. I obviously gravitated to the “Asian Comfort”.

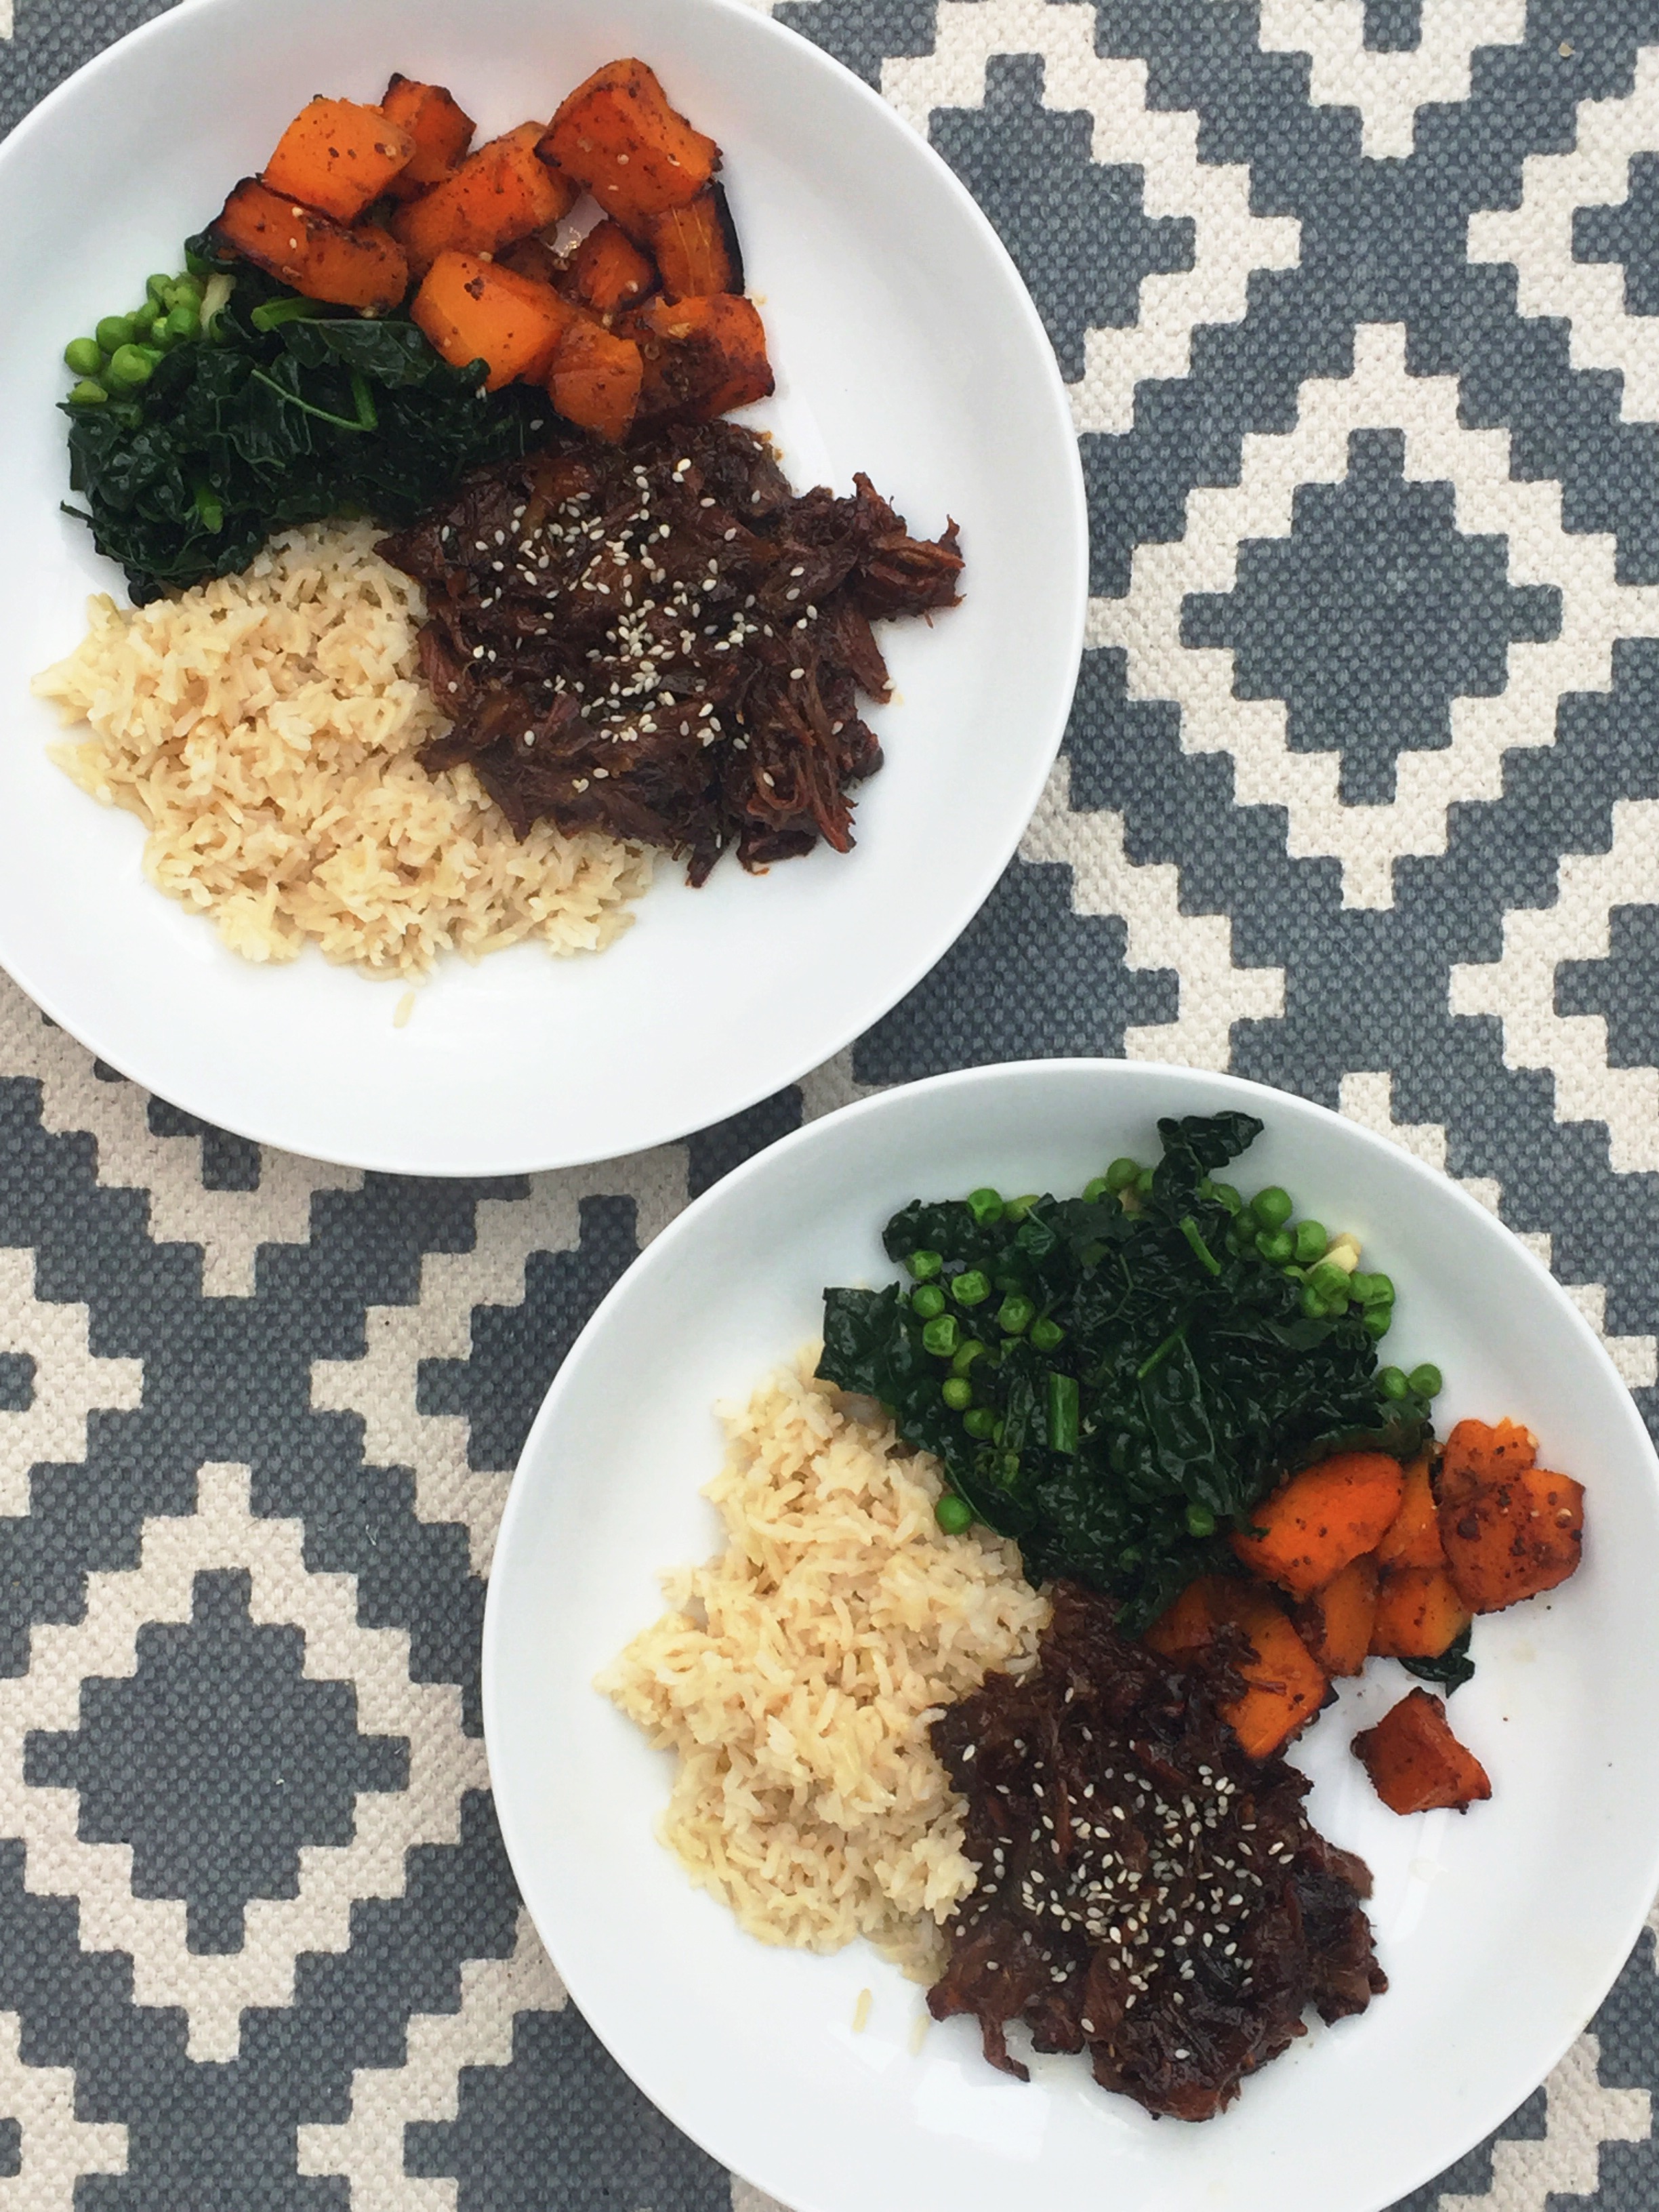
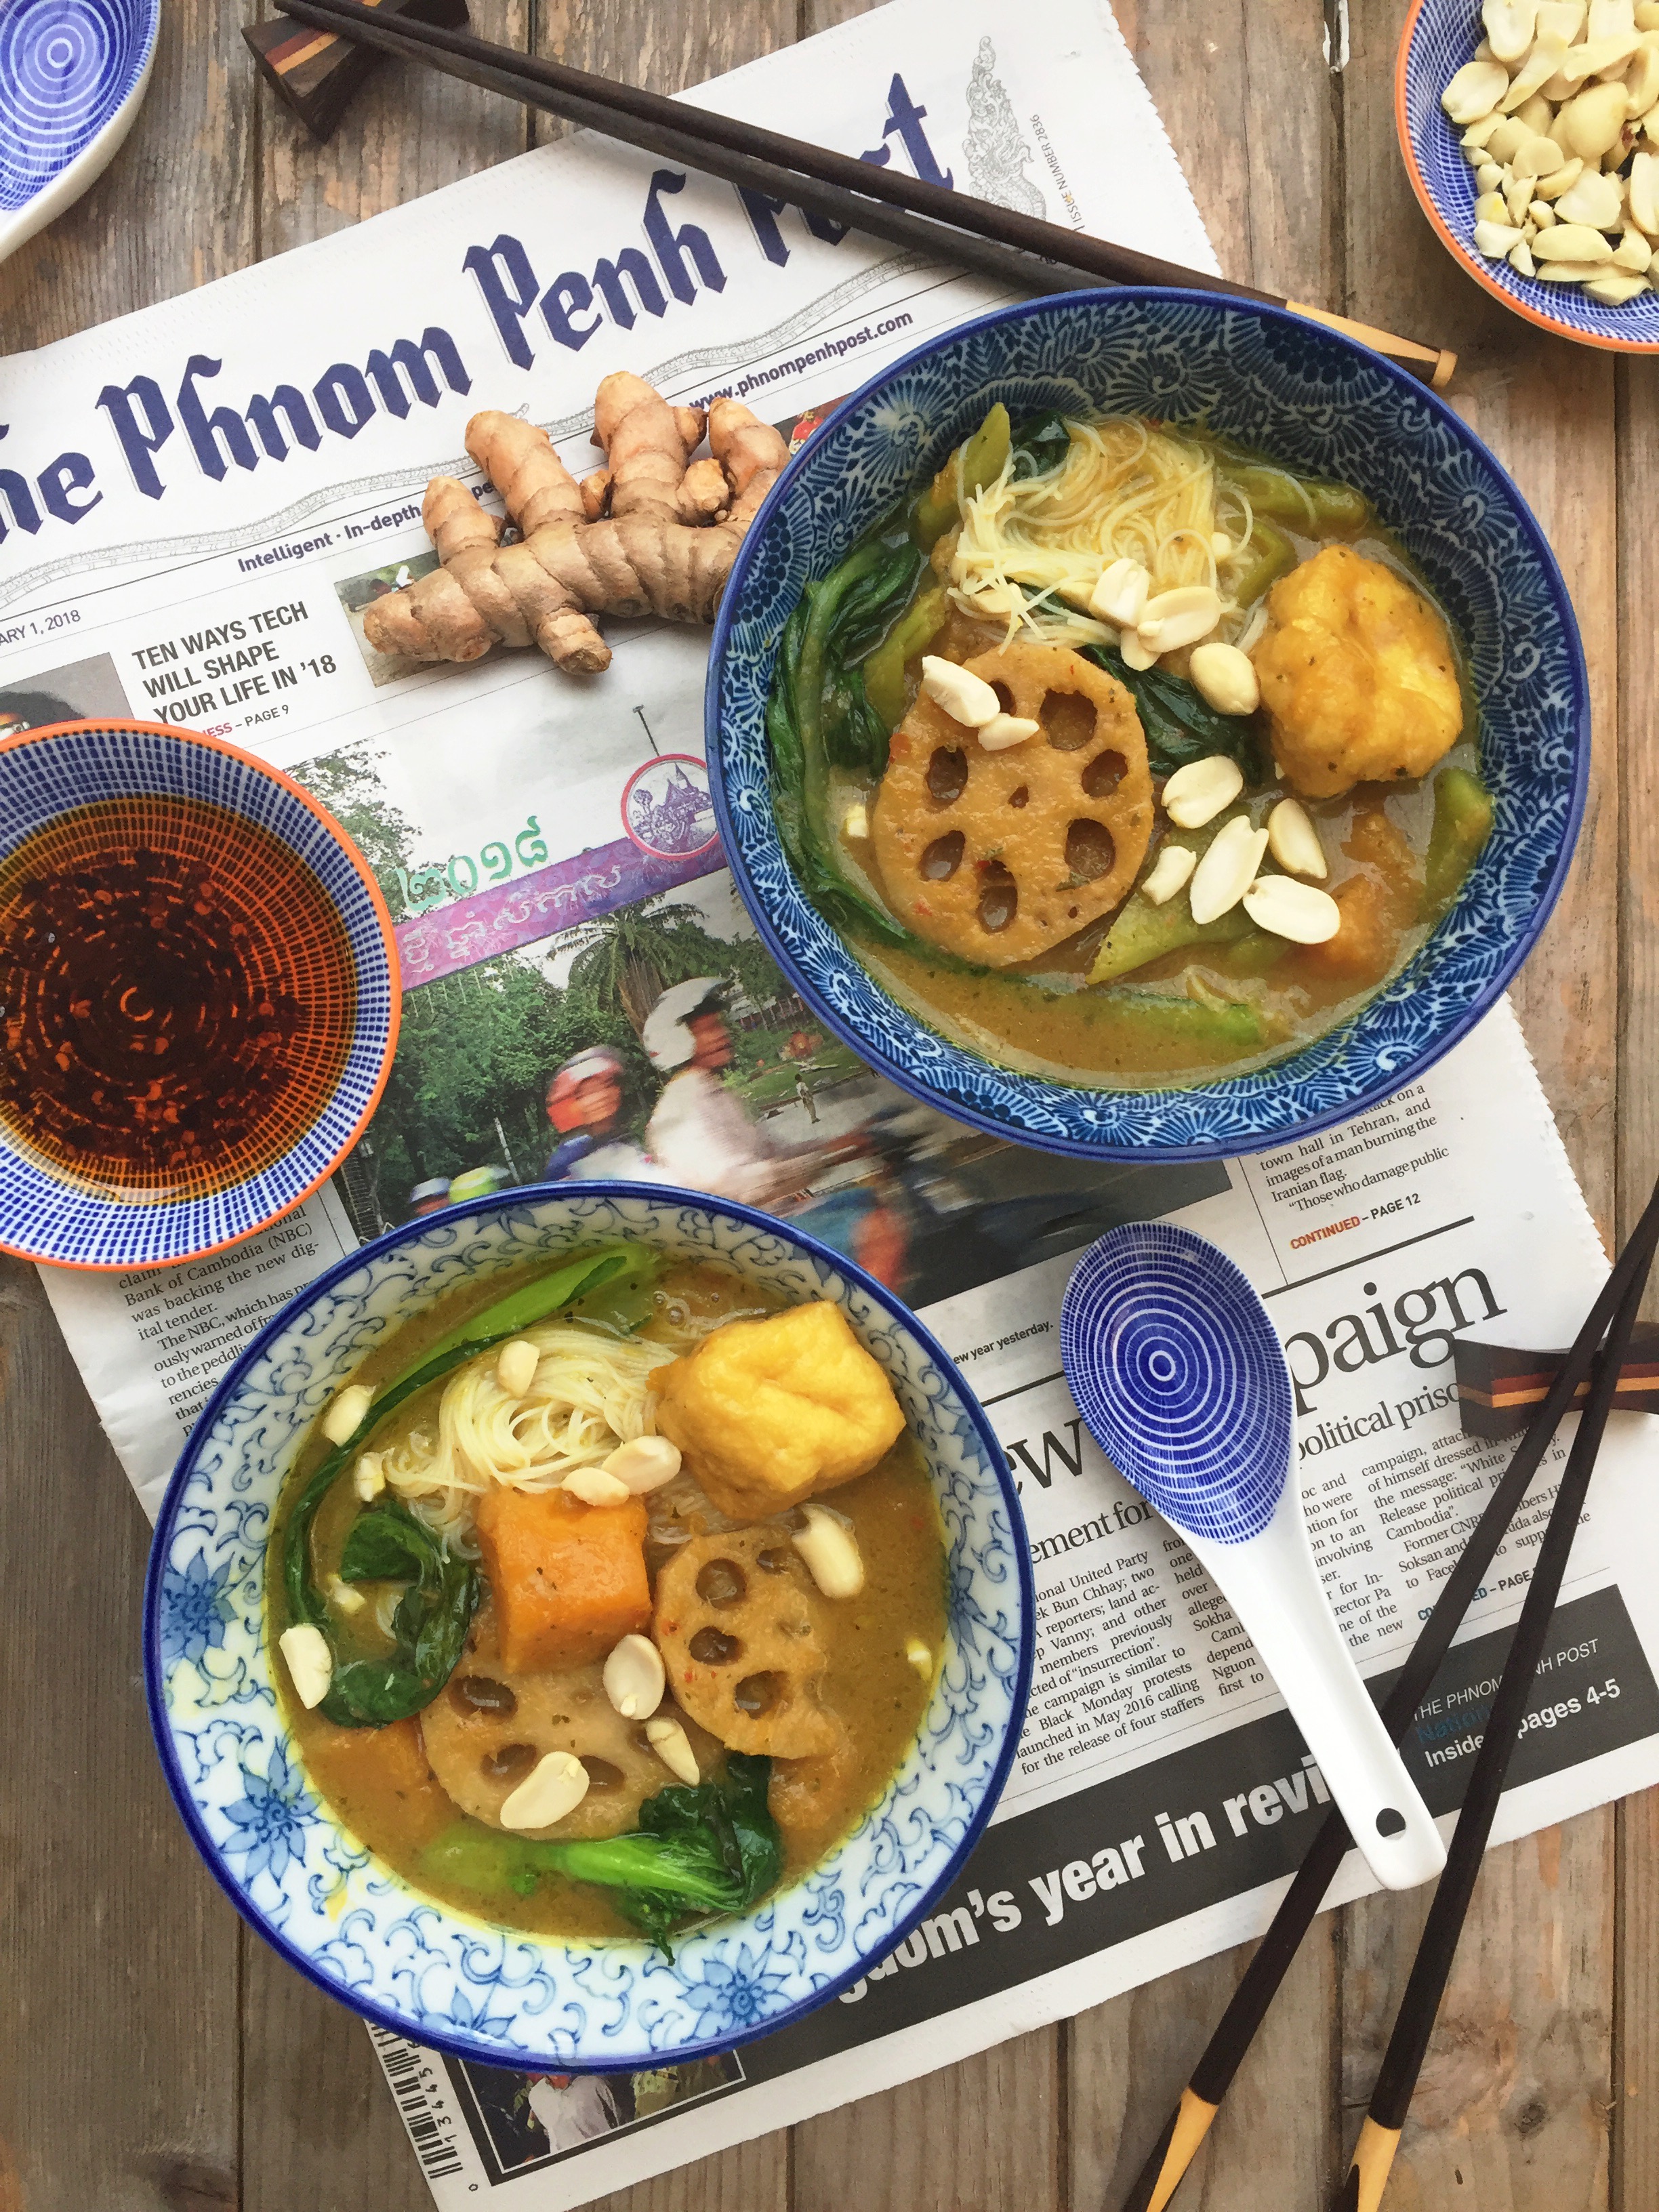
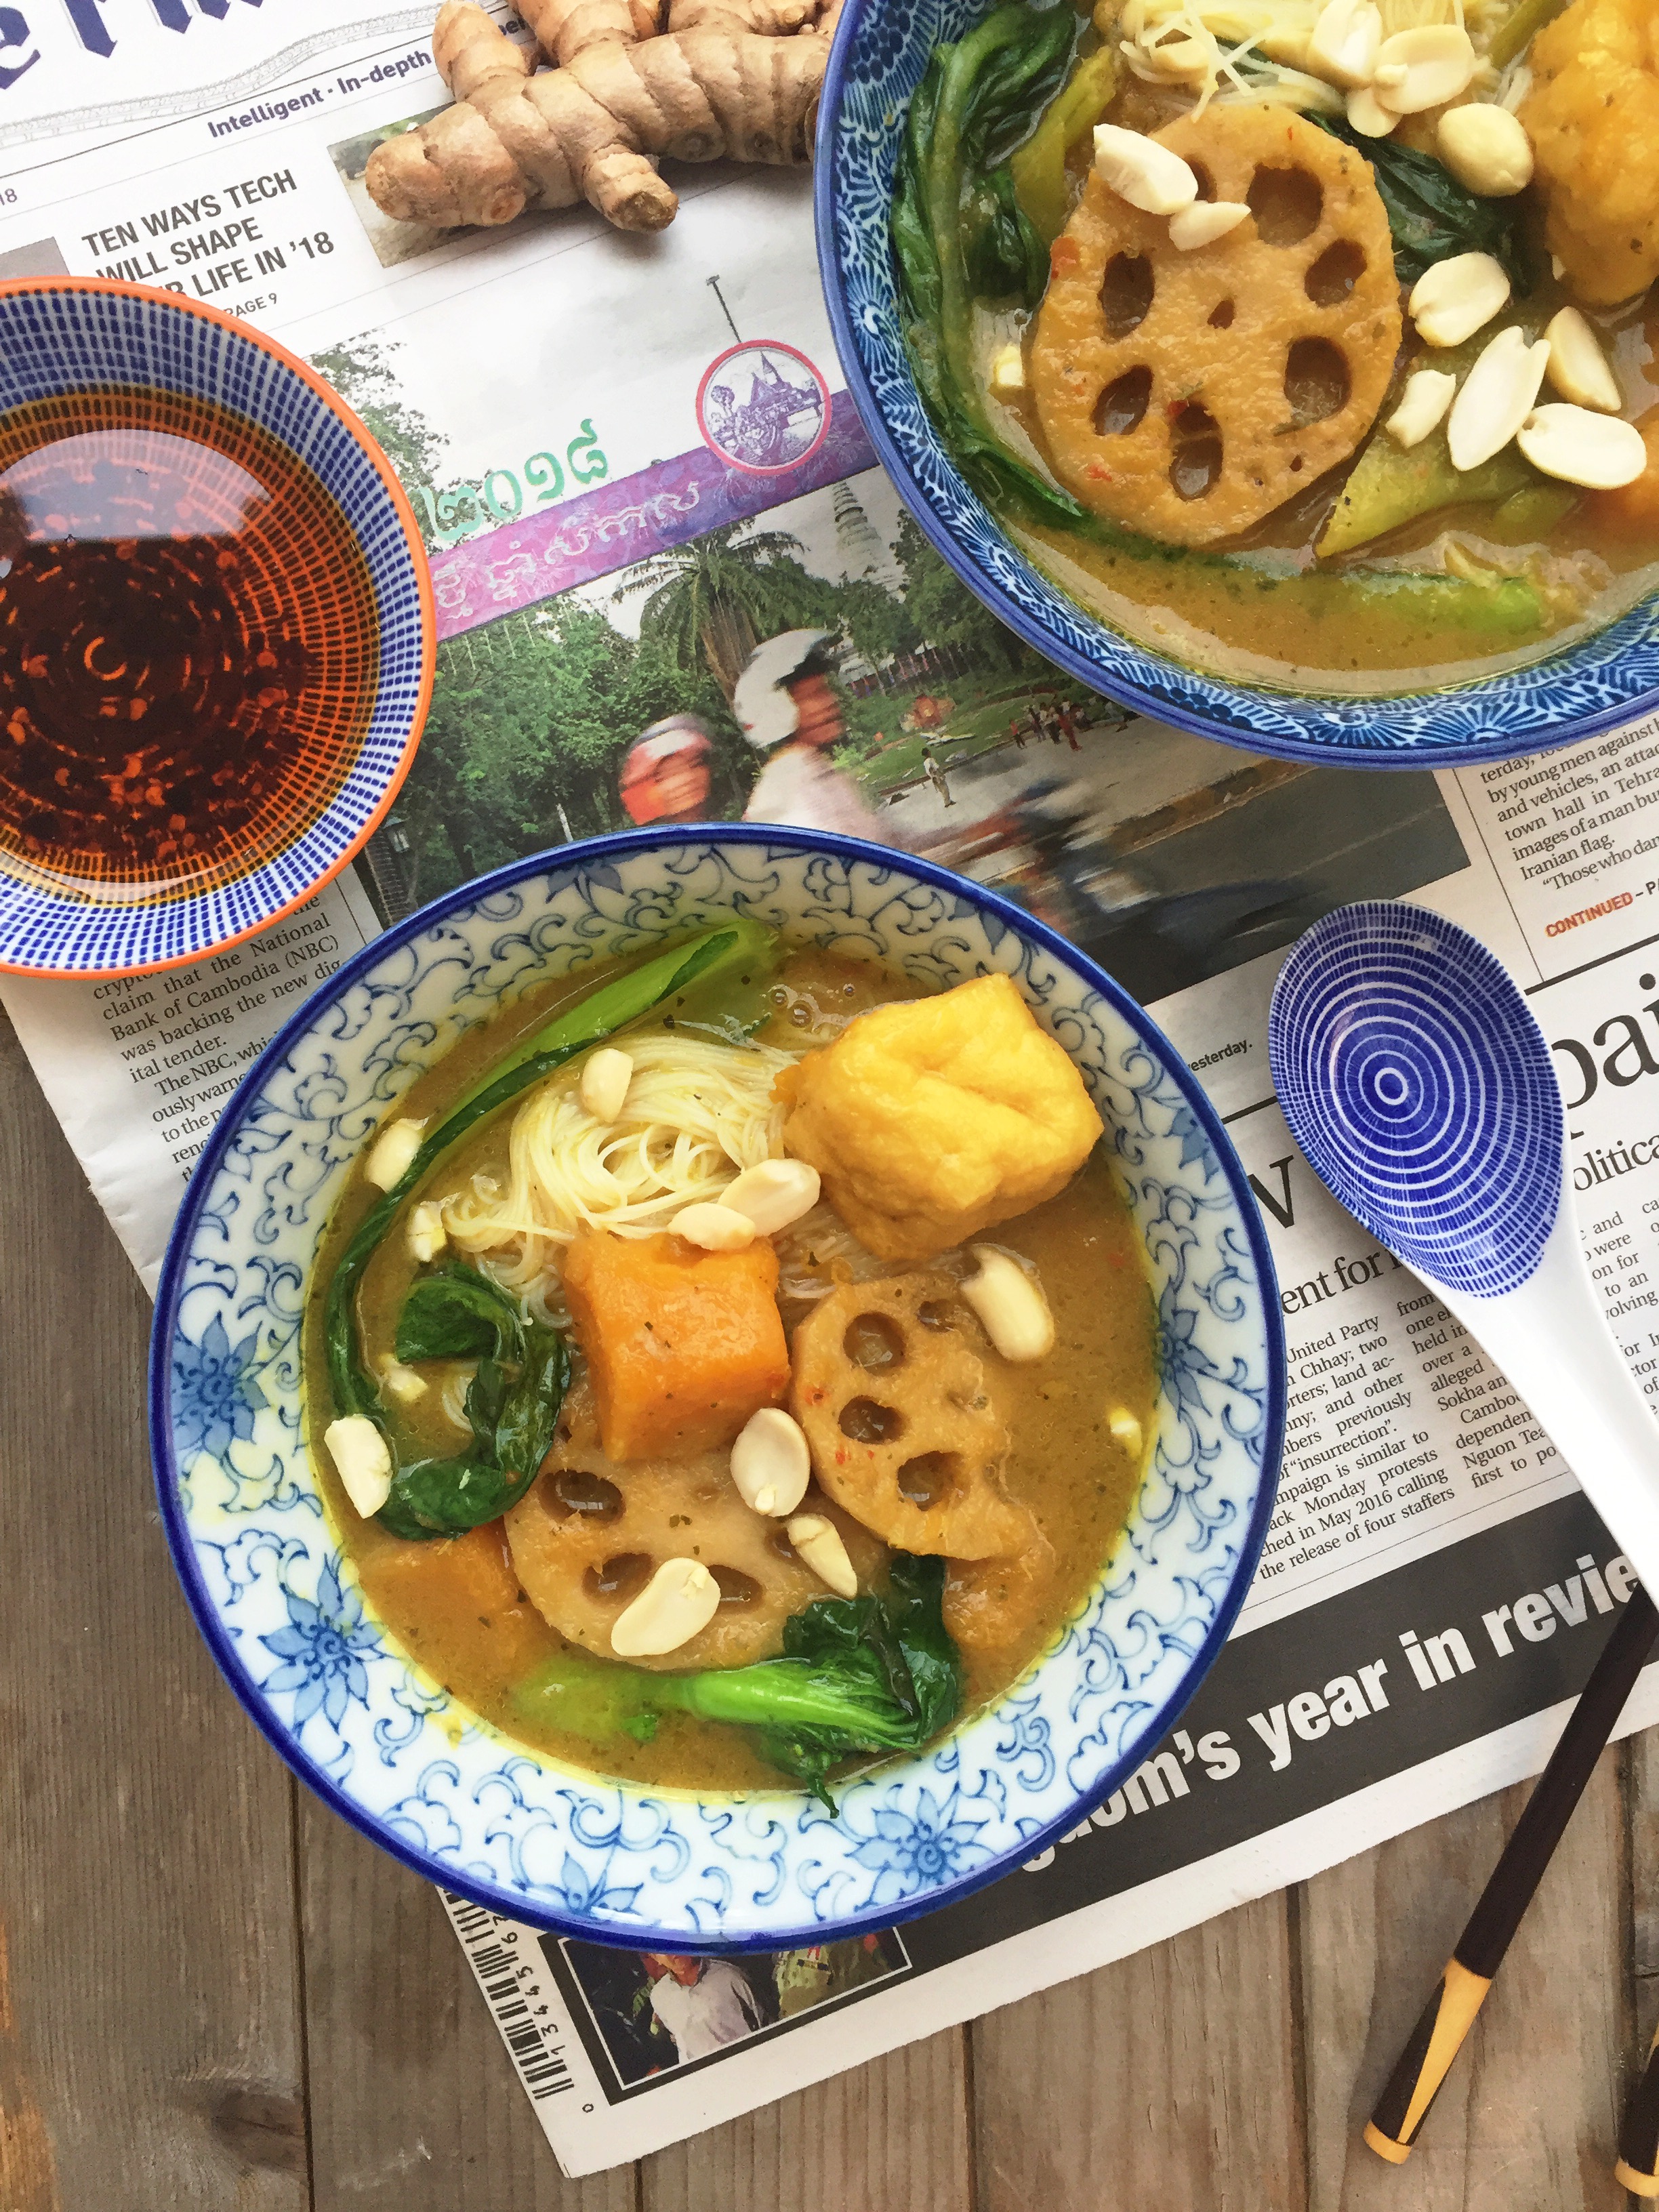
I think that to become full-time vegan does involve a commitment to actually stock your pantry/cupboard/fridge very differently. Leafing though the pages I found a couple of Cambodian recipes. Again I never come across Cambodian recipes so both of them really appealed to me. I opted on one though which I think is a real January mood-pick-me-up. It’s called “Num Banh Chok” – a Cambodian yellow curry with rice noodles and I cannot tell you how AWESOME this recipe is. I gave it to my father-in-law who has been recovering from a bout of flue and he couldn’t stop saying how delicious it was. It is now firmly part of my culinary arsenal and I will be cooking it again and again hence forth. I LOVED it.

I thought that the recipe tied in so well with this post and me having just come back from beautiful Cambodia, as well as the VB6 article, which I had been mulling over.

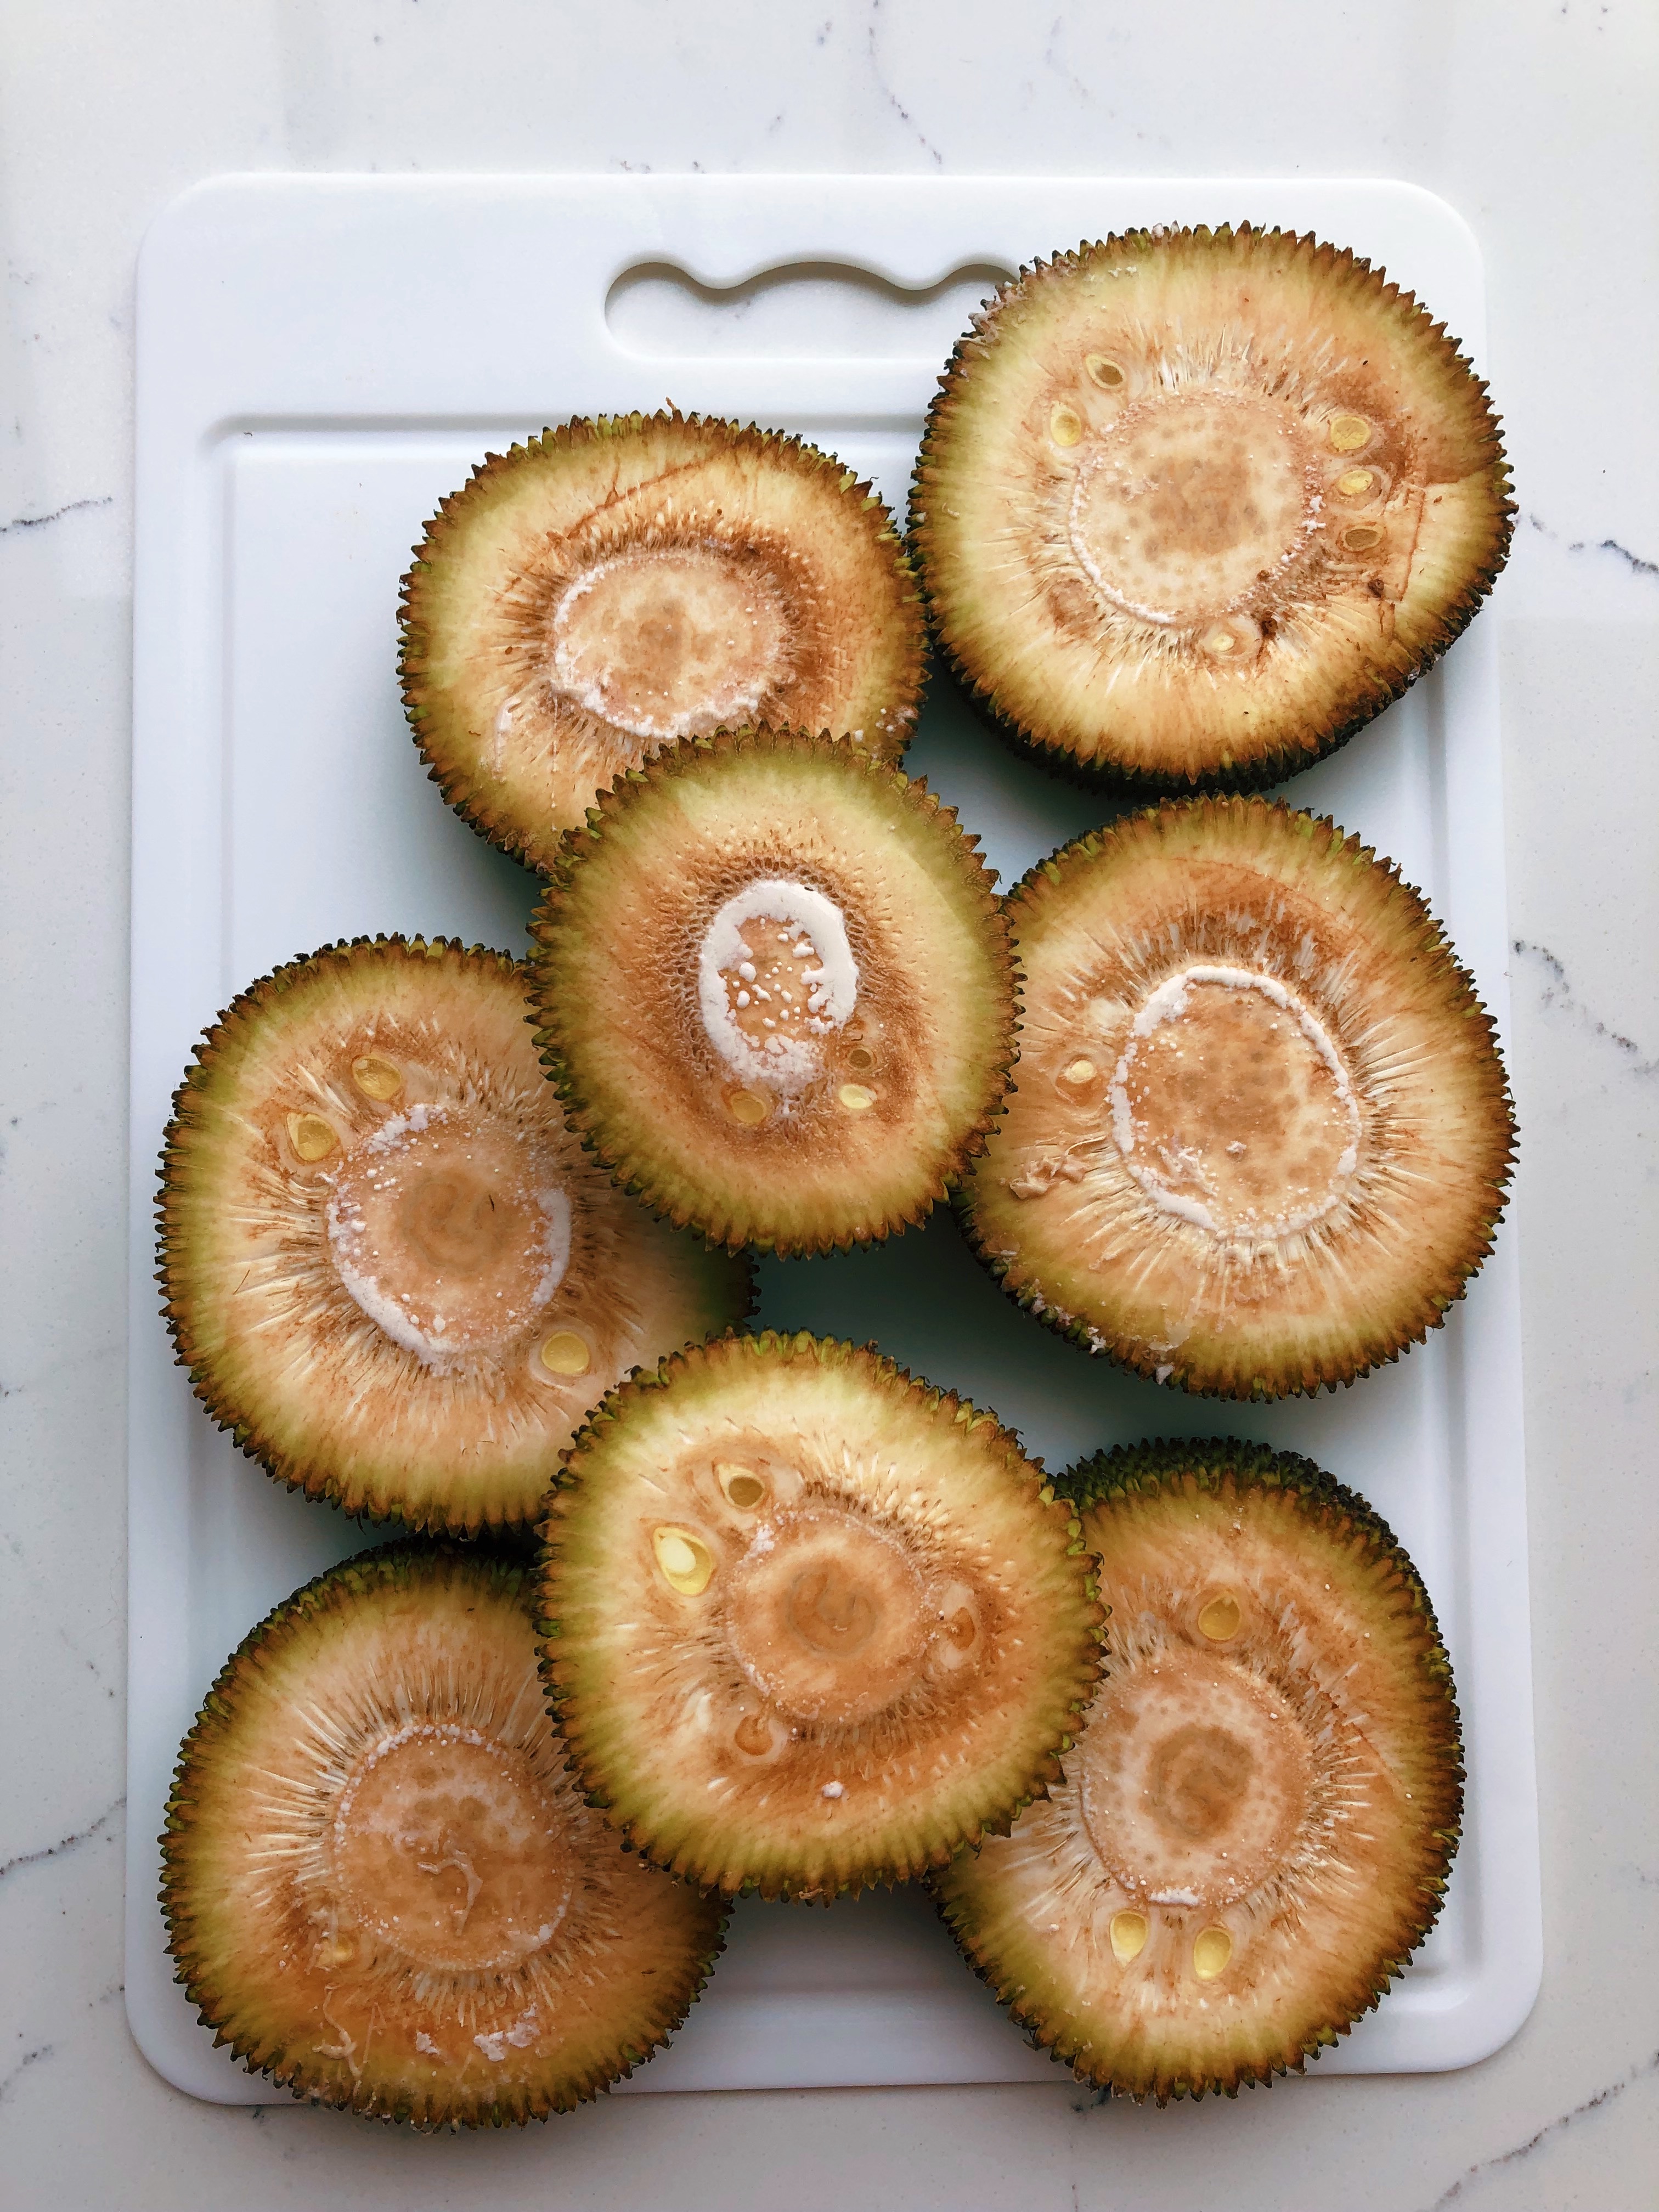
Now a couple of things to note. I made one change –  I added fried tofu instead of banana flower. I do love banana flower but it is tricky to find, certainly if you live outside London or not near any Vietnamese grocers. I thought it wasn’t very realistic for others to find if I found it tricky. Secondly, the vegetable with holes in it is called “lotus root”. I admit lotus root is also not that easy to find. My usual Asian grocers did not have it so they sent me off to a Chinese grocers that did. So folks aim for Chinese/Thai/Vietnamese/Japanese grocers near you. It is not stocked in your local supermarket. You can buy it online at places like Amazon and Fresh Oriental – here. You can also buy it frozen, but fresh is best if you can locate it. Galangal is not as hard to find, but again you may need to head to your South East Asian grocer.

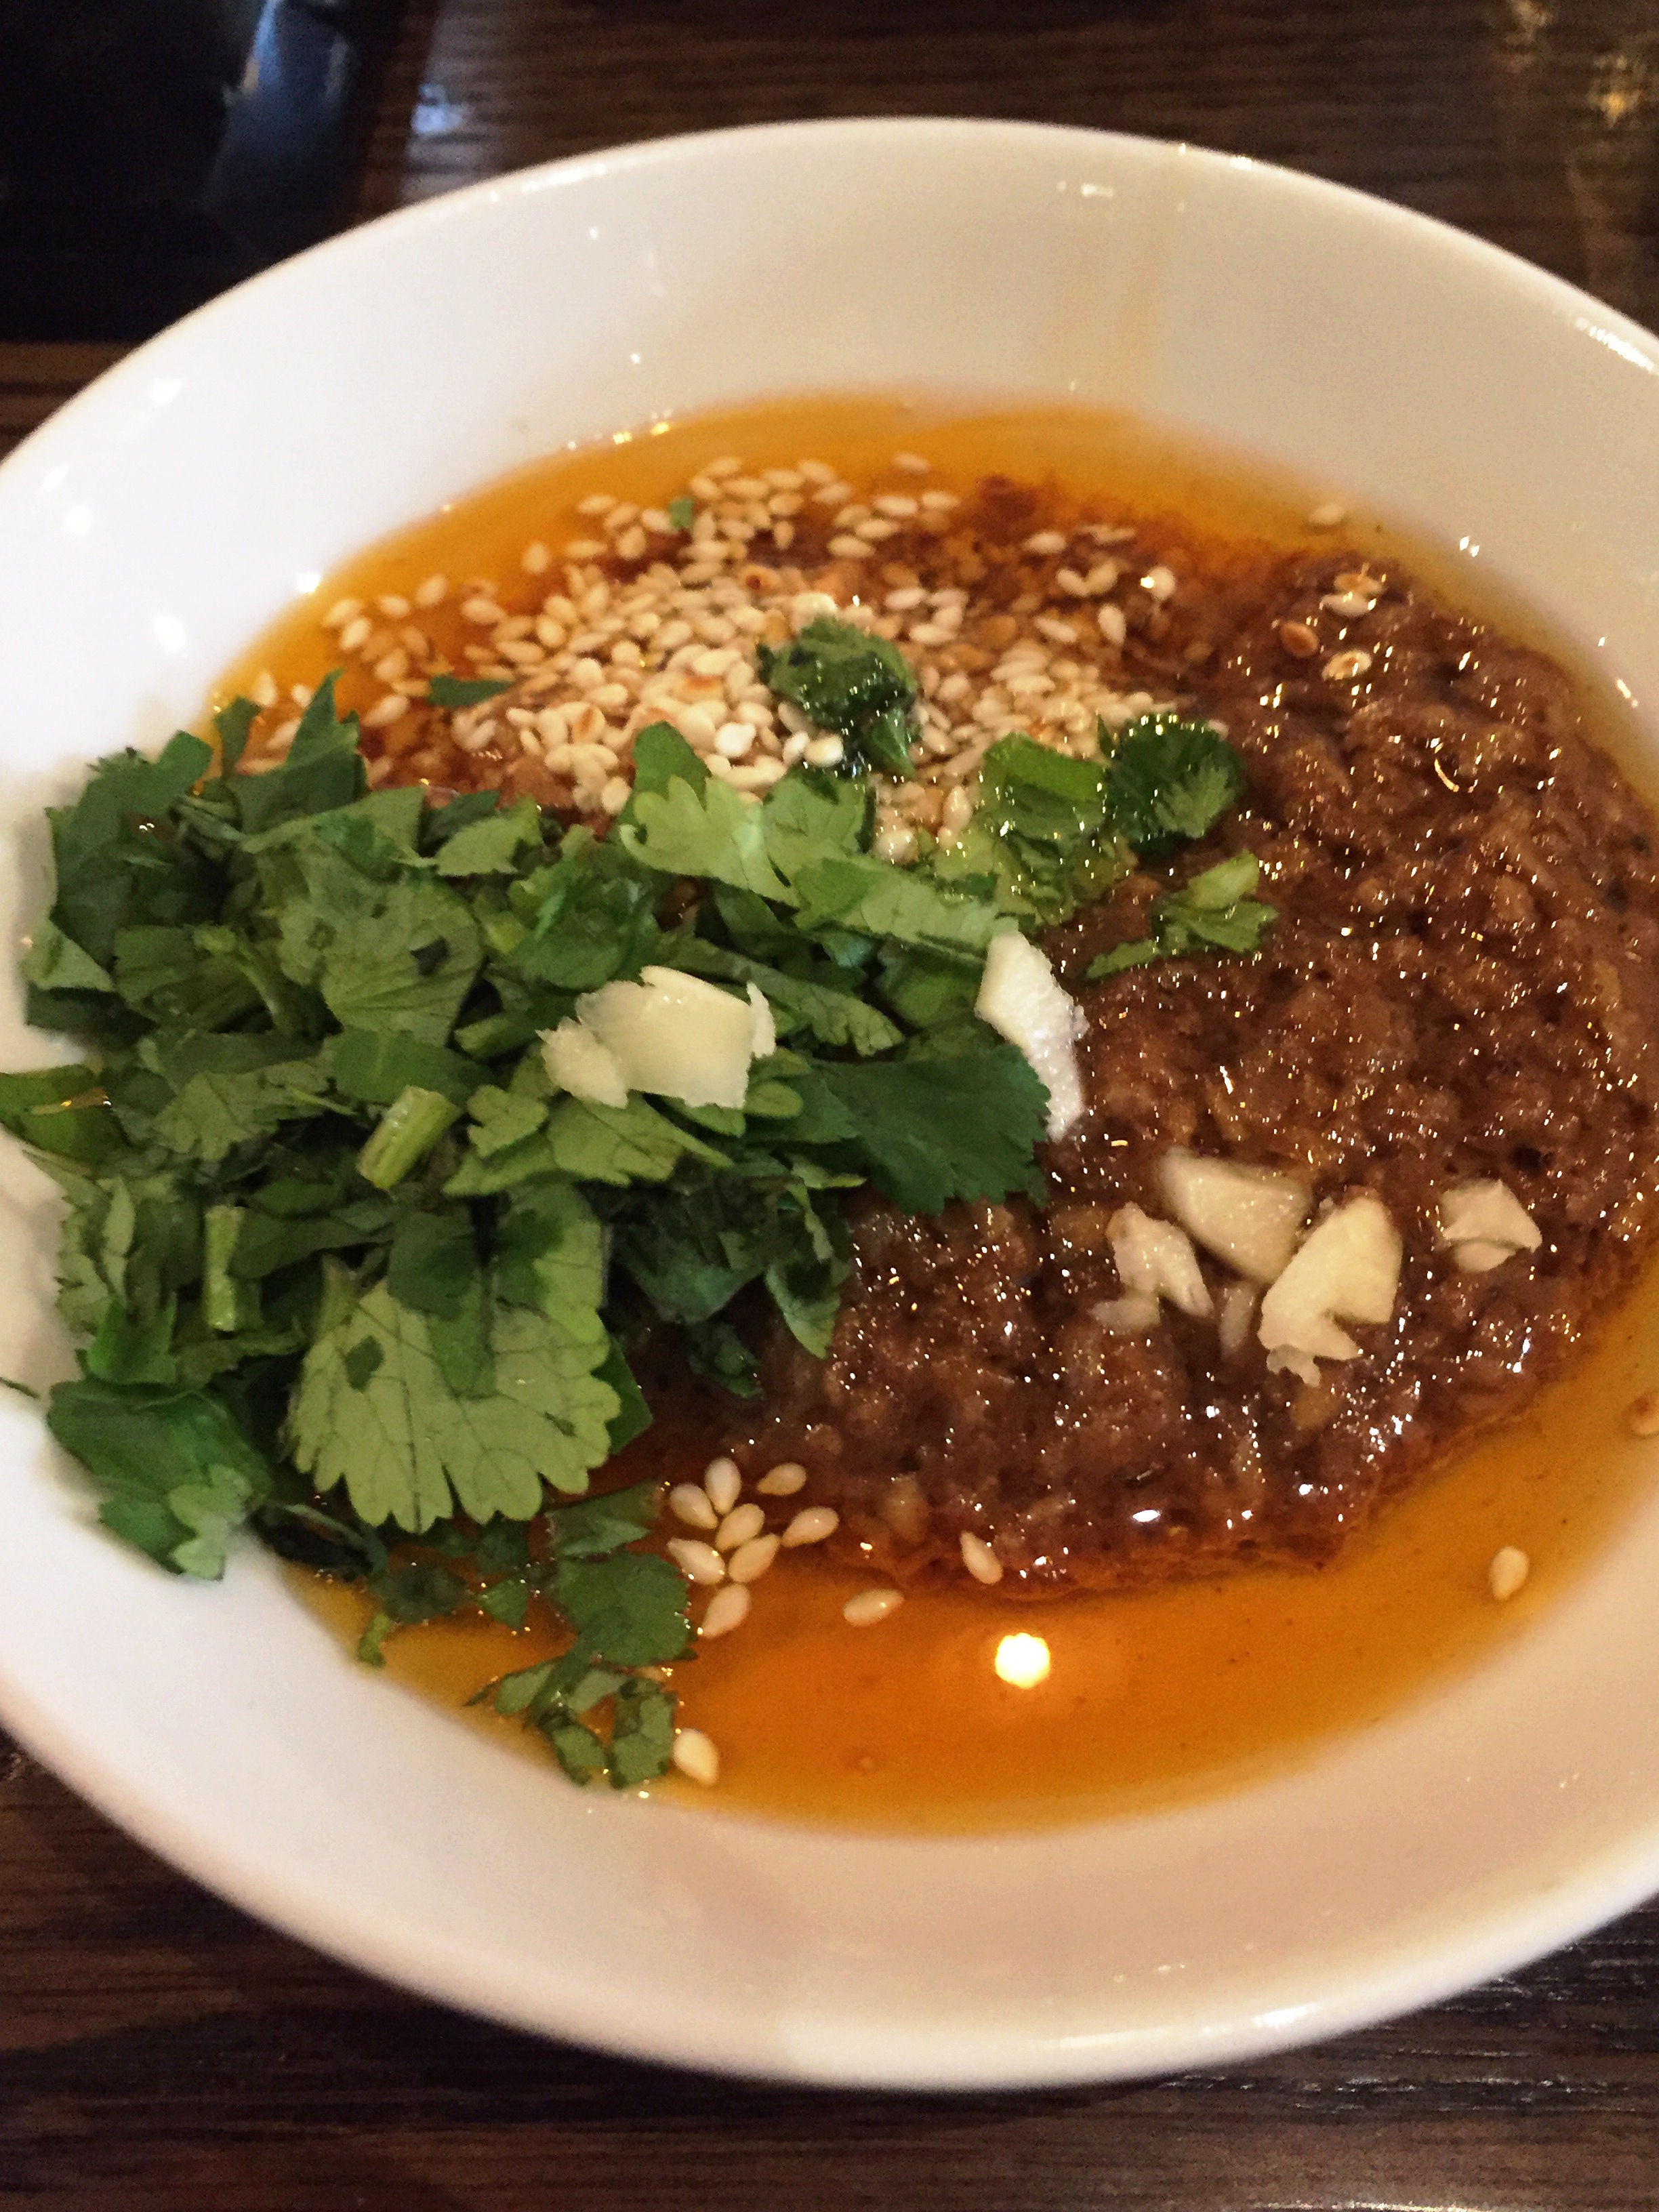
Once you have the ingredients the recipe is a piece of cake to make. Do try it and let me know. If this recipe is anything to go by I can’t wait to try making the other Cambodian recipe “Khmer croquettes” (photo below) very soon. Don’t they look temptingly moreish.

Photography credit above: Clare Winfield, published by Ryland Peters & Small

Cambodian Yellow Curry with Rice Noodles

adapted from “My Vegan Travels” by Jackie Kearney, published by Ryland, Peters & Small

Serves 4

(1/2= half)

To make the Spice Paste

2 6cm/2 inch thumbs of fresh turmeric (or 1 1/2 tsp powdered)

1/2 tsp paprika

4 garlic cloves

5cm/2 inch thumb of ginger

5cm/2 inch thumb of galangal

4-6 dried red chillies, soaked in boiling water for 10 minutes

1 small red onion

2 lemongrass stalks, ends trimmed and outer layer removed

10 kaffir lime leaves


To make the curry

2 tbs coconut/vegetable oil

900ml/4 cups vegetable stock or water, plus extra if needed

2-3 tbs vegan fish sauce or light soy sauce

1 tbs agave syrup or brown sugar

200g/7oz lotus root, peeled and cut into thick slices (or use cauliflower florets(

1/2 butternut squash, peeled and cubed

150g green or runner beans, trimmed

400ml/14 oz can of coconut milk

1-2 rock salt, to taste

100g/3 1/2oz Chinese leaf, roughly torn ( I used choi sum, but chard, beet leaves also works)

100g fried tofu cubes (I picked this up at Hoo Hing)


To serve

1 packet of thin rice thread noodles, soaked in hot water for 20 minutes

drizzle of chilli oil/chilli (optional)

50g/1/2 cup of roasted peanuts, roughly chopped (optional)


  1. First place your rice noodles in a bowl and cover with hot water and leave whilst you get on with making the dish.
  2. New place all the spice paste ingredients in a blender/food processor and blitz until smooth. Easy hey.
  3. In a large non stick pan/wok, heat the oil and fry the curry paste.
  4. Add the stock/water, vegan fish sauce/light soy sauce and agave nectar/brown sugar and bring to the boil then add the lotus root and squash and simmer for around 8 minutes.
  5. Then add the green/runner beans and simmer for another couple of minutes before adding the coconut milk and more stock if needed; it should be a soupy consistency.
  6. Salt to taste and bring back to the boil. Make sure the butternut squash is soft. The lotus root will not be as soft!
  7. Stir in the choi sum and then remove from the heat, allowing it to wilt completely.
  8. Drain the rice noodles from the water. They should be soft and ready to eat.
  9. Place in a bowl and ladle the curry broth on top. Sprinkle with peanuts and chilli oil if necessary.

More instalments from Cambodia next week.

SaveSave

SaveSave

SaveSave

SaveSave

SaveSaveSaveSave

SaveSave

SaveSave

SaveSave

SaveSave

SaveSave

SaveSave

SaveSave

SaveSave

SaveSave

SaveSave

SaveSave

SaveSave

SaveSave

SaveSave

SaveSave


How to Make Sri Lankan/ Southern Indian Sambar

So how have you been getting on with making ‘hoppers/appam’ at home? Has anyone been brave enough to give them a whirl? I would love to hear how you got on. You do need a special pan mind you, but they are easy to source on the web – I think this is the one that I bought. Perfect christmas gift for anyone with a keen interest in cooking? If you do give them a go PLEASE can you post it up on Instagram and tag me @chilliandmint and #chilliandminthoppers. Thank you.

As promised todays post is all about the sambar. Sambar is very similar to a dal, the main difference is that it is more of a lentil based vegetable stew, whereas dals tend to be more of a lentil soup with maybe one of two vegetables incorporated within it. Sambar often has a tamarind broth as its base note, which can also be found in dal – for example toor dal – but not exclusively. It is eaten in both Southern Indian and Sri Lanka and once you have made the spice blend you can keep making it in a relatively short space of time. I hosted a Sri Lankan lunch recently where I basically fed my pals a typical Sri Lankan breakfast…but I gave it to them for lunch (they weren’t to know). Egg hoppers, sambar, pol sambol (similar to a dry coconut chutney) and an onion relish. I think it was a hit.

When you make sambar you can use any vegetable that needs using up. Unless you live near an Asian grocers you are unlikely to come across ‘drumstick’ which is fairly typical to see in a sambar. Don’t worry, just pop in marrow, courgette, pumpkin, squash, green beans – anything that needs using up will work a treat.

Sambar Powder

50g chana dal (split husked Bengal gram)

50g urid dal (split husked black gram)

30g coriander seeds

2 tbsp cumin seeds

1 tsp fenugreek seeds

1 tsp black peppercorns

10 dry red chillies

12 fresh curry leaves

1/2 tsp turmeric powder

1/2 tsp asafoetida/hing powder

1 tbsp desiccated coconut (or fresh of course!)

  1. Heat a dry frying pan over a low heat and dry roast both dals until they turn bronze slightly – a couple of minutes max. Place in a bowl to one side.
  2. Using the same pan add the coriander, cumin, fenugreek, black peppercorns and dried chillies and move them around the pan for 30 seconds. A wonderful aroma will be released.
  3. Add the fresh curry leaves, asafoetida, turmeric and desiccated coconut and mix it all around the pan for another 20 seconds and then place in the bowl with the dals.
  4. Let it all cool and then whizz it up in a spice grinder. I have this one and it works a treat.
  5. Store in an airtight container and use as and when you need it.


Sambar

You can make it with a range of different lentils but I find that red lentils work really well as they take the least amount of time to cook.

200g red split lentils, washed under cold water for a couple of rinses

water to cover the lentils about an inch above (you can always add more if it dries out)

2 green chillies, sliced lengthways and seeds kept in

1/2 tsp turmeric powder

******

250ml tamarind water (use a walnut size piece of tamarind – see notes below)

2 tbsp oil (rapeseed/vegetable)

1 tsp mustard seeds

1 tsp cumin seeds

7 fresh curry leaves

2 dried chillies (split in two)

1 medium onion, finely chopped

4 garlic cloves, finely chopped

80g of pumpkin/squash, cut into 1 cm pieces

80g carrots, cut into 1 cm pieces

80g aubergine/green/runner beans, cut into 1 cm pieces

1 large drum stick, washed and part of the outer green skin removed, chopped into 1 inch pieces, optional

250ml tamarind water (use a walnut size piece of tamarind – see notes below)

1 tbsp sambar powder

salt to taste

  1. In a deep pan add the lentils, chillies and turmeric powder and cover with water. Simmer gently, removing any scum that may form, for 10-15 minutes, by which time the lentils will have completely softened. Do not drain, instead leave to one side whilst you work through the following steps.
  2. Take a generous walnut size piece of tamarind and place in a bowl and add boiling water to cover it. Leave to rest for 20-30 minutes then strain. Using the back of a spoon push through any of the tamarind pulp. Discard the stones. Place the liquid in a measuring jug and leave to one side.
  3. In a large frying pan/skillet heat the oil and then add the mustard seeds and allow them to gently pop before adding the cumin seeds, curry leaves and dried chillies. Move around the pan for 10 seconds and then add the onion and garlic. Leave to soften, stirring occasionally for around 7 minutes.
  4. Add all the vegetable pieces (they should all be around the same size, other than the drumstick) and mix in with the spices and onions.
  5. Add the sambar powder, salt and tamarind water and bring to the boil.
  6. Lower the heat and place a lid on the pan and allow the vegetables to soften completely – this will take  around 12 minutes. Check that they have softened completely before adding the lentils.
  7. Add the lentils and stir in well to the spices and vegetables. Add more salt if necessary and allow to simmer further for another 5 minutes.

It makes a wonderful ‘soup/stew’ as the days get shorter and the weather colder. If you are living in a warmer climate then sambar is equally good for you all year around.

Have a good week folks.


SaveSave

SaveSave

SaveSave

SaveSave


Butternut Squash and Coconut Soup with Ginger and Chilli – The Brother Hubbard Cookbook


Last weekend I jetted over to Ireland to visit the Ballymaloe Food and Drink Literary Festival, which was a whirlwind of eating, talks, demonstrations, foraging forays (now just try to say that quickly!), and talking to A LOT of other kindred spirits who are all passionate about food in some capacity.

One talk I booked myself into was given by Garrett and James who set up ‘The Brother Hubbard’ cafe x2 in Dublin. I’ll be honest with you – I’d never heard of it or them, but I always like to hear how people start their journey into food, so thought it would be interesting to attend. I also rather liked the title of the book. It sounded intriguing.

Their one hour talk was utterly engaging and I loved the way that they embarked on some serious world travels – after the 3 month intensive course at Ballymaloe Cookery School –  in order to gain first hand food and cusine knowledge and experience, even spending time in Syria (prior to the troubles today). After a spell in Australia working in cafes to gain yet more experience they returned home to Dublin to open up their very own cafe, with a leaning on Levantine and Southern Mediterranean cuisine. It takes a brave person to give up their nice, ‘safe’ careers with pensions and all the perks to follow their passion.

It has clearly all paid off as 5 years later they have 2 cafes, one of which is about to expand threefold and 65 staff. I did not go into their talk thinking that I would necessarily buy their cookbook as I have so many, but after hearing their story and talking to them over the weekend, I thought I would be crazy not to purchase it as it is packed full of fabulous sounding recipes, using a myriad of herbs and spices. Clearly a no-brainer for me.

I also love the fact that the photos and pages are matt finish, that they have 4 yellow ribbon bookmarks – how cool is that. Publishers seriously think about doing this in other cookbooks as it is so handy to have more than one. It doesn’t have loads of photos, but the narrative is engaging that for once I don’t mind so much that there is not a photo with almost every recipe.

It’s been so hot this week – blissfully hot – that eating outside with a glass of rose has been a must. Before you ask why on earth am I showing you a soup recipe in the sweltering heat, let me just say that hot soup and drinks actually cools you down in the heat. In India I am always having a hot soup even in the heat. Give this recipe a whirl as it is a real keeper. You can also purchase the book online and at all good bookshops.

Butternut Squash and Coconut Soup with Ginger and Chilli

Recipe from ‘The Brother Hubbard Cookbook’

Serves 4 (as a substantial lunch)

1kg butternut squash, skin kept on, scoop out the seeds and dice

2 tbsp olive oil

1 tsp coriander powder

1 tsp cumin powder

2 tbsp olive oil

250g onions (2-3), diced

250g celery, diced

6 garlic cloves, roughly chopped

1 fresh red chilli, deseeded and roughly chopped

30g fresh ginger, peeled and grated

1 kg boiling water

1x400ml tin of coconut milk

salt and freshly ground pepper, to taste

1-2 limes, juice only

fresh coriander to serve

toasted coconut flakes to serve

  1. Preheat your oven to 180 degrees. Place the diced butternut squash in a large bowl. Add the oil and then sprinkle with cumin and coriander powder. Mix in well with your hands. Turn out onto a baking tray.
  2. Roast the butternut squash for 25 minutes. You want them to be soft but not very brown as it will discolour the soup.
  3. If serving with coconut flakes, use a frying pan to bronze them for a few minutes. You need to move them around constantly and do not add any oil. Place to one side.
  4. Meanwhile in a large pan add the olive oil and sweat the onions, celery and garlic. To do this simply cut a piece of baking paper and place directly over the vegetables. It does not need to be neat or perfect fitting. Place the lid on the pan. Every 5 minutes, stir the vegetables and then replace the baking paper. After 10 minutes, add the chilli and ginger and continue to sweat the vegetables for a further 5 minutes. Make sure that the ginger and chilli do not brown on the bottom.
  5. Now add the squash, which is now soft and add the boiling water, coconut milk, salt and pepper. Bring to a simmer and then reduce the heat for 10 minutes.
  6. Using a hand blender blend all the ingredients until super smooth. Adjust the seasoning and add the lime juice.
  7. Before serving add the fresh coriander and toasted coconut flakes. If you fancy you could also add a slice of red chilli.