Sri Lanka’s Cultural Triangle and Sri Lankan Dal

Sri Lanka’s temperature can change dramatically depending where you are in the country. The cultural triangle is in the interior dry lands, also known as the northern plains (and traditionally known as Rajarata, or “The King’s Land”). Earthy scrub mingles with dense jungle and this is in turn is punctuated by  small mountainous boulders – such as Sigiriya (below) and Pidurangala.

We climbed the less touristy Pidurangala, which is a few feet shorter than Sigiriya and far less crowded, we probably saw no more than 15 people there and back. It offered us the same views, at a fraction of the cost apparently, and a good view of Sigiriya itself. It does not have the same ruins that Sigiriya has at the top,  although it does have it’s own temple and buddha, but if it is the view you are after then you have the same experience on either rock.  I will say however that the final part of the climb is precarious – a case of heaving yourself up onto a giant boulder – so makes it tricky for children or those not sure on their feet!

For three days we did some serious cultural touring in the heat, travelling a good distance on some days. The main sites that draw locals and tourists alike are the ancient kingdoms of Anuradhapura, Polonnaruwa, Sigiriya and to a lesser extent on Pidurangala and Daumbulla cave temple (below).

However for those keen on wildlife, Minneriya National Park is also within the cultural triangle and an absolute must. The park forms part of the elephant corridor, allowing elephants to migrate between the protected areas of Kaudulla National Park in the north and Wasgomuwa National Park in the south. Hiring a jeep we spent a few hours in the park viewing all the wildlife (over 200 elephants) as well as wild buffaloes, land monitors, a vast array of birds and even a crocodile. There were a number of other jeeps with other tourists, so it did feel a little bit like feeding time at the zoo, but that said I would recommend a few hours scoping out the place.

The largest site to see is Anuradhapura, which was founded in the 4th century BC and was one of Sri Lanka’s greatest centres of religious and political power. The ancient city is sprawling with numerous temples, massive dagobas – which are the Sinhalese name for the Buddhist stupa, a mound-like structure with relics, used by Buddhist monks to meditate (see below).

You can also see remains of ancient palaces, pools and auspicious trees.

Local pilgrims far out numbered tourists and with the heat blazing down my one piece of advice is take a pair of socks to slip on when you visit the temples and dagobas. You have to remove your shoes and the stone is scorching hot. I learned the hard way on the first day.

Outside all the temples there are flower and incense sellers selling stunning purple lotus flowers to passing pilgrims, which in turn buy them in order to offer them to buddha within the temples.

Stone elephants stand proudly guarding the boundaries to the temple complexes.

Polonnaruwa is not as sprawling as Anuradhapura and less busy, but offers the traveller as rich an experience. During the 12th century the kingdom went through a golden age where monasteries and  temples where built on a massive scale. The prosperity was not to last and by 1293 the city was abandoned and the jungle quickly consumed it. It wasn’t until the 20th century that excavation and restoration began and in 1982 it was a declared a UNESCO World Heritage Site. Our driver kindly drove us from ruin to ruin, but if you are feeling up to it you can also hire bikes, which looked a fun, albeit hot, way to move around the city.

With all this touring we parked ourselves at the Water Gardens Sigiriya (a few hours away from these ancient kingdoms) which had a rather impressive view upon arrival.

It opened at the end of last year (2016) and offers incredibly spacious rooms (I think a villa would be more apt), with plunge pools in some. Although when you have the main pool like this –

then your plunge pool becomes pretty redundant. The hotel is beautiful and has been thoughtfully created in the natural habitat. Peacocks roam around the grounds – apparently eating up the snakes (Sri Lankan has more venomous snakes than any other country), although they have a cry similar to a young child, which is a little disarming to begin with but after a while you don’t even notice it. Golf buggies are on hand to  ferry guests from their rooms to the restaurant, bar or pool.

The restaurant had both Western and Sri Lankan fare, although I personally wish they had had more of the latter and less of the former. Eating Western lamb shanks in Sri Lanka just isn’t my thang! The Sri Lankan food was very good, but after three days I was craving more variety.   We were on half board and the menu for supper included starters, soups, then the main event – the Sri Lankan food, followed by dessert. The starters and soup were more Western in flavour and to be honest I would have preferred more continuity of Sri Lankan food throughout…….but maybe that’s just me.

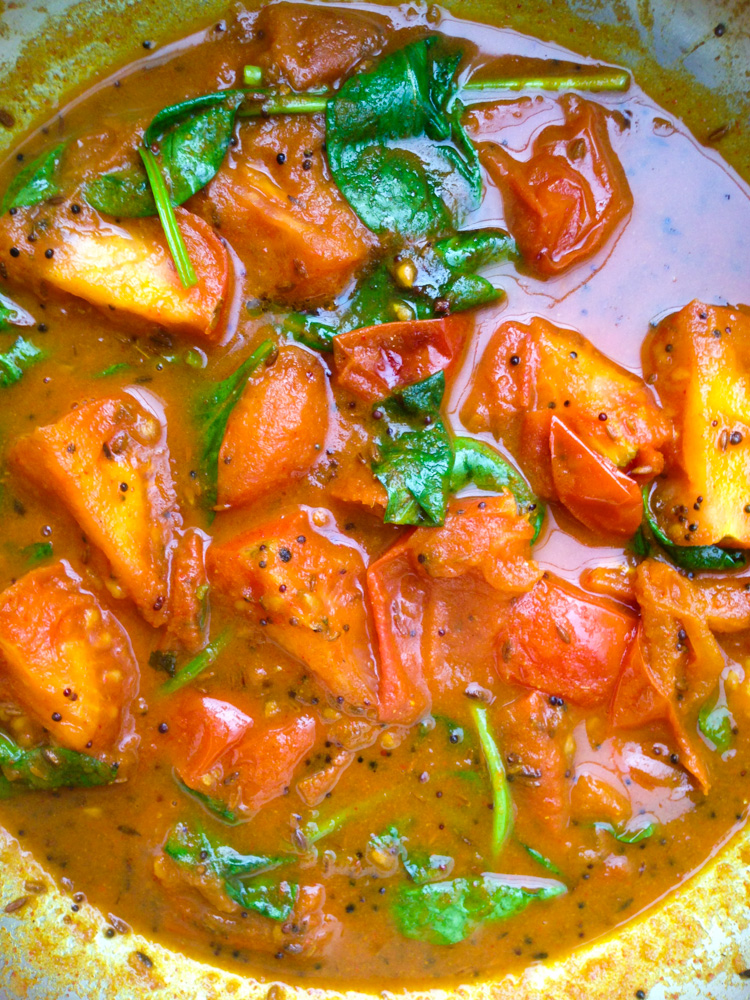
This week I wanted to show you how to cook a delicious dal I was fed on numerous occasions in Sri Lanka. It is very different from my Bengali dal but equally as moreish.

Sri Lankan Dal

Serves 4-6 if served with other dishes

300g red split lentil dal

1 red onion, roughly chopped

3 garlic cloves, roughly chopped

2 pandan leaves *

10 fresh curry leaves **

1/2 large tomato, diced

1 tsp salt

1/2 tsp ground turmeric

1 heaped tsp Sri Lankan curry powder ***

1/2 tsp freshly ground black pepper

1/2 tsp chilli powder

1 fresh green chilli, sliced in two

400ml coconut milk

400ml water

1. Wash the red split lentils and then place all the ingredients on top along with the coconut milk and water.

2. Simmer gently for 15 -20 minutes. Check to taste the salt levels are correct and add a little more water as required.

In Sri Lanka two varieties of coconut milk were added and no water. First they added the less thick variety and then only at the end, on a low simmer, did they add the thicker coconut milk. 

*pandan leaves – you can pick these up from your local Asian or Sri Lankan grocers or equally you can order online here.

*** fresh curry leaves you can pick up easily at Asian grocers or online.

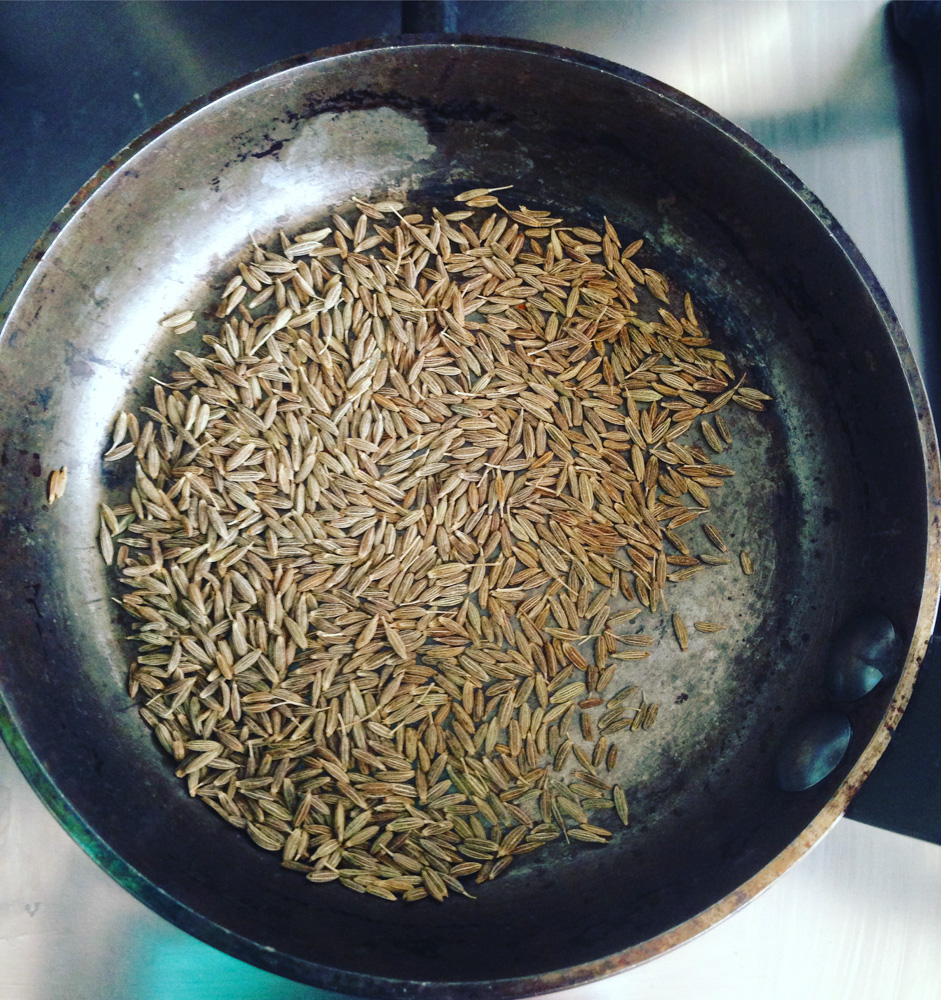
***There are two types of curry powder in Sri Lanka – roasted which is redder in colour and unroasted, which is browner in colour. You need to use the unroasted in this dal. I bought back both varieties from my trip but if you want to make your own simply unroasted then blend 2 tbsp coriander seeds with 1 tsp of cumin seeds and 1 tsp of fennel seeds. Very easy.

If you want to make the roasted curry powder: Warm a frying pan and then add 2 tbsp of coriander seeds, followed by 1/2 tsp black peppercorns, 5 cloves, 5 cardamom pods (seeds only), 6 dried chillies, 3 stalks of fresh curry leaves, 1 tbsp cumin seeds and 1/2 tbsp fennel seeds. Move around the pan continuously for 5 minutes so that they do not burn and then place in a spice grinder.

SaveSave

SaveSave

SaveSave


Gobi Aloo Kasoori Methi – Cauliflower with Potato and Dried Fenugreek Leaves

Cauliflower, in my view, is massively underrated. In the past it was perhaps thought of as a little bland, but when you boil anything I guess it could be described as bland. Growing up we had cauliflower cheese – which don’t get me wrong, is delicious – but beyond that people really didn’t tend to do much with it.  That has all changed though in the last couple of years, with dishes such as cauliflower rice, cauliflower base for pizza, roasted cauliflower, burnt cauliflower – you name it, people are getting creative with this humble ingredient. In Indian cuisine  it is hugely versatile and used in all manner of dishes.

Throw a little spice into the mix and you have yourself a very tasty little number. I thought I would show you one of my favourite cauliflower recipes that works well either on its own or as part of a larger Indian feast. Dried methi, or fenugreek as it is also known, is fairly easy to come by these days. Certainly the large supermarkets stock it, but I like to get it from one of my local Asian grocers. You can order online  – herfrom Asian Dukan. Easy.

Methi has a wonderful aroma, that works so well with the cauliflower. Only scatter the dried leaves over the cauliflower at the very end of cooking and gently fold the leaves into the dish. I cook this dish with the trinity of Indian spices: turmeric, cumin and coriander, but my mother-in-law likes to keep it super simple and literally just add, oil, dried chilli, salt and dried methi. It is also delicious this way, but try my slightly more elaborate way first.

Gobi Aloo Kasoori Methi – Cauliflower with Potato and Dried Fenugreek Leaves

serves 4-6 along with another dish or two.

2 medium potatoes, cubed into 2-2.5cm

3-4 tbsp rapeseed/vegetable oil

1 tsp cumin seeds

2 small dried red chillies

1 cauliflower, outer leaves removed and cut into small florets

1 tsp turmeric

1 tsp cumin powder

1 tsp coriander powder

1 tsp salt, to taste

sprinkling of water

2 tbsp of Kasoori Methi


  1. Peel the potatoes and then once diced place them in a pan of boiling water and boil for around 8 minutes or until softened but not mushy. Strain and place to one side.
  2. In a large wide pan (ideally with a lid), add 1 tablespoon of oil and when it is hot add the cumin seeds move around the pan for 10 seconds before adding the dried chillies.
  3. Add the boiled cubed potatoes and cover with the cumin seeds.
  4. Place the cauliflower florets into the pan and move around so that they are also beginning to coat themselves in the cumin seeds. You will need to add a little more oil at this stage to help the cauliflower cook and soften. Add the oil in stages instead of all at once.
  5. Add the turmeric, cumin and coriander powders along with the salt and fold into the cauliflower.
  6. Keep the cauliflower gently moving around the pan at intervals. Sprinkle a little water to help soften the cauliflower and place a lid on the pan.
  7. Every few minutes move the contents of the pan around.
  8. Continue to cook gently, on a low heat for a further 10-15 minutes so that the cauliflower has softened.
  9. Finally add the fenugreek leaves – kasoori methi and gently fold into the cauliflower. Take off the heat and serve.

An alternative and even simpler way to cook this dish is to replace cumin seeds with methi (fenugreek) seeds, do not add any spice and then the kasoori methi. Obviously the dish is not as yellow in colour but still tastes really delicious. You can also omit the potatoes if you wish. 


Hot Spiced Tomatoes with Spinach

img_4614

Cooking at the end of the day when you are tired and exhausted can be a bit of a chore. I always have loads of tomatoes in my fridge – probably my favourite ingredient of all time – so am often coming up with inventive ways to use them – Indian style tomato chutney anyone?

img_4606

This recipe uses them as the star ingredient and as I always like to eat greens, a handful of fresh spinach  complements the dish perfectly. If you have some fresh fish, place it in the oven for 10 minutes (you may need a little longer if you have a large fish/portion) then you can quickly whip this tomato side dish to accompany the fish. Easy and no fuss.

img_4611

It’s also great to use alongside more on an Indian feast if you are feeding a crowd. It adds zing and heat in equal measure.

Hot Spiced Tomatoes with Spinach

Serves 4 (accompanied with another dish or two)

2 tbsp rapeseed/vegetable oil

1 tsp brown mustard seeds

1 tsp cumin seeds

450g large tomatoes (works out to be about 6), quartered

1/2 tsp turmeric

1 tsp coriander powder

1 tsp Kashmiri chilli powder (less if you like it less hot)

1 tbsp jaggery (or sugar if you don’t have jaggery see note below)

1 tsp salt

100ml water

1 handful of fresh spinach

  1. Gently heat the oil and when it is hot place the cumin and mustard seeds into the pan. They will sizzle immediately. Keep the heat low. After 10 seconds add the quartered tomatoes and move around the pan so that the spices cover them.
  2. Add the spices, salt and jaggery and then after 20 seconds add the water. Keep on a low heat and simmer for a couple of minutes.
  3. Add the fresh spinach and take off the heat. The spinach will wilt from the heat of the tomatoes. Do not overcook the tomatoes as you want them to have soften but still to have held their shape as much as possible.

Serve with freshly cooked fish or chicken or as part of a large Indian feast.

Jaggery – also known as palm sugar – check out the health benefits of using jaggery instead of sugar here.


Tuscan White Bean Soup

img_3651

Many years ago we arrived in Tuscany at the dead of night to our rented farmhouse, which was nestled on its own down a very long track. We were tired and hungry and when we stumbled in we found a note scribbled on a piece of paper alluding to some supper on the stove. Wandering over to the hob we found a white bean soup waiting for us. It was hearty and warming with garlic and tomato undertones. I suppose it wasn’t dissimilar to a grown-ups version of baked beans.

img_3652

It was exactly the kind of comfort food we craved after a day of travelling. I never managed to get the exact recipe but have tried to replicate it as best I could ever since. I think this version works pretty well. I tend to always opt for white beans in a glass jar – this variety works for me and I pick it up at a local middle eastern grocers near me. Sometimes I add rosemary and other times not.

img_3654

Bay leaves though are essential and add a lovely flavour to the soup. I also prefer to use fresh tomatoes, but if you are out, tinned will suffice. The trick is to put it on a low heat for 30-40 minutes if you can. You want the garlic to be completely soft and the liquid to have reduced a fair amount.

img_3653

With all the excess that December will bring I thought this soup was a good one to throw into the mix.

Tuscan White Bean Soup 

serves 4-6

2 tbsp olive oil

9 whole garlic cloves, peeled

2 bay leaves

650g fresh tomatoes, diced

2x400g jar of white beans

1 tsp tomato puree (optional)

300ml vegetable stock

salt and pepper to taste

  1. Heat the olive oil in a pan and add the garlic cloves. Move around the pan for 30 seconds before adding the bay leaves and then add the fresh tomatoes.
  2. Allow the tomatoes to soften for a few minutes before adding the white beans.
  3. Add the vegetable stock, salt and pepper and leave on a low flame with the lid on, stirring from time to time.
  4. Remove the lid half way through cooking to allow the liquid to thicken. You can add more liquid if you prefer it more soupy. I tend to like mine thickish but still of soup consistency.
  5. When the garlic’s are soft and the liquid has been absorbed a little, turn off the heat and allow to rest.

This is great eaten the following day as well when the flavours have relaxed into one another.


Baked Spiced Squash and Potato Samosa, Curry For Change Campaign and Wandsworth Radio

img_3470-2

I love it when friends bring edible gifts, especially ones they have been handmade or grown. The other day I was given this gorgeous blue looking squash that my pal had grown in her vegetable patch in the Cotswolds. We are not too sure what it is exactly but our guess is pointing us towards pumpkin invincible (we liked the name anyway). It looked beautiful, so I let it sit around in the kitchen for over a week for us all to admire. Part of me wanted to spray it silver or gold and have it sitting by the fireplace over the christmas season, but then again I knew it would be delicious as a lot of care and love had gone into growing it, it would be a shame not to eat it such a gorgeous gift.

img_3469-2

I broke into it yesterday – it definitely won top prize on ‘hardest squash to break into’. It’s flesh was bright orange with seeds slightly puffier than your regular pumpkins. I removed the skin from a quarter of it and then diced it up small. The rest I covered and placed in the fridge to use on another occasion.

A lovely idea would be to incorporate the squash into some gnocchi itself – you could use my recipe for gnocchi here or incorporate it with some store bought gnocchi here.

My plan was to use the filling for some spiced baked squash and potato samosas. I was going on to Wandsworth radio later in the day to talk to presenter, Emma Gordon aka Mrs Stylist, about the charity ‘Find Your Feet’ and their ‘Curry For Change’ campaign and hosting your own supper parties to help the charity. In addition the plan was to talk about alternative christmas snacks, so thought the samosas and my Indian tomato chutney were perfect for the occasion. You can hear the interview here if you fancy hearing me on the airwaves.

img_3459-2

For those keen to get involved in the campaign they are really having a push next week (21st November). The charity is all about helping those who live in rural communities in northern India, Nepal, Malawi and Zimbabwe to help them ‘find their feet’ – rather than simply giving handouts, through acquiring training and skills that can break the cycle of poverty by setting up their own business to allow them to feed themselves and their families. The idea is that we host supper parties. Natco and Kingfisher beer sponsor the whole campaign and will send those who sign up here a spice pack, which invariable includes lentils and other exciting goodies. Kingfisher will also send a crate of beer to  drink at the event. You ask diners to pay what they would ordinarily spend on a curry take out and the money then goes to ‘Find Your Feet’. Natco then double the amount you raise.  It’s a simple idea that is a win win for all involved. You don’t need to be a food blogger to take part. Everyone young and old can give it a whirl – even my mother has expressed an interest to take part. The curry for change website also has lots of inspiring recipes to help you plan your curry evening. You may even see one of two of mine listed on their site.

img_3464-2

Back to the spiced squash samosas.

The good thing about these snacks is that they can be prepared and then frozen, pre cooking, and then when you are ready to bake them you simply place them in the oven for 20 minutes from frozen. So simple. I often like to prepare a chutney to go along with a street food snacks, such as samosas. You can see my recipe for Indian spiced tomato chutney here. It is very quick to prepare and stores in the fridge for a couple of days.

Folding the samosas is easier than you think. Place the filling in the bottom right hand corner and then fold the pastry over so that a triangle forms. Then you fold the pastry up along the line before folding over to the left hand side, continuing with the triangle theme. Just keep in mind that you need to keep folding in alternative triangles and using water or ghee to stick the sides together. There are more photos showing how it is done on my post about ‘beetroot, feta and cumin samosas’ – see here. I like to sprinkle the samosas with nigella seeds, also known as black onion seeds, equally you could sprinkle sesame seeds or even chilli flakes.

img_3468-2 img_3467-2 img_3466-2 img_3465-2


 Baked Spiced Squash and Potato 

Makes 20

700g squash/pumpkin of your choice, cut into small cubes

1 large potato (250g), cut into small cubes

2 tbsp sunflower oil

1 tsp cumin seeds

1 tsp black mustard seeds

1 tsp nigella seeds

pinch of asafoetida/hing

1 onion, finely chopped

1 birds eye green chilli, finely sliced

1 tsp ginger paste

1/2 tsp turmeric powder

1 tsp cumin powder

100g frozen peas

2 packets of Jus Filo Sheets 270g each

2 tbsp melted ghee

  1. First place the cubed squash and potatoes in a pan with boiling water and let them soften, which will take around 10 minutes. If they are still a little hard, allow them to cook for a little longer. Strain and place to one side.
  2. In a separate wide pan add the oil and then add the mustard, cumin and nigella seeds followed by the asafoetida. Allow them to move around the pan for around 20 seconds before adding the onion.
  3. Allow the onion to soften for around 8 minutes, before adding the ginger paste and fresh chilli.
  4. Add the squash and potato and cover with the spices along with the cumin and turmeric powder.
  5. Using a fork or potato masher, gently squash the squash and potatoes. You don’t necessarily want it as smooth as mash, but certainly soften from it’s cubed form.
  6. Add the frozen peas and place a lid on the pan for a few minutes, adding a little water if it is becoming too dry. Take off the heat and leave to one side.
  7. Take the filo pastry out of its packet and using one sheet cut into in two horizontally. With the remaining filo pastry cover with a damp cloth.
  8. Working quickly you want to place a spoonful of the filling in the bottom right hand corner of the pastry (see photos). Place a little the melted ghee along the left hand edge of the pastry. Bring the bottom right hand corner of the pastry up to the right hand side at a diagonal to form a triangle (see photos above). Fold over from side to side until you reach the top. Stick the ends with melted ghee and either place on a plate to go into the freezer or one some greaseproof paper on a baking tray. Sprinkle with nigella or sesame seeds.
  9. Work your way through all the filling until it has all been used up. Freeze any left over filo pastry.
  10. If you are cooking immediately heat the oven to 180 degrees. Once the oven is hot place the samosas into the oven for 20 minutes – or until they are nicely bronzed.
  11. Eat when they are nice and hot with either a spiced tomato chutney or perhaps some tamarind and date chutney

If you host a curry for change dinner I would LOVE to hear about it. Take a photo and tag #chilliandmint and #curryforchange on twitter/instagram.


Methi (Fenugreek) Paratha for Durga Puja

img_3013

This coming weekend is the beginning of the Bengali Hindu festival of Durga Puja, which lasts for five days. I have written a few posts on the celebration here and here over the last couple of years. In short, the weekend is spent visiting temples in all corners of London, catching up with family and friends and eating vegetarian feasts at the temples. I am not Hindu but I enjoy being part of the occasion, which is always very lively and colourful, and of course the food is always so good.

img_3005

I was pottering around in my local Asian supermarkets this morning when I came across some methi – fresh fenugreek. Fenugreek is jam packed with health benefits. We all need it in our diet – either the seeds or fresh leaves or both. It lowers blood cholesterol, reduces the risk of heart disease, controls blood sugar levels – therefore diabetics are advised to eat it daily. It aids digestion, weight loss, prevents colon cancer – the list goes on. Seriously if you have not had it before please try it and then try and incorporate it into your diet. One way you can do this is by making fenugreek/methi paratha. The hard part will be locating the fresh methi.

img_3006

If you live in London then you will have no problem as you will find it at any Indian/Asian supermarket. Apparently it is really easy to grow so maybe it is something to look into growing if you are living outside a major city. I would love to hear how you get on if you go down this path.

img_3007

Anyway back to the making of the paratha. It is important to carefully take the leaves of the fenugreek plant away from the stem, as the stem is very bitter and you don’t want to be eating that. I leave the leaves to soak in a bowl for 15 minutes so that the grit and dirt sinks to the bottom. Then you can easily remove the leaves and place them in a new dry bowl along with the spices and flour.

img_3008

If you don’t have a tawa then simply use a frying pan. Once the leaves have soaked and you have made the dough it takes very little time to make the paratha.

img_3009

They are great eaten with dal such as this one or this one or simply with chutney and perhaps a little yoghurt and lemon. In India they are sometimes eaten at breakfast, but I tend to eat them for lunch or dinner.

img_3010

img_3011

Methi Paratha

Makes round 5

150g wholemeal chapati flour/atta 

50g gram/chickpea flour

50g fresh methi/fenugreek (leaves only), washed and finely chopped

1 small fresh green chilli, finely chopped (optional)

1/4 tsp Kashmiri chilli powder

1/4 tsp turmeric powder

1/2 tsp salt, optional

2 tbsp melted ghee/butter/oil

  1. First remove the methi leaves and discard the rest of the methi stem. Place in a bowl of fresh cold water and leave to soak for 15 minutes.
  2. Gently remove the methi leaves so that the grit and dirt is at the bottom of the water bowl. Discard this water. Place in a clean dry bowl.
  3. Measure out the flours, chilli powder, turmeric powder, salt and fresh chilli (if using).
  4. Use your hand to begin to bind the ingredients together. Gradually add a little warm water so that a dough forms.  Be careful not to make it too wet.
  5. Place a drop of oil in the bottom of the bowl and cover the dough, which you have now made into a ball shape. Cover the bowl and leave for 10 minutes.
  6. Knead the dough for a minute further and then break off a small part – about the size of a lime.
  7. Place the dough in some fresh flour and then roll it out on a dry, clean surface. If you want to make triangular paratha roll the dough into a circle and then fold it in half and then half again. I kept mine round today.
  8. Heat a tawa/frying pan and place a drop of ghee onto the pan. Then place the paratha on the pan and leave for a couple of minutes.
  9. Whilst it is cooking begin making your next paratha.
  10. Before turning over the paratha on the pan, brush a little ghee on the top and then turn over. You want the paratha to begin to have little bubbles that begin to bronze. Leave to cook on this side for a further couple of minutes. If need be turn over again and then place to one side.
  11. Repeat until all the dough has been used up.

Eat warm with dal, chutney or yogurt with a splash of fresh lemon.

Notes: You can also add finely chopped onion, 1 tsp garlic paste and/or ginger paste, 1 tsp cumin seeds, 1 tsp ajwain/carom seeds, 1/2 tsp coriander powder. There are so many options so try a variation and see what works for you.img_3015


Vietnamese Tofu Banh Mi Sandwich

img_2823

I have a love affair going on when it comes to the ubiquitous Vietnamese sandwich known as banh mi. If the truth be told I love them in every form: pork, chicken, fish, beef, tofu – you name it and I pretty much love all the varieties that you can have. I love the cruchiness and sweet and sour piquant from the pickle, combined with the freshness of the coriander, the spices from the marinaded tofu/meat/fish, the chilli and the freshness from the baguette. Every bite has so much action going on for the palate – sweet, sour, umami chilli notes.

img_2848

They are not as much of a chore as you’d expect if you make them at home. I tend to buy the baguette, but if you have time on your hands, then I can totally recommend The Banh Mi Handbook by Andrea Nguyen to show you how to make the traditional baguette as well. Father Christmas kindly popped it in my stocking a few years back – such a thoughtful fella!

img_2853

I’ll talk your through it step by step, but once you’ve made the pickle – this takes no time at all – you’re pretty much all set. The pickle also lasts up to a month in the fridge so there is no need to use it all in a couple of days.  I am going to show you how to do the tofu version, but if you prefer to make it with chicken or pork then the same marinade can apply.

img_2852

I used the silken firm tofu, which you need to handle with care. Some brands are firmer than others, but ultimately if it falls apart a little it doesn’t really matter once it is in the baguette.

There are a few ingredients that you really need to get hold of before making a banh mi:

  • daikon (also known as mooli or white radish) – it looks similar to horseradish but has a lot milder flavour. I pick mine up from my local Indian grocer.
  • carrots
  • rice wine vinegar
  • a crunchy baguette
  • maggi seasoning sauce – according to Andrea Nguyen for a ‘first class banh mi, drizzle on some maggi sauce; it will boost each bite with an umami hit’ – she goes on to explain that ‘it is practically synonymous with banh mi’. I picked mine up from my local Asian supermarket but you can also order it from Ocado here
  • chillies to give the heat injection
  • fresh coriander
  • cucumber to add texture and crunch
  • mayonnaise (vegan if you want to keep the whole meal vegan)
  • sriracha sauce
  • 1 litre jar for the pickle


So to begin with you need to prepare the pickle. Trust me it is quick and easy to make.


Carrot and Daikon Pickle

500g daikon, peeled and cut into matchsticks *

2 large carrots, peeled and cut into matchsticks (as above)

1 tsp salt

2 tsp caster sugar

100g caster sugar

300ml rice wine vinegar

250ml warm water

1 litre storage jar (can be slightly bigger but no smaller)

  1. After peeling, cut the carrot and daikon up into equal size matches and place them in a bowl.
  2. Sprinkle the salt and the teaspoons of sugar over the carrots and daikon and gently massage them gently for a few minutes using your hands. This will make them become softer and more bendy.
  3. Wash and drain them thoroughly under some cold water before placing them into your jar.
  4. In a separate jug mix the rice wine vinegar, caster sugar and warm water so that the sugar dissolves and then pour into the jar with the carrots and daikon. Discard any left over brine. If you need a little extra brine to cover the carrots and daikon simply add a little more warm water.
  5. Refrigerate for up to a month.

*the exact size of the matchsticks is irrelevant, obviously not too big, but do make sure that the carrot and daikon matchsticks are of similar size if possible.  I have seen them super skinny and slightly wider like mine below. Both ways taste delicious. 

img_2855


Matchstick daikon and carrots above and with salt and sugar ready to be massaged below.

img_2854

Once your carrot and daikon pickle is resting it’s now time to make the marinade for your tofu. I slice my block of tofu gently into about about 9slices. You don’t want to cut them too thin or they will easily break.

Place them gently in a bowl and add the marinade, which consists of: tamari (or soy sauce), 1/2 lime and zest, 1 tsp of minced garlic, 1 tsp minced ginger and cracked pepper. Coat evenly and then leave to marinade for around 20 minutes. Heat some groundnut (or sunflower) oil in a pan and then let the tofu  cook gently on each side for around 3-5 minutes before turning over. It wants to be nicely bronzed.

Tofu Marinade

349g firm tofu (or similar size pack), sliced

2 tbsp tamari (or soy sauce)

1/2 lime, juice and zest

1 tsp minced garlic

1 tsp minced ginger

liberal amount of cracked pepper

1 tsp groundnut/sunflower oil

  1. Slice the tofu gently into approximately 9 pieces and then place in a bowl and cover with the marinade ingredients.
  2. Leave to marinade for 20 minutes.
  3. Heat  the pan with oil and gently space out the marinated sliced tofu. On a medium low heat, leave the tofu for around 3 minutes to see if it is nicely bronzing. If it is then carefully turn it over for a further 3 minutes. Leave a little longer if it requires more time to bronze.
  4. Remove from pan and leave to cool whilst you prepare the rest of the sandwich.

If you are using pork or chicken make sure to slice the the meat thinly and leave to cook for longer on both sides. 

img_2851

The next part is easy. You simply mix a couple of tablespoons of mayonnaise (homemade, vegan or shop bought) and add sriracha to taste. I usually find that around 1/2 tbsp works really well.


Sriracha Mayo

2 tbsp mayonnaise (homemade, vegan or regular shop bought)

1/2 tbsp sriracha, or to taste

  1. Mix the two ingredients together to form a salmon pink sauce. Taste and add more sriracha if necessary.

The next part is the assembling. First you need to slice the baguette, but not all the way through.  Take out some of the white bread part within – this allows more space for the fillings. Now follow the instructions below.

Assembling the Bahn Mi

few drops of maggi seasoning sauce

1/4 cucumber, thinly sliced

handful of fresh coriander

2 red chillies, chopped – optional

  1. Spread out the sriracha mayo evenly along the baguette followed by a few drops of maggi seasoning sauce.
  2. Next add the cucumber, tofu followed by some of the pickled carrot and daikon. You can also add some thinly spiced fresh red chillies for extra heat if necessary or omit this part and just add the fresh coriander.

It sounds terribly long winded but I assure you that it really doesn’t take that long at all. The pickle will last for ages and is pretty quick to make in the first place. The marinading is straightforward and the sriracha mayo takes seconds. So give it a whirl. Trust me you’ll become as addicted as me about banh mi.


Toasted Cauliflower with Freshly Ground Cumin, Lemony Tomato and Fresh Coriander

img_2785

Cauliflower has gained a bit of a renaissance in the last few years. Personally I love it and feel that it is a hugely versatile, tasty and nutritious vegetable to include in your diet. A few years ago I posted recipes for sweet piccalilli and cauliflower curry which are both delicious and straightforward to prepare.

Recently when I was in LA I was admiring a ‘salad’ and got chatting to the chef on how he prepared it. I noted it down in my head and have since prepared back to the UK.  It’s a hit folks, seriously it tastes SO good and takes no time to whip together.

img_2780

It is perfect eaten on it’s own or with another salad or perhaps with lamb, chicken or even fish. It’s a great little recipe to have in your arsenal. Give it a go and let me know what you think. I think you’ll find it will be a keeper.

img_2781

 Toasted Cauliflower with Freshly Ground Cumin, Lemony Tomato and Fresh Coriander

Serve 2-4 (depending on the size of your cauliflower)

1 cauliflower, greens removed and cut into florets

1 tsp of cumin seeds, toasted and then ground

10 baby plum tomatoes

1/4 lemon, juice only

1/2 tsp salt

handful of roughly chopped fresh coriander

  1. Heat a pan and when it is hot add the cauliflower florets and move them around the pan at intervals  for five minutes so that the cauliflower begins to char. Turn off the heat but leave in the pan.
  2. In a separate pan dry roast the cumin seeds for around 30 seconds so that the aroma of the cumin is released.
  3. Place them into a spice grinder to create cumin powder. Pour the cumin powder over the cauliflower and move around the pan so that the powder coats the cauliflower.
  4. In the pan you used to dry roast the cumin seeds, add the tomatoes and keep on a medium heat so that the tomatoes heat up and begin to char. Then remove from the heat and allow to cool enough so that you can hold them and peel off the skin. Place them in a bowl with the lemon juice and crush them slightly.
  5. Add the lemony tomatoes to the cauliflower and move gently move around the pan so that they are evenly distributed.
  6. Add the salt and the fresh coriander and serve either immediately or at room temperature, both work equally well.

img_2783


Chermoula – North African Marinade

IMG_1855

Stuck for marinade or rub ideas? Or perhaps you simply want a tasty relish to go with some grilled or BBQ meat or fish. Chermoula is the answer, seriously it is sooooooo good you are going to be doing a happy dance once you’ve prepared and tasted it. Trust me.

IMG_1854

This tasty Moroccan herb spiced marinade can be prepared within minutes and adds so much flavour and exotic notes to a dish that I can guarantee you’ll be wanting to prepare it time and time again.

IMG_1856

Chermoula is used in cooking throughout North Africa, particularly in Morocco, Tunisia, Libya and Algeria. It includes fresh parsley and coriander alongside spices such as cumin seeds, sweet paprika, cayenne pepper, black pepper, salt, saffron. These are then mixed with garlic, lemon juice, fresh red chilli and extra virgin olive oil. It really is that simple. It’s also one of those marinades that you can marinade meat or fish an hour before you cook, or serve it in a bowl for people to serve themselves. Versatile and flexible, what’s not to love?

IMG_1857

You can make it super smooth, but personally I like to have it so that you can still see bits of garlic, parsley, coriander and chilli.

IMG_1858

North African Chermoula

Serves 4-6 (double up if you are catering for larger numbers)

1 tsp cumin seeds

3 garlic gloves, roughly chopped

1 tsp sweet paprika

1/4 tsp cayenne pepper

pinch of saffron (optional)

12g fresh coriander, finely chopped

12g fresh flat leaf parsley, finely chopped

1 red chilli, seeds removed and finely chopped

1/2 tsp freshly ground black pepper

salt to taste

juice from 1/2  lemon

5 tbsp extra virgin olive oil

  1. Dry roast the cumin seeds for around 20-30 seconds to release their smell and then place them in a hand blender *.
  2. To the same hand blender add the rest of the ingredients and 2 tbsp of extra virgin olive oil. Blitz briefly with the hand blender then add the rest of the olive oil. Blitz again briefly, unless you want it super smooth.
  3. Check the balance of salt and sour and add more salt or lemon if needed.
  4. Either place in a serving bowl, cover and leave in the fridge until ready to eat or add to your meat or fish for up to an hour before cooking.

I ate my chermoula with lamb chops and a salad on the side. Perfect summer out door dining.

*or mortar and pestle

IMG_1859


Crispy Savoury Donut known as Medu Vada

IMG_2627I want to introduce you to a new kid in town that will seriously impress you.

Step aside donut and cronut (croissant and donut pastry) and make way for the Indian savoury donut known as ‘medu vada’. These savoury delicacies look very similar to their saccharin cousins the donut, but are filled with lots of wonderful spices instead of sugar.

IMG_2620

They are really fun to make and you can add your own twists to make them your own. They are a little bit naughty in that they are fried, but hey a little bit of fried deliciousness now and again is absolutely fine in books. They are made of urad dal – the white dal you can easily find in any Asian grocers-  that is soaked for at least 3 hours and then blended to form a soft fluffy paste.

IMG_2635

My daughters find them equally irresistible so they really are a treat for the whole family. They are typically eaten in southern India and Sri Lanka either at breakfast time or as a snack with a coconut chutney or possibly a dal or sambal. I could quite happily eat them for my breakfast but more often then not I make them for an afternoon snack with a cup of warming tea.

They are crispy on the outside and have a soft texture on the interior.

IMG_2619

My recipe makes around 13 little donuts, but if you want to make more just double up on the ingredients. There are no set rules here other than not making the dough too wet.

Medu Vada – Indian Savoury Donuts

Makes 13

175g white urid dal

1/2 tsp salt

1 medium white onion, finely chopped

1/4 tsp asafoetida/hing

1 tsp cumin seeds

1 tsp fresh ground black pepper

1/4 tsp baking powder

1 handful of fresh coriander, roughly chopped

 12 fresh curry leaves, chopped (optional)

1 green/red fresh chilli finely chopped (optional)

  1. Soak the white urid dal in a bowl covered with water for at least 3 hours.
  2. Strain the dal and place into a blender. Blend and if needed add literally a tsp at a time of water to loosen it slightly. Do not over water. You want it to have the same consistency as a fluffy light dough.
  3. Place the lentil dough into a large bowl and with your hand lift the dough, folding it over so that it gets air into it about 15 times.
  4. Add all the ingredients and mix well with your hands or a spoon.
  5. Heat a pan with cooking oil and when it is hot wet one of your hands and create a small ball (a little larger than a golf ball) and then place your thumb in the centre to create a hole through the dough. Then gently loosen the dough off your hand and place into the hot oil. Be careful when doing this as the movement from placing the dough into the pan and removing your hand needs to be super quick.
  6. Place a few donuts in the pan at once and leave them to bronze on one side for a couple of minutes, before turning them over with a slotted spoon for another couple of minutes.
  7. You are looking to get a yellowy bronze hue as opposed to brown, so be careful to watch them closely.
  8. Remove them from the pan and place on kitchen paper to soak up any excess oil.
  9. Continue to make the rest.
  10. If you are planning to serve them as a snack when friends come over simply place them in a preheated oven that has subsequently been turned off. They should stay warm for a good hour.

They are perfect to eat with a chutney, dal or sambal (see links in the body of my post).

Note: 

  • I often don’t add chilli so that all my family can comfortably eat them. For those who like the chilli kick, you can serve them with a hotter chutney, which keeps all parties happy.