Green Jackfruit Curry


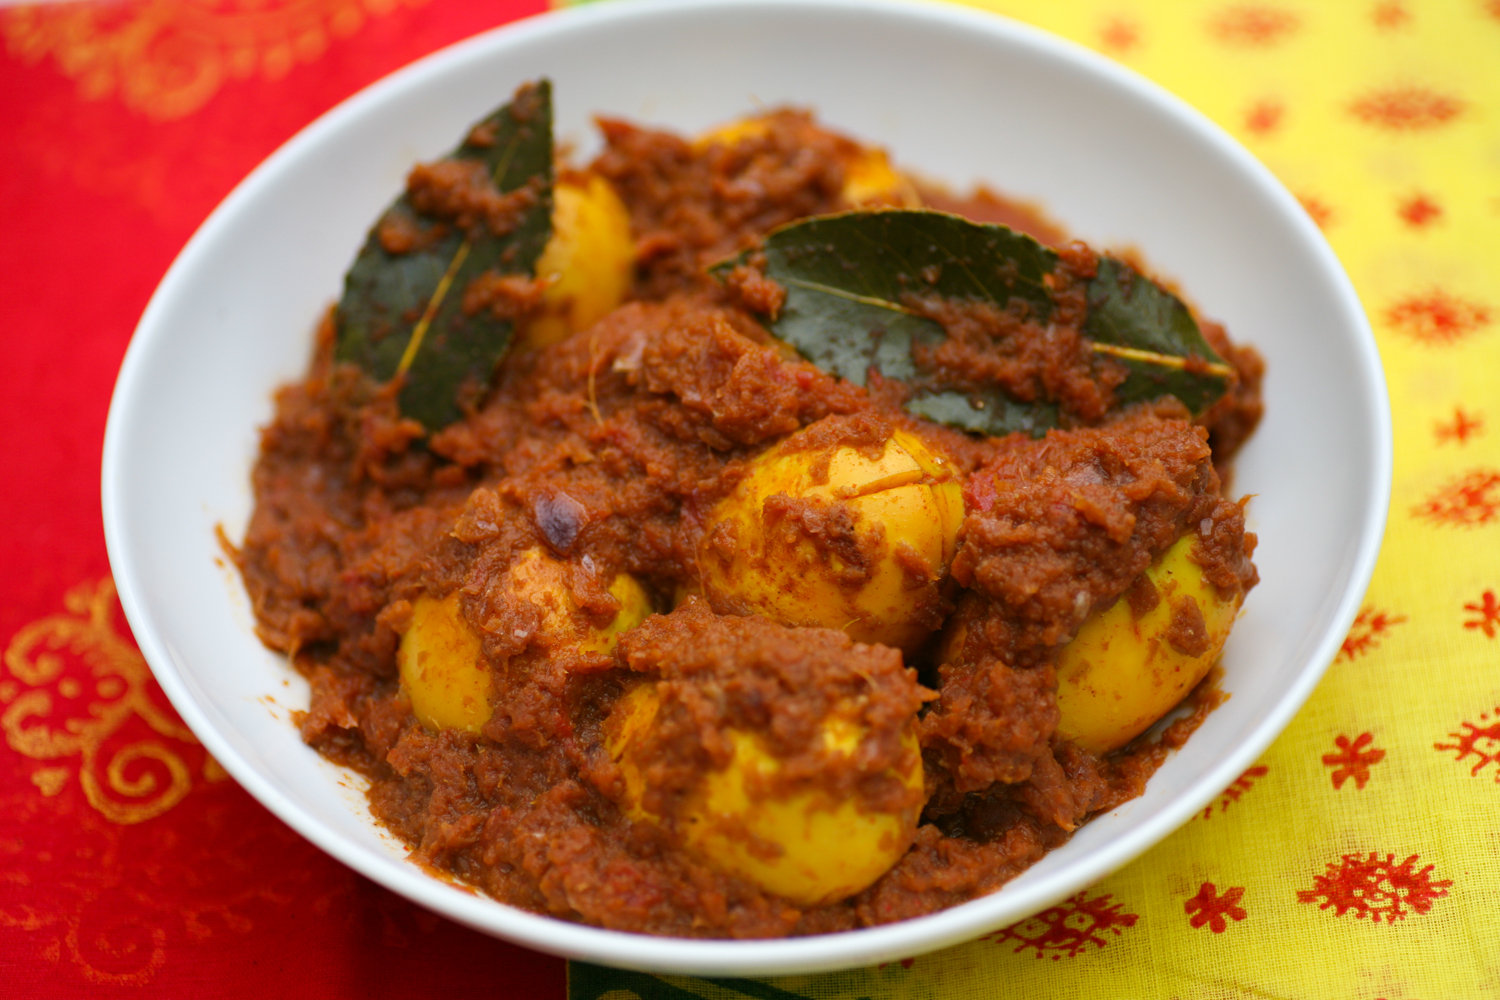
Back in December, when I was in Kolkata, I was at a family gathering and was given a curry that tasted absolutely delicious. Deep in conversation I ate the curry, pausing after a few mouthfuls to ask what ‘meat’ it was as I couldn’t quite work it out and thought perhaps it was pork. The answer was ‘green jack fruit’. Somewhat surprised but delighted that such a fruit could taste so ‘meat-like’ in structure. It was substantial, filling and utterly delicious. In the photo below it is the curry bottom right.

Fast forward a few months and I’m down in Tooting taking some clients on a spice tour before heading back to my house to teach some Indian recipes. One of my shopkeeper friends – Rohit – delighted us all by giving us a plate of his delicious jackfruit curry that he had just made – it tasted divine and prompted one of my clients to immediately buy a fresh green jackfruit to take home to replicate the curry. I love enthusiastic foodies.

I returned a few days later to continue the conversation of his curry and how he made it exactly and to buy one myself so I can share it here with you. This is Rohit’s recipe and it works a treat. They are in season now (in India and Africa) so if you see one when you are next in your local Asian grocers be brave and pick one up and try making this recipe. Please note the yellow jackfruit is sweet and not used in savoury curries – you want to buy the green jackfruit.

An important point to note:

  1. Once you cut into the jackfruit – cut into rounds and then use a serrated knife to cut away the tough outer skin – it is VERY sticky. Place a little oil on your hand that will touch the jackfruit to prevent the stickiness from covering your hand.


If you are keen to join me on a spice tour of Tooting followed by an Indian cooking class at my house- send me an email chilliandmint@gmail.com for details.


**********

Jack Fruit Curry

kindly given to me by Rohit – my friendly Asian grocer in Tooting

2 tbsp vegetable oil (you can use mustard too)

1 tsp black mustard seeds

1 tsp cumin seeds

1 dried red chilli, broken in two

5 fresh garlic, roughly chopped

2 inches of fresh ginger, skin removed and finely grated, chopped also fine

1/4 tsp asafoetida/hing

2 fresh green chillies, finely sliced

2 or 3 large white onions, finely chopped

salt, to taste

1tsp coriander powder

1 tsp turmeric powder

1 tsp cumin powder

1x 400g tin of tomatoes OR 3 or 4 large tomatoes diced

200ml water

1 small green jackfruit, cut into rounds and then skin removed and then cut into 2 inch pieces

1 tsp garam masala


  1. First cut and peel the jackfruit and then cut into 2 inch pieces and place in a pan of boiling water so that it covers the jackfruit completely. Allow to boil for 20 minutes so that the jackfruit softens. It will never be soft, like potato for example, but when you place a sharp knife into one piece it will go in easily. Drain and keep to one side.
  2. In a different pan, heat the oil and when it is hot add the black mustard seeds, cumin seeds and dried red chilli. Move around the pan for 20 seconds and then add the chopped garlic and ginger and move around the pan for a minute.
  3. Now add the asafoetida/hing and fresh green chillies. Stir.
  4. Add the chopped white onion and some salt (to speed up the cooking time for the onion)and move around the pan, mixing all the ingredients together. Allow the onions to pick up some colour – lightly bronzed. This will take 10-12 minutes.
  5. Add the coriander, cumin and turmeric powders and stir once again.
  6. Add the tomatoes and mix together before adding the cooked green jackfruit. Stir gently into the sauce and add the water. Add the garam masala and cook for a further 5-10 minutes. Checking the salt and add more if necessary.

Serve with spiced rice or Indian naan or flat breads.

Do YOU have any spectacular green jack fruit curries that you would like to share? Please do so in the comments box below.


Maharashtrian Stuffed Aubergines with Cashew, Coconut and Tamarind

img_2735

I’ve been having quite a number of requests recently for aubergine recipes. At my local Indian grocers they have the full range from the small round ones, which I used for this recipe, to the small finger looking ones, to the more regular sized ones that you find in your general supermarket.

As far as recipes go I have quite a few already on the blog so do check them out:

miso aubergines

fried indian aubergines

aubergine, pork and rice noodle salad

moussaka

red Thai tofu, aubergine and egg curry

Indian aubergine peanut and tomato curry

baba ganoush (one of my favourites)

soba noodles with tofu, aubergine and mango

img_2724

img_3222


The one that I wanted to show you today is very similar to the Indian aubergine, peanut and tomato curry, however it uses small oval shaped aubergines that are easy to find at Indian grocers. It also uses cashew nuts, desiccated coconut and tamarind and does not include onion. This recipe is a traditional Maharashtrian dish often prepared over religious festivals. As diwali – the hindu festival of light – is fast approaching this coming Sunday 30th October I thought it was apt to show you how to make it.

img_3219

Do not be put off by the length of ingredients as it really is pretty easy to make.

Maharashtrian Stuffed Aubergines with Cashew, Coconut and Tamarind

serves 6-8 if serving with a couple of other dishes (reduce the amount of aubergines if serving a smaller number)

12-14 small oval aubergines – slit (but not all the way through) crossways

2 tbsp vegetable oil

1 tsp black mustard seeds

1 tsp cumin seeds

1/2 tsp turmeric

1/2 Kashmiri chilli powder

10 fresh curry leaves

pinch of asafoetida

2 medium tomatoes, diced

1 tsp salt

150ml water

Paste

70g cashew nuts

2 tbsp white sesame seeds

3 tbsp desiccated coconut

2 tbsp coriander seeds

30g fresh coriander – leaves and stalks

1 tsp salt

1 tsp tamarind paste

1 tbsp jaggery/brown sugar


  1. First make cross incisions in all of the aubergines being careful not to cut all the way through. Place in a bowl of cold water with pinch of salt added.
  2. Next make the paste. First dry roast the cashew nuts and when they begin to brown very slightly add the sesame seeds and keep them moving around the pan for about 20 seconds before adding the coconut and stirring for a further 20 seconds. Remove from the heat and allow to cool before adding to your spice grinder along with the coriander seeds.
  3. As my spice grinder cannot take liquid I then move to my mini blender where I then add the fresh coriander, salt, tamarind paste, jaggery and a splash of water to loosen it slightly – although it is important it remains a paste as opposed to a runny liquid.
  4. You then want to stuff each of the aubergines with the paste and place to one side. If you have any paste left over this will go into the pan so also leave to one side
  5. Heat a deep pan and add the vegetable oil. When it is hot add the mustard and cumin seeds, followed by the asafoetida, curry leaves, Kashmiri chilli powder and turmeric powder. Move around the pan for 15 seconds before adding any leftover paste and the diced tomatoes. Keep on a gently heat for a couple of minutes before adding the aubergines.
  6. Add around 150ml of water – you can add more later if it becomes too thick and keep on a gentle simmer for 25 minutes with the lid on. Turn the aubergines over at intervals.
  7. Taste the sauce and add more water if too thick. Add more salt or jaggery if need be.
  8. Serve with a scattering of freshly cut coriander.

SaveSave


Bengali Egg Curry

IMG_7385

When I was staying in the heart of Kolkata, I was often woken from my deep slumber by the egg (dim) or milk (dudha) wallah shouting out in his crescendoing voice each morning. It was my regular wake up call to get out of bed and embrace the day ahead. There was something very charming about the wallah selling the fresh eggs and milk as he pushed his cart slowly down our road. Bengalis love eggs as much as I do. To this day, a picnic is not a proper picnic without a hard boiled egg. So when I was introduced to Bengali egg curry many moons ago, it was an immediate hit. Easy to execute, it makes for a most satisfying protein rich meal.

For the adventurous, this also serves as a wonderful late Sunday brunch with a kick.

IMG_7364

After boiling the eggs, remove the shell and place a cross with a sharp knife at the top of each egg and make a few other incisions on the skin and then cover them with turmeric and salt. Shake the bowl gently so that the eggs are properly covered in the turmeric.

IMG_7370

Fry the eggs in a pan so that the outer skins darken and harden. Then place to one side.

IMG_7427

Bengali Egg Curry

Serves 4

6 eggs, hard boiled

1 tsp turmeric

1 tsp salt

4 tbsp vegetable/mustard oil

2 onion, blended into a paste

4 garlic cloves, blended into a paste

2 inches of fresh ginger, blended into a paste

2 bay leaves

1 tsp cumin powder

2 tsp coriander powder

1/2 tsp sugar

1 tsp kashmiri red chilli powder

1 plum tomato from tin and a little juice (or 1 fresh tomato)

1 tsp garam masala

1.  Boil the eggs in water for 5 minutes and then strain under cold water and peel off the shells.

2. Place a small cross incision at the top of each egg as well as a few prick marks over their sides so that they do not explode during cooking. Place in a bowl and cover with turmeric and salt.

3. In a pan heat up some oil and when hot carefully lower the eggs into the pan and let them sizzle away for a few minutes so that the sides are bronzed and the skins harden. Remove from the pan and place to one side.

4. With an electric blender, blend the onion, garlic and ginger to form a paste. Add a little water so that the paste runs smooth. In the same pan that you cooked the eggs in, add a little more oil before adding the onion/garlic/ginger paste and simmer gently, moving the paste around in the pan with a spoon. When it dries up add a little boiling water and continue to heat through.

5. Add the chilli, coriander and cumin powder as well as the bay leaves and fold into the paste. Now add the chopped plum tomato and a little  tomato juice (about 2 tbsp) and leave to simmer.  Add a little more boiling water and let it simmer gently.

6. Return the eggs to the pan and fold into the paste along with the garam masala. Simmer for a few more minutes and add a little more salt if necessary.

Serve with some plain basmati rice or naan bread.

IMG_7395


Bengali Prawn Curry

IMG_4683

This Bengali prawn curry is one that was passed on to me by my mother-in-law and is, without doubt, my favourite of all prawn curries. The sweet undertones from the desiccated coconut and prawns blends superbly with the black mustard seeds and chilli powder, giving it a gently kick. I love to cook it using the king of all prawns, but it tastes equally good if you cook it using the smaller varieties as well. I do prefer to keep the tails mind you, both for appearance and because it holds the prawns together well, so if you can find prawns with shells and tails on I would always opt for those as opposed to buying the ones that have already been shelled and deveined.

IMG_4611

The prawns will be a greyish colour when you buy them. I bought frozen prawns and then let them defrost slowly over night in the fridge before peeling and deveining them in the morning. They remind me of the giant grilled prawns I would eat most evenings when I was staying on the shores of Lake Malawi for my honeymoon, many moons ago.

IMG_4620

Within seconds of being gently cooked the prawns will turn a fabulous pink and begin to curl into themselves. They only need a minute or so cooking on each side to seal them.

IMG_4629

The sealed prawns waiting to go into the curry sauce. The meatiness of them makes them a very satisfying and filling meal.

IMG_4641

Once the prawns have been added to the curry sauce let them simmer gently for a few minutes, making sure you coat the prawns sufficiently in the delicious sauce. Sprinkle ground garam masala over the prawns and give a little stir, before serving with basmati rice.

Bengali Prawn Curry

Serves 3-4

600g prawns, peeled, deveined but tails left on (I used 9 frozen super king prawns)

1 medium sized white onion, finely chopped

3 garlic cloves, finely chopped

1 inch piece of fresh ginger, skin removed and grated

vegetable oil

2/3 bay leaves

1 tsp black mustard seeds

25g (or 4/5 tbsp) desiccated coconut

1 tsp turmeric powder

1 tsp sugar

1 tsp chilli powder (less if you prefer it less hot)

1 tsp cumin powder

1 tsp coriander powder

1 tsp salt (you may wish to add one more – taste first)

2tbsp chopped tin tomatoes

200ml boiling water

1 tsp ground garam masala

1. Heat a couple of tablespoons of vegetable oil in a fairly deep frying pan or karahi. On a low heat add the prawns, in stages if your pan is on the small side, so as to seal them. They will curl up slightly and take on a vibrant pinkish hue. After a minute or so turn them over so that both sides are sealed. Then turn them on to their backs so as the top side is also cooked. Remove from the pan and place on a plate to one side, whilst you finish cooking the remaining prawns.

2. Add a little more vegetable oil if it is running dry and keeping the oil at a low heat add the black mustard seeds. They will burst open and sizzle so make sure the oil is not too hot as they will spit! Add the bay leaves and stir with the black mustard seeds.

3. Add the onion, garlic and ginger to the pan and cook gently for around 5/6 minutes until they begin to bronze in colour.

4. Add all the spices apart from the garam masala, as well as the salt and sugar.  Stir together and add the tinned chopped tomatoes.

5. Add 200ml of boiling water and add the desiccated coconut. Bring to the boil gently stirring and add the prawns. Gently cover the prawns in the sauce and simmer for a few minutes. Taste and add more salt if necessary.

6. Add the ground garam masala over the prawns, give a quick stir and serve immediately.

Serve with basmati rice.