Sri Lanka’s Tea Gardens, the Coast and Beetroot Curry

This is quite a long post so boil yourself some water and make yourself a cup of tea. Sitting comfortably……..then let’s begin.

No trip to Sri Lanka is complete without a stay in the tea gardens. The cooling climate, the rich green tea plantations and the slower pace of life is very appealing, especially after spending time in the hot dry lands of the cultural triangle. I loved the experience of staying in them when I visited Kerala so made sure they were included in our Sri Lanka itinerary. Many travellers head to Nuwara Eliya often referred by the Sri Lankan tourist industry as ‘Little England’, a nod to the British summer time retreat in the 1800, but instead we opted to stay in a few valleys away, near to a small town called Hatton. There is a train station in Hatton and if I were to revist I would take the slow steam train from Kandy to Hatton to admire the scenery and avoid the hairpin bends, which make even the most hardened traveller feel car sick. Tickets need to be bought in advance so think about this as an option even if you have a driver.

We stayed a night in Mandira Dickoya and a night in Mandira Strathdon both old colonial ‘planters’ cottages who managed the tea estates. Mandira Strathdon is best for those travelling with a family as there are adjoining rooms. On arrival you are transported to another era where the pace of life was slow and charmed.  The food at these boutique hotels is homely and authentic – check out these delicious bowls of curry that we had for supper.

Breakfast involved a freshly squeezed juice and some beautifully presented fruit – papaya with fresh lime being my favourite.

This was followed by buffalo milk curd and coconut treacle – I*N*C*R*E*D*I*B*L*E. Don’t be fooled into thinking it looks plain and tasteless. You’ll become addicted I promise you.

This was then invariable followed by the ubiquities rice hoppers with dal, chilli and pickle, sometimes with an egg in the middle. Tasty and certainly very filling.


In order to walk off breakfast, a guide showed us around the neighbourhood and the numerous tea plantations so that we could learn more about the tea, flora, fauna and general wildlife. Can I recommend that if you do this you wear long trousers and socks that pull up. My husband decided to take a stroll in shorts and ended up with the inevitable leeches, which caused his ankle to bleed for the proceeding three hours.


We met with some of the tea-pluckers, many of whom are the older women. The fear is that by the next generation there will be no one left to actually pick the leaves as the younger generation are not wanting to take on such hard labour. The tea plantations will revert to the forests that they once were before the arrival of the British, Dutch and Portuguese. To give you an idea of a ‘day-in-a-life’ of a tea plucker we learn’t that they rise before 6.30am and report to the factory where they are allocated an area to pluck tea leaves. They must pluck 18kg a day to get paid. For their labours they will receive the equivalant of £7 a day. As part of the job they will receive lodgings until their retirement.

A derelict tea factory stood alongside a hindu temple and tea pluckers cottages were painted in vibrant colours,  some with beautiful flower garlands adorning the porch area.

There was even the most beautiful Christian church that was still well maintained and cared for, with graves from British planters who called this corner of the world home; the views from the church were magnificent.

We visited Norwood tea factory and got to see the full cycle of a tea leaf, leaving with an enhanced respect for both the tea pluckers and the process involved to create the tea that is drunk the world over. Definitely worth a visit if you are in the area. 

On our return to our lodgings we chanced upon a rather fascinating festival where crowds of people had gathered. As the traffic was brought to a standstill we decided to get out on foot to take a closer look. From afar we could see young men tied to large bamboo poles that were levered up into the air and then attached to small lorries. There was a lot of colour and noise and it looked intriguing if not a little surreal. The mind boggled as to what on earth they were actually doing. On closer inspection what appeared to be a rather jolly occasion looked, to the Western spectator (there was only us), to be dreadfully painful.

We discovered that the young men were actually tied up to the poles with small cleaver hooks going through their skin. Bizarrely it was our youngest daughter who first spotted this, who inquired whether we thought it would hurt. Bewildered and fascinated in equally measure, back at our hotel I discovered that the festival was called – Thirunaal, which coincides with the full moon around the 13/14th April and practiced by Tamil Hindus. I discovered that Sri Lanka is not the only country which practices such extreme religious devotion, it is also hugely popular in Indonesia and am sure it also takes place in India as well. The belief is that ones devotion to the hindu gods will free the body from pain incurred from the hooks. Being part of this festival the young men fulfil their vows to hindu gods.

Throughout the night, drums were heard and the festival continued as the full moon shone. It was certainly interesting to stumble upon, but felt a world away from Western civilisation.

The following day we headed for the coast, using the super highway from Columbo to Galle – 100km which takes no time at all owing to the fact that it was tolled and hence no one used it other than tourists, not even the sacred cows! As much as I love the hill stations and mountains I adore being near the sea – smelling the salty air, the sound of the waves and the palm trees gently blowing in the wind. We stayed in a small boutique hotel called Apa Villa, which is owned by Hans Hoefer – the photographer, designer and founder of Insight Guides.

It overlooks the sea, but due to the reef it is impossible to swim safely here. We didn’t mind as we had a beautiful pool to do some laps.

It was whilst staying here that we spent half a day with the kitchen staff at Hans’s other residence Apa Villa Illuketia a few kilometres inland, and which you can also stay in. This was the estate that Hans originally bought before buying his property on the coast. It has plenty of old world charm and we spent a peaceful morning with the staff, before sitting down to the lunch that we had watched being prepared.

Galle is definitely worth a visit, which was 15-20 minutes up the road from Apa Villas. This Dutch built fort town is walkable, absolutely charming and filled with fascinating shops, museum and churches.

It feels very European – well Dutch to be precise – once you get within the city walls.

We loved this great retro poster shop and thought this poster was rather apt.

We couldn’t resist a London priced cocktail at the Aman Galle Hotel occupying an elegant, 17th-century Colonial-style building to watch the world go by.

The beetroot recipe below was one that I was taught during the morning at Illuketia and works as a great accompanying dish with other fish/meat/vegetable curries or a simple dal.

Sri Lankan Beetroot Curry

2 tbsp rapeseed/coconut oil

1/2 red onion, chopped

2 garlic cloves, thinly sliced

10 fresh curry leaves

1 pandan leaf, cut into 4 strips

1 small/medium tomato, roughly chopped

1/4 tsp Sri Lankan chilli powder

1/2 tsp salt

1 tsp garam masala

1/4 tsp turmeric

2 medium sized beetroot, peeled and chopped into batons

pinch of freshly ground black pepper

25ml water

200ml coconut milk

  1. Heat the oil in a pan and add onion, garlic, curry leaves, pandan leaf and tomato and allow to soften for a 5 minutes.
  2. Add the chilli powder, salt, garam masala and turmeric and stir into the other ingredients.
  3. After a further five minutes add the beetroot and, to help soften it, add the water and coconut milk. Simmer gently for around 20 minutes so that the beetroot has softened and the liquid reduced slightly.
  4. You are now ready to serve.


SaveSave

SaveSave

SaveSave

SaveSave

SaveSave


Arriving: Sri Lanka and Tuna Curry

I feel as if I have seen and eaten A LOT since I last wrote a post. For those who follow me on instagram  you’ll know that I’ve been galavanting around Sri Lanka with my family trying to experience as much as humanly possible in 12 days. Sitting on a beach for two weeks, just isn’t our thing.  We packed in a lot and as such feel as if we have been away for a lot longer. I have so much to tell that I thought I would break it down in a series of mini posts, to make it more interesting and accompany each post with a recipe that I was taught so you get a bit of travel tips and a recipe combined. Well that’s the plan – I hope you like it. First up – if you are planning or are just interested in Sri Lanka or just love history and travel then I really recommend you pick up a copy of both of these books. They are absolutely excellent and very well written.


After a long flight there is nothing better than arriving and acclimatising to your destination as quickly as possible. Horathapola Estate helped us to just that and I would return in a heartbeat.

It’s a good hours drive from the Colombo airport, in the countryside on a glorious old estate with plenty of charm and elegance. Arriving we were greeted by these two smiling gentlemen with fresh coconuts juice – the perfect drink in the midday sun.


Photo credit: Horathapolo Estate Instagram feed (check it out as it captures the estate beautifully)

The place is small and intimate – 5 bedrooms, so you are not going to find coach loads of tourists arriving here. Phew. They put us in the beautiful family lodge, which was a two bedroom cottage with two large bathrooms and four poster beds with, importantly, mosquito nets to keep the blighters at bay.

It has a beautiful pool to relax in, that you can even share with the odd passing holy cow – that was definitely a first. The wildlife wandering by and the sounds coming from the trees was enchanting – it almost has something mystical about the place.

Keen to explore the estate we were whisked off……well maybe not whisked but a slow plod, on a bullock cart around the grounds. This was the mode of transport for all Sri Lankans before the motor car, tuk tuk and train arrived. We were shown flora, fauna and wildlife – of particular interest was this:

The cashew nut. One single seed (or nut as we know it) comes from each fruit. We learnt that surrounding the seed is an acid that is an irritant to the skin – similar to the toxins found in poison ivy – and that long gloves need to be worn when opening up the seed. By properly roasting the cashew – outside as the smoke contains droplets that can seriously irritate the lungs – destroys the toxin. This laborous process, combined with the fact that only one seeds comes from a fruit, may explain why cashew nuts are so expensive. Indeed cashew nut curry in Sri Lanka is only really served at special occasions, such as weddings.

Staying at this beautiful estate was the perfect introduction to life in Sri Lanka. We immediately felt at home and eager to embrace our new surroundings. Eating a bowl of rasam (one of my absolutely favourite soups) – a deliciously fragrant and black pepper Sri Lankan soup, tasted heavenly after 10 hours on a plane.

In fact I could have eaten bowls of it, but restrained myself as supper was only a few hours away. The food at Horathapola Estate was Sri Lankan food at it’s best. When travelling I much prefer to eat food from that specific country, rather than Western food, which I can frankly eat anytime when I am home in London. I visited the kitchen and met the chefs and the food was all freshly made for the guests. I could not fault it – it wasn’t uber fancy, but to be honest I’m not really into that kind of food – and would definitely love to return in the future and stay for a little longer next time.

The first recipe I wanted to share with you today is a Sri Lankan tuna curry. I was taught the recipe by chefs I met later in my travels, and thought it was a great way to incorporate tuna into a curry. There are a couple of ingredients that you maybe unfamiliar with. The first is pandan leaves, also known as rampa. They have long green blade like leaves and add a distinct and aromatic flavour to a curry or even a dessert.  They are widely used in cooking in South Asia and I picked up mine from my local Sri Lankan grocers. You can easily find them on the internet – Amazon even sells them fresh, and Thai grocers will also stock them. You can freeze them, so a packet will last you for some time.

The other ingredient that you may not have come across is Sri Lankan roasted curry powder, which is deeply aromatic with a reddish hue. The spices are dry roasted before being blended together to create a powder. You can buy online or make your own, it really is pretty straightforward.

Sri Lankan Tuna Curry

Serves 4 (accompanied with some vegetable curries)

400g cubed tuna (bite sized)

1 tsp chilli powder

1 tsp Sri Lankan roasted curry powder

1/2 tsp freshly ground black pepper

100ml cold water

2 tbsp vegetable oil

1 lemongrass, cut in half

1 fresh green chilli sliced

1 pandan leaf, broken into 4

1/2 red onion, finely chopped

2 garlic cloves, thinly sliced

2 medium sized tomatoes, roughly chopped

6 tbsp thin coconut milk

1/2 tsp salt or to taste


  1. In a bowl add the cubed tuna, red chilli powder, black pepper and roasted curry powder and then add about 100ml of cold water. Mix together and set aside.
  2. In a pan add a little vegetable oil and when it is hot, but on a low to medium heat,  add the red onion, lemongrass, pandan leaves, garlic and allow to cook in the pan for a few minutes. Stir from time to time to stop the onions sticking to the base of the pan.
  3. Add the tomatoes and allow to soften before adding the tuna and spicy liquid that you had set aside.
  4. Add 2 tbsp of coconut milk – ideally the thinner milk, as opposed to the thicker cream. Gently turn the tuna at intervals, careful not to break it up. It is a firm fish so it should hold together well. Add a further 2 tbsp of coconut milk.
  5. Add the salt to taste and finally add a further 2 tbsp of coconut milk. Simmer gently. If you feel it is too spicy add a little more coconut milk.
  6. The tuna will be cooked within 10-15 minutes and place to one side, until ready to serve.


SaveSave


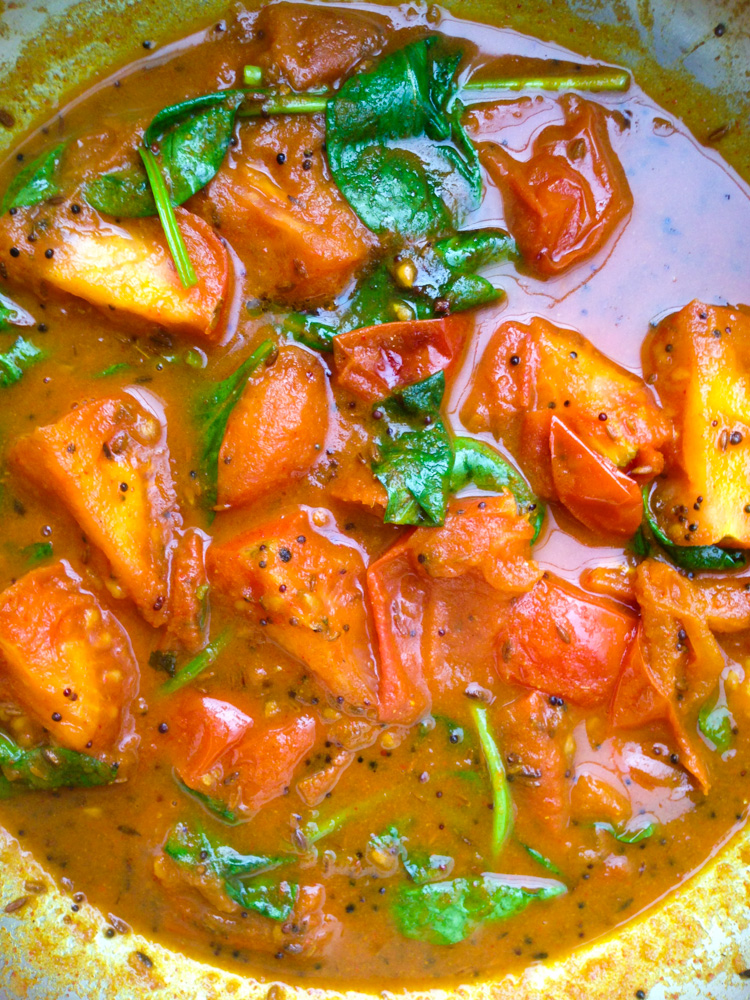
Hot Spiced Tomatoes with Spinach

img_4614

Cooking at the end of the day when you are tired and exhausted can be a bit of a chore. I always have loads of tomatoes in my fridge – probably my favourite ingredient of all time – so am often coming up with inventive ways to use them – Indian style tomato chutney anyone?
img_4606

This recipe uses them as the star ingredient and as I always like to eat greens, a handful of fresh spinach  complements the dish perfectly. If you have some fresh fish, place it in the oven for 10 minutes (you may need a little longer if you have a large fish/portion) then you can quickly whip this tomato side dish to accompany the fish. Easy and no fuss.

img_4611

It’s also great to use alongside more on an Indian feast if you are feeding a crowd. It adds zing and heat in equal measure.

Hot Spiced Tomatoes with Spinach

Serves 4 (accompanied with another dish or two)

2 tbsp rapeseed/vegetable oil

1 tsp brown mustard seeds

1 tsp cumin seeds

450g large tomatoes (works out to be about 6), quartered

1/2 tsp turmeric

1 tsp coriander powder

1 tsp Kashmiri chilli powder (less if you like it less hot)

1 tbsp jaggery (or sugar if you don’t have jaggery see note below)

1 tsp salt

100ml water

1 handful of fresh spinach

  1. Gently heat the oil and when it is hot place the cumin and mustard seeds into the pan. They will sizzle immediately. Keep the heat low. After 10 seconds add the quartered tomatoes and move around the pan so that the spices cover them.
  2. Add the spices, salt and jaggery and then after 20 seconds add the water. Keep on a low heat and simmer for a couple of minutes.
  3. Add the fresh spinach and take off the heat. The spinach will wilt from the heat of the tomatoes. Do not overcook the tomatoes as you want them to have soften but still to have held their shape as much as possible.

Serve with freshly cooked fish or chicken or as part of a large Indian feast.

Jaggery – also known as palm sugar – check out the health benefits of using jaggery instead of sugar here.


Maharashtrian Stuffed Aubergines with Cashew, Coconut and Tamarind

img_2735

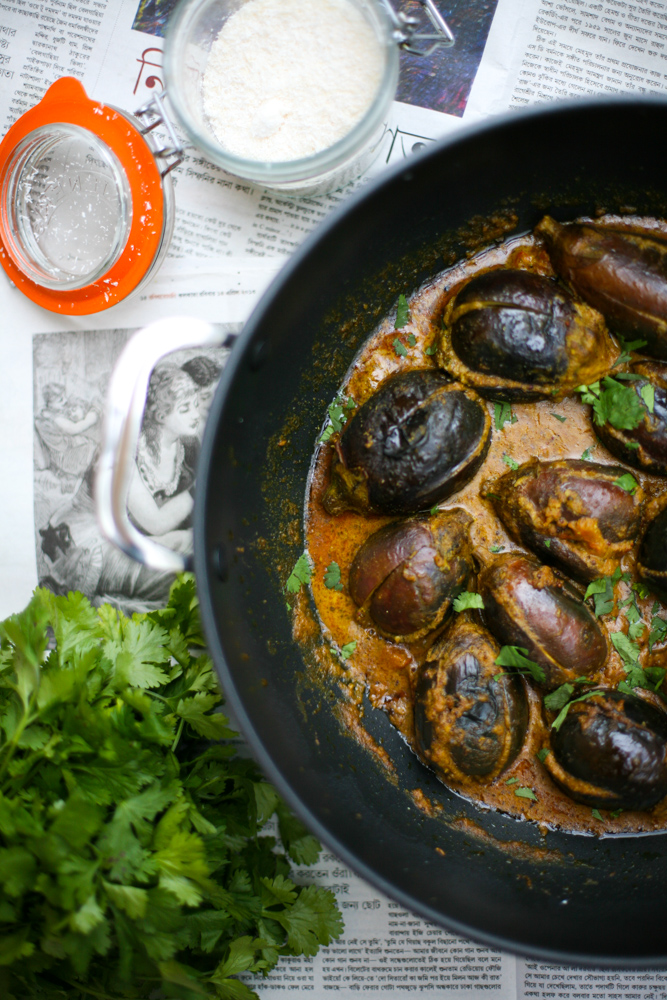
I’ve been having quite a number of requests recently for aubergine recipes. At my local Indian grocers they have the full range from the small round ones, which I used for this recipe, to the small finger looking ones, to the more regular sized ones that you find in your general supermarket.

As far as recipes go I have quite a few already on the blog so do check them out:

miso aubergines

fried indian aubergines

aubergine, pork and rice noodle salad

moussaka

red Thai tofu, aubergine and egg curry

Indian aubergine peanut and tomato curry

baba ganoush (one of my favourites)

soba noodles with tofu, aubergine and mango

img_2724

img_3222


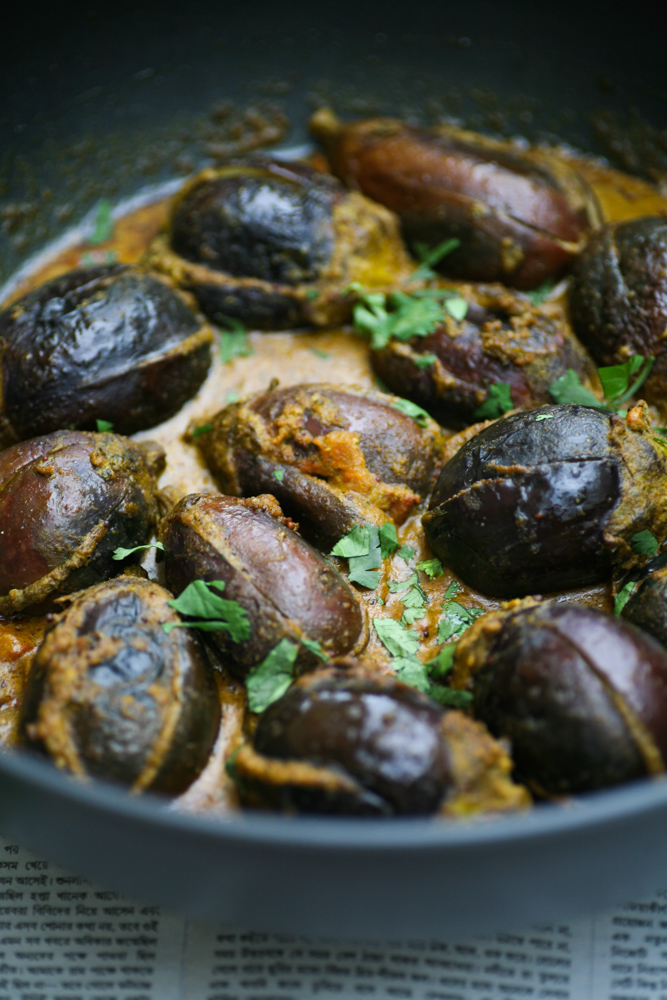
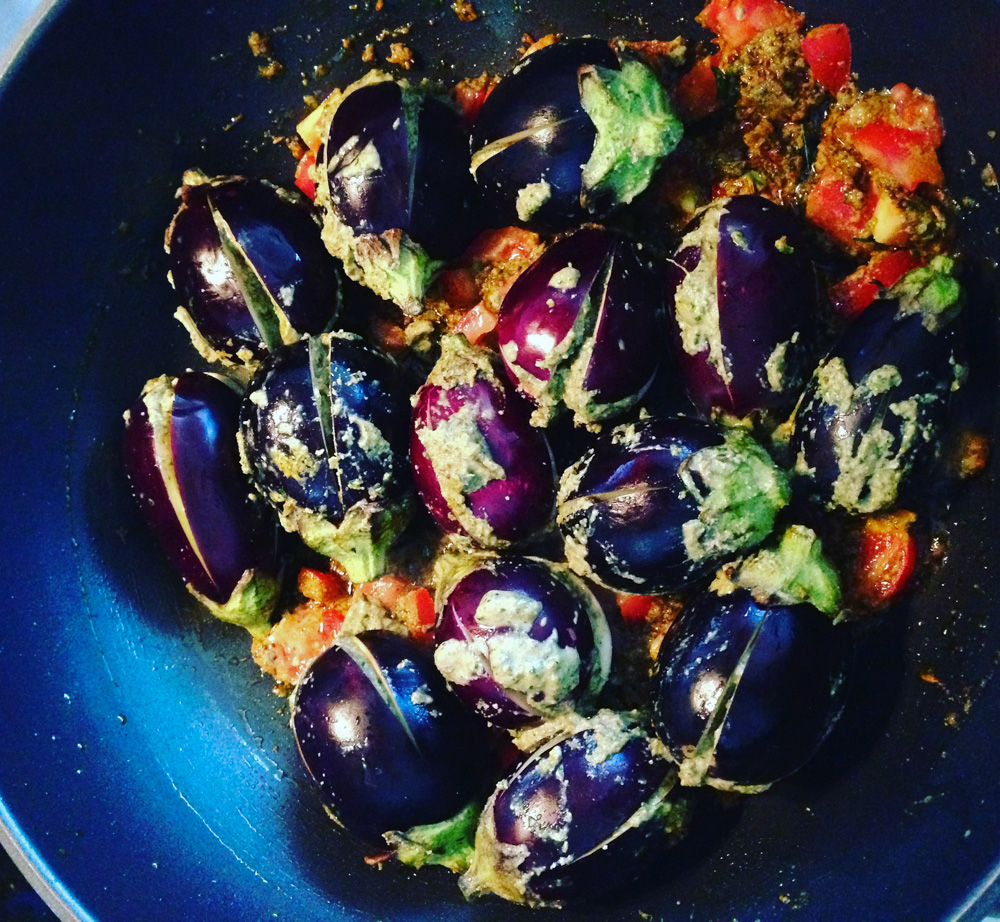
The one that I wanted to show you today is very similar to the Indian aubergine, peanut and tomato curry, however it uses small oval shaped aubergines that are easy to find at Indian grocers. It also uses cashew nuts, desiccated coconut and tamarind and does not include onion. This recipe is a traditional Maharashtrian dish often prepared over religious festivals. As diwali – the hindu festival of light – is fast approaching this coming Sunday 30th October I thought it was apt to show you how to make it.

img_3219

Do not be put off by the length of ingredients as it really is pretty easy to make.

Maharashtrian Stuffed Aubergines with Cashew, Coconut and Tamarind

serves 6-8 if serving with a couple of other dishes (reduce the amount of aubergines if serving a smaller number)

12-14 small oval aubergines – slit (but not all the way through) crossways

2 tbsp vegetable oil

1 tsp black mustard seeds

1 tsp cumin seeds

1/2 tsp turmeric

1/2 Kashmiri chilli powder

10 fresh curry leaves

pinch of asafoetida

2 medium tomatoes, diced

1 tsp salt

150ml water

Paste

70g cashew nuts

2 tbsp white sesame seeds

3 tbsp desiccated coconut

2 tbsp coriander seeds

30g fresh coriander – leaves and stalks

1 tsp salt

1 tsp tamarind paste

1 tbsp jaggery/brown sugar


  1. First make cross incisions in all of the aubergines being careful not to cut all the way through. Place in a bowl of cold water with pinch of salt added.
  2. Next make the paste. First dry roast the cashew nuts and when they begin to brown very slightly add the sesame seeds and keep them moving around the pan for about 20 seconds before adding the coconut and stirring for a further 20 seconds. Remove from the heat and allow to cool before adding to your spice grinder along with the coriander seeds.
  3. As my spice grinder cannot take liquid I then move to my mini blender where I then add the fresh coriander, salt, tamarind paste, jaggery and a splash of water to loosen it slightly – although it is important it remains a paste as opposed to a runny liquid.
  4. You then want to stuff each of the aubergines with the paste and place to one side. If you have any paste left over this will go into the pan so also leave to one side
  5. Heat a deep pan and add the vegetable oil. When it is hot add the mustard and cumin seeds, followed by the asafoetida, curry leaves, Kashmiri chilli powder and turmeric powder. Move around the pan for 15 seconds before adding any leftover paste and the diced tomatoes. Keep on a gently heat for a couple of minutes before adding the aubergines.
  6. Add around 150ml of water – you can add more later if it becomes too thick and keep on a gentle simmer for 25 minutes with the lid on. Turn the aubergines over at intervals.
  7. Taste the sauce and add more water if too thick. Add more salt or jaggery if need be.
  8. Serve with a scattering of freshly cut coriander.

SaveSave


Kolkata Style Mustard Mackerel Curry

IMG_2550

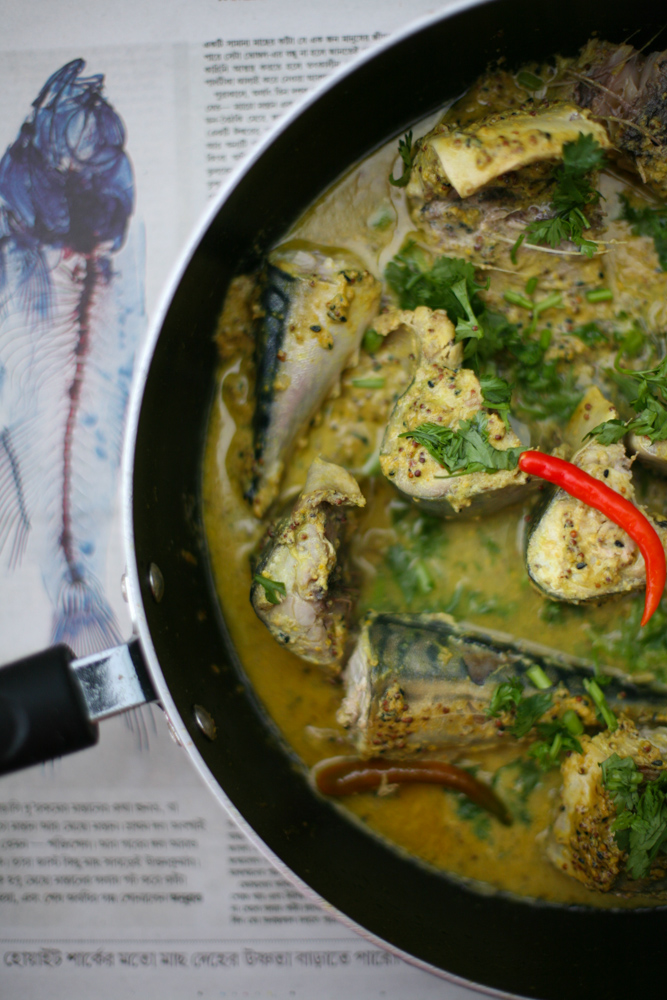
Bengalis love fish in a big way.  Mention ilish/hilsa or rui and their eyes will light up. In Kolkata the use of mustard seeds, mustard oil and mustard paste is used in a lot of their cooking. For this dish I have used mackerel as it is easy to source in the UK, is super tasty and is packed full of omega 3 fatty acids – the type of fats that are good for our health. For those who have been following my blog for quite a few years will recognise this recipe as I realise I posted a very similar one with bream back in 2013. You can see it here.

IMG_2539

This dish is something that can be rustled up in no time at all – from start to finish is max 15 minutes and unlike many mackerel curries, the fish is not fried. My mother-in-law cooks it fairly frequently so it has naturally become one of my staple dishes too.

IMG_2557

There is no need for onion or garlic in this dish, the ingredients are very simple: turmeric, nigella seeds, fresh chillies, chilli powder, wholegrain and English mustard and fresh coriander/cilantro. Give it a whirl and let me know what you think.

IMG_2547

Kolkata Style Mustard Mackerel Curry

Serves 4

3 mackerel, cut into 4 pieces (you can keep the head if you wish, which would make 5 pieces)

4 tbsp oil

1 tsp nigella seeds

1/4 tsp turmeric powder

4 fresh chillies, slit at the top to release some seeds

3 heaped tsp of wholegrain mustard

2-3 heaped tsp English or Dijon mustard

pinch of chilli powder – optional

75ml water

1/4 tsp salt

  1. Heat the oil and when it is hot add the nigella seeds, turmeric, chilli powder followed by both mustard pastes and the fresh chilli. Move around the pan for up to a minute.
  2. Add approximately 25ml of water, salt and then add the fish. Be careful not to move them around too much as you do not want them to break and fall apart. Place a lid on the pan.
  3. After a few minutes cooking add a further 50ml water and gently turn the fish over and replace the lid on the pan.
  4. Cook for 12 minutes and then take off the heat.
  5. Before serving sprinkle fresh coriander leaves. If cooking ahead of time gently reheat the fish adding a little more water and then add the coriander leaves.

Serve with rice or Indian breads.

As a side note: this dish is fabulous to eat as leftovers the next day. I like to add a little more water, a heap of fresh spinach and a couple of tomatoes quartered. It tastes delicious.


Bengali Vegetable Curry with Lentil Kisses

IMG_2531

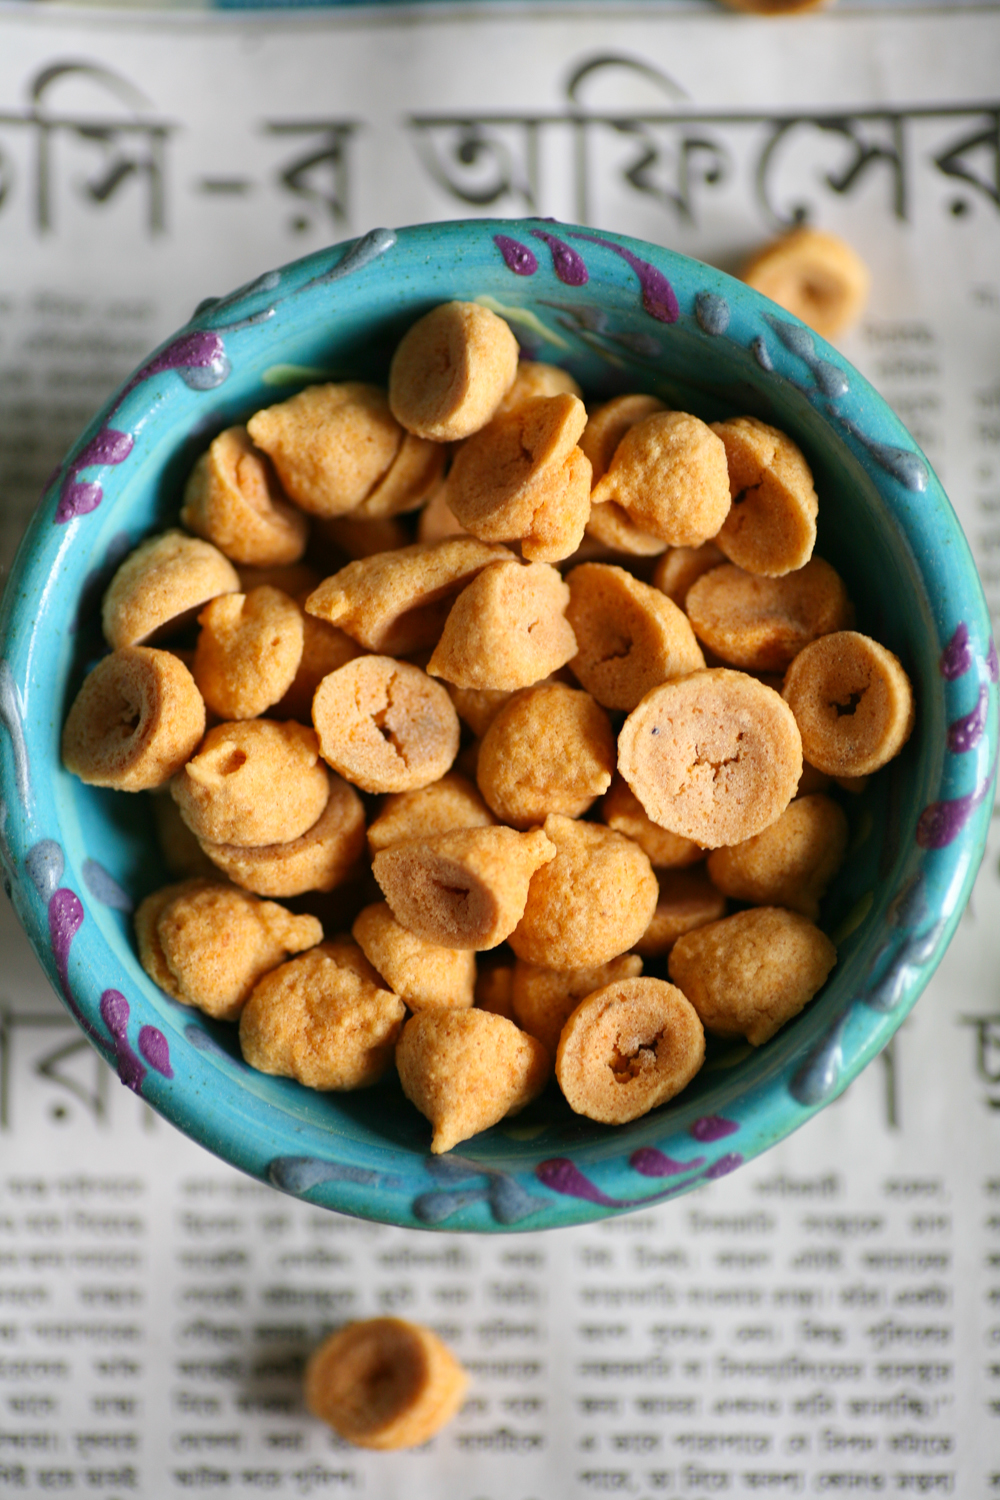
Lentil kisses, known as bori, are little sun dried lentil nuggets that have often been handmade and left to dry in the hot, warming Indian sun. My mother-in-law often brings me back a jar upon visiting her beloved  home city of Kolkata. They remind me of a lentil version of Hershey’s chocolate kisses – the type that visitors from the US often used to bring me and my siblings when we were young. Making bori yourself is not too tricky – there is a lovely recipe here if you are keen – if you live in a country where you can rely on warm, glowing hot sun, but as the weather in the UK is at best erratic when it comes to sunshine, it would probably be rather tricky.

IMG_2509


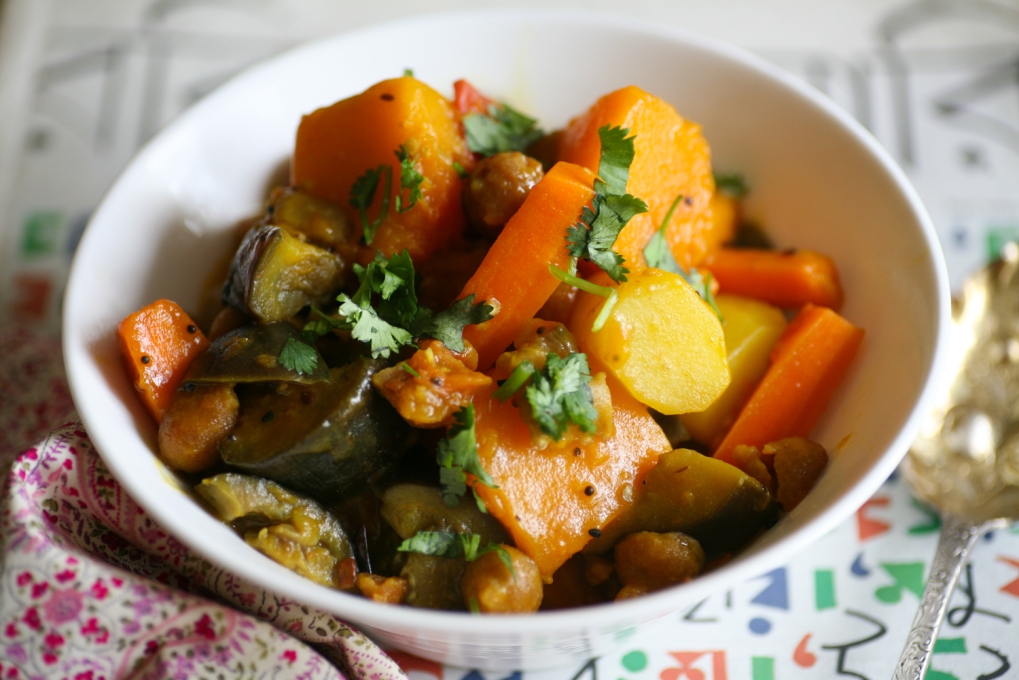
Whilst I realise not everyone has a Benglai mother-law-in who can magic up bori at a whim, you can get hold of bori in London at any good Asian grocers. In Kolkata, bori is also cooked with fish dishes or with greens, but today I wanted to show you a simple recipe that uses up vegetables that you are likely to have in your fridge. It makes for a very satisfying and enjoyable vegetable meal that is perfect eaten on it’s own or accompanied with some dal, rice or flat breads.

IMG_2512

Good luck in your quest for lentil kisses. They are seriously not that hard to seek out. Let me know how you get on.

IMG_2530

Vegetable Curry with Lentil Kisses

1 large handful of bori (lentil kisses)

2 tbsp groundnut oil

2 small dried red chillies

1 tsp panch phoron

1/2 tsp turmeric

1/2 tsp chilli powder, optional

2 carrots, cut into bite sized chunks

3 medium sized potatoes, quartered

1/4 of an aubergine, cut into bite sized chunks

2 tomatoes, finely diced

1 tsp salt

to serve

1 handful of fresh coriander

  1. Heat a tablespoon of oil (or thereabouts) in a pan and when it is hot add the dried chillies and allow them to blacken a little, this will take no longer than a minute, but may make you cough a little so beware!
  2. Add the panch phoron which will begin to fizzle almost instantly. Then add the turmeric and chilli powder (if using the latter) and add the chopped carrots and potatoes. Move around the pan, lower the heat add a couple of tablespoons of water and place a lid on the pan and leave for 15 minutes, stirring at intervals.
  3. Meanwhile in a separate pan add another tablespoon of oil and when it is hot add the bori/lentil kisses so that they bronze slightly in colour. This will only take a few minutes, if you keep moving them around the pan. Remove them from the pan with a slotted spoon and place on a plate with kitchen roll.
  4. In the main pan now add the aubergine, salt and fresh tomatoes and stir into the other ingredients. Add a little more water to help soften the ingredients, but not too much as you do not want the sauce to become too runny. Place a lid on the pan and leave for another 10 minutes.
  5. After 5 minutes check to see if the potatoes and carrots are softening. Add the bronzed bori and gently stir into the vegetables. Place the lid on the pan and leave for a further 5 minutes or until the potatoes and carrots have softened sufficiently.
  6. To serve add freshly chopped coriander.

It is wonderful to accompany with some dal and rice or Indian flat breads.

IMG_2517


Vietnamese Prawn, Mango, Lemongrass and Coconut Curry

IMG_2436

Don’t ever throw away coriander stalks as they are bursting with flavour and are perfect for making a delicious paste to go in all manner of curries. Today I wanted to show you one of my Vietnamese inspired prawn curries that combine lemongrass, ginger, garlic, chilli, coriander stalks, jaggery (palm sugar – or you can just use caster sugar), fresh mangoes and coconut milk.  To say it’s sublime would be an understatement. It is so downright delicious that you’ll be wanting to make it on repeat.

IMG_2430

I always seem to have frozen prawns in my freezer as, once thawed, they are hugely versatile to make all manner of curries or prawn cakes and generally speaking I find that most people like prawns. I had some fresh mangoes and lemongrass that were needing to be eaten so I thought that I would work the recipe around my three main ingredients – prawns, mangoes and lemongrass.

My hand blender is back in action (rejoice – how I missed it) so it took no time to whizz up a paste that tasted of the exotic Far East. By adding a little coconut milk allowed the paste to become smooth, whilst retaining its thickness.

My mother-in-law modelled the mangoes and I bought king prawns that had already been deveined and peeled to save time. So all in all from start to finish this is definitely a 15 minutes tops kind of meal, unless you are slow at peeling and cutting up your mangoes, which in that case might add on another 5 minutes or so.

If you love prawns you might also like Bengali Chingri Maach or perhaps Keralan Prawn and Kokum or my Prawn and Tamarind Curry or if you buy prawns with shells on don’t forget to keep the shells and heads so that you can make a heavenly Prawn Bisque

Happy Easter All.

IMG_2422


Vietnamese Prawn, Mango, Lemongrass and Coconut Curry

paste

40g coriander stalks

2 lemongrass stalks, outer layers removed and finely chopped

1 red chilli

1 tsp ginger paste

1 tsp garlic paste

1 tsp jaggery/palm sugar or caster sugar

a little coconut milk from a 400ml tin

*****

2 tbsp vegetable/coconut oil

15g shallots, finely sliced

1 tsp salt

700g king prawns, deveined and peeled

2 mangoes, cut into bite sized pieces

the remaining coconut mil from the 400ml tin

  1. Place all the paste ingredients into a hand blender and whizz them up to form a smooth paste. Adding a little of the coconut milk will loosen up the ingredients and help the paste to become smooth.
  2. In a deep pan or karahi add the oil and when it is hot add the shallots and salt. Move them around the pan for a couple of minutes, being careful not to let them burn.
  3. Now add the paste and simmer gently for 3-5 minutes before adding the rest of the coconut milk. Let the coconut milk heat up before adding the prawns.
  4. Move the prawns around the pan until they become pink. This will take no more than a few minutes. Simmer for an extra couple of minutes before adding the mango.

Serve with rice with some fresh lime on the side and a sprinkle of fresh coriander on the top.

If you like this recipe I am sure you will love my Butternut Squash, Lemongrass, Coconut and Coriander Curry


Prawn and Tamarind Curry

IMG_1830

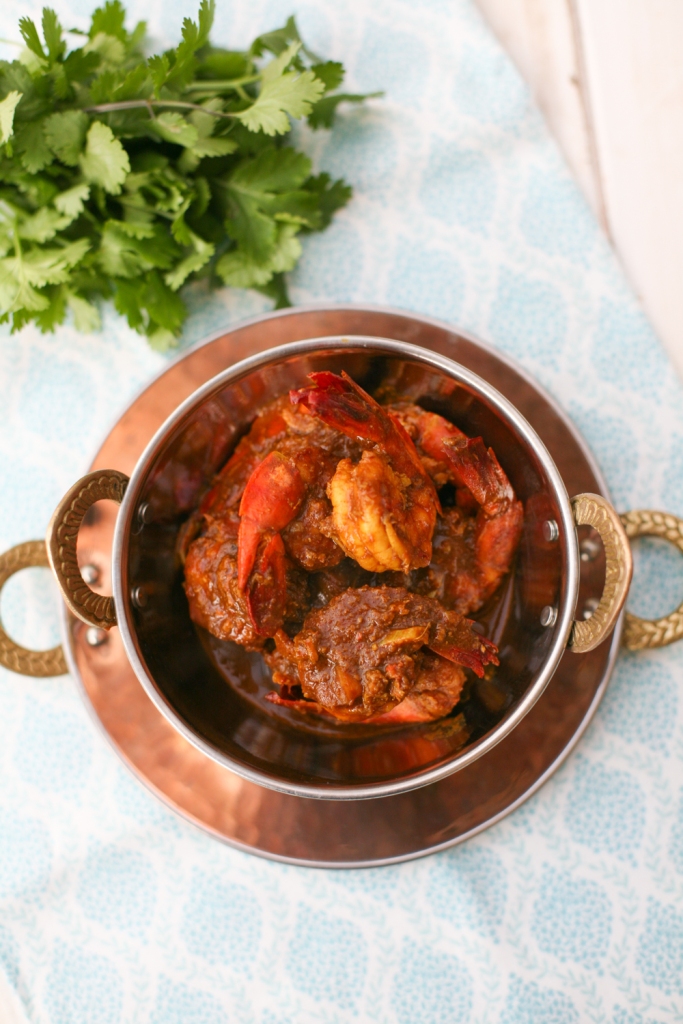
Prawn curries are one of my favourite. Earlier this year another of my prawn recipes made its way into Delicious Magazine – see here – have you tried it yet? Decadent and spoiling, prawns are incredibly tasty, especially if they are of the king prawn variety. I am also a huge fan of tamarind, which has a very sweet and sour taste to it. So married together prawns and tamarind create a very satisfying meal.

IMG_1800

These beauties start off grey, but rest assured as soon as they are cooked in the oil they turn pink almost immediately. I leave the tails on, more for cosmetic reasons than for any other. The rest of the shell is removed, but not discarded (next week I will show you what to do with all those discarded shells and heads), and the black vein that runs along the prawns back is discarded completely.

IMG_1809


Other than peeling and deveining the prawns, this dish is incredibly quick to make and totally doable on a busy work week. Taking time to eat a delicious, comforting meal in the evening I think is so important. If you invest a little bit of time in preparation you really are rewarded with a memorable feast.

IMG_1838


Prawn and Tamarind Curry

serves 4

600g king prawns, peeled but keep the tails on, devein

1 tsp salt

1 tbsp tamarind paste

1 tsp ground coriander

1 tsp ground cumin

1/s tsp Kashmiri chilli powder

1/2 tsp turmeric powder

2 tbsp vegetable oil

5 garlic cloves, finely chopped

1 tsp grated fresh ginger

1 tsp salt

150 ml of boiling water

fresh coriander leaves to scatter when serving

  1. Peel, devein (make an incision down the back of the prawn to reveal a black vein, remove with a sharp knife and discard) and keep the tails on, scatter with the salt and then place to one side. Don’t forget to keep those shells and heads and I will show you how to make a magnificent prawn broth which turns into a prawn bisque next week!
  2. In a small bowl add the tamarind pulp, ground cumin and coriander, chilli powder and turmeric. Stir to form a smooth paste.
  3. Heat the oil in a pan on a medium low heat and then add the garlic and ginger. After a minute add the prawns and stir for a further minute so that they become a lovely pink colour.
  4. Add the tamarind paste and coat the prawns. Immediately add the boiling water and stir. Simmer gently for a further 5 minutes.
  5. Serve immediately with either rice, puri or other Indian flat bread.

So simple and yet utterly delicious

IMG_1829


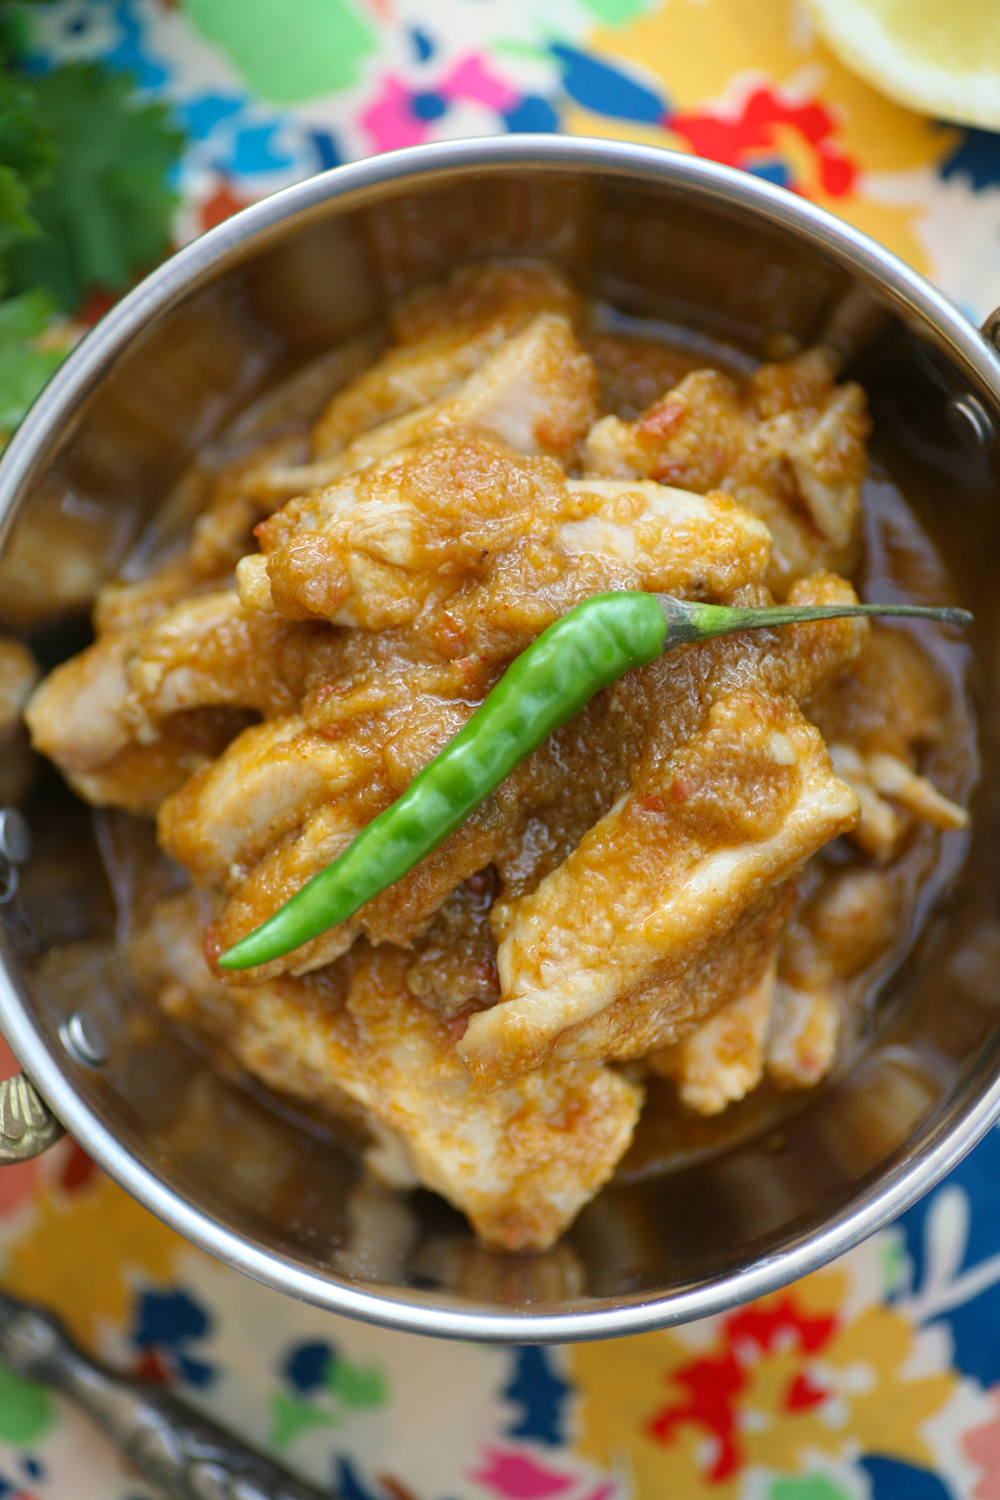
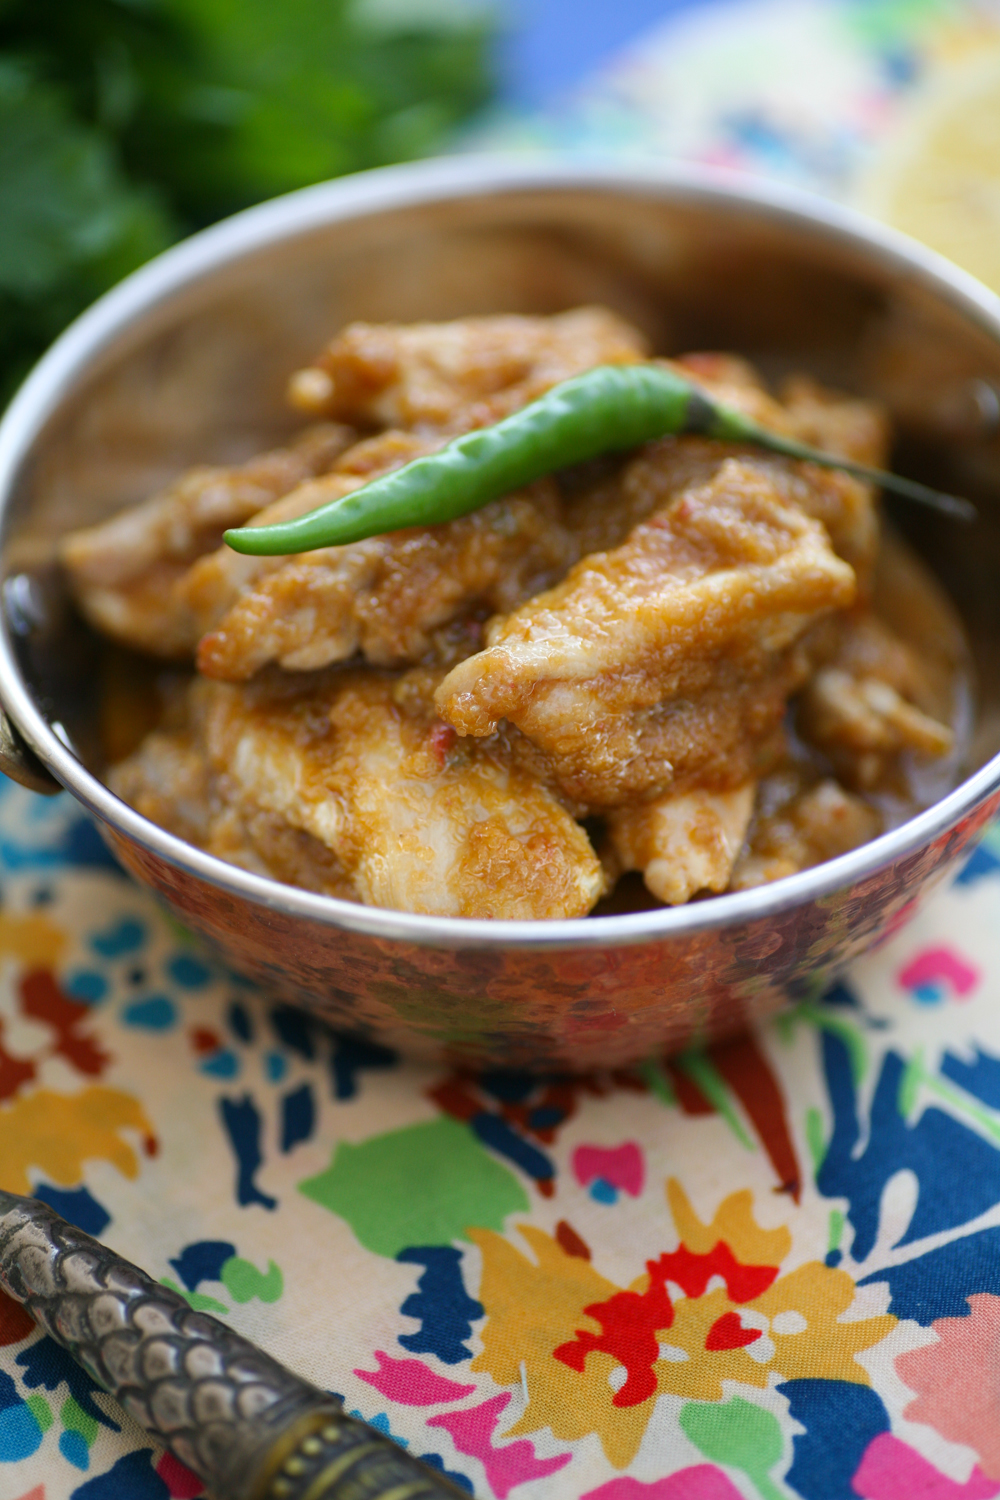
Simple Chicken Curry – when your spice cupboard is bare

IMG_1252

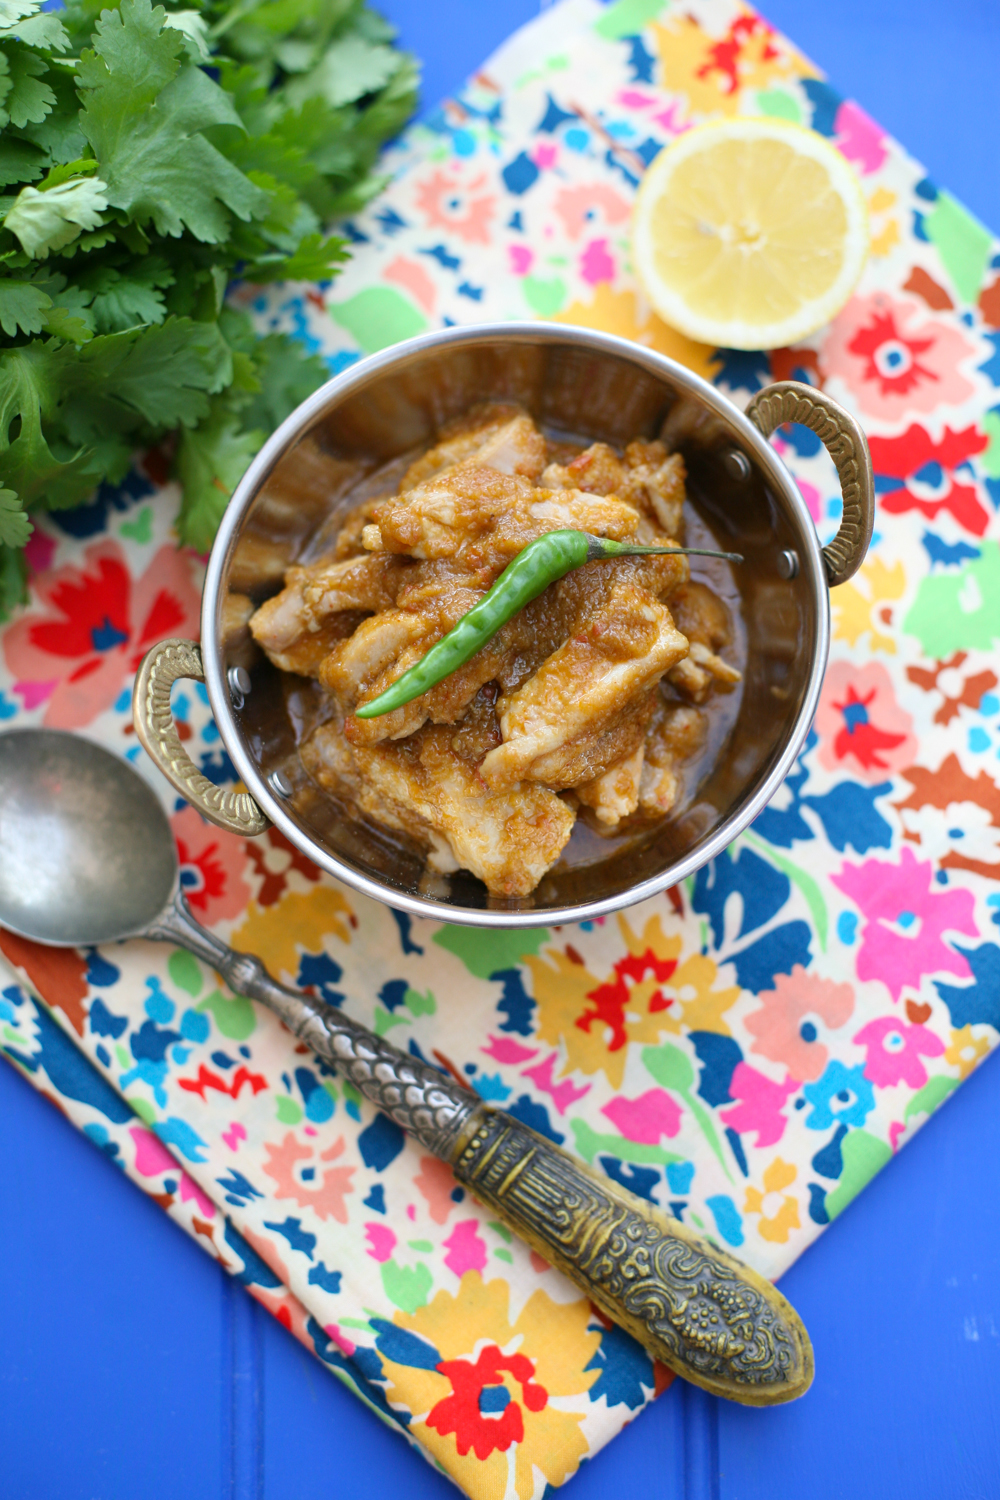
If you are starting out cooking curries or if you are running low on spices, then this is the curry for you as it only requires chilli powder – I tend to opt for the Kashmiri chilli powder for it’s deep red colour and its subtle heat. It also includes onions, ginger, garlic, tomatoes and chillies, which are pretty much fridge staples for me and I’m guessing you too! So it is ridiculously straightforward to make with minimum fuss.

IMG_1232

I like to use boneless and skinless chicken thighs for this curry, but breast meat is fine too – it’s really up to you. Like with most curries it can be cooked well in advance and then slowly reheated adding a little water if necessary. You can reduce the amount of fresh chillies if you want it less hot, but I find adding two fresh green chillies is fine for my 9 year old – I would cook a separate curry however for my 5 year old.

IMG_1246

Simple Chicken Curry

Serves 4

9 garlic cloves, roughly chopped

2 red onions, roughly chopped

2 inch piece of ginger, skin removed and roughly chopped

2 fresh chillies, roughly chopped

4 medium sized tomatoes roughly chopped

1 tsp of Kashmiri chilli powder

2tbsp water

*****

2 tsp groundnut oil

800g boneless and skinless chicken thigh, chopped into bite sized pieces

1 tsp salt

coriander to garnish (optional)

1. Using a blender add the garlic, onions, chillies, tomatoes, ginger and chilli powder. Depending on how juicy your tomatoes are you may need to add a little water to make the paste smooth.

2. Heat the groundnut oil in a pan and add the chicken. Move it around the pan for a couple of minutes so that it whitens. Remove from the pan with a slotted spoon and place to one side.

3. Using the same pan add the paste and gently fry for 45 minutes so that it thickens and allows the flavours to come through.

4. Return the chicken to the pan and add the salt. Simmer gently for a further 7 minutes, coating the chicken in the spiced tomato sauce.

5. Serve with a coriander garnish with either rice or flat bread.

IMG_1247


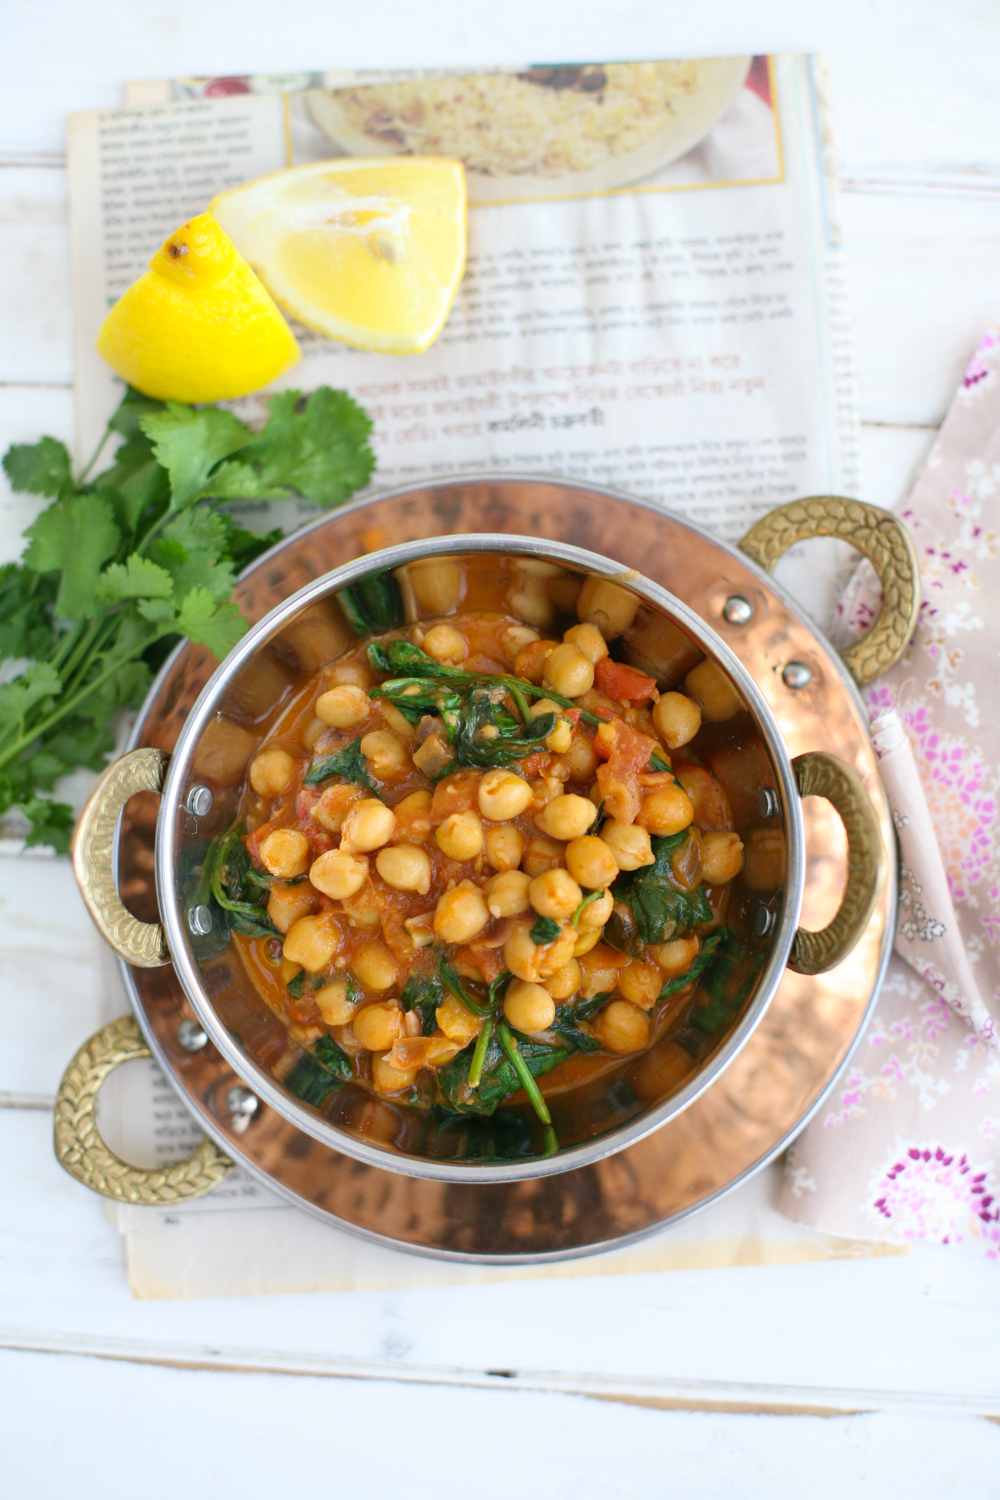
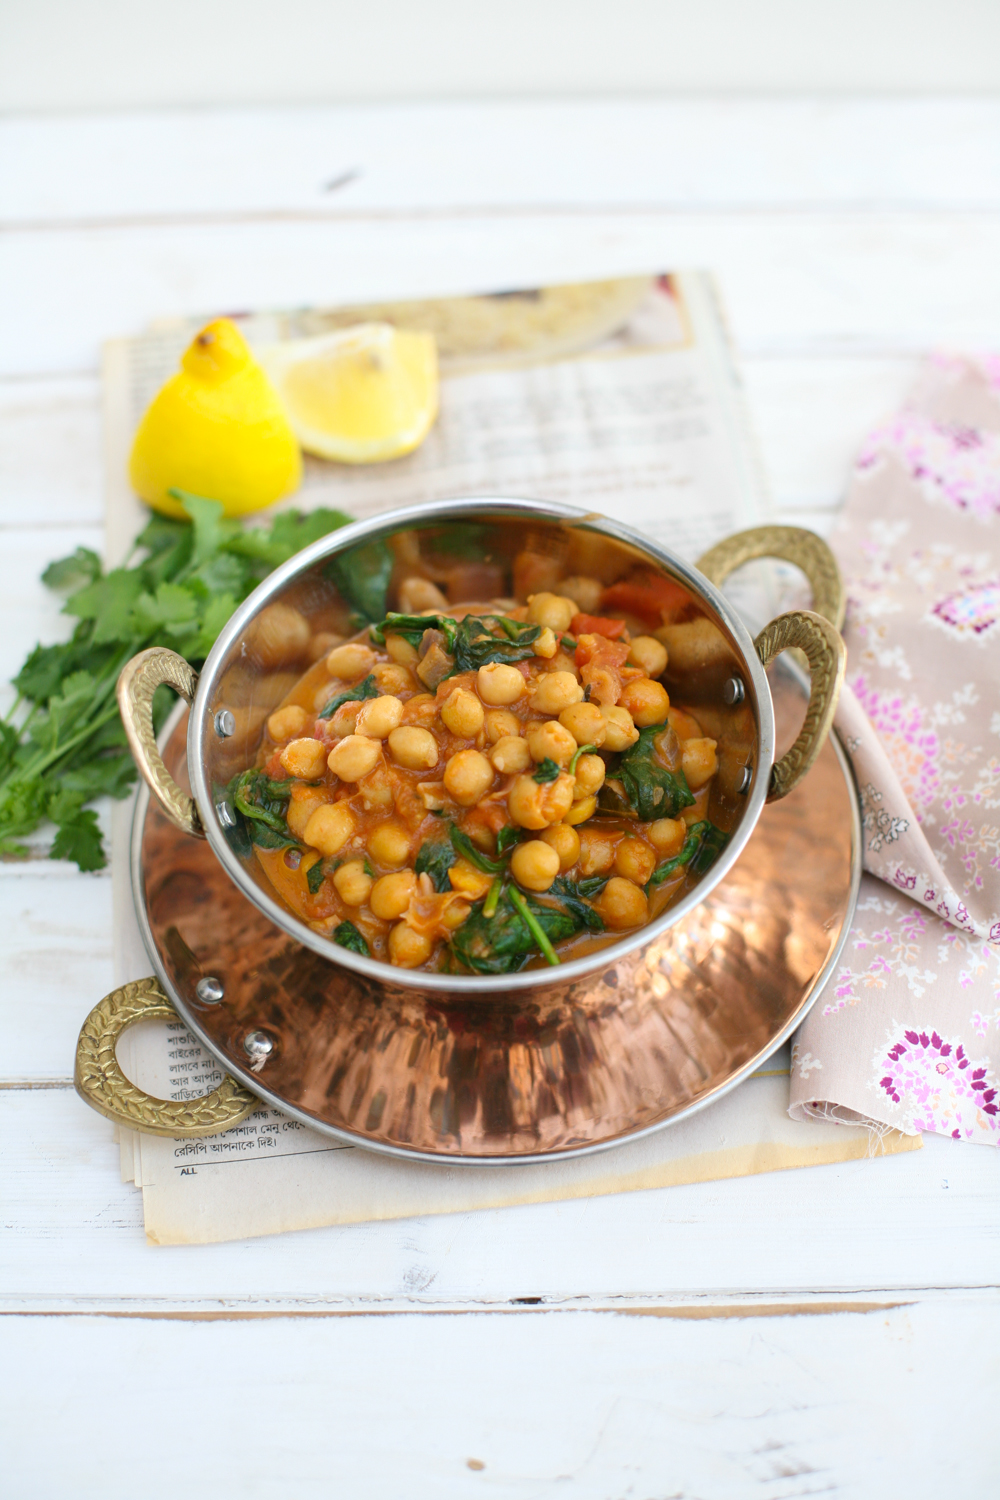
The Tastiest Spiced Chickpea Curry Ever

IMG_1186

The humble chickpea can provide the most satisfying of meals if it is mixed with a little magic, and in this case spices. The final note of adding chaat masala raises the game of this dish into one bursting with flavour that is both salty and sour. For those who have not come across chaat masala before it’s a spice mix that is commonly used in India, Pakistan and Bangladesh and normally includes many of the following: mango powder, black salt, asafoetida, pomegranate seeds, nutmeg, mint leaf, chilli powder, black pepper, salt, cumin, coriander and dried ginger. You can pick up sachet’s or packets at your local Asian grocers or any of the large supermarkets.  If you are feeling really adventurous you could make your own. Have a look at this lovely lady showing you how to do so .


Like many of the dishes on my blog this is very straightforward, filling, nutritious, tasty and kind on the wallet. My eldest daughter loves it (she just avoids swallowing the green chillies that I simply cut in half so are easy to spot) and my youngest….well she tells me she prefers ‘English’ food. I asked her like what and she answered ‘Like udon noodles, chicken, spring onions and soy sauce’. Oh dear!

IMG_1182

If you are UK based chances are that you’ll be on half term next week – if you have children that is. This dish ticks so many boxes and is perfect for an adult, or more sophisticated child eater. Next time your are in the shopping aisles of your local supermarket – think Chaat Masala, seriously you won’t regret it. A little bit of searching will reward you royally.

You heard it here first.

IMG_1174

 Spiced Chickpea Curry

2 tbsp groundnut/rapeseed oil

10 fresh curry leaves

1/2 red onion, finely chopped

1 tsp salt

2 tsp garlic paste

1 tsp ginger paste

2 small green chillies

1 tsp cumin powder

3 medium sized tomatoes, diced

500g chickpeas (tinned is fine)

1 tbsp yoghurt

1 tbsp tomato puree

150ml juice from chickpea tin/boiling water

125g fresh spinach

1 tsp chat masala

1/2 lemon, juice only

handful of fresh coriander to serve

1. Gently heat the oil in a deep frying pan and then add the curry leaves. After 20 seconds add the onion and salt and lower the heat to allow the onions to soften and not burn. After 5 minutes add the garlic and ginger paste along with the green chillies and stir into the existing ingredients.

2. Add the cumin powder and then add the fresh tomatoes and allow them to soften slightly before adding the chickpeas.

3. Add the yoghurt and tomato puree and stir into the chickpeas.

4. Add the chickpea juice and/or boiling water and leave until the liquid has reduced. This will take around 10-15 minutes.

5. Stir in the spinach, which will wilt almost immediately.

6. Take the pan off the heat and add the chaat masala and lemon juice and stir into the curry. Add a little fresh coriander on the top of each serving.

Relax, sit back and enjoy a very satisfying bowl of chickpea curry.

SaveSave